Are you ready to take over an existing WordPress site?
Taking ownership of a new website can be daunting because there are so many parts to the whole process.
But the process becomes far easier if you know exactly what to look for. during a takeover.
For this post, we’ve put together a checklist outlining how to take over an existing WordPress site.
How to Take Over an Existing WordPress Website and Domain
We’re going to run through steps to ensure a successful transfer in the shortest amount of time.
In This Article
Let’s consider these items in more detail:
1. Collect All Logins for WordPress Backend + Hosting
To start with, you need complete access to all services essential to running a website. This includes:
- WordPress admin: In order to be able to manage the content across the entire site, you need administrator-level rights to the site’s WordPress dashboard. Without it, you can’t change anything on your new site.
- Hosting account: You’ll need access to the site’s web hosting including cPanel and FTP. These are necessary for managing domain-level settings like DNS records.
- Domain registrar: For most websites, the domain registrar and web hosting provider are one and the same. However, if the site you’re taking over has a separate registrar, make sure you have access to it.
- CDN: A lot of websites use CDN (Content Delivery Network) services to improve their site speed for users accessing the site from different parts of the world. Ensure that you have access to the CDN if the site is using it.
- Email accounts: You’ll need access to any email accounts connected to the website for password recovery, authentication, or other administrative purposes.
If the previous site owners were using a password manager, they should be able to quickly share all necessary logins without any hassle. We also recommend using a password manager to make account management for the new site easy for your team.
2. Transfer the Domain to Your Web Host (Optional)
If you’re running multiple websites, you may want all of them to be connected to the same web hosting service. It’s a lot easier to manage your sites when their domain registration and web hosting are connected to the same account.
Besides, the previous owner of the site you’re taking over may not want to share their web hosting account if they’re still managing other sites with it.
In these scenarios, you’ll need to transfer the domain you’re acquiring to your own web host.
We recommend Bluehost because it provides the most affordable pricing for high-quality hosting services.

You can easily transfer a domain to your Bluehost account. Here’s how:
Update Registrant Contact Information
Before initiating the transfer, first make sure that the contact information on the domain record is up-to-date. You may have to contact the registrar to update contact information like your name, email address, and organization.
Change Nameservers to Bluehost
The nameserver settings from your domain registrar should point to Bluehost for a successful domain transfer. To change the nameservers, open your domain registration account and look for the DNS settings. This should have a section for Name Servers.
BlueHost’s nameservers are:
- ns1.Bluehost.com
- ns2.Bluehost.com
It may take up to 72 hours for the nameserver settings to update.
Get the EPP Code
The EPP code is an authorization code that is unique to each domain. You’ll need this code to authorize the transfer request. The domain registrar should provide the EPP code for the domain, so go ahead and contact their support for help.
Transfer the Domain
You’re now ready to initiate the domain transfer to your Bluehost account. Log in to your Bluehost dashboard and select Domains » Transfer from the left-hand navigation bar.
On this page, enter the domain name that you want to transfer and click on Continue.
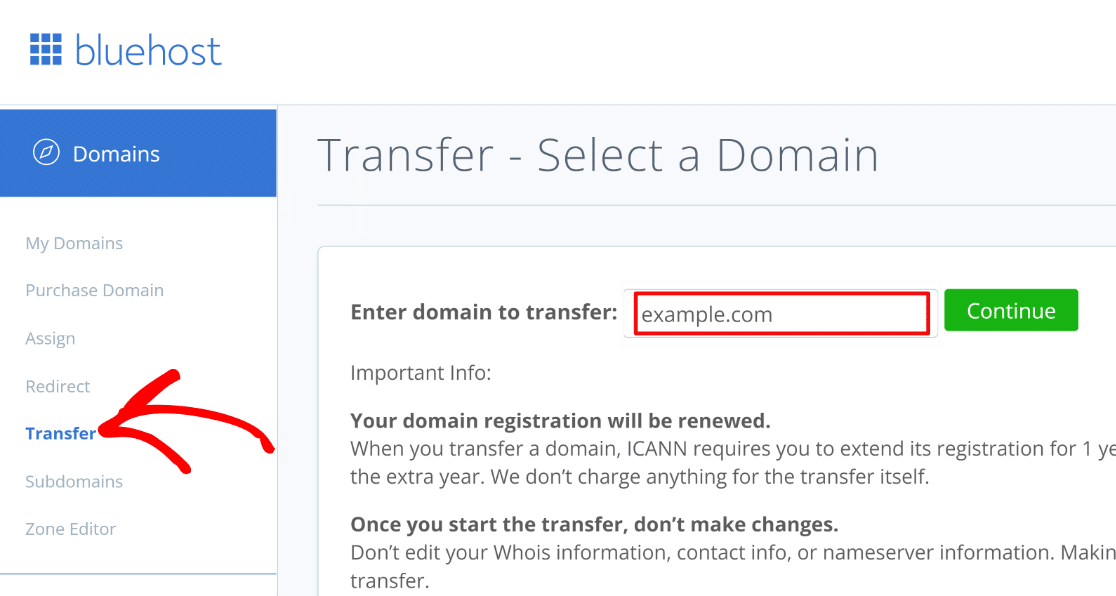
Then, enter the EPP code that you obtained in the previous step and press Continue.

You’ll now receive a verification code in the admin email address connected to the domain being transferred. Enter the verification code and click on Continue.
You can now select your domain renewal preference, change domain privacy settings, and update nameservers if needed.
Proceed to pay for the domain renewal to initiate the transfer process.
Good job! Your new website’s hosting and domain registration settings are now accessible from your main Bluehost account.
3. Change All Passwords
Now that you have all the accounts and the domain is connected to your hosting, make sure to change your password for every single one of the accounts.
This is extremely important from the security point of view. You wouldn’t want anyone that isn’t a part of your team to have access to the site’s WordPress backend, hosting, or branded email accounts.
Once again, changing passwords is much faster using a password manager, so we recommend using one. It also allows you securely share passwords with your team without having to save them in plain text that anyone can see.
4. Change the Admin Email Address
As the new owner, the WordPress admin email address should be connected to your email account.
To replace the admin email, go to Settings » General. Then, enter your current email address in the Administration Email Address field.

Scroll down to the bottom of the page and select Save Changes. You will receive an email from WordPress to authorize the email change. Open your inbox and click the link within it to confirm the email change.
Now, all administrative emails will be sent to your current email address by WordPress (except emails from plugins that are using different email addresses. We’ll go into this later).
5. Audit Web Forms
It’s likely that the WordPress site you’re taking over already has forms added to different pages and widgets. But you must audit each form to make sure they’re working as intended and have the proper fields set up.
In order to perform an audit, you’ll first need to know exactly which pages have a form. It can be needlessly time-consuming to scour your site manually to find these pages.
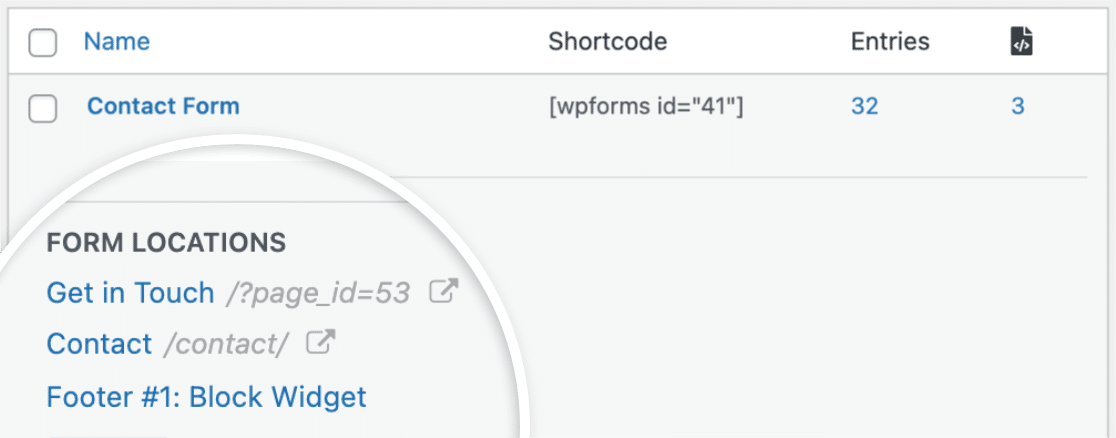
If the forms on the site were built using WPForms, you can use the form locator feature to find all the pages on this site that are using a form.
You can also import forms built using other plugins (Contact Form 7, Ninja Forms, and Private Forms) into WPForms, and then use the form locator feature to discover each page with a form on your site.
So, if your new website doesn’t already have WPForms, one of the first things you should be doing after the takeover is to install WPForms.
WPForms’ form locator feature counts the number of different pages a form is located in. It also shows you the specific locations for each form.
Check out our guide on how to find all pages with forms on your site to learn using the form locator.
When you’ve discovered where your forms are, you can then launch an audit. This form testing checklist may help.
After auditing your form for functionality, make sure the notifications are pointing to the correct email address.
Change Form Notifications
WPForms provides a lot of flexibility for your form email notifications. You can change the notification recipients, email subject line, body text, and more.
To edit the notifications for any form, first navigate to WPForms » All Forms.
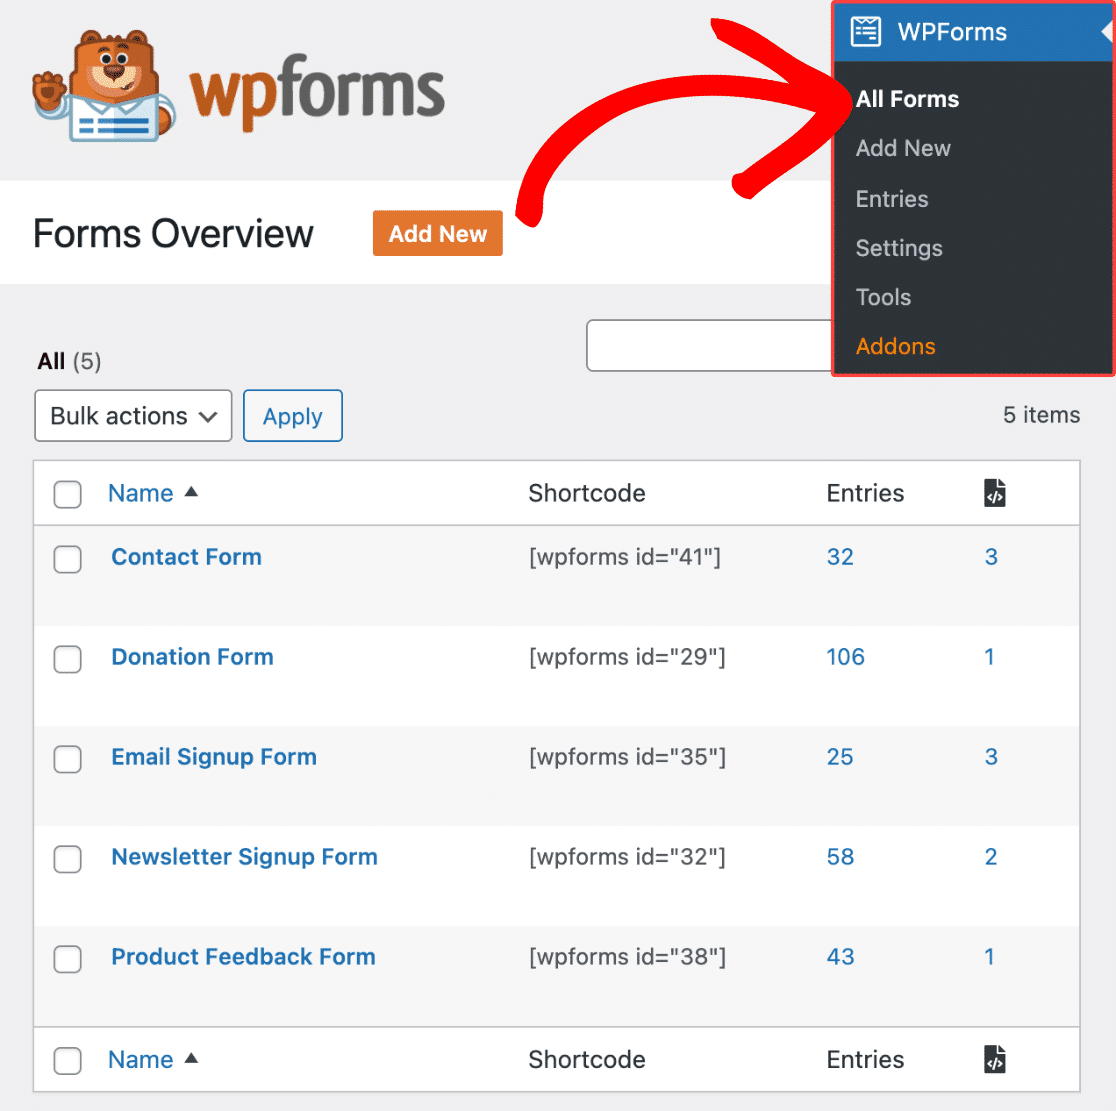
Now, hover your mouse over the form whose notifications you want to edit. Then, click on Edit.

This will open the form builder view where you can do all the editing. Click on Settings » Notifications on the left.
Notifications should already be enabled by default, but if they’re not, click on the toggle button next to Enable notifications.

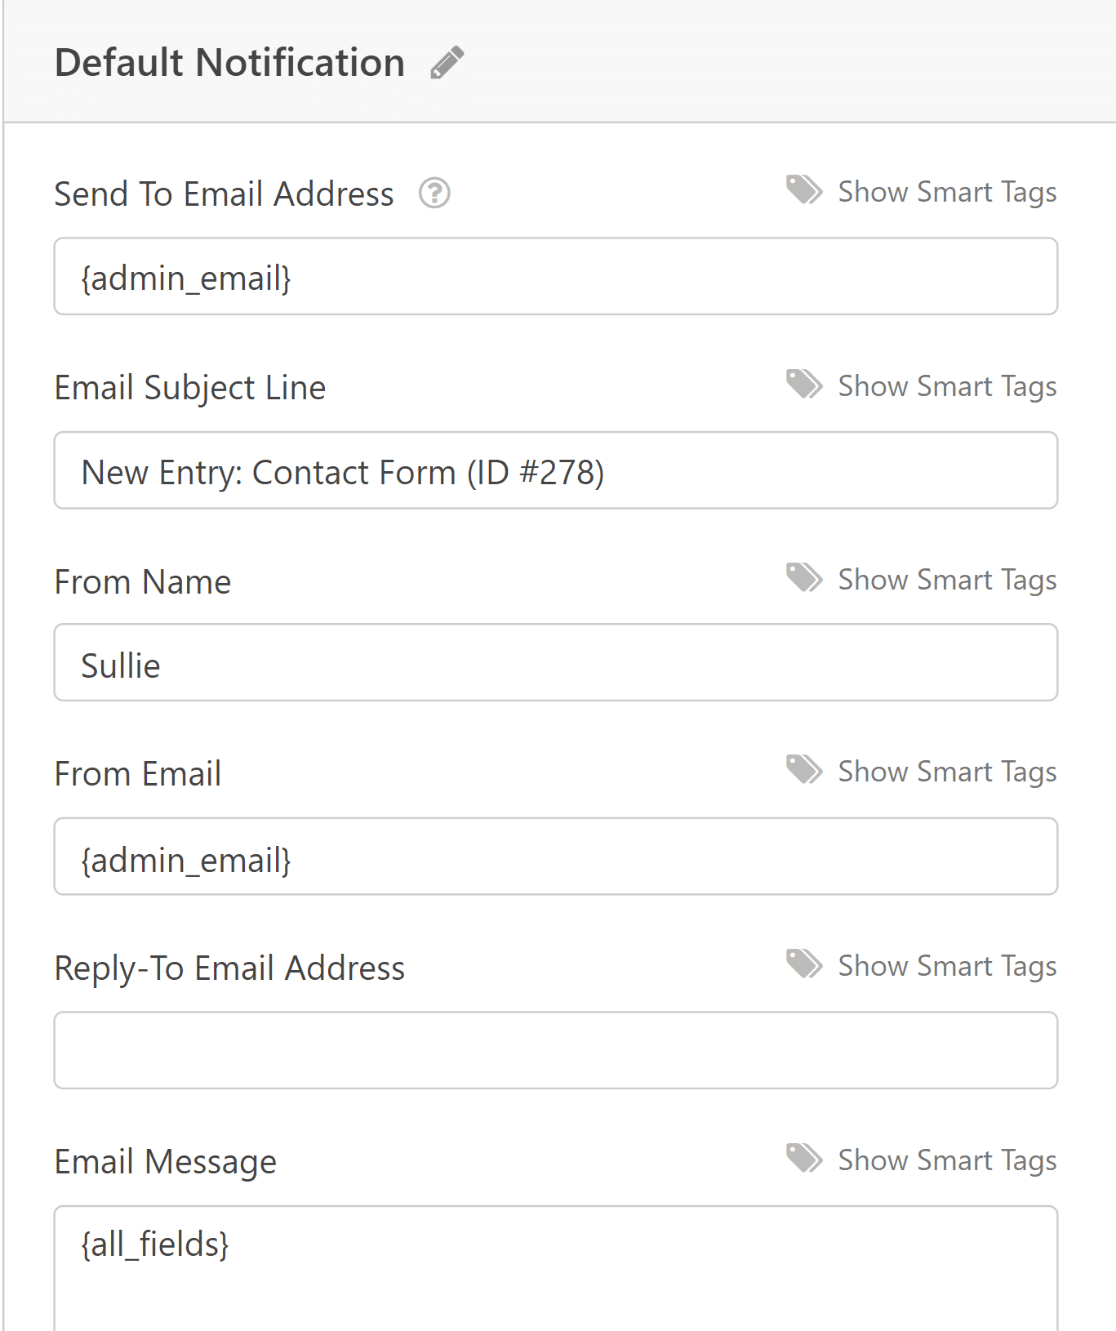
Here, you should make sure that the Send To Email Address is set to your email address and not to your previous owners.
If it’s using the {admin_email} smart tag, then notifications will automatically send to your current email address (as long as you’ve replaced the previous admin’s email address with your own in WordPress settings).
You can also customize other sender details using the settings on this page.
If you’d like to set up a separate notification for your users, you can press the Add New Notification button on the top-right corner.
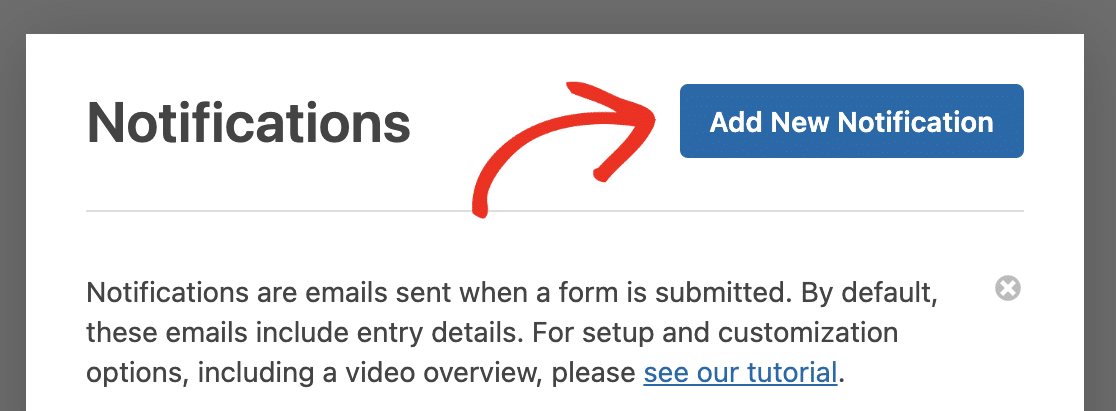
Now, you can use the same settings as above to set up a new notification that will be sent out to users who fill out your form. For more details, see our doc guide on setting up form notifications.
Ensure SMTP Email Is Configured
Problems with form notifications and other WordPress emails are fairly common. In the majority of cases, these problems occur when your site isn’t configured to use SMTP for emails.
SMTP is an email protocol that helps your emails avoid triggering spam filters on mailing servers and ensure successful delivery. Configuring SMTP on your site is really easy with a special plugin designed for this purpose: WP Mail SMTP.
WP Mail SMTP connects with popular SMTP email service providers like SendLayer, Brevo (formerly Sendinblue), and SparkPost. You can see this article on how to fix WordPress emails to learn about using SMTP on your site.
One particular WP Mail SMTP feature that you may find very useful when performing an audit on your new site is email override.
Rather than checking each individual plugin on your site to make sure their email notifications are set up to the correct from email. you can simply use WP Mail SMTP to override the From Email.
After setting up WP Mail SMTP on your site, go to WP Mail SMTP » Settings from your WordPress dashboard. Then, scroll down to the From Email setting and click on Force From Email checkbox.

Click the Save Settings button on the bottom of the page to successfully use the same from email for all plugins on your site. This is an easy way of making sure no plugin is still using the former admin’s email.
6. Review Site SEO
Every website demands SEO audits from time to time. But when you’re taking over a WordPress site, it’s especially important to review how well the site is optimized for search.
The easy way to review the SEO status of your site is by using a plugin called All in One SEO or AIOSEO for short.

AIOSEO has a super handy SEO analysis tool that automatically performs an SEO check on your site. The results of the analysis are then summarized in a simple, actionable report.
On your dashboard, AISOSEO displays an SEO site score, which is a good way of measuring how well your website’s homepage is optimized.
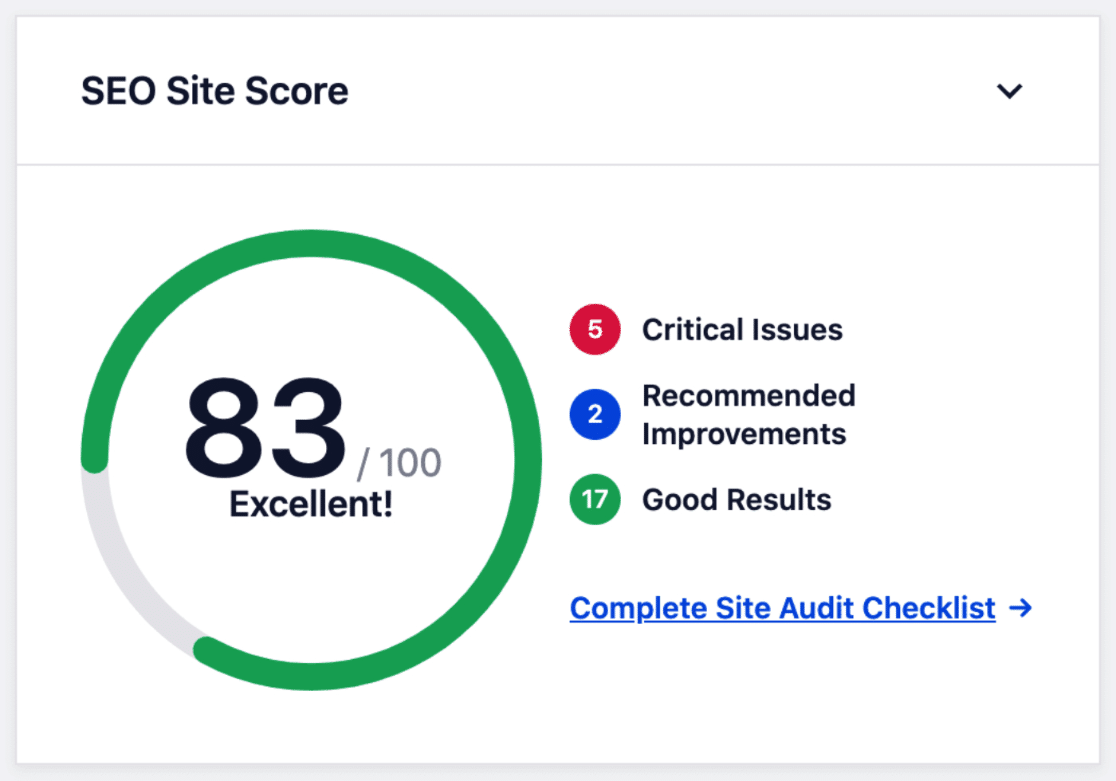
It’s recommended to aim for a score of above 70 for the best results. But how do you know what changes you should make to improve the score?
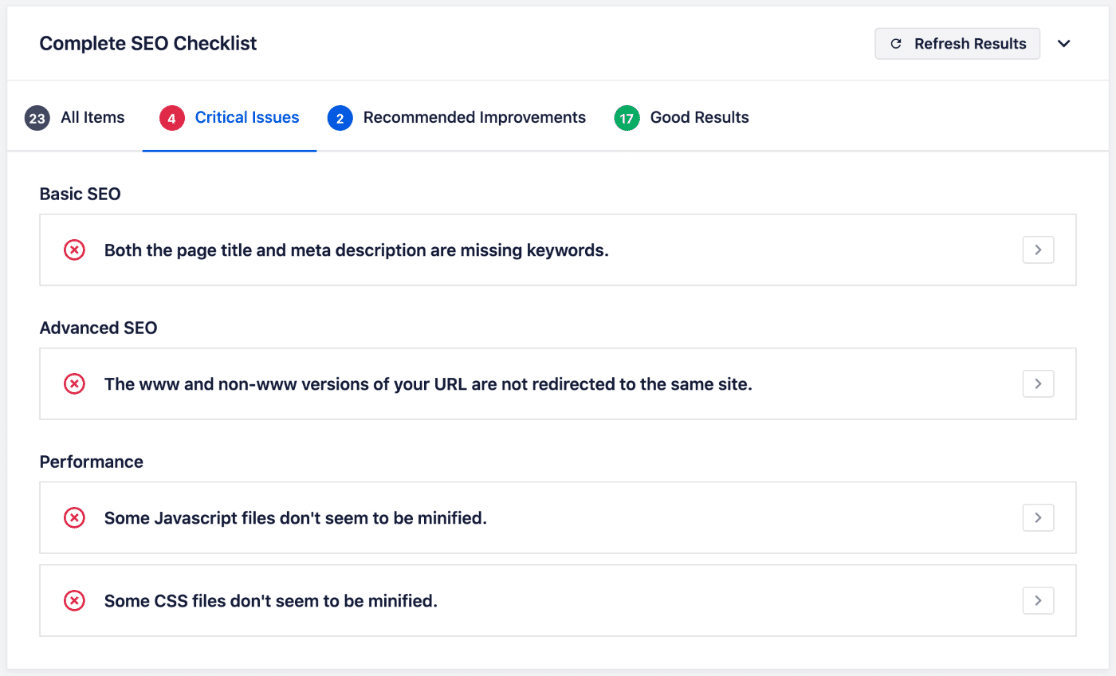
Well, right below the SEO Site Score, AIOSEO displays a list of issues on your site that you can fix to improve the score.
And that’s not all. AIOSEO also has an awesome link assistant tool that analyzes links across your whole site. The link assistant makes it really easy to find posts that have no links yet (orphaned posts) and also discover new linking opportunities.
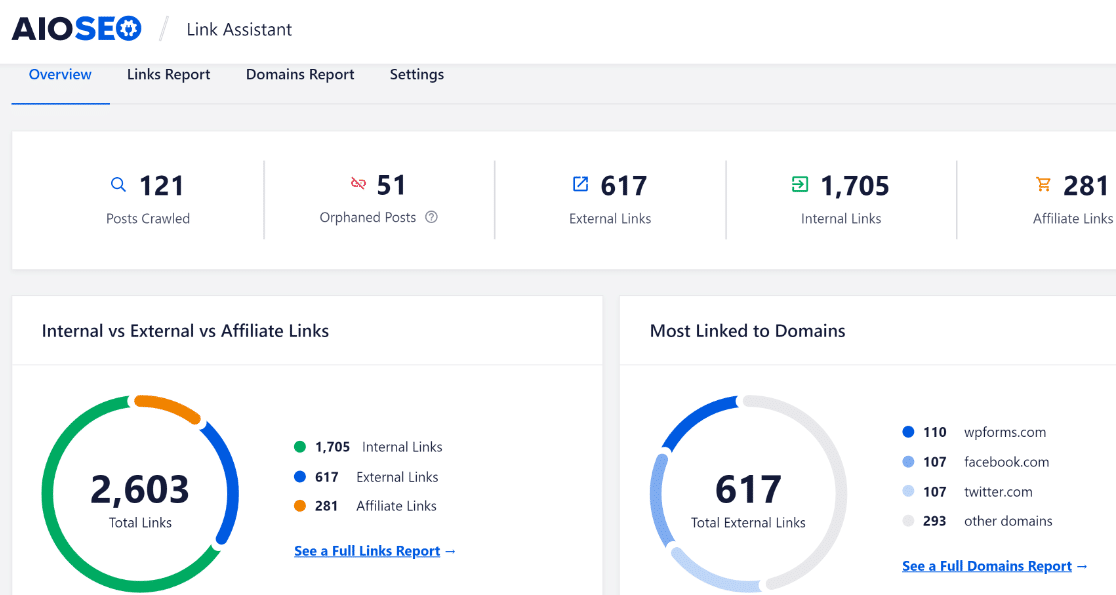
Internal linking is an often ignored but hugely valuable part of SEO, and it can directly impact your rankings. And with AIOSEO, you can quickly set your newly acquired site up for SEO success.
To learn more about AIOSEO and its capabilities, see our detailed AIOSEO review.
7. Review User Roles and Activity
We strongly advise reviewing user roles on your new site. Only the people that are on your team and connected to your project should have access to your WordPress backend (unless you deliberately want other people to have access too).
This is also a good opportunity to change the role or entirely remove the previous administrator of the site. To do that, click Users » All Users to see the list of all currently active users.
Then, hover your mouse over the user you want to either delete or change the role of. Use the Edit button to change their role or the Delete button to remove their account from the WordPress site.

If you simply want to change the role and permissions of the user, click on Edit. This will take you to a new screen. Scroll down to find the Role option and use the dropdown to select a role.

Press Save Changes on the bottom of the page to complete the role reassignment.
You may also want to review the activity logs of users on your site. There are various WordPress activity log plugins that allow you to track how users are interacting with your website.
Some plugins like WP Activity Log monitor all users with access to your WordPress backend and notify you if a user makes any changes to your core WordPress files, plugins, themes, user profiles, and other settings.
By reviewing activity logs, you can make sure that users on your site aren’t tampering with your settings or changing parts of your site that they’re not supposed to.
8. Plan a Full Site Audit
Finally, plan a complete audit to check the overall functionality and design of your site. This may involve testing your site’s menu items, CTA buttons, links, security, site performance, and other details.
You may want to delegate different audit tasks to your team to speed up the audit process and minimize human errors.
Don’t forget to check your site’s functionality and appearance across desktop as well as mobile devices. The site may look completely OK on a desktop but may have broken components when viewed on a mobile screen.
And that’s it! You’re now ready to take over an existing WordPress site and grow your business with it.
Next, Improve Your Multi Author Site Management
Sites that have multiple authors writing content for posts can be hard to manage. But these multi-author blog plugins can be a massive help.
Also, check out our post on undoing changes in WordPress to learn easy tips for fixing common WordPress mistakes.
Create Your WordPress Form Now
Ready to build your form? Get started today with the easiest WordPress form builder plugin. WPForms Pro includes lots of free templates and offers a 14-day money-back guarantee.
If this article helped you out, please follow us on Facebook and Twitter for more free WordPress tutorials and guides.

