WordPress makes it easy to add images to posts or pages. However, if you need to add multiple images, they’ll stack on top of each other and appear in uneven rows. This doesn’t look great and requires users to do a lot of scrolling.
With image galleries, you can beautifully display photos in organized layouts. This lets you showcase more photos in a limited amount of space and makes it easier for users to browse your photos.
In this article, we’ll show you how to easily create an image gallery for your WordPress site.
How to Create an Image Gallery in WordPress Using Envira Gallery
Creating an image gallery in WordPress is super easy with Envira Gallery. Simply follow the steps below:
Step 1. Install and Activate the Envira Gallery Plugin
First, you need to install and activate the Envira Gallery plugin on your WordPress website. If you need help, see this guide on how to install a WordPress plugin for step by step instructions.
There is a free version of Envira Gallery that comes with everything you need to create WordPress image galleries. However, for this tutorial, we’ll be using Envira Gallery Pro to unlock more powerful features.
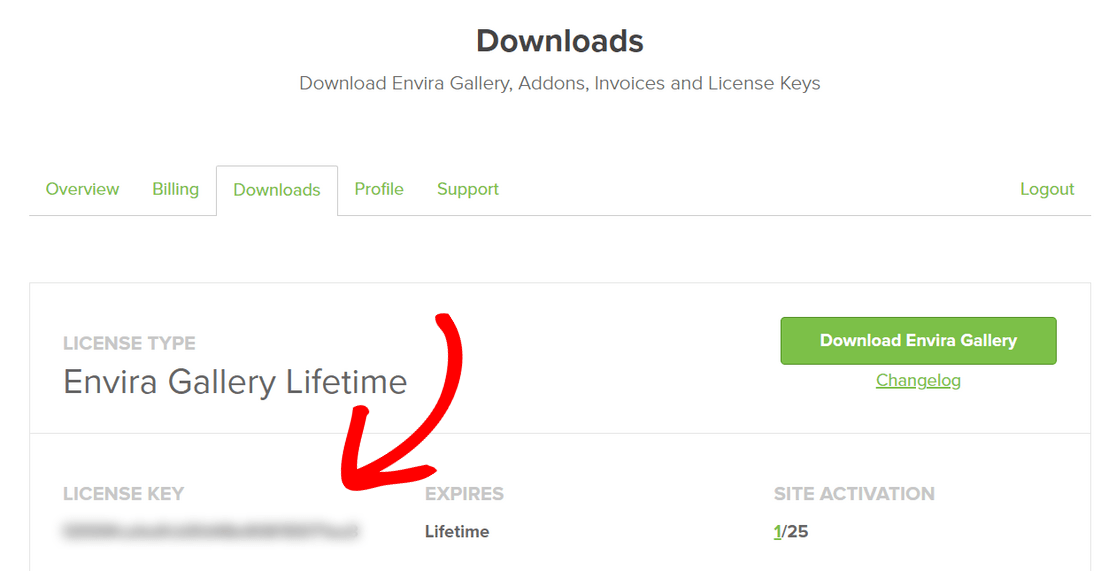
To activate your Pro license, you need to log in to your Envira Gallery account area. Then, click on the Downloads tab and copy the license key.
Next, open your WordPress admin area and go to Envira Gallery » Settings. Here, you need to enter the key you copied into the License Key field and click on the Verify button.
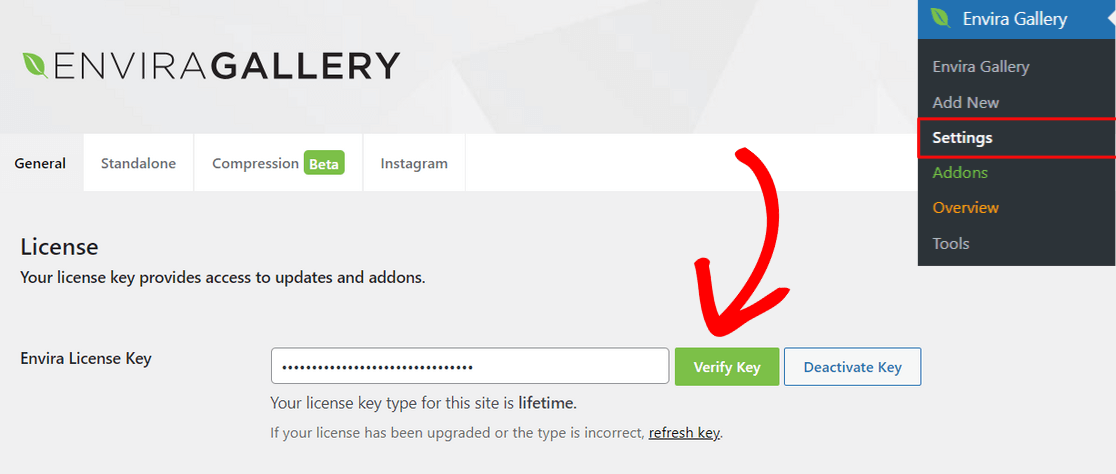
Now that your Pro license is activated, you’re ready to create your first gallery.
Step 2. Create a New Gallery in Envira Gallery
To create a new image gallery, go to Envira Gallery » Add New from the WordPress dashboard.
From here, start by entering a name for your gallery at the top of the page. Then, you can click on the Select Files from Your Computer button to upload images to your gallery.
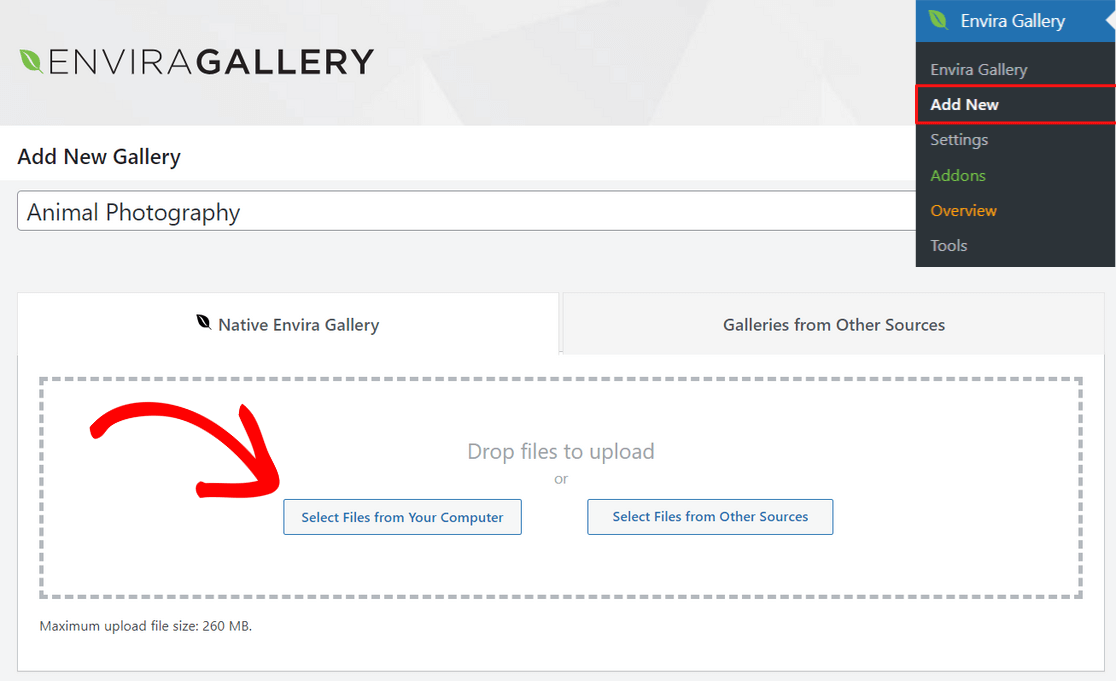
You can also click the Select Files from Other Sources button to upload images from the WordPress media library. Keep in mind that with this option, you can only upload one image at a time.
Once your images are uploaded, you can scroll down to the Gallery section where you’ll be able to see all of your image thumbnails.
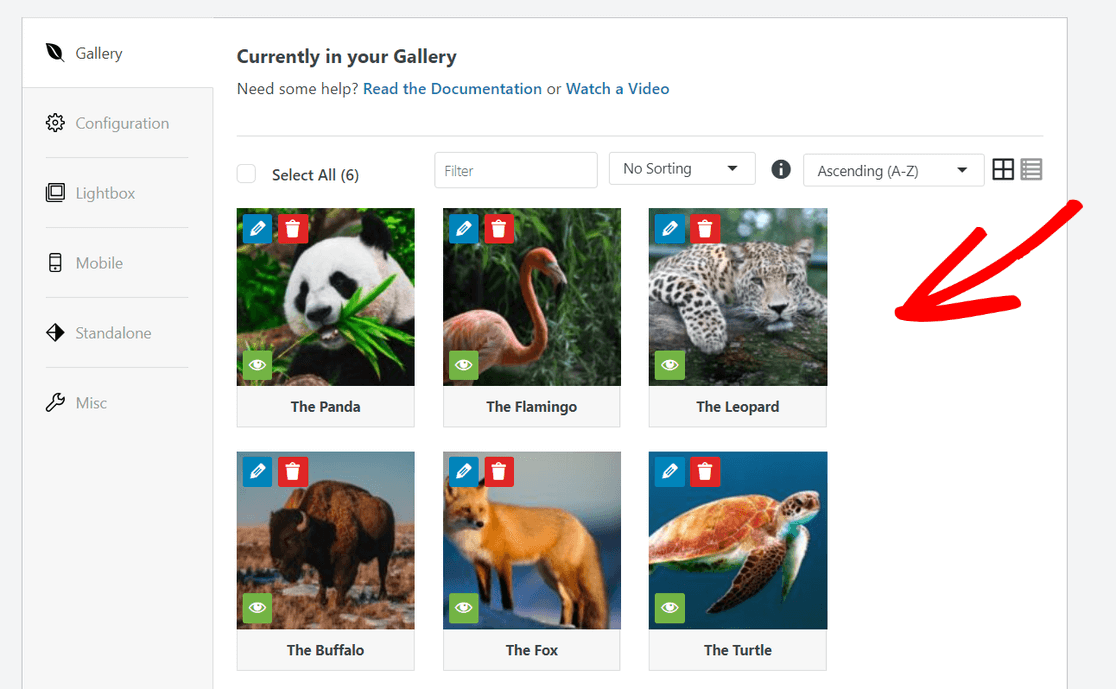
You can drag and drop the thumbnails to rearrange how you want the images to appear in your gallery.
You can also click on the pencil icon at the top of each image thumbnail to add metadata such as the title and alt text, which is important for search engine optimization (SEO).
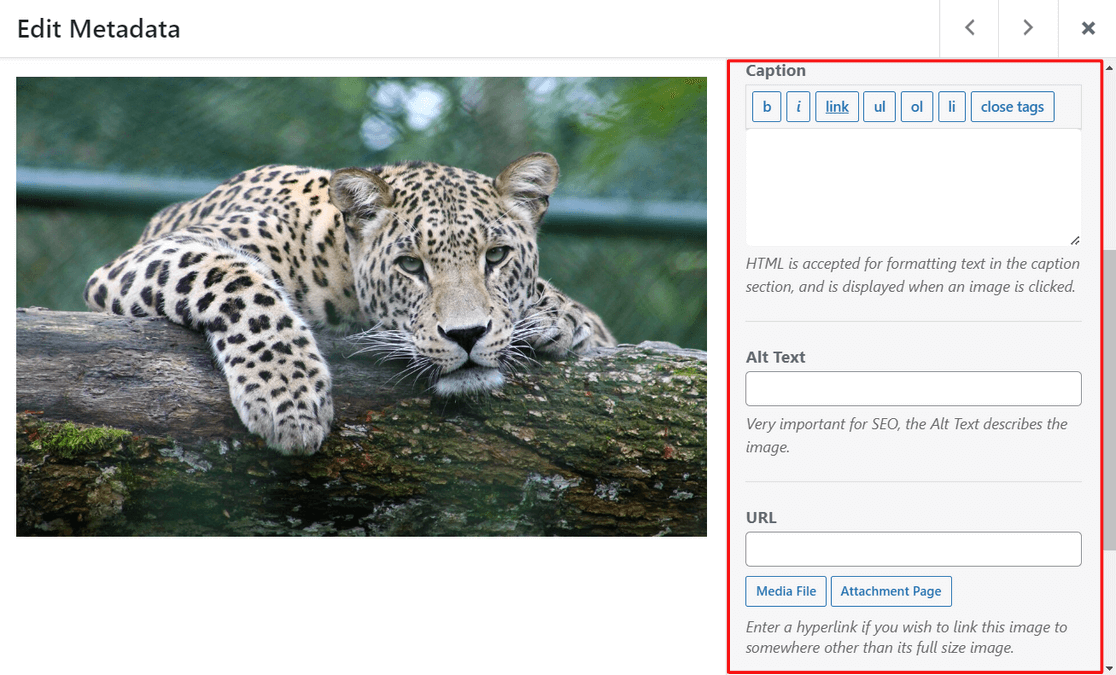
In addition, you can add a caption with HTML and add a link to any attachment page or website in the URL field.
Once you’re happy with the metadata, don’t forget to hit the Save Metadata button to store your changes.
Step 3. Configure Your Gallery Settings
Next, click on the Configuration tab to choose your image gallery settings.
You can start by selecting the layout you want for your gallery. The plugin offers gallery layouts such as Automatic, Mason, Grid, Square, Blogroll, and more.
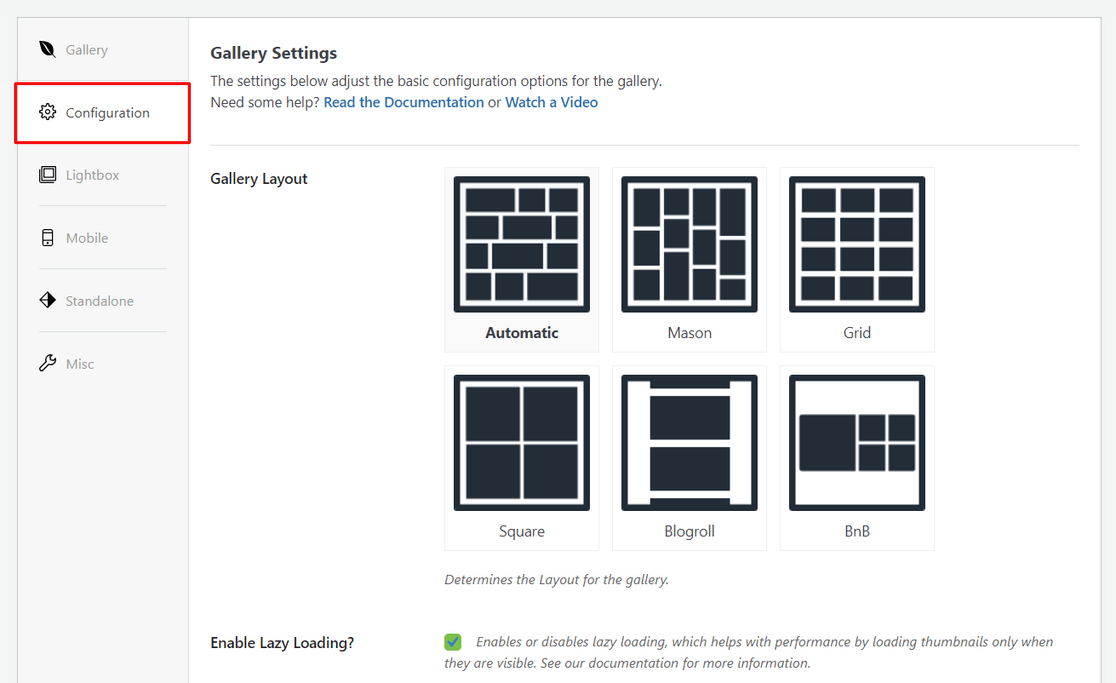
You can also enable lazy loading and set the lazy loading delay. Depending on which layout you chose, you can also edit settings like the number of columns, row height, and more.
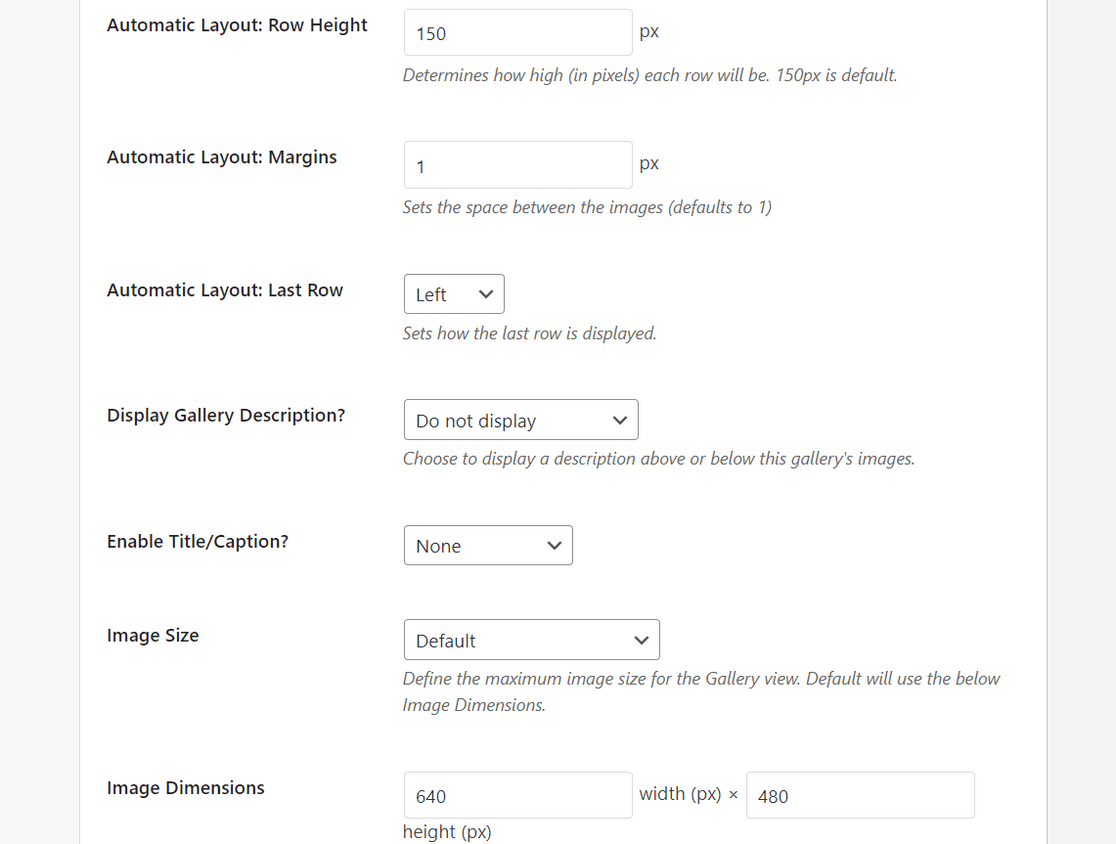
If you scroll down, you’ll see additional settings that you can configure.
For example, you can display a gallery description, enable the title/caption below images, select the image size for gallery view, choose a gallery theme, crop images, and more.
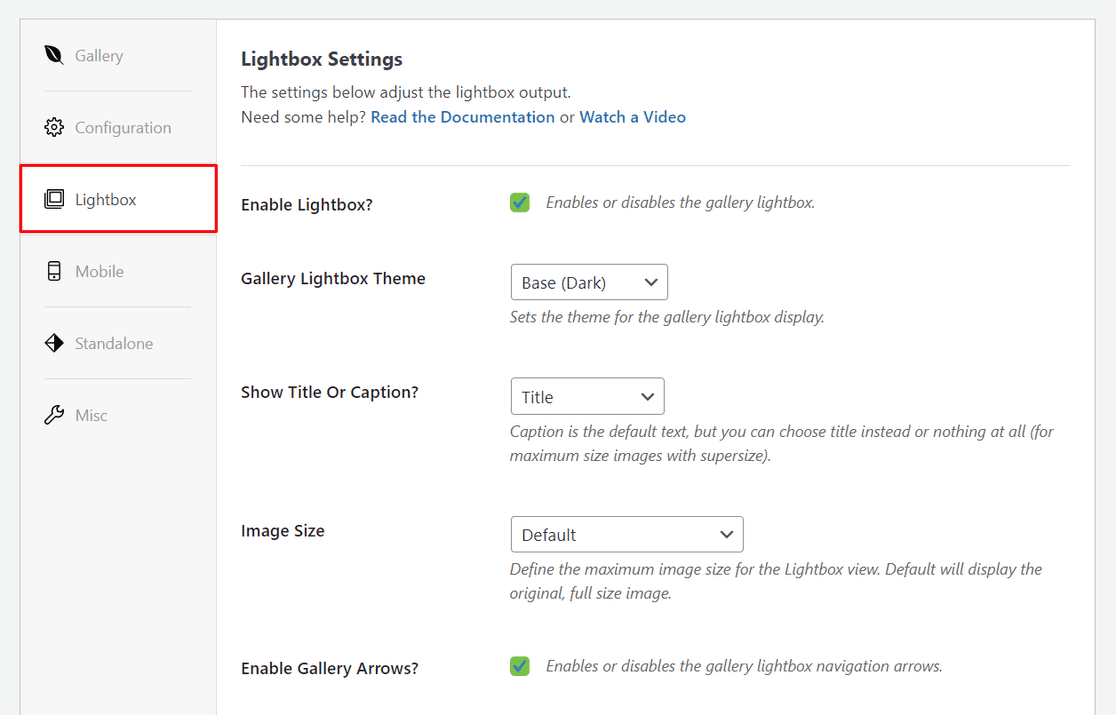
After that, you can switch to the Lightbox tab to enable a gallery lightbox, which allows you to display full size images in a popup viewing window.
From here, you can also choose a lightbox theme and adjust settings for image size, gallery arrows, loop gallery navigation, lightbox effects, and more.
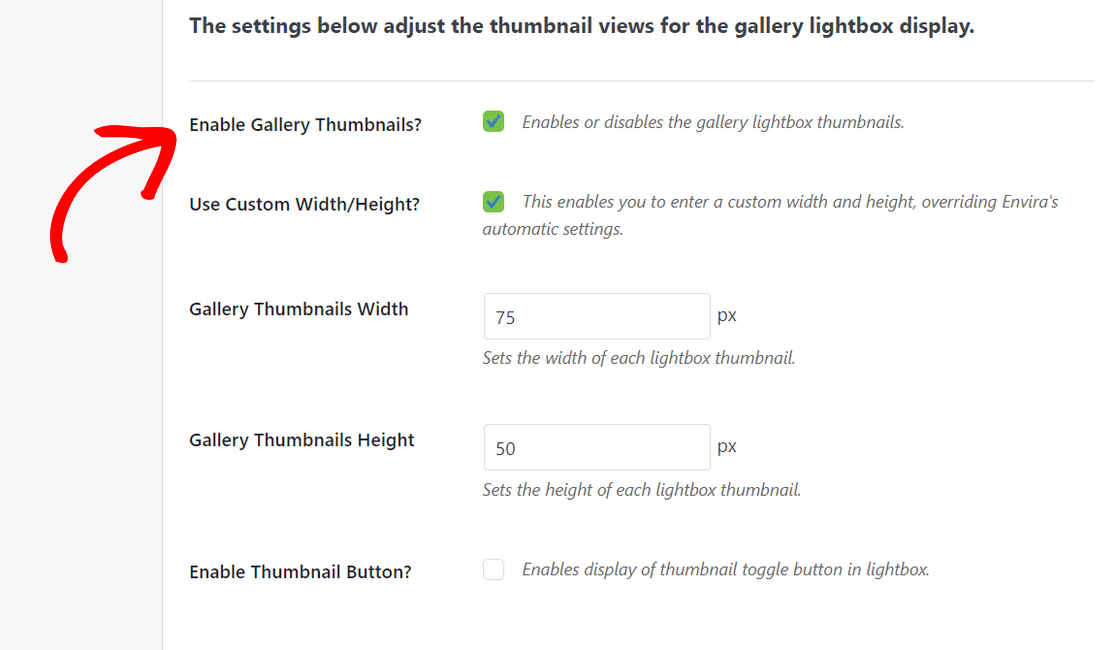
At the bottom of the screen, you can configure the thumbnail views for the lightbox gallery. These thumbnails will appear below the lightbox display and they allow users to browse through your gallery by clicking on them.
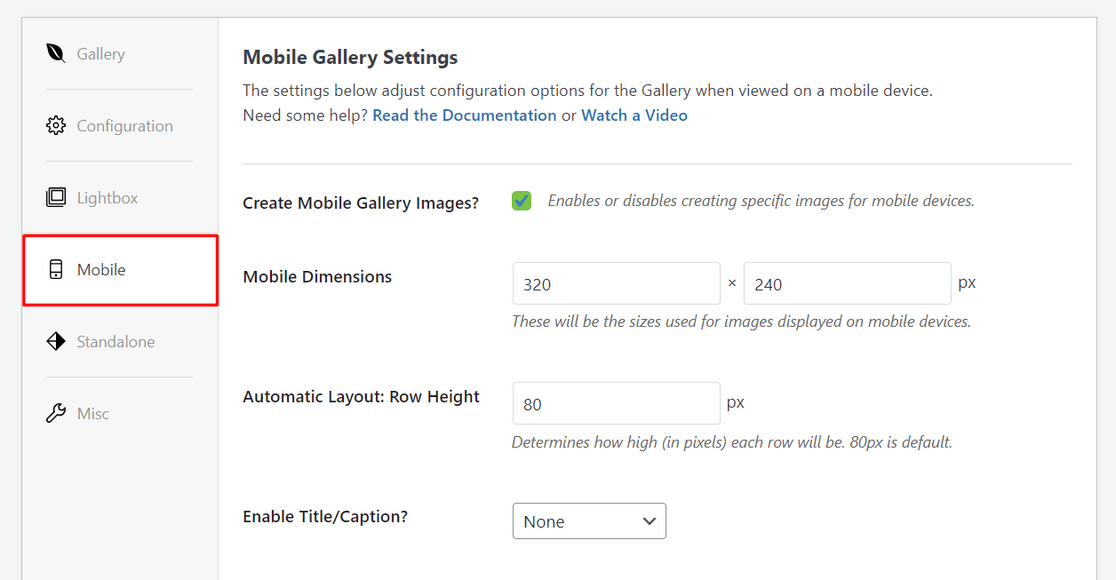
With Envira Gallery, you can also make sure that your galleries are mobile-friendly and look great on all screen sizes.
Simply click on the Mobile tab and enable the option to create mobile gallery images.
Then, you can adjust settings like the mobile image dimensions, row height, title/caption, and more.
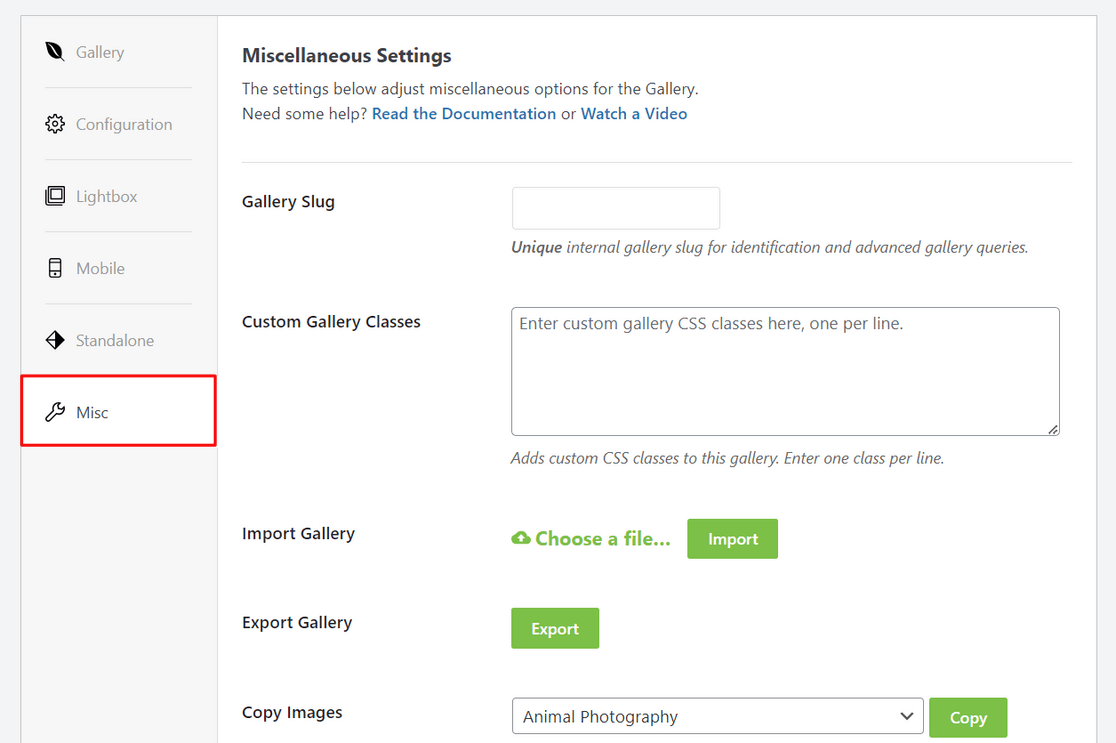
Lastly, you can switch to the Misc tab to configure other miscellaneous settings.
For example, you can create a unique gallery slug, add custom CSS to your gallery, and more. There are also options to export your gallery or copy the gallery images.
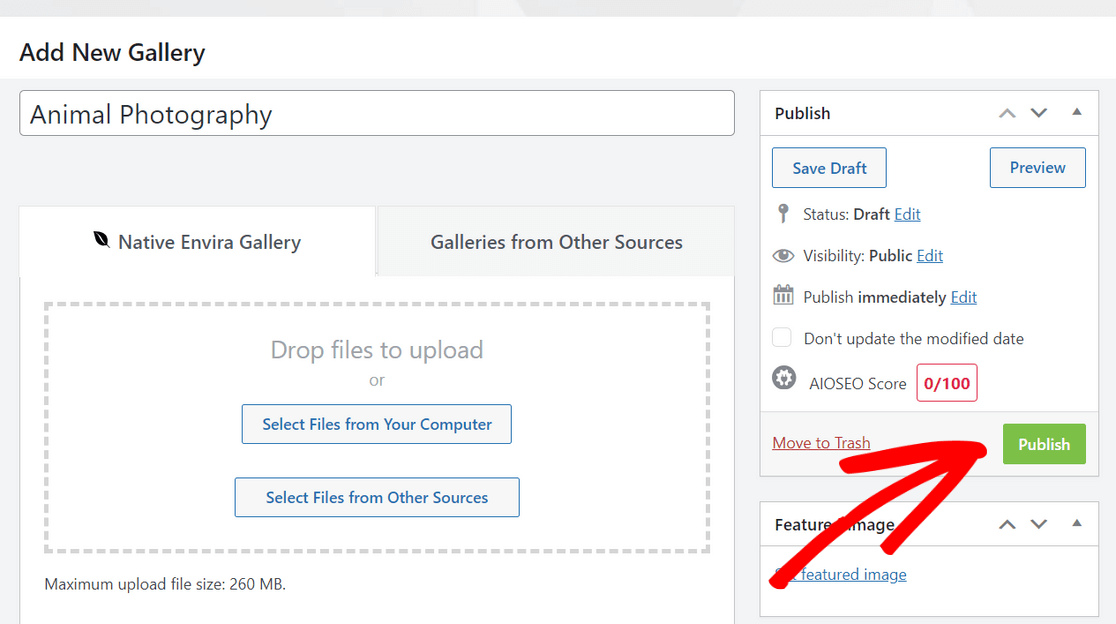
When you’re happy with your gallery settings, you need to click on the Publish button at the top of the screen to make this gallery available.
After publishing the gallery, you can scroll down to see the shortcodes that you can manually insert into any post, page, sidebar, or WordPress widget area to display your image gallery.
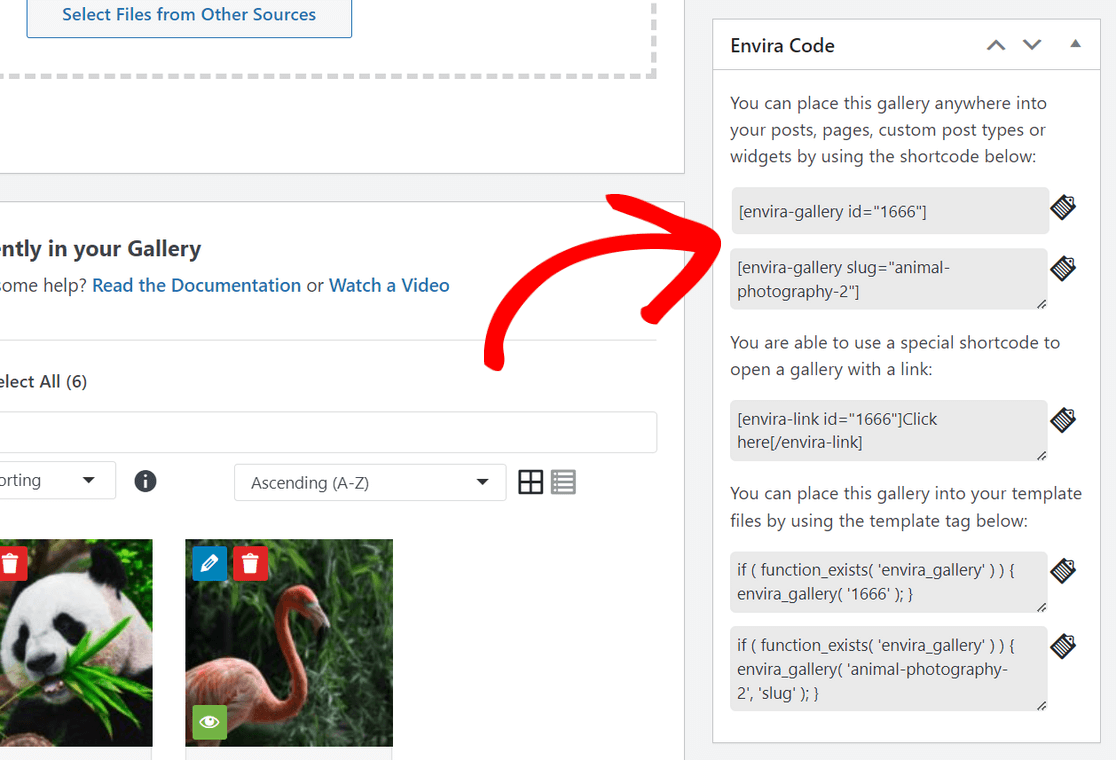
Awesome! Now you’re ready to add the gallery to your WordPress website.
Step 4. Add Your Image Gallery to a WordPress Post or Page
The final step is to display the image gallery you created on a blog post or landing page so that your website visitors can see it.
As we mentioned above, you can use Envira’s shortcode to embed your gallery anywhere in WordPress. For step by step instructions, see this tutorial on how to add shortcodes to WordPress.
An even easier way to display your image gallery is to use Envira’s built-in WordPress block.
For this method, you need to open up a post or page where you want to embed the gallery. Or, you can create a new page or post. Once you’re in the WordPress content editor, click on the plus (+) icon and add the Envira Gallery block.
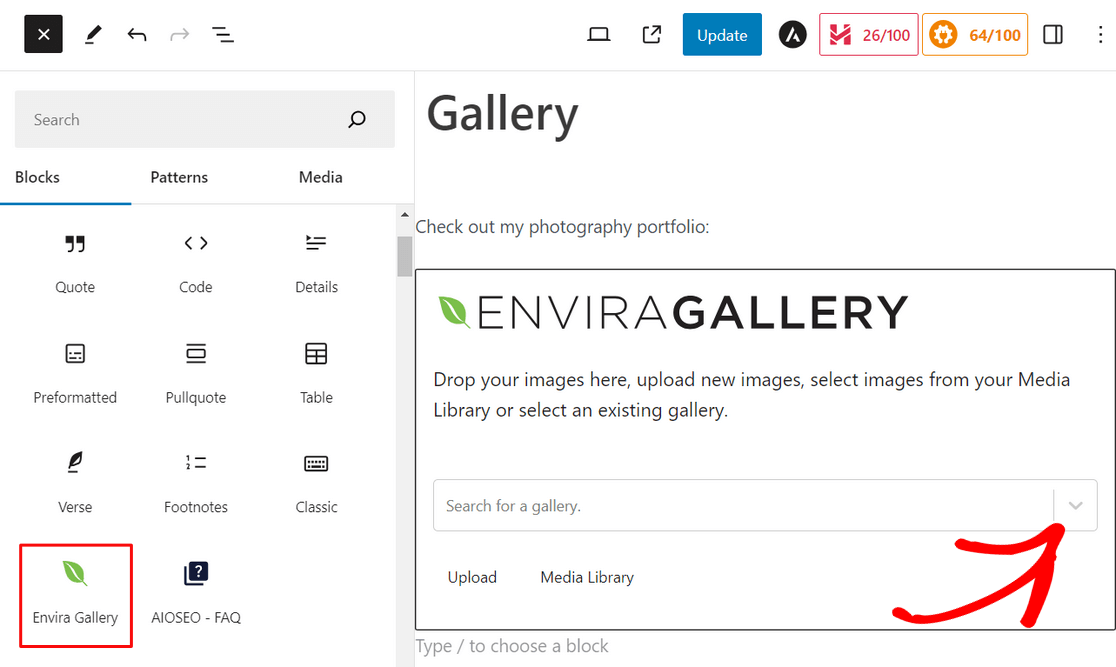
After that, click on the dropdown menu inside of the Envira Gallery block to select which gallery you want to display.
You’ll then see a preview of your image gallery in the block editor. If you’re satisfied with how your gallery looks, go ahead and click on the Update or Publish button at the top of the page.
You can then visit your website to see your stunning image gallery in action.
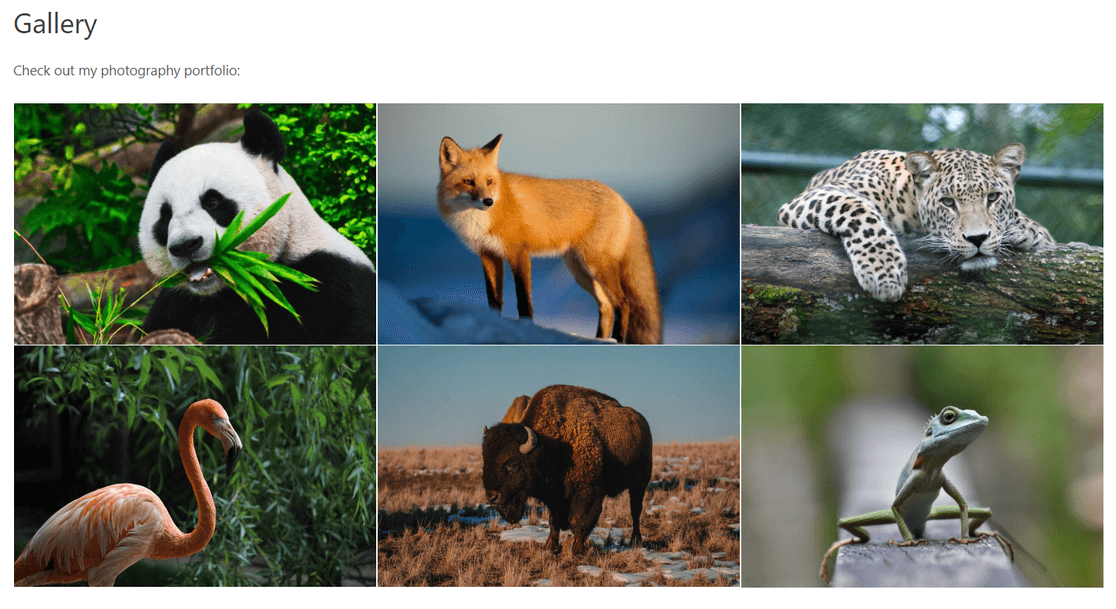
That’s it! It’s that easy to add image galleries in WordPress with Envira Gallery.
Why Envira Gallery?
Envira Gallery is the best WordPress gallery plugin on the market with over 2 million users. It makes it easy to create beautiful WordPress galleries that are completely customizable.
It comes with a user-friendly drag and drop gallery builder that allows you to quickly add images and rearrange them how you want. There’s also multiple pre-made gallery templates to give your gallery a gorgeous look in an instant.
Envira Gallery also offers other powerful gallery-building features, including:
- Supersize lightbox images
- Photo albums, carousels, and slideshows
- Image zoom functionality
- WordPress video galleries for YouTube, Vimeo, and more
- Watermarking and image protection
- Social sharing and Instagram addon
- Image optimization and pagination for fast load times
- WooCommerce integration to sell your photos
- And much more
Bonus: Add Advanced Features to Your Image Gallery
If you want to take your WordPress image gallery to the next level, you’re in luck because Envira Gallery comes with a ton of powerful features that you can use. Let’s take a look at a few different ways that you can create advanced WordPress galleries with Envira Gallery:
Enable Image Zoom
Do you want users to be able to see all of the gorgeous details in your photos? With Envira Gallery, you can easily add zoom functionality to your gallery images. You can choose from 3 zoom modes and configure zoom effects, lens shape, and more.
Image zoom is especially useful for creating product image galleries because it allows users to hover over an image to get a closer look at the product details.
Create Photo Albums
Using Envira Gallery’s Albums Addon, you can easily organize your galleries into albums for an even better browsing experience. In the album, you can display cover photos, gallery titles, and even image counts for each individual gallery.

The drag and drop functionality allows you to quickly add galleries to your album and rearrange them how you want.
Add Social Sharing to Your Images
To improve your online reach and drive traffic to your website, you can add social sharing buttons to your WordPress gallery images.
Envira’s Social Addon allows readers to share your photos on all of the popular social media platforms, including Facebook, Pinterest, Twitter, LinkedIn, and WhatsApp. Plus, it gives you full control over how your social share buttons are displayed.
Add Watermarks to Your Images
Most photographers watermark their images to prevent image theft. To protect your photos, Envira Gallery makes it easy to add a watermark to your uploaded images.
You can create any type of custom watermark, such as your company logo, a text based watermark, copyright symbols, and more. Once you’ve configured a watermark, the plugin will automatically add it to all of your photos, which saves you a ton of time.
Sell Your Photos Online
Envira Gallery seamlessly integrates with WooCommerce, the most popular eCommerce plugin for WordPress. This allows you to easily display and sell your photos directly from your website, which is perfect for professional photographers who want to grow their business online.
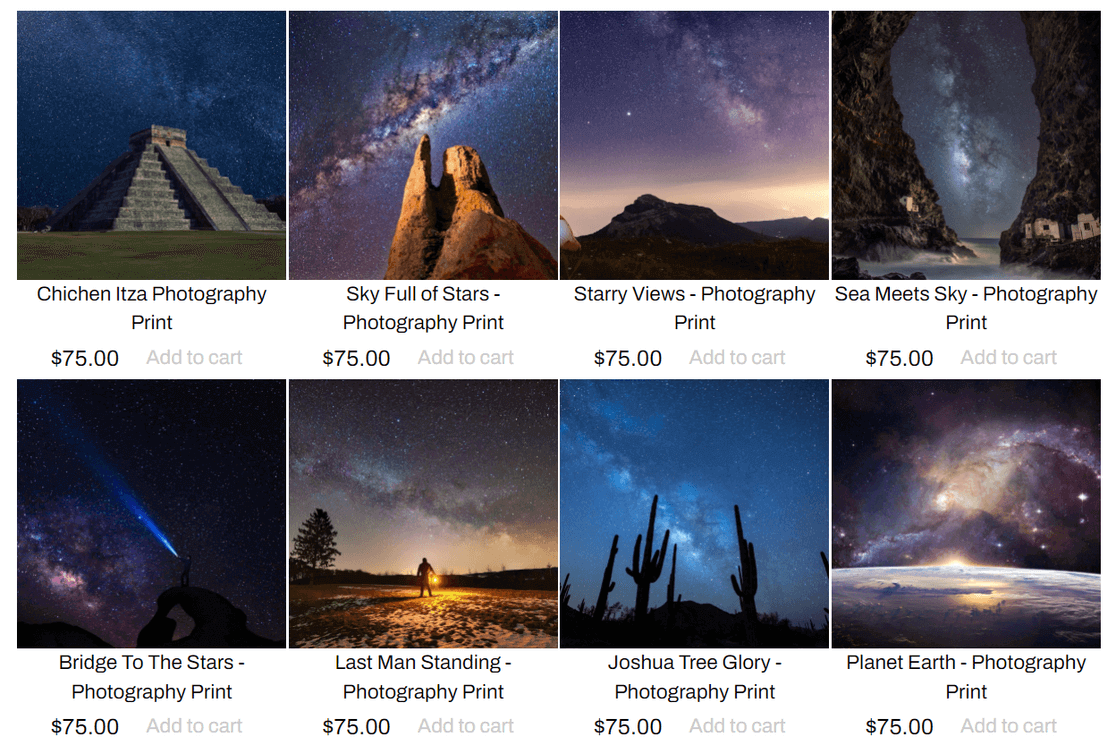
It also comes with a helpful image proofing feature. With proofing, your clients can browse a gallery to pick their favorite photos from a session, as well as specify the quantity and photo sizes they want to order from you.
How Do You Create a Gallery in WordPress?
You can create a gallery without an image gallery plugin using the WordPress block editor (Gutenberg).
Simply create a post or page in WordPress, or edit an existing one, and click the plus (+) button in the top left corner of the screen. Then, find and click on the Gallery block to add it.
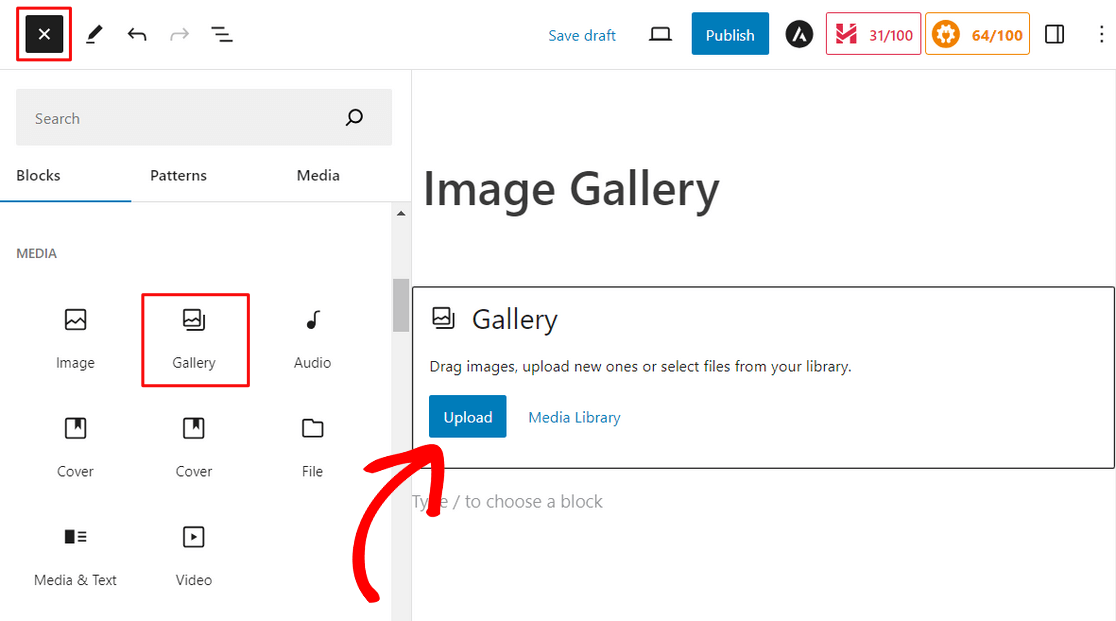
From there, click on the Upload button to upload new images from your computer. Or, click Media Library to select images from your WordPress media library.
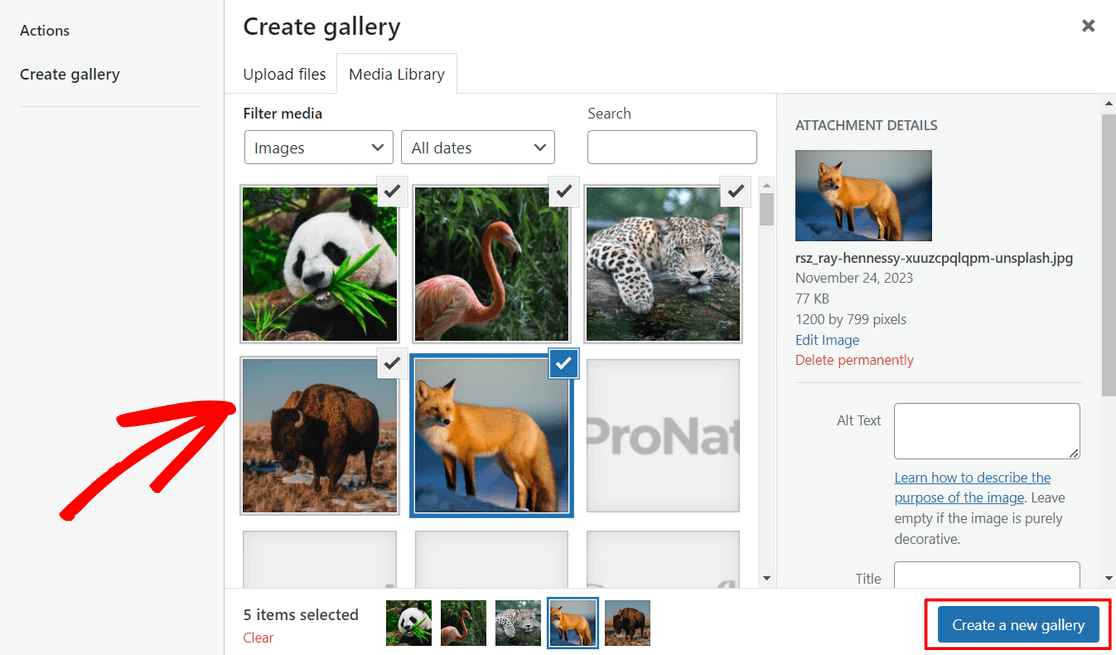
When you click the Media Library button, you can easily select multiple media files all at once. After choosing the images, click Create a new gallery.
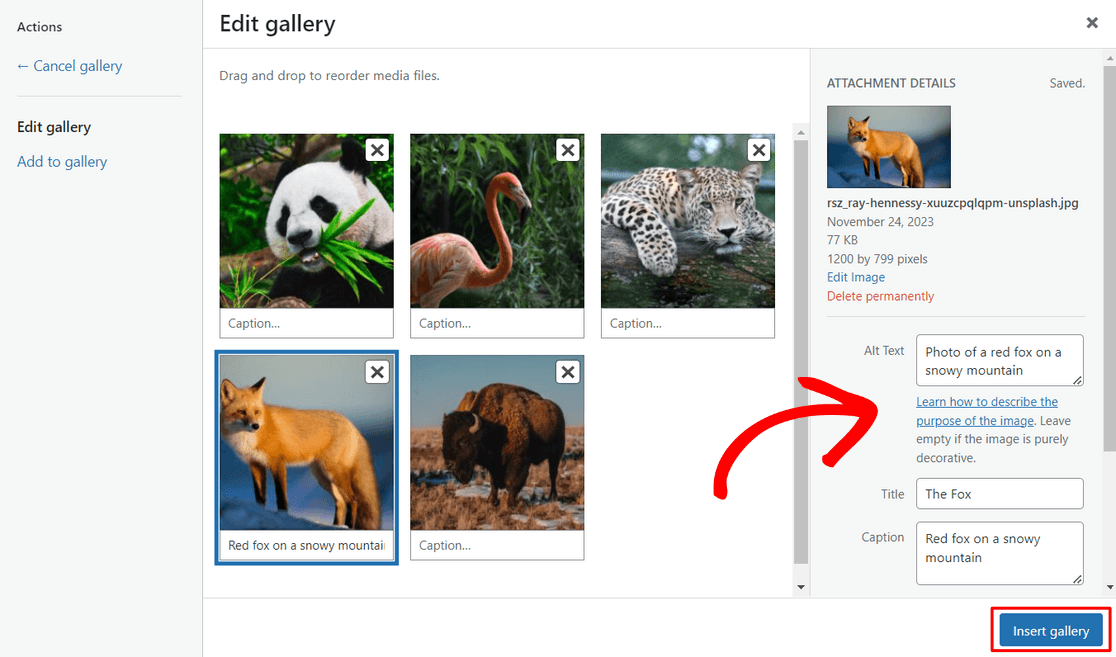
Next, on the Edit gallery screen, you can configure settings like the image alt text, title, and caption. Then, click the Insert gallery button.
Your gallery then will be automatically added to the page and you can see a preview of it in the WordPress editor.
Now, you can hit the Publish or Update button in the top right corner of your screen to make the gallery live on your website.
This method is very basic though and it doesn’t offer many customization options for your gallery. That’s why we recommend using a WordPress photo gallery plugin like Envira Gallery. It comes with advanced features to make your photos look even better.
FAQs on How to Create an Image Gallery in WordPress
How to create a gallery in WordPress without a plugin?
To create a gallery without a plugin, use the WordPress block editor. Add a Gallery block to your page or post, upload your images, or select them from the Media Library. You can arrange the images, adjust columns, and customize captions directly in the editor.
How do I create a photo gallery for my website?
You can create a photo gallery by using the WordPress block editor or a plugin. For a simple setup, use the Gallery block to upload and display images. If you need more advanced features like lightbox effects, a plugin like Envira Gallery can help.
How do I create an image menu in WordPress?
To create an image menu, use the block editor to add an Image block or Gallery block for each menu item. Link each image to the corresponding page or section. Alternatively, you can use custom HTML in the widget area for a more tailored design.
Next, Allow Users to Upload Images to Your WordPress Site
Now that you can display beautiful image galleries, wouldn’t it be great if users could upload images to your website for photo contests, product reviews, and more?
You can make it happen with WPForms! See our guide on how to allow users to upload images to your WordPress site for more details.
Create Your Wordpress Form Now
Ready to build your form? Get started today with the easiest WordPress form builder plugin. WPForms Pro includes lots of free templates and offers a 14-day money-back guarantee.
If this article helped you out, please follow us on Facebook and Twitter for more free WordPress tutorials and guides.

