AI Summary
Do you want to create a Net Promoter Score survey in WordPress?
A Net Promoter Score (NPS) survey is a super useful tool that indicates how satisfied your customers are with you and what they think about your business.
In this post, we’ll show you how to create an NPS form in WordPress so you can understand your customers better.
In This Article
- Step 1: Install WPForms
- Step 2: Install the Surveys and Polls Addon
- Step 3: Use the NPS Survey Form Template
- Step 4: Set Up NPS Form Conditional Logic
- Step 5: Limit Entries to Your NPS Survey Form
- Step 6: Configure Your NPS Survey Form Notifications
- Step 7: Configure Your Form Confirmations
- Step 8: Add Your NPS Survey to Your WordPress Site
- Step 9: View Your NPS Calculation
What Is a Net Promoter Score Survey?
A Net Promoter Score (NPS) survey measures your customers’ feelings about your brand.
The results of an NPS survey can help you determine how likely your customers are to stay loyal to you and also promote your business with positive word-of-mouth.
The NPS ranges from 0 to 10. The best promoters of your business are usually the respondents giving you a score of 9 or 10. On the other hand, customers giving you a score of 6 or below are usually your detractors.
The respondents falling in between these two extremes with a score of 7 or 8 are likely to be passive customers that don’t feel strongly either way about your business.
So if you’re curious about how your customers perceive you, an NPS survey is the perfect tool for you.
How to Create an NPS Survey Form in WordPress
It’s fairly easy to build an NPS survey form in WordPress with the right plugin.
Just follow the step-by-step instructions below to learn how.
Step 1: Install WPForms
WPForms is the most user-friendly WordPress plugin for building NPS survey forms. You can create any form effortlessly right from your WordPress dashboard using WPForms.
We recommend getting the WPForms Pro license because this includes the Surveys and Polls addon. We’ll be needing this addon to access the NPS field and the powerful survey reporting features of WPForms.
Once you’ve purchased the required license, you can go ahead and install WPForms on your site. For more details, see this step-by-step guide on how to install a plugin in WordPress.
In the next step, we’ll install an addon required to access the NPS field.
Step 2: Install the Surveys and Polls Addon
We’re going to install the Surveys and Polls addon now.
From your WordPress dashboard, navigate to WPForms » Addons.
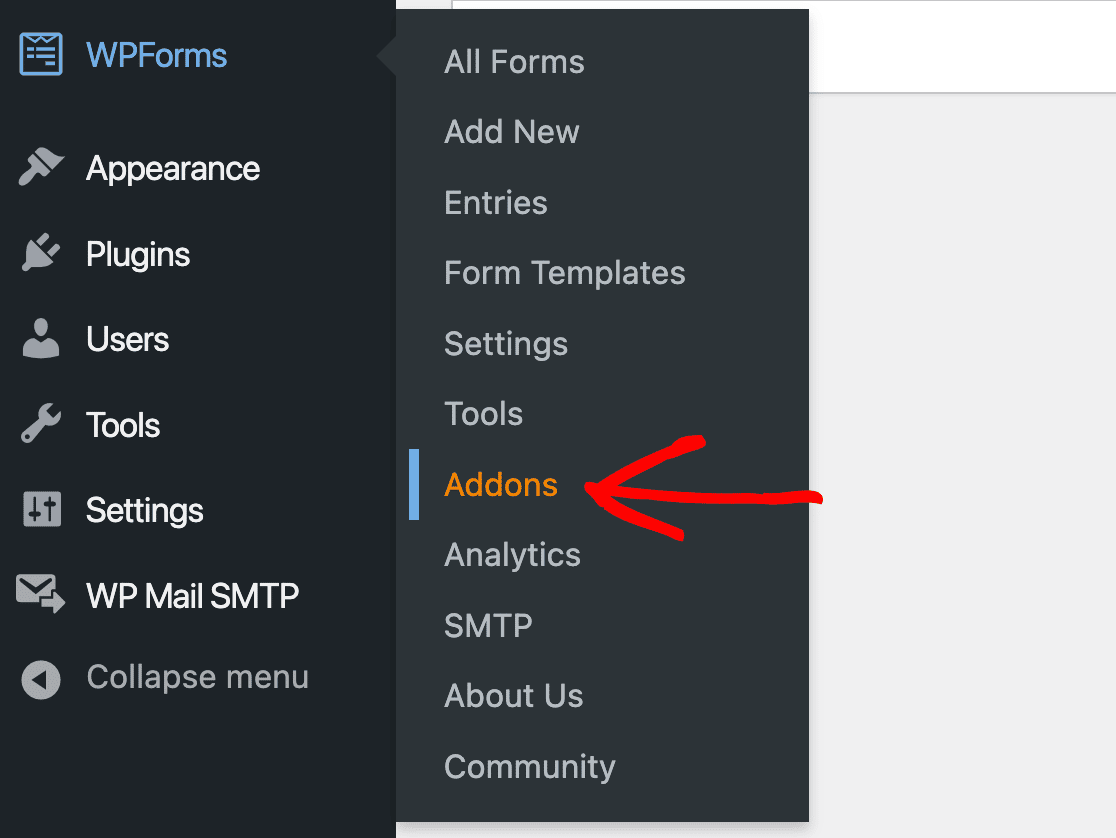
On the next screen, find the Survey and Polls addon and click on the Install Addon button under it.
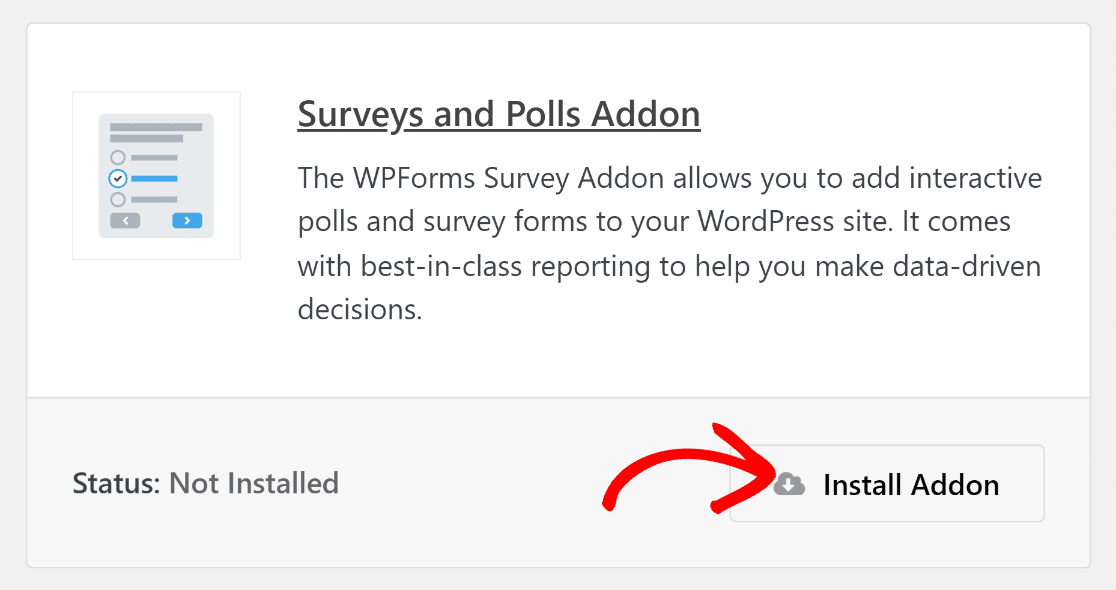
The addon will finish installing in just a few seconds. When the Staus reads “Active”, it means the addon was installed successfully.
It’s time to start building the NPS survey form now!
Step 3: Use the NPS Survey Form Template
From your WordPress admin area, click on WPForms » Add New.
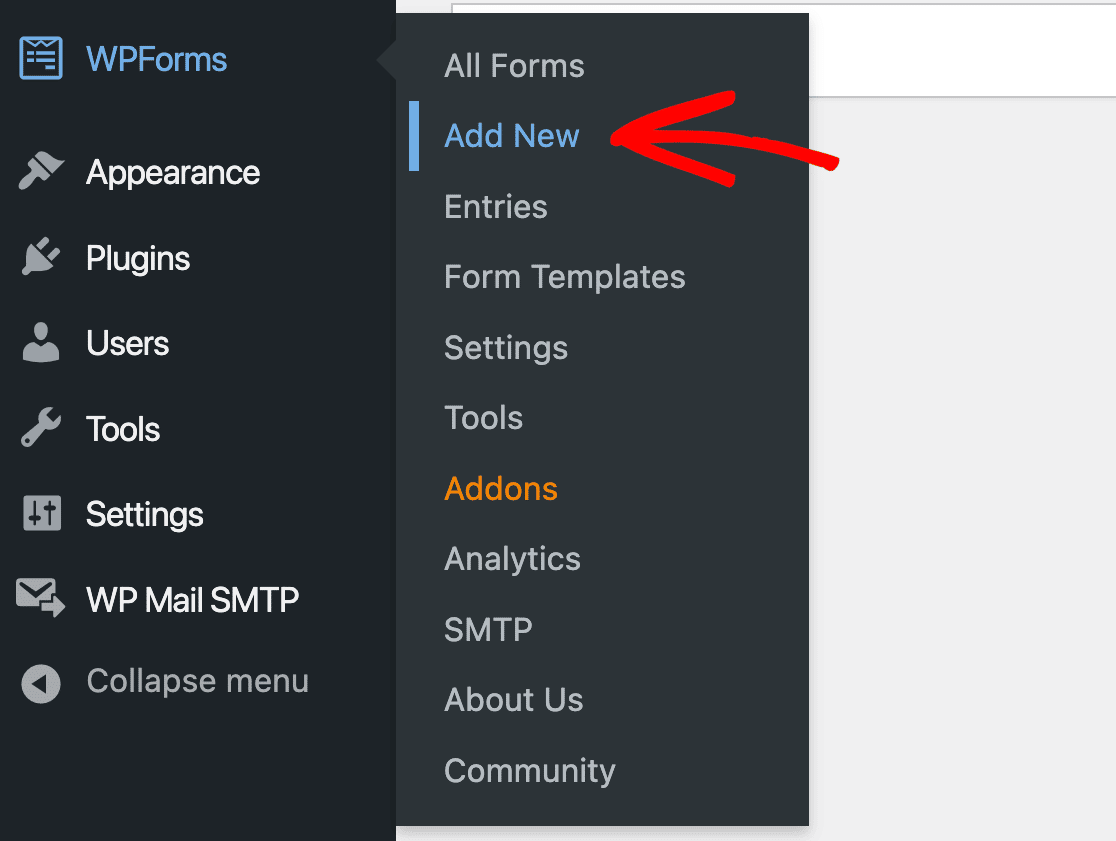
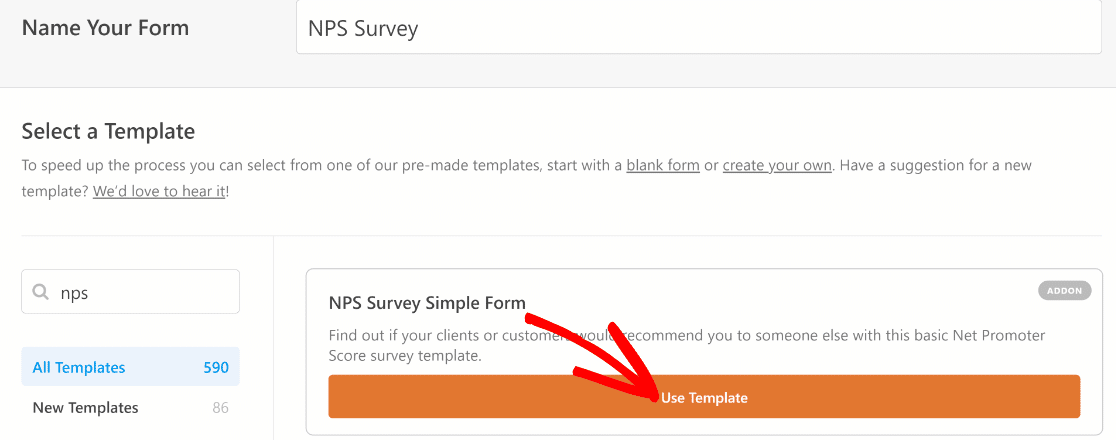
On the setup screen, you can name your form so you can easily identify it later on if you need to make edits. If you scroll down, you can find hundreds of ready-made form templates for your use.
We’ll use the NPS Survey Simple Form in this example (though you can also use the enhanced variant of the same template or create your form from scratch if you want). Hover your cursor over the template and press Use Template to proceed.
Once you’ve done that, you’ll be taken to the form builder with your template loaded.
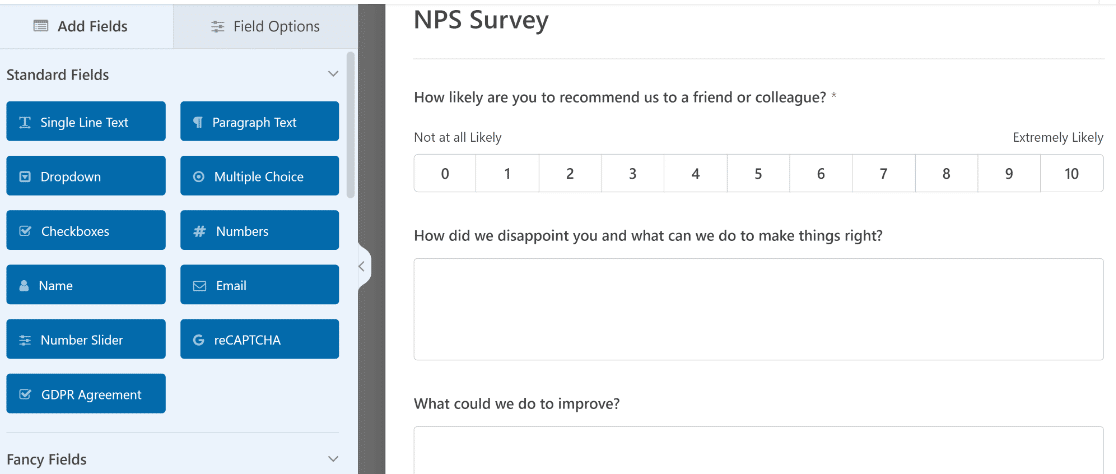
This template is ideal for collecting feedback from your customers. But you’re free to make changes to this template if you’d like to add additional fields to collect more details and insights from your customers.
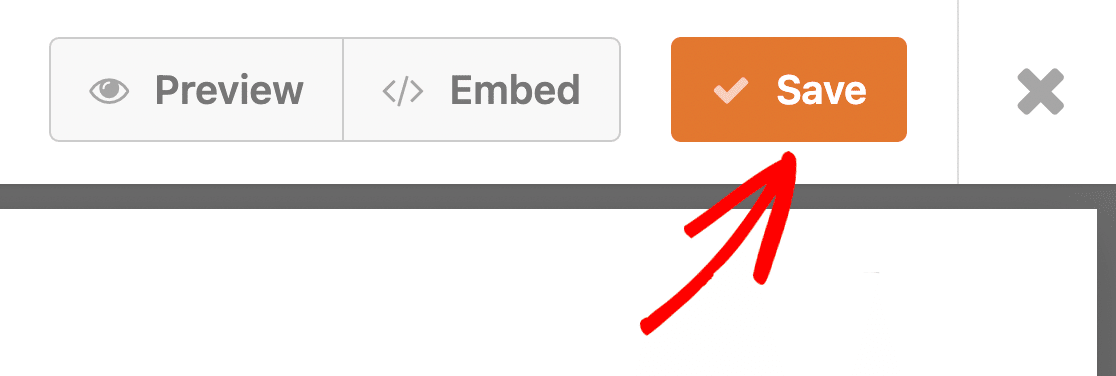
Make sure to press Save when you’re done making changes to your form.
Great! Now that all your form fields are ready, we can continue configuring conditional logic.
Step 4: Set Up NPS Form Conditional Logic
This is one of the neatest things about the Net Promoter Score form field in WPForms. It’s been designed to work with conditional logic so you can get even more information from your site visitors when they fill out your form, regardless of their answers.
Here’s what’s already pre-built with conditional logic in this NPS feedback form:
- If someone answers your NPS field as a passive (7-8), this will display a text box asking What could we do to improve?
- If someone answers your NPS field as a detractor (0-6), this will display a text box asking How did we disappoint you and what can we do to make things right?
And if you want to edit the conditional logic on your form, click on a paragraph field you’d like to edit and select Smart Logic under Field Options on the left-hand pane.
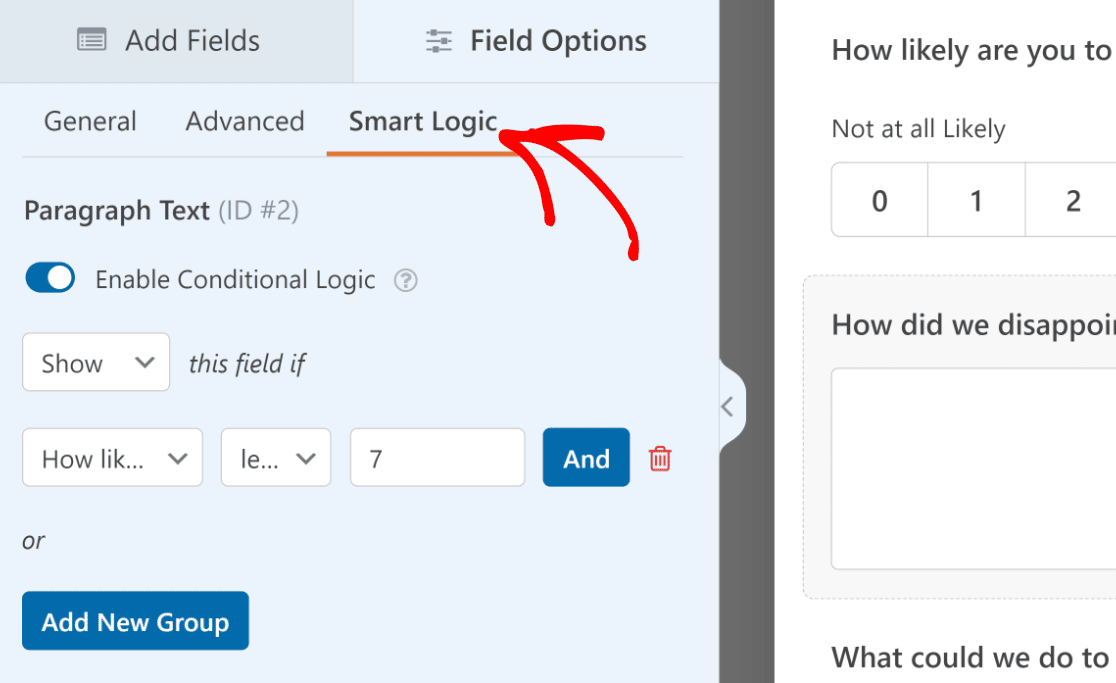
Then you can simply use the conditional logic fields to meet your needs.
While you’re working with conditional logic on your forms, be sure to check out our suggestions for using conditional logic to create killer forms.
Step 5: Limit Entries to Your NPS Survey Form
It’s important that each customer only responds to your survey only 1 time to obtain accurate survey results. You can restrict the number of entries in WPForms using the Form Locker addon.
You can install this addon by following a similar process as you did in step 2. Exit your form builder (make sure to save all the settings first) and go to WPForms » Addons and click the Install Addon button under Form Locker addon.
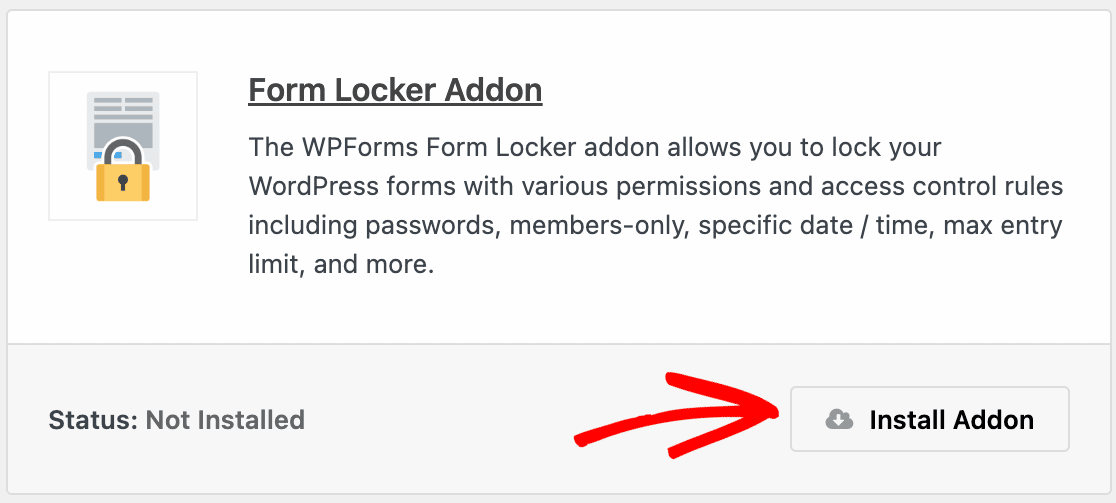
After you’ve installed this addon, you’ll be able to set entry limits for your Net Promoter Score form.
Return to your NPS survey form from by locating it on the WPForms » All Forms screen.
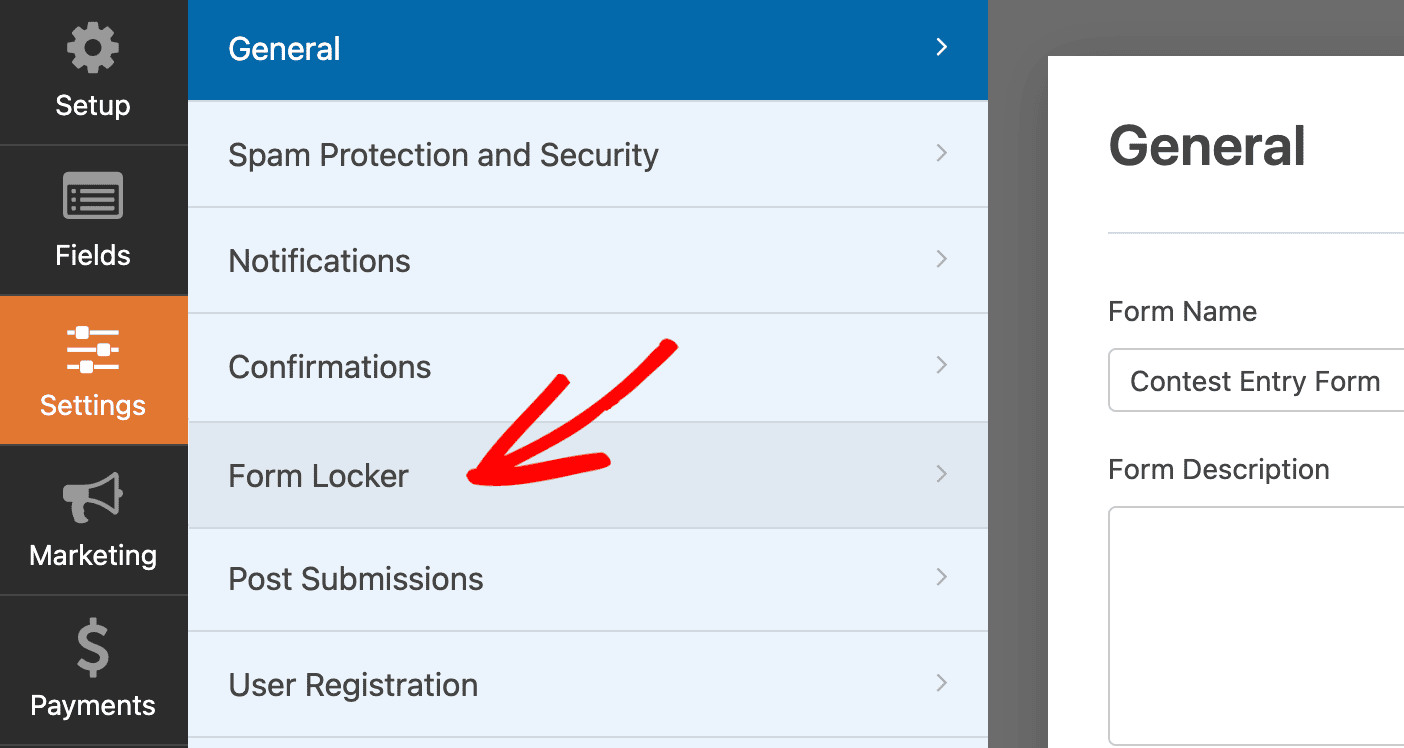
Now, you’ll be able to access the Form Locker settings by navigating to Settings » Form Locker.
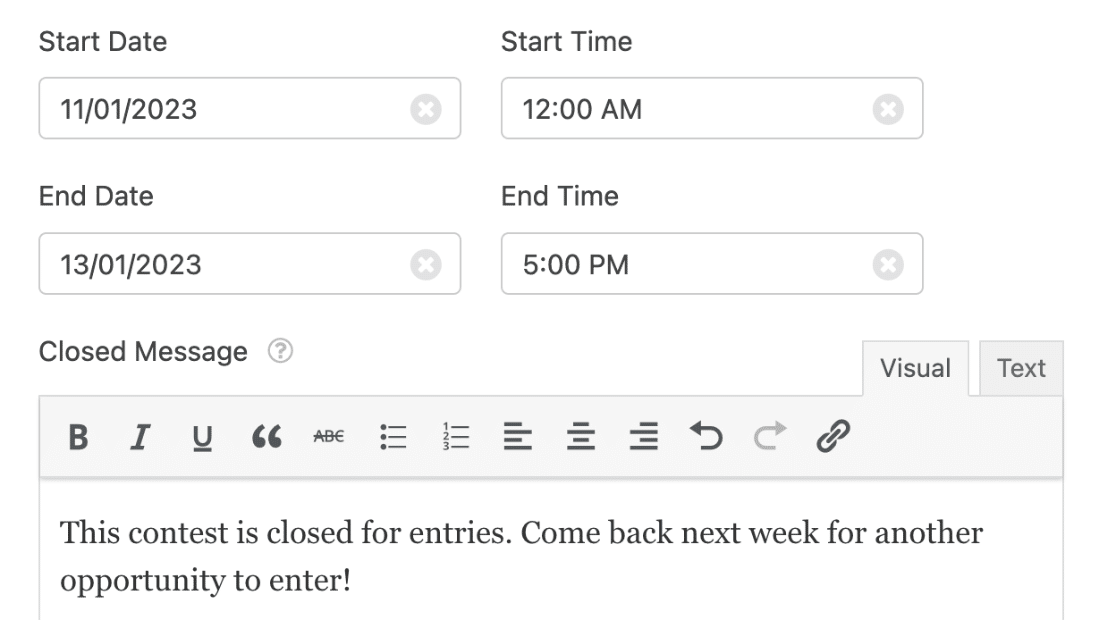
It’s a good idea to schedule your form so that it only accepts submissions during a specific time period. You can create a schedule for your survey form by clicking on the Form Scheduling toggle button inside the Form Locker settings.

Then use the date and time fields to specify the duration. You can also edit the Closed Message to make it appropriate for your case.
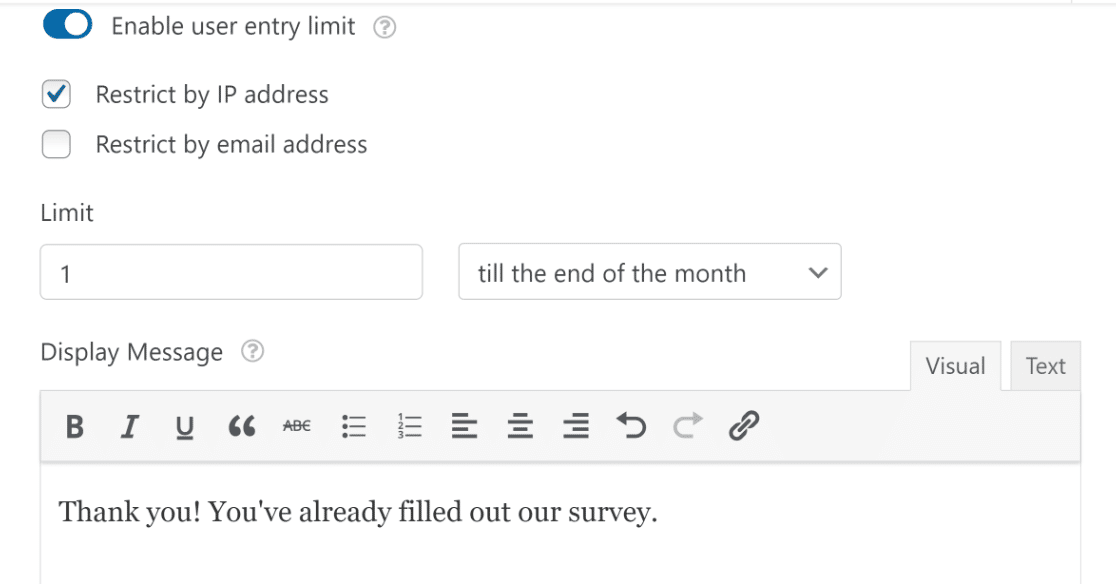
Next to these settings, you’ll also find the Entry Limits & Restrictions section. When you use the toggle switch next to Enable user entry limit and then press Restrict by IP address checkbox, you’ll see new fields open. You can specify the entry limit and the time period the limit should remain valid for using these fields.
For more details, see our guide on limiting WordPress form entries.
Step 6: Configure Your NPS Survey Form Notifications
WPForms automatically sends you a notification every time a new entry for your NPS survey form is submitted.
By default, this notification is sent to your admin email. But you can edit the recipient as well as the content of these notifications directly from the form builder.
To edit form notifications, select Settings » Notifications.
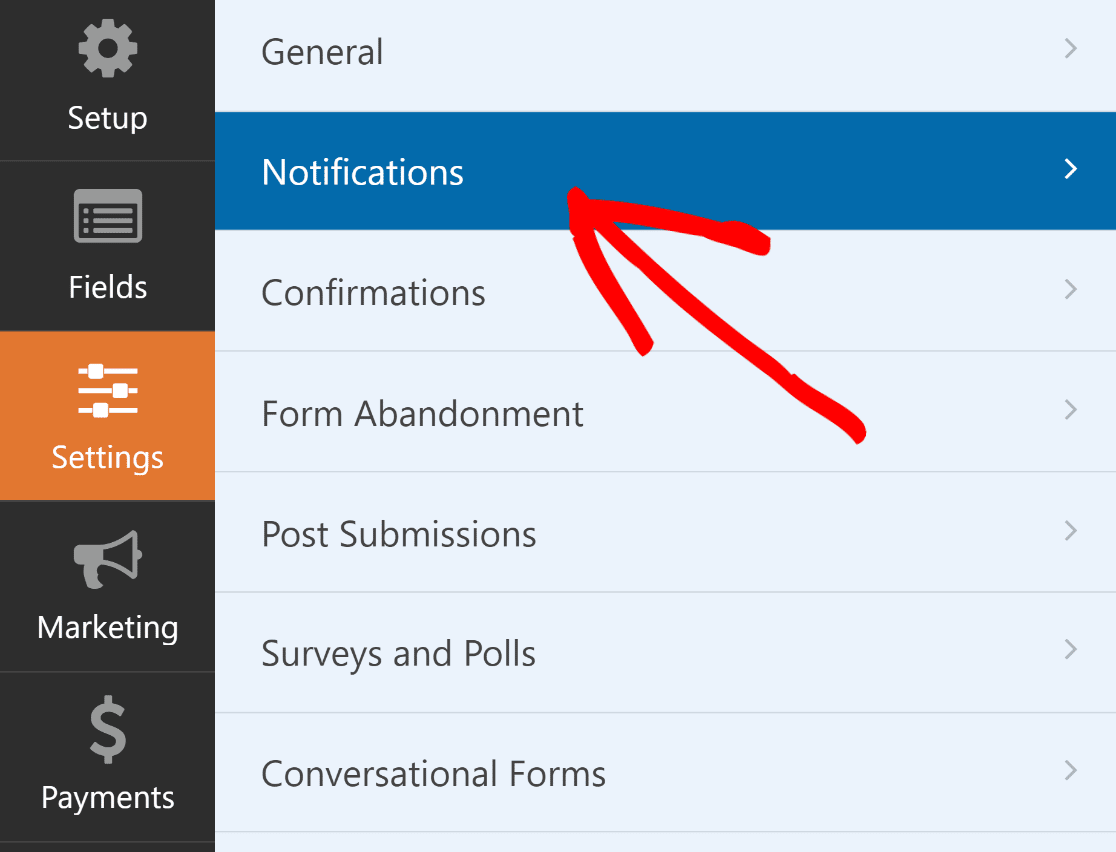
For help with this step, check out our documentation on how to set up form notifications in WordPress.
Step 7: Configure Your Form Confirmations
Confirmations are displayed on the page immediately after a user presses the Submit button.
Like notifications, you can edit the confirmation settings of your survey form.
You can configure confirmation by going to Settings » Confirmation.
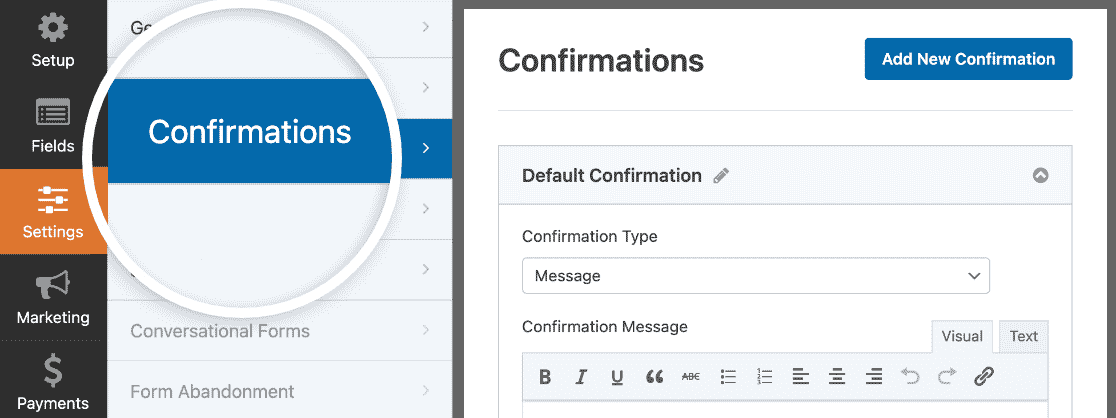
WPForms lets you choose from three types of confirmations:
- Message. This confirmation displays a simple message once an NPS survey respondent submits their form.
- Show Page. This confirmation type will take site visitors to any given URL on your site. For help with this step, check out our tutorial on redirecting site visitors to a thank you page, as well as our guide to creating effective thank you pages.
- Go to URL (Redirect). If you want to redirect respondents to a different website altogether, you can use this confirmation type.
For step-by-step instructions, check out this documentation on setting up form confirmations.
Step 8: Add Your NPS Survey to Your WordPress Site
After you’ve created your Net Promoter Score survey form, it’s time to embed it on your site.
WPForms lets you add your forms to your site in several places, including your blog posts, pages, and sidebar widget areas.
To begin the embed process, click on the Embed button.

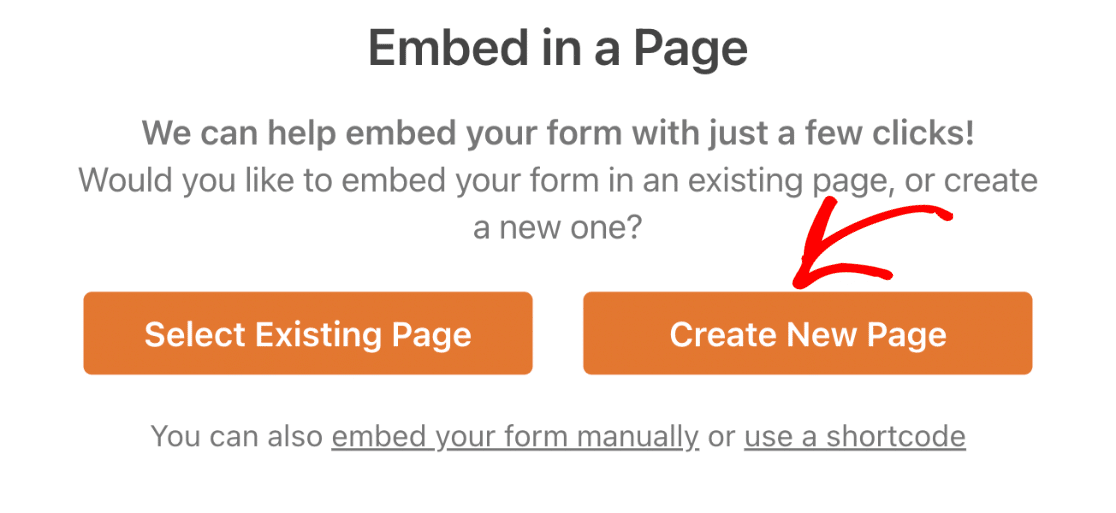
You’ll see a modal window open which will give you the option to embed your form in an existing page or embed it in a new page entirely.
In this example, we’ll embed our Net Promoter Survey form in a new page by clicking on the Create New Page.
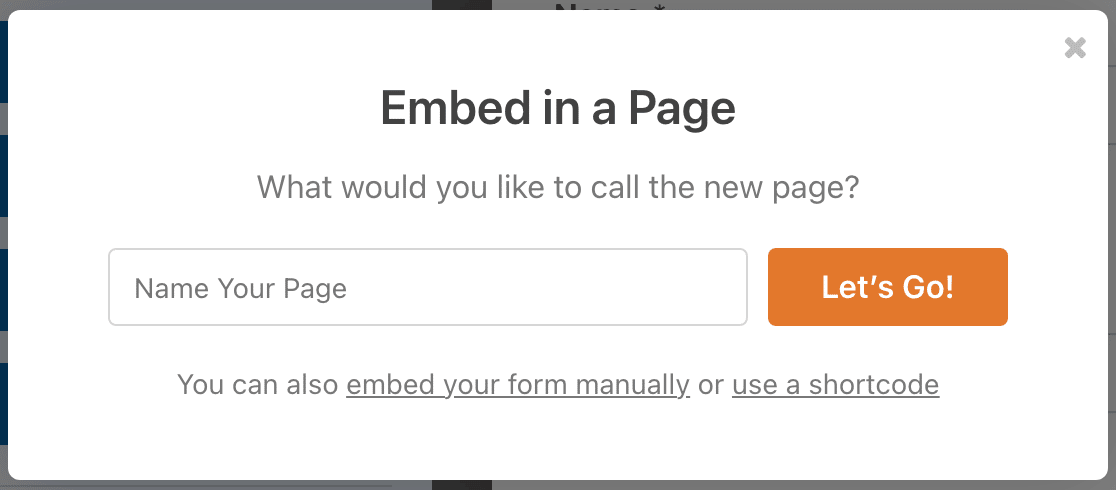
After that, you’ll be able to give a name to the new page you’re embedding this form in. Then press the Let’s Go! button when you’re ready.
At this point, you’ll be taken to your WordPress page editor, where you’ll find your NPS survey form already embedded.
You can make any changes to your page content here if you’d like. When everything looks the way you want, go ahead, and press Publish on the top-right.
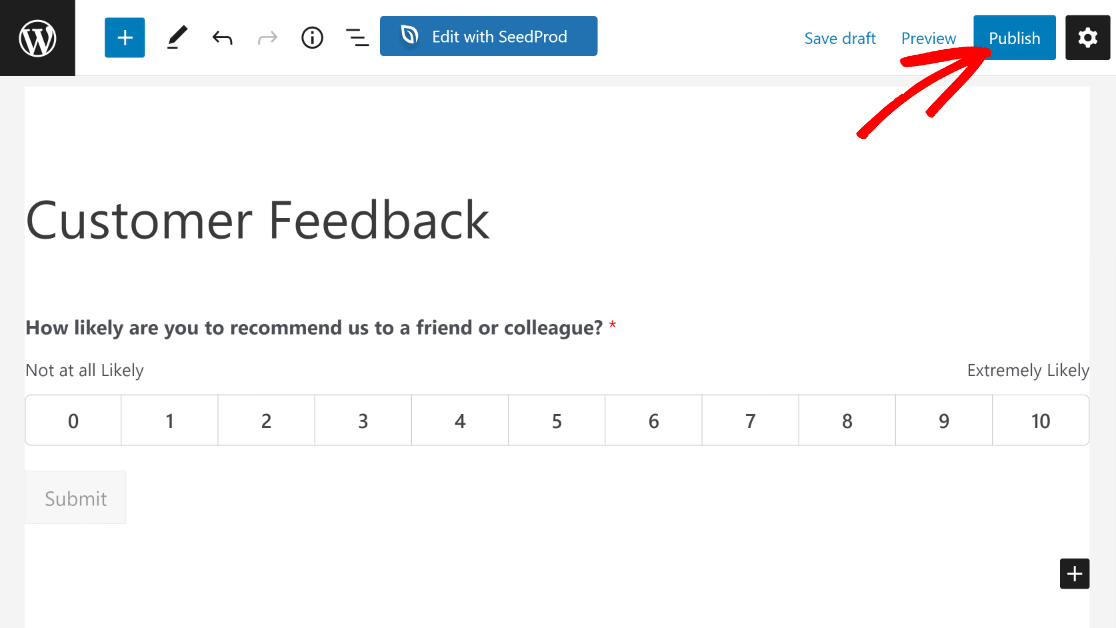
With the form published, you can go ahead and check it out. Here’s what it looks like for us.
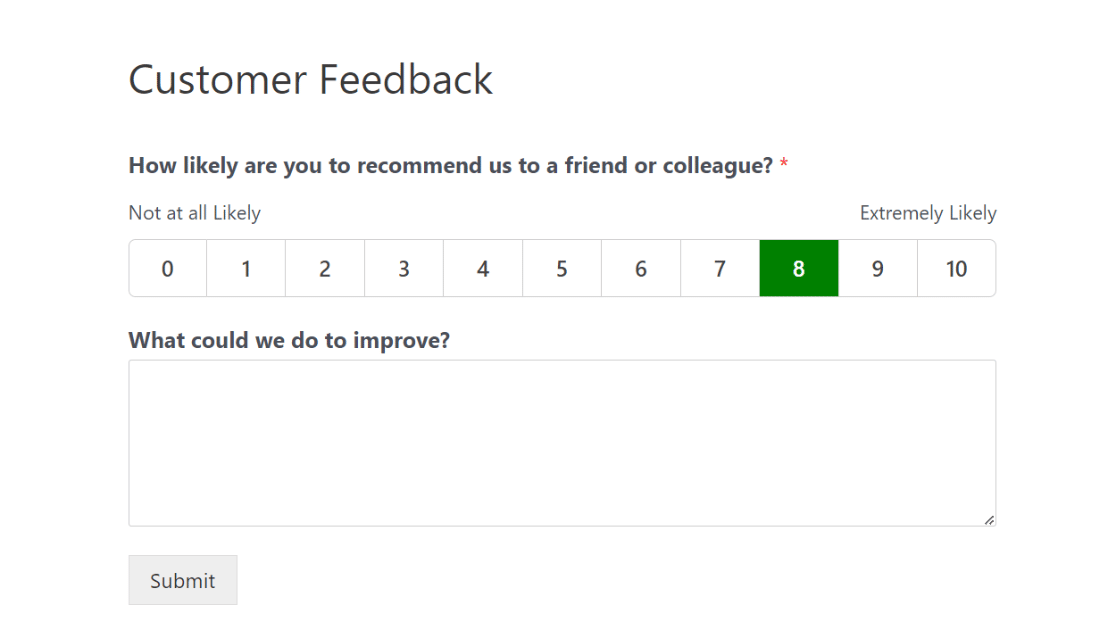
You can expect to see your customers responding to the form as soon as they start seeing it.
But how do you view the results of the survey?
Thankfully, WPForms makes that effortless too, as we show in the next step.
Step 9: View Your NPS Calculation
WPForms will start calculating your NPS as soon as customers begin filling out your form.
To view these results, go to WPForms » All Forms. From there, hover over the form name to display the extra menu items, and click on Survey Results.
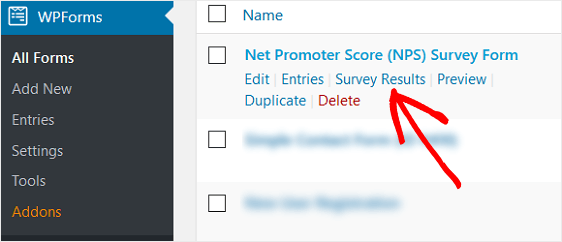
Once you’re on the Survey Results page, you’ll be able to see your Net Promoter Score calculations.
WPForms’ survey reporting tool is extremely powerful and supports various different chart styles to make it easy for you to interpret the results of your survey.
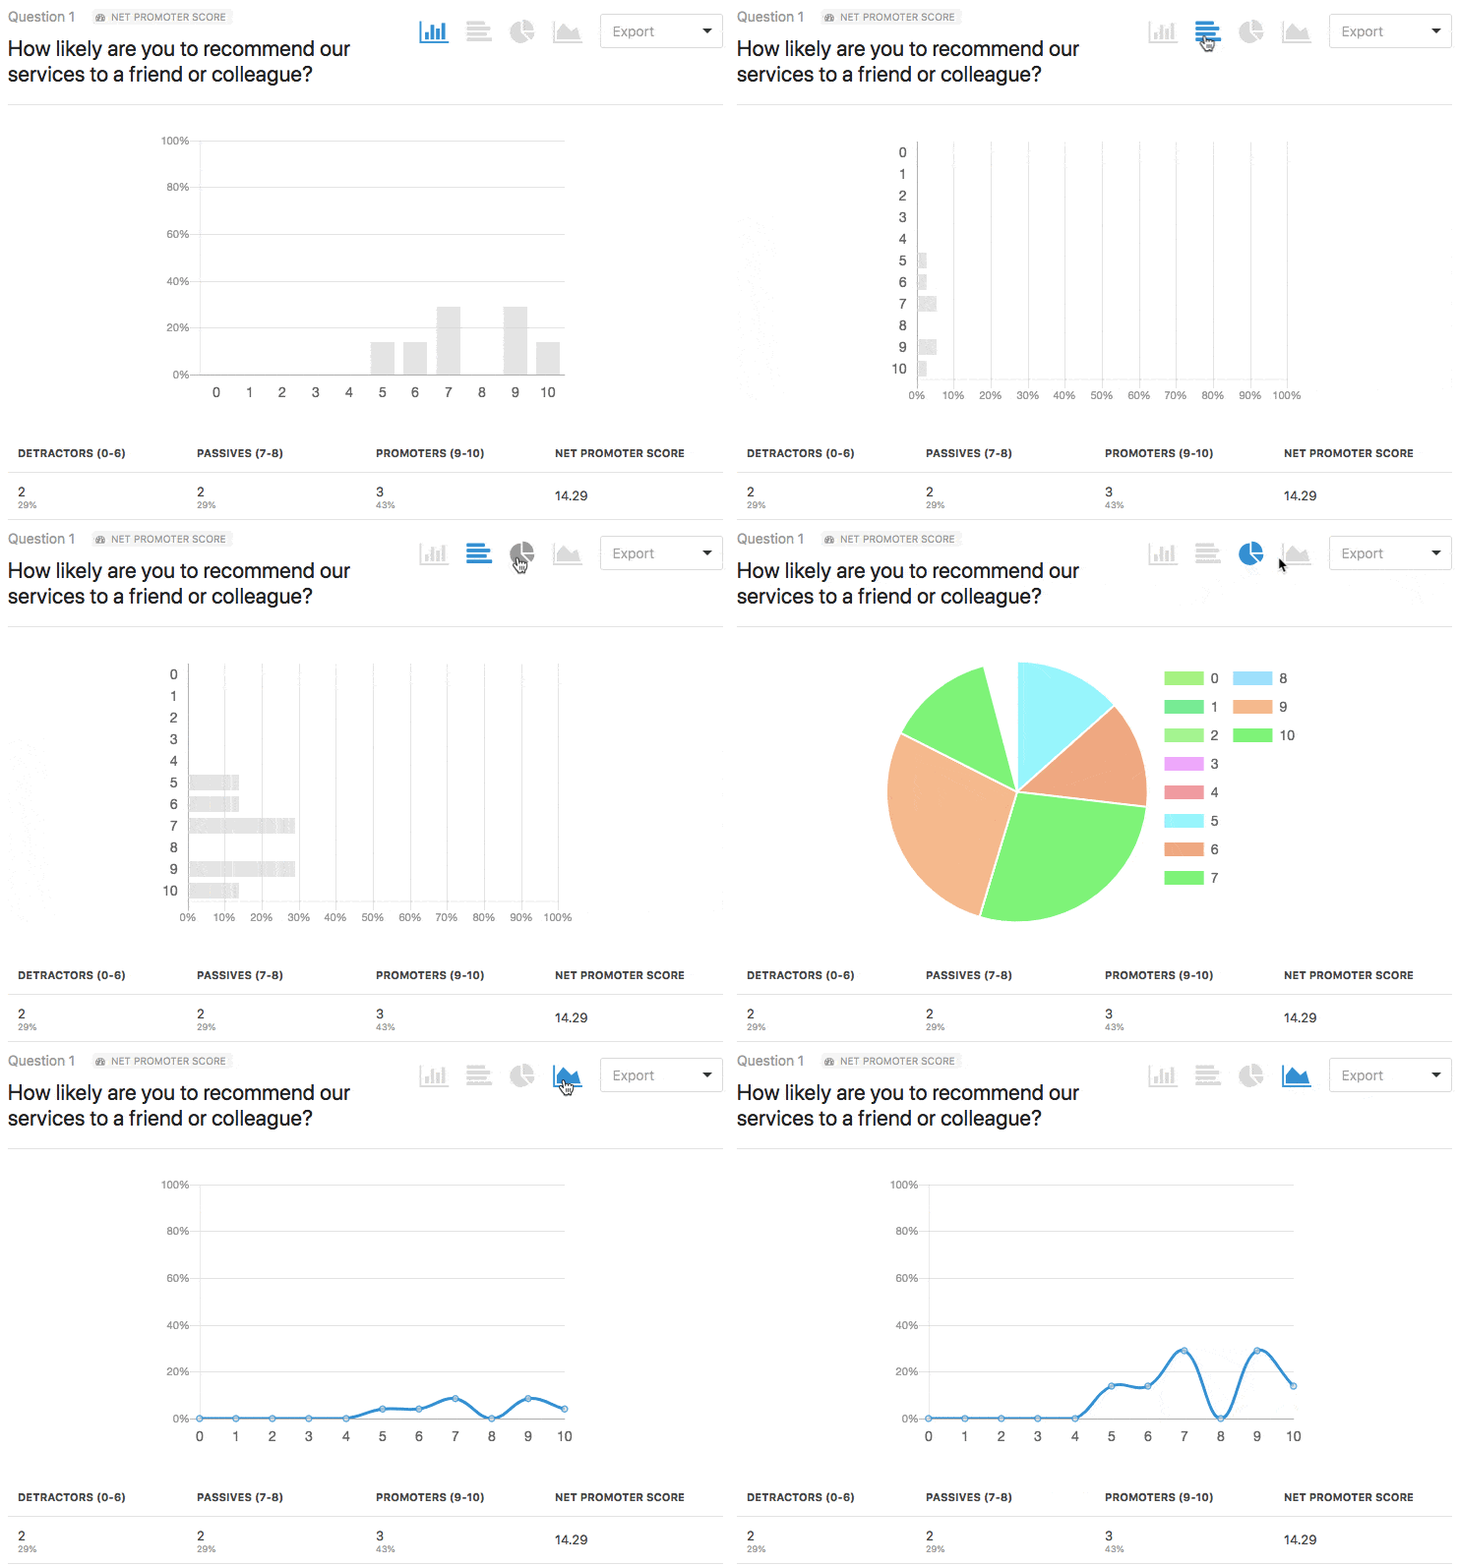
You’ll see the number of detractors, passives, and promoters that have filled out your NPS survey form. You’ll also see a calculation of your overall final Net Promoter Score.
And there you have it! You now know how to create a Net Promoter Score survey to gauge how your customers really feel about your business and identify areas of improvement.
FAQ
Below are some of the most frequently asked questions we get about NPS Surveys.
What Is a Good NPS Score?
Generally, the higher the NPS, the more loyalty your company has. A score above 0 can be considered good because it means that you have enough customers serving as promoters of your business.
But to really make a mark, you should aim to have an NPS above 50. It means that the majority of your customers are very satisfied and would gladly return to do more business with you while also recommending you to their friends and colleagues.
What Is a Good Sample Size for NPS?
Ideally, it’s good to have a sample of at least 2,500 respondents for your NPS survey. This way, you’ll be able to have at least 250 responses even if only 10% of the people from your sample fill out your form. However, every company is different.
If you have a small customer base, you’ll have no choice but to make do with a small sample size. On the other hand, companies with a larger customer base can get a higher sample size for their surveys.
How Long Should You Run an NPS Survey?
It’s good practice to run an NPS survey for at least 7 days. This gives your customers enough time to fill out your survey before it expires. A survey with a shorter duration may lead to a poorer response rate, so you may not be able to collect enough feedback.
Next, Improve Form Conversions
If you want to learn how to get more form conversions, check out our roundup of research based tips to improve contact form conversions. And if you want to take it a step further, and work on driving more traffic to your website, check out how to boost your SEO rankings.
Ready to build your form? Get started today with the easiest WordPress form builder plugin. WPForms Pro includes lots of free templates and offers a 14-day money-back guarantee.
If this article helped you out, please follow us on Facebook and Twitter for more free WordPress tutorials and guides.

