AI Summary
We all love discounts. It’s a proven way to boost your sales. But in their excitement, small businesses get carried away and launch an imperfect coupon strategy. One that involves simply offering a coupon code.
With this approach, the customer has to manually copy (or remember) the coupon, go through the entire checkout process, and remember to add it at the right place.
That’s a lot of friction that could drive your customers away rather than compelling them to purchase.
Instead, my preferred method of setting up coupon codes is to auto-apply discounts at checkout.
This is also how we set up discounts whenever we have a big WPForms sale. It’s because we see fewer abandonments and more coupon redemptions with auto-applying coupon codes.
This is why I’m writing this guide. Hopefully, you’ll understand which pitfalls you need to avoid and how to get the most out of your automatic coupon codes for your next sales.
Traditional Coupon Systems Cause Friction
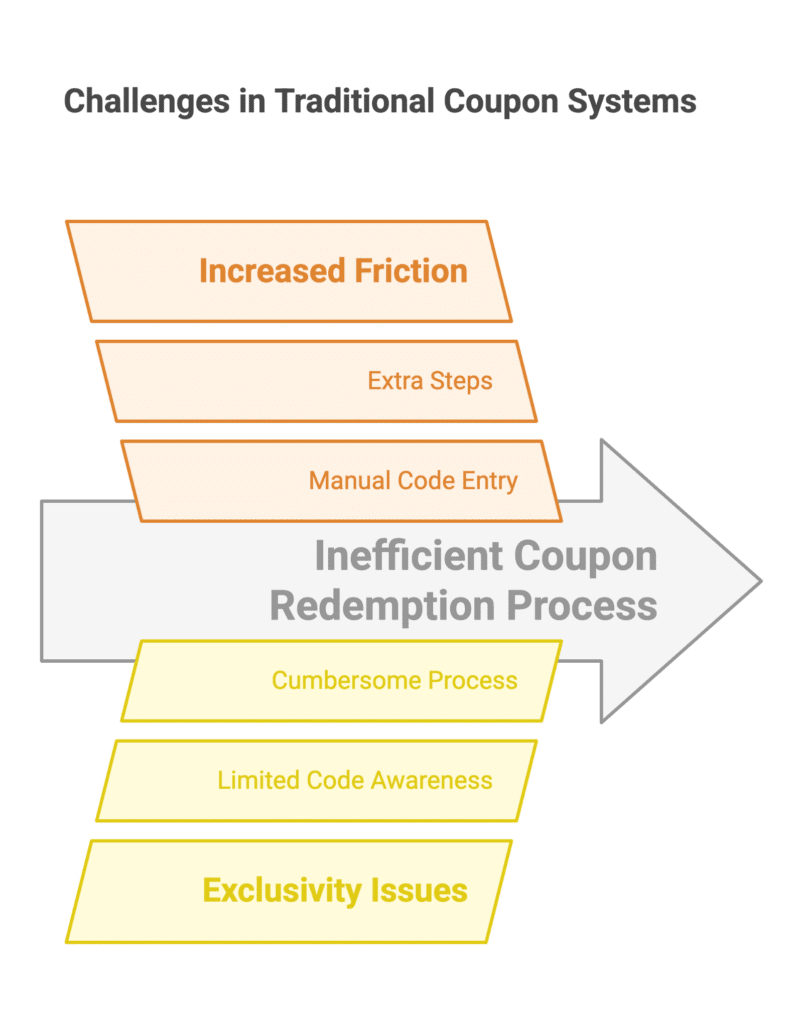
Traditional coupon systems often require customers to manually enter codes or follow a series of steps to avail discounts. Naturally, there are several challenges here but in my theory, these are the main ones:
- Increased Friction: Requiring customers to input coupon codes adds extra steps to the purchasing process, which can deter potential buyers. Even minor inconveniences can lead to cart abandonment, so a streamlined experience is essential.
- Exclusivity Issues: While discount codes can create a sense of exclusivity, they may also alienate customers who are unaware of the codes. Or they might find the process too cumbersone to follow through. This can result in missed opportunities, lower sales, and decreased customer satisfaction.
What a Friction-Free Coupon Experience Looks Like
A friction-free coupon experience ensures that customers can take advantage of discounts without extra effort. Here’s what that looks like in practice:
Automatic Coupon Application at Checkout
Instead of requiring customers to hunt for codes, your checkout should detect eligible discounts and apply them instantly. This makes the process seamless and stress-free.
It’s so important to simplify coupon use that the state of Connecticut recently proposed a bill to automatically apply coupon codes for supermarket shoppers.
It just seems like if a business says they are willing to provide something at a reduced price that consumers shouldn’t have to do any thing extra in order to take advantage of that
State Rep. Craig Fishbein
While an online store isn’t the same as a brick-and-mortar supermarket, the principles of smooth customer experience hold just as true online.
Clear, Upfront Pricing
Customers should see their savings reflected in real-time as they browse or add items to their cart.
The Coupon field in WPForms automatically shows the amount your customers can save as they select products to purchase in your payment form.
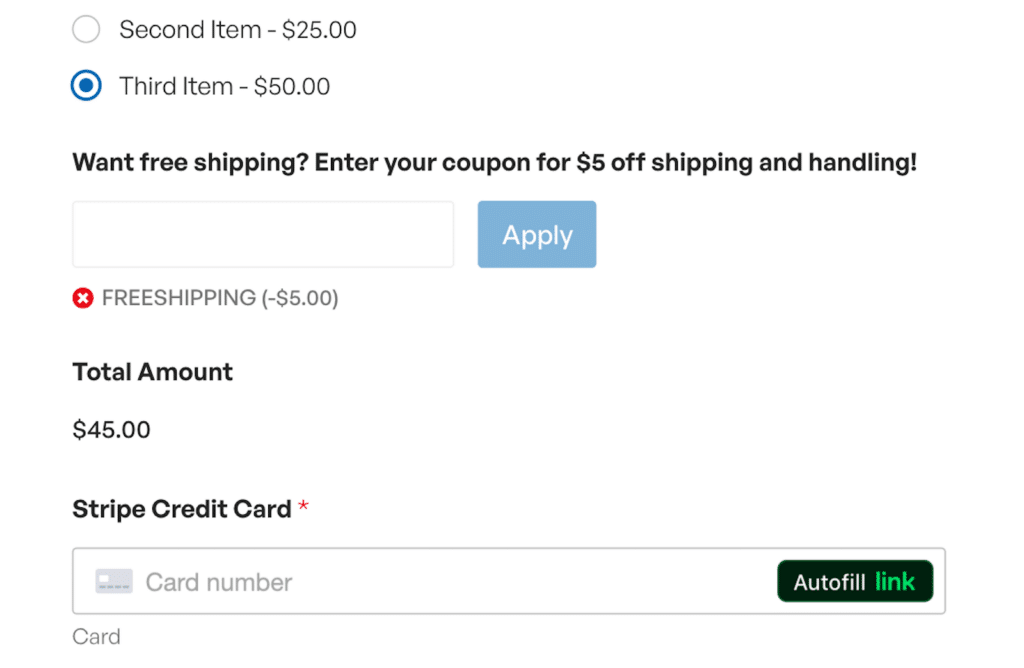
This is a great way to add transparency and reassure customers about the value of your sale.
No Login or Signup Barriers
Some stores require users to create an account or complete multiple steps before using a discount. By applying discounts whether the customer is logged in or not, you remove barriers that can prevent some visitors from buying.
You can make coupons applicable for everyone (logged in and logged out users) with WPForms.
How to Automatically Apply a Coupon on Your Payment Forms
Now that you understand the power of automatic discounts and using coupons strategically, here’s one of the easiest ways to create auto-applying coupons on your WordPress forms.
Step 1. Install WPForms
The easiest way to generate coupons and simplify the process of adding them to your form is to use the WPForms plugin.
WPForms is one of the best-rated WordPress plugins, having 4.8/5 stars on WordPress.org.
You’ll need the WPForms Pro license to access the Coupons addon, which comes with all the functionalities you need to set up coupon codes with prefill option enabled.
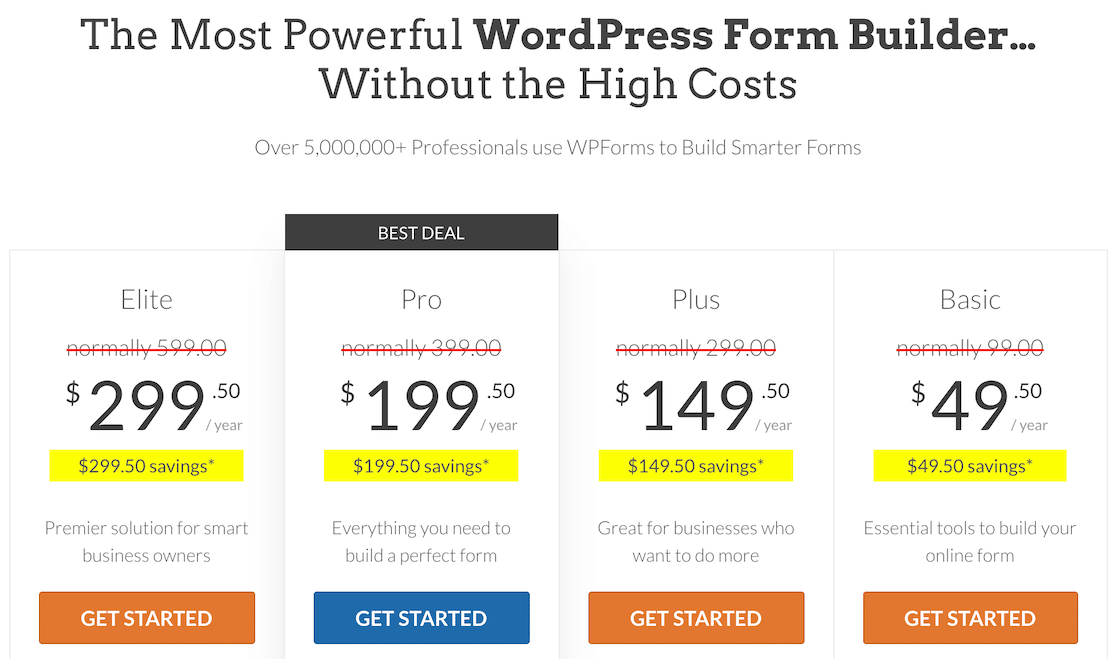
When you’ve purchased your license, go ahead and install WPForms on your website. It will only take you a few minutes.
In the next step, we’ll set up the Coupons addon.
Step 2. Install the Coupons Addon
After installing WPForms, open your WordPress dashboard and navigate to WPForms » Addons.
Once inside the addons screen, look for the Coupons addon and press the Install Addon button under it.
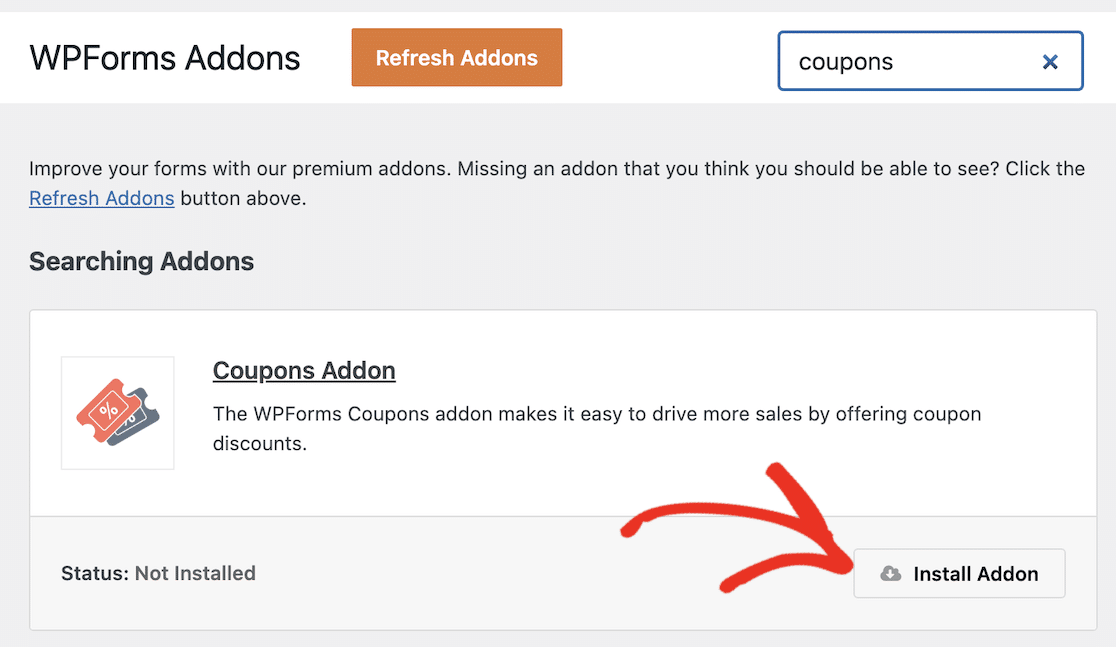
It will just a few seconds to install the addon. You’ll see the Status change to Active once the addon is ready to use.
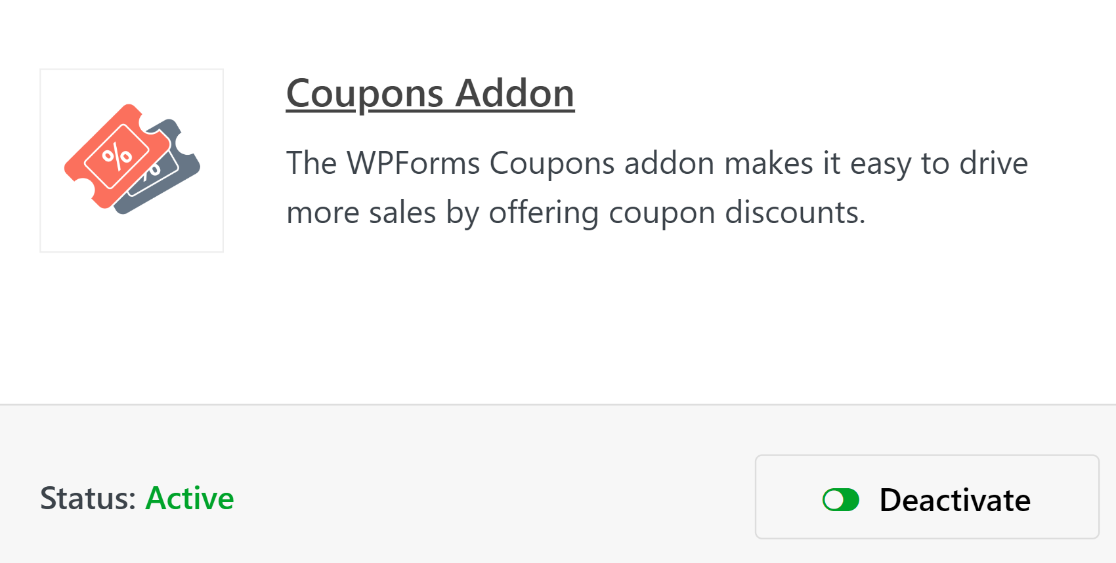
With these steps out of the way, we can now go ahead and create a coupon code.
Step 3: Create a New Coupon
While you’re inside the WordPress admin menu, click on WPForms » Payments.
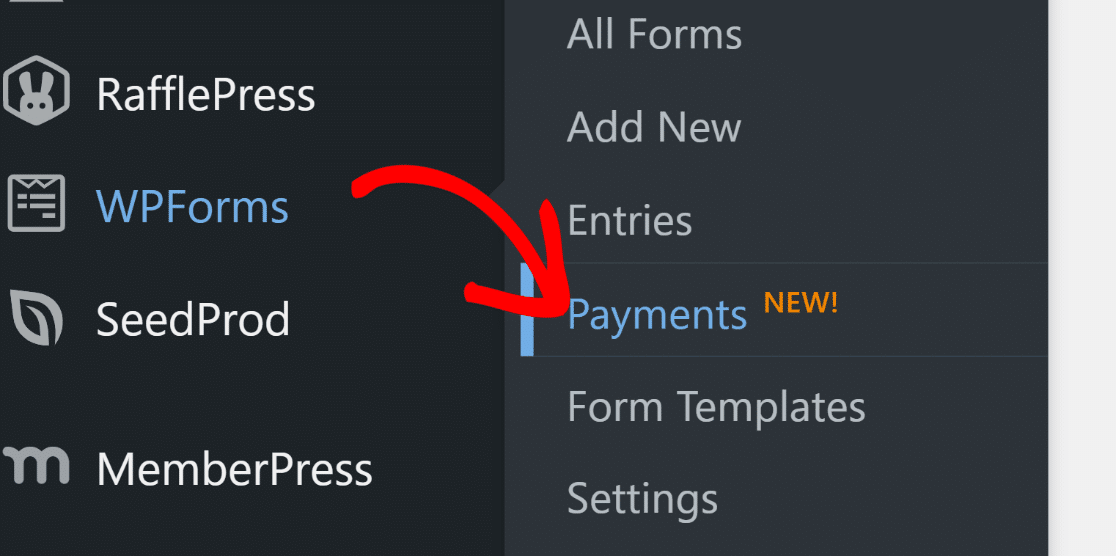
The Payments screen has a Coupons tab that allows you to create any number of coupons for your site. Click on the Coupons tab to proceed.

Next, click on the Add Coupon button.
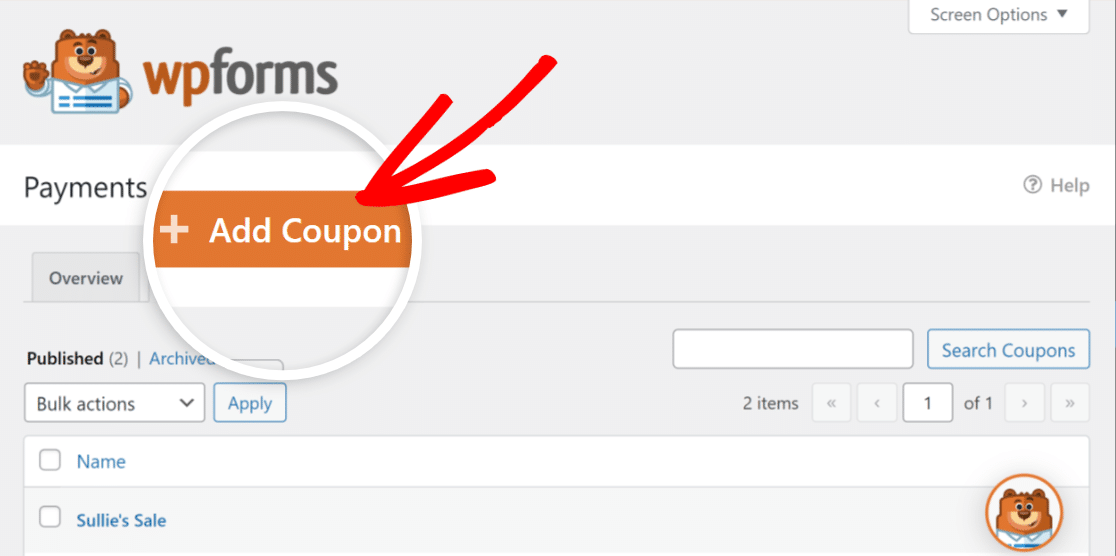
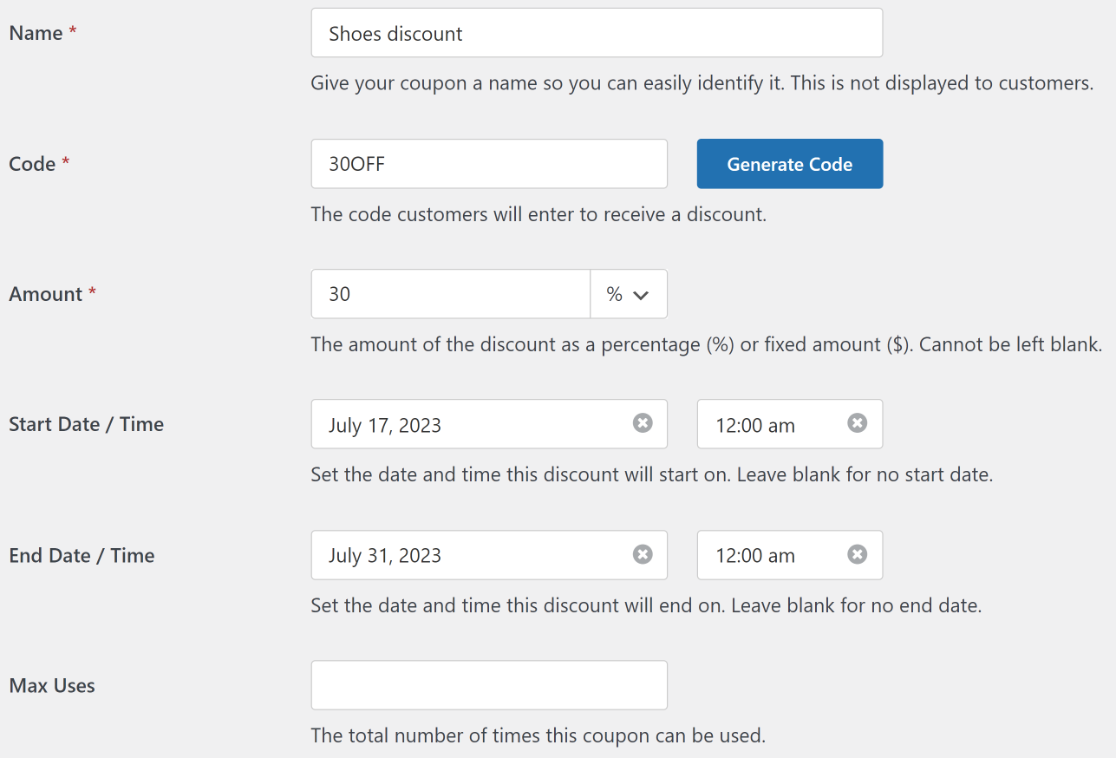
You’ll now be taken to a new screen where you can set up your new coupon. Here, you can enter the name, code, amount, and configure other settings for your coupon. You’re free to enter a custom code or have WPForms auto-generate one for you if you want.
You can also set your coupon’s start and expiry date and place a maximum usage limit. Leave these fields empty if you don’t want to limit coupon validity by time or number of uses.
Scroll to the bottom to select which forms from your existing forms the coupon can be used on. Because we haven’t created a form for this coupon code yet, you can come back to this step later.
Click on Save Coupon to save your newly created coupon code.

Now that you’ve created your coupon, it’s time to build a payment where the coupon can be used on.
Step 4: Create a Payment Form
Creating forms is the easiest part of using WPForms, thanks to its rich library of over 2,000+ form templates.
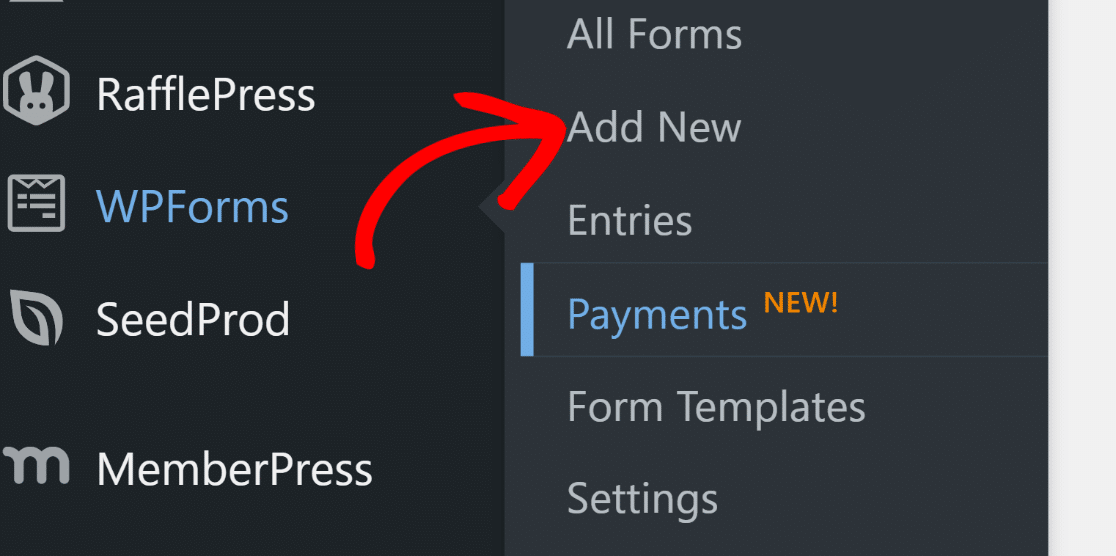
To start building your form and access the template library, simply go to WPForms » Add New.
Enter a name for your form. The name is used only internally for your reference so you can identify your forms easily.
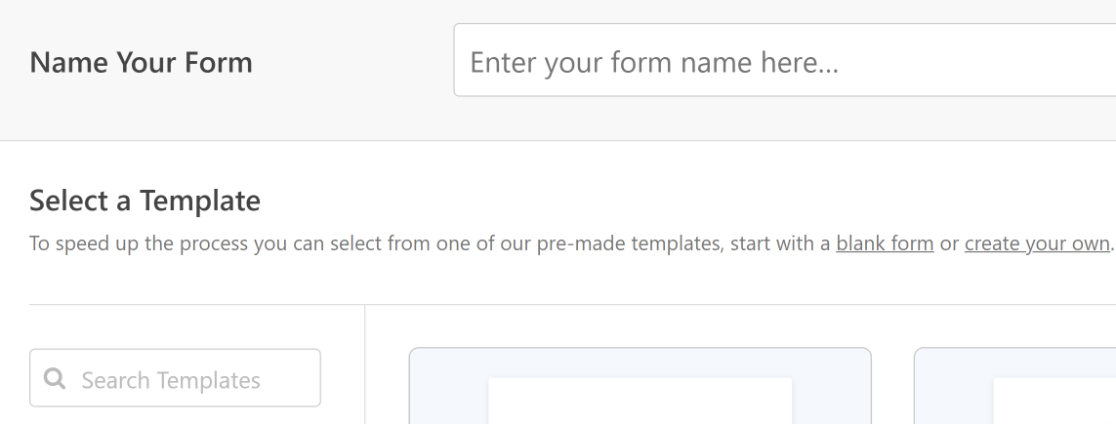
Then scroll down and select a suitable template. For this tutorial, we’ll use the Stripe Payment Form template because it closely meets the requirements for our goal.
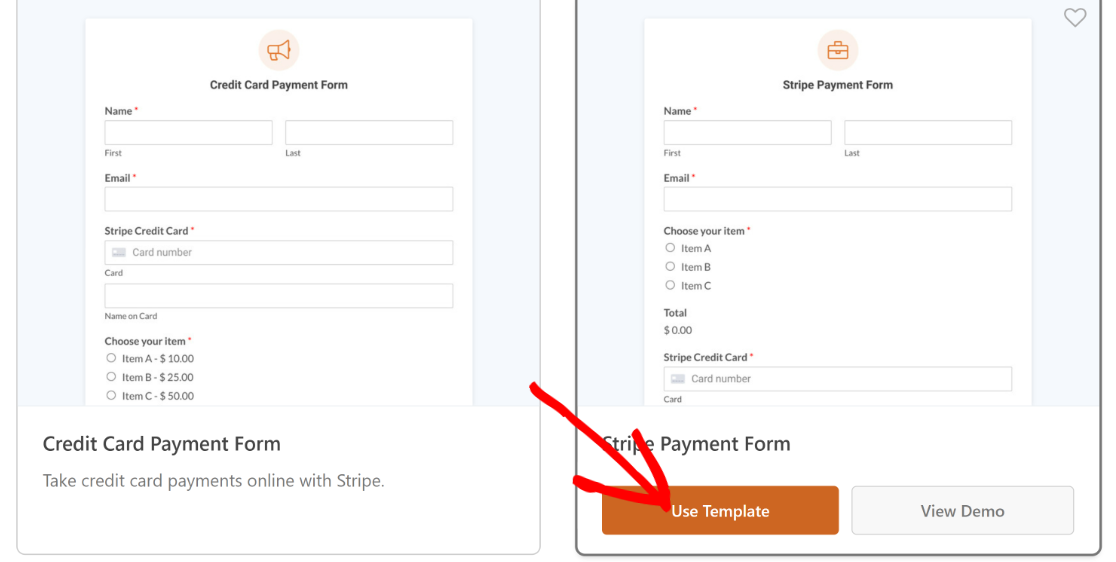
Once you’ve clicked on a template, it will load in the form builder. You can make any edits you want to the fields, layouts, and other settings of the form.
For instance, this template has all the fields you need to accept payments, but it doesn’t have a coupon field for discounts.
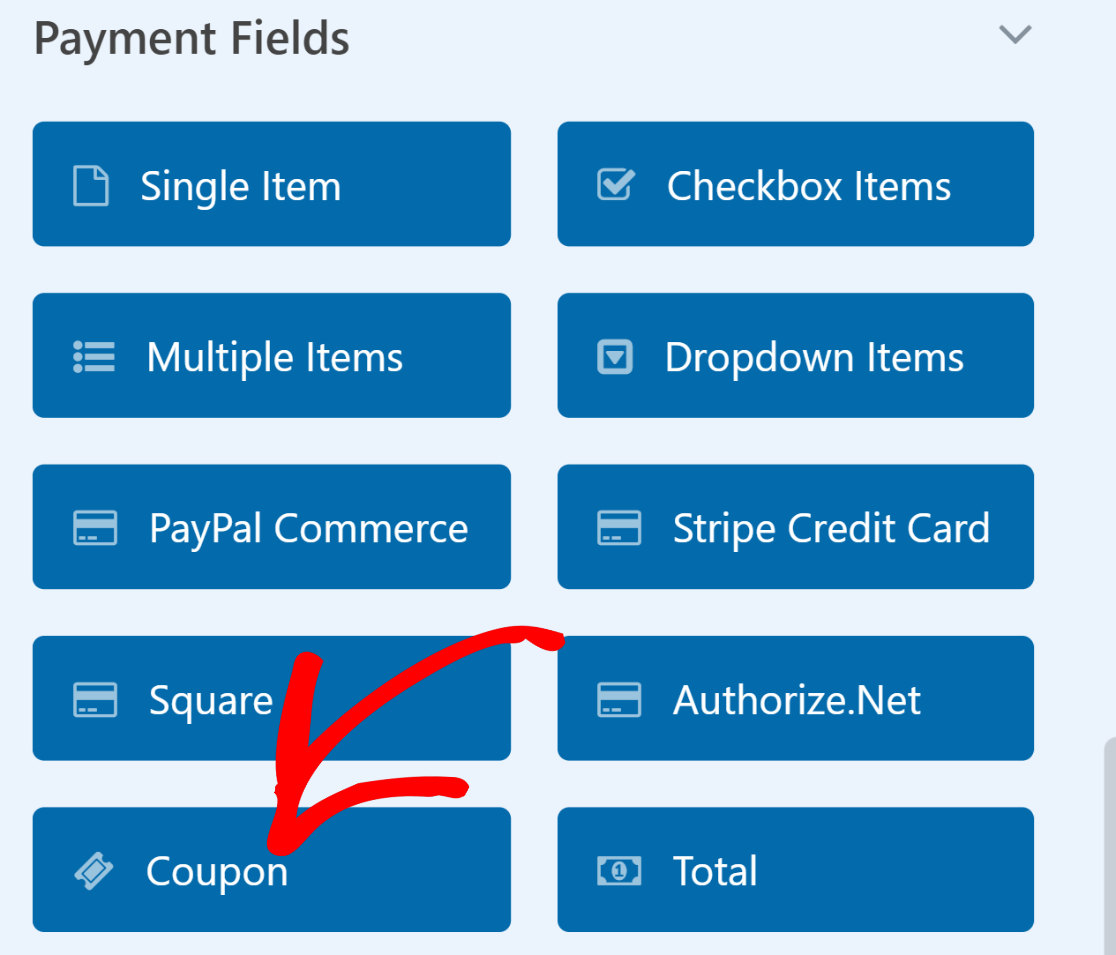
So, we’ll drag and drop the Coupon field just above the Total field.
Now, we’ll select which coupons this field can accept. Click on the Coupons field to open Field Options. Then click on the Allowed Coupons dropdown and select the coupon you’d like your customers to be able to want to be valid for this form.
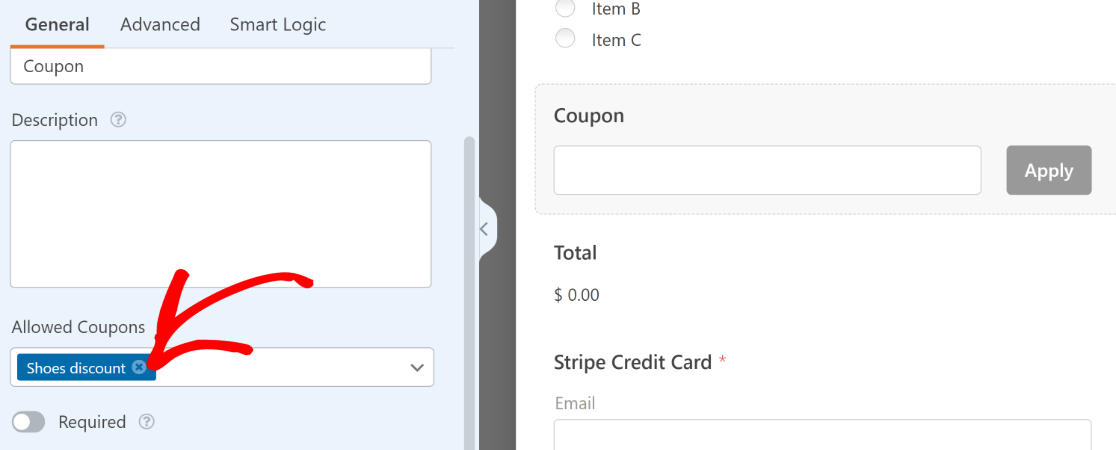
Make sure to press the Save button at the top when you’re finished customizing the payment form.
Step 5: Enable Prefill by URL
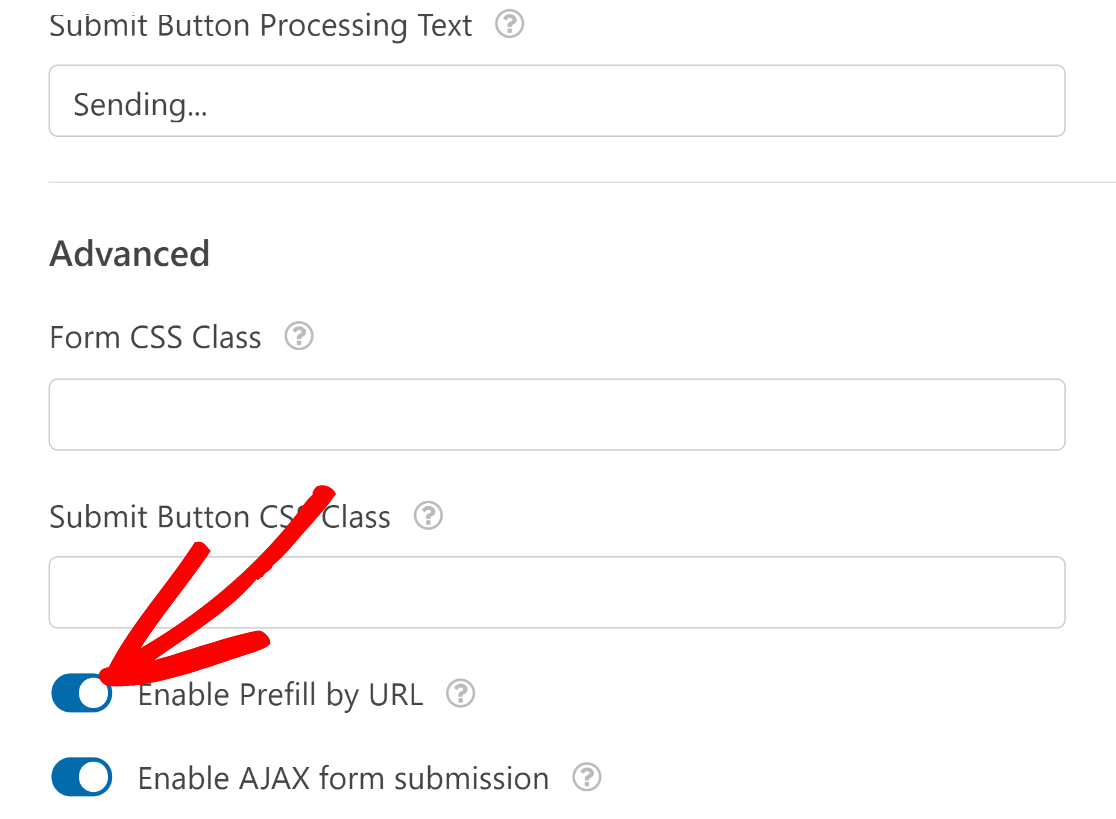
In order to configure your form to auto-apply coupon codes, you’ll need to enable prefill by URL.
This option is located in Settings » General inside the form builder.
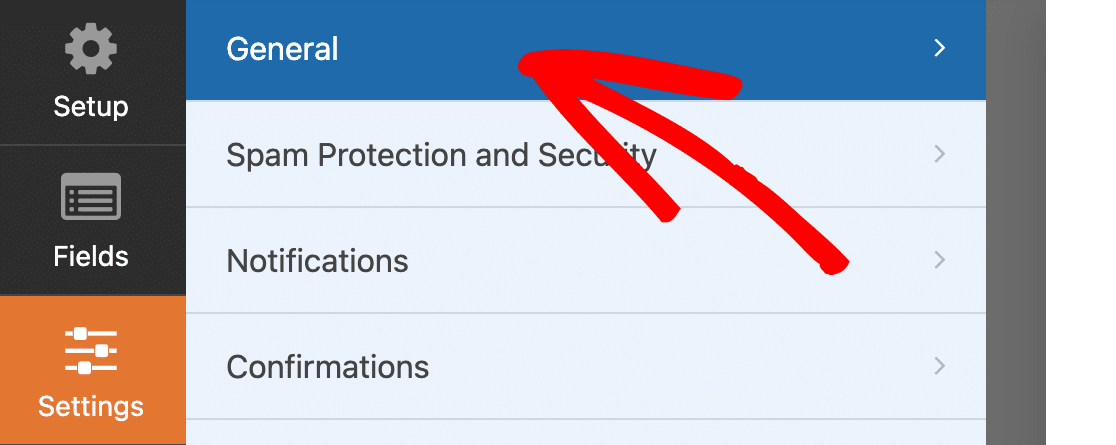
Scroll down the General settings and click on Advanced to expand additional options. After you’ve done that, click on the Enable Prefill by URL toggle button.
Also, make sure that you’ve enabled payment for whichever payment gateway you’re using for your form.
For example, if you’re using Stripe, go to Payments » Stripe and click the Enable Stripe Payments toggle button. Without this, you won’t be able to collect payments from customers filling out your form.
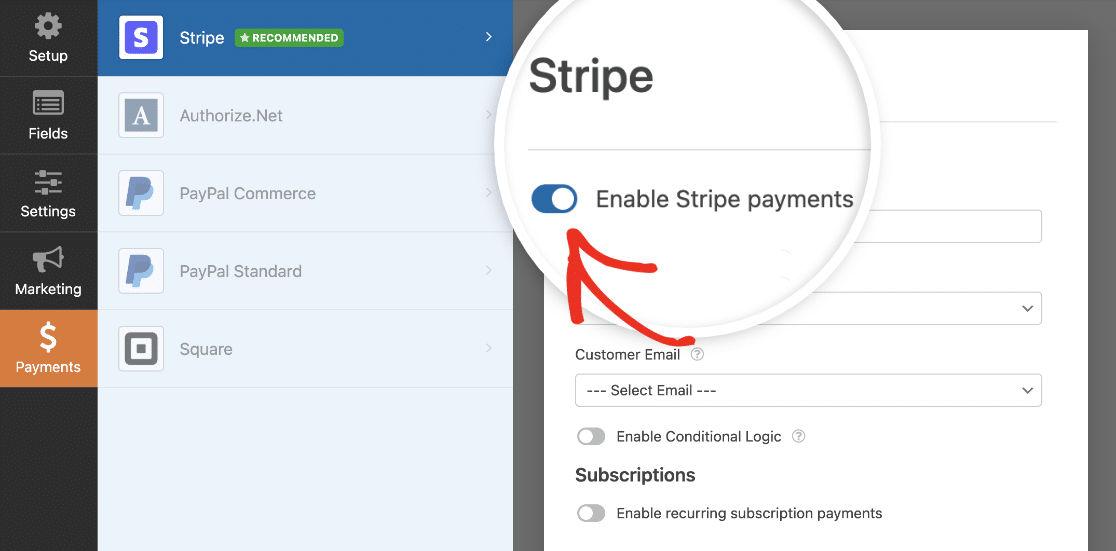
Similarly, if you’re using PayPal, Square, or Authorize.net, make sure you’ve set up the appropriate integrations and enabled payments from your form builder.
Excellent! We’re now ready to publish this form.
Step 6: Publish the Payment Form
Click on the Embed button at the top to start the publishing process for your form.

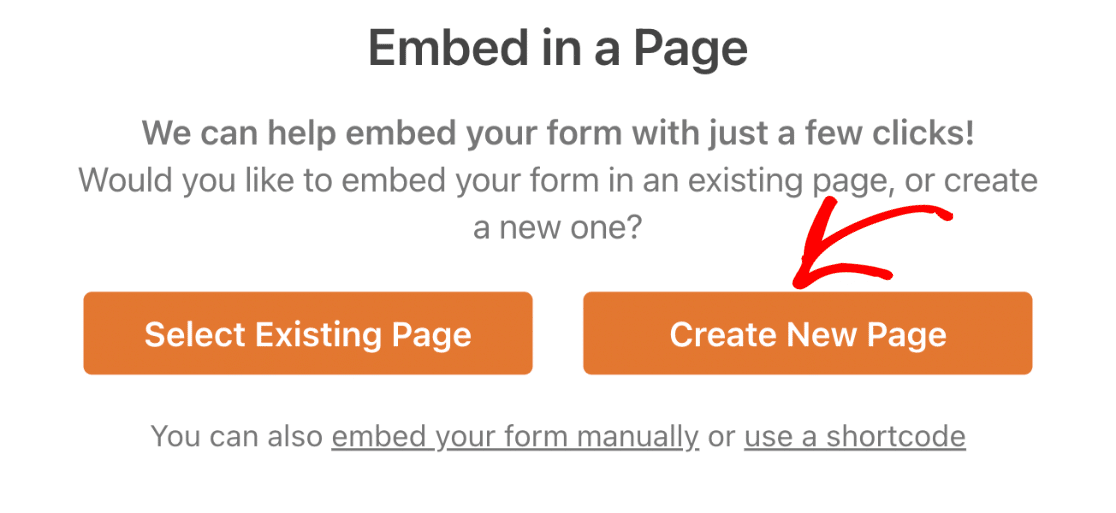
You’ll be prompted to select one of two options between embedding the form in an existing page or a new page. We’ll choose to embed in a new page by clicking on the Create New Page button.
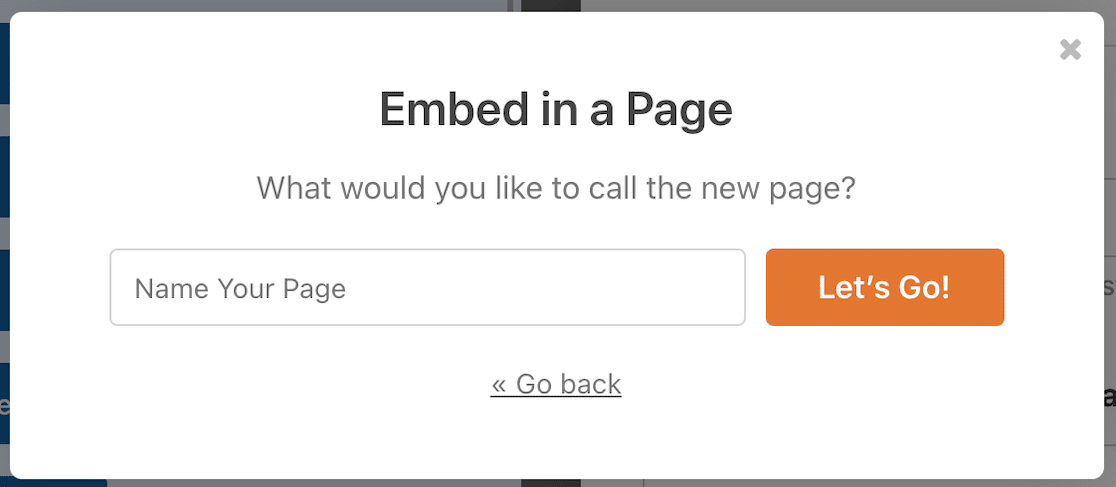
Name your form and press Let’s Go.
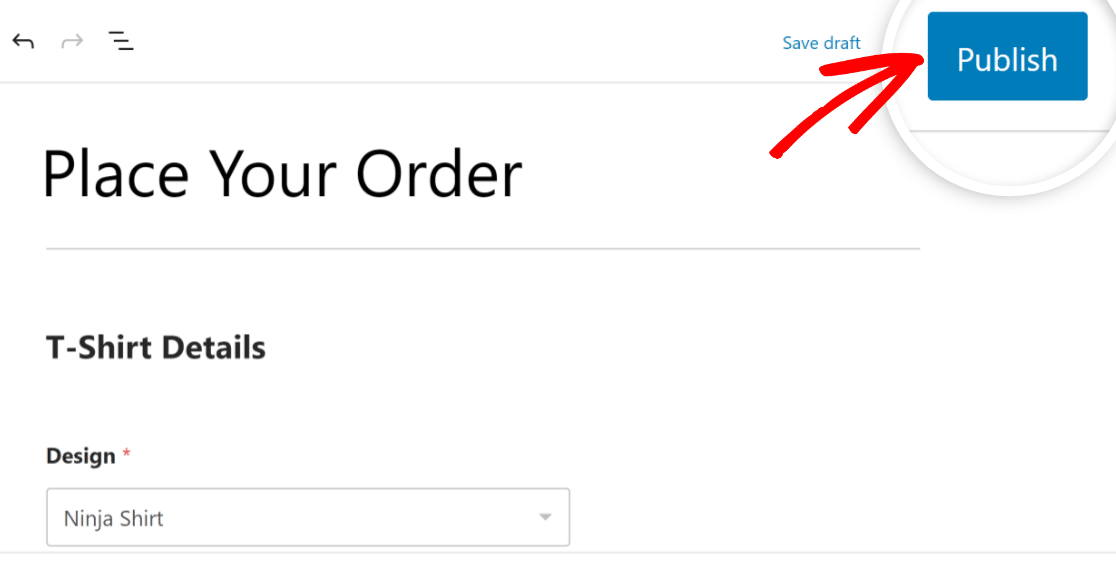
At this point, you’ll see your WordPress block editor open with your form already embedded.
When you’re ready to launch, press the Publish button at the top.
Excellent. With this form, the coupon code will already be prefilled after your users click a special URL.
But you’ll have to construct this special URL for that to happen. We’ll cover this in the next step.
Step 7: Construct URL for Auto-Filling Coupon Code
The auto-filling functionality for the coupon code field will only work after you’ve modified your new form page URL appropriately.
You’ll need 3 things to construct a URL capable of auto-applying the coupon code:
- Form ID
- Field ID
- Coupon code
You can find the Form ID for your form by going to WPForms » All Forms and locating the form you want to apply the code on. Take a look at the shortcode column next to your form and notice the number. This is the Form ID, which in our case, is 67.

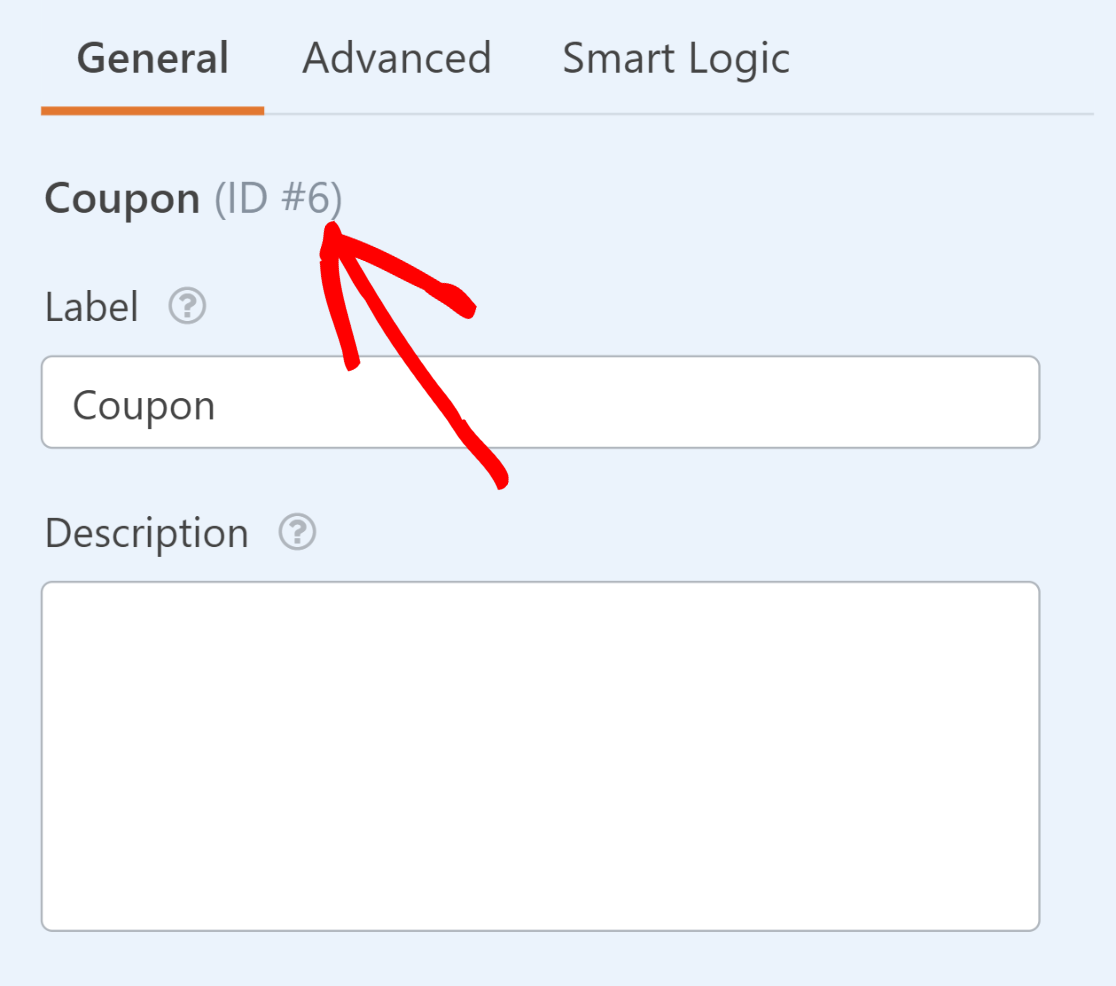
Now, click on the form to open it. We need to find the Field ID of the Coupon field. This can be easily done by clicking on the Coupon field and looking at the ID# next to the field name under Field Options.
Finally, you need the exact coupon code that you created for the coupon applicable to this form.
If you don’t remember the code, you can find it by going back to WPForms » Payments and clicking on the Coupon tab. The code will be written in a column to the name of your coupon.

Now that we have all the pieces together, we can compose our special URL for auto-applying the coupon code.
Let’s assume that the URL for your form page is “https://sulliesflowers.com/buy-shoes/“.
We now need to modify the URL in the following way to make the automatic coupon application work:
https://sulliesflowers.com/buy-shoes/?wpf[Form ID]_[Field ID]=[Coupon Code]
Now, you just need to plug in the correct values in the three paramaters I’ve highlighted in brackets above (you don’t need the brackets when actually entering the values).
For this particular form, here are the values I need:
- Form ID: 67
- Field ID: 6
- Coupon Code: 30OFF
Inserting these values into the formula for the modified URL, we get:
https://sulliesflowers.com/buy-shoes/?wpf67_6=30OFFThat’s it! Now if your customers click on your link, they’ll find the coupon code already applied as soon as your form loads.
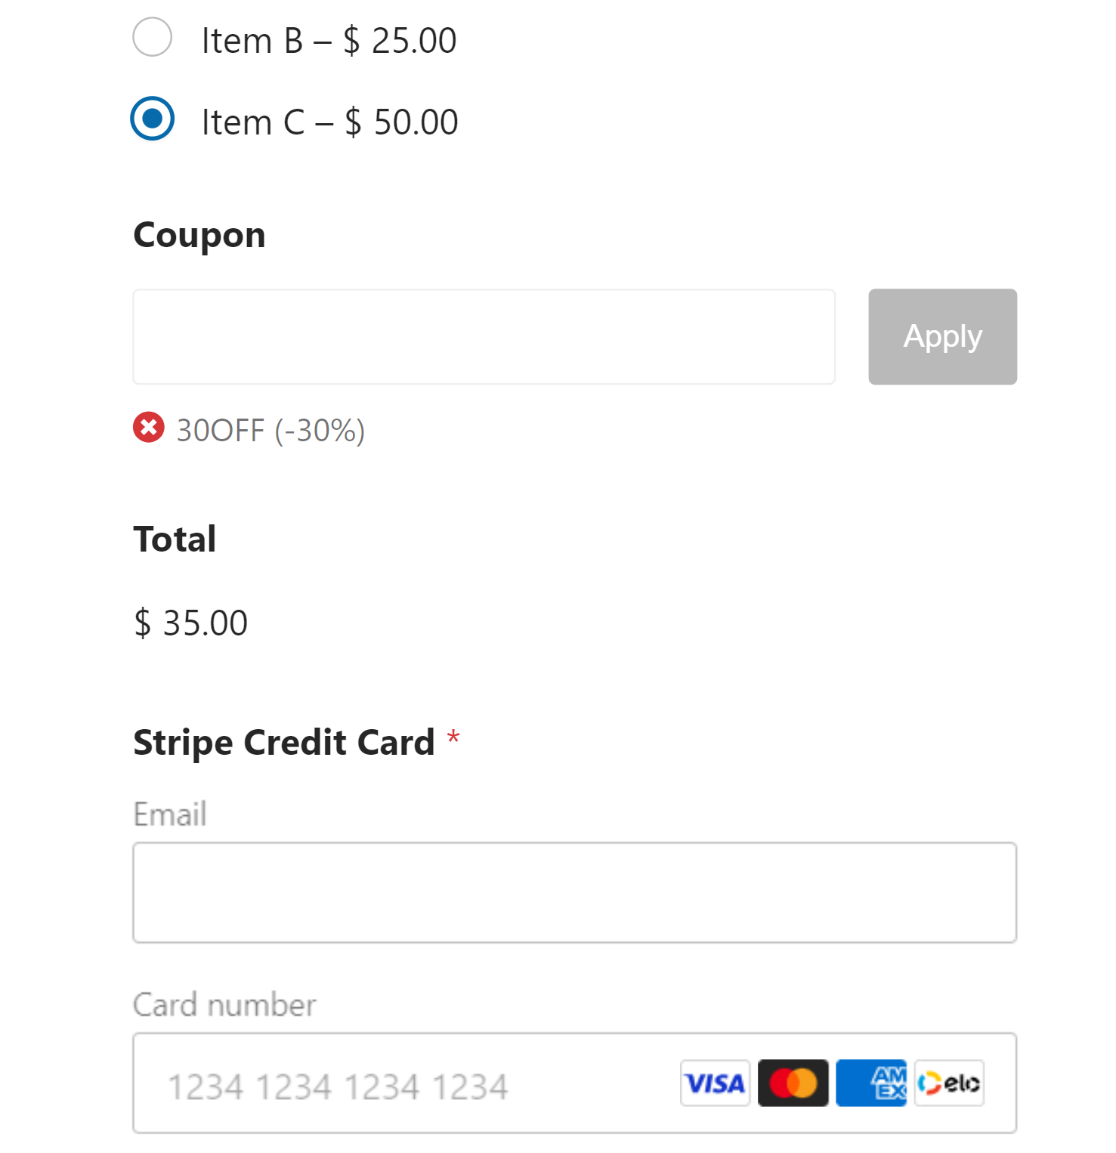
You can send this special URL for the coupon code to your customers via your newsletter, social media posts, or any other marketing communication to ensure a streamlined coupon experience.
And there you have it!
Next, Set Up Recurring Donations
If you’re a nonprofit preparing to run a donation campaign, you can benefit greatly by setting up recurring donations instead of offering only one-time donations. You can see our guide on how you can boost recurring donations for tips.
If you’re looking for more details about coupon plugins available for WordPress, you may want to read our roundup of the best coupon code plugins for WordPress.
We also have a guide that shines more light on why WPForms is rated so highly on Trustpilot.
Ready to build your form? Get started today with the easiest WordPress form builder plugin. WPForms Pro includes lots of free templates and offers a 14-day money-back guarantee.
If this article helped you out, please follow us on Facebook and Twitter for more free WordPress tutorials and guides.



I wasn’t able to get this to work correctly with a multipage form with the coupon code on the final page. The field would be filled but the code wouldn’t be applied and I was unable to apply the text un the field until first clicking into the coupon code field.
Hey Katie – When you get a chance, please drop us a line with more details about the issue you are facing in support so we can assist further.
If you have a WPForms license, you have access to our email support, so please submit a support ticket.
Otherwise, we provide limited complimentary support in the WPForms Lite WordPress.org support forum.
Thanks 🙂