
AI Summary
You published a contact form, tested it once, and moved on. Then a month later you find out a customer has been trying to reach you for weeks. The form was working the whole time. The emails just never made it to your inbox.
If that sounds familiar, you’re in the right place. This is one of the most common problems we hear about from WPForms users, and the fix is almost always the same.
In this post, I’ll walk through why WordPress contact form emails end up in spam (or disappear entirely), and the exact steps to fix it so your notifications actually reach your inbox.
TLDR: The Quick Answer
Most WordPress contact form emails go to spam because your site sends mail through PHP’s mail() function, which doesn’t authenticate your domain. Email providers like Gmail and Outlook treat unauthenticated mail as suspicious and either filter it to spam or block it entirely.
The fix: install WP Mail SMTP, connect a mailer like SendLayer or Brevo, and authenticate your domain. Setup takes under 10 minutes and it’s free for most small sites.
How to Fix Contact Form Emails Going to Spam
- Why Do Contact Form Emails Go to Spam?
- How To Fix Contact Form Emails Going to Spam
- Step 1. Choose a Mailer and Authenticate Your Domain
- Step 2: Install WP Mail SMTP
- Step 3: Run the Setup Wizard
- Step 4: Set Your From Name and From Email
- Step 5: Turn On Email Logs and Alerts
- Step 6: Check Your WPForms Notification Settings
- Other Ways to Improve Deliverability
- FAQs About Contact Form Email Spam
Why Do Contact Form Emails Go to Spam?
Every email you send gets scored behind the scenes. Mailbox providers run your message through dozens of checks, and the higher the spam score, the less likely it lands in the inbox.

For WordPress contact forms specifically, these are the usual culprits:
1. Your domain isn’t authenticated
This is the big one. Gmail, Yahoo, and Microsoft now require sender authentication (SPF, DKIM, and DMARC) for bulk senders, and they heavily penalize unauthenticated mail from everyone else. If your WordPress site isn’t set up to send authenticated email, you’re starting with a handicap.
2. WordPress is using PHP’s mail() function by default
Out of the box, WordPress sends email through your web server using PHP’s built-in mail() function. It works, but it isn’t designed for deliverability. There’s no authentication, no retry logic, no logging. Most hosting servers aren’t configured to send legitimate mail either, which is why so many WordPress emails fail silently.
3. Your hosting server is on a blacklist
Shared hosting plans put hundreds of sites on one server. If one of those neighbors sends spam or gets hacked, the entire server’s IP can end up on a blacklist. Your forms still submit, but your emails get rejected before they reach the recipient.
4. The From address doesn’t match your domain
If your form sends from [email protected] but your site lives at yourbusiness.com, mail providers see the mismatch and get suspicious. This is called domain spoofing, and it’s one of the fastest ways to get flagged.
5. Your content looks like spam
Big image attachments, lots of links, all-caps subject lines, and classic spam-trigger words (“free,” “act now,” “limited time”) all push your score up. Contact form notifications usually don’t have these issues, but auto-responders to your users sometimes do.
6. You’re on an unusual domain TLD
Some top-level domains carry more spam risk than others. Newer TLDs like .work, .shop, and .biz get extra scrutiny compared to established ones like .com or .org.
The Real Reason Most Form Emails End Up in Junk
Of the causes above, one is behind nearly every “help, my WPForms emails aren’t arriving” support ticket we see: authentication.
This is a WordPress problem, not a WPForms problem. Every plugin that relies on wp_mail() inherits the same limitation, which is why so many site owners run into it.
The good news is the fix is easy, free for most sites, and permanent. Swap PHP’s default mail function for an authenticated email service, and your deliverability problem disappears.
How To Fix Contact Form Emails Going to Spam
The tool for this job is WP Mail SMTP. It replaces WordPress’s default mail function with a properly authenticated connection to a real email service, so your messages get the same deliverability treatment as mail from Gmail or Outlook.

There’s a free version on the WordPress.org plugin directory, and a Pro version with extras like email logs, instant failure alerts, and access to premium mailers. For most small sites, the free version plus a free mailer account is all you need.
Here’s the full setup.
Step 1. Choose a Mailer and Authenticate Your Domain
First, pick a mailer (also called a transactional email service). This is the third-party service that will actually deliver your mail.
WP Mail SMTP supports every major option.
Recommended for most sites:
- SendLayer — purpose-built for WordPress, generous free tier, easy setup
- Brevo (formerly Sendinblue) — free up to 300 emails/day, great for small businesses
- SMTP.com — industry veteran, reliable at scale
Other supported mailers:
Amazon SES, Elastic Email, Google Workspace/Gmail, Mailgun, Mailjet, MailerSend, Mandrill, Microsoft 365/Outlook, Postmark, Resend, SendGrid, SMTP2GO, SparkPost, Zoho Mail, or any Other SMTP provider.
Once you’ve picked one, sign up and follow their setup instructions. Most mailers will ask you to authenticate your domain by adding SPF, DKIM, and sometimes DMARC records in your DNS settings. Your host’s documentation will walk you through it, or WP Mail SMTP’s docs have step-by-step guides for each mailer.
Don’t skip domain authentication. It’s the single most important step for deliverability.
Step 2: Install WP Mail SMTP
Head to your WordPress dashboard, go to Plugins » Add New, and search for “WP Mail SMTP.” Click Install Now, then Activate.

If you bought Pro, upload the plugin zip file instead using the Upload Plugin button at the top of the Add Plugins page.
Step 3: Run the Setup Wizard
As soon as you activate the plugin, WP Mail SMTP launches a setup wizard. Click Let’s Get Started to kick it off.

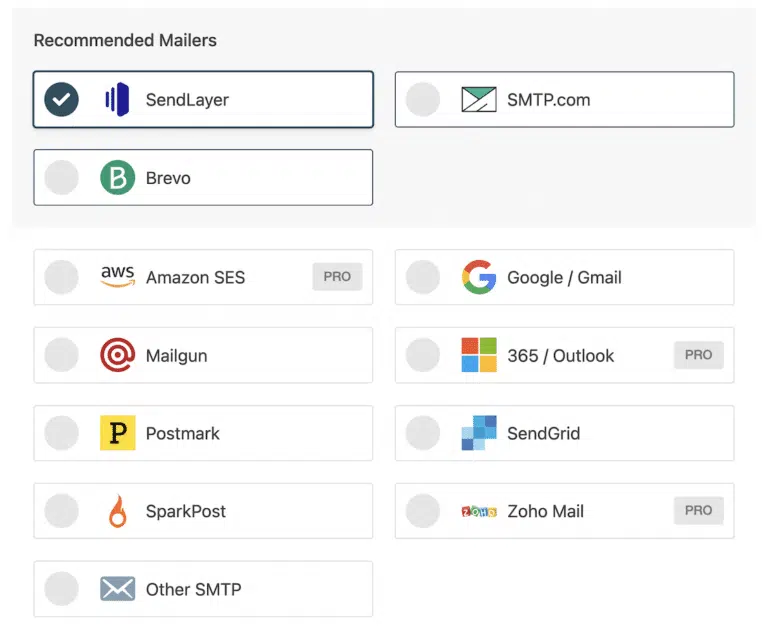
The first screen asks you to pick your mailer from a visual list. Choose the same service you signed up for in Step 1 (this part matters — mixing mailers causes authentication errors).
From there, the wizard walks you through connecting your account. Each mailer has slightly different steps, but WP Mail SMTP handles most of the technical setup for you.
Step 4: Set Your From Name and From Email
After you connect your mailer, you’ll set the From Name and From Email that appear on your outgoing messages.
Two rules to follow:
- Use an email address at the domain you authenticated. If you authenticated yourbusiness.com, the From Email must end in @yourbusiness.com. Using @gmail.com here defeats the whole point of authentication.
- Toggle on Force From Email and Force From Name. This overrides any plugin (including WPForms) that tries to set its own From address. It’s the cleanest way to make sure every email from your site gets authenticated properly.

Step 5: Turn On Email Logs and Alerts
If you’re on WP Mail SMTP Pro, enable these two features during setup (or later under WP Mail SMTP » Settings):
- Detailed Email Logs — keeps a record of every email your site sends, whether it succeeded or failed. Invaluable for troubleshooting.
- Instant Email Alerts — pings you immediately if your site fails to send an email, so you find out about delivery problems in minutes instead of weeks.
You can also turn on the Weekly Email Summary to get deliverability stats and open/click-through rates delivered to your inbox.
At the end of setup, WP Mail SMTP sends a test email so you can confirm everything is working. If it lands in your inbox, you’re good.

Step 6: Check Your WPForms Notification Settings
Last step. Open the form you want to check in WPForms, then go to Settings » Notifications.

You’ll see a note on the From Name and From Email fields letting you know those settings are now controlled by WP Mail SMTP. That’s exactly what you want. It means your form notifications will be sent through your authenticated mailer, not through WordPress’s default function.
If you have multiple forms, this applies to all of them automatically. No form-by-form updates needed.
Other Ways to Improve Deliverability
Once SMTP is set up, a few more tweaks will squeeze extra deliverability out of your forms:
- Use a recognizable From Name. “Your Business Name” or “[Your Name] at Your Business” works better than something generic like “WordPress” or “Admin.”
- Keep auto-responder content clean. If you send an automatic reply to users who submit your form, skip the spam-trigger words, heavy images, and long link lists.
- Limit attachments. Big files push your spam score up. If you need to share a document, link to it instead.
- Test with a tool like Mail-Tester. Send a test email from your form, paste the test address they give you, and get a 0-10 deliverability score with specific suggestions.
- Match your WordPress admin email to your authenticated domain. If your admin email is still [email protected] but you authenticated yourbusiness.com, some system emails will still misbehave. Here’s how to change your WordPress admin email.
- Be careful with file attachments in form notifications. Our guide on how to attach files to form notifications covers the right way to do it without hurting deliverability.
Ready to Stop Missing Leads?
If your contact form emails have been going to spam, you’ve probably already lost inquiries you’ll never know about. The fix is small, free, and permanent.
Get WP Mail SMTP and spend 10 minutes on setup today. Then build any form you need for your business with WPForms, the most beginner-friendly WordPress form plugin used by 6 million+ websites.
FAQs About Contact Form Email Spam
Why are my WPForms contact form emails not being delivered at all?
Your form is probably working correctly, but the emails are being rejected or silently dropped because your site isn’t authenticated. Install WP Mail SMTP, connect a mailer, and authenticate your domain. That fixes it in nearly every case.
Is WP Mail SMTP free?
Yes. The free version of WP Mail SMTP is available on the WordPress.org plugin directory and works with several free mailers, including SendLayer’s free tier and Brevo’s free plan (300 emails/day). Pro adds email logs, instant alerts, and access to mailers like Amazon SES and Microsoft 365.
What’s the difference between SendLayer, Brevo, and SMTP.com?
All three are recommended, authenticated mailers that work great with WP Mail SMTP. SendLayer is built specifically for WordPress and has the easiest setup. Brevo has the most generous free tier (300 emails/day forever). SMTP.com is best if you send high volumes and need enterprise-level reliability.
Do I need to authenticate my domain even for a tiny WordPress site?
Yes. Since Gmail and Yahoo rolled out stricter sender requirements in 2024, unauthenticated email gets filtered aggressively no matter how little you send. A low volume won’t save you.
Why did my emails start going to spam suddenly?
Three common reasons: your hosting provider changed something about their mail setup, your shared server ended up on a new blacklist, or a mailbox provider tightened its spam rules. Setting up SMTP with domain authentication insulates you from all three.
Can I use my Gmail address to send form notifications?
You can, but you’ll need to set up WP Mail SMTP with the Google Workspace/Gmail mailer and authenticate properly. You can’t just type your Gmail address into the From Email field and expect it to work — that triggers spoofing filters.
Will this also fix other WordPress emails, like password resets and WooCommerce orders?
Yes. WP Mail SMTP routes every email your site sends, not just form notifications. Password resets, WooCommerce order confirmations, membership welcome emails, and anything else that goes through wp_mail() will all get the same deliverability boost.
What if I’m not using WPForms?
The steps in this article work with any WordPress form plugin — Contact Form 7, Gravity Forms, Fluent Forms, etc. The root cause (WordPress’s default mail function) is the same, and WP Mail SMTP fixes it at the WordPress level, not the form plugin level.
Next, Learn How To Change the WordPress Admin Email
Don’t make the rookie mistake of authenticating an email address only to have a different one set as your WordPress admin email. Find out how to change the WordPress admin email to match the email address you authenticated in WP Mail SMTP. We can also help if you just need to configure your WordPress email settings.
Ready to build your form? Get started today with the easiest WordPress form builder plugin. WPForms Pro includes lots of free templates and offers a 14-day money-back guarantee.
If this article helped you out, please follow us on Facebook and Twitter for more free WordPress tutorials and guides.


I’m still having some trouble. It’s not that my emails are going to spam – the responses to the contact form on my website are going to my spam folder in my email. My own email is listed as the “from”, so why would it not be trusted?
For example, when someone fills out the form on my site, the response gets sent to my email. But that email goes to my spam folder, even though it’s from myself.
I’m not sure if that makes sense. What can I do to prevent that?
Hey Amy, — We are sorry for any trouble. This guide should be able to help you, in order to make sure we answer your question as thoroughly as possible and avoid any confusion, could you please contact our team?
If you have a WPForms license, you have access to our email support, so please submit a support ticket. Otherwise, we provide limited complimentary support in the WPForms Lite WordPress.org support forum.
Thanks.
Hello, I’m having the same issue! Did you manage to sort it in the end?
Many thanks
Hello Jamie – I am sorry to hear about the trouble. When you get a chance, please drop us a line in support so we can assist.
If you have a WPForms license, you have access to our email support, so please submit a support ticket.
Otherwise, we provide limited complimentary support in the WPForms Lite WordPress.org support forum.
In the meantime, you can check this guide that should help you in resolving the issue.
Thanks 🙂