
AI Summary
Hiring new members for your team is tough work, but hiring without the proper tools to manage your recruitment is infinitely worse.
You’ll likely find yourself fighting two battles at the same time—one in pursuit of the perfect candidate and the other against the inefficiencies rearing their heads in the absence of a streamlined hiring system.
Luckily, building a simple system for your hiring process is something you can instantly achieve. All it takes is having a job application form with powerful built-in functionalities, and you’ll likely never need anything more expensive or sophisticated than that for your talent hunt.
When it comes to application forms, WPForms is often the simplest answer.
Create Your Hiring Forms Now 👉
In this post, I’ll show you some of the most impactful ways that WPForms can help make your hiring more efficient and painless without having to spend countless hours.
Let’s begin.
- How WPForms Can Help Streamline Your Hiring Process
- First, Install WPForms
- 1. Tailored Applications With Smart Logic
- 2. Simplifying Document Uploads
- 3. Capturing Variable Amounts of Info With Repeaters
- 4. Encourage Quality Applications With Save and Resume
- 5. Enhance Application Experience with Multi-Page Forms
- 6. Instant Notifications Upon Application Submission
- 7. Centralized Data Management
- 8. Use Ready-Made Hiring Form Templates
How WPForms Can Help Streamline Your Hiring Process
I’m no HR professional, but I’ve created enough application forms for my own side projects over the years.
So, my goal is to share what I’ve learned about creating hiring forms that are pleasant for candidates to fill out and that can add operational convenience to your businesses in many ways.
First, Install WPForms
I strongly recommend using WPForms Pro for creating your job application form. The reason why I recommend WPForms is that it has the easiest form creation process and the lowest learning curve that I’ve honestly seen in any WordPress form solution.

Not sure how to install the plugin on your site? See our guide on installing WPForms for detailed steps.
With the plugin installed, you can start building forms immediately. Here’s a step-by-step tutorial on creating your first form.
All of the tips I’m going to share are extremely easy to apply with WPForms Pro. So, for the rest of this article, I’m going to assume that you’re using WPForms.
1. Tailored Applications With Smart Logic
If there’s one feature that well-designed application forms usually have, it’s dynamically changing forms that adapt to each applicant’s responses in real-time.
This is exactly what conditional logic allows you to do.
In WPForms, you can set conditions to define when a specific field should appear (or disappear from view) depending on the selections made by the applicants as they fill out your form.
Let’s work with an example. Suppose you’d like to ask a few questions about language proficiency. But the trick is that these questions should only appear if the applicant has previously indicated that they can speak multiple languages.
To create conditional fields like these, I’ll start by adding a Multiple Choice field to my form.

You can change the field label and choices by clicking on the Multiple Choice field after inserting it into your form to open Field Options on the left.
On this side panel, simply enter the text for the label and choices you want.

Since this is a simple yes or no question, you can remove the “Third Choice” option by clicking on the red minus ‘-‘ button next to it. Now, you’ll be left with just the two options you need.

Next, let’s add a scale that lets people indicate their proficiency level in other languages. For this, you can use the Likert Scale.

Once again, you can edit the rows and columns of the scale by clicking on it to access Field Options on the left.

After editing the rows, scroll down to the Columns section and modify the columns as you see fit.

Here’s where things get interesting. Since this Likert Scale question is only going to be relevant to people who do know languages other than English, the best practice is to make this field appear only if the right conditions are met. Otherwise, it’s just taking extra space and is likely to daunt an applicant who has no extra language qualifications.
Adding conditional logic to this field is easy. Simply click on the Smart Logic tab under Field Options.

Now, use the toggle button next to Enable Conditional Logic. You’ll then see additional options appear underneath.
For the sake of clarity, I’ll spell out the selections I made using the dropdowns for the logic:
“Show “this field if “Do you speak any languages other than English” “Is” “Yes“.

Sweet! All you have to do now is save your form and embed it. Now, if a visitor answers “yes” to the question about languages, the Likert Scale field will automatically be displayed underneath.

But when the answer is “no”, the form will skip over the Likert Scale field and hide it from view.

Pretty slick, right?
There’s an endless number of ways you can streamline your hiring forms by adding conditional logic so that only the most relevant fields appear for each applicant.
2. Simplifying Document Uploads
No application form would be complete without the applicant being able to conveniently upload documents such as their resume, cover letter, certifications, etc.
However, I still often come across application forms that require people to submit a link to an uploaded file, which is rather inconvenient (it also looks less professional and, frankly, kind of lazy).
With WPForms, adding a File Upload field is easy. Plus, it gives you some really useful options. To accept uploads, you can simply drag and drop the File Upload field on your form.

After adding the field, you can change its settings by clicking on it and accessing Field Options on the left-hand pane. Feel free to change the label to something more descriptive, like “Upload your resume.” You can use the Description text box to add instructions about the types of files you’re accepting.

To make the most of this feature, I recommend clearly specifying the types of files you’ll accept and any size limitations. This helps ensure you receive documents in formats that are easy to for you to review and manage.
If you scroll down further, you can control precisely which files an applicant can upload, the size of the files, and the number of files.

Use these settings to enforce your requirements and eliminate potential abuse by spammers uploading unnecessary files.
If you leave these fields blank, they’ll use the default file specifications. See this doc for more details about the File Upload field default settings.
Now your applicants can upload resumes, letters, and any other document you require directly from their computer with just a few clicks.

The next tip is something that’s one of my favorites.
Accept File Uploads With WPForms 🔗
3. Capturing Variable Amounts of Info With Repeaters
The best candidates often like to share their history in some detail, whether that’s their educational background, past work experience, achievements, and so on. But how can you know in advance how many fields you should leave in your form for each section? After all, every candidate is different and has a varying amount of experience.
The simple solution to this problem is a Repeater field. The WPForms repeater field allows your visitors to duplicate a field with a click. That means you can accommodate all kinds of candidates with a single field because the applicant can duplicate the same field to fill out details as required.
Here’s how it’s done with WPForms. Start by adding the Repeater field to your form.

Now, click on the Repeater field to access its Field Options. Like before, you can change the label of the field and make it more descriptive. It’s a good idea to use a label that describes the repeater section.
Since I want to add three fields for the repeatable section, I’m going to use the 3 column layout.

You’ll now notice 3 drop areas appear inside the repeater section. Simply drag and drop different fields to these areas, one by one, as required. In my example, I’m using two Single Line Text fields and one Dropdown field.

I’ve chosen these fields to collect information about Job Title, Company, and Length of Employment of the applicant for each experience they want to provide. For this, I can simply change the labels of the three fields so they describe the information I’m expecting the candidate to fill in.
Here’s the final result:

Create Repeatable Fields with WPForms 🔁
4. Encourage Quality Applications With Save and Resume
Let’s face it. Filling out an application in a detailed and thoughtful way can take some time. Your application form should welcome applicants to take their time, if necessary, without requiring them to complete it in one go.
The WPForms Save and Resume addon is perfect for this.
You can add the Save and Resume functionality to your form by going to its Settings from the form builder and clicking on Save and Resume.

Note: If this addon isn’t already installed, it will appear grayed out in the Settings menu. You can click on it to install and activate it immediately by following the on-screen instructions. For a detailed tutorial, see our article on saving progress on a WordPress form.
Once installed, go ahead and click on the Enable Save and Resume button.

You should now see a bunch of options related to this feature appear underneath. The first one is the link text for saving the form. This link appears right next to the Submit button, and you’re free to edit the text as you please.

You can also show different kinds of messages about the saving feature to instruct the applicant how they can resume their application at a later time.
For instance, you can enable the Disclaimer Page, which shows an editable message about what information your website will be storing and reassure the applicant about how sensitive information is handled (WPForms doesn’t store credit card numbers, file uploads, mailing addresses, etc. for security reasons).
Similarly, the Confirmation Page message contains instructions for resuming the form, which can also be edited. Finally, you’ll find Email Settings, which lets you edit the email notification that contains the actual resume link and on-page confirmation message that appears after the link has been sent to the applicant’s email address.

The Save and Resume functionality lets you be more accommodating to applicants with busy schedules or unique circumstances to apply at their own pace. Plus, it shows that you respect your candidates’ time and are committed to providing a positive application experience.
5. Enhance Application Experience with Multi-Page Forms
The WPForms Save and Resume feature can be used independently, but it can also be used in a powerful combination alongside multi-page forms. Typically, an application form has multiple sections such as biographical details, past job experience, academic qualifications, etc.
If your form is too long, applicants might feel daunted to complete and end up abandoning more. But if you break down the application process into manageable sections, you can make your form look much more inviting.
Creating a multi-page form in WPForms is really easy. All you need to do is add the Page Break field where you want to insert a new page.

Inserting a Page Break automatically inserts the “Next” button at the bottom of each page. Plus, it also adds a progress bar at the top to indicate how far along a candidate is into their application. You can enter a title for each page and customize the “Next” button text as well.
Notice that if you’ve also activated Save and Resume, the save link will appear at the bottom of each page. This way, your candidates will get multiple chances to save their application after filling out each major section.

By presenting questions in a logical, step-by-step format, candidates are more likely to provide thoughtful, comprehensive responses. I’ve found that using multi-page forms can actually increase the quality of applications I receive.
Also read: How to create multi-step forms in WordPress.
6. Instant Notifications Upon Application Submission
One of the most frustrating aspects of hiring can be the time between when a candidate applies and when you actually see their application. WPForms solves this with instant notifications that are super customizable.
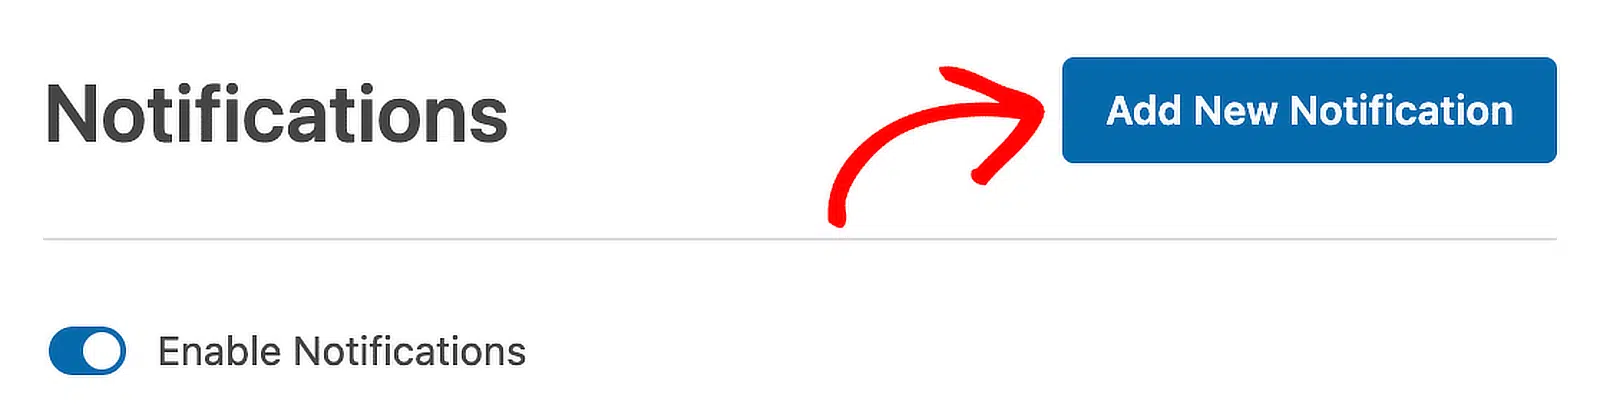
You can configure your notifications by going to Settings » Notifications. Notice that there’s already a notification meant for the site admin, which sends you a copy of the submission directly to your inbox.

This way, you’ll receive an alert in your inbox as soon as a new candidate submits their application. Not only that, you can also send a notification to the candidate, which is great for confirming the successful submission of their application and/or discussing the next steps.
To do that, you can create a new notification by pressing the Add New Notification button.
Enter a name for the notification when prompted to continue. After that, make sure to use the Smart Tags and select the Email field from the available options in the Send to Email box. This way, WPForms will send the email directly to the candidate’s provided address.

Go ahead and customize the email subject and message so that it’s appropriate and helpful for the candidate. You can share the next steps with them, let them know how long a response would likely take from you, and even include a copy of their filled-out form for their reference using the {all_fields} tag.

The notification system is highly customizable, meaning you can set up different alerts for different positions or even route applications to specific team members based on the role. Check out our guide on setting up multiple notifications.
7. Centralized Data Management
As applications start rolling in, keeping track of all that information can quickly become overwhelming. WPForms tackles this challenge by organizing all submissions in one central location: your WordPress dashboard. You can find a complete record of your candidates’ submitted entries by going to WPForms » Entries.

You’ll find a list of all of your saved forms. Select the form you want to view the entry records for. You’ll then see a full list of the entries you’ve received for that form. If you want to see an individual submission with all its details, click on any entry from the list to open it.

You can even export any entries or download file attachments as needed.
That’s not all! You can even store candidate applications on a Google spreadsheet with smooth automation. Check out this step-by-step guide on storing form submissions in Google spreadsheet.
8. Use Ready-Made Hiring Form Templates
Building forms from scratch in WPForms is an effortless process. But the great thing is that you don’t have to start from scratch–WPForms has pre-built templates for job application forms and various other hiring and HR use cases.
You can select any one of the 2,100+ form templates to speed up your form creation. Here are just a few of the available templates that come up if you search for “hiring” on the form builder screen after clicking WPForms » Add New from your WordPress admin menu.

In fact, you can save any form that you’ve made as a custom template. This can be helpful if your organization needs different kinds of hiring forms that vary in some ways but have many other common elements. For example, you can use build hiring forms for different positions in your organization based on the same customized template.
To turn any form into a template, click on the menu icon at the top to expand additional options. Then click Save As Template.

As soon as you’ve done that, the form builder screen will refresh, and an orange template badge will appear next to the form name to indicate the successful conversion of your form to a template.
Now, you can use this template to build other forms by going to WPForms » Add New, and selecting the My Templates category. All your custom templates will appear here.

You can read this comprehensive guide on creating custom templates to learn about all the options available to you in detail.
And there you have it! I hope that with these tips, you can make your application forms and hiring processes significantly more convenient by attracting the right candidates and managing their applications with greater efficiency.
For more information, check out all of our WPForms HR solutions.
Next, Build a Full-Length Form Page
With WPForms, you always have more than one way of achieving a specific result. Embedding a job application form is a good example. You can either publish a standard form on a new page, or you can create a full-length form on a distraction-free dedicated page.
Create Your Hiring Fom Form Now
Ready to build your form? Get started today with the easiest WordPress form builder plugin. WPForms Pro includes lots of free templates and offers a 14-day money-back guarantee. If this article helped you out, please follow us on Facebook and Twitter for more free WordPress tutorials and guides.

