


AI Summary
Want to learn how to create one time use coupons without WooCommerce?
One time use can mean two different things, either a single code that stops working the moment somebody redeems it, or a unique code for every customer that each person can claim once.
WPForms handles both, and you don’t need a store plugin or a line of code to set either one up. In this article, I’ll show you the easiest way to make a form for managing and distributing single-use coupons with WPForms.
Create Your One Time Use Coupon Form Now! 🙂
Why Use One Time Use Coupons On Your WordPress Site?
A single use coupon burns out after one redemption, so the first person to enter the code gets the discount and everybody who tries it afterward sees an error instead. You control that with one setting called Max Uses, which you’ll set to 1 in Step 4.
The phrase also covers a second setup that trips people up, where instead of one code that works once you issue a separate code to each customer and every one of those codes works a single time. Both approaches are covered below, and the shared code is the faster of the two to build.
Either way, a discount that can only be claimed once gives customers a convincing reason to choose your brand over the competition, and it brings a few other advantages along with it:
- Increases Order Value: Coupons frequently encourage customers to add more items to their carts. With a discount at hand, they’re more likely to opt for higher-priced products, boosting your business’s sales.
- Attracts New Customers: A timely discount can help tip the scales in your favor for customers who are interested in your products but hesitant to make a purchase, hence attracting new customers.
- Tailored Marketing: One time use coupons help create a highly focused marketing approach. You can target specific consumer segments by aligning coupons with demographics, behaviors, and preferences.
- Creates Urgency: Personalized coupons inherently convey urgency. Customers must act fast to avail of their special deal, encouraging prompt purchases, thanks to their exclusivity appeal.
- Boosts Repeat Business: One time use coupons are incentives to bring customers back to your site. They offer an attractive proposition for making another transaction from your site!
Now that you’re familiar with the numerous benefits of one time use coupons, let’s dive into the steps of creating one for your online business!
How to Create One Time Use Coupons in WordPress
WPForms handles single-use coupons through its Coupons addon, and the full setup runs about ten minutes across eight steps once the plugin is installed.
- Step 1: Install the WPForms Pro Plugin
- Step 2: Build Your Payment Form
- Step 3: Install and Activate the Coupons Addon
- Step 4: Create Your Single-Use Coupon
- Step 5: Add the Coupon Field to Your Form
- Step 6: Enable Form Notifications and Confirmations
- Step 7: Publish Your One Time Use Coupon Form
- Step 8: Track Coupon Usage and Redemptions
- How to Give Every Customer Their Own Single-Use Code
Step 1: Install the WPForms Pro Plugin
WPForms is a drag and drop form builder with 2,100+ templates, and its payment templates already carry the fields you need to charge for something before a coupon ever enters the picture.
WPForms is an advanced form builder plugin that lets you create payment forms with coupons to maximize the potential of your online business.
Use the Pro version to unlock the ready-made payment form template and access the Coupons addon for managing and distributing coupons.
Once you’ve decided to buy a WPForms Pro license to build a single use coupon form, it’s time to install and activate the plugin on your WordPress site.
Step 2: Build Your Payment Form
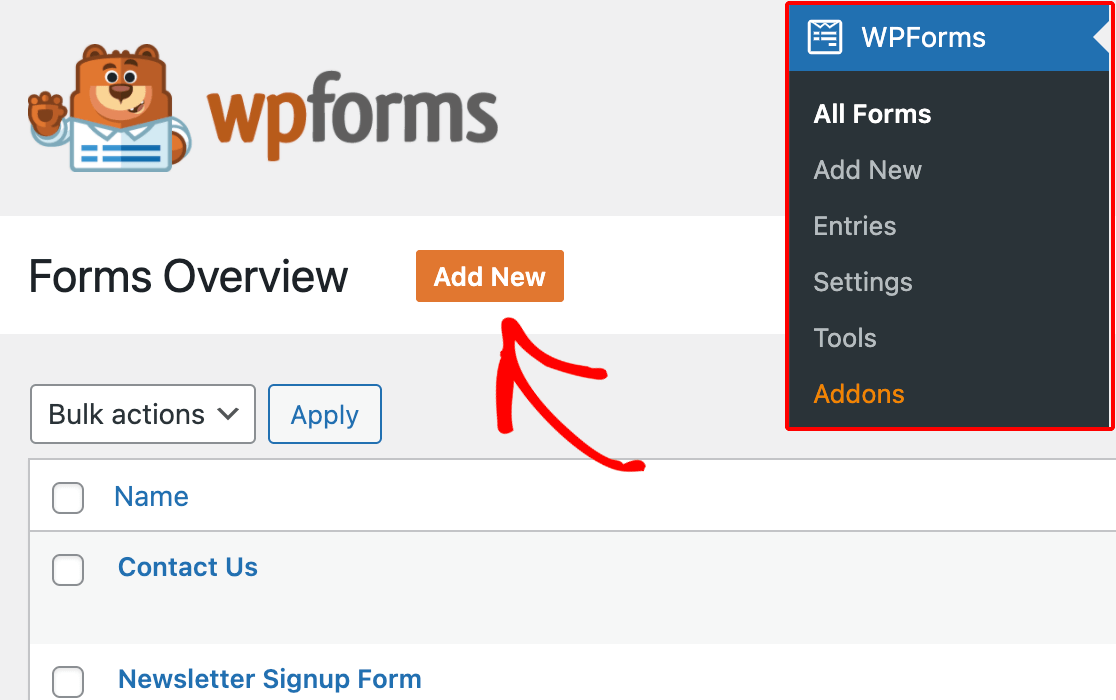
Let’s get started on creating your payment form with a one time use coupon! From your dashboard, go to WPForms and click the Add New button.
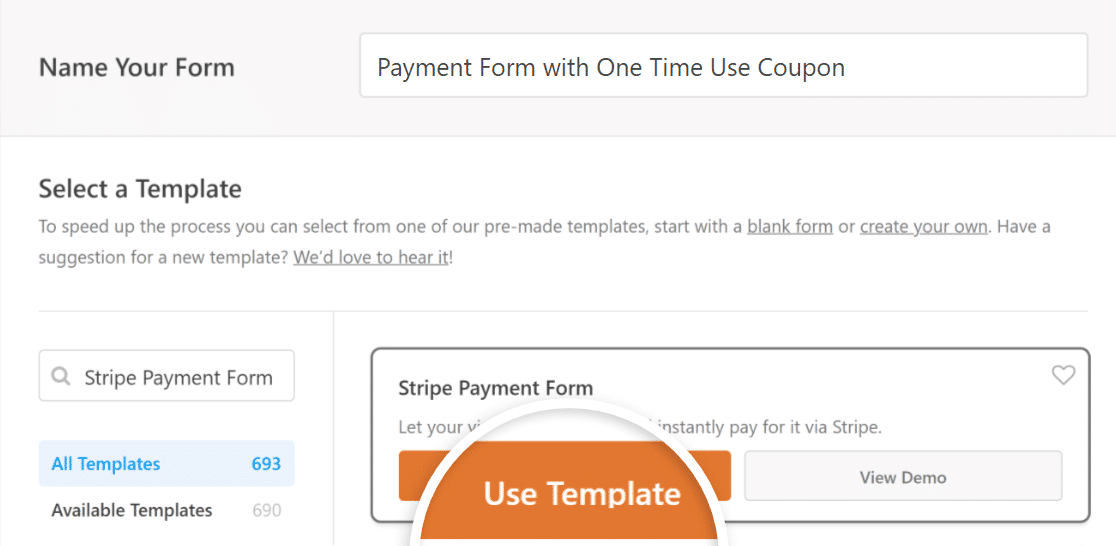
Name your form, then find the Stripe Payment Form template via the search box. Once it shows up, click on the Use Template button.
If you haven’t created a payment form in the past with WPForms, a popup should now appear, telling you to Enable Stripe Payments.
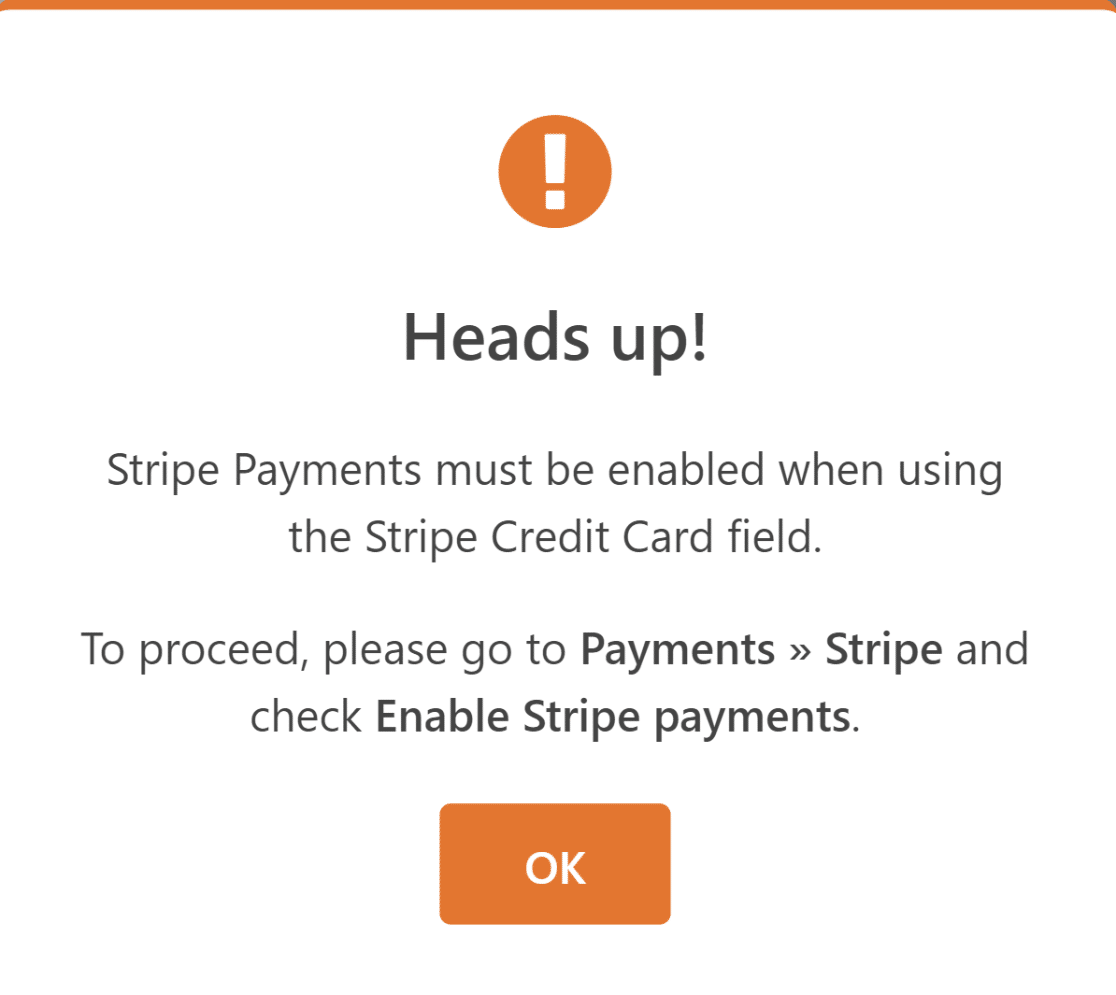
You’ll need to connect WPForms with Stripe and configure your payment settings to accomplish this.
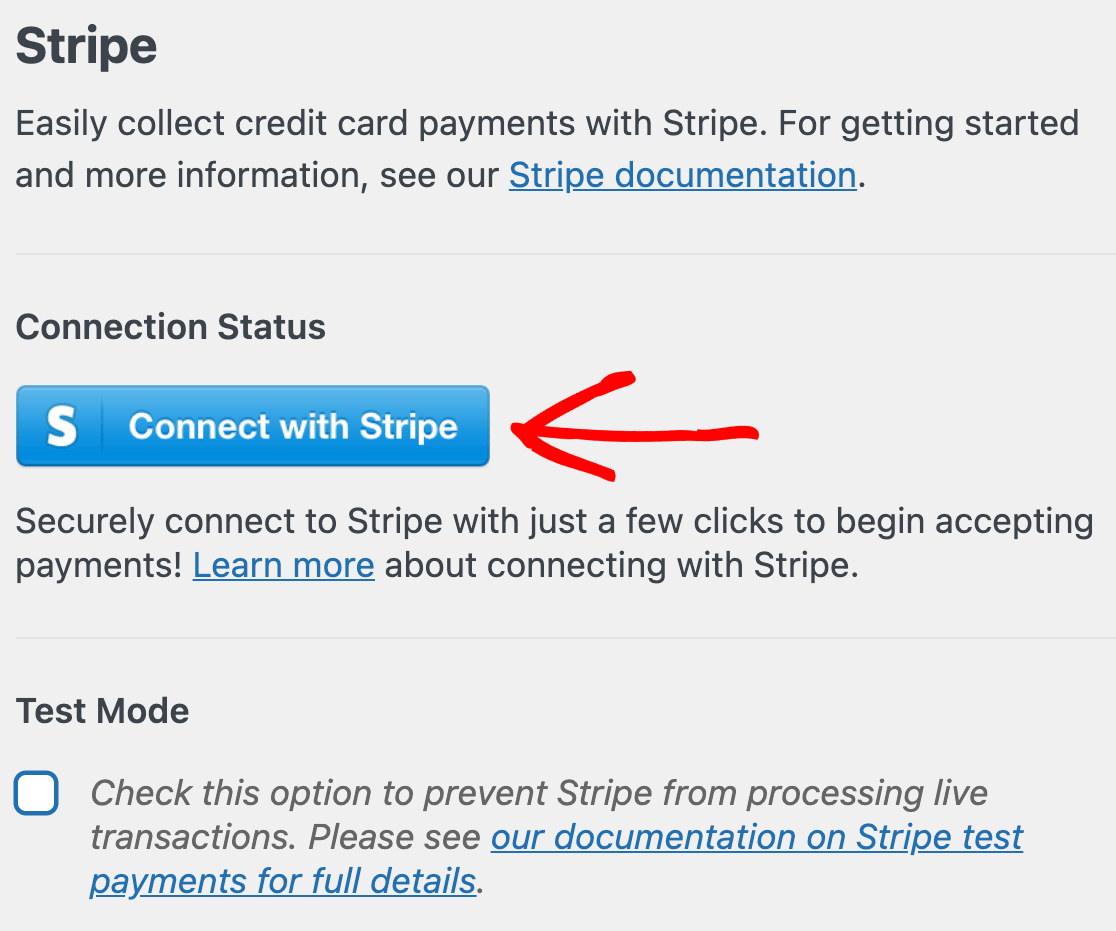
Once you finish the payment integration and your template loads successfully, you can customize the form by adding fields and changing their settings.
Since this form contains all the required fields we need for now, we’ll leave it as it is. In the next step, we’ll install the Coupons addon.
Step 3: Install and Activate the Coupons Addon
Installing the Coupons addon is incredibly easy. From your WordPress dashboard, navigate to WPForms and click on Addons.
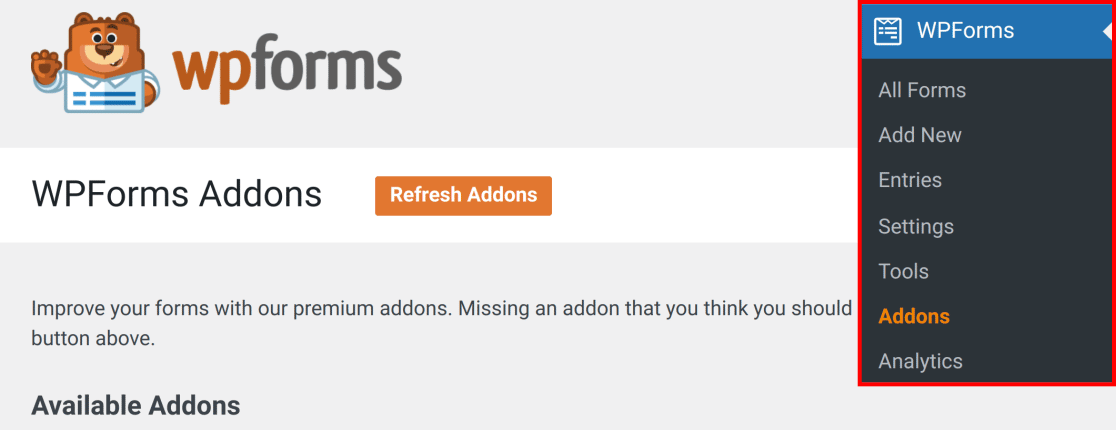
In the Seach Addons field, type in Coupons addon. Next, click on the Install Addon and then the Activate button. Great job! You’re all set now to create your one time-use coupon from the WPForms Payments dashboard.
Step 4: Create Your Single-Use Coupon
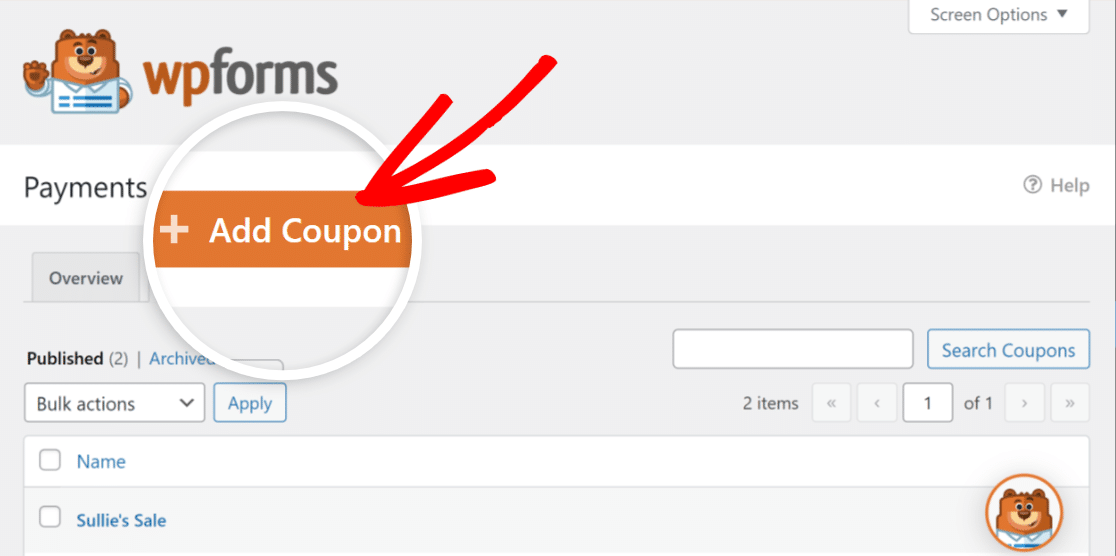
From your WordPress dashboard, navigate to WPForms » Payments. Next, click on the Coupons tab.
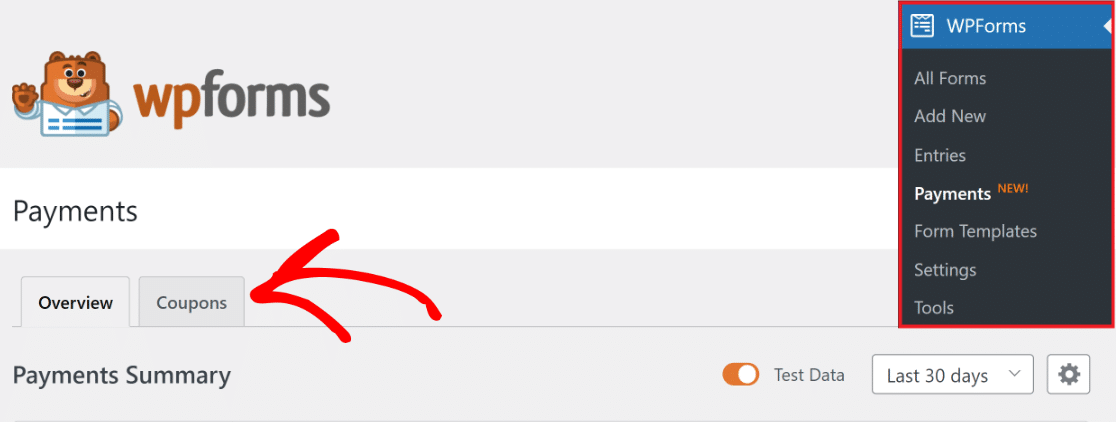
Creating your coupon now is very simple. Simply click on the + Add Coupon button to proceed ahead.
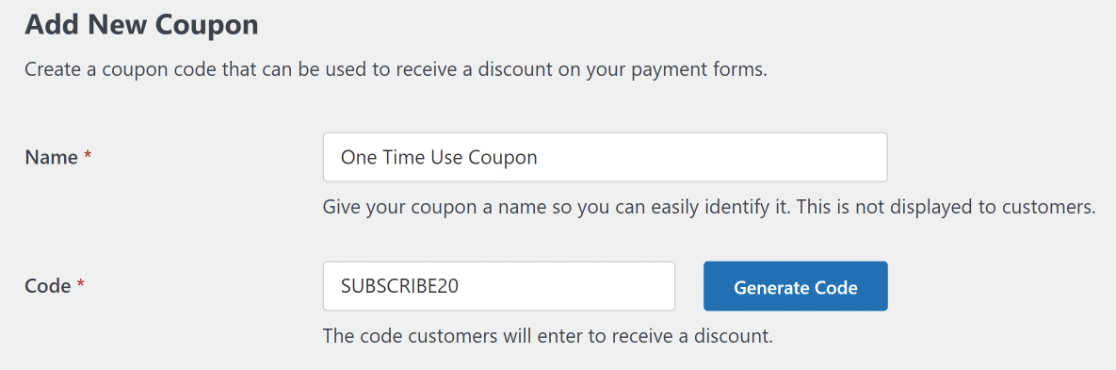
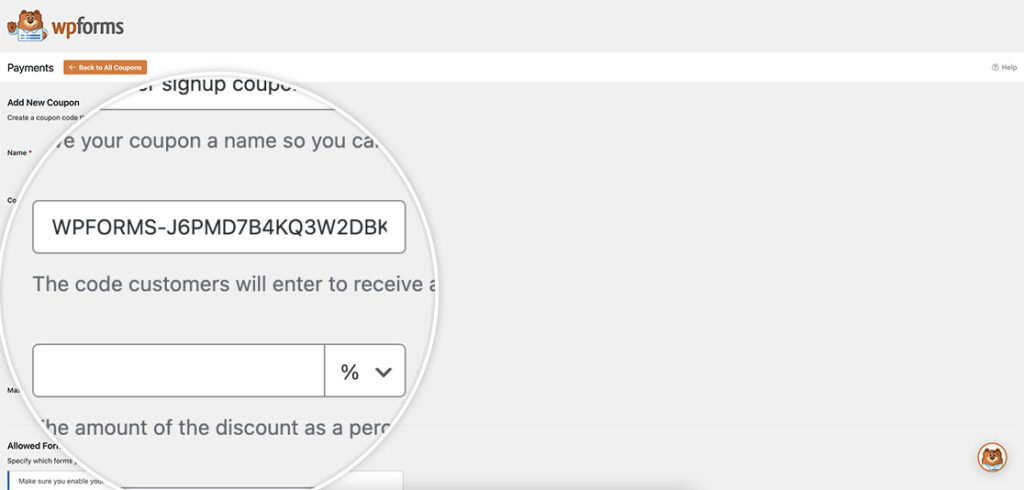
Next, give your coupon a name, and enter the unique Code you’ll want customers to enter to receive a discount on your online store.
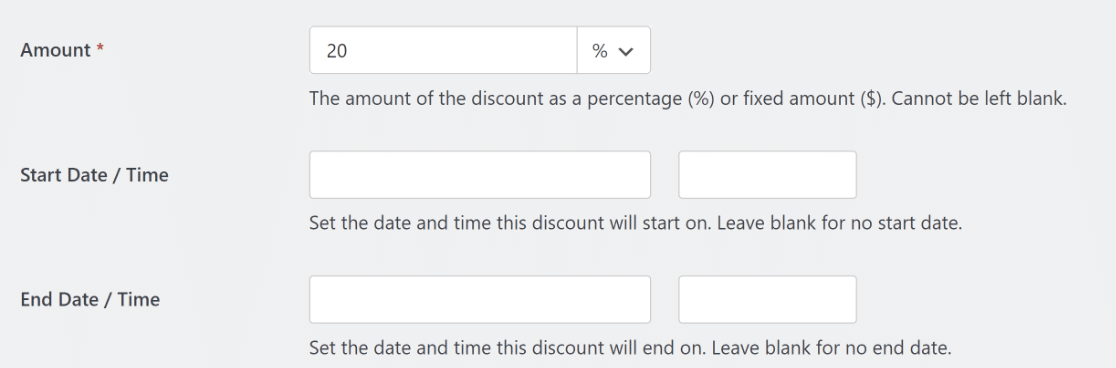
Next, enter the Amount as a percentage discount (%) or a fixed amount ($).
You can also specify the coupon’s Start Date / Time and End Date / Time (if required). Both are worth setting even on a single-use code.
A coupon with no end date stays valid forever, which means a code you emailed to one customer last spring still works next year if nobody ever redeemed it, and an end date closes that door for you.
Next, enter the Max Uses you’ll want the coupon to be used. Since this guide is about a single-use coupon, we’ll set the coupon usage as 1.

Bear in mind Max Uses counts total redemptions rather than redemptions per form or per person.
A coupon set to 1 and allowed on three different forms is still spent the moment somebody redeems it anywhere, and from then on the next person to enter the code gets your error message instead of a discount.
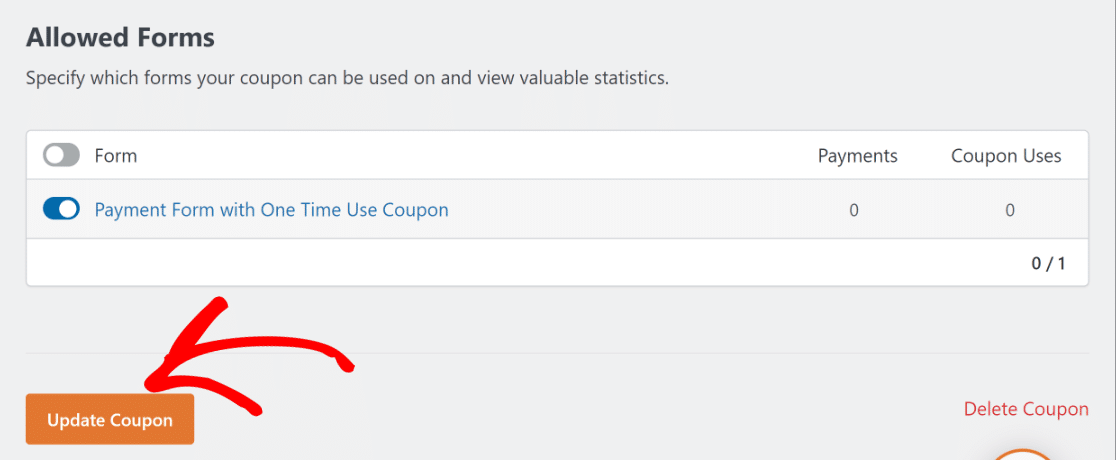
After that, all you have to do is select the payment form you created earlier and hit the Update Coupon button! Great! Now, it’s time to add the coupon field to your form.
Scroll to Allowed Forms and toggle on the payment form you built in Step 2. There’s a master toggle beside the Form column header if you want the coupon valid on every form at once. Connecting a form here is optional, so you can save now and come back to it later.
Step 5: Add the Coupon Field to Your Form
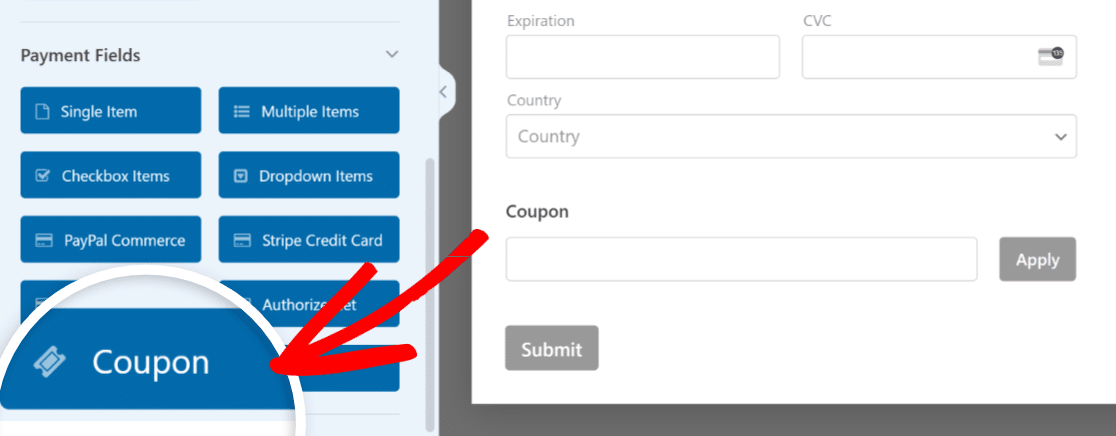
From the Form Builder interface, navigate to the Payment Fields section. After that, drag and drop the Coupon field into your form before the checkout.
Next, under the Allowed Coupons heading, select the One Time Use Coupon you created earlier.
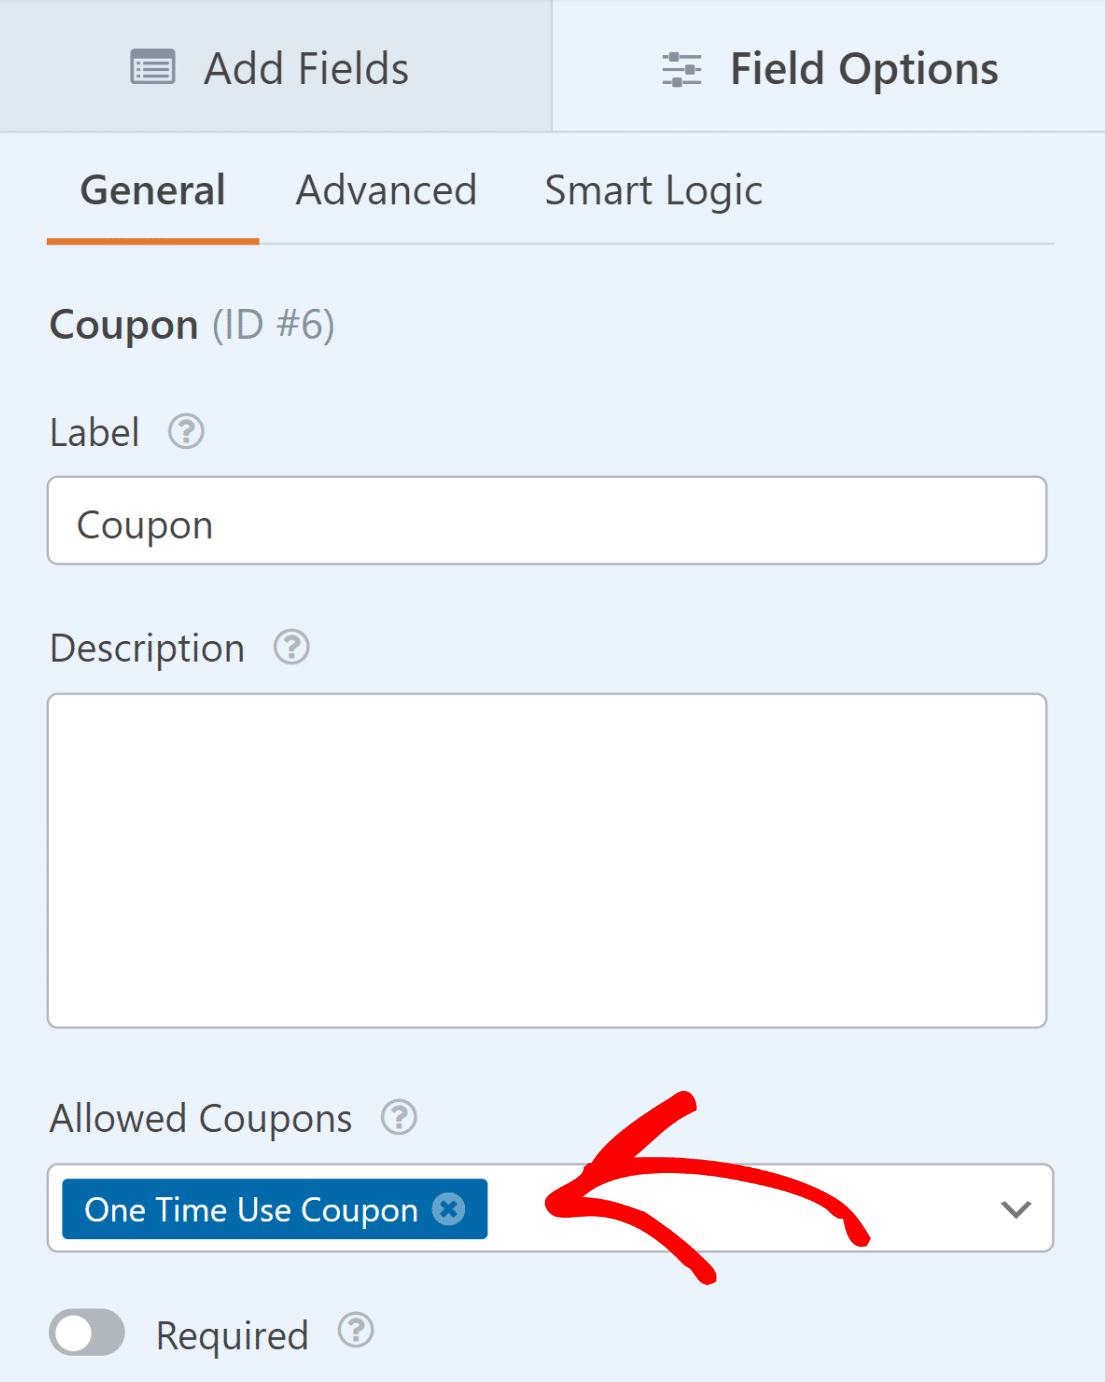
You can allow more than one coupon on the same field, and customers apply whichever code they were given. They still only get one coupon per submission, so allowing five codes doesn’t let anybody stack five discounts.
- Two more settings sit on this field, and both matter more for a single-use code than they do for a general discount. Scroll to the bottom of the field’s settings and you’ll find the Coupon Error box, which holds the message somebody sees when their code doesn’t work.
- The default reads “This is not a valid coupon,” and that wording confuses people who were handed a code that has already been redeemed. Something like “This code has already been used or has expired” answers the question they’re actually asking.
The second is Button Text on the Advanced tab, which renames the Apply button to something like Redeem Code if that reads better on your form.
If you want, you could also add a coupon disclaimer to your form, stating that the coupon can also be used once. Excellent. We’re close to wrapping this up now!
Step 6: Enable Form Notifications and Confirmations
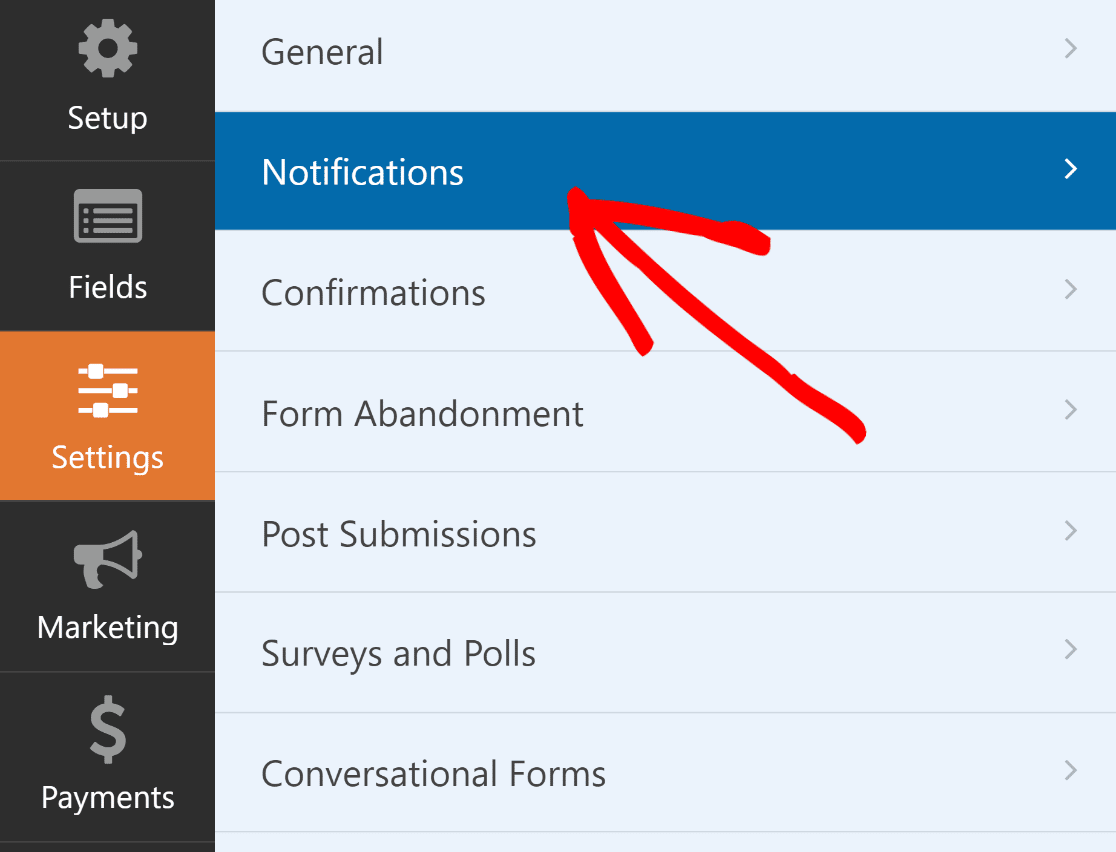
It is crucial to set up the messages and notifications to appear after a user submits the form and enters their coupon code. From the Form Builder screen, navigate to the Settings tab and select Notifications.
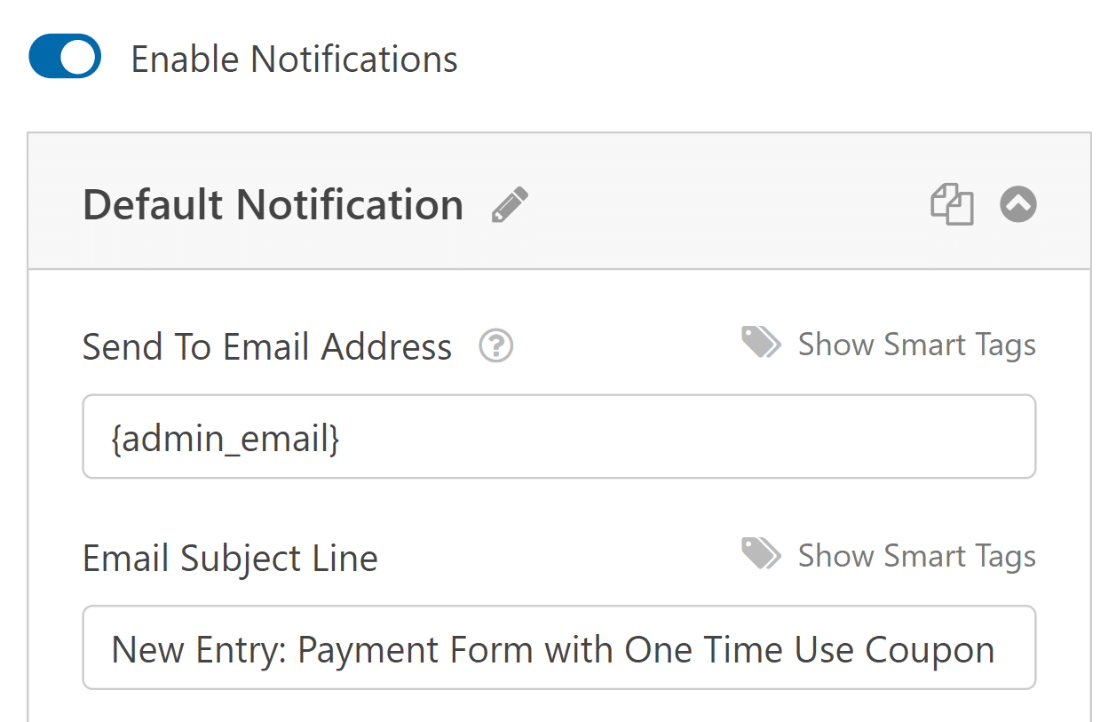
Administrators will receive alerts automatically. However, the email’s title, body, and list of recipients can be modified if required.
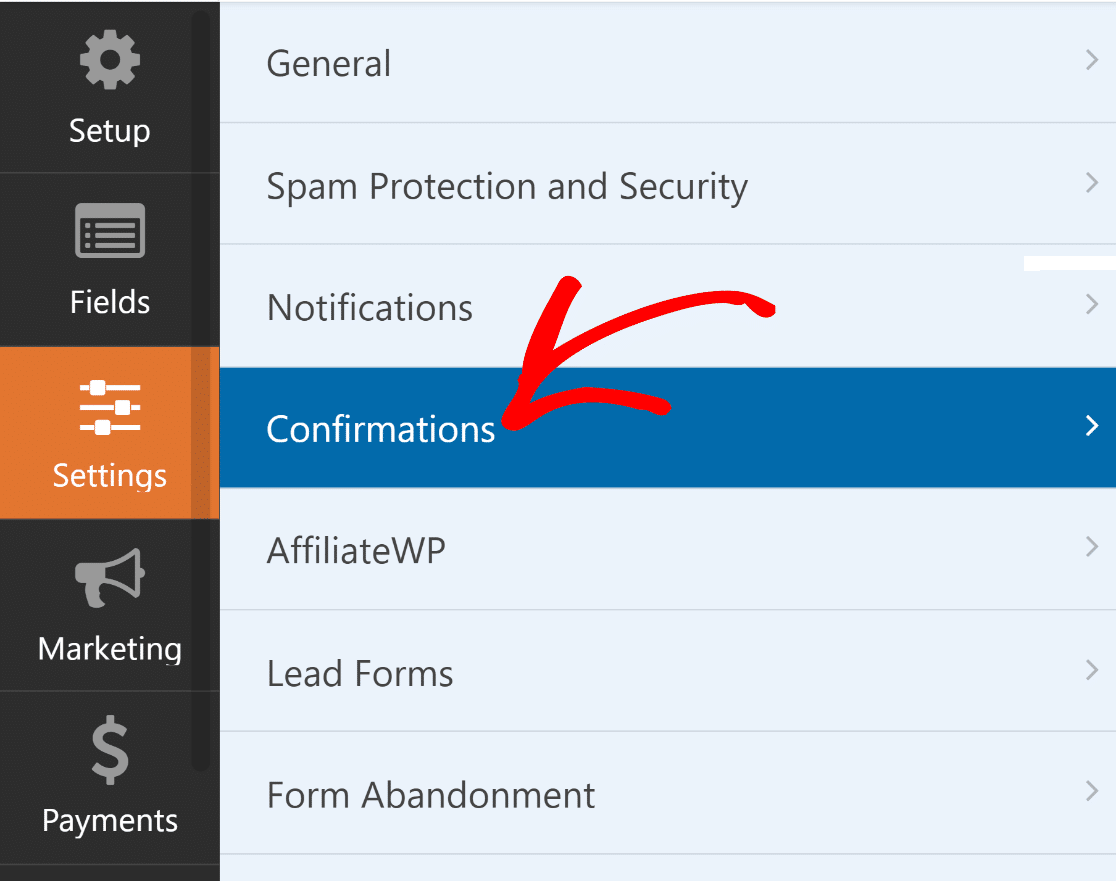
Next, under the Settings tab, select Confirmations to modify the message your customers will receive upon completing the form.
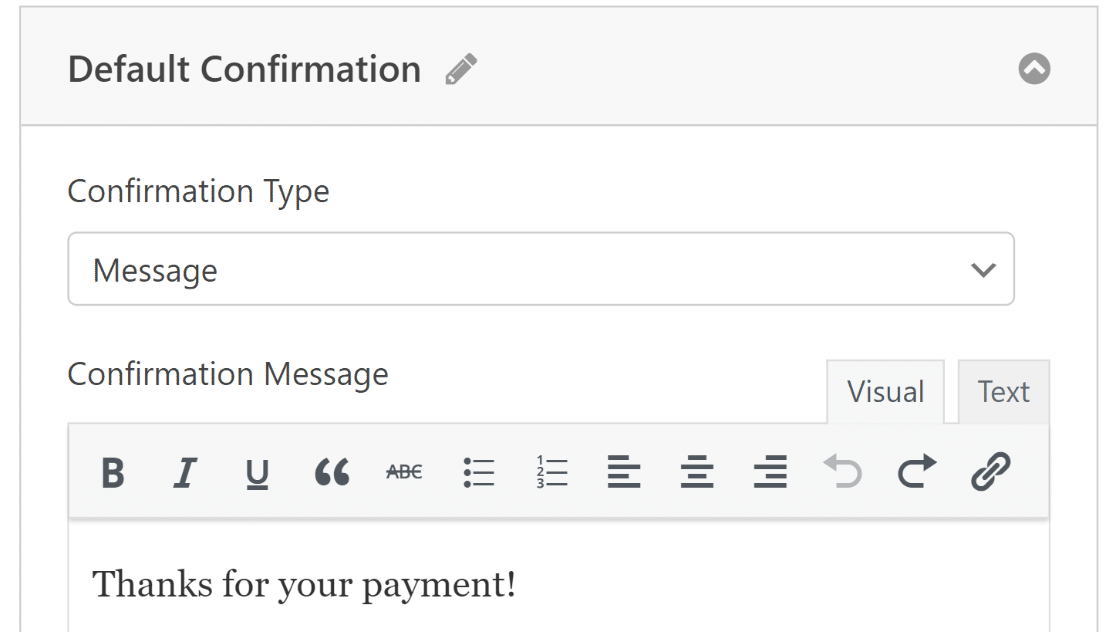
The Confirmation Type setting in WPForms allows you to display a message, link to another page, or redirect the user.
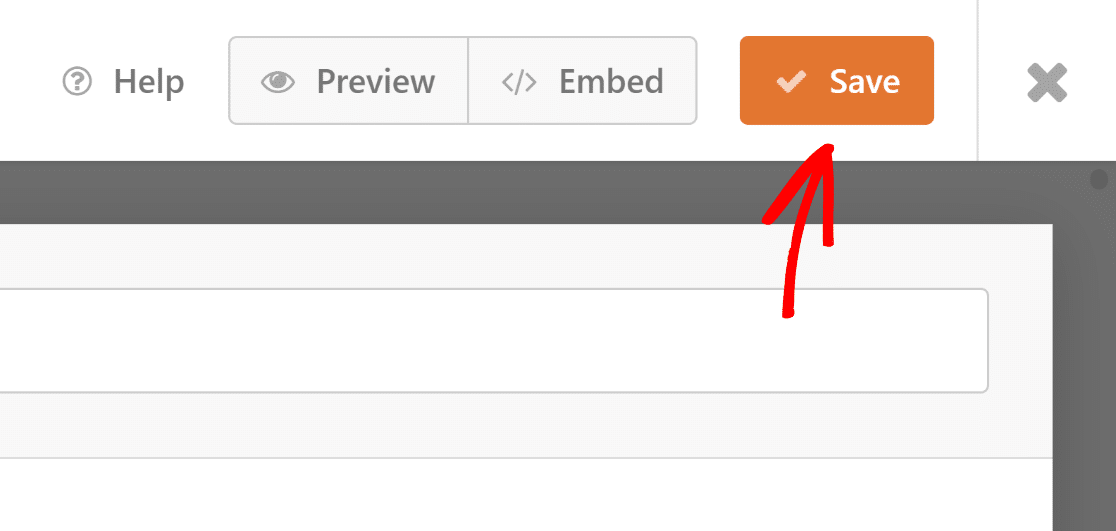
Before moving on, hit the Save button to avoid losing any changes.
We’re almost finished now!
Step 7: Publish Your One Time Use Coupon Form
Once you’ve finished creating your form, you can add it to your WordPress site and customize it using the block editor.
Create a new page/post or update an existing one. After that, click on the Add Block button and select the WPForms icon.
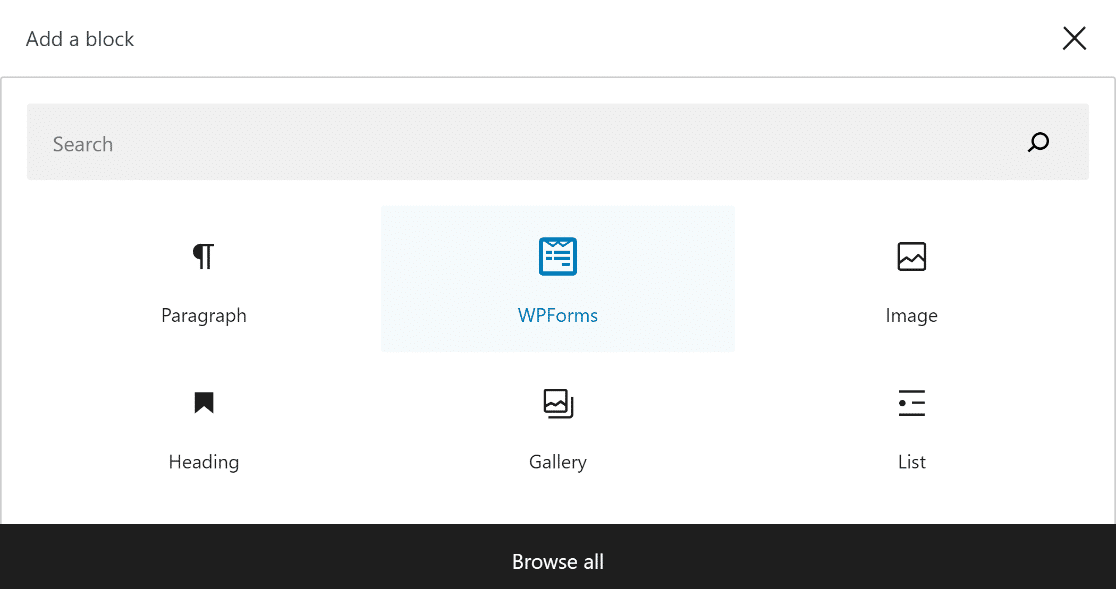
Next, choose your coupon order form from the dropdown menu in the WPForms block to add it to your page or post. If you want to customize the appearance of your form, now may be a good time to style it using the block editor.
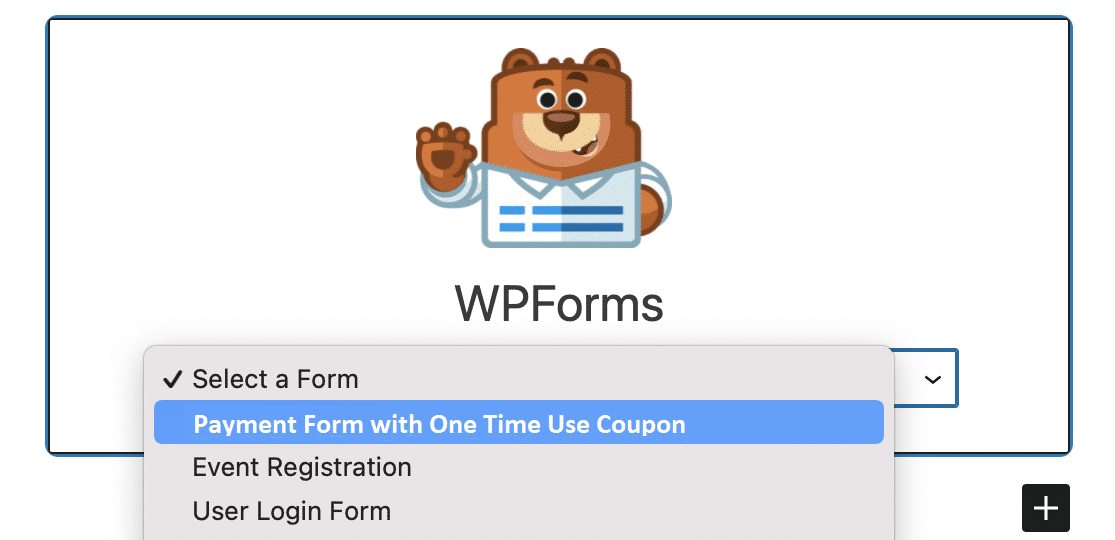
If everything seems promising, you can make your form public by clicking the Update or Publish button. After you’ve published the form, all that’s left to do is ensure it works as planned by testing the embedded form.
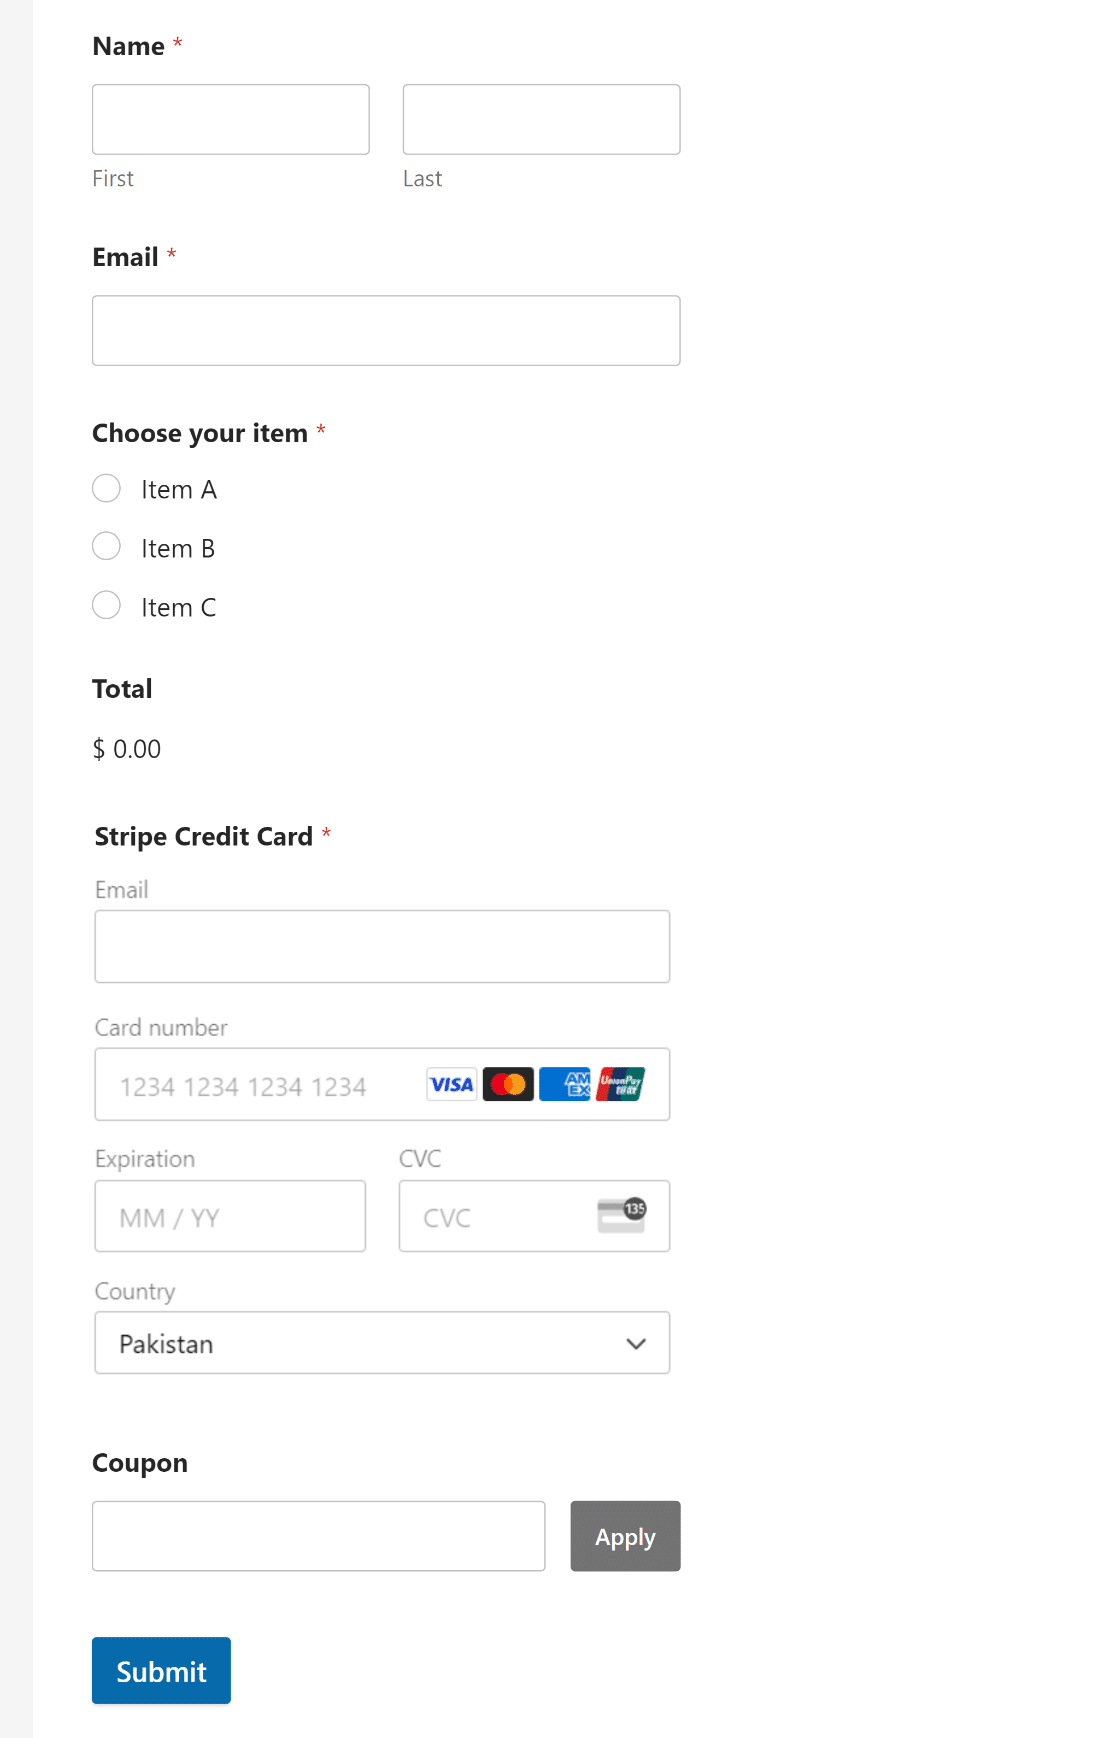
You can also configure your form to automatically apply the coupon code when a link to this form is clicked, which saves your customer from typing anything at all.
Step 8: Track Coupon Usage and Redemptions
Wondering what happens to your WPForms data once a user fills out the form? WPForms Lite and Pro customers can utilize the Payments Screen to keep track of payments and coupon usage in an organized fashion.
Head to WPForms » Payments and click on the Coupons tab to view your coupon summary for transactions made via WPForms.
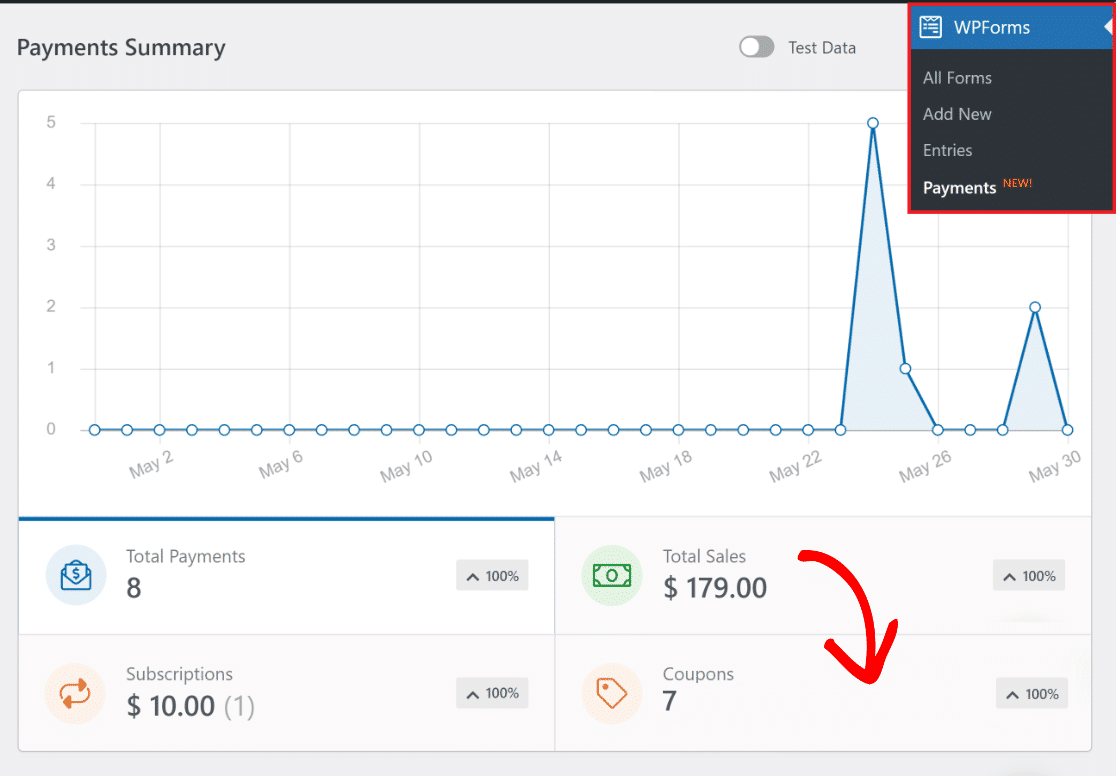
The table gives you seven columns, Name, Code, Amount, Usage/Limit, Forms, Start Date, and End Date.
Usage/Limit is the one that matters here, because a single-use coupon reading 1/1 has been redeemed and is now dead, while 0/1 is still waiting for its customer.
The docs on viewing and managing coupons cover the rest of the screen. Going further down, you’ll find a comprehensive table listing every transaction completed using your coupon form.
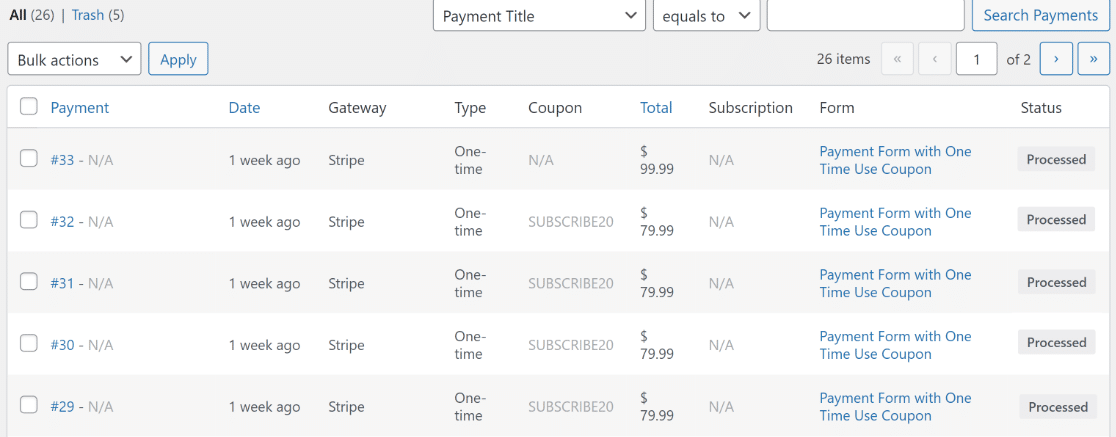
For redemptions over time rather than one code’s status, switch to the Overview tab and click the Coupons option.
That redraws the Payments Summary graph as coupon usage, which is the quickest way to see whether a batch of single-use codes is actually being claimed.
A coupon somebody has already redeemed can’t be deleted, and the Delete Coupon button turns into Archive Coupon instead.
Archiving switches the code off without destroying the payment record attached to it, which is the behavior you want, since deleting a redeemed coupon would take a real transaction’s history along with it.
At this point you have a working payment form, a coupon that expires after a single redemption, and a dashboard that tells you the moment it gets claimed.
How to Give Every Customer Their Own Single-Use Code
Everything above produces one shared code that works once, while the other version of a one time use coupon gives each customer a code of their own that only they can redeem.
Welcome offers, refund credits, review incentives, and VIP lists all work this way, because a code tied to one person can’t be posted to a coupon site and drained by strangers.
WPForms builds this from the same pieces you just used, only repeated per recipient. Create one coupon for each person, click Generate Code on every one so the strings are random and unguessable.
Then, set Max Uses to 1, and toggle on the same form for all of them. Your Allowed Coupons dropdown then holds every code, and each customer can only apply the one they were sent.
You can add a shared prefix to every generated code with a short snippet, so a campaign comes out as SUMMER-K4M9P rather than a bare random string, which keeps the Coupons table readable and makes the codes recognizable to customers.
And rather than asking people to type their code, you can send each of them a prefilled link using the method from Step 7.
Where this approach runs out of road is scale, because there’s no bulk generator in the Coupons dashboard and you’re creating these one at a time.
That’s fine for a campaign of a few dozen codes and painful past a couple of hundred. If you need thousands of unique codes, look for a dedicated coupon platform instead.
FAQs on One Time Use Coupons
Single use coupons raise the same handful of questions, usually about what happens to a code once it’s been redeemed and how to issue one code per customer. Here are the answers.
Can a one time use coupon be reused after someone redeems it?
No. Once the redemption count reaches the Max Uses limit you set, the code stops working for everybody, including the person who redeemed it. Anyone entering it afterward sees whatever message you put in the Coupon Error box rather than a discount. If you want a code that several people can each use once, create a separate coupon per person instead.
How do I give each customer their own single-use code?
Create one coupon per customer with Max Uses set to 1, and use the Generate Code button so each string is random. Add all of them to the same form’s Allowed Coupons list, then send each person only their own code. Customers can apply just one coupon per submission, so nobody can stack codes.
Can I create one time use coupons without WooCommerce?
Yes, and that’s the whole point of building them this way. Coupons are part of WPForms rather than a store plugin, so you can add a coupon code field to any WordPress form that collects a payment. You don’t need a product catalog, a cart, or a checkout page.
What happens if I set a coupon to 100% off?
The payment fails unless you set up conditional logic first, because gateways can’t process a $0 charge. Add a rule to your payment settings that skips the charge when the Coupon field matches your 100% code, then conditionally hide the payment field so customers aren’t asked for card details.
Can I change a coupon’s code or discount amount after saving it?
No. Code and Amount lock as soon as you save, and no amount of editing changes them afterward. Every other field, including Max Uses, the dates, and Allowed Forms, stays editable. To fix a wrong code or amount, create a replacement coupon and archive the old one.
How many one time use coupons can I create?
There’s no cap on the number of coupons, so a separate single-use code for every customer on a list is fine as far as WPForms is concerned. The practical ceiling is your patience, since coupons get created one at a time in the dashboard.
Next, Learn How To Sell On WordPress Without WooCommerce
If you want to run an online business but don’t have the technical know-how or expertise to build an eCommerce website, it’s a good idea to explore how you can sell on WordPress without WooCommerce.
And if you’d like to create coupon codes for your Black Friday sales, check out our post on Black Friday coupon codes to try out this year. Want to level up when it comes to your coupons?
Start Issuing Single-Use Coupons Now
Ready to build your one time use coupon form? Get started today with the easiest WordPress form builder plugin. WPForms Pro includes lots of free templates and offers a 14-day money-back guarantee.
If this article helped you out, please follow us on Facebook and Twitter for more free WordPress tutorials and guides.





