AI Summary
All email marketing begins with a single email subscription form. Not only does an email signup form hold massive importance for marketers, but it’s also incredibly easy to set up.
When it comes to WordPress, I’ve tried using different methods of embedding email signup forms to my websites, such as using default forms from themes, forms from page builder plugins, and forms created with SaaS marketing apps and later embedded on my website.
But I still haven’t found an easier method than using WPForms to create a completely customized email subscription form.
I’ll walk you through the steps so you can build your signup form without a hitch.
Create Your Email Signup Form 📨
What Is an Email Capture Form?
An email capture form helps you collect the email addresses of new visitors to your website.
With the help of an email capture form, you can capture more leads, grow your subscriber list, and send email newsletters to increase conversions by converting subscribers into loyal customers.
Your email list can be crucial not only for your newsletter but also for running important promotions like Black Friday. See this Black Friday and Cyber Monday checklist to learn about how email subscription forms can prove effective for your campaign.
Create an Email Subscription Form in WordPress
Step 1: Install the WPForms Plugin
WPForms is the best online form builder plugin for creating email subscription forms in WordPress. Using an intuitive drag-and-drop visual builder, you can create all sorts of WordPress forms with ease and in no time.
I suggest getting WPForms Pro to access the most powerful features for growing your email list with marketing integrations and high-converting tools like the Lead Forms mode for your signup forms.
With a professional-looking newsletter email subscription form, you can collect users’ email addresses from any page on your website.
So, download and install the WPForms plugin on your WordPress site. You can follow this step-by-step guide to learn how to install a plugin in WordPress.
Step 2: Select an Email Subscription Form Template
After installing and activating the WPForms plugin, you’ll need to create a form. You can also select an email subscription form template from the WPForms library.
To get the form template from the library, go to WPForms » Add New from your WordPress admin area.

WPForms comes with 2,000+ WordPress form templates. You can use these pre-built form templates to help you save time. You can also edit, remove, and rearrange form fields to customize them according to your needs.
On the startup menu, name your form and select the Email Signup Form template.
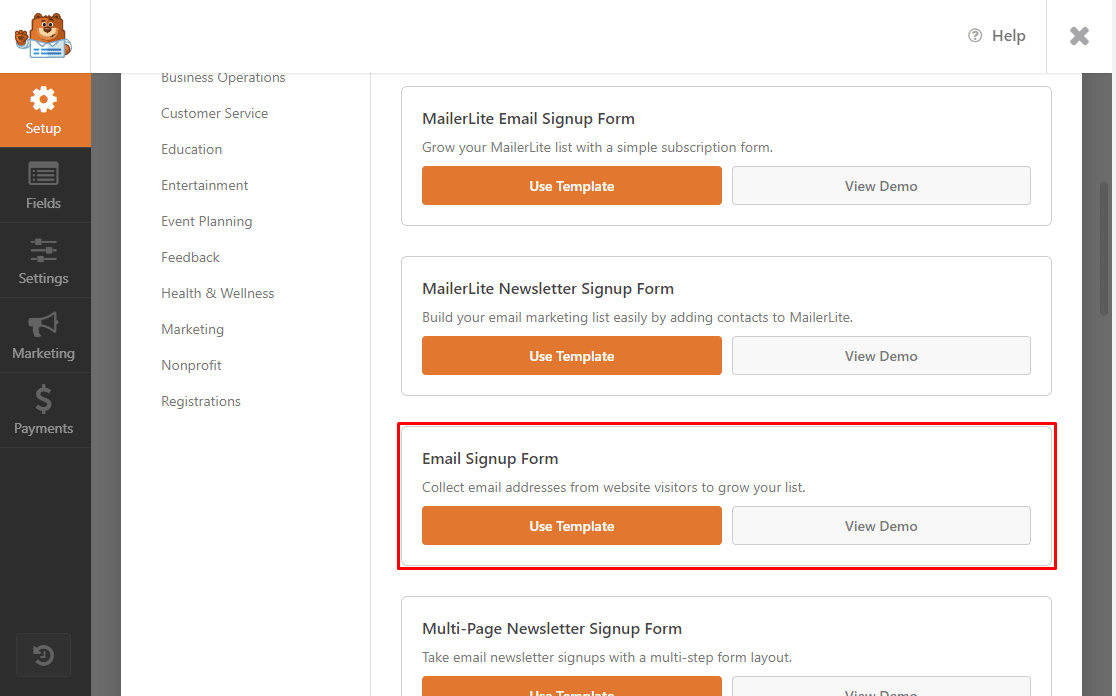
WPForms will create a simple email signup form.
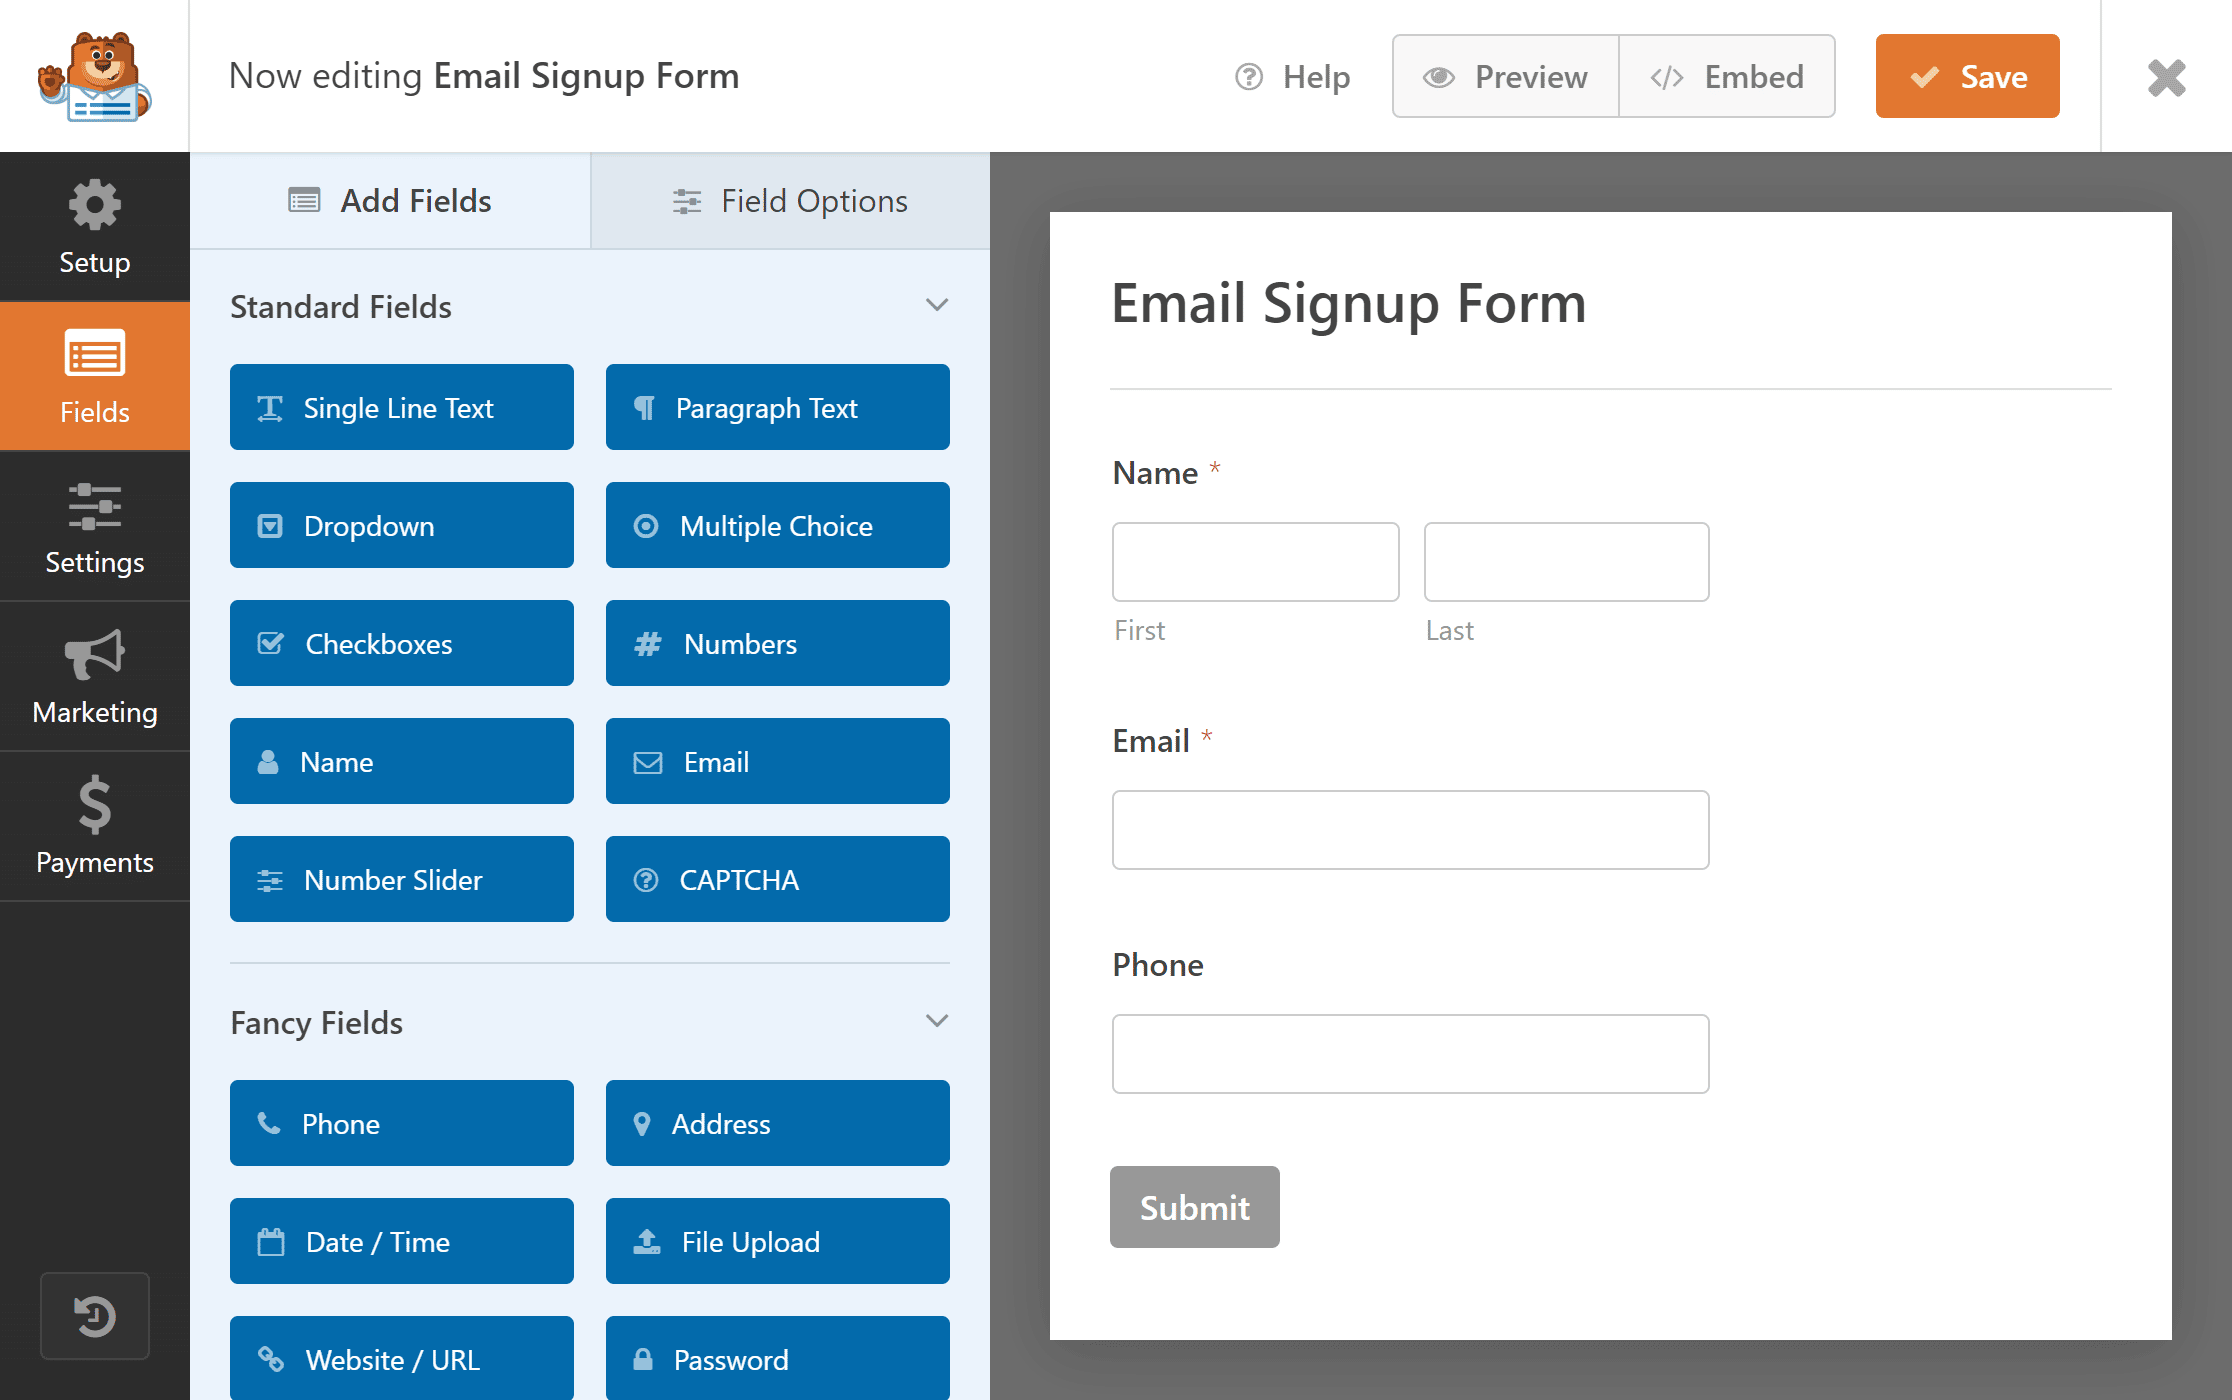
You can add additional fields and customize the form template according to your needs.
If you’re an Elementor user, you may want to see our tutorial on creating a custom signup form using Elementor.
Step 3: Customize the Template
To customize your form, you can add custom form fields and make edits or delete existing sections, depending on your needs.
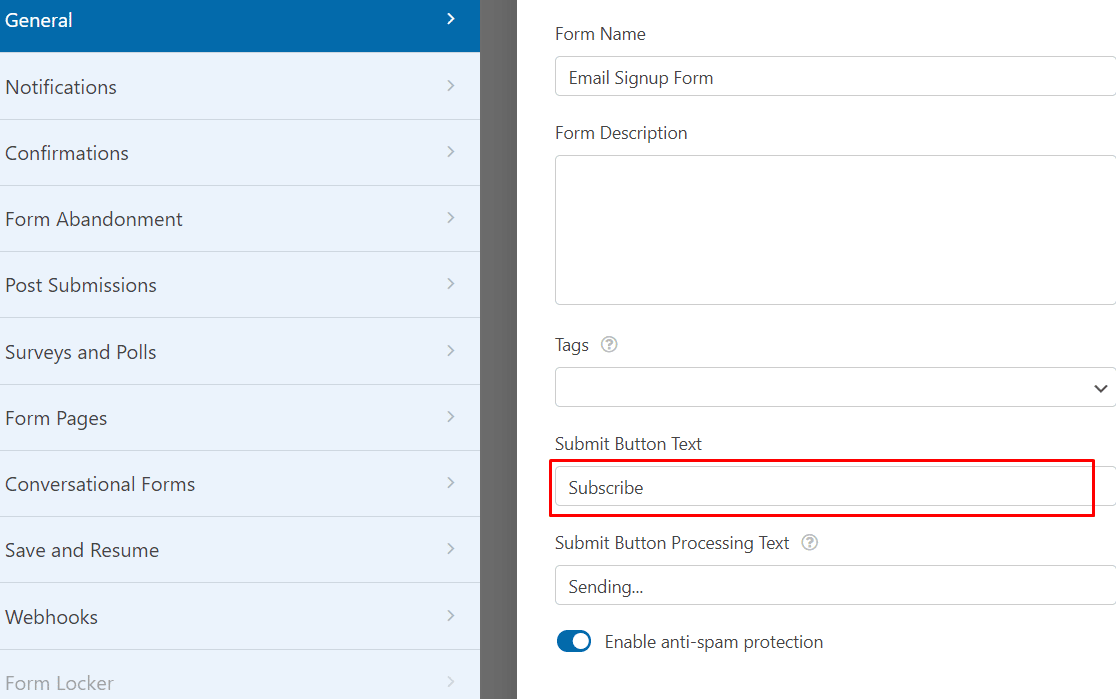
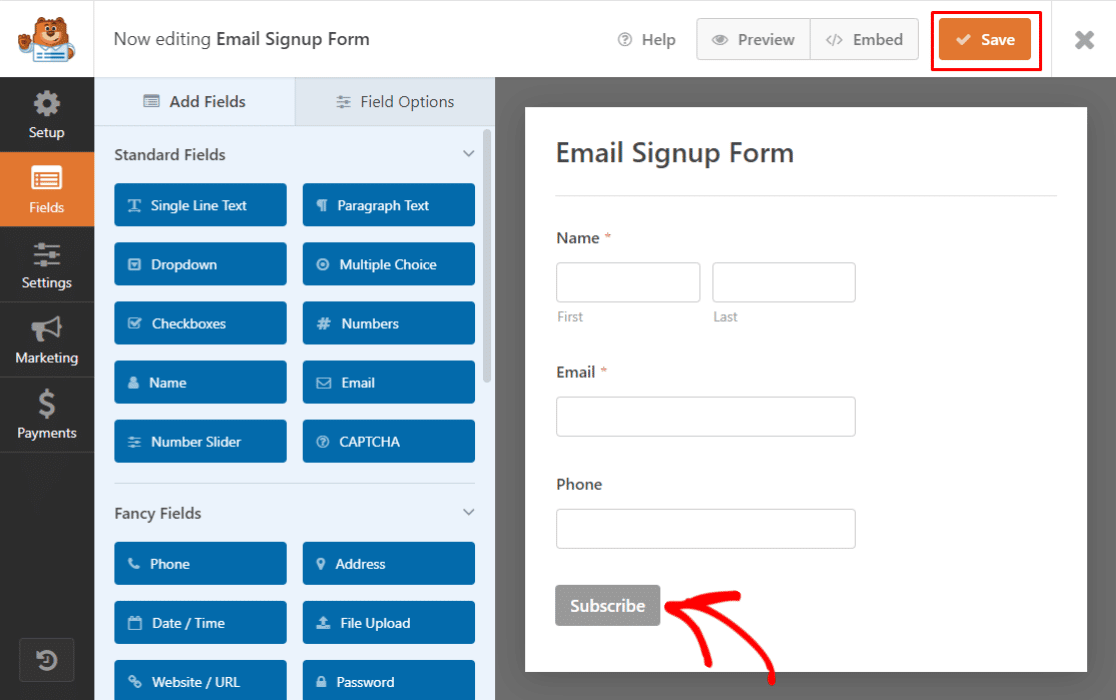
In this form, we will change the submit button text to “Subscribe”.
To do so, click on the Submit button in the form.
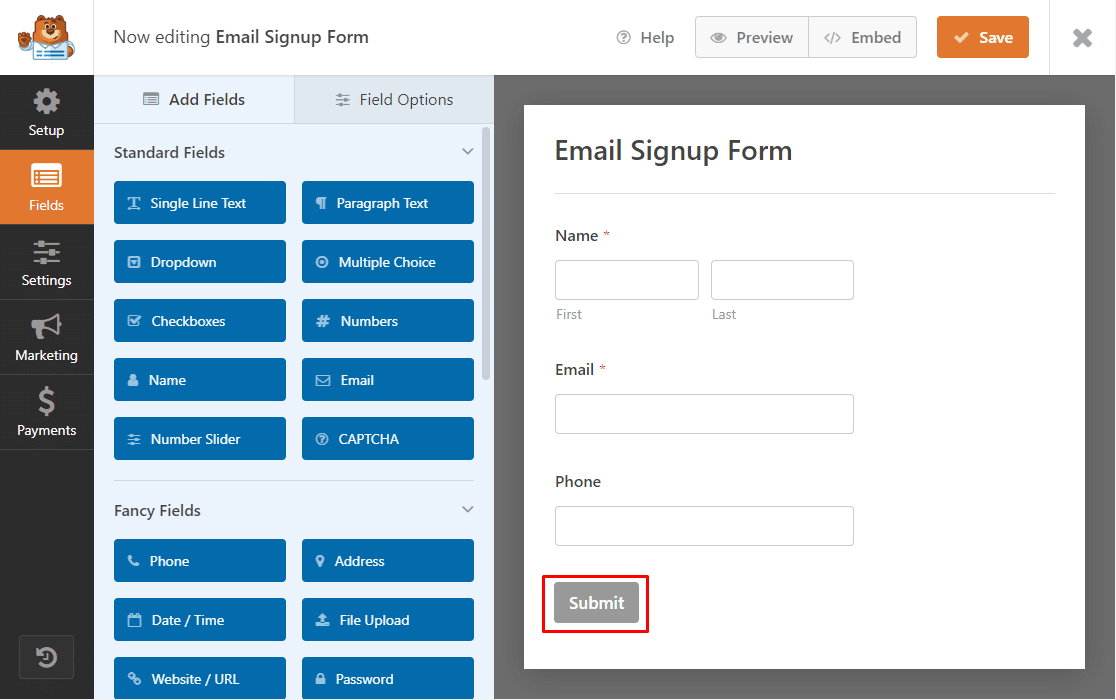
You’ll move to the settings menu, where you can change the submit button text from Submit to Subscribe.
Next, click the Save button on your screen to keep the changes made.
Next, you must connect your email signup (subscription) form to an email service provider addon on WPForms. For this tutorial, we will use MailerLite.
Step 4: Connect the Email Subscription Form to MailerLite
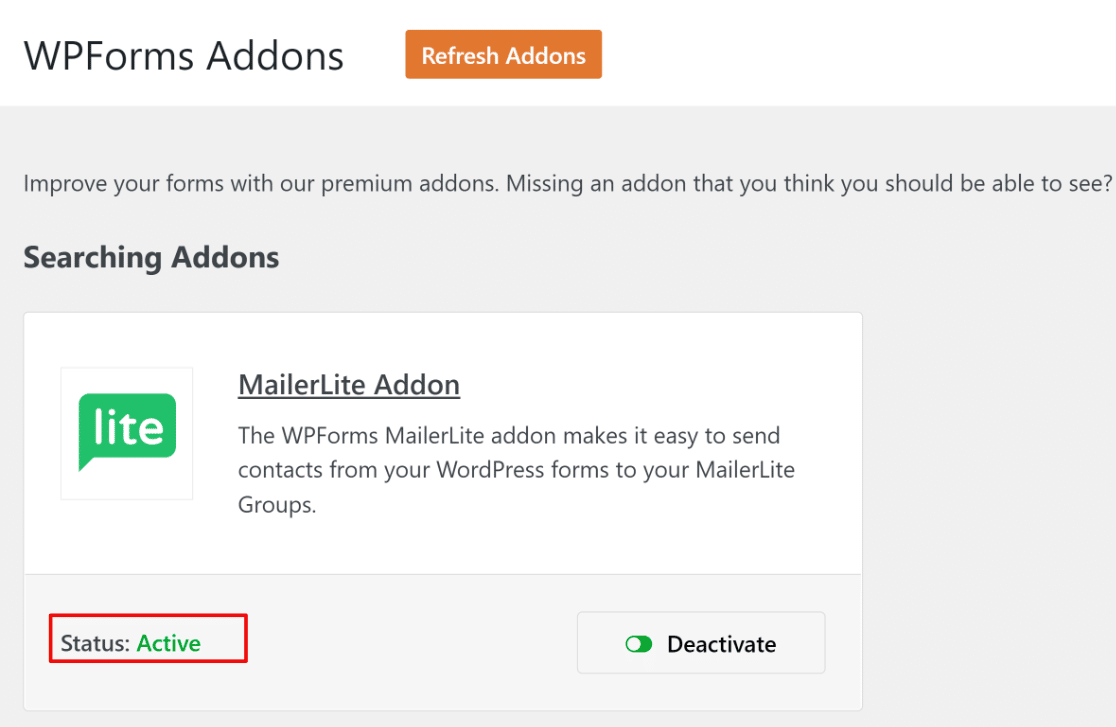
First, you need to activate the WPForms MailerLite addon. Go to WPForms » Addons and find the MailerLite Addon.
Install and activate the MailerLite Addon.
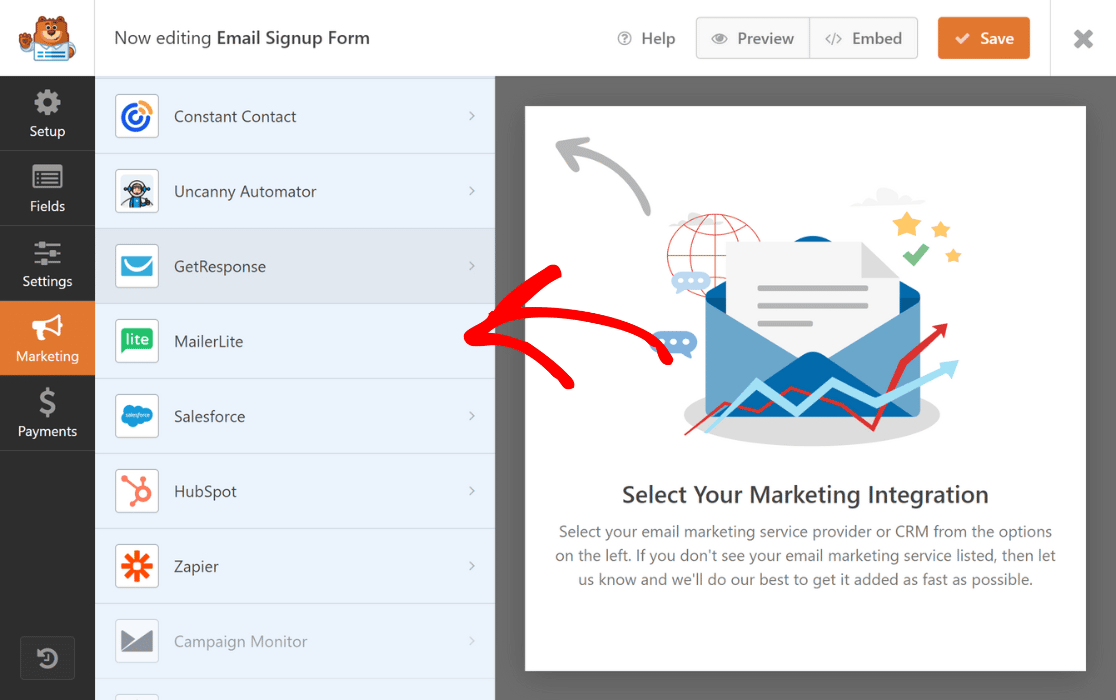
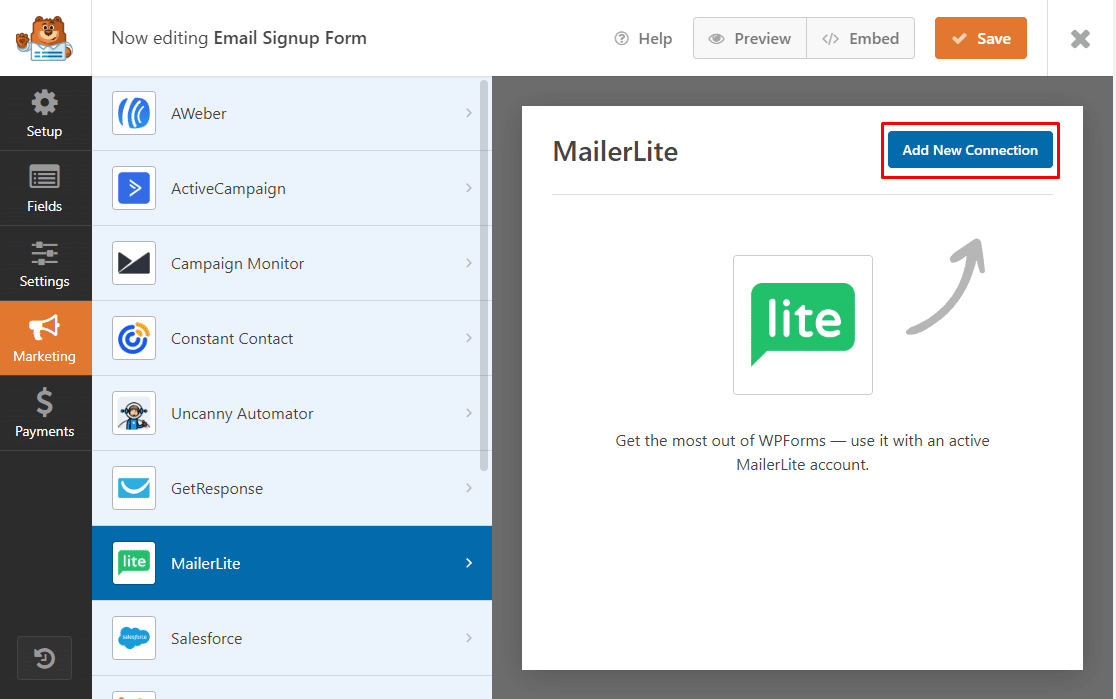
To connect your email subscription form to MailerLite, go to Marketing » MailerLite on your form editor window.
Now, click on Add New Connection.
Next, a box will pop up requesting you to Enter a Connection Nickname.
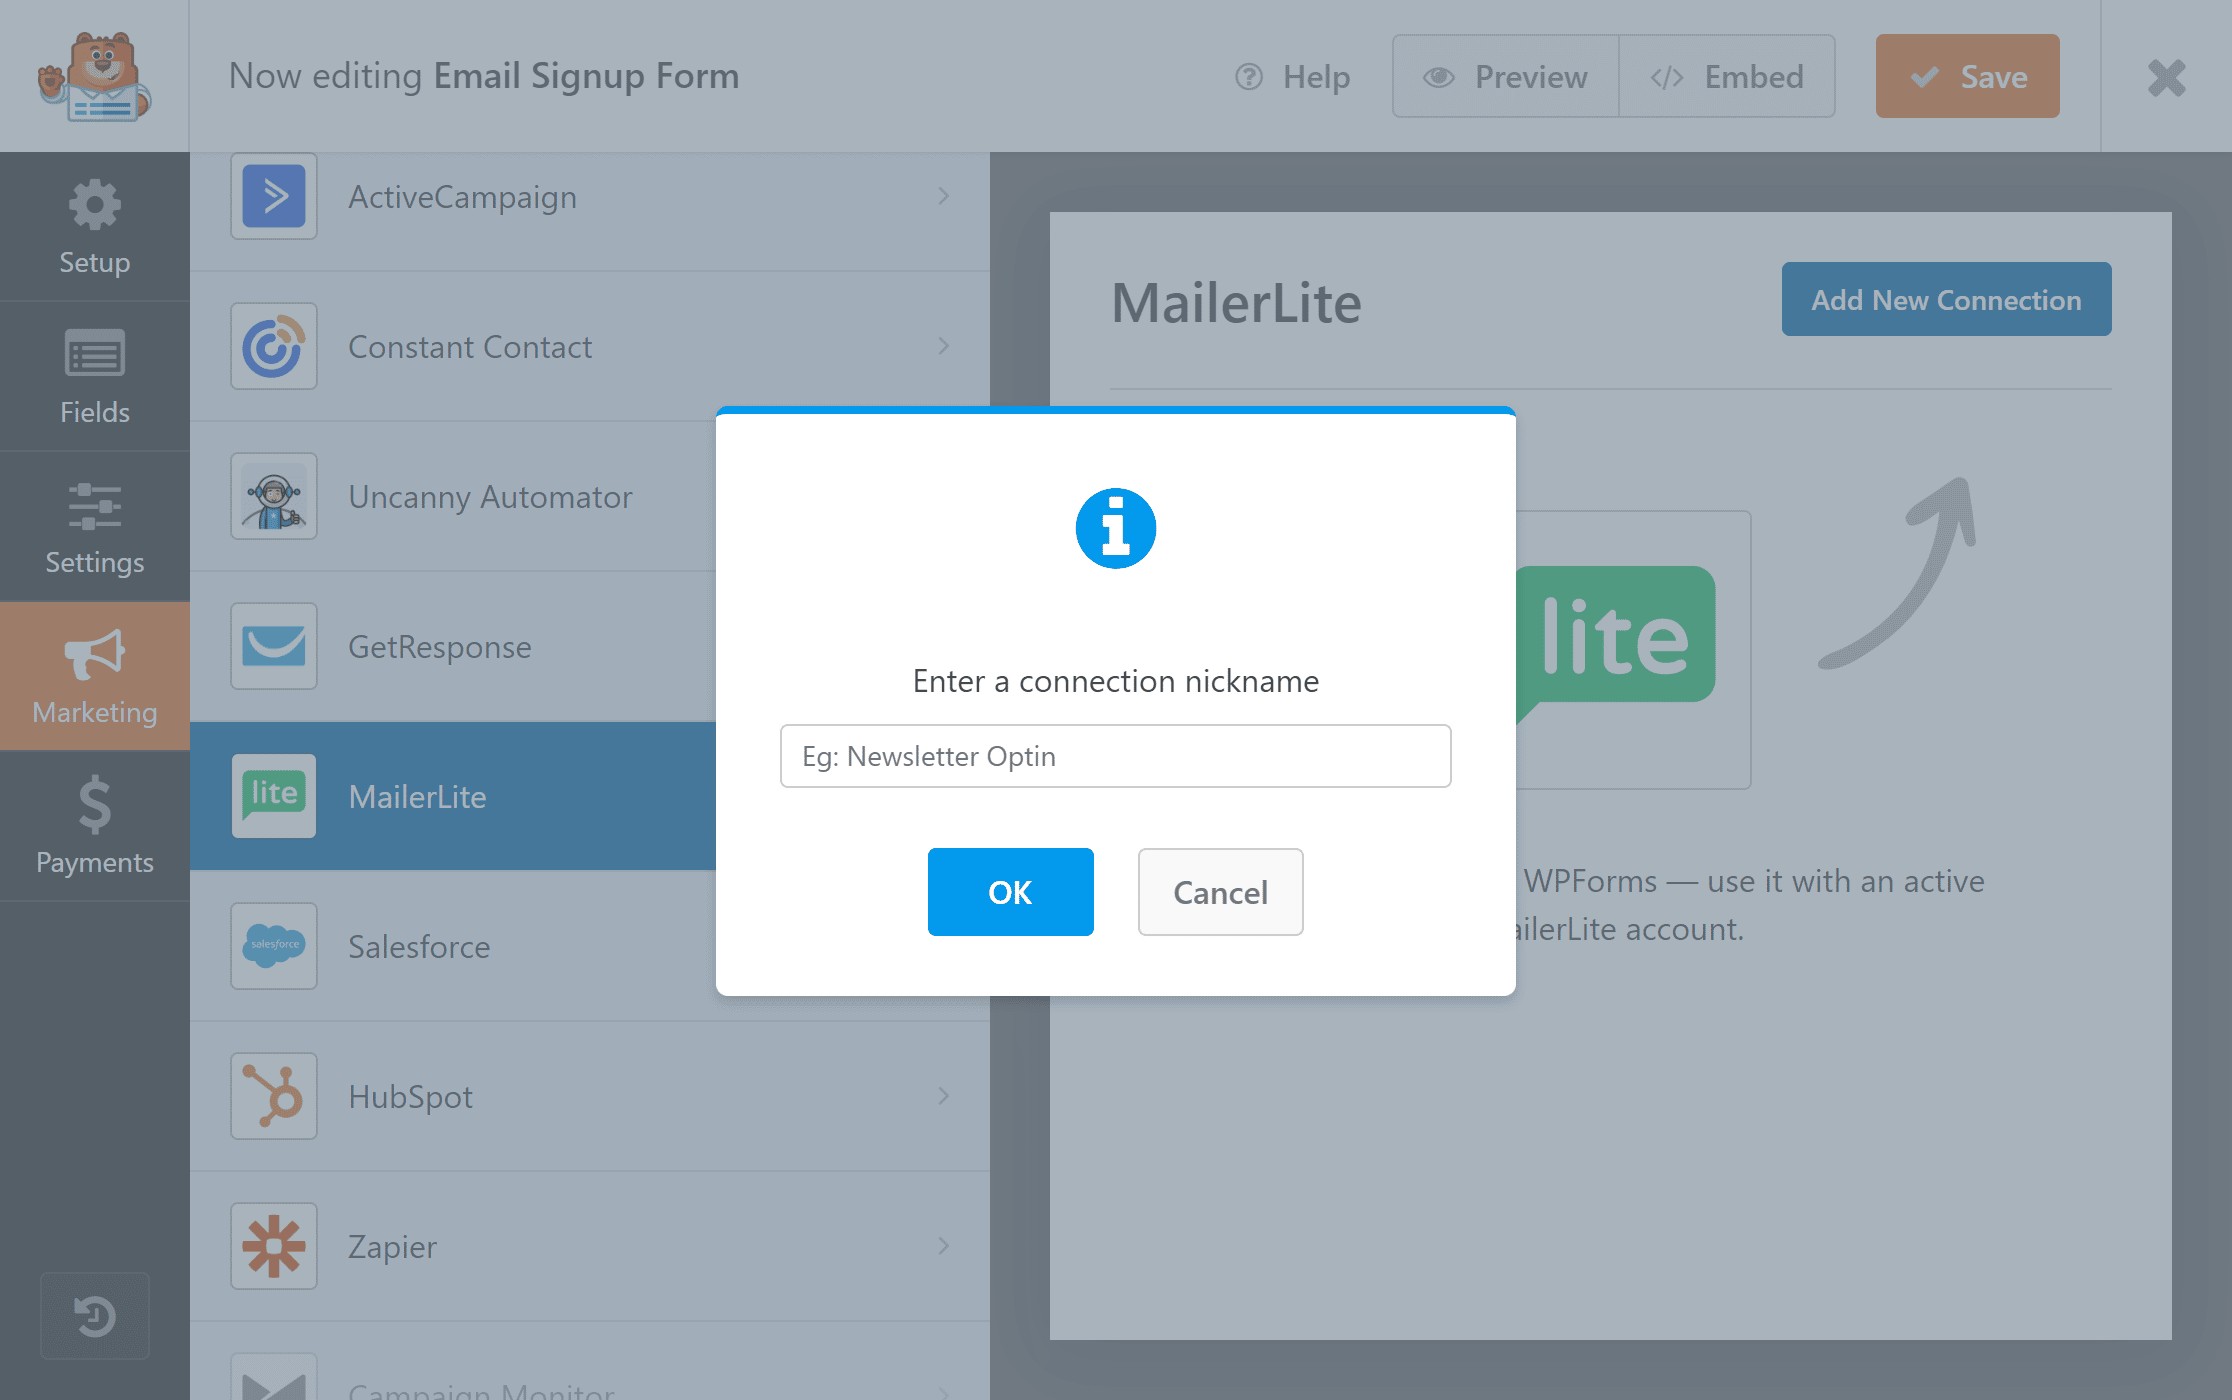
You can create any nickname you like, as this is only for your reference, and click OK.
After you enter the nickname, a new window will appear. Here you can:
- Select your MailerLite account.
- Choose what action you want to perform.
- Move the subscribers to an email list of your choice.
- Add custom fields.
- Enable conditional logic if it applies to your form.
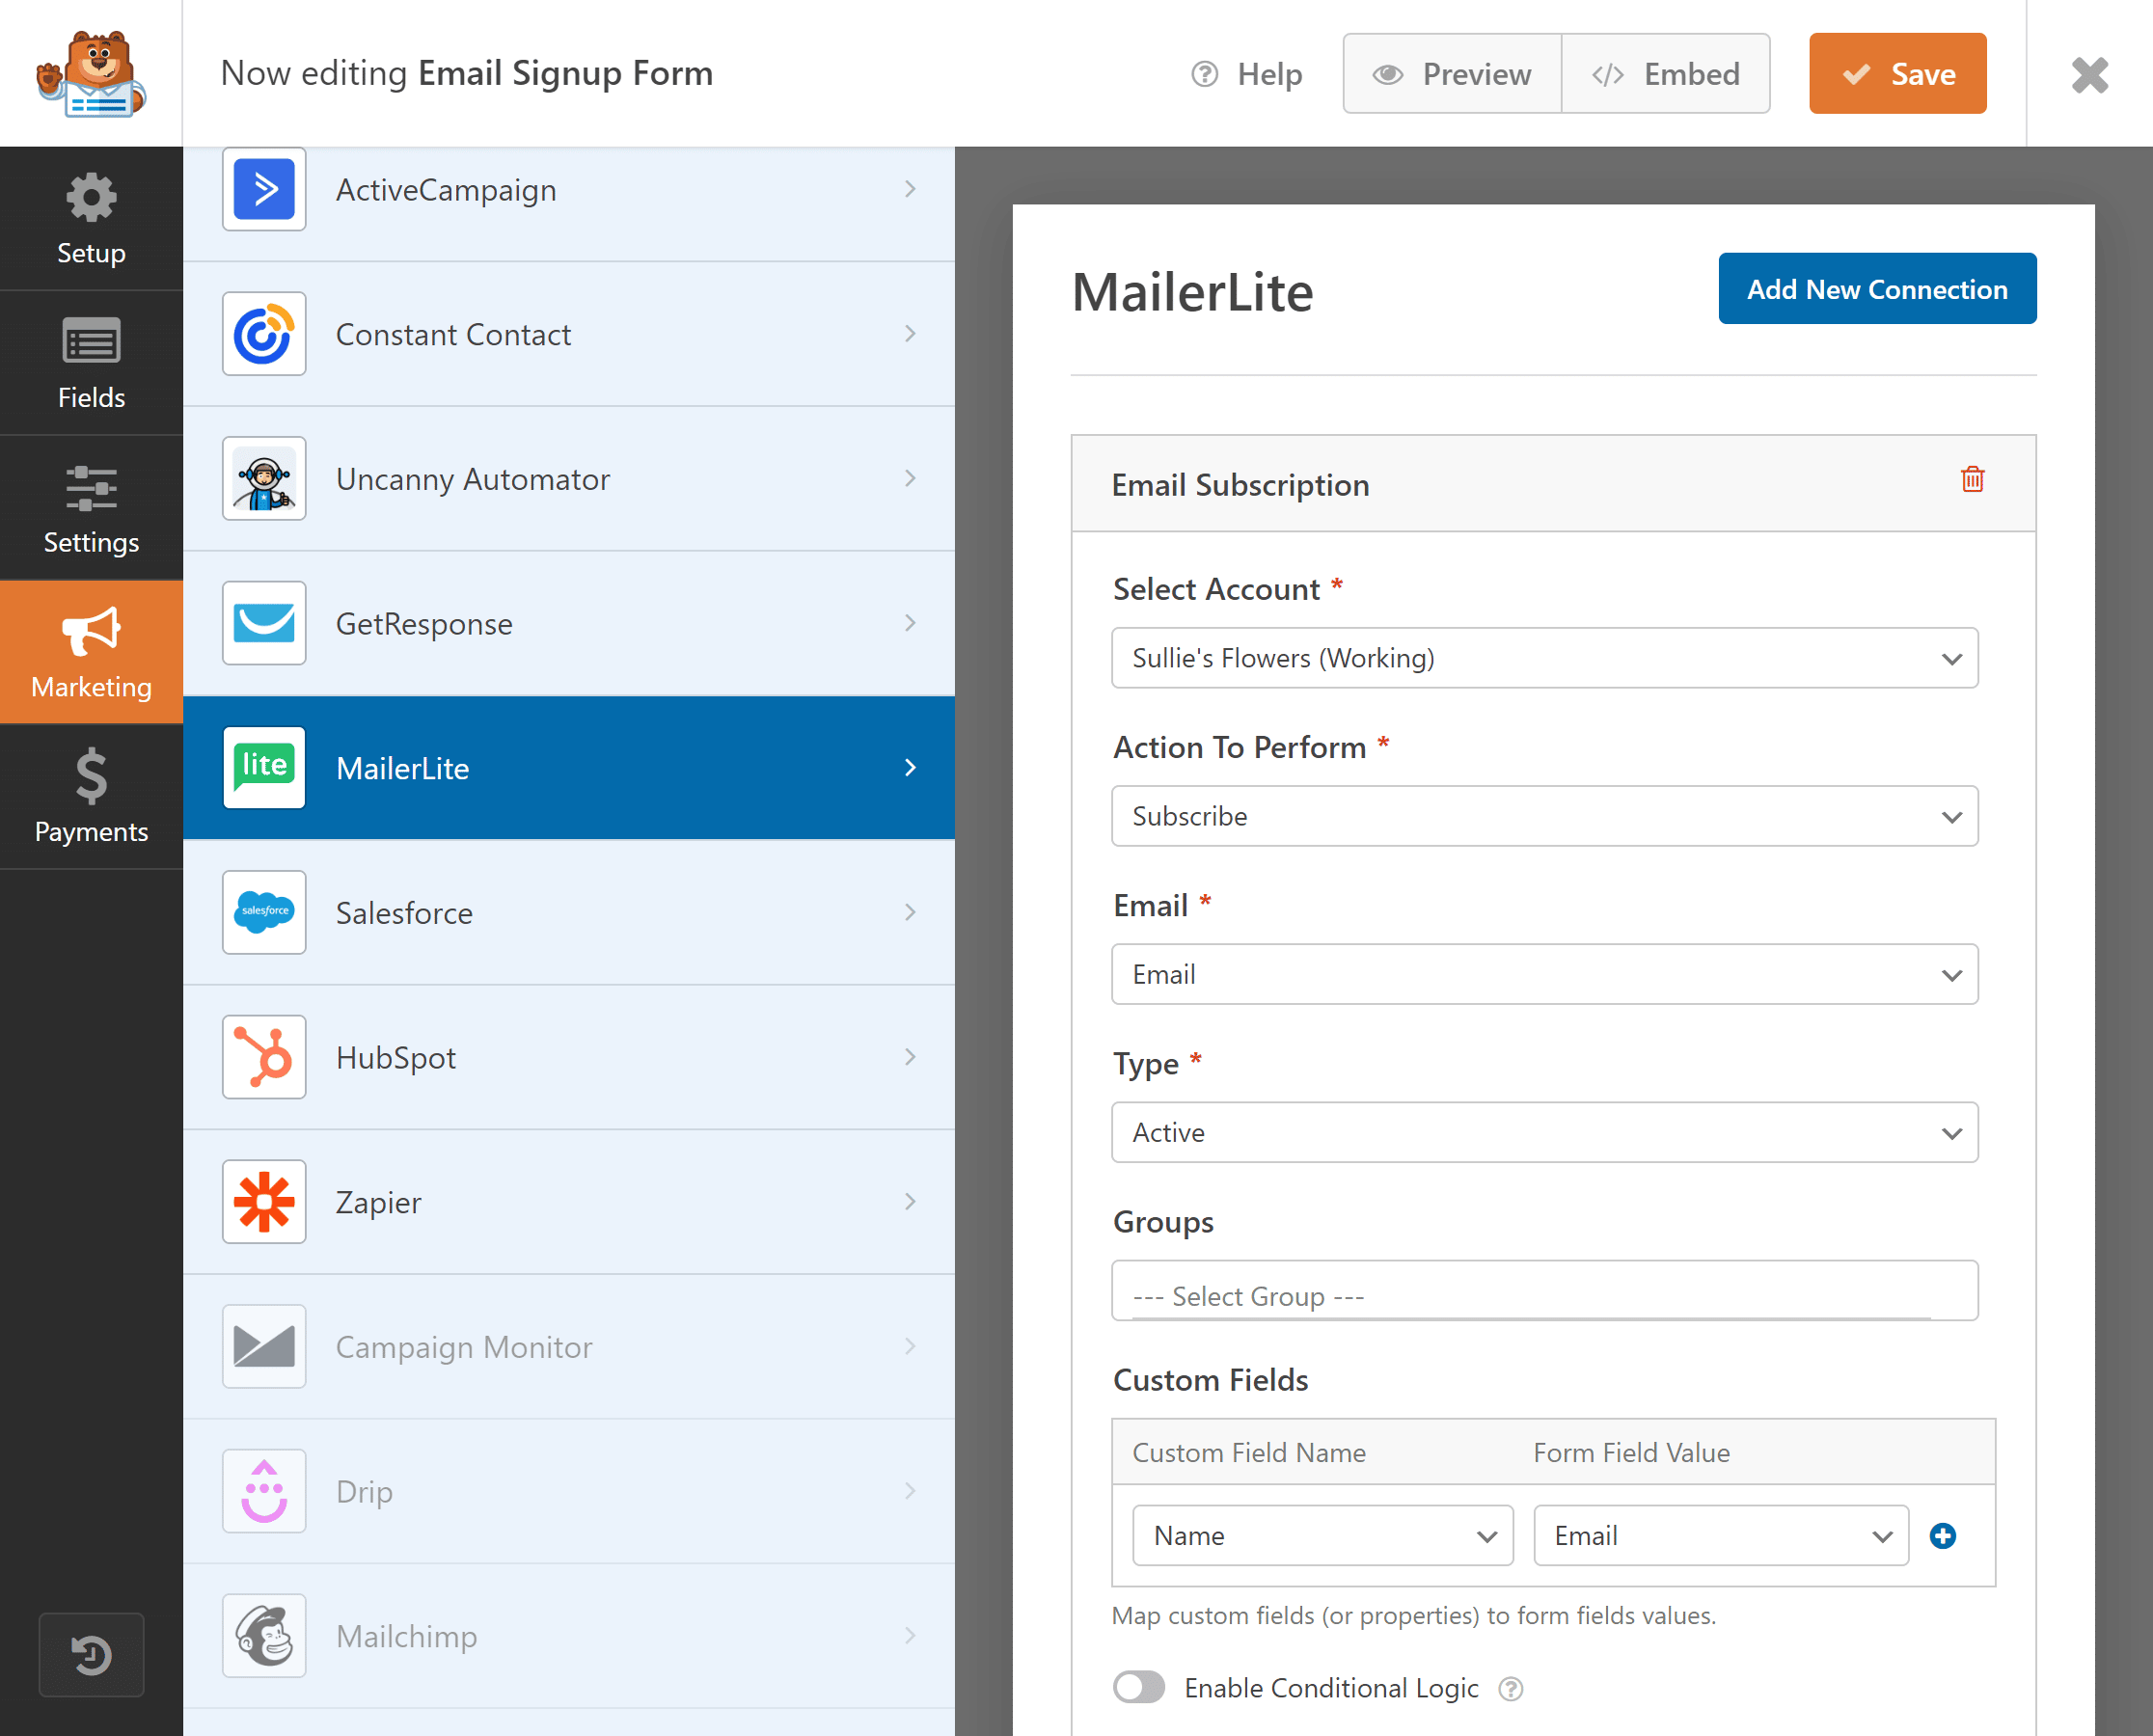
After configuring the settings, click Save.
Next, it is time to add the email subscription form you’ve created to your website.
Step 5: Publish Your Email Subscription Form in WordPress
Now you can add your email subscription form to any location on your WordPress site. You can add it to your blog, landing pages, or as a sidebar widget.
To add forms to your website, you can either embed your form with the WPForms embed wizard or use the WPForms block in the block editor. You don’t need custom code to add forms to your website with WPForms.
To add your email subscription form to any page or post, click on the “+” icon and search for WPForms in the block editor.
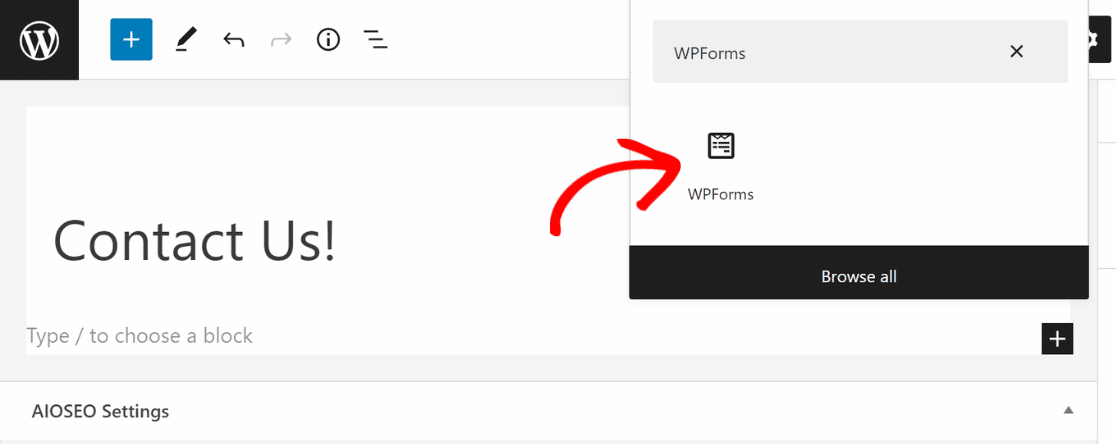
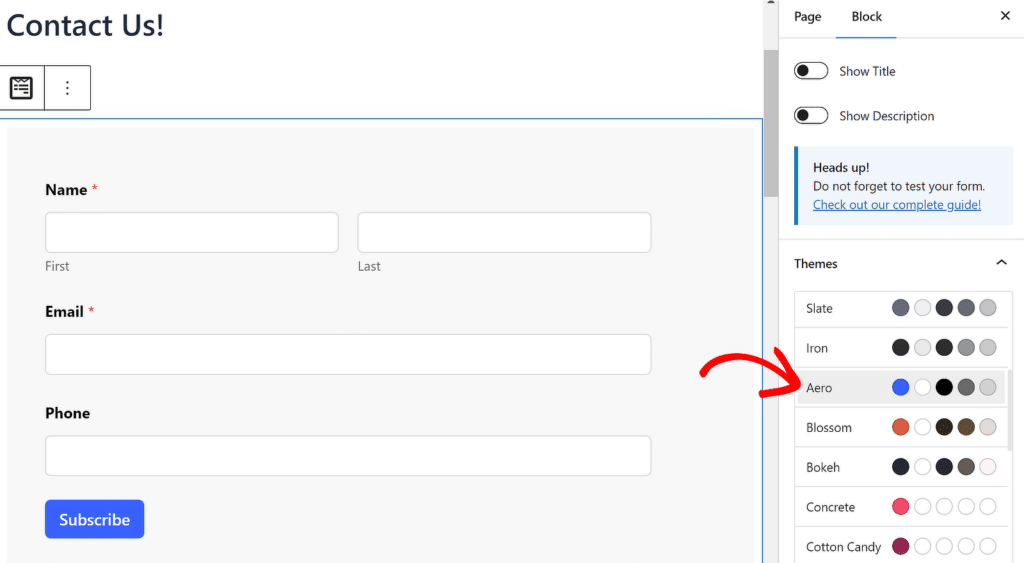
Click on WPForms and choose the email signup form that you created. At this point, you can add pre-made themes to your form to improve its visual styles or adjust the styles yourself using the easy point-and-click controls.
I’m using the Aero theme for this signup form, which enhances the visual appeal by adding a prominent container. You can see our guide on form styles in the WordPress block editor to learn more.
Your email subscription form will look something like this on your website.
That’s it! You have successfully created an email subscription form to collect emails from visitors to your WordPress website.
More Questions on Email Subscription Forms
Can I integrate other email marketing services with WPForms?
Yes, WPForms integrates with various many popular marketing services like Constant Contact, Mailchimp, Active Campaign, ConvertKit, and more.
How do I customize the look and feel of my email subscription form?
The WPForms block editor offers styling options for customizing the look of your form. Choose from professional themes designed to enhance your form’s visual style, or use intuitive options built into the block editor to make custom adjustments to the buttons, field borders, labels, background, and container.
Is it possible to add conditional logic to my email subscription form?
Yes, WPForms allows you to add conditional logic, enabling you to show or hide fields based on user input. However, it’s rare to require conditional logic for field display behavior in a subscription form, since these forms are supposed to be very short and sweet. At the same time, you’ll likely need conditional logic to control which segments of your list a visitor should be added to if you’re offering multiple options to choose from based on user interest.
Next, Engage Your Subscribers With Email Newsletter
You want to engage your leads so that they keep visiting your website and transition into paid customers. Newsletters can help you create a bond with your audience.
If you want to boost conversion and encourage visitors to keep coming back using an email newsletter, read this guide to learn how to create an email newsletter in WordPress.
For more information on email subscriptions, check out these guides:
- How to Create a Mailchimp Subscribe Form in WordPress
- Top WordPress Email Subscription Plugins
- Newsletter Signup Form Tips
Ready to build your form? Get started today with the easiest WordPress form builder plugin. WPForms Pro includes lots of free templates and offers a 14-day money-back guarantee.
Create Your Email Signup Form 📨
Ready to build your form? Get started today with the easiest WordPress form builder plugin. WPForms Pro includes lots of free templates and offers a 14-day money-back guarantee.
If this article helped you out, please follow us on Facebook and Twitter for more free WordPress tutorials and guides.

