Most small businesses make one crucial mistake – they use fairly standard signup forms that look just like every other signup form on the web.
We repeatedly see this pattern whenever we get a chance to check our customers’ forms while addressing their queries.
So we wanted to put together a quick guide to help our readers create impressive signup forms to build your newsletter list.
In this guide, we’re going to walk you through the steps to create your own custom signup form using the most popular page builder tool for WordPress – Elementor.
Create Custom Signup Forms in Elementor
Creating a Custom Signup Form in Elementor
Use the quick links below to immediately jump to any section of the tutorial:
In This Article
Let’s begin.
Step 1: Install Elementor and WPForms
Because the majority of people use Elementor for publishing their pages, we’ll show you how to create custom signup forms using Elementor.
If you don’t already have it, go ahead and install Elementor on your site.
You won’t need a premium Elementor license for this tutorial. Instead, you can use Elementor along with WPForms to build signup forms for free! 😎
If you don’t know how to install plugins, check out this beginner’s guide on plugin installation.
While you can build beautiful-looking custom signup forms using a combination of Elementor and WPForms completely for free, we recommend trying the WPForms Pro license to access some advanced tools to achieve better results.
After you’ve installed both of the plugins, it’s time to begin creating your fully customized signup form!
Step 2: Create or Edit a Page with Elementor
You can add a signup form to an existing page or a brand new page. Usually, a newsletter form is embedded as one of the several sections in a larger landing page. But we’ll be creating a new page containing only a signup form for simplicity’s sake.
To start, open your WordPress dashboard and click on Pages » Add New Page.

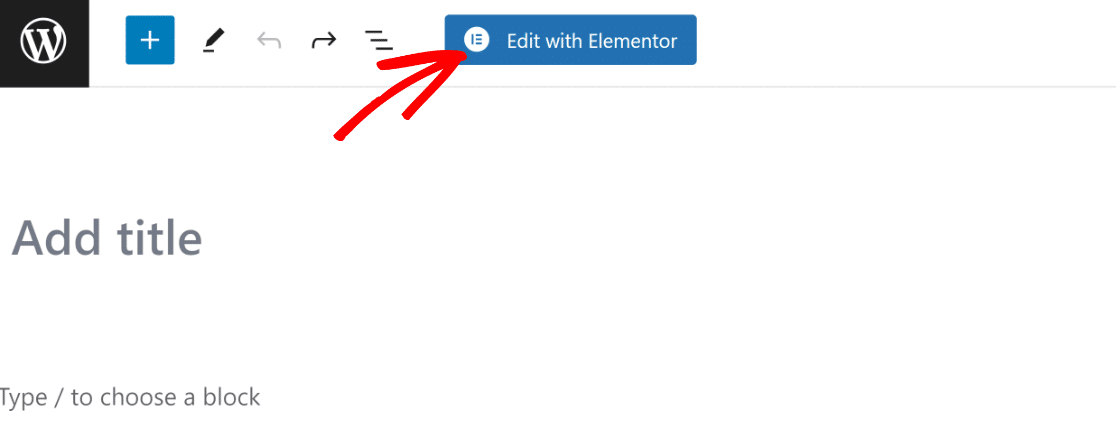
Once you’re inside the WordPress block editor, click on the Edit with Elementor button at the top.
After clicking the button, the Elementor editor will load in a few seconds. You can build a complete landing page using the drag and drop editor.
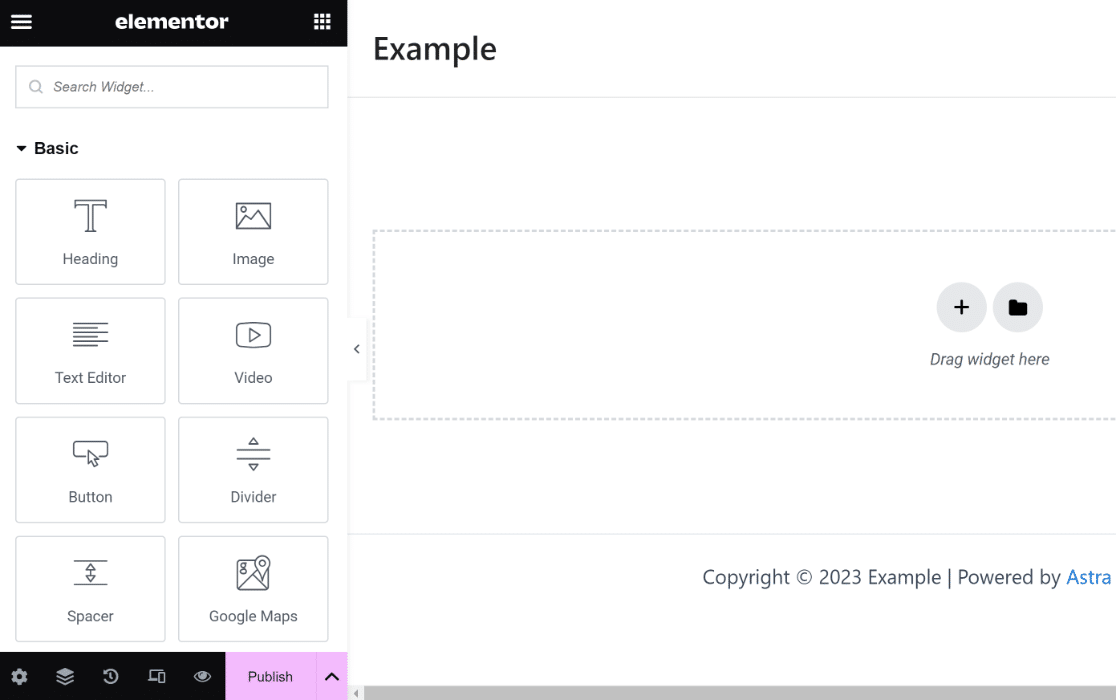
In the next step, we’ll be using the WPForms widget to create a custom signup form.
Step 3: Create a New Signup Form
Because we just need to add a custom signup form here, let’s look for the WPForms widget and drag it to the area on the right-hand side.
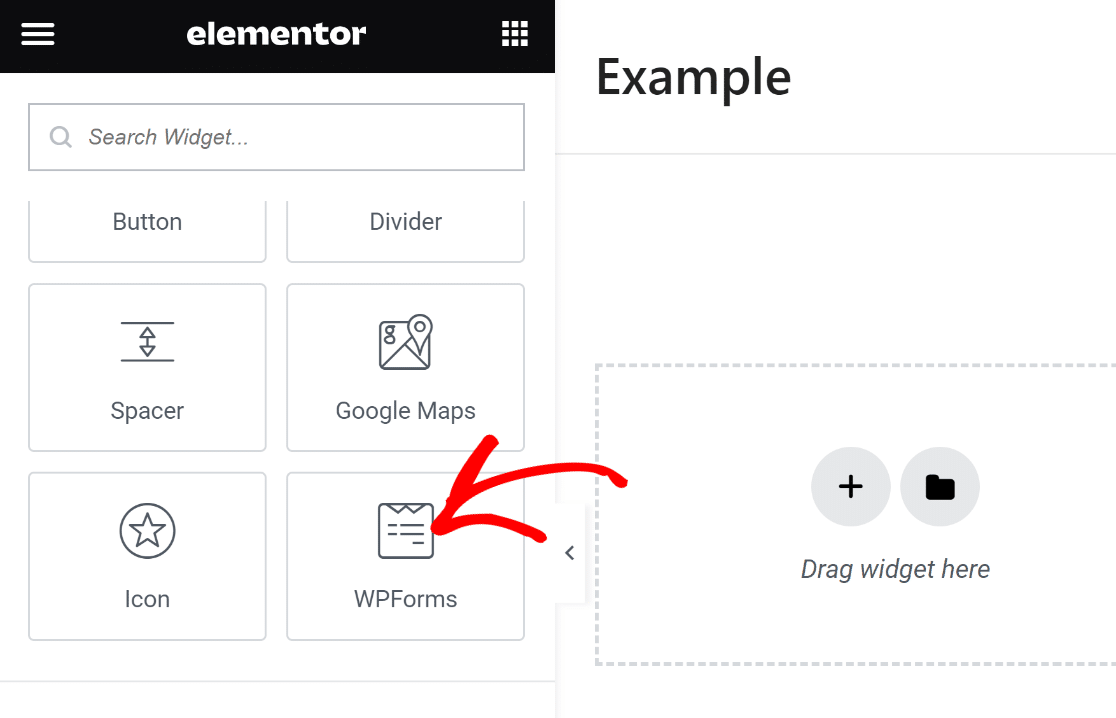
When you’ve inserted the WPForms widget into your page, you can either select any saved form you made with WPForms or create a new one.
We’ll create a new signup form by clicking the + New Form button on the left-hand pane.
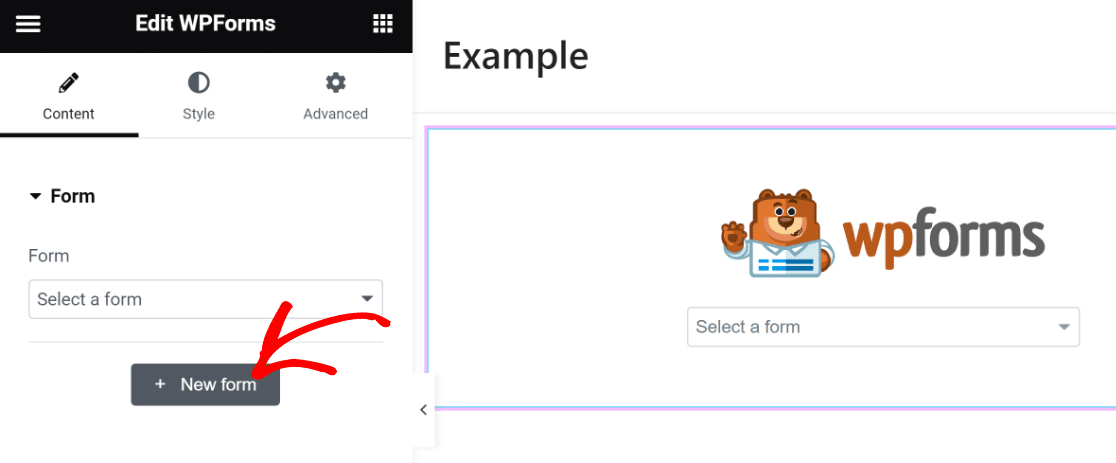
At this point, the WPForms form builder will start loading as an overlay. Here, you can create the signup form you need to embed on your page.
Start by naming your form. This is helpful so you can reference and find it later in your WordPress dashboard.

Next, scroll down and use the search bar under the template selection pane to find a suitable template. We’ll be using the Newsletter Signup Form template for this tutorial.
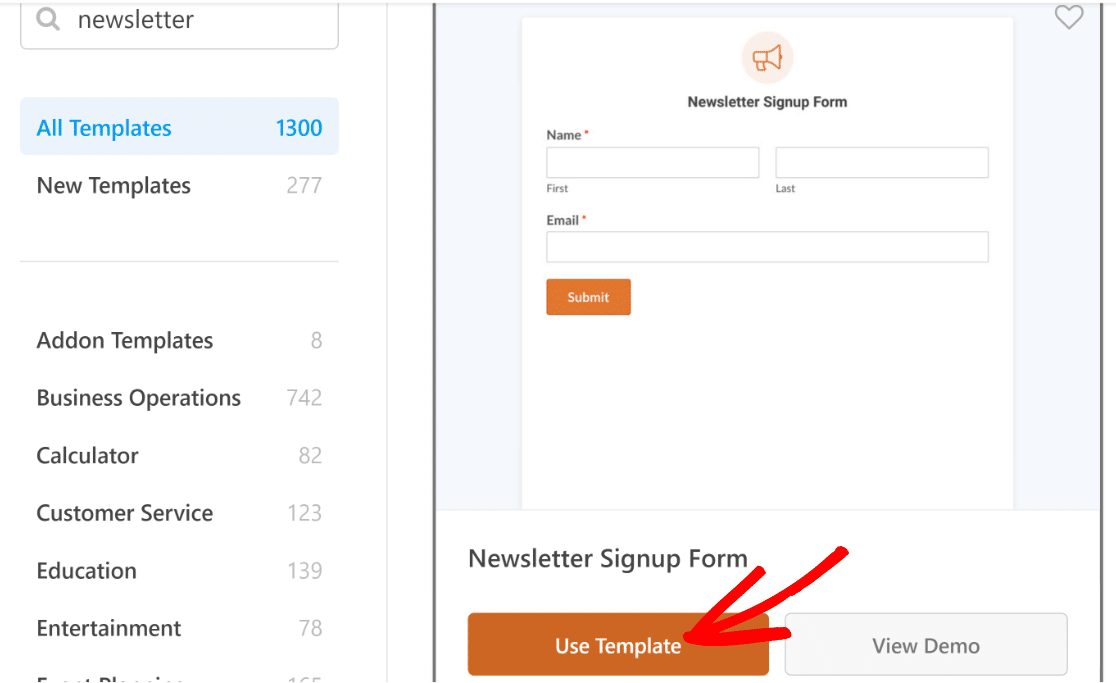
After selecting the template, the form builder will load on your screen. You’ll notice that this template already includes the Name and Email fields, which is basically all you need for newsletter signup.
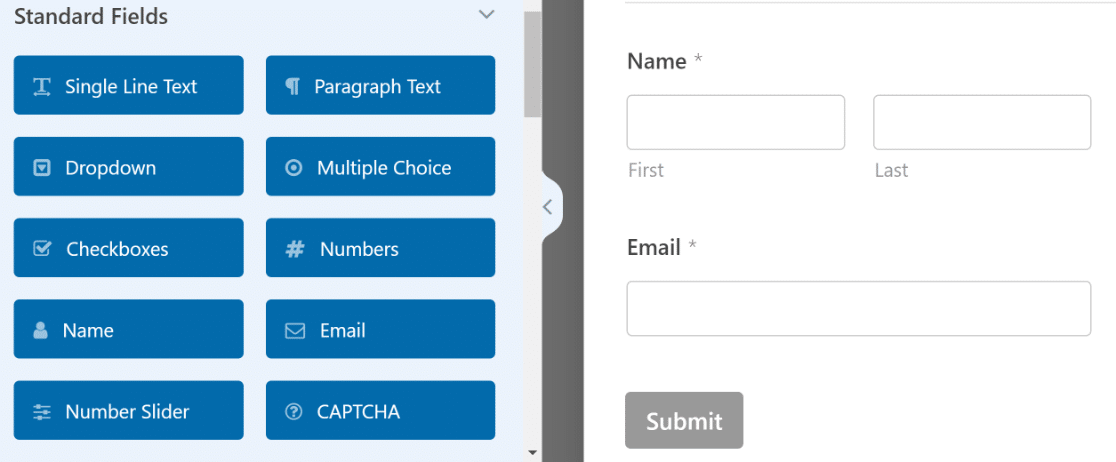
But the fun doesn’t stop there! We can take this form to the next level and give it a real glow up.
One of the ways we can do that is by adding a fun heading that invites more people to sign up.
You can do this using the Content field available in WPForms Pro. We’ll insert the Content field at the top of the form.
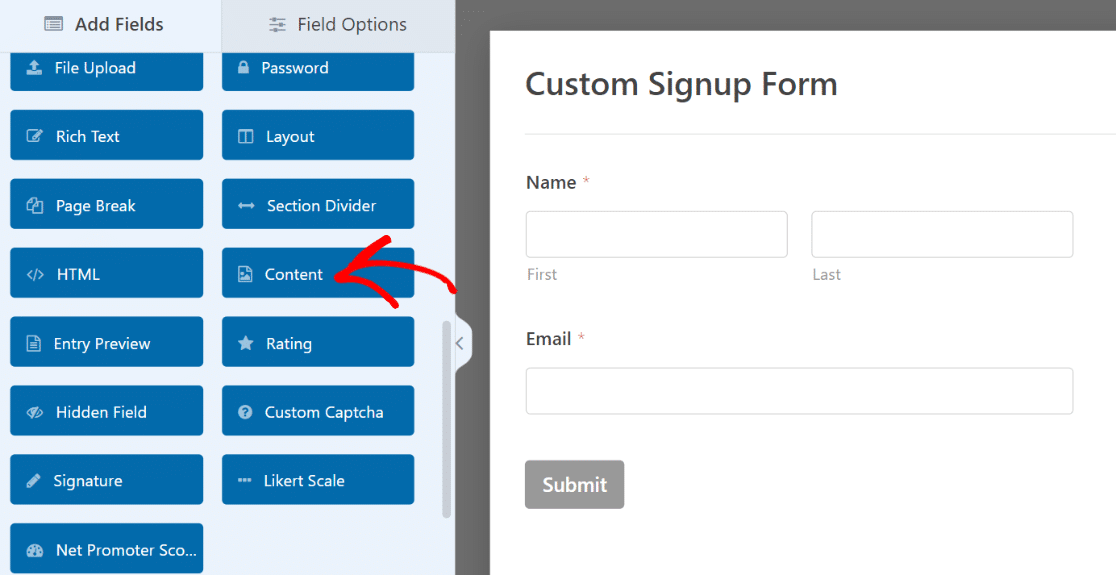
After adding the field, click on it to open its associated Field Options on the left-hand pane.
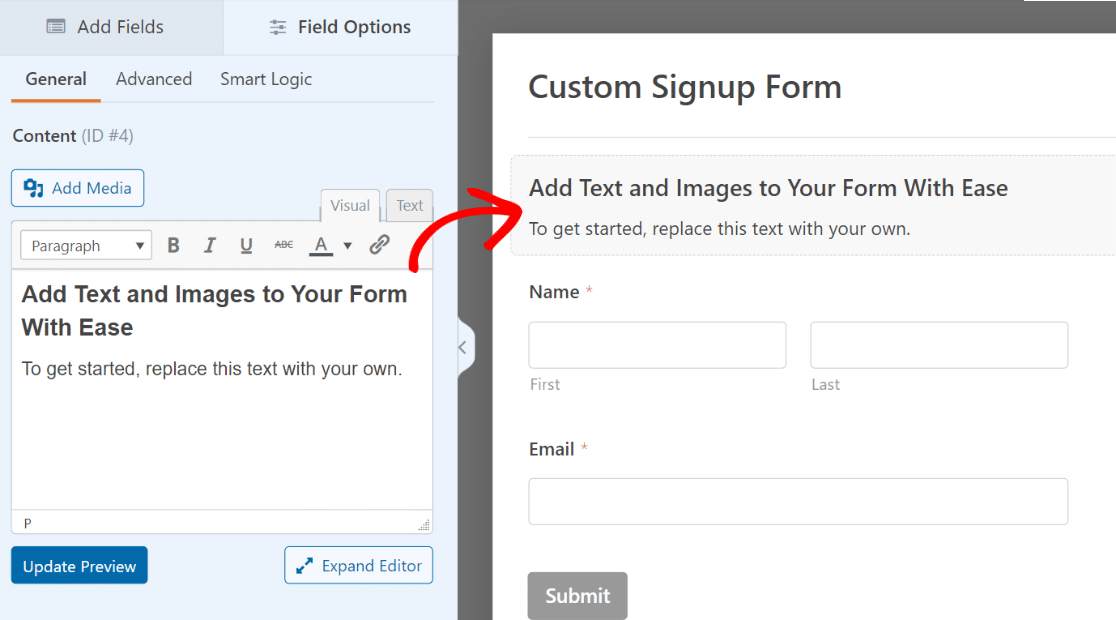
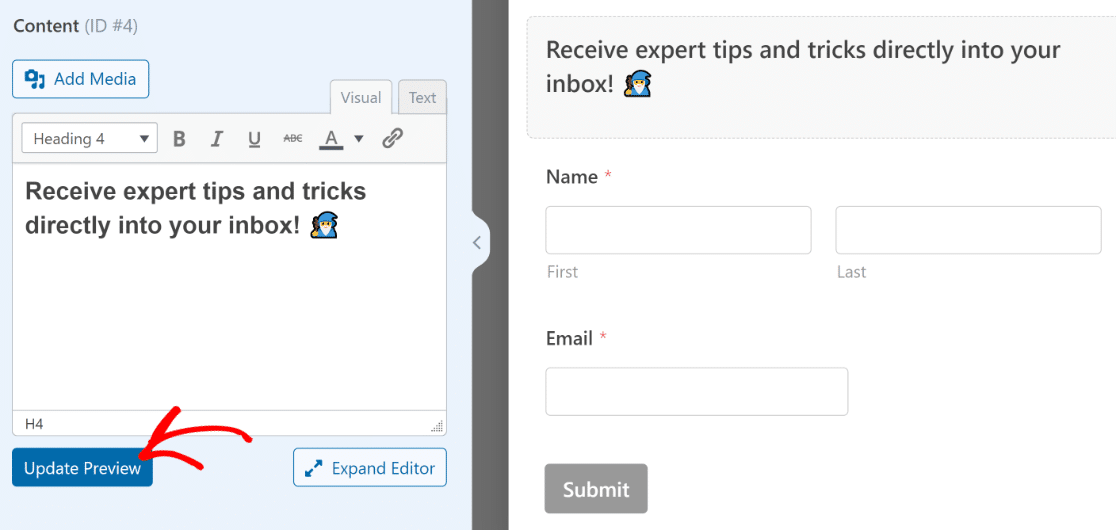
The text editor on the left-hand pane lets you add any piece of text without any code. We’ll add some text and format it as Heading 4. Let’s also add an emoji to make the text stand out more! 🕺
Make sure to press the Update Preview button under the editor to see the changes take place on your form on the right.
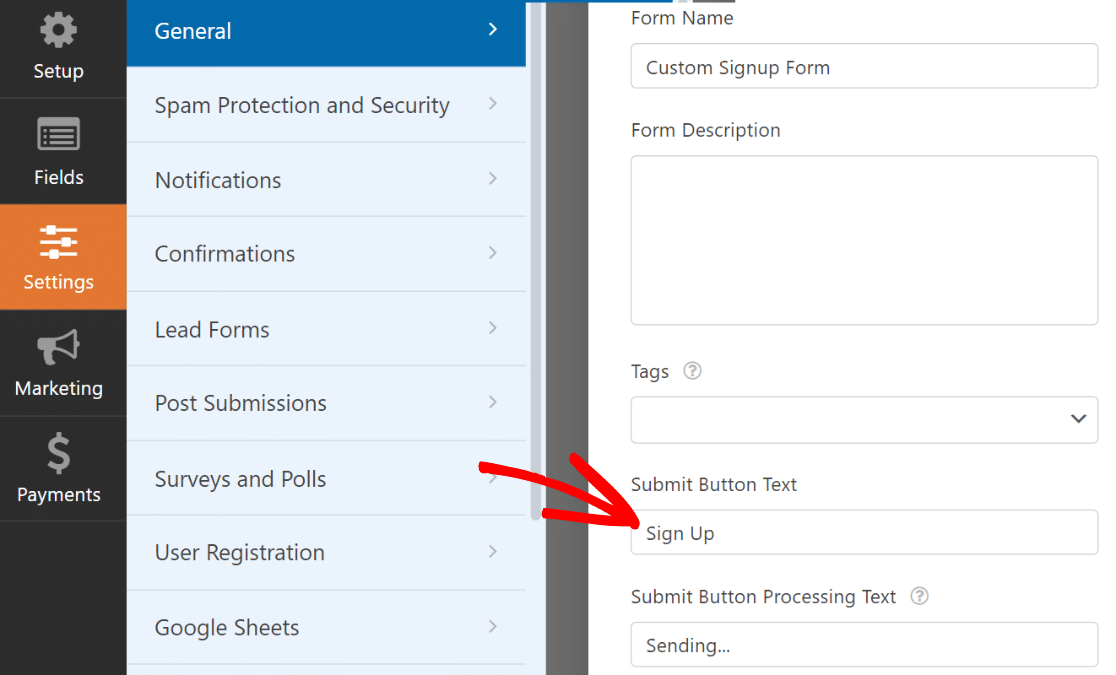
And while we’re at it, let’s also change the submit button text and make it more relevant to the nature of the form.
From the sidebar in the form builder, click Settings » General. Scroll down until you find the Submit Button Text field. You can replace the default text simply by typing in here.
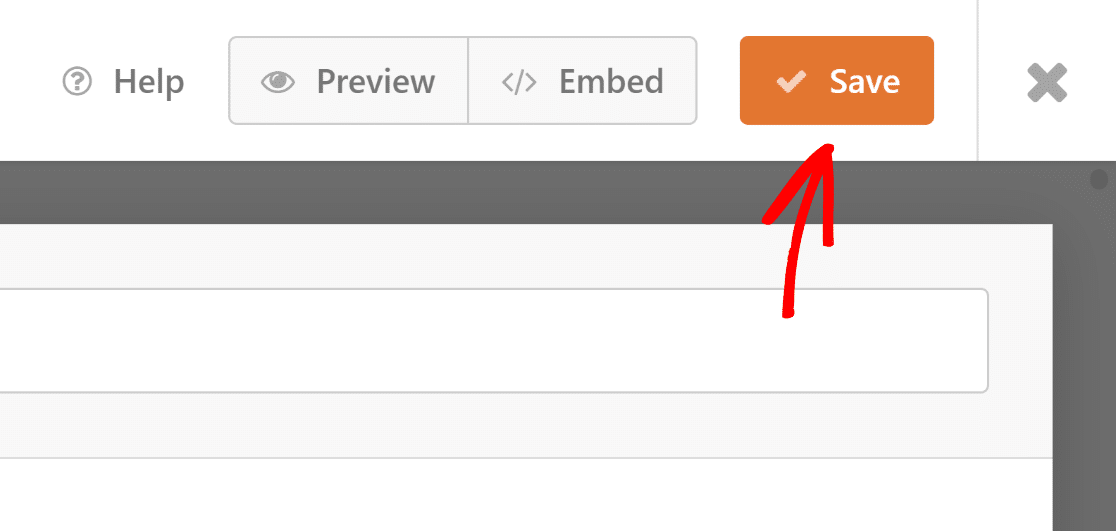
Great! The form is already shaping up nicely. This is a good time to save the form by pressing Save at the top.
But a newsletter signup form would be meaningless without being integrated with your email marketing tool.
In the next step, we’ll show you integrate your form with your marketing app so new subscribers are automatically copied into your subscriber list.
Step 4: Connect Signup Form with a Marketing Platform
WPForms supports various marketing integrations starting from Plus and above plans. If you’re using WPForms Lite, you can still access the Constant Contact integration for free.
For this example, we’ll quickly show you how to connect your signup form with Brevo.
Simply go to the Marketing tab on the sidebar.
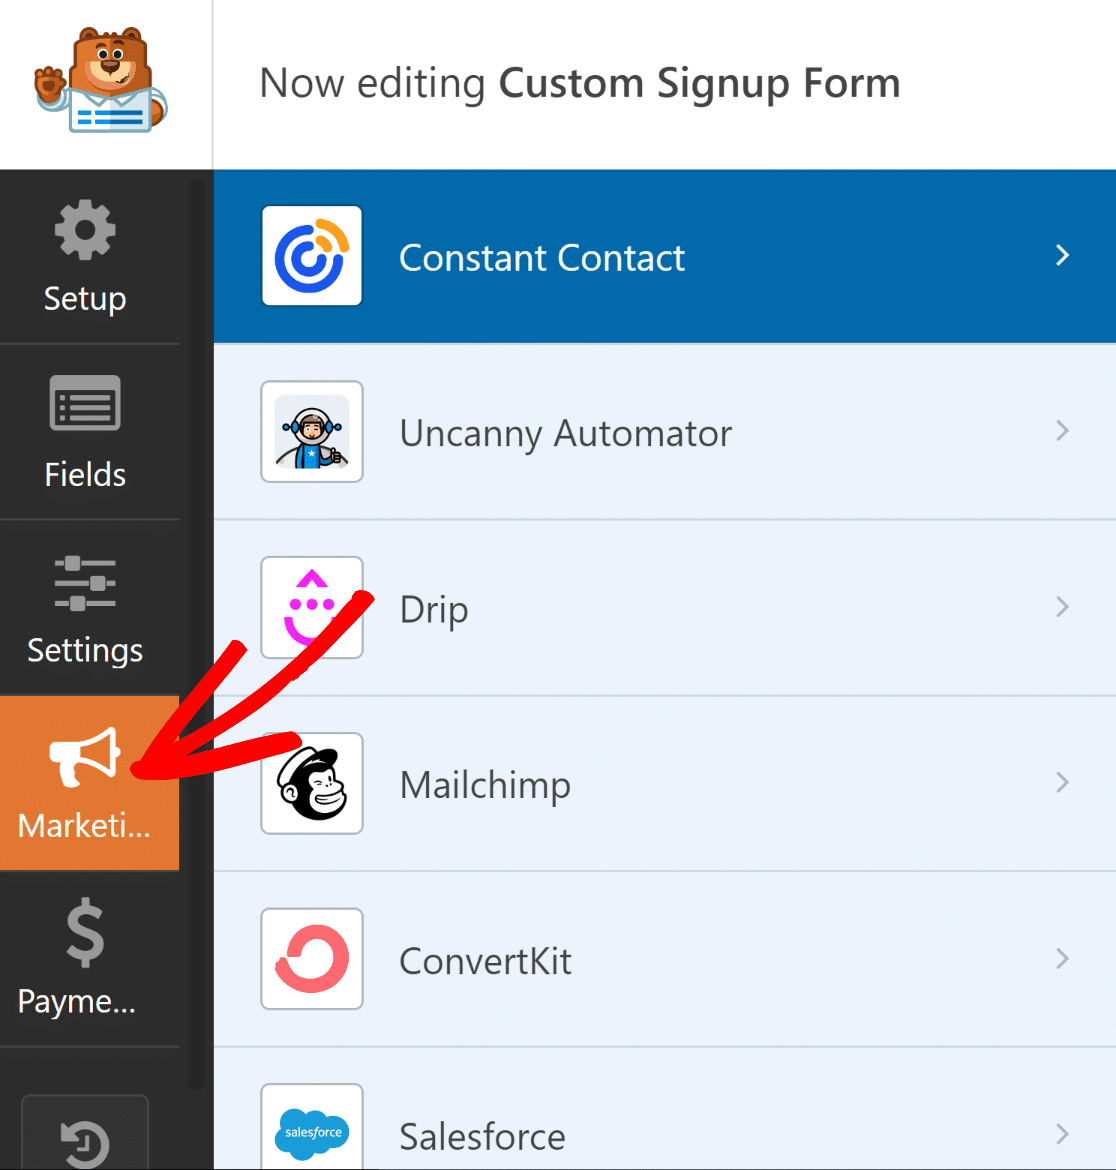
Then, select the service you want to connect your form with. With the exception of Constant Contact, all the supported marketing integrations require you to install the appropriate addon first.
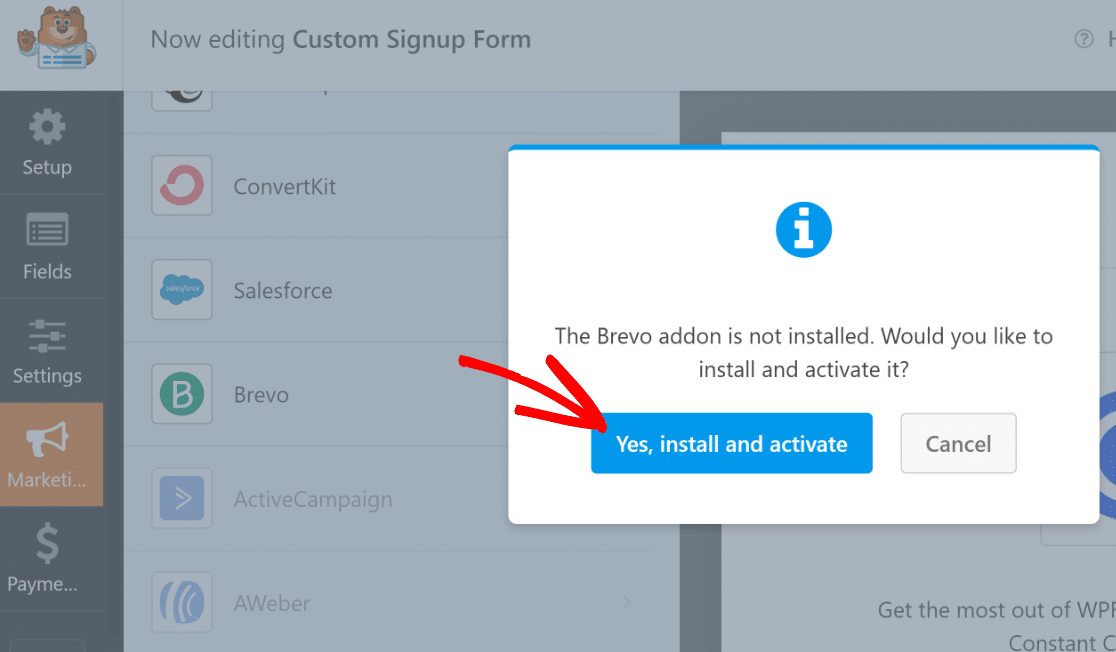
If you don’t already have the addon, WPForms will install it for you when you click it.
In this case, we’re using Brevo. Clicking on Brevo inside the Marketing tab, we got a prompt for installing it. After we pressed Yes, install and activate, it only took about 5 seconds for the Brevo addon to be installed and ready.
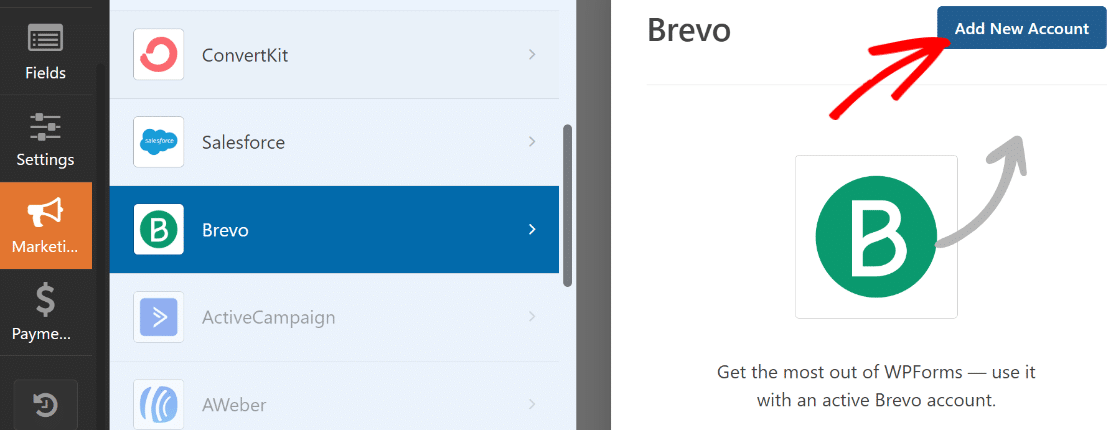
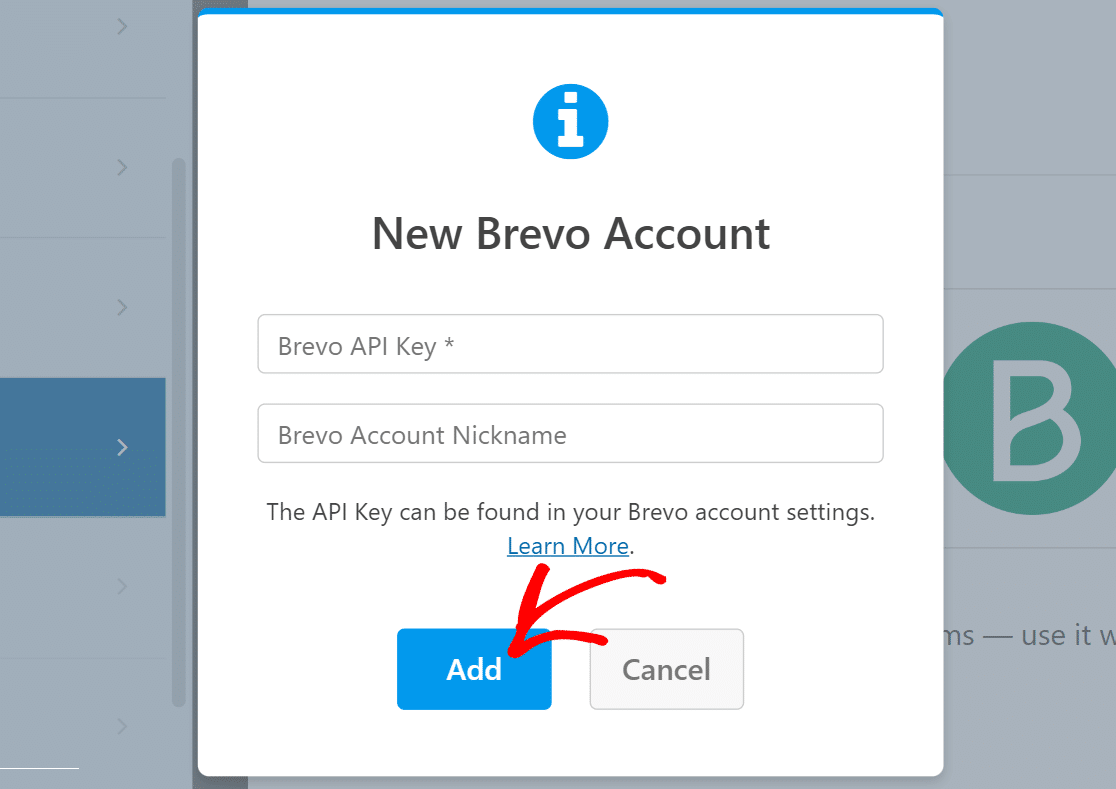
Next, with Brevo selected on the left-hand pane, click on the Add New Account on the top-right.
Now, simply enter your Brevo API Key and account nickname. If you need more help with finding your Brevo API key, see our Brevo addon doc for details.
After entering the required information, click Add.
Once you’re connected with your Brevo account, a new list of settings will populate on the right-hand pane.
Go ahead and use the dropdown fields to configure how your form should work with your Brevo account. You can set things like the action to perform in Brevo when the form is submitted, the list where new subscribers should be added or removed, mapping the email fields, and more.
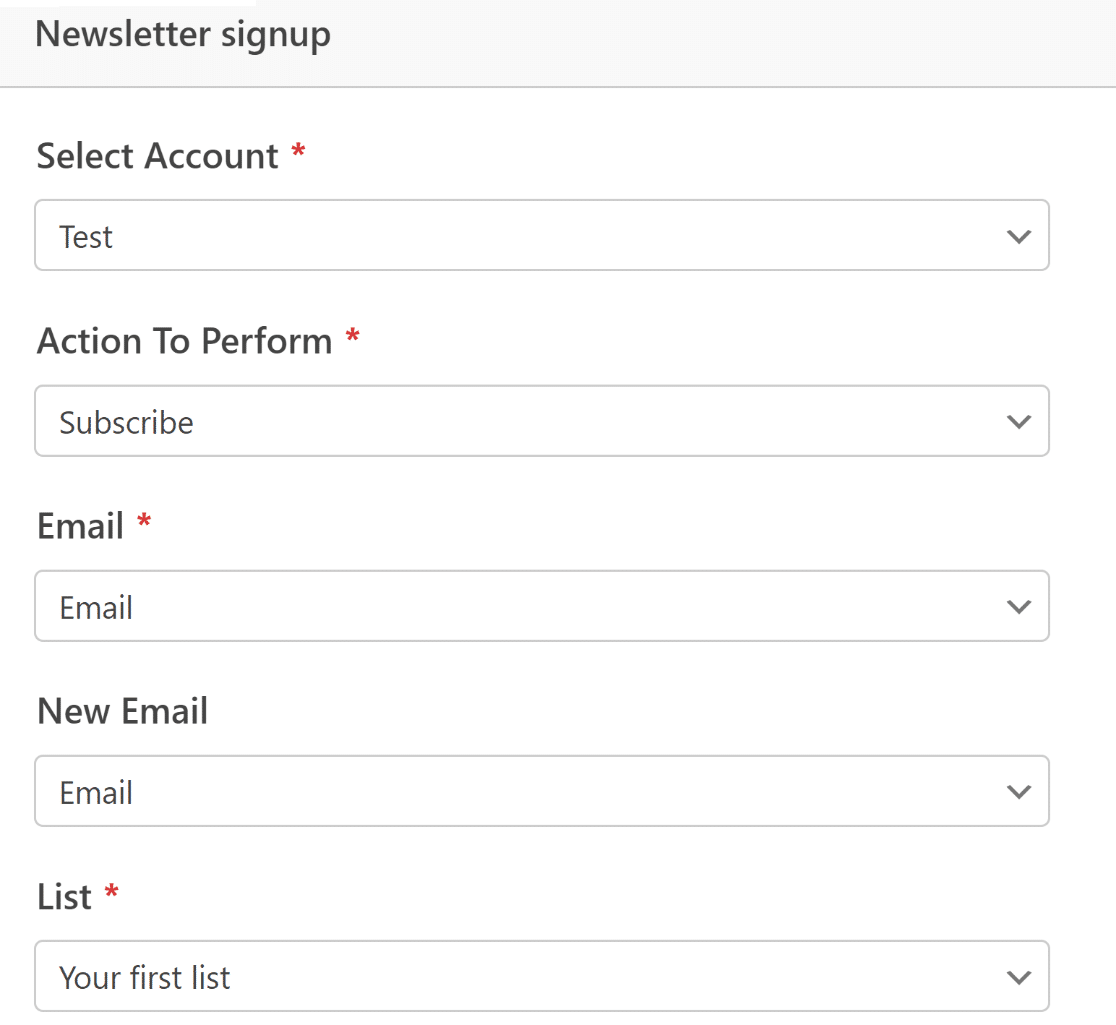
When you’re done, make sure to press Save at the top.
The marketing integration is now complete. That was easy, wasn’t it!?
Step 5: Style Your Signup Form and Publish
At this point, we’re done with setting up the required functionalities for the signup form. But as we emphasized at the beginning of this tutorial, an impactful form needs to be more than just functional – it also needs to be visually impressive.
While we’ve already made our form much more exciting by adding some text and emojis with the Content field, we can go even further with the combined power of WPForms and Elementor.
After your form is ready, simply exit WPForms by pressing the cross button. You should now have the Elementor editor with your newly created form embedded as a widget.
Click on the form and then select the Styles tab located on the left-hand pane.
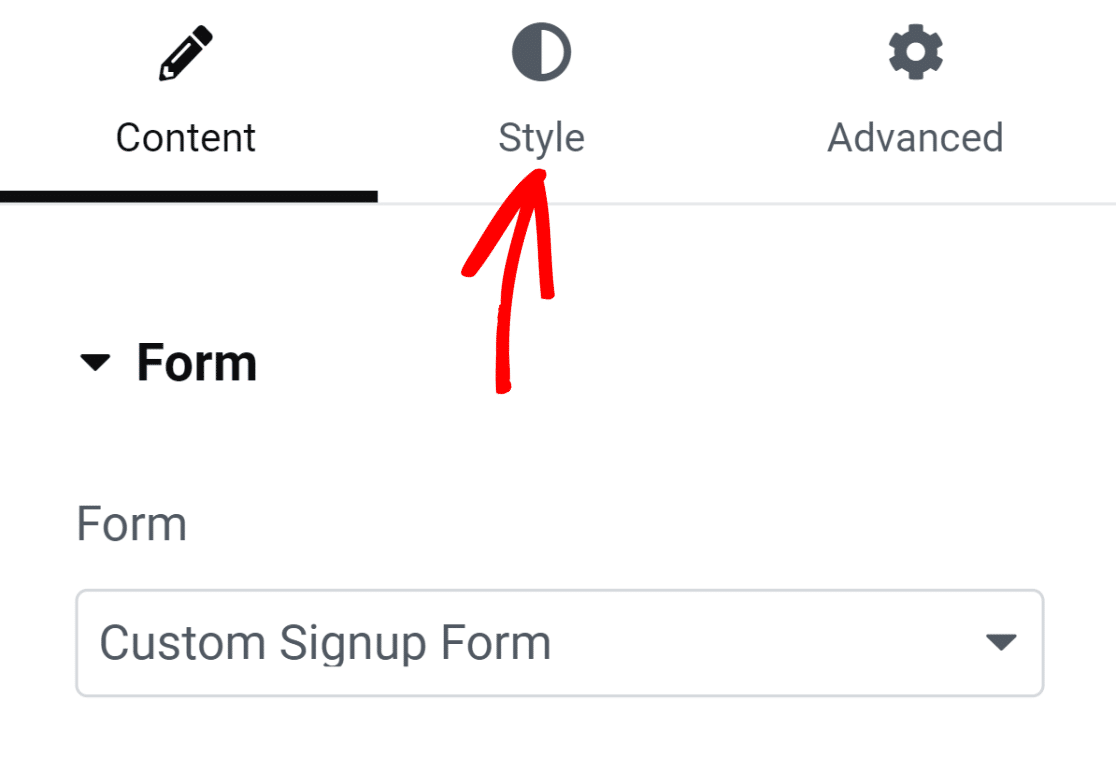
Under this tab, you’ll find options for customizing styles of different form components. For example, you can customize the styles of your fields, labels, and buttons without any code.
In our form, the field borders are rectangular with straight corners by default. But if you need rounder field borders, you do that by simply increasing the border radius value under Field Styles.
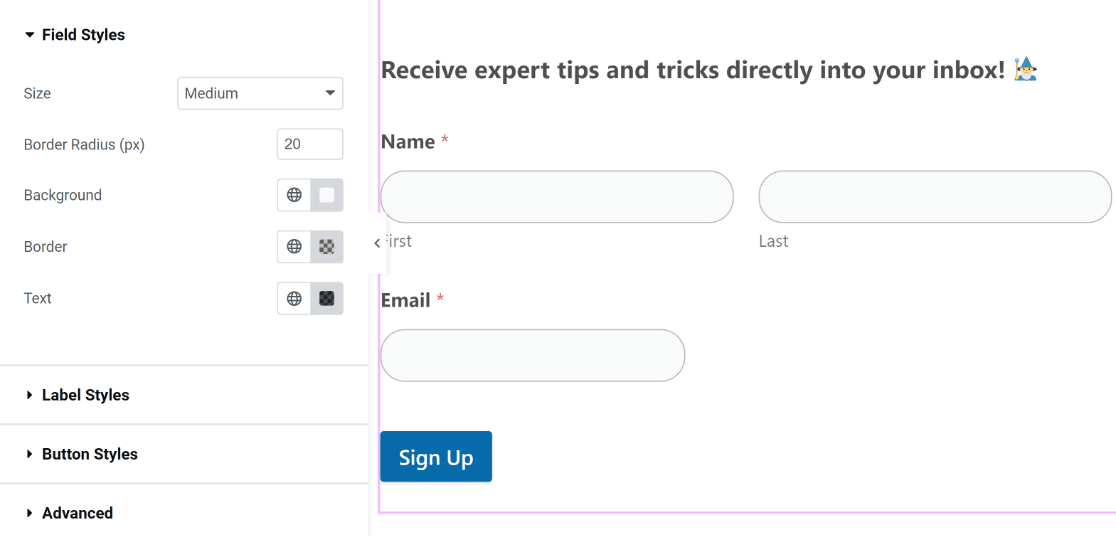
Similarly, you can change the color of your fields, labels, and buttons with a single click. We’ll use the default colors because they match our theme perfectly well. But you’re free to experiment with different colors on your form.
In Elementor, you can also change your form container styles. To do that, click on the Advanced tab.
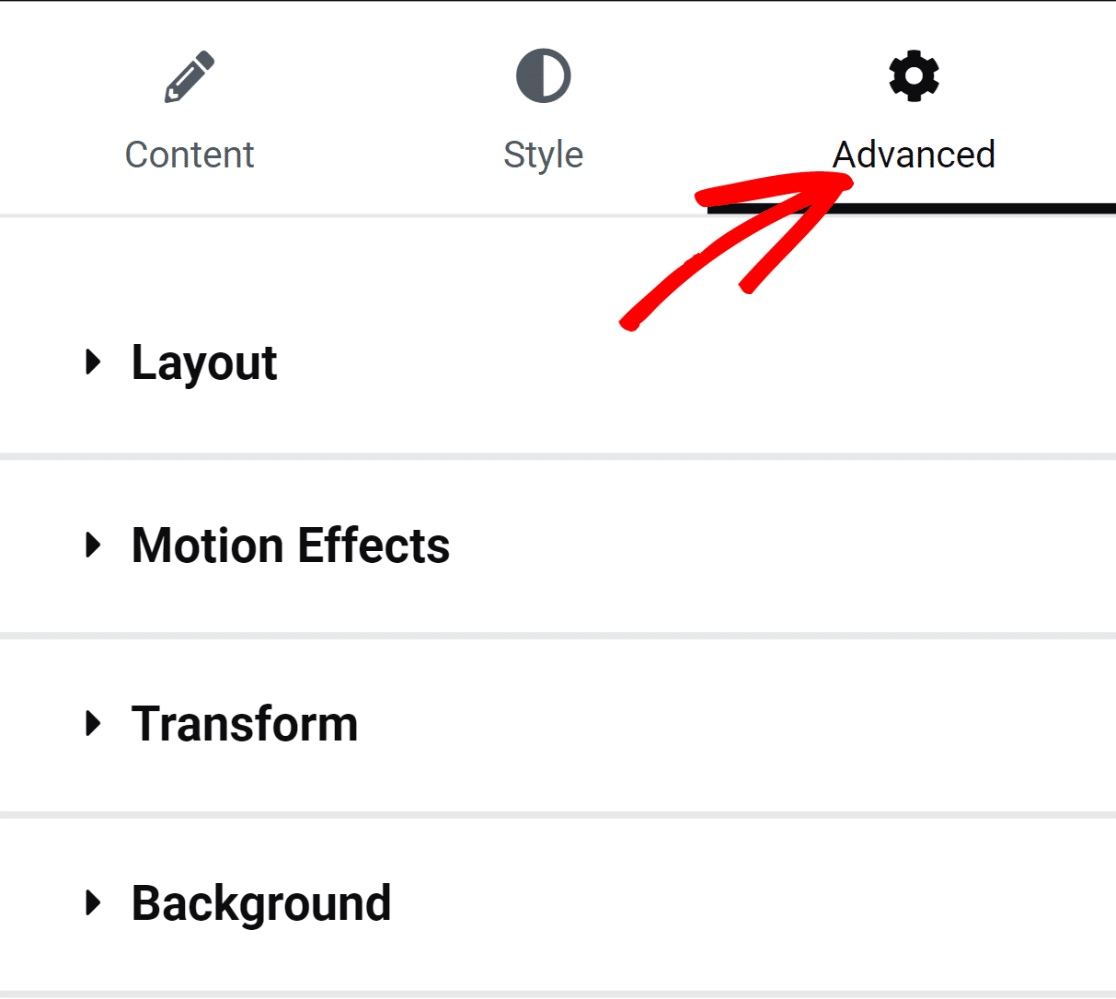
You’ll find a bunch of fascinating settings here including layout adjustments, animation effects, background customizations, and more.
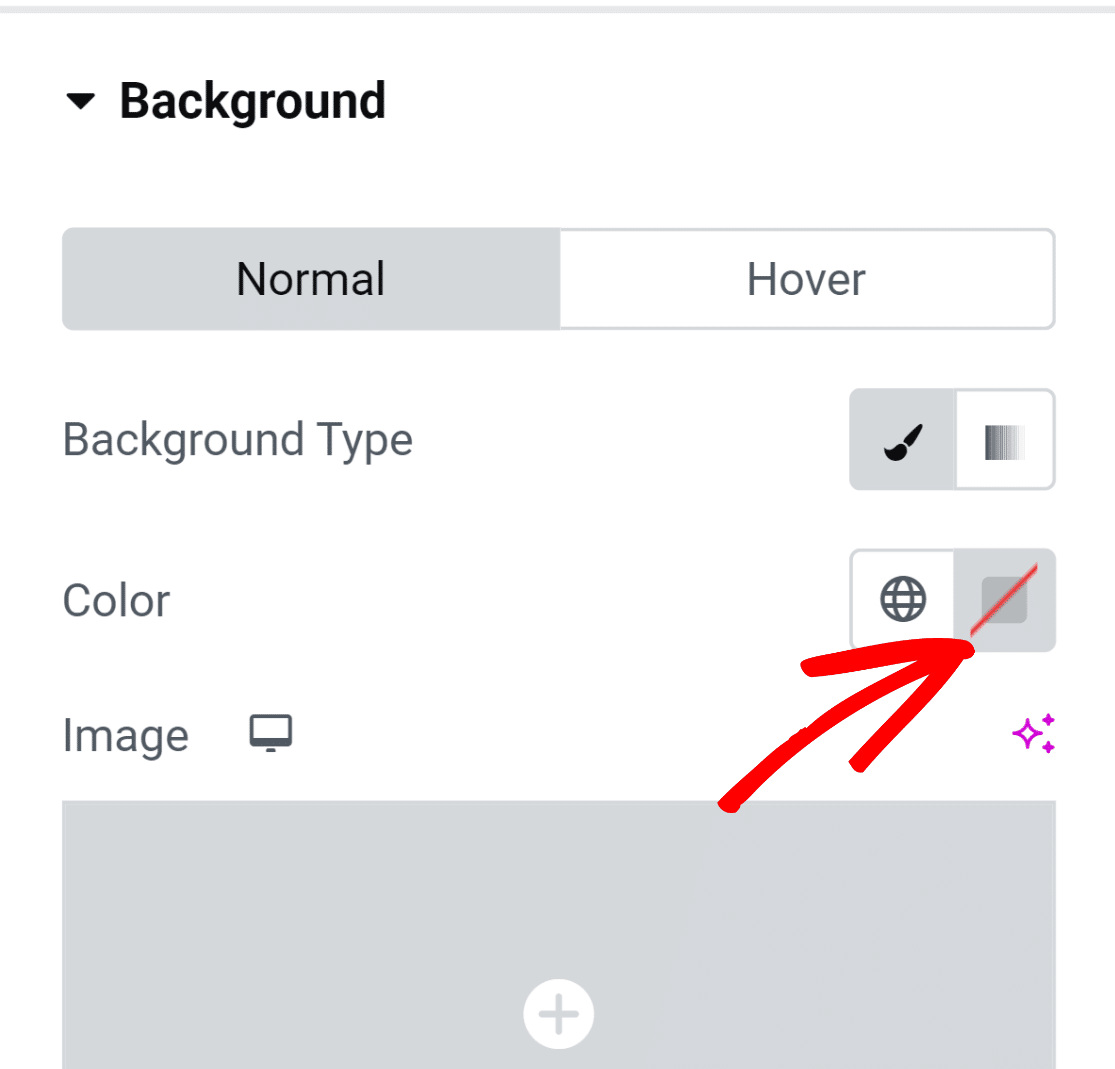
Let’s add a background color to the form container to give it a more lively outlook. Click on the Background option to expand the menu with additional settings.
We’ll add a solid color by clicking on the color selection icon on the right.
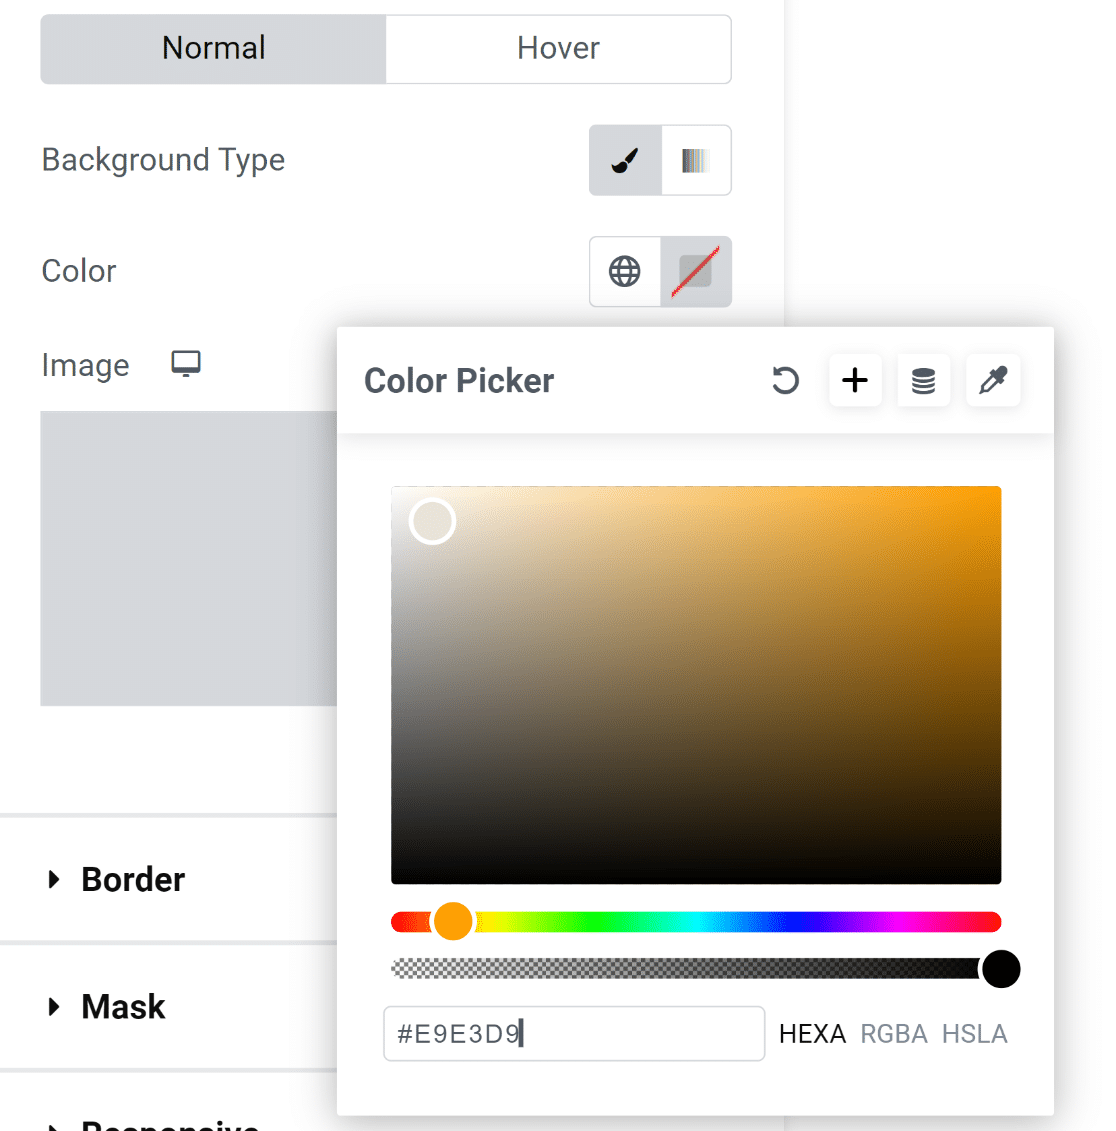
The color picker tool lets you conveniently select any color with a click.
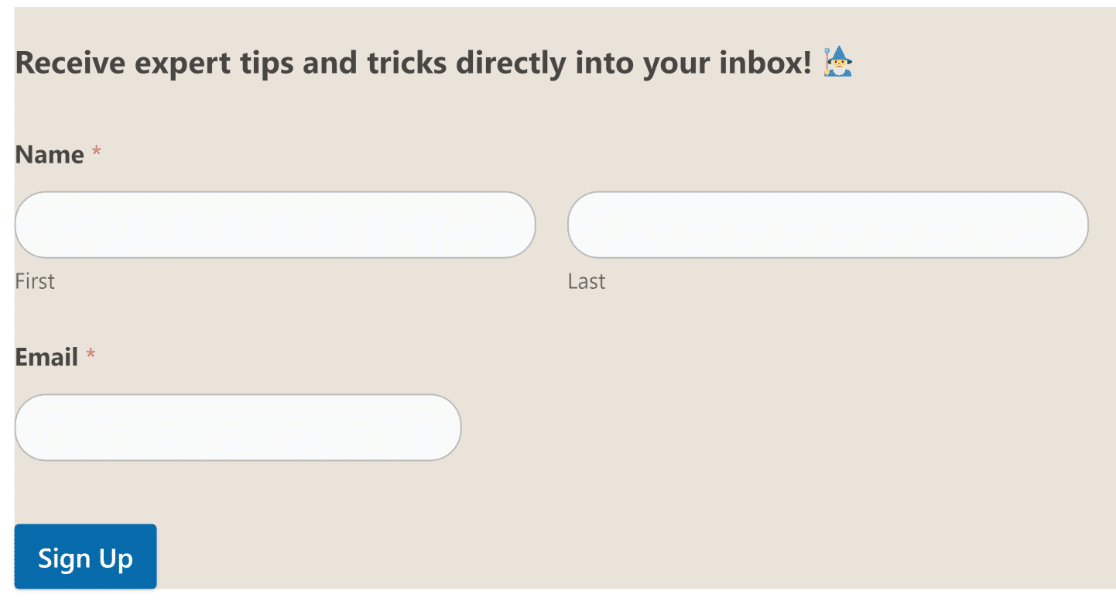
After selecting the color, the form immediately looks much more visually appealing!
However, the elements inside the form are touching the borders of the container, which doesn’t look very good.
This is an easy fix!
Click on the Layout option under the Advanced menu on the left-hand pane to access the margin and padding settings. We simply added some padding and the results are looking great!
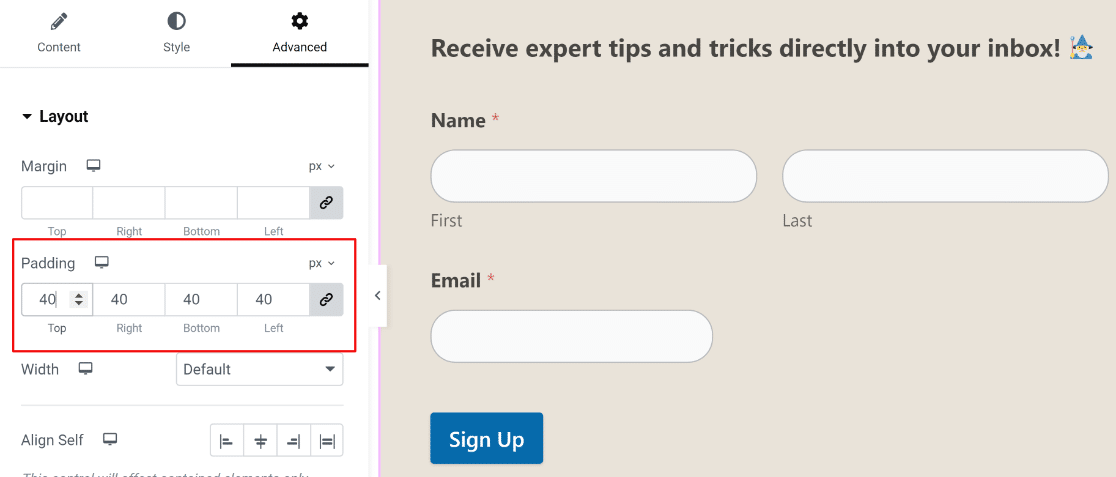
At this point, we’re ready to go ahead and publish your form. But if you’d like to try further customizations, feel free to spend more time here and explore different options.
When you’re ready, press the Publish button at the bottom.
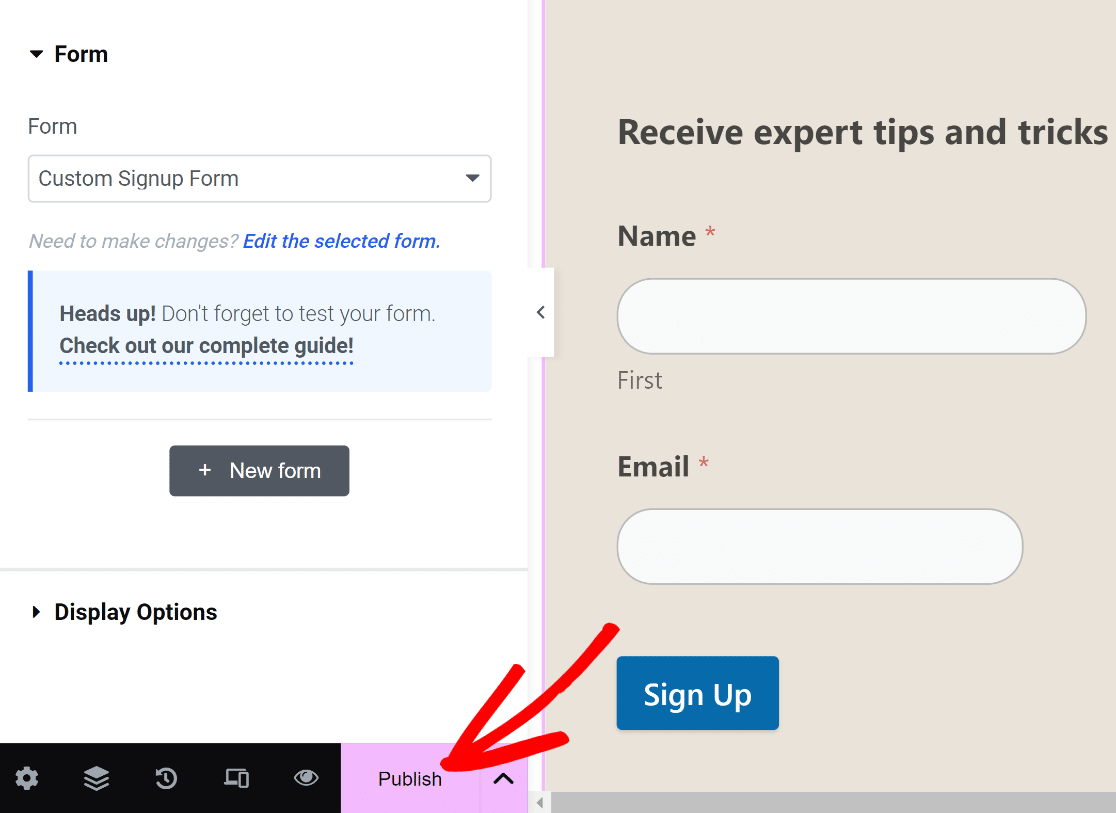
You’ll immediately see a message pop out asking if you’d like to view your published page now.
Go ahead and view your page after publishing.
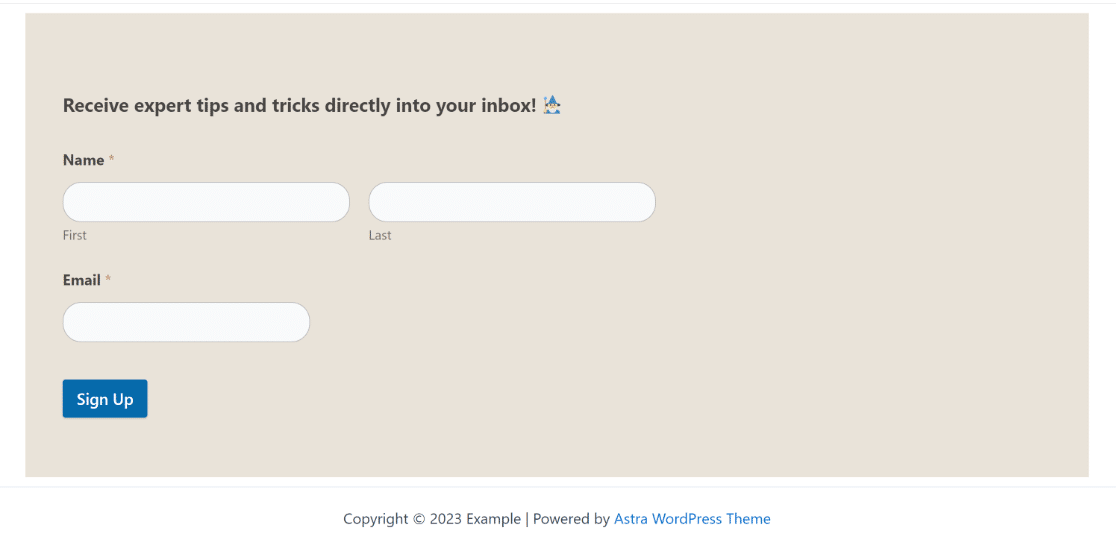
And that’s it!
You’ve just added a custom signup form using Elementor and WPForms.
With this, you can ensure that your form looks unique for your website and is equipped with time-saving integrations under the hood to help you grow your email subscribers with no hassle whatsoever!
FAQs on Elementor Signup Forms
Do you still have some questions about creating signup forms in Elementor? Here are some questions our customers have asked us before.
Do I need Elementor Pro to create a signup form?
No, you don’t need Elementor Pro to create a signup form as long as you have WPForms installed. You can access the WPForms widget in Elementor without needing to upgrade to the Pro version. However, Elementor also has a separate form builder of its own. If you want to build signup forms with Elementor only, you’ll need a Pro license.
While Elementor is a fantastic page builder tool, the Elementor form builder is more basic and has various limitations compared to advanced form builders like WPForms.
How can I style my sign-up form to match my website’s branding?
The easiest way to match your signup forms with website branding is to use your site’s theme colors for different aspects of your form.WPForms automatically picks your theme’s primary and secondary colors, so you can easily use these colors for different components of your form such as the borders, labels, and buttons.
You can access these style customization settings in the Elementor WPForms widget by clicking on the Style tab. There, you’ll find the option to change the color of different parts of your form by choosing from available theme colors to match your branding. There’s no coding needed!
Can I use custom CSS to style my sign-up form?
Yes, you can add custom CSS classes to your signup form if you’re using WPForms. To do this, click on Style after selecting the WPForms widget in Elementor, then click on Advanced. You can then insert custom CSS to style your signup form.
How can I create a multi-step signup form?
WPForms gives you several ways to create a multi-step signup form. You can add page breaks to split your form into multiple pages, or you can use the Lead Forms addon which automatically turns a regular form into a multi-step signup form with page breaks in between.
Next, Create a Custom ConvertKit Form
WPForms integrates with various marketing platforms including ConvertKit. We have a dedicated guide showing you how to create a custom ConvertKit form. Make sure to check it out!
You can also compare free order form options if you’re selling any products online.
Create Custom Signup Forms in Elementor
Ready to build your custom signup form? Get started today with the easiest WordPress form builder plugin. WPForms Pro includes lots of free templates and offers a 14-day money-back guarantee.
If this article helped you out, please follow us on Facebook and Twitter for more free WordPress tutorials and guides.

