


AI Summary
Whether you’re uploading a logo for the first time or swapping in a fresh design, changing the logo in WordPress is one of the quickest ways to make your site feel like yours. It gives your site a personal touch that instantly tells visitors who you are.
The catch is that the exact steps depend on your theme. When I first tried to change a logo on an older classic theme, I went looking for the Site Editor and it simply wasn’t there.
So, in this guide, I’ll walk you through 5 easy ways to add or change your logo in WordPress, from your site header and favicon to your contact forms and email notifications.
How to Add or Change a Logo in WordPress
You can add or change your logo in several different places on your WordPress site. I’ll cover the steps for the most important ones below. And if you don’t have a logo file ready yet, these best AI logo generators can help you create one in minutes.
1. Add a Logo to Your Site Header (Block Themes)
Use this when your site runs a block theme, like the Twenty Twenty-Five theme that ships with new WordPress installations. Block themes use the Site Editor, which is quite handy for various header customizations like adding or changing a logo.
From your WordPress Dashboard, go to Appearance and select Editor from the menu. This will take you to the Site Editor, where you can use the block editor to add your site logo. Click on Patterns.

Next, scroll down until you find the Template Parts section, then click on Header to access its options. On the right, click the Header image to open customization options and select the Edit icon.

In the Document Overview for your header, click on the List View icon to see all the elements included in the WordPress header.
Expand all the blocks in List View, click on the first Row item, and set the Alignment to Full Width to start customizing the header template.

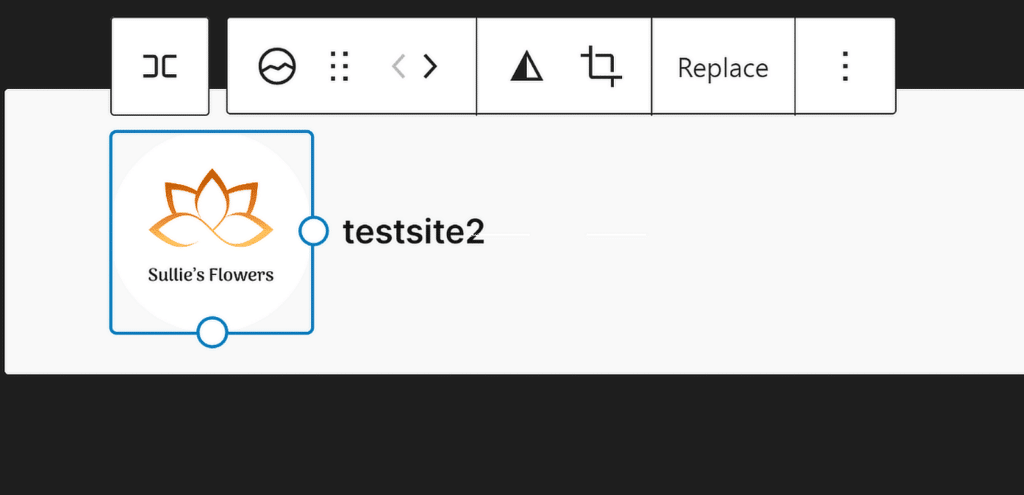
Next, click on the Site Logo option in List View and then the Upload icon in the header preview section. You can either upload your logo via the Upload Files tab or choose an existing file from your Media Library.

If necessary, use the Resize Dots to adjust the size and dimensions of your site logo according to your needs.
If you need assistance with creating an attractive header for your site, check out this guide for step-by-step instructions on how to edit the header in WordPress.
2. Change Your Logo With the Theme Customizer (Classic Themes)
Use this when your site runs a classic theme, like Astra, GeneratePress, or an older default theme. Classic themes don’t include the Site Editor, so you’ll change your logo through the Theme Customizer instead.
The good news is that this method is even quicker.
- From your WordPress Dashboard, go to Appearance » Customize to open the Theme Customizer.
- Click on the Site Identity panel. Some themes label this slightly differently, but it’s almost always near the top of the menu.
- Under the Logo section, click Select Logo. If your site already has one, you’ll see a Change Logo button instead.
- Upload your logo via the Upload Files tab or pick one from your Media Library, then crop it if WordPress asks you to.
- Click the Publish button at the top to make your new logo live.
You’ll see the logo update in the live preview on the right before you publish, so you can check how it looks against your header colors first.
Note: A few themes tuck the logo setting into their own options panel instead, such as a Theme Options page or a page builder’s header settings. If you don’t see a Logo section under Site Identity, check your theme’s documentation for where it stores the logo option.
3. Add a Logo to Your Site Icon
A favicon, also known as a site icon, is a small image representing your website in the browser tab. Adding a favicon is a simple yet effective way to make your site easily recognizable.
Your favicon should be your site logo to strengthen your brand identity whenever someone visits your site. Ideally, it should be around 512×512 pixels to display clearly across all devices.

To add a favicon to your WordPress site, start by going to your WordPress Dashboard. Navigate to Settings and then click on General.

Once the General Settings menu opens up, you can edit the Site Title, Tagline, and add your Site Icon. Simply click on the Choose a Site Icon button.

You can then either choose to upload your logo via the Upload Files tab or choose an existing file from your Media Library. Once done, your site logo should appear in a preview as shown below.

If you’re using a block theme, there’s also a shortcut. The Site Logo block in the Site Editor includes a Use as Site Icon toggle, which applies your logo as the favicon at the same time.
4. Add a Logo to Your Contact Form
Including your logo on your contact form is a great way to reinforce your brand and make your forms look more professional and consistent with the rest of your site.
To add a logo to your contact form in WordPress, start by opening the WPForms plugin. If you haven’t already created a contact form, go ahead and create one using the drag-and-drop form builder.
Once you’ve created your form and added all the fields to your liking, drag and drop the Content Field at the top of your form to add your brand logo.

Next, modify or replace the existing text in the Visual editor as needed, then click on the Add Media button to add the brand logo to your form.

From this window, you can either upload your brand’s logo or select it if it’s already in your Media Library, then click the Insert into Form button.

Your logo is now part of your contact form. Adjust the alignment to your preference, and click Update Preview to see how the form appears with your logo.

You can also use form themes to match your form’s colors and fonts to the rest of your branding.
If you want to add a logo to all your forms, follow the steps in this guide to convert your branded form into a custom template for later use!
5. Add a Logo to Your WordPress Emails
Adding your logo to WordPress emails is another great way to create a consistent brand identity, especially when someone receives an email from your website.
To get started, use WPForms to create your form and then navigate to Settings » Notifications tab in the form builder to set up a basic form notification email.

Then, navigate to WPForms » Settings from your WordPress dashboard and click on the Email tab to create a custom email template for your website.

By default, all form notification emails use the Classic template, but upgrading to Pro gives you access to the Modern, Elegant, or Tech templates.
For this example, let’s go with the Elegant template, but you can choose the one that best fits your style and needs.

Next, head to the Header Image section and click the Upload button to add a logo that will appear at the top of your emails.

You can either upload a new image or select one from your WordPress Media Library. After selecting or uploading your logo, click the Use Image button.

If you need to adjust the size of the logo, you can choose from options like Small, Medium, or Large using the dropdown menu.

Once you’ve finished customizing your email template, scroll down and click the Save Settings button to apply the changes. For more details, check out this doc on adding a custom header image to your email template.
To preview how your new email will look in recipients’ inboxes, click on the Preview Email Template link, and a new tab will open, showing a sample of your notification email with your brand logo.

And that’s about it! You’ve successfully added a logo to help with your branding and making your site more recognizable. Don’t forget to check out these WordPress tips too!
FAQs About Changing Your Logo in WordPress
Changing the logo in WordPress is a common task for site owners, but the steps vary depending on your theme and where you want the logo to appear. Here are answers to the questions I hear most often.
How do I add a custom logo to WordPress?
If your site uses a block theme like Twenty Twenty-Five, you can add a custom logo through the Site Editor. Go to your WordPress Dashboard and navigate to Appearance » Editor. In the Site Editor, click on the Header section to open the customization options, then add or change your logo using the Site Logo block.
If your site uses a classic theme, go to Appearance » Customize and open the Site Identity panel to upload your logo there instead.
How to make a logo clickable in WordPress?
When you add your logo using the Site Editor in WordPress, the logo is automatically linked to your homepage. This means that visitors can click on the logo to return to your homepage without any additional setup required.
If you’re customizing your logo through a different method, ensure that it’s wrapped in an anchor tag with the URL of your homepage to make it clickable.
How to add a logo to your contact form?
To add a logo to your contact form, you can use WPForms. After creating your form, add the Content field to the form using the drag-and-drop builder. Use the Add Media button to insert your logo in this field, and your logo will be displayed at the top of your contact form.
What size should my WordPress logo be?
Header logo sizes vary by theme, but a wide rectangular logo around 250 by 100 pixels works well for most WordPress headers. Use a transparent PNG so the logo sits cleanly on any background color.
Your site icon is different. WordPress asks for a square image that’s at least 512×512 pixels so it stays sharp in browser tabs, bookmarks, and mobile home screens.
Why can’t I change the logo in WordPress?
The most common reason is looking in the wrong spot for your theme type. Block themes manage the logo in the Site Editor, while classic themes use the Customizer’s Site Identity panel. A few themes also move the logo setting into their own options page.
Keep in mind that these methods only change your site’s logo. Some pages, like your login screen, use the WordPress logo by default, though you can swap it out by creating a custom login form.
Next, What’s the Best Logo Size for WordPress Websites?
The appropriate logo size for your website header depends on your site theme, which is why logo sizes are highly variable across the web. Check out this guide for more information regarding the best logo size for your WordPress website.
Create Your WordPress Form Now
Ready to build your form? Get started today with the easiest WordPress form builder plugin. WPForms Pro includes lots of free templates and offers a 14-day money-back guarantee.
If this article helped you out, please follow us on Facebook and Twitter for more free WordPress tutorials and guides.





