Are you wondering how to create branded form templates that resonate with your brand identity and ensure a consistent user experience?
Branded forms that reflect your brand’s colors, logo, and style make your forms feel more personal and professional, enhancing user engagement and trust.
Create a Branded Form Template Now! 🙂
In this guide, I’ll walk you through the steps to create a branded form that looks great and functions perfectly for your needs.
How to Create a Branded Form Template
Creating branded form templates is incredibly easy with WPForms. Follow the steps below to get started:
In This Article
1. Install and Activate WPForms
WPForms is a popular WordPress plugin that helps you easily build and manage various forms on your website, such as contact forms, surveys, and registration forms. You don’t need any coding knowledge to use it.
The plugin also makes it simple to create branded form templates you can use to create personalized forms. It offers a wide range of customization features, enabling you to create forms that are not only appealing but also responsive.
To begin, you’ll need to install WPForms on your WordPress site. Once it’s activated, follow the steps outlined below to customize your form. Save it as a template, and use it when creating a new form.
2. Create a Form to Use as a Template
First, open your form builder tool and choose an existing form or create a new one to customize into your unique template.
In the form builder’s initial setup area, you’ll see an option to name your form. In the Name Your Form field, type in the name for your template.
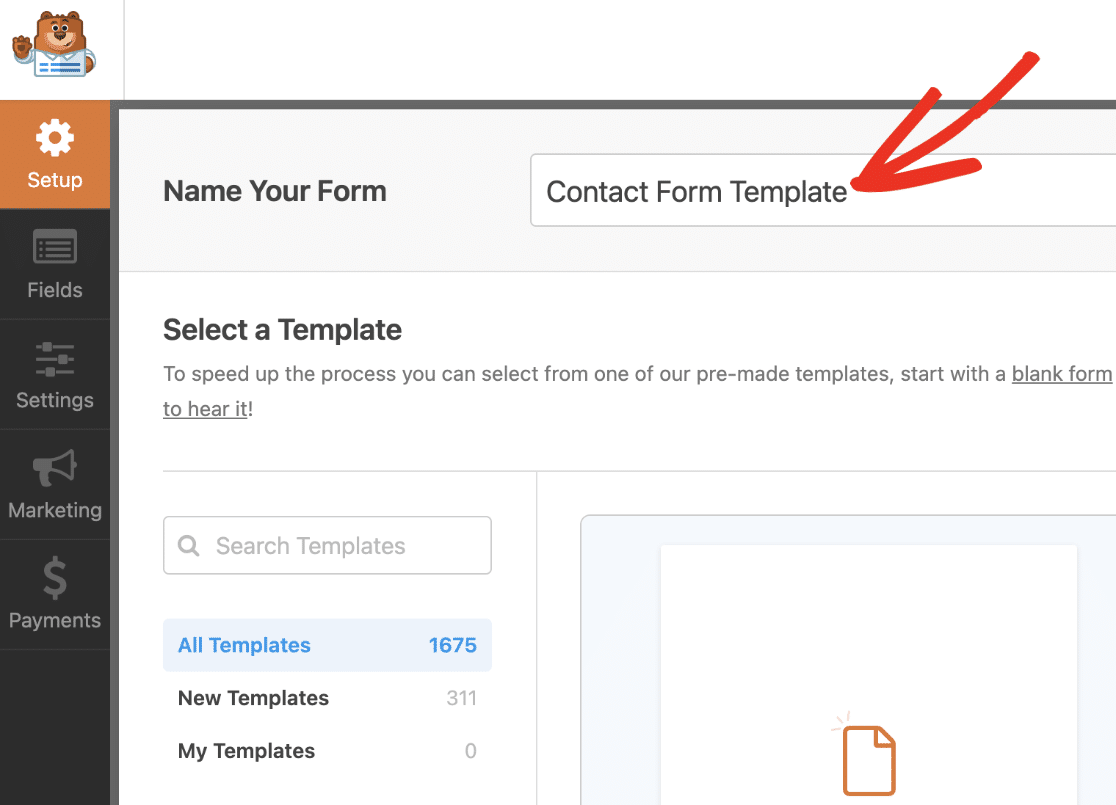
This title will be visible in the template library once you add your custom template to it, so make sure to use a short but descriptive title.
3. Add Your Brand Logo to the Form Header
Click on the field(s) you want to add to the form in the form builder. You can also drag and drop the field to the preview area.
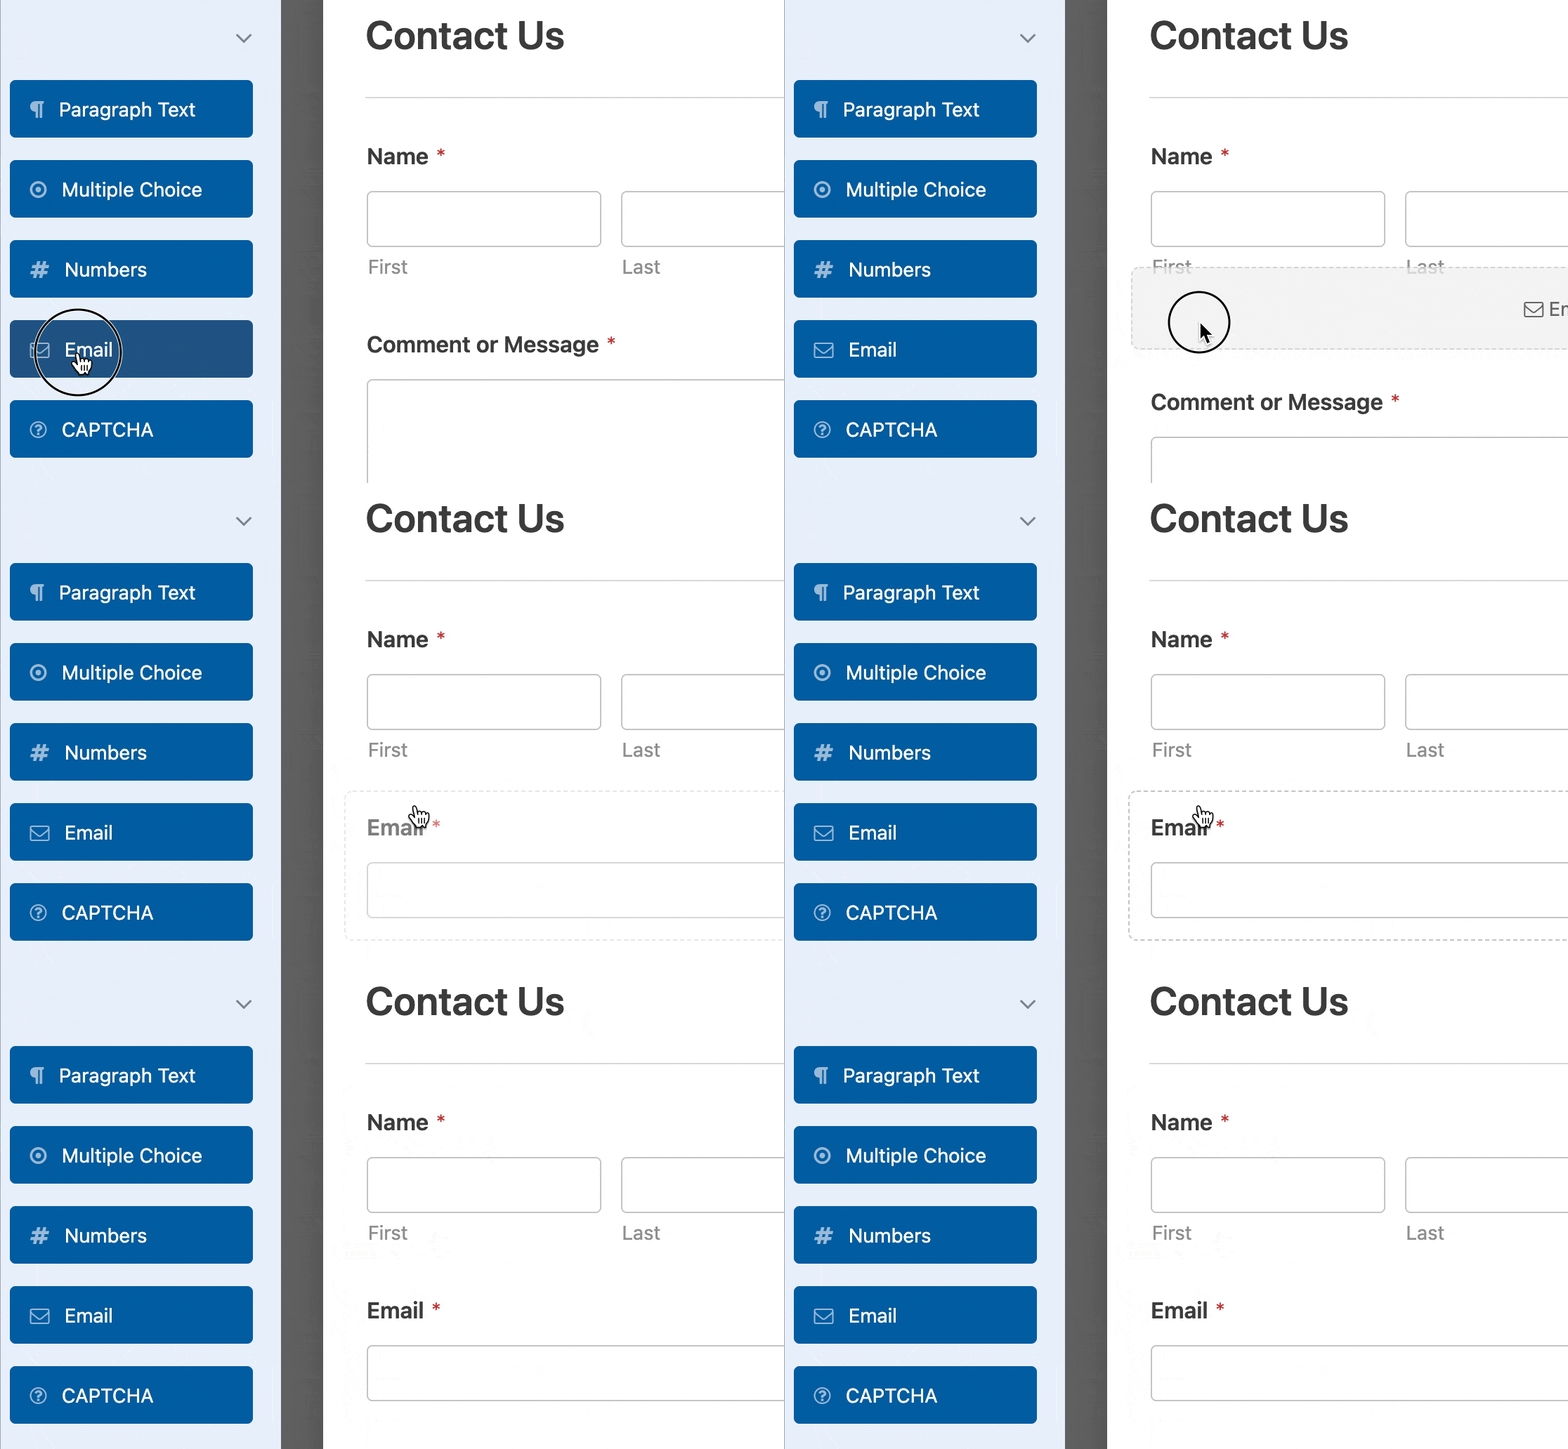
If you click on any field in the preview area, the Field Options panel will appear. This is where you can make more changes to the field.
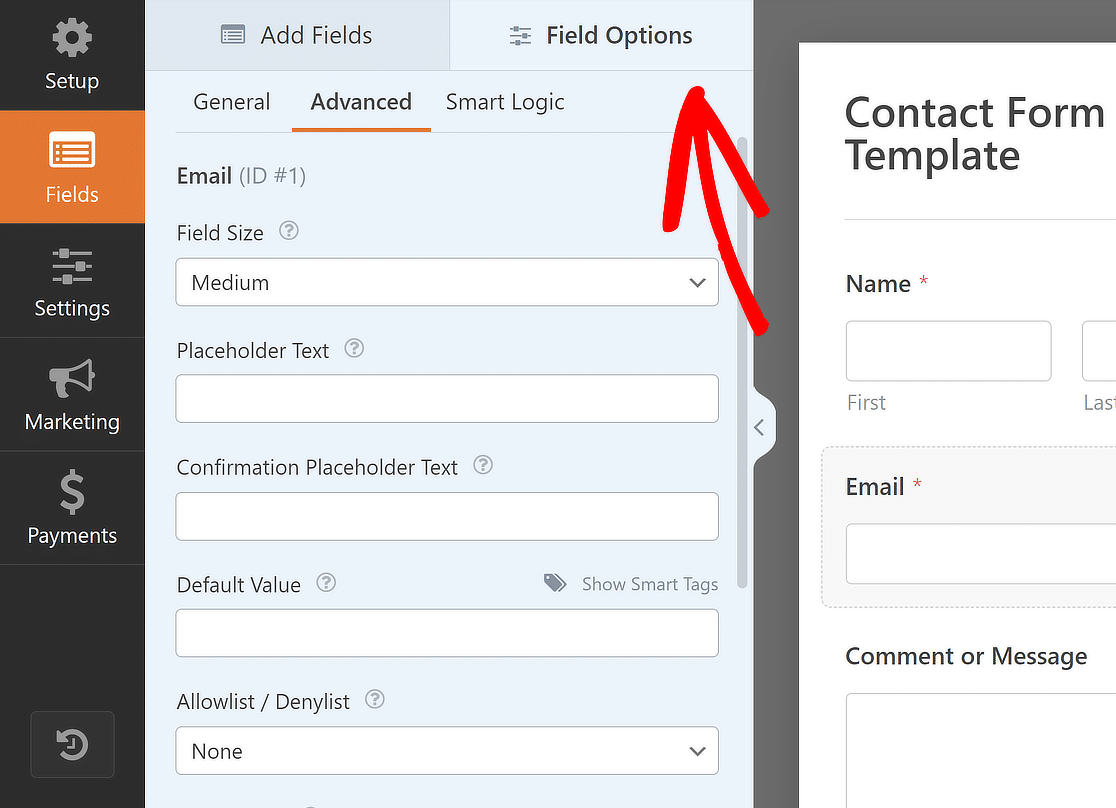
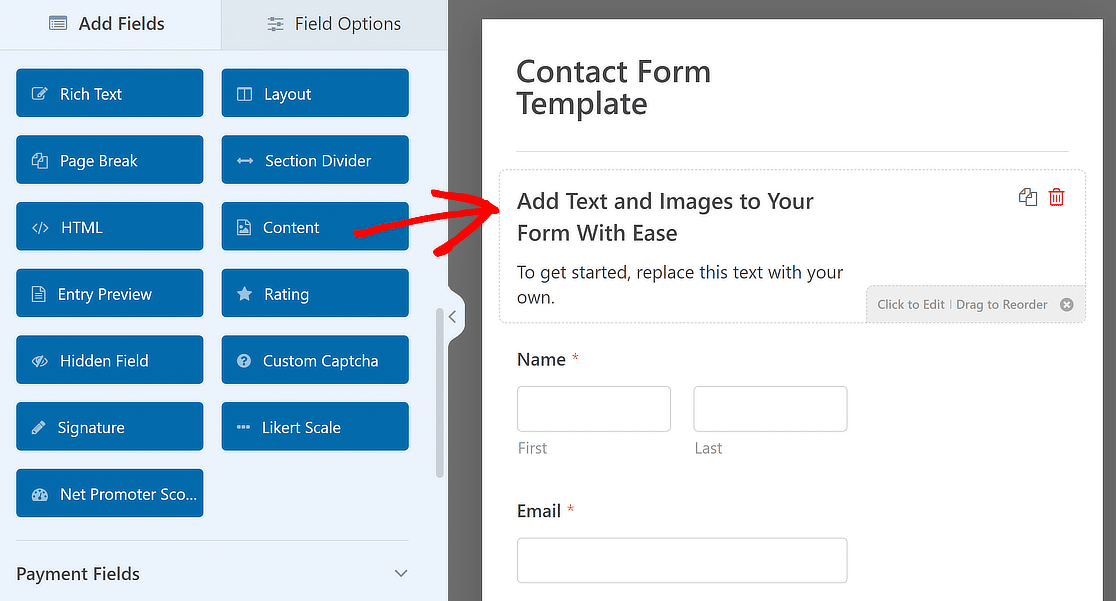
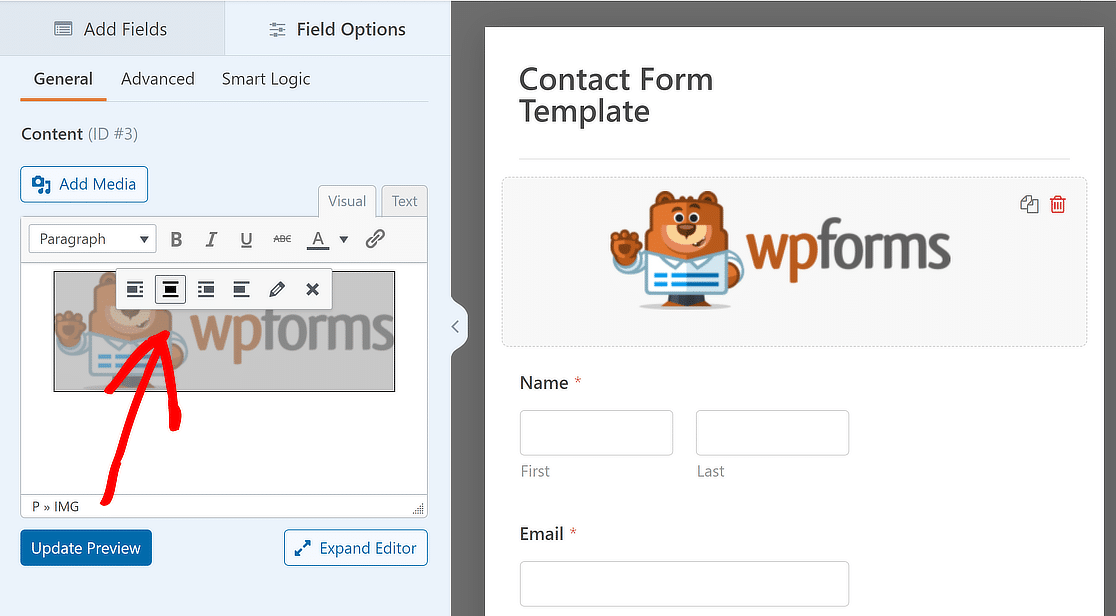
Once you’ve added all the fields to your liking, drag and drop the Content Field at the top of your form to add your brand logo.
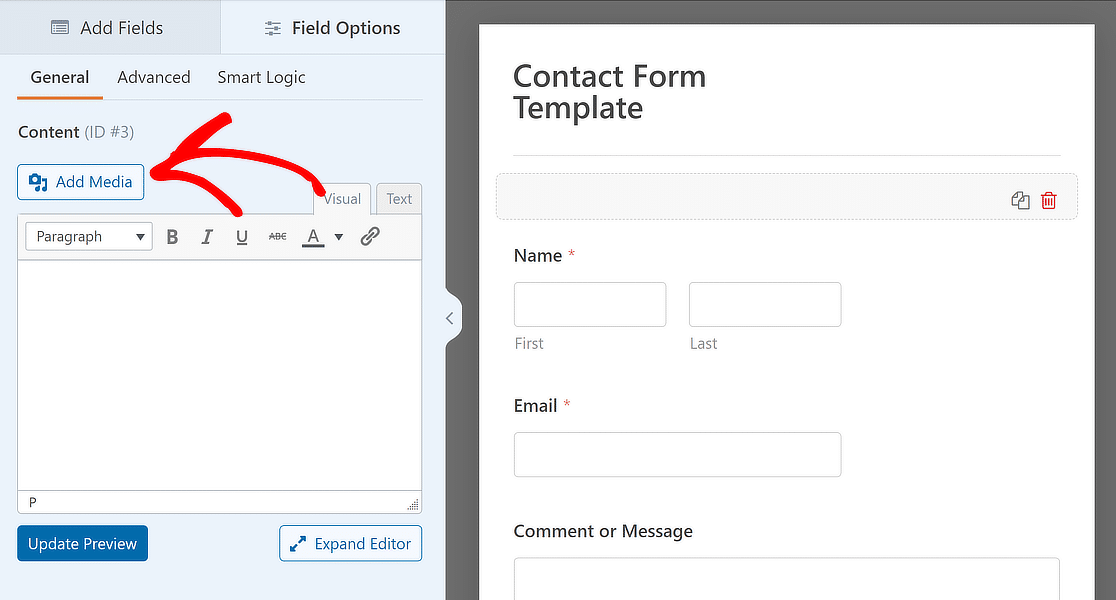
After that, add new text or remove the existing text in the Visual editor as required, and click the Add Media button.
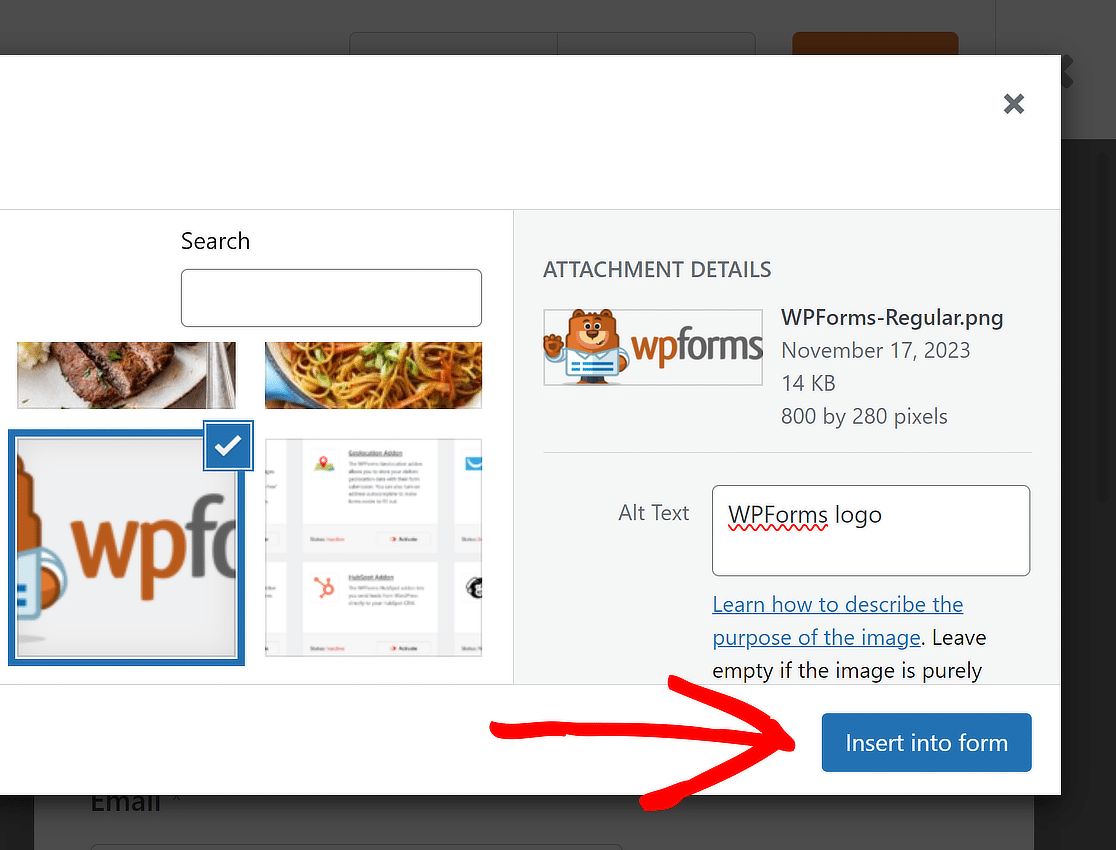
From here, you can upload your brand logo or select it if it already exists in the Media Library and hit the Insert into Form button.
Your brand logo has now been added to your template. Feel free to change the alignment as suited and click Update Preview to see how your form looks.
Also Read: How to Allow Visitors to Duplicate Form Fields
4. Convert Your Form Into a Custom Template
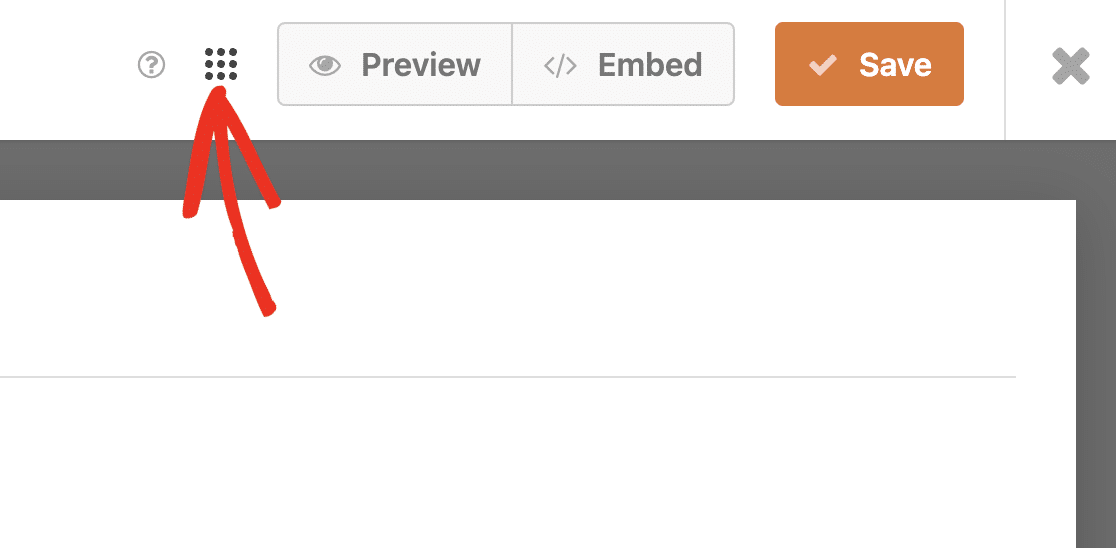
After you’ve set up your form’s settings and added the fields, you can make your form template. To do that, click on the Menu icon before the Preview button.
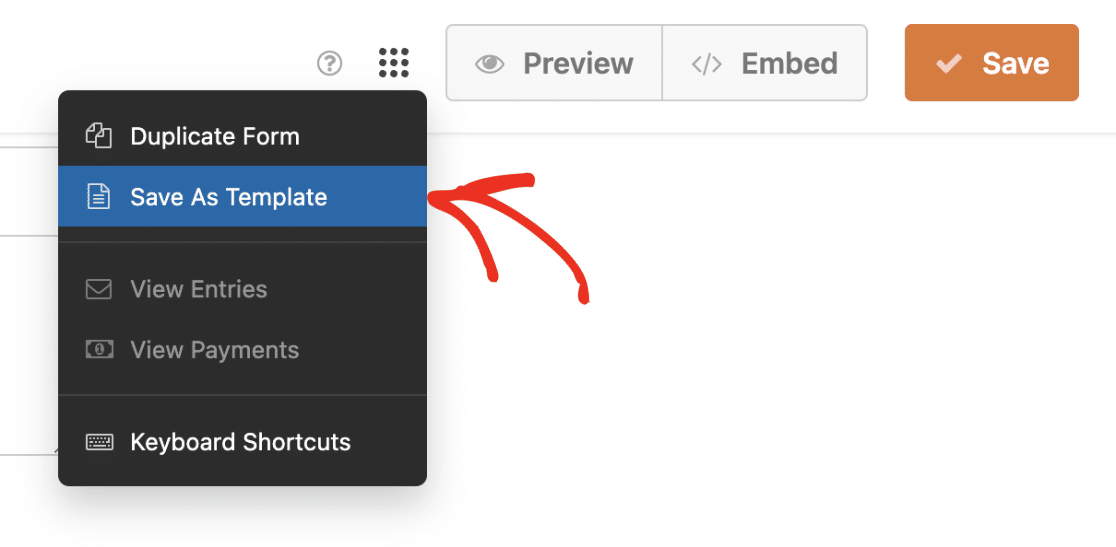
Next, in order to create your branded template, you will need to select the Save As Template button.
After you’ve followed these steps, there will be a TEMPLATE tag next to the form’s name to show that it is now a template.
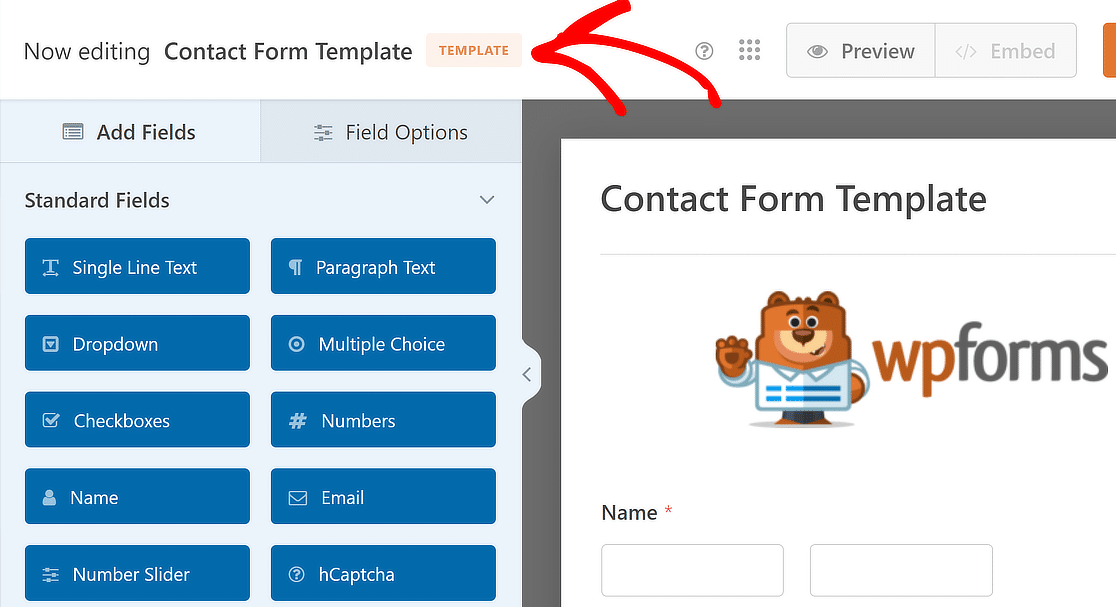
The Embed button will also be disabled, which means that you won’t be able to use this custom template on your website’s front end.
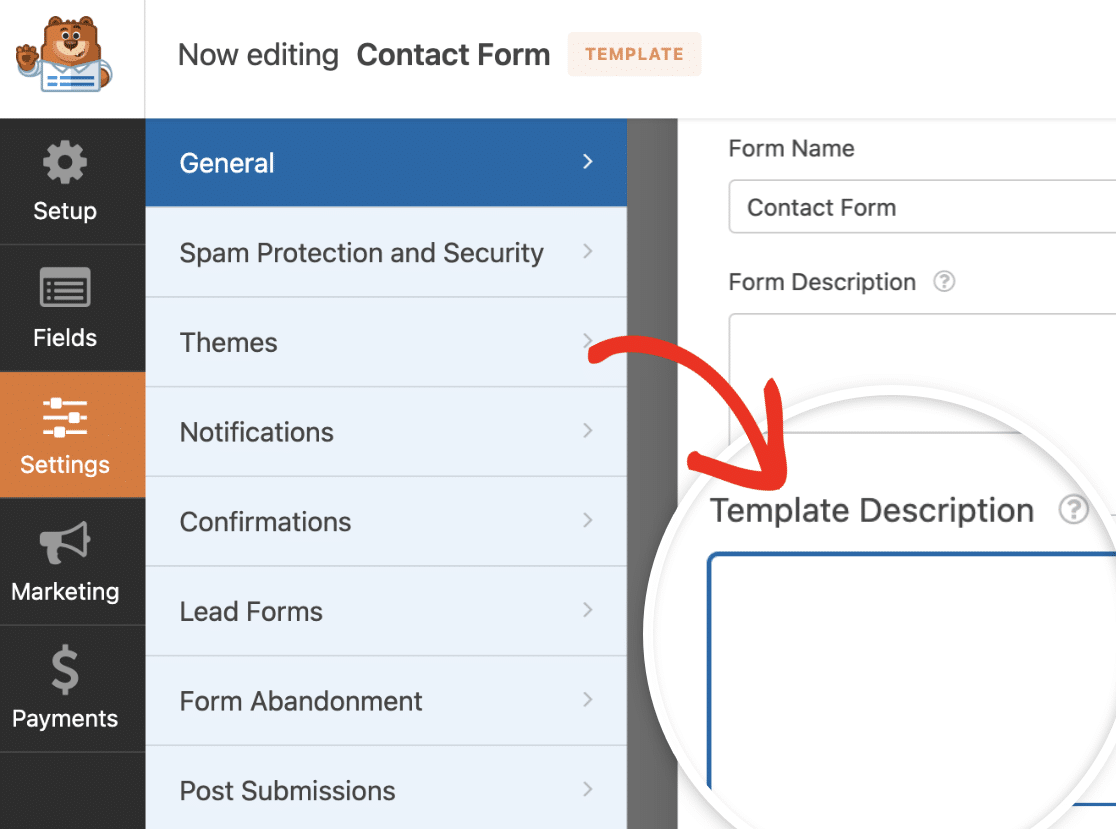
 You can give your template a short description if you’d like to. This can help to give a quick outline of how the custom template is meant to be used.
To add a description, go to Settings » General in the form builder. Then scroll down and locate the Template Description field.
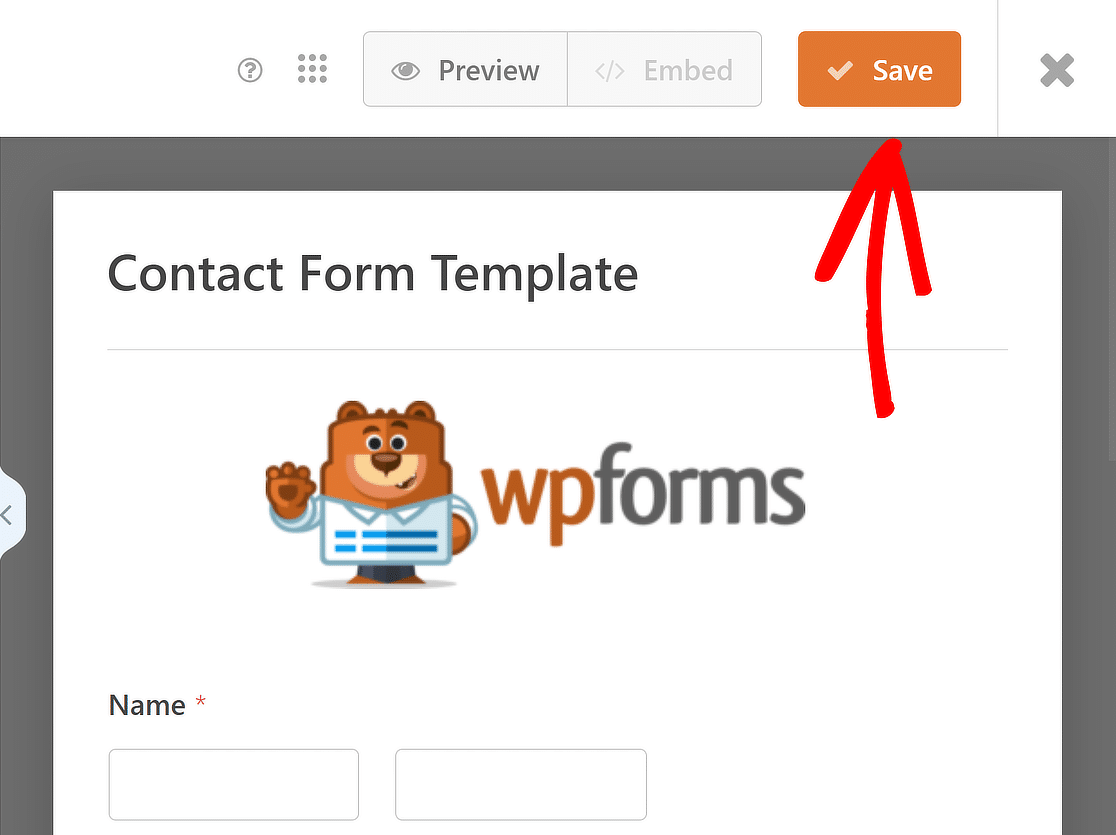
Next, ensure you click the Save button after you have finished updating the custom template so that your changes are reflected.
5. Access Your Branded Form Template
Go to WPForms » Form Templates to see the custom templates you’ve made for your site. Afterward, go to the sidebar menu and choose My Templates.
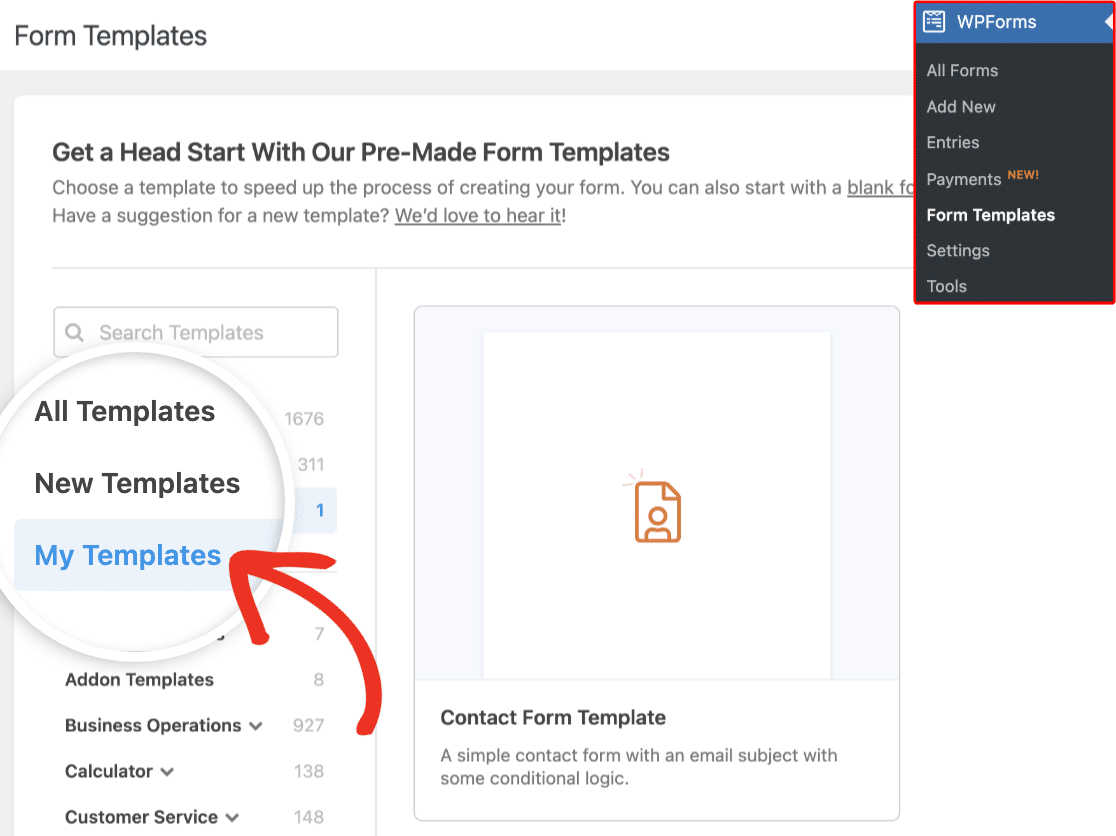
When you hover over an individual custom template, you’ll see options to either use, edit, or delete the template.
To use your branded form template, simply hover over the template name and click on the Create Form button.
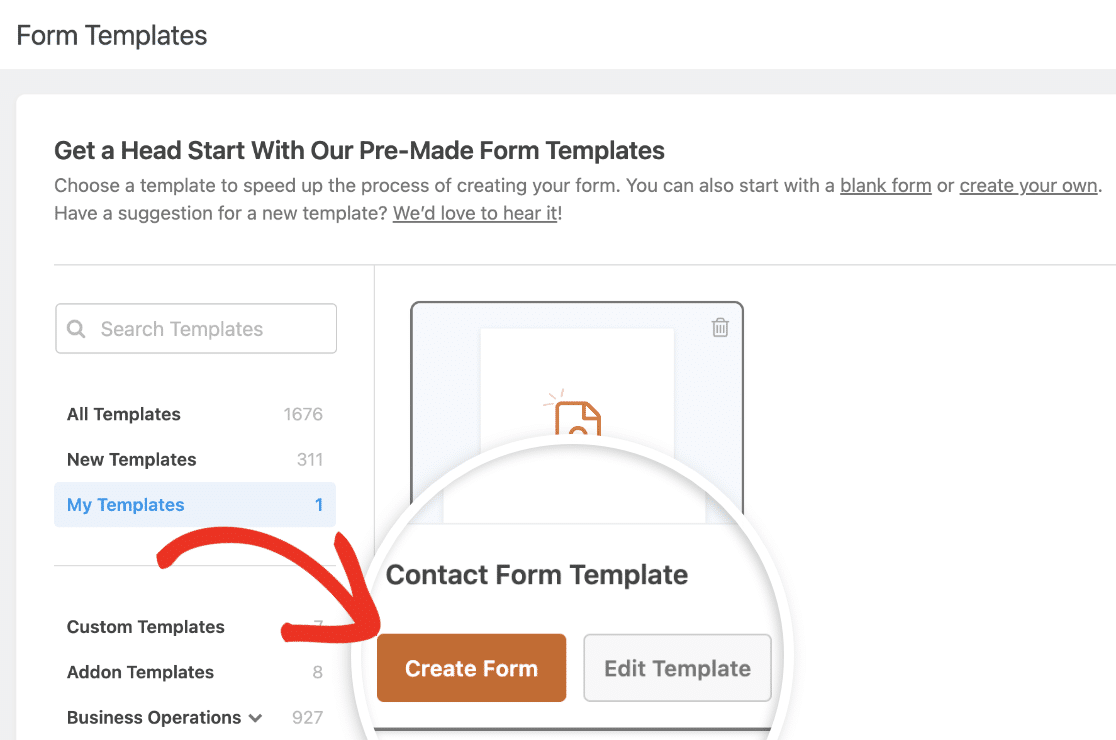
The button text changes to “Use Template” when you go to the custom templates page while making a new form.
You’ll then be taken to the form builder interface. Here, all the fields from your chosen custom template will already be in place.
Feel free to modify these fields to better suit your needs or you can simply display the form as it is.
6. Style Your Branded Form Template (Optional)
Use the branded template you’ve created to create a new form. After you’ve customized the fields, load the form in the WordPress block editor.
In the WordPress block editor, simply click on the form to open additional styling and customization options for the WPForms block.
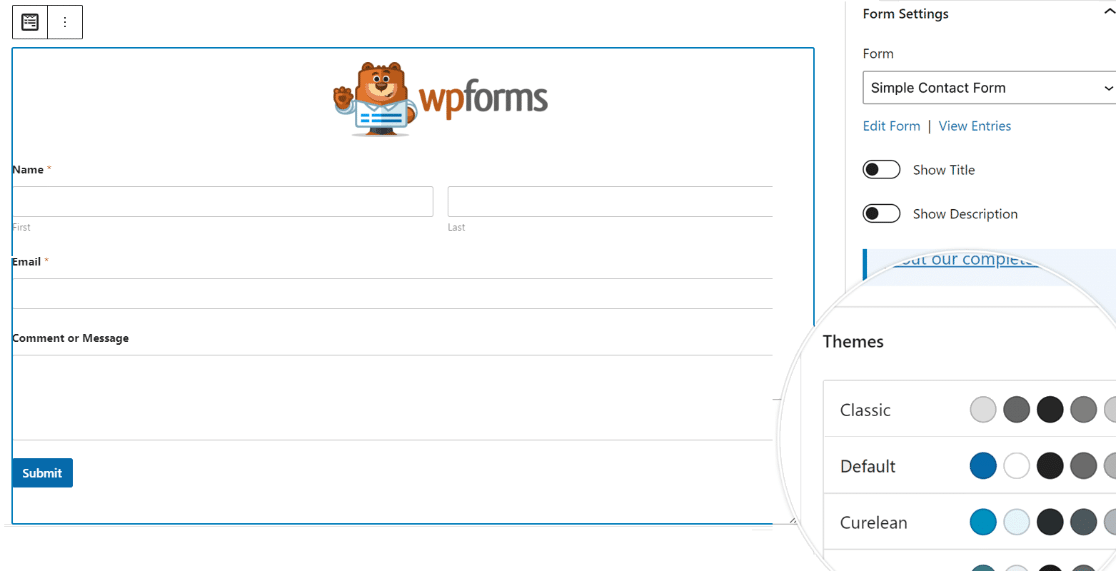
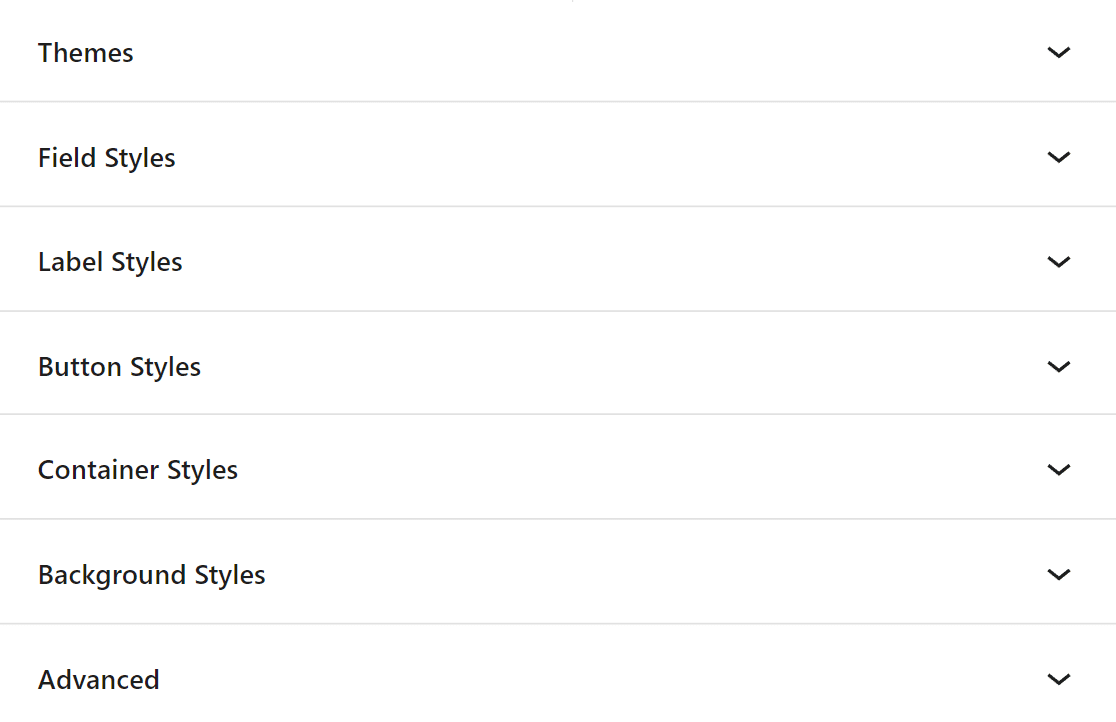
You can change the color theme, form fields, labels, buttons, and the container and background styles without writing any CSS in the WPForms block settings.
Once you’ve stylized your branded form template, click on the Advanced tab. Here, you can copy the CSS code containing all the styles you’ve added.
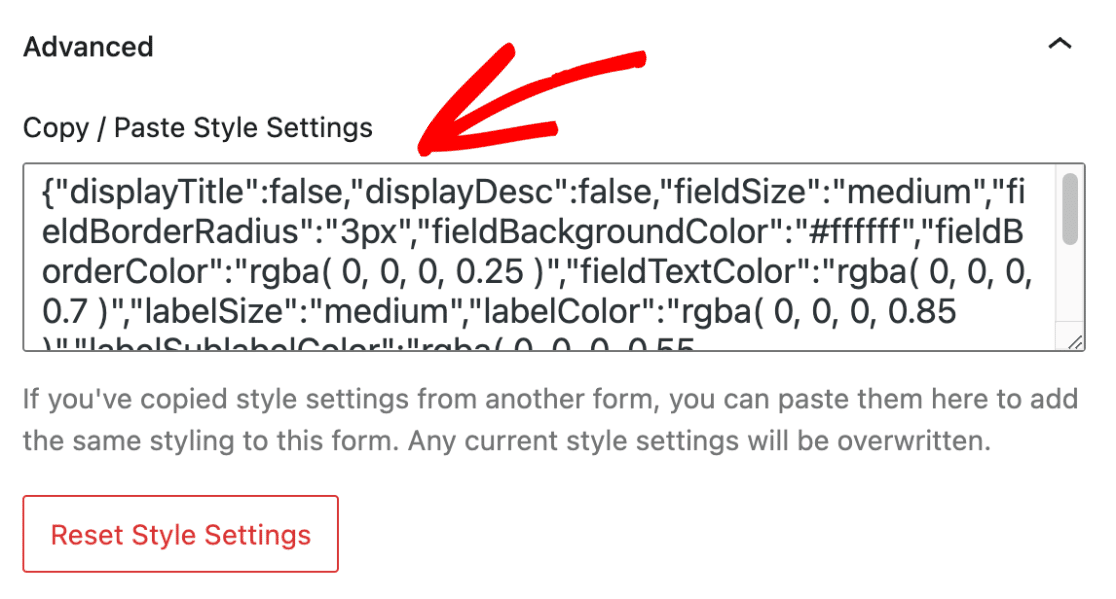
Whenever you create a new form using the branded form template, simply paste the code snippet, and the form design will use the styles from the previous form.
FAQs on How to Create Branded Form Templates
Branded form templates are a popular topic of interest among our readers. Here are answers to some common queries about them.
What is a branding form?
A branding form is a type of online form that incorporates elements of a brand’s identity, such as logos, color schemes, and fonts. It helps in maintaining a consistent brand presence across all customer interactions.
What are branded templates?
Branded templates are pre-designed layouts that include specific branding elements tailored to a company. These templates ensure that all communications and forms remain consistent with the brand’s visual identity.
How many brand templates can you have on WPForms?
With WPForms, you can create and use an unlimited number of branded templates, which get saved in the My Templates tab. This flexibility allows you to tailor forms for various purposes while maintaining your brand’s look and feel.
How do I use WPForms for branding?
To use WPForms for branding, start by accessing the Form Themes and Custom Templates features.
These allow you to design and apply your brand’s unique style to your order forms, making customer interactions more professional and cohesive.
You can customize these templates with your brand’s colors, logos, and fonts (the same ones you use in social media and apps).
Next, Learn How to Create a Custom Email Template
Through WPForms, you can easily change the look and feel of your notification emails to create a more personalized experience. Check out this guide for steps on how to create a custom email template using WPForms.
Create a Branded Form Template Now! 🙂
Ready to build your form? Get started today with the easiest WordPress form builder plugin. WPForms Pro includes lots of free templates and offers a 14-day money-back guarantee.
If this article helped you out, please follow us on Facebook and Twitter for more free WordPress tutorials and guides.

