
AI Summary
Do you want to let visitors choose the recipient on your contact form?
Adding a selection dropdown can help to make sure messages get to the right person or department.
In this post, we’ll show you how to create a WordPress contact form with a dropdown to select who it’s sent to.
Can a WordPress Contact Form Send to Different Email Addresses?
Yes! With WPForms, it’s easy to create a WordPress form that sends to different email addresses.
You can do this in 3 ways:
- Add multiple form notifications so that multiple people get an email
- Add email addresses to the CC or BCC field in the notification
- Add a field that lets the visitor pick which department or person receives the message.
In this tutorial, we’ll focus on the 3rd way: adding a field that lets the visitor pick which department or person receives the message. This is the best solution if you want to have 1 form for all your messages, but you also want messages to be routed to the correct person on submission.
How to Allow Users to Select Recipients in a WordPress Contact Form
If you prefer reading instructions, we’ve written out this tutorial below.
Let’s start by installing the WPForms plugin so we can create your new form.
1. Install the WPForms Plugin
Before we start, you’ll want to download and install the WPForms plugin.
Since we’ll be using conditional logic, you’ll want to choose the Basic license or higher.

We took this screenshot during a sale. Click here to see if the discount’s still available!
If you need any help getting WPForms installed on your WordPress website, check out this guide to installing a WordPress plugin.
All set? Great! Let’s create your contact form.
2. Create a Simple Contact Form
Let’s start by creating a simple contact form in WordPress. Go ahead and add a new form to start.

Next, type in a name for your form. All versions of WPForms come with a contact form template, so let’s click it to open it up in the form builder.
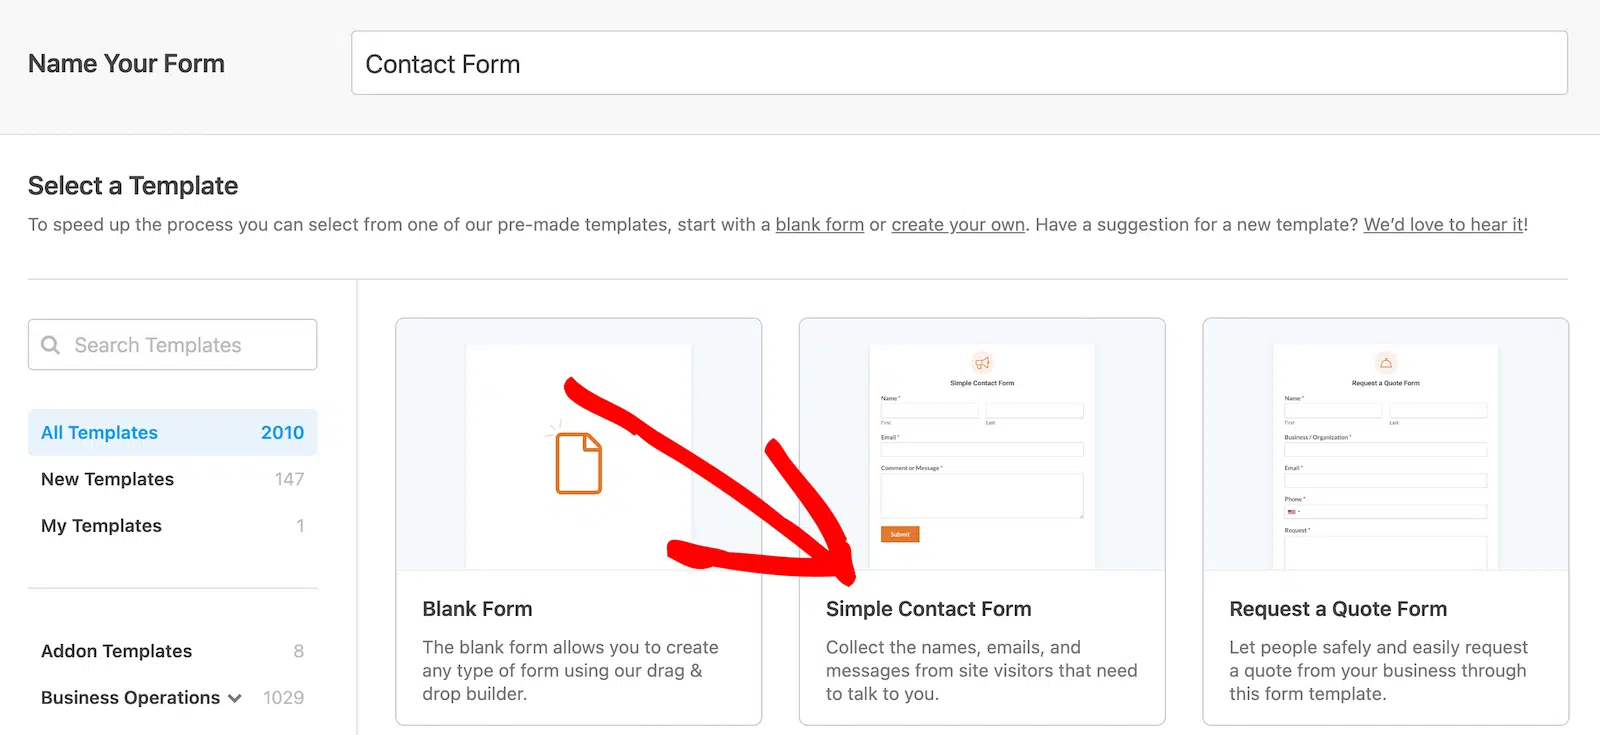
As you can see, your basic contact form is set up and almost ready to go.
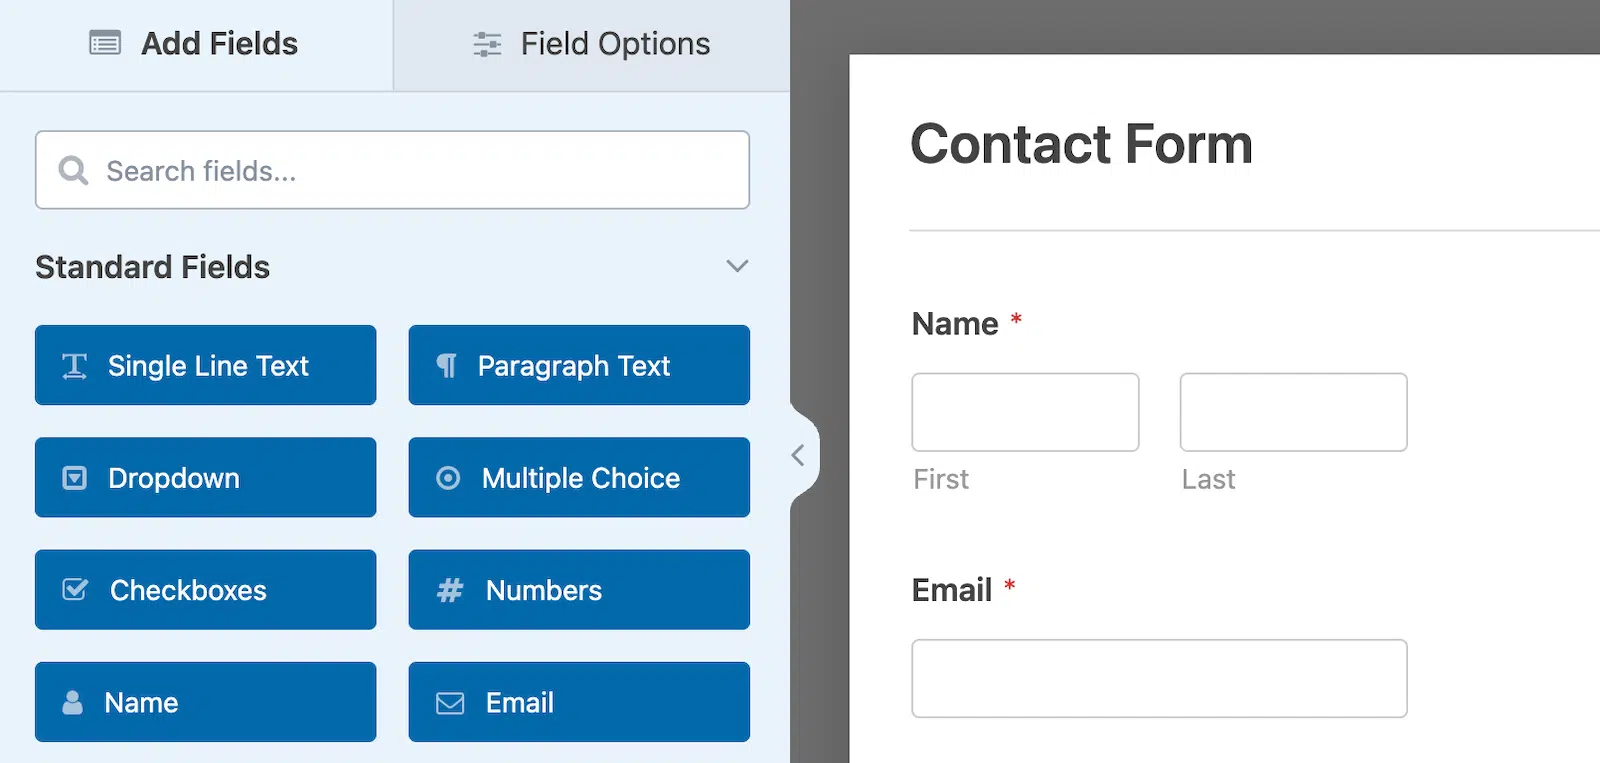
We’re going to add a dropdown field next so that the user can pick the recipient.
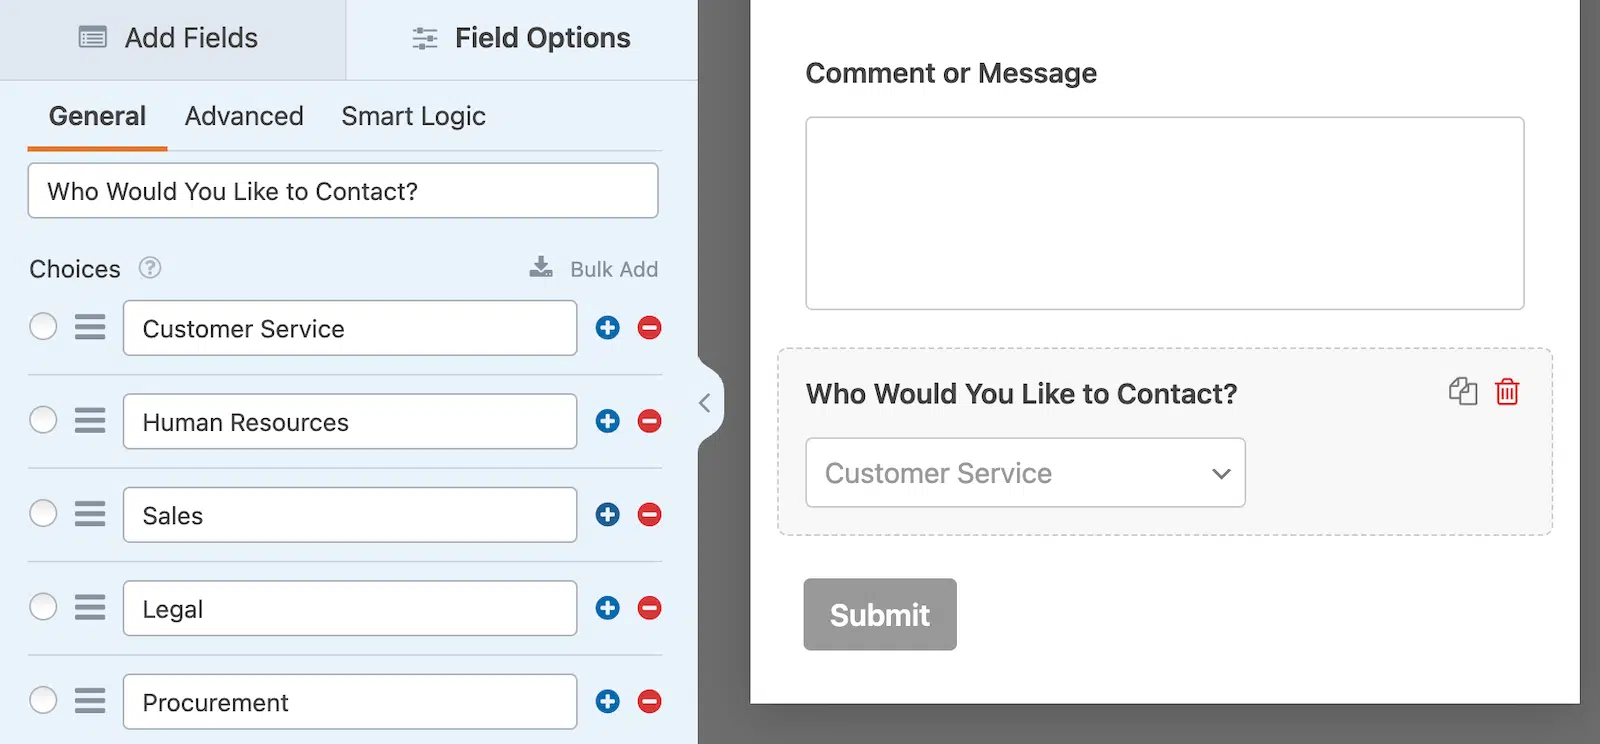
Go ahead and drag the dropdown field onto your form, then click on it to open the settings.
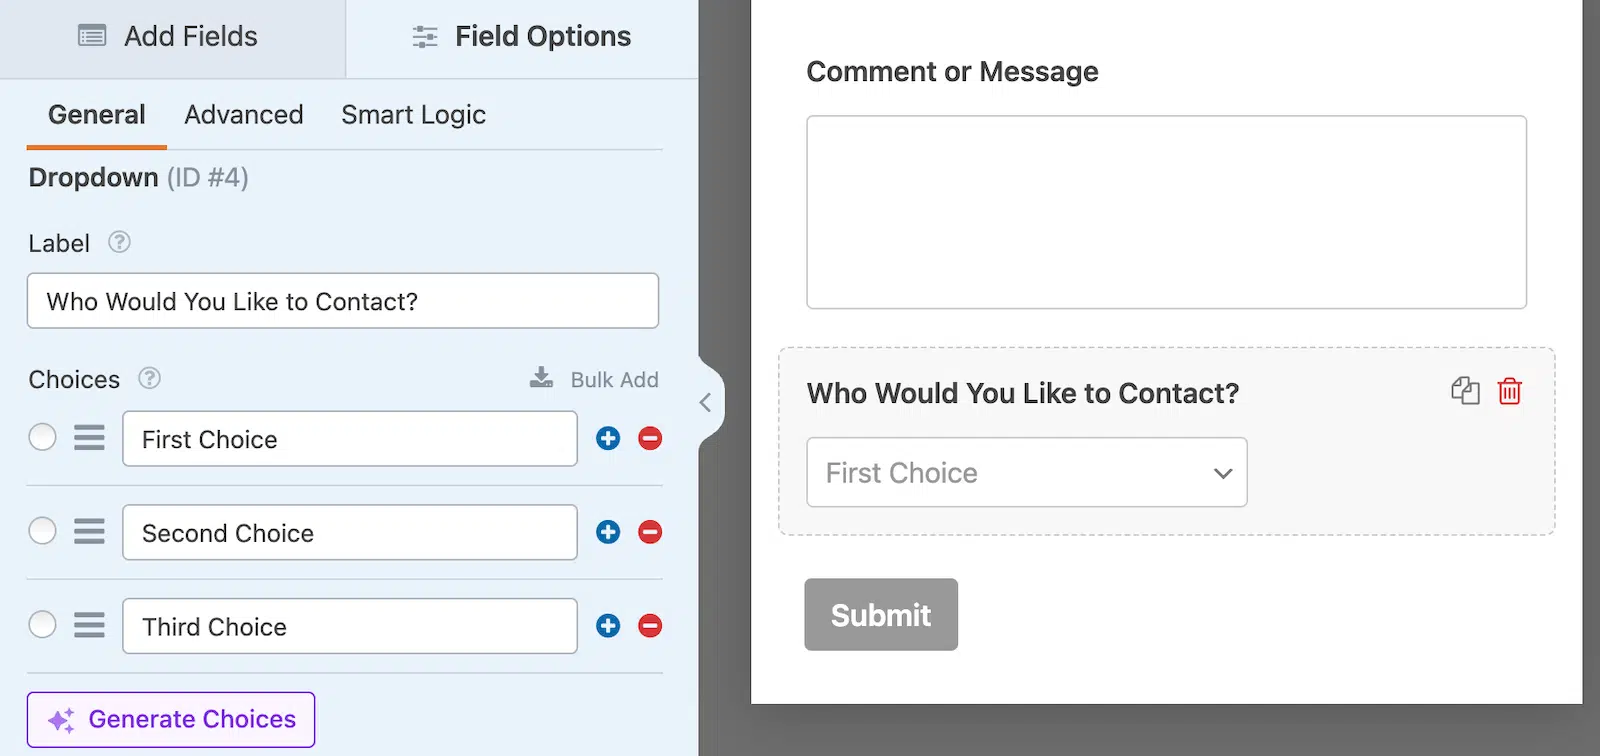
You’ll want to change the Label first. We’re using “Who would you like to contact?” here.
You can add a choice for every person or department you want to add for contact. If you only have a few, you can add them manually.
If you have a large company with a lot of departments, consider using the AI Choices feature by clicking Generate Choices.
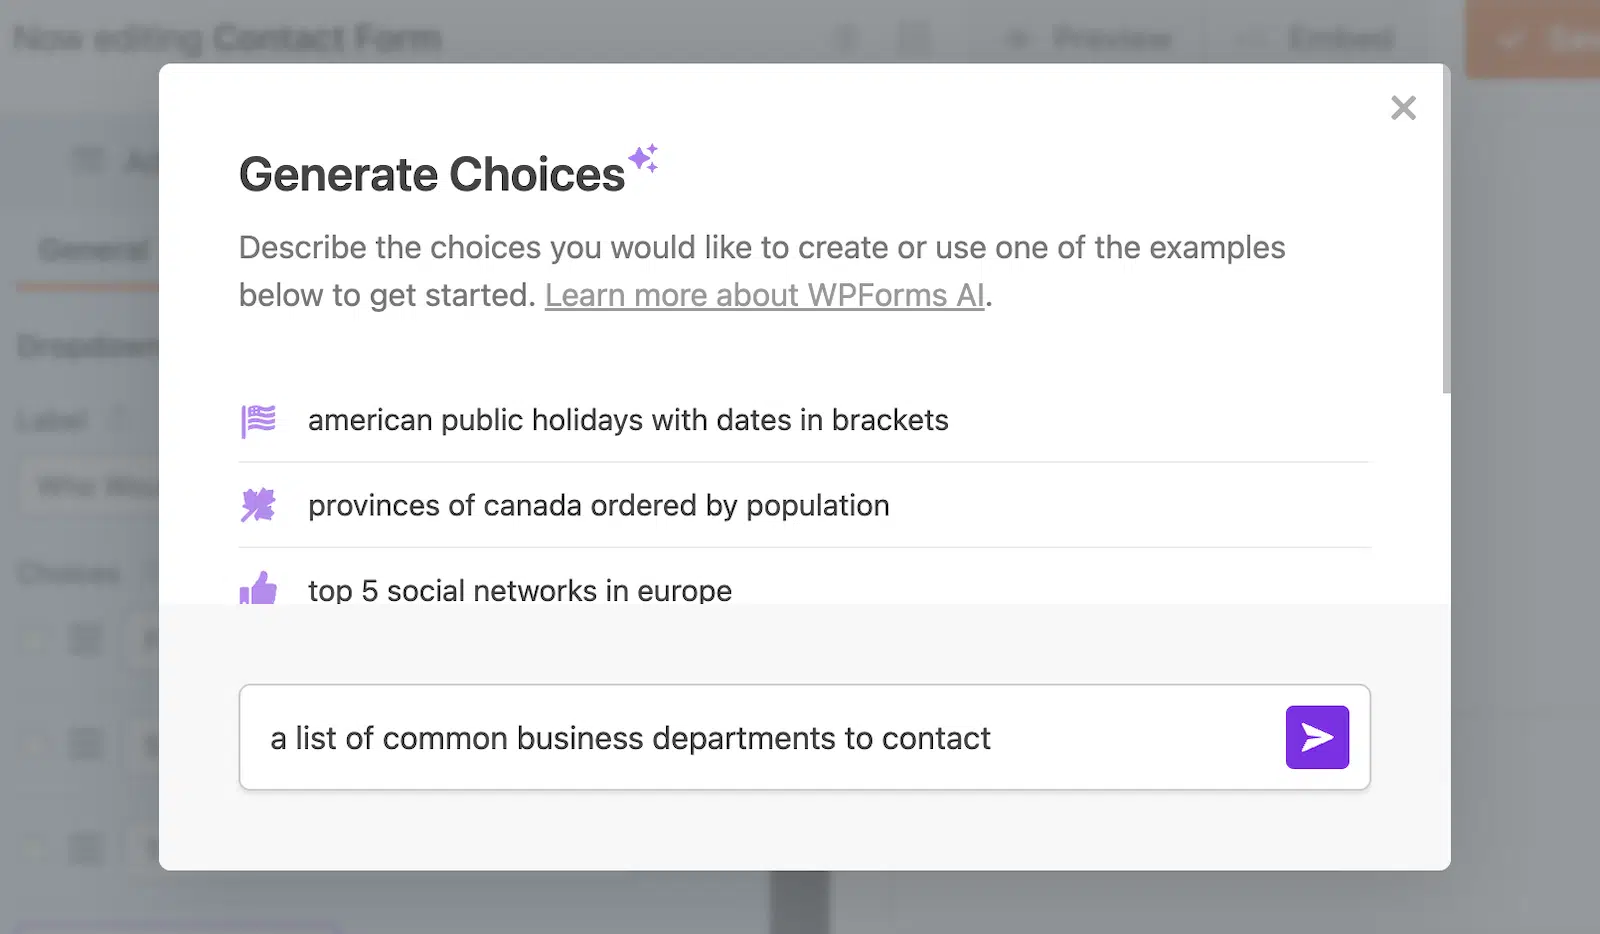
It will generate a list of options for you and you can edit it to remove the ones you don’t need if necessary. You can reorganize them by dragging the options to appear in whichever order you like.
Whether you add options manually or use the WPForms AI Choices feature to generate a list, once you have your list in place, check the box to make this field required.
Don’t forget to mark the field as Required.

Now let’s set up the notifications for each of your departments or recipients.
Save your form before moving on to the next step.
3. Set Up Conditional Notifications
In this step, we’re going to create conditional logic for the dropdown field. Each option in the dropdown will be paired with an email address, and we’ll tell WPForms to send the notification based on the selection.
To start, click the Settings icon on the left-hand side of the form builder.

And now click Notifications to see the email that will be sent when your form’s submitted.

In the Send To Email Address field, type in the email address for the first dropdown option. In our case, it’s our customer service email.

You can tweak the other content in the notification if you’d like to.
Next, scroll down and enable the conditional logic on your notification by checking the box.

When you check the box, you’ll see the conditional logic options open underneath. Set up the conditional email like this:
Send this notification if Who would you like to contact? is Customer Service

Now scroll back up click the clone button at the top of the notification.

In the cloned notification, follow the same process again.
First, change the email to the second option in the dropdown.

Then change the conditional logic statement to Billing

Repeat this process of cloning notifications until you have 1 notification for every option in your dropdown. Save your form before moving on to the final step.
4. Publish Your Contact Form
You’re all set! We’ve created your form and set up the logic. Let’s publish your form. There are 3 ways you can embed a form on your site with WPForms. For this example, we’re going to use the Embed button and create a new page.
At the top of the form builder, click Embed.

Next, click the Create New Page button to make a fresh page for your form.

And in the next popup, type in a name for your new page.

If everything looks good, simply hit Publish to go live!

It’s that easy! Now you have an awesome contact form with multiple recipients.
Next, Add a File Upload Field to Your Form
Now you have your form set up, you can add a file upload field to your form as well. For example, you could add a field for a customer to upload an invoice, then conditionally show it if they select the Billing department.
Ready to build your form? Get started today with the easiest WordPress form builder plugin. WPForms Pro includes lots of free templates and offers a 14-day money-back guarantee.
If this article helped you out, please follow us on Facebook and Twitter for more free WordPress tutorials and guides.


Syed, isn’t there a setting to prevent the form from resending when the page is refreshed?
I have a listing’s page with multiple people. I want to put a WP form under each listing so people can contact them through the form instead of putting email addresses on the page.
Is there a solution using WP forms that I can use. Of course, I can add the forms. However when the page gets refreshed the form submissions get resent.
I do hope there is an answer to my dilemma.
I absolutely love WP forms.
Hi Michael,
If you’re seeing users refreshing the page, I’d recommend using a Thank You page rather than a confirmation message. We have a great tutorial with examples of how to leverage a Thank You page to your advantage. This page could include a link back to the form page if they want to submit the form again.
Hope that helps! 🙂
Great option , i need to choose recipient when sending an email but it don’t work with free version 🙁
Too bad , I will check for an alternative form plugin.
Hi Pierre.
The Conditional logic feature is available with any of our paid licenses.
In case it helps, we currently offering a 50% discount for all new purchases.
I apologize for any confusion!
Have a good one 🙂
Do you have nested (AND/OR) conditional selections such as IF(State = TX) AND IF(Department = QA) then send to a specific user and then also have a catch all in case these options are not available?
Hi Carlos!
You can absolutely create conditional Notifications in WPForms to be sent based on the user’s input in the form fields.
For more detaiuls, please checkout this article on our site. In case it helps, we also have this one on how to use AND/OR conditions in WPForms.
I hope this helps.
Have a good one 🙂
We would like to have our users be able to send out their referral code to anyone in their contacts. Are we able to do this using wp forms? If not, any suggestions?
Thank you!
Hi Neil, I’m sorry, we’ll need a little bit more details before I can conclusively let you know if our plugin is the right tool for you. Could you please contact us and provide some more details or an example of the workflow you have in mind? Screenshots, screencasts, or even links to a working example would also be helpful.
Thanks!
Hello
Is it possible for the user to enter the email address they wish to send the form to?
Hi Stephen! It sure is possible to set up your notifications in a way so that the form goes to the email they wish. To do this, you’d take your email field’s ID number to generate the proper Field ID Smart Tag, then place it in your form’s Notification setting’s Send To Email Address field.
In case it helps also, you can find details about Notification Settings in this article as well.
I hope this helps to clarify 🙂 If you have any further questions about this, please contact us if you have an active subscription. If you do not, don’t hesitate to drop us some questions in our support forums.
Hi
Is it possible to have a reusable global form that will be placed on multiple posts/pages where the recipient is determined by a custom field in the post?
This will be used to allow visitors to apply to job postings. Each page with a posted job will also include this global form. The form submissions should be sent to a recipient based on the specific department for the job (marketing, sales, etc.). That department will be identified in an Advanced Custom Field within the job posting. Is that possible?
Similarly, we’d also like the subject of the email to be dynamic and include the specific job title – which would be the page/post title. I assume if the recipient question above is possible, changing the subject dynamically should be possible as well.
Thanks
Hey Chris, I am sorry it is not possible to dynamically set the send to email as you’ve described. This is because of the order in which data and tasks are processed by the form. Notifications are processed before some of the values for the Smart Tags are processed. Again, I do apologize as we can’t be able to provide what you are looking for at the moment but I’ve made a note of this feature request.
In regards to including the page/post title, it should be possible using the {page_title} Smart Tag in the Email Subject Line.
Having said that, in order to make sure we answer your question as thoroughly as possible and avoid any confusion, could you please contact our team?
If you have a WPForms license, you have access to our email support, so please submit a support ticket. Otherwise, we provide limited complimentary support in the WPForms Lite WordPress.org support forum.
Thanks.
Hello!
Is the dropdown option for selecting recipients available on the free version of WPForms?
Hey Jim, the dropdown select is available on the free version of the WPForms. Please take a look at the list of the standard field here.
It is worth mentioning that, if you will be following this guide, in order to set up conditional notifications, you will need a Basic or higher license. The Conditional logic feature is available with any of our paid licenses.
In case it helps, we currently offering a 50% discount for all new purchases.
Have a good one
I have 10 different departments, each with its own email address. After setting up the form as shown in this guide, is there a way to load the form with the correct department already selected, maybe passed in as a URL parameter? For example, if the user clicked on the contact us form through my Sales web page , the contact form would load with the dropdown box already having the Sales value selected.
Hey Omar – You can pre-fill the dropdown with an incoming URL using Query String. You can add create link on the specific page with the query string URL, and if user clicks on that link, the related option will get pre-selected in the Dropdown field. For more details, please take a look at our documentation here.