AI Summary
Are you looking for a way to include a contact form in the middle of your blog post, rather than just on your contact page? As a site owner, you need to give your readers an easy way to contact you from your site.
In this tutorial, we’ll show you how to add a contact form to your WordPress post content.
How to Add a Contact Form in Your WordPress Post Content
In This Article
Step 1: Create Your WordPress Form
The first thing you’ll need to do is install and activate the WPForms plugin. For more details, see this step-by-step guide on how to install a plugin in WordPress.
Once you’ve installed the WPForms plugin, go to WPForms » Add New, and name your form. Then find the Simple Contact Form template and click on the Use Template button.
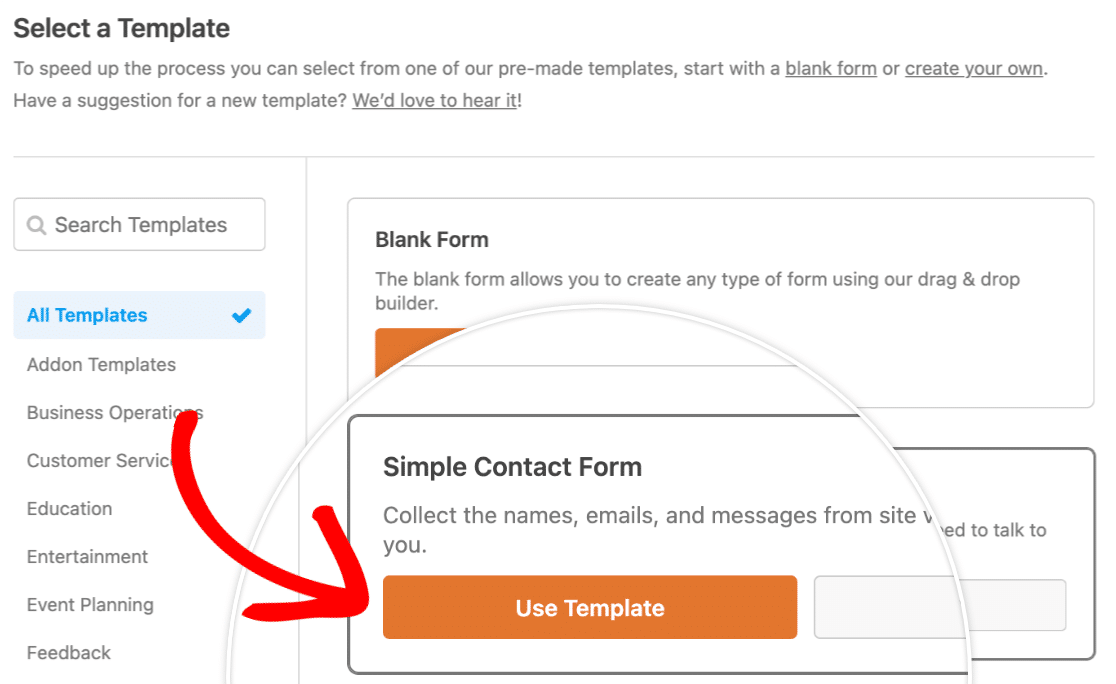
WPForms will create a simple contact form for you.
In fact, when the pre-built contact form loads, most of the work is already done. You’ll see that Name, Email, and Message fields have automatically been added to the form.
You can add additional fields to your form by dragging them from the left-hand panel to the right-hand panel.
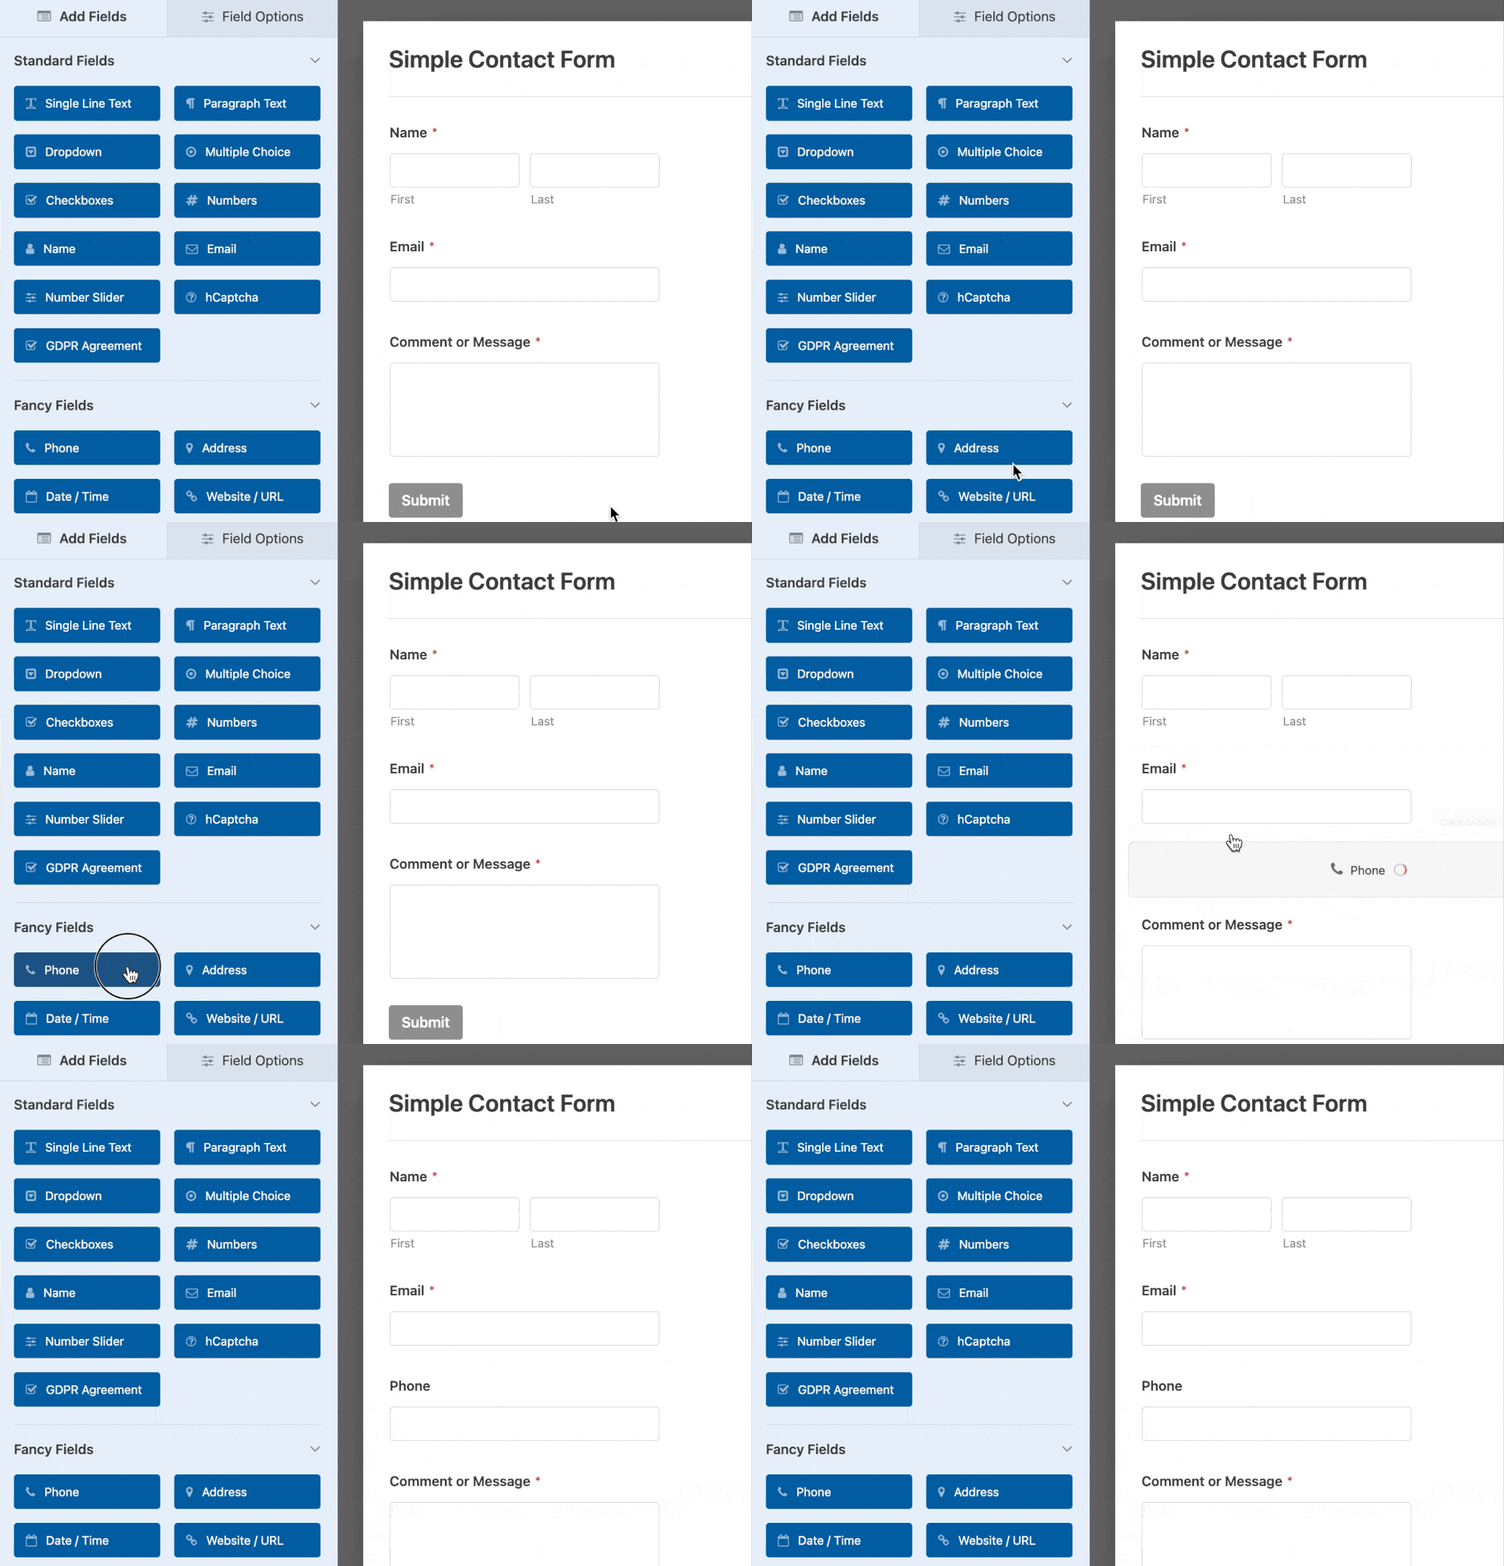
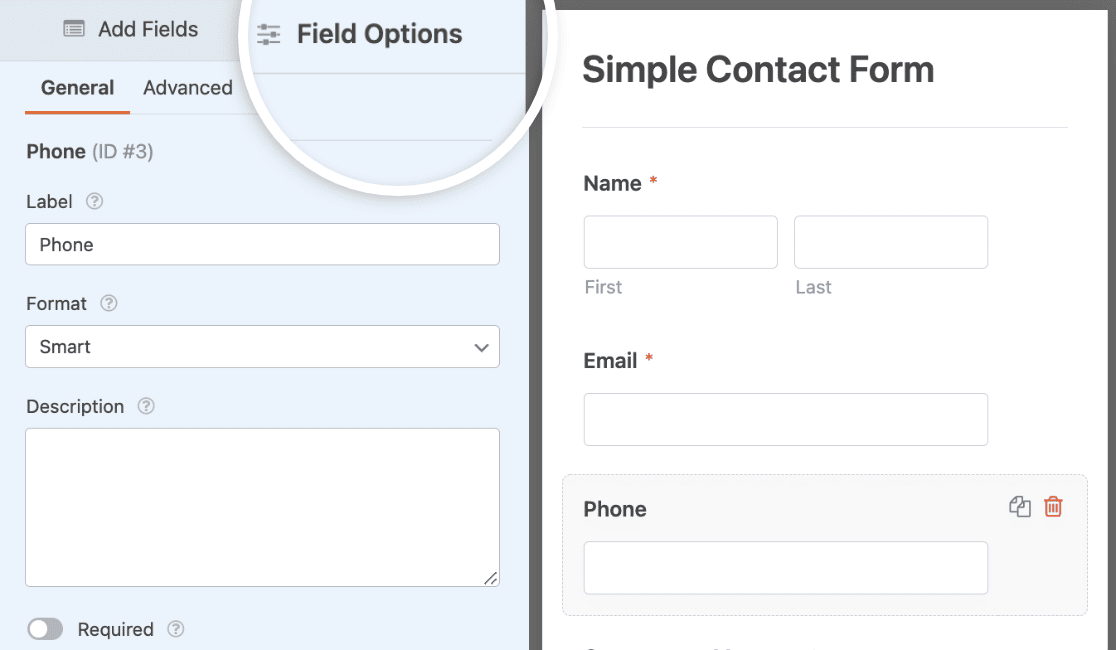
You can also click on a form field and drag it to rearrange the order on your contact form. To customize a field’s settings, click on it to open the options panel.
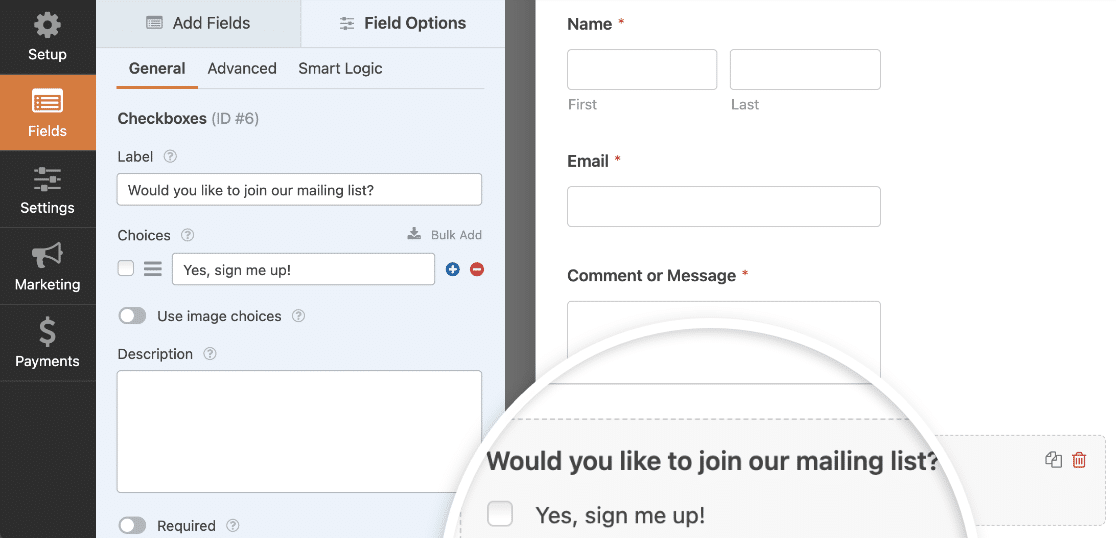
If you want to boost your email marketing efforts and let people easily subscribe to your email list, you can always add a signup checkbox to your simple contact form that users can select.
And if you’re worried about being GDPR compliant, you can also add a GDPR Agreement field to your form so people can explicitly consent to you sending them marketing emails in the future.
Step 2: Configure Your Form Settings
Once your contact form looks the way you want it to, click the Settings tab in the Form Editor. This will take you to the form’s settings.
There are many form settings to configure:
- General Settings: Here you can change things like your form’s name, description, and submit button copy. You can also enable additional spam prevention features to keep your website secure from unwanted form submissions.
- Form Confirmations: Form confirmations are messages that display to site visitors once they submit a contact form on your website. WPForms has three confirmation types to choose from: Message, Show Page, and Redirect. You can choose one or a combination.
- Form Notifications: Notifications are a great way to send an email whenever an order form is submitted on your website. A notification will automatically send to you once a form is submitted on your site. You can also send one to the site visitor who submitted the form and anyone else who needs to be notified of form submissions.
In addition, if you’ve added a subscribe checkbox to your contact form, you’ll need to integrate it with your preferred email marketing provider.
WPForms offers the following email service provider integrations:
- AWeber
- Drip
- Constant Contact
- Mailchimp
- Campaign Monitor
- GetResponse
- Brevo (formerly Sendinblue)
- Campaign Monitor
- MailerLite
Once you’ve configured all your form’s settings, make sure to save your form by clicking the orange button at the top of the form builder.

Step 3: Add Your Form to Your WordPress Post
WPForms allows you to add your forms in various locations including your blog posts, pages, and your sidebar.
If you’re using Elementor, you can skip this section and follow the steps in our Elementor contact form guide instead.
To add a contact form in your WordPress post content, the first thing you need to do is either create a new blog post in WordPress or edit the existing post where you want to add the contact form.
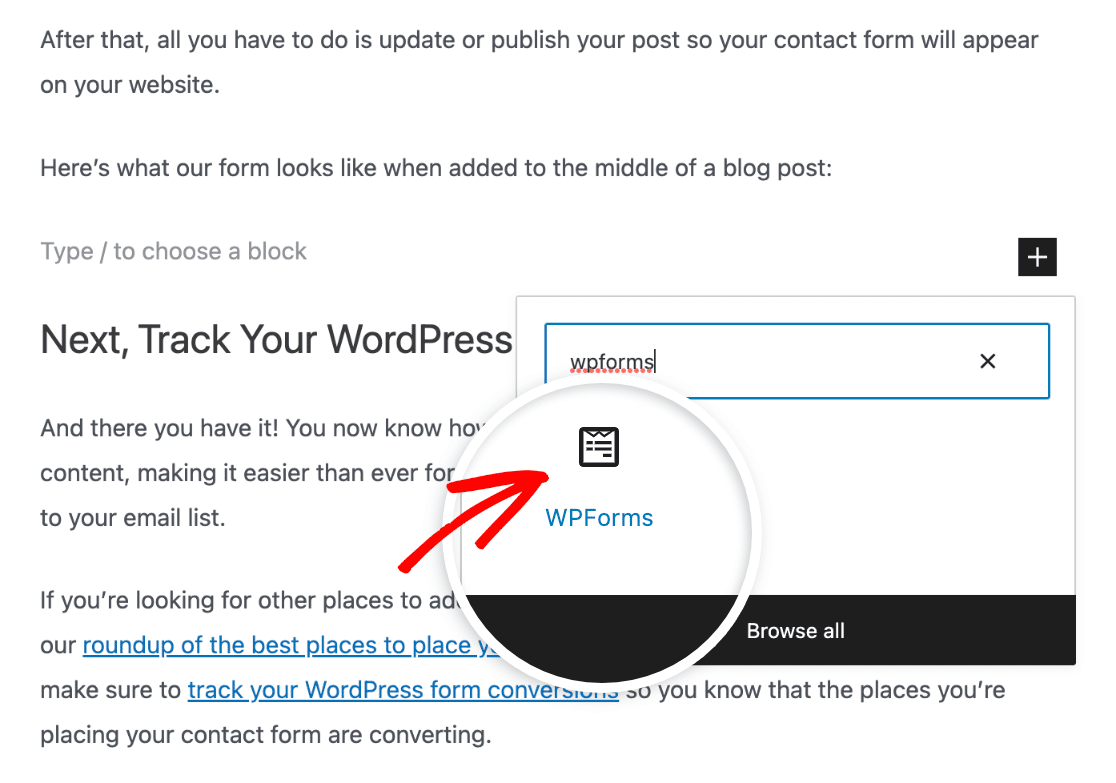
Next, add a new block wherever you want your form to appear. Then select the WPForms block.
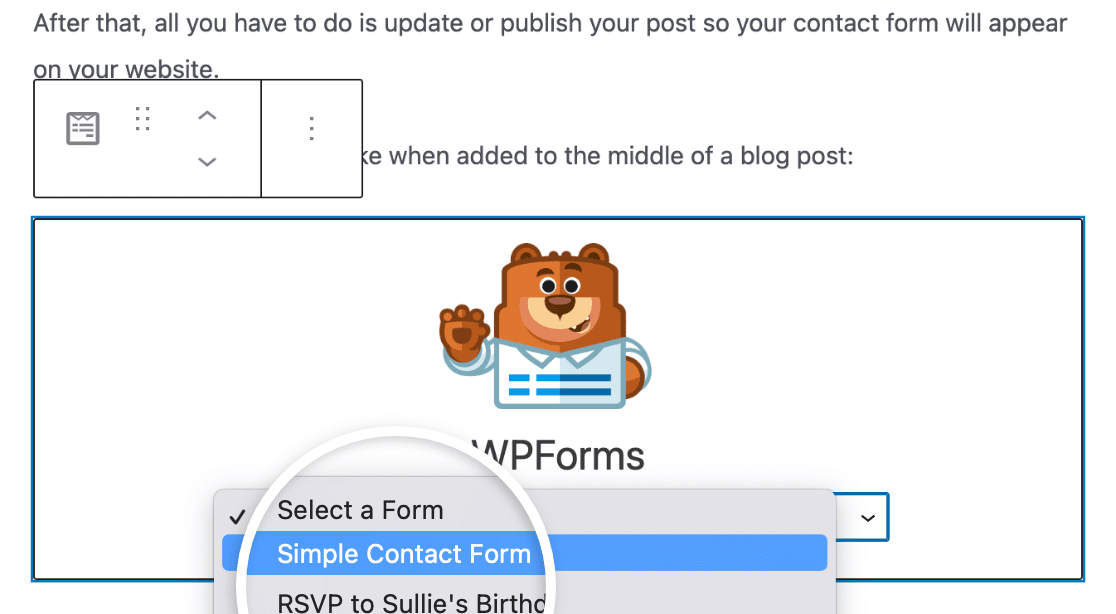
From the dropdown that appears, select the Simple Contact Form you just created.
After that, all you have to do is update or publish your post so your contact form will appear on your website.
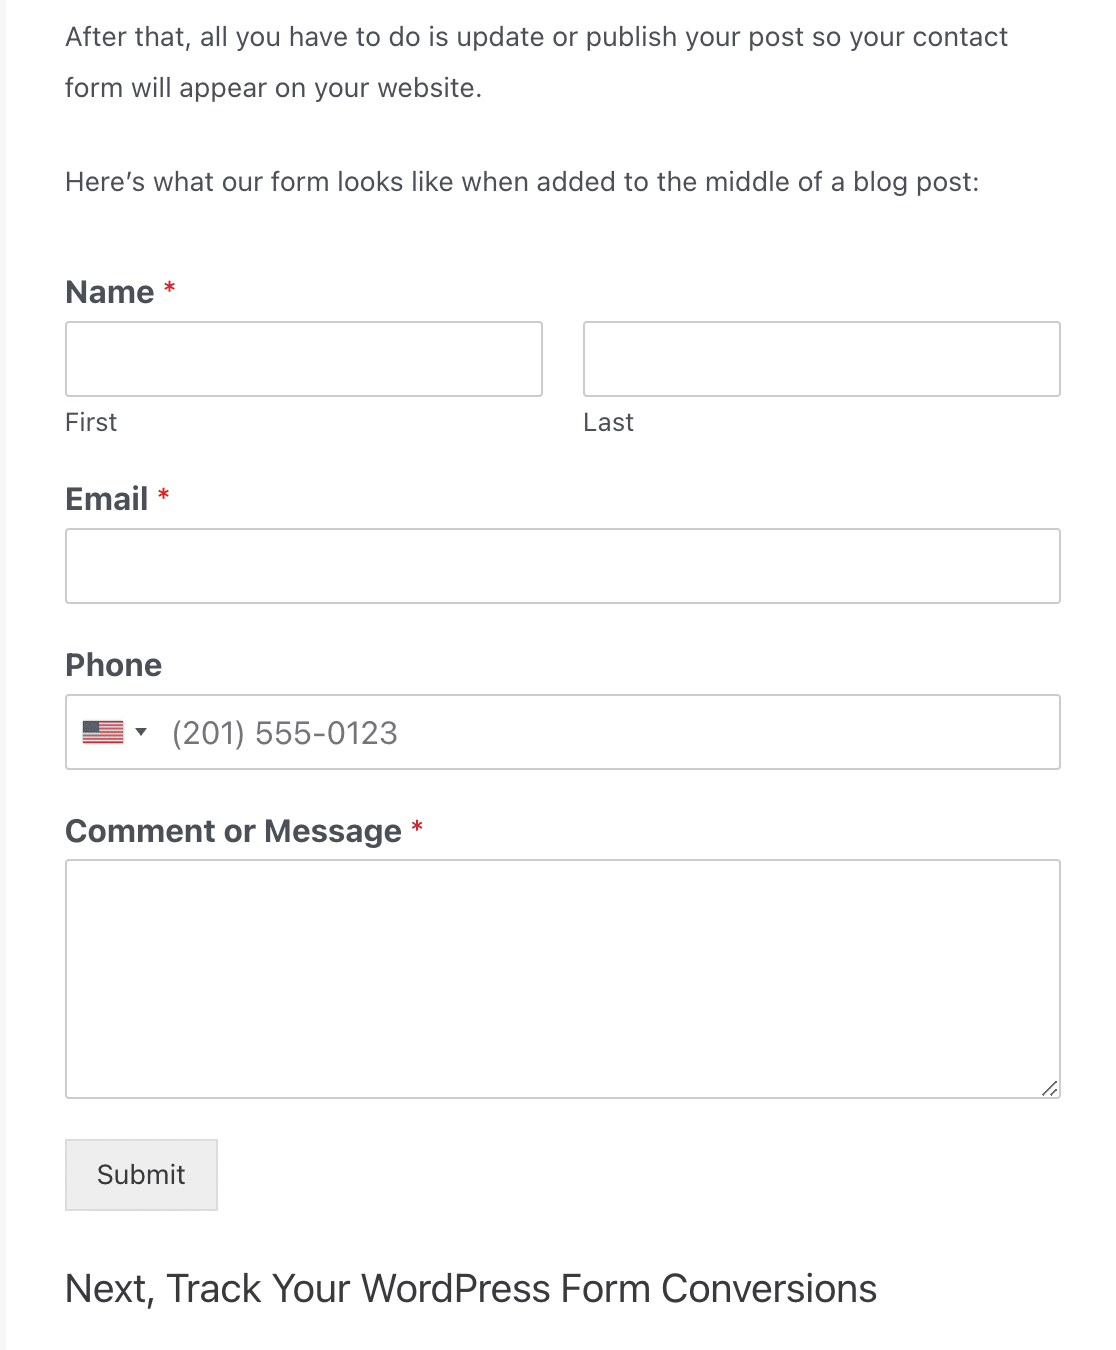
Here’s what our form looks like when added to the middle of a blog post:
Once you’ve published your form, you can easily find which blog posts you’ve added it to using the WPForms Form Locator.
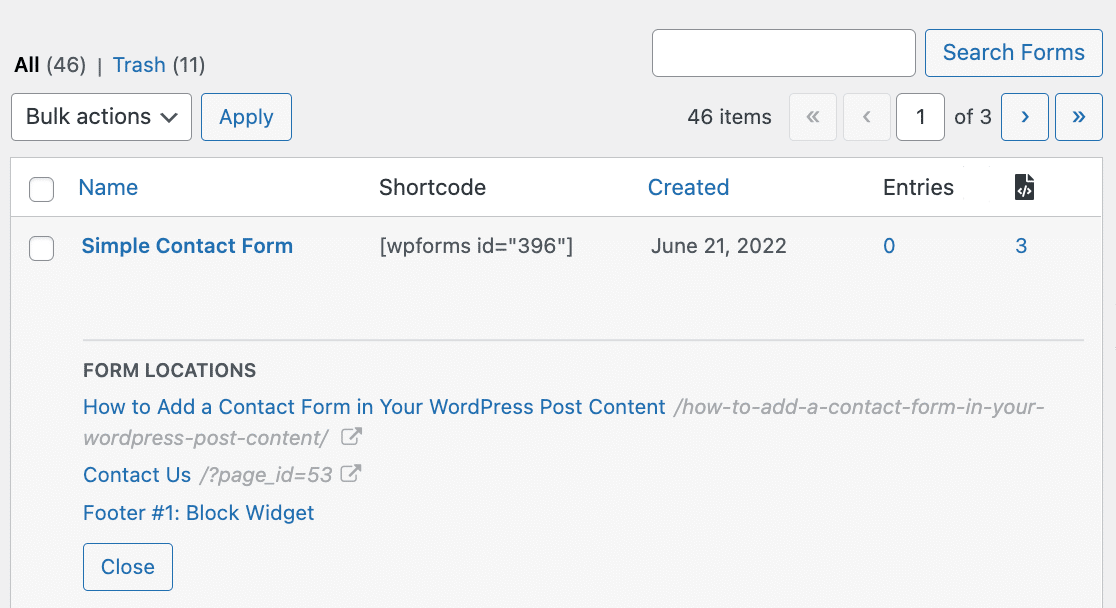
Head over to the WPForms » All Forms. Open the screen options at the top of the page and make sure the Locations option is checked.
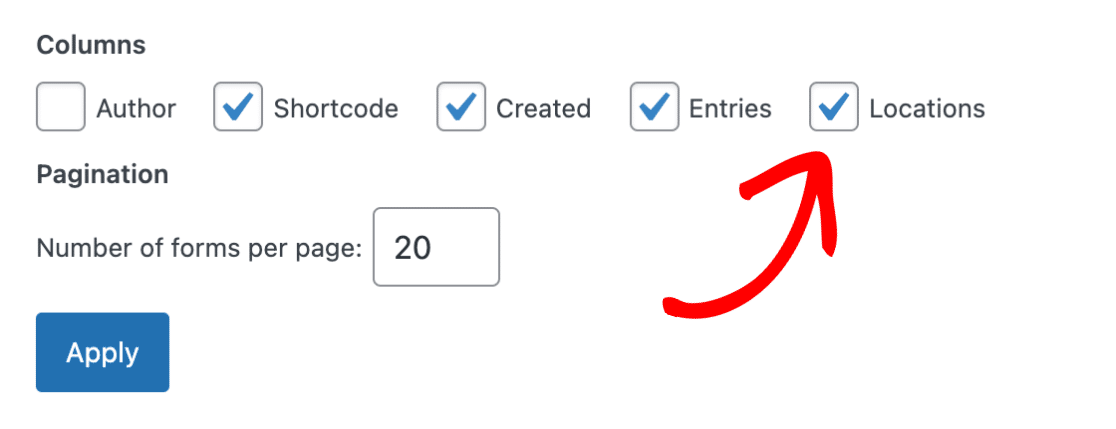
This will add the Locations column to your Forms Overview page. In the row for your Simple Contact Form, you’ll see the number of locations where you’ve embedded it.

Click on this number to see all the locations listed. You can click on the link for any of them to view the post, page, or widget where you’ve added your contact form.
Next, Track Your WordPress Form Conversions
And there you have it! You now know how to add a contact form in your WordPress post content, making it easier than ever for your site visitors to get in touch and even subscribe to your email list.
If you’re looking for other places to add your WordPress contact forms, be sure to check out our roundup of the best places to publish your contact form for more leads. Adding to that, make sure to track your WordPress form conversions so you know that the posts you’re adding your contact form to are converting.
So, what are you waiting for? Get started with the most powerful WordPress forms plugin today.
And don’t forget, if you like this article, then please follow us on Facebook and Twitter.


not receiving any email notification after submitting form.
Hi Andy, we recommend setting up SMTP for reliable email delivery, since WordPress’s built-in method can sometimes fail. Feel free to reach out to support if you need help with your WPForms notifications 🙂
I have a page with a calculated fields and I want to send it so it shows the calculation via a contact form, and it does not work … Can you help me?
I hope you understand me, because I do not speak English well …!
Hi George,
Sorry about any confusion, but we don’t currently support any calculations in our forms aside from adding up prices of products. This is on our list to consider down the road, though.
If you have more questions about this, please feel free to reach out 🙂
This was really helpful to me. Thanks for your support
Hello,
There’s a way to automatically write the post title on the notification email?
Hi Nicolas,
Sure, to set this up you can use our built in Smart Tags. Smart Tags are a super easy way to pull bits of information into your form/form settings. So for example if you add the Smart Tag
{page_title}to your notification email Subject/Message, it will automatically pull the page/post title where the form was embedded when the user submitted it.For more details, please see our Smart Tags tutorial.
I hope this helps! 🙂
Hi, how do you add a form to a page?
Hi Leon,
You can follow our Getting Started guide which includes instructions on how to add a form to a page on your site.
I hope this helps! 🙂
Hi guys,
Thanks for the form. But I can’t find the “Add Form” in my wordpress page.
Can you please help.
Saiedeh
Hi Saiedeh! I hope you are doing well!
I have double-checked and I see that you can use the WPForms block in the modern WordPress Gutenberg editor. Simply try to search for WPForms when you add new block.
I hope this helps!
Have a good one 🙂
I follow instructions on how to add the form on the page. I did it but the page doesn’t show any form – only code. I used both ways: by clicking the button Add a form and second insert a code on the page.
Still nothing.
Hi Robert!
This issue will require us to cehck your pages and do some troubleshooting.
If you have a WPForms license, you have access to our email support, so please submit a support ticket.
Otherwise, we provide limited complimentary support in the WPForms Lite WordPress.org support forum.
Have a good one 🙂
How do I integrate some specific fields or field id’s from wpforms to any other page for any specific user or entry ID?
Hi Dheeraj!
Currently, we do not have a built-in feature to achieve this. I do agree it would be super helpful, though. I’ve made a note of the feature request and we’ll keep it on our radar as we plan out our roadmap for the future.
I apologize for any inconvenience.
Have a good one 🙂
Hi,
We have changed our Contact form to WPForms, and the main Comment section on our site is working correctly. However, we have many posts on our site with each post having a comment section at the end. Please advise how or if it is possible to bulk connect the comment section across every page rather than do this one by one. Thanks, Geritrak
Hey Mark – I apologize but I was not able to understand your question. Are you using WPForms as a comment form for your posts? If so, to add the form to all posts at once, you can modify your post template and add the WPForms shortcode in the PHP template so it will be visible on all posts at once. Here is a tutorial on how to add WPForms shortcode to PHP templates.
I hope this helps!
Everytime I try and put a form on my contact page when I fill out the form to test and press submit, it comes up with an error that says there has been a critical error on the website and doesn’t process the enquiry. Can you please help to fix.
Hi There- I am sorry to hear that you are facing this odd issue! This likely could be an issue related to any plugin/ theme conflict within your site. Checking your site’s error logs would help you to narrow down this issue. For any further help on this, please drop us a line in support so we can assist.
If you have a WPForms license, you have access to our email support, so please submit a support ticket. Otherwise, we provide limited complimentary support in the WPForms Lite WordPress.org support forum.
Thanks! 🙂