Are your contact form emails going to spam when the response is triggered? We get it. It’s frustrating to realize your messages aren’t reaching their recipients.
In this post, we’ll look at issues with email deliverability, including why your emails are going to spam and the easy steps you can take to fix them.
Why Do Contact Form Emails Go to Spam?
When you send an email, a lot happens behind the scenes. For instance, did you know that every email receives a spam score? The higher your spam score, the more likely your message never reaches its intended recipient.
So what affects that spam score? In short, an email’s characteristics determine whether or not it goes to a spam folder. Various factors affect an email’s score, but here’s a brief overview of some of the most common ones:
- Your server is on a blacklist
- Common with shared hosting
- Can be the result of a malware infection or hacker
- Sending a lot of images and attachments
- Images and attachments increase spam score
- Large file sizes and multiple attachments impact score
- Sending from an unusual domain TLD
- .biz, .work, .shop are examples of this type of gTLD (TLDs not associated with a geographic area)
- Choose a traditional domain TLD like .com to lower your odds of ending up in spam
- Not meeting anti-spam requirements
- If WPForms isn’t sending email to Gmail, you’re likely not meeting Google’s anti-spam requirements.
What Is the Most Likely Reason for Contact Form Emails Going to Spam?
Many WPForms customers ask us: where does WPForms data go?
If you don’t receive notifications from your forms, it’s a good question. We find that emails that don’t arrive typically land in your spam folder.

This isn’t an issue that’s unique to WPForms. Most WordPress emails are vulnerable because of the way they’re sent. To put it simply, your contact form emails are sent through a server that is not configured with email sending in mind.
Additionally, your emails may lack proper authentication to tell email providers that they aren’t spam.
When this happens, the message might not be delivered, or it might get caught up in spam filters and end up in a junk folder, never to be seen.
How Do I Stop Contact Form Emails From Going to Junk?
You might set it up so that form submissions on your site trigger an automatic email confirmation or response. If someone fills out a form on your site, you want them to receive the triggered response.
To stop your contact form emails from going to junk, you must ensure that the emails go through an email service provider so that they’re properly authenticated. Emails that aren’t authenticated tend to be marked as spam.
How To Fix Contact Form Emails Going to Spam
To fix your email deliverability issues, we’ll show you how to use the WP Mail SMTP plugin to send your website’s emails through a properly configured mail server with the right authentication.
WP Mail SMTP fixes both of these problems by helping you connect your site to a 3rd party service that will send all of your WordPress emails. We call this type of platform a mailer, and you’ll start by choosing which one you want to use.
If you’d like to learn more, we’ve written a comprehensive review of WP Mail SMTP to explain all of its features.
In This Article
1. Create a Mailer Account and Authenticate Your Domain

The first thing you’ll need to do is sign up for a mail service. Check the documentation for your chosen mailer by clicking the links below for step-by-step instructions on properly configuring your account.
- SendLayer
- SMTP.com
- Sendinblue
- Google Workspace/Gmail
- Mailgun
- Postmark
- SendGrid
- SparkPost
- Other SMTP
- Amazon SES
- Microsoft 365/Outlook.com
- Zoho Mail
We’ve found that SendLayer, SMTP.com, and Sendinblue are the best options. As transactional email providers, they’re well-equipped to handle large volumes of automated messages, such as contact form emails.
Some mailers require you to authenticate your domain by adding DNS records to your domain’s settings.
Note that each mailer provides different DNS records, so you have to go through and complete the setup on the service’s site. There are some, though, like Gmail, that don’t provide them at all.
Use the links above to access documentation for your chosen service and our guide will walk you through setup and domain authentication.
2. Download and Install WP Mail SMTP
After you set up your email provider and authenticate your domain, the next step is downloading and installing WP Mail SMTP.
First, you’ll need to select your plan.
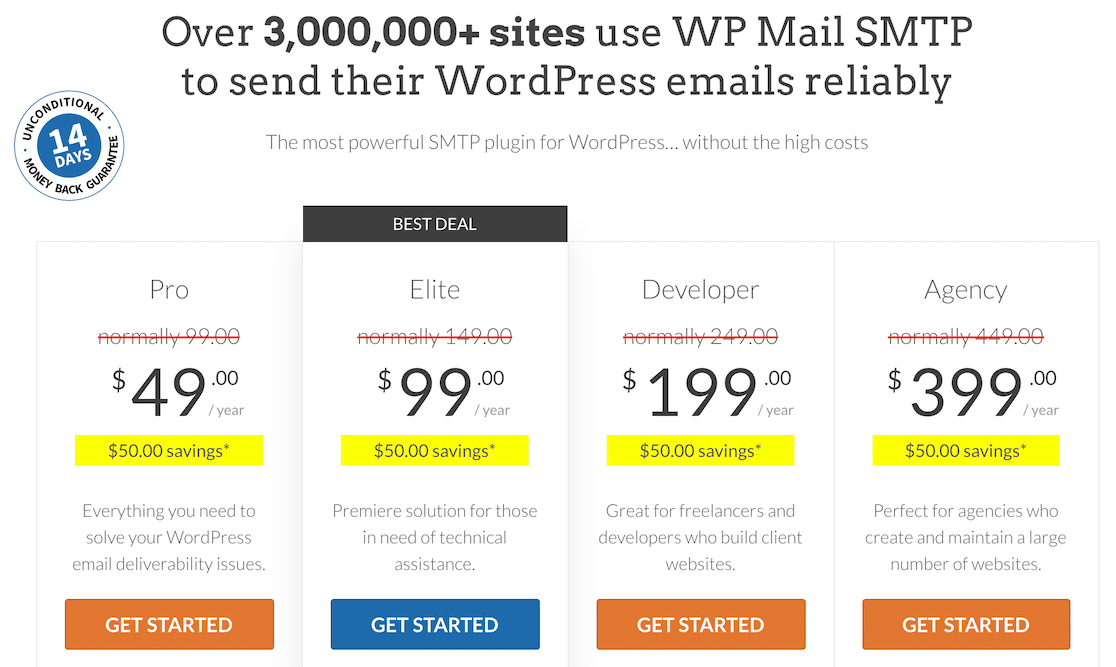
Once enrolled, you’ll receive a .zip file that you can download.
After that, you upload that file to WordPress to install the plugin.
In your WordPress dashboard, click on Plugins in the left sidebar menu, then click Add New.
Locate the Upload Plugin option at the top of that page.

Upload the .zip file with the WP Mail SMTP plugin.
SMTP, or Simple Mail Transfer Protocol, is the industry standard for sending emails with proper authentication methods, in order to ensure email deliverability. That’s why we suggest using the WP Mail SMTP plugin.
Otherwise, you might not receive notifications about your forms, your form emails may end up in a spam folder, or you may face a whole host of other problems with your types of delivery.
3. Launch the Setup Wizard and Connect Your Email Provider
After you’ve installed the plugin, you need to run the Setup Wizard. The first step is connecting the email service account you set up in Step 1 to be sure your contact form emails are delivered properly.
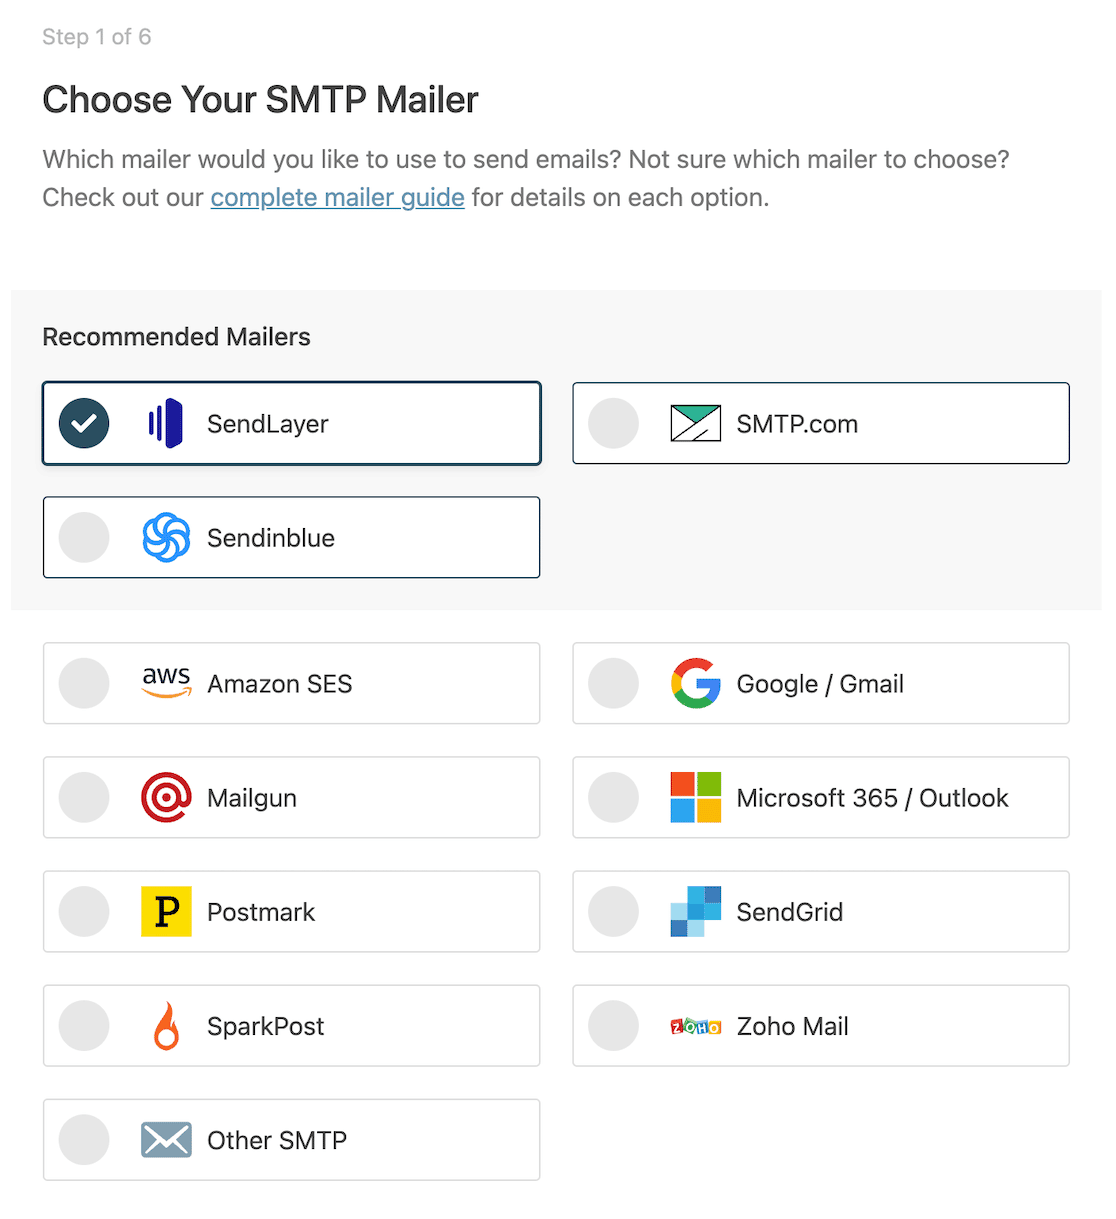
The first thing you’ll do then is select the email provider you want to use from a list of services that WP Mail SMTP supports.
You should select the email provider you used in step 1 to authenticate your domain. This is very important!
4. Set Your From Email and From Name
Once you’ve chosen your mailer, you need to ensure your From Email and From Name are formatted correctly.
This is important because when someone submits a form on your site and triggers a response, this will be the name and email address they see.
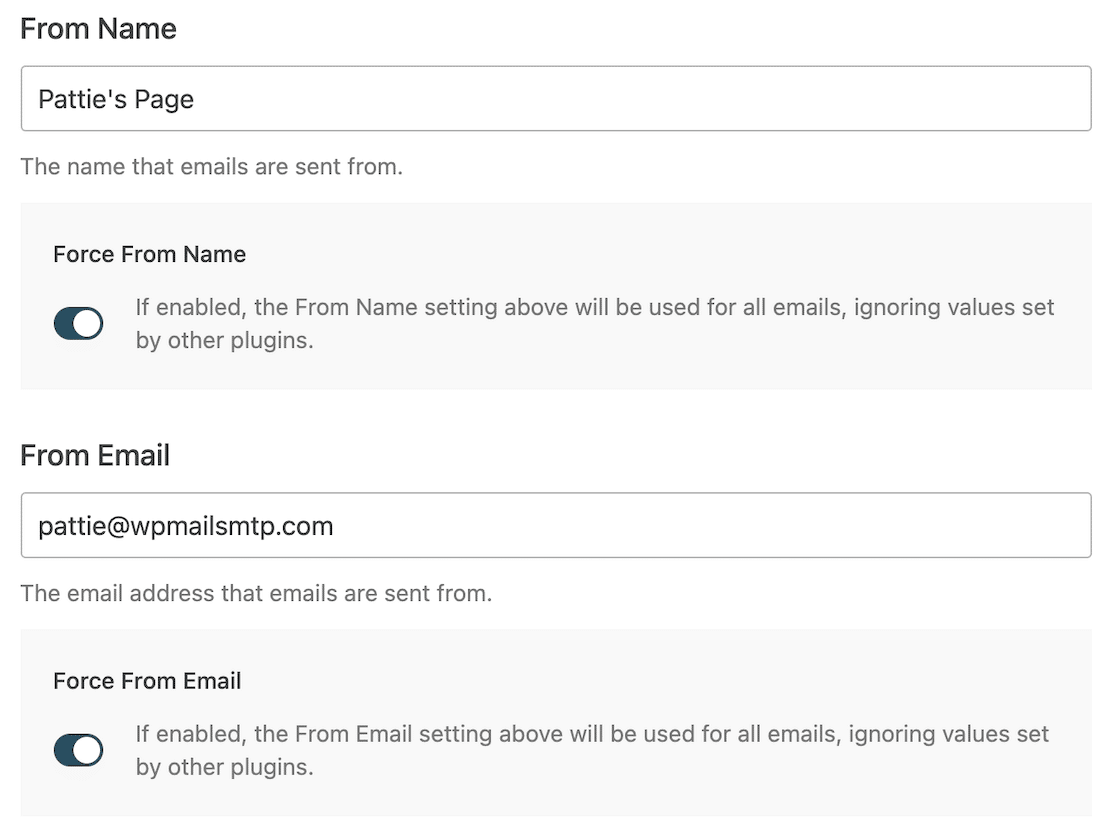
It’s crucial that the email address you use is one at the domain you authenticated in previous steps.
If you authenticated examplepage.com, for instance, then your email should end with @examplepage.com.
For each field, you can Force From Email or Force From Name.
When you select this option, you can rest easy knowing that all emails sent through your contact forms will be authenticated because you’ve already authenticated that domain name. This is a big step in preventing your form emails from landing in the spam folder.
5. Enable Detailed Email Logs and Weekly Summary
If you signed up for a Pro license with WP Mail SMTP, we highly suggest you enable Detailed Email Logs and the Weekly Summary Email when you get to the last step of setup.
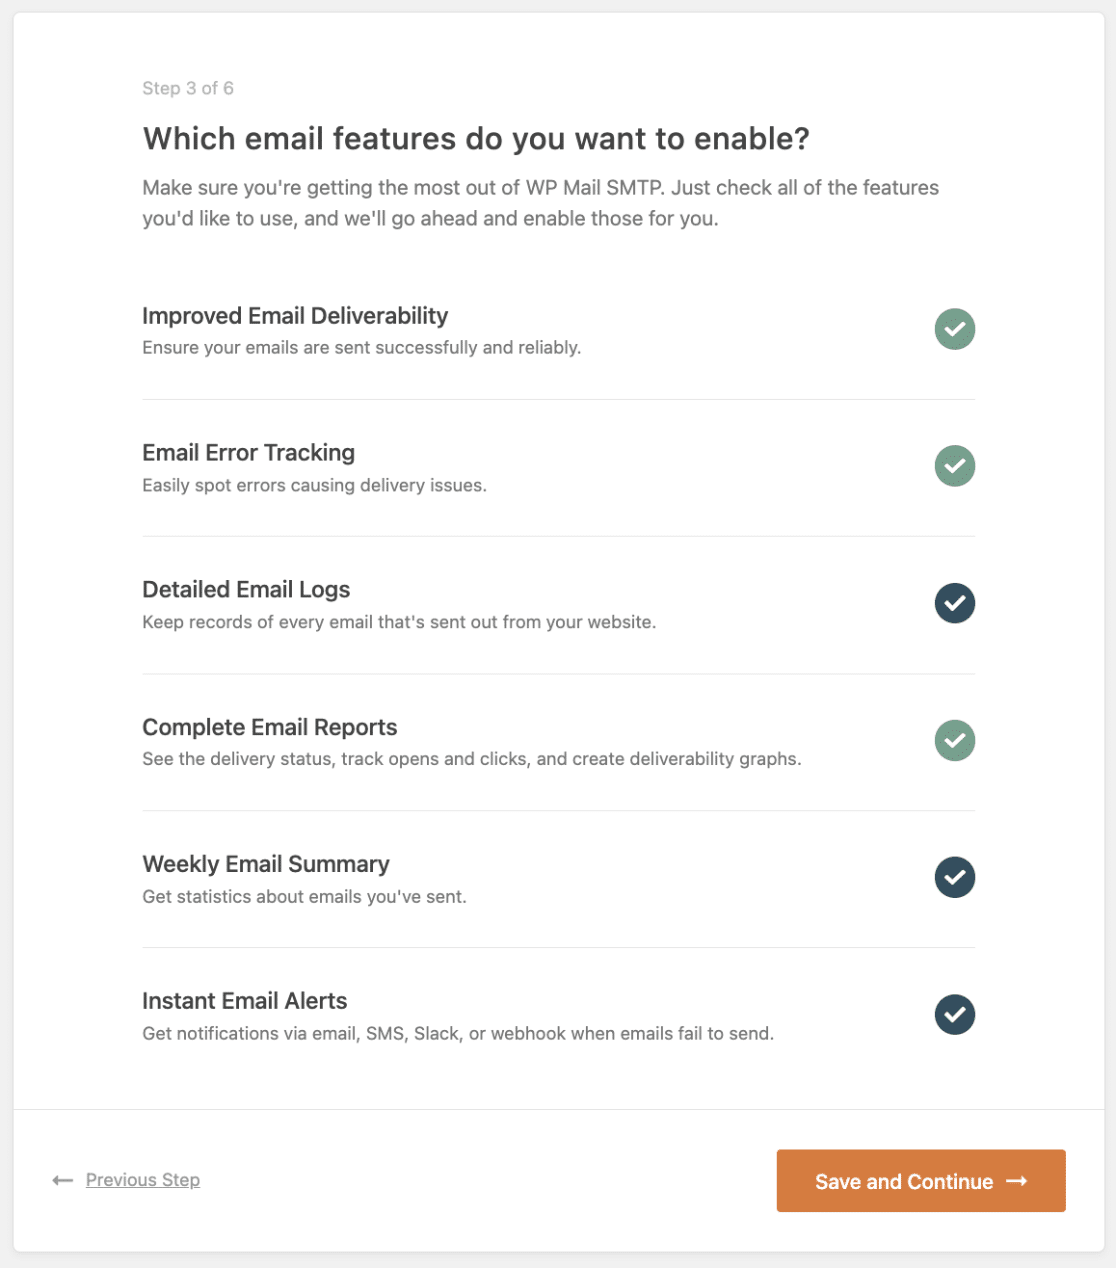
In doing so, you’ll increase WP Mail SMTP’s functionality quite a bit. Some of the features you can expect to have, then, are:
- Full email logging
- Open and click tracking
- Save email attachments
- Export email logs
- Export in EML format
- Email resend
- Weekly update detailing deliverability stats, open rates, and click-through rates
And if you want to receive automatic alerts if your site fails to send an email, you can turn on Instant Email Alerts, too.
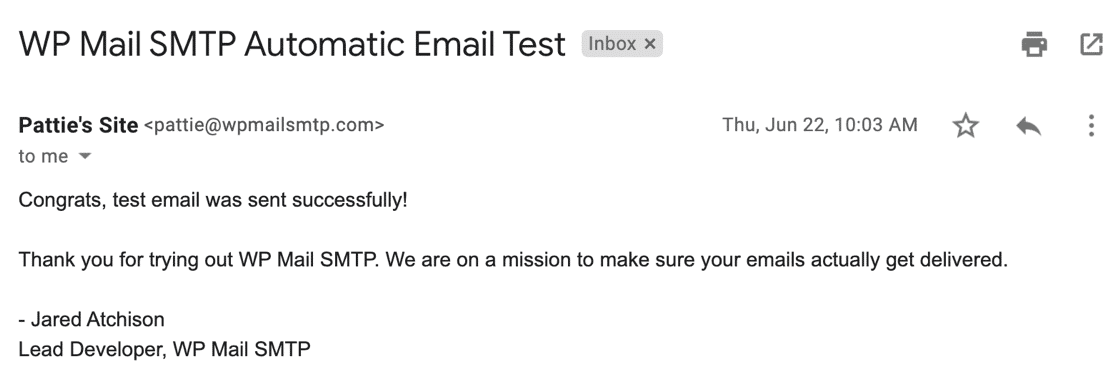
After setting up your email provider, WP Mail SMTP will send you a test email to confirm that everything is working as it should.
6. Adjusting Your Form Settings
Now that you’ve got WP Mail SMTP set up, you can go back to WPForms to check your form settings.
Open the form you want to use, and click Settings » Notifications.
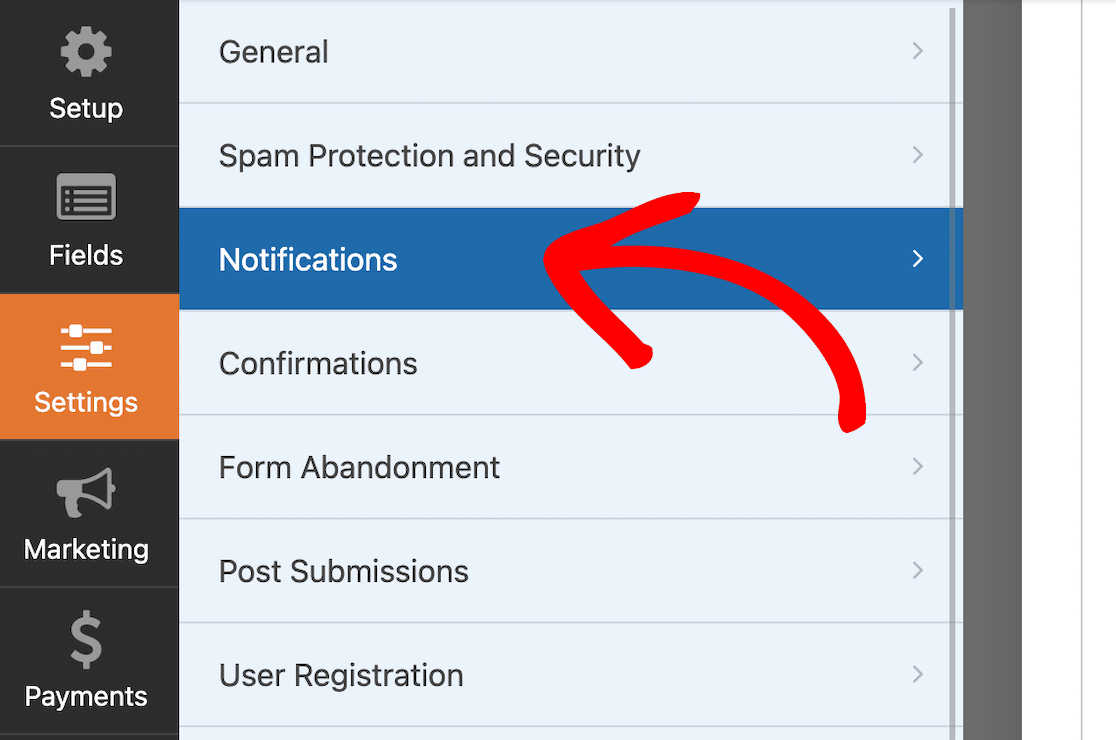
In the From Name and From Email fields, you should now see an alert telling you that you can’t change these settings because of your settings in WP Mail SMTP.

The info in these fields should match the domain you authenticated in WP Mail SMTP.
Now that you’ve gone through these steps, your contact form emails should safely land in inboxes instead of spam filters!
Next, Learn How To Change the WordPress Admin Email
Don’t make the rookie mistake of authenticating an email address only to have a different one set as your WordPress admin email. Find out how to change the WordPress admin email to match the email address you authenticated in WP Mail SMTP. We can also help if you just need to configure your WordPress email settings.
And don’t forget to learn the right way to attach files to your form email notifications. Don’t forget that too many attachments can trigger a spam filter!
Create Your WordPress Form Now
Ready to build your form? Get started today with the easiest WordPress form builder plugin. WPForms Pro includes lots of free templates and offers a 14-day money-back guarantee.
If this article helped you out, please follow us on Facebook and Twitter for more free WordPress tutorials and guides.



I’m still having some trouble. It’s not that my emails are going to spam – the responses to the contact form on my website are going to my spam folder in my email. My own email is listed as the “from”, so why would it not be trusted?
For example, when someone fills out the form on my site, the response gets sent to my email. But that email goes to my spam folder, even though it’s from myself.
I’m not sure if that makes sense. What can I do to prevent that?
Hey Amy, — We are sorry for any trouble. This guide should be able to help you, in order to make sure we answer your question as thoroughly as possible and avoid any confusion, could you please contact our team?
If you have a WPForms license, you have access to our email support, so please submit a support ticket. Otherwise, we provide limited complimentary support in the WPForms Lite WordPress.org support forum.
Thanks.
Hello, I’m having the same issue! Did you manage to sort it in the end?
Many thanks
Hello Jamie – I am sorry to hear about the trouble. When you get a chance, please drop us a line in support so we can assist.
If you have a WPForms license, you have access to our email support, so please submit a support ticket.
Otherwise, we provide limited complimentary support in the WPForms Lite WordPress.org support forum.
In the meantime, you can check this guide that should help you in resolving the issue.
Thanks 🙂