Do you want to accept sponsored posts on your site and let people pay per post with a WordPress plugin? With WPForms, monetizing your website with sponsored posts is easy. All you need to do is to create a blog post submission form and require users to pay to submit.
So in this tutorial, we’ll show you how to create a post submission form and accept payments from your users.
Start Making Money on Post Submissions Now
Accepting Sponsored Posts on Your Site
Accepting sponsored posts on your site is a common tactic to make money online. It helps your sponsors to get exposure by publishing a paid post. You can publish them once in a while to make some extra income from your blog.
When publishing a paid article, make sure to explicitly tell your audience that it’s sponsored. Otherwise, the article might come off as a little out of sync with your trusting audience. You can read how to add a sponsored post prefix to your post titles.
WPForms makes it super easy to accept sponsored posts on your site. You don’t even have to offer login credentials to your WordPress site. Still, you can let users submit articles for review on your WordPress dashboard using our Post Submissions addon.
You can also take payments right from your WordPress form. This makes accepting, reviewing, and publishing sponsored post submissions quick and easy.
Let’s look at how to let users pay per post with a WordPress plugin, step by step.
How to Require Users to Pay Per Post With a WordPress Plugin
In This Article
Step 1: Install WPForms and Addons
The first thing you need to do is to install and activate the WPForms plugin. Here’s a step-by-step guide on how to install a WordPress plugin.
Then you need to install the Post Submissions addon. You can do this by going to WPForms » Addons in your WordPress menu and clicking on Install Addon under the addon.
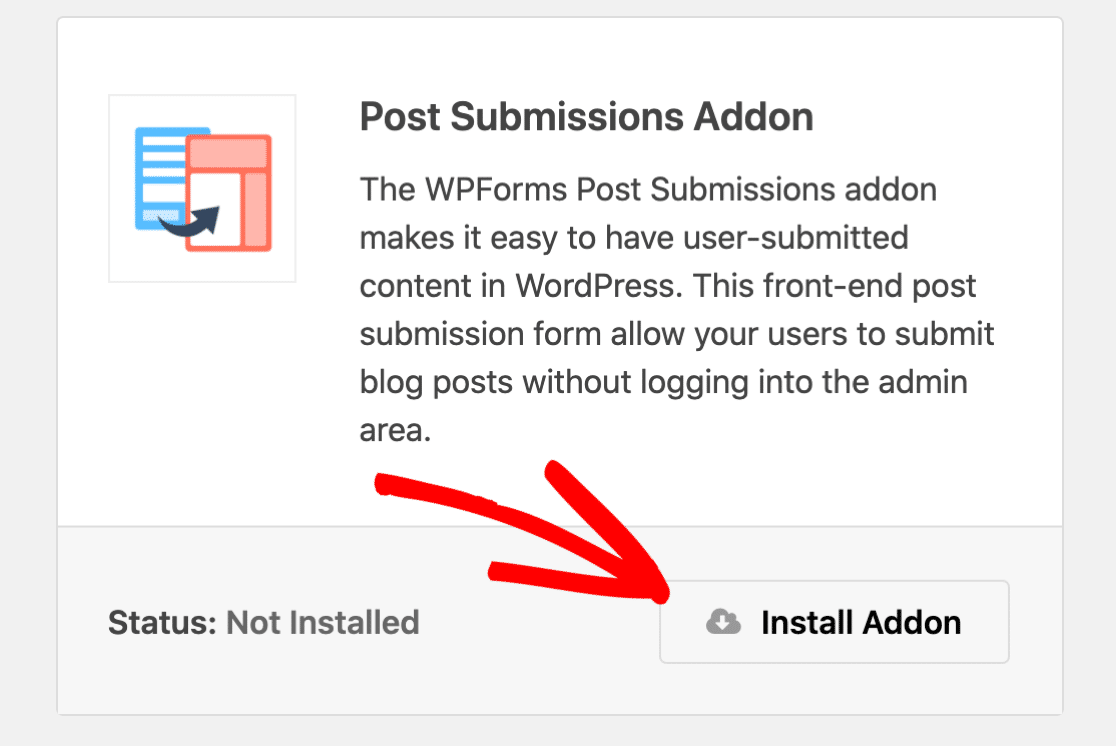
Lastly, you need to install one of the WPForms payments addons. WPForms allows you to accept payments through PayPal, Stripe, Square, or Authorize.Net if you have an Elite plan.
You can install your payment addon the same way we installed the Post Submissions addon. Then make sure you set up your payment addon before you try to add a payment field to your form. If you need help, check out our documentation for the addon you picked:
Step 2: Create a Blog Post Submission Form
After the installation, you’ll need to create a blog post submission form. To get started, you can see our tutorial on creating a blog post submission form in WPForms.
The fastest way to get started is to use our Blog Post Submission Form template.
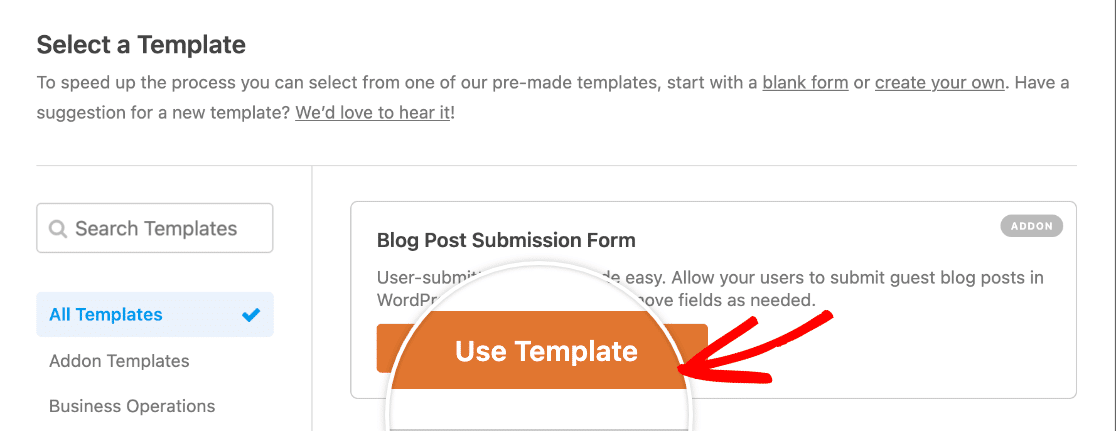
You can make any changes you want to this template to customize it. For example, you could replace the Post Content Paragraph Text field with a Rich Text field if you want to let writers style their own posts.
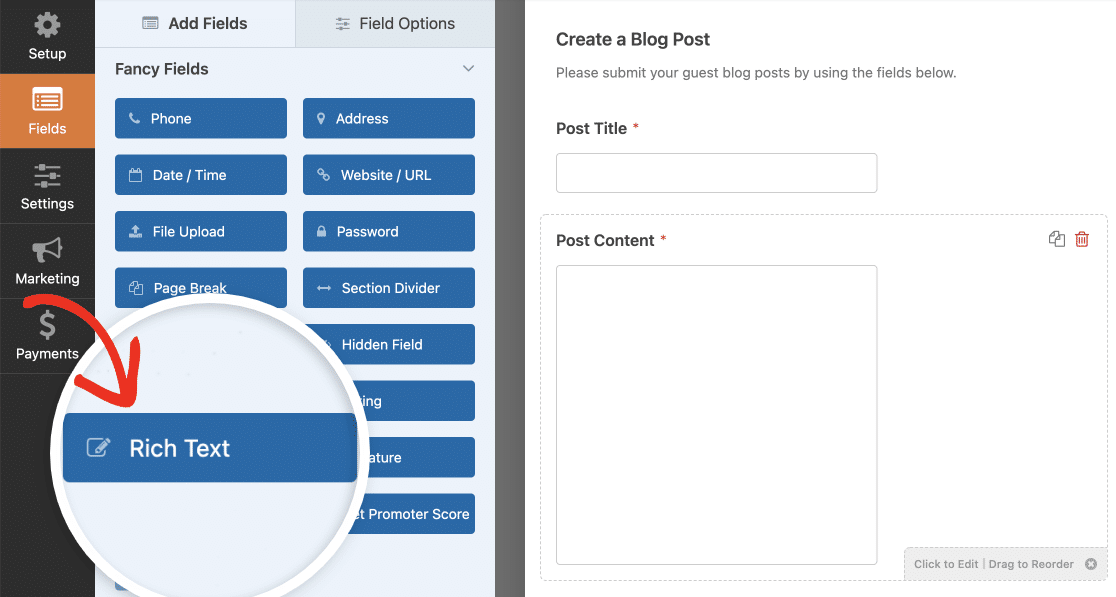
This can save you time during the review process after submission.
To require users to pay to submit a post, you’ll need to customize the form a bit more.
In this example, let’s take a look at how to accept payments via Stripe. But the steps will be pretty much the same no matter which payment addon you use.
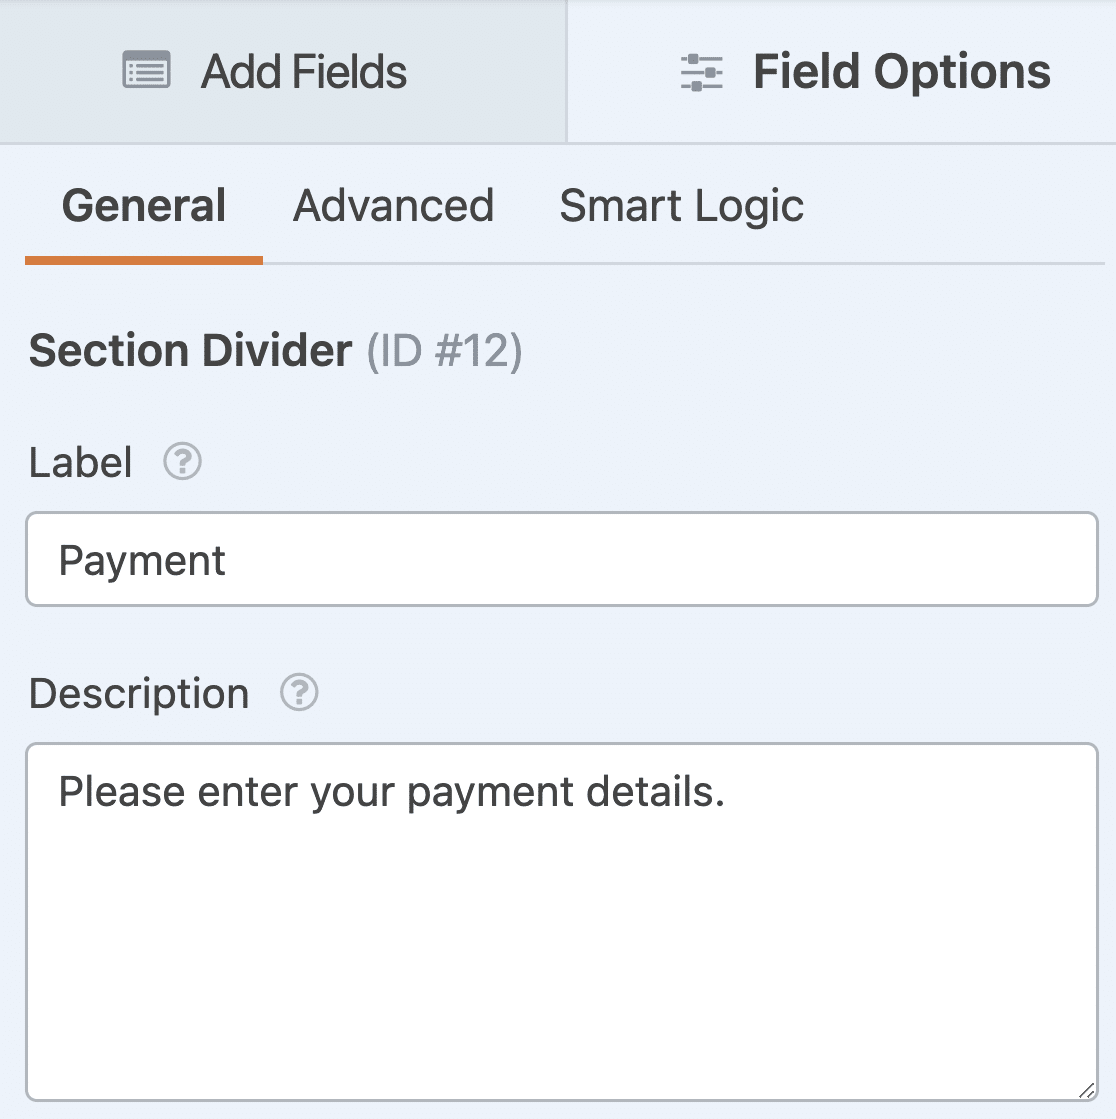
Before we add any payment fields to our form, let’s separate the payment section from the rest of the form by dragging and dropping the Section Divider field into the form.
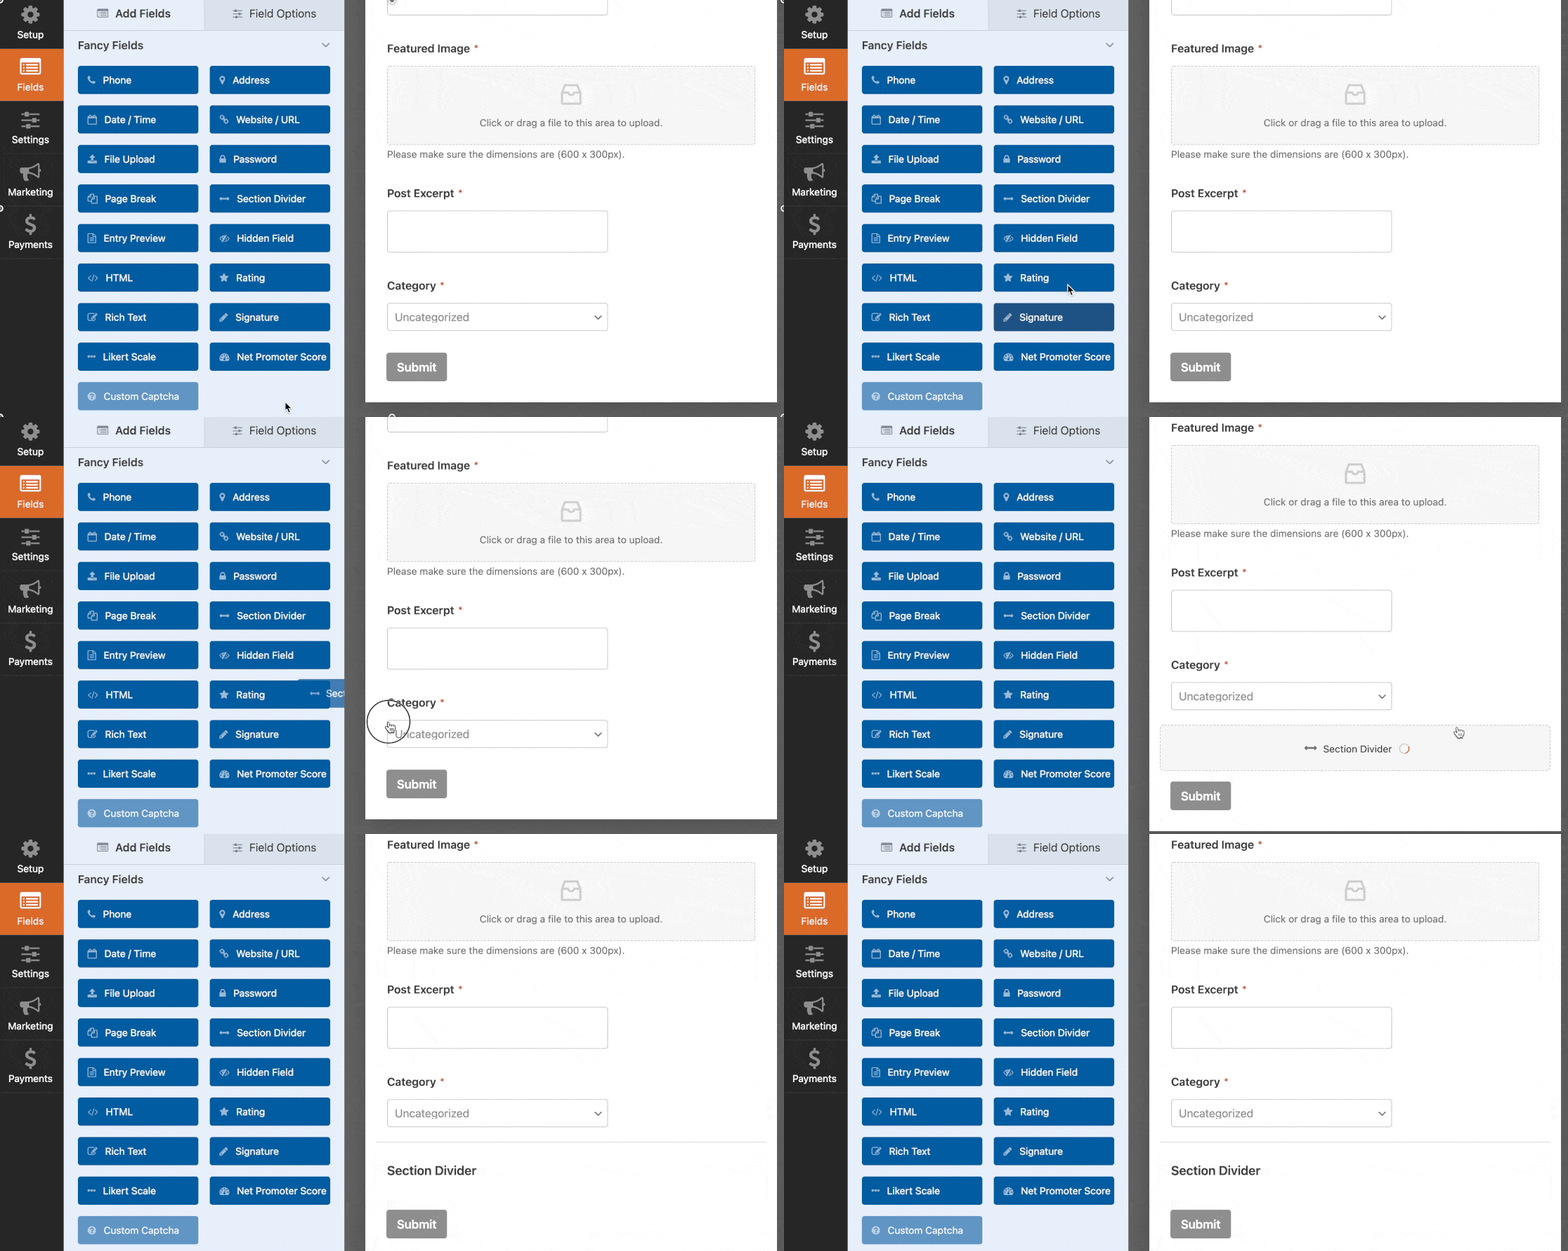
To customize the field, click on the Section Divider you just added in the right panel. In the left panel, you can now customize the label and description.
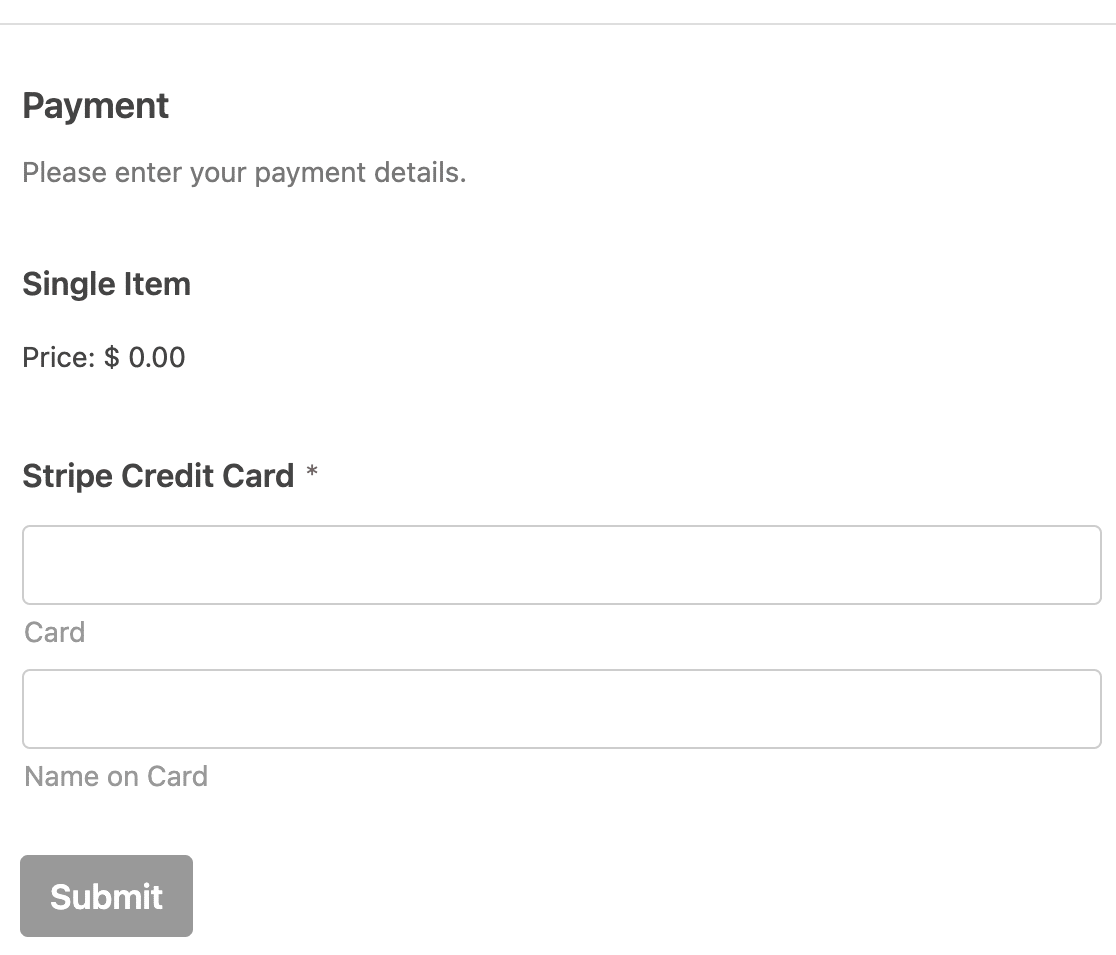
Next, let’s add 2 payment fields to our form: Single Item and Stripe Credit Card.
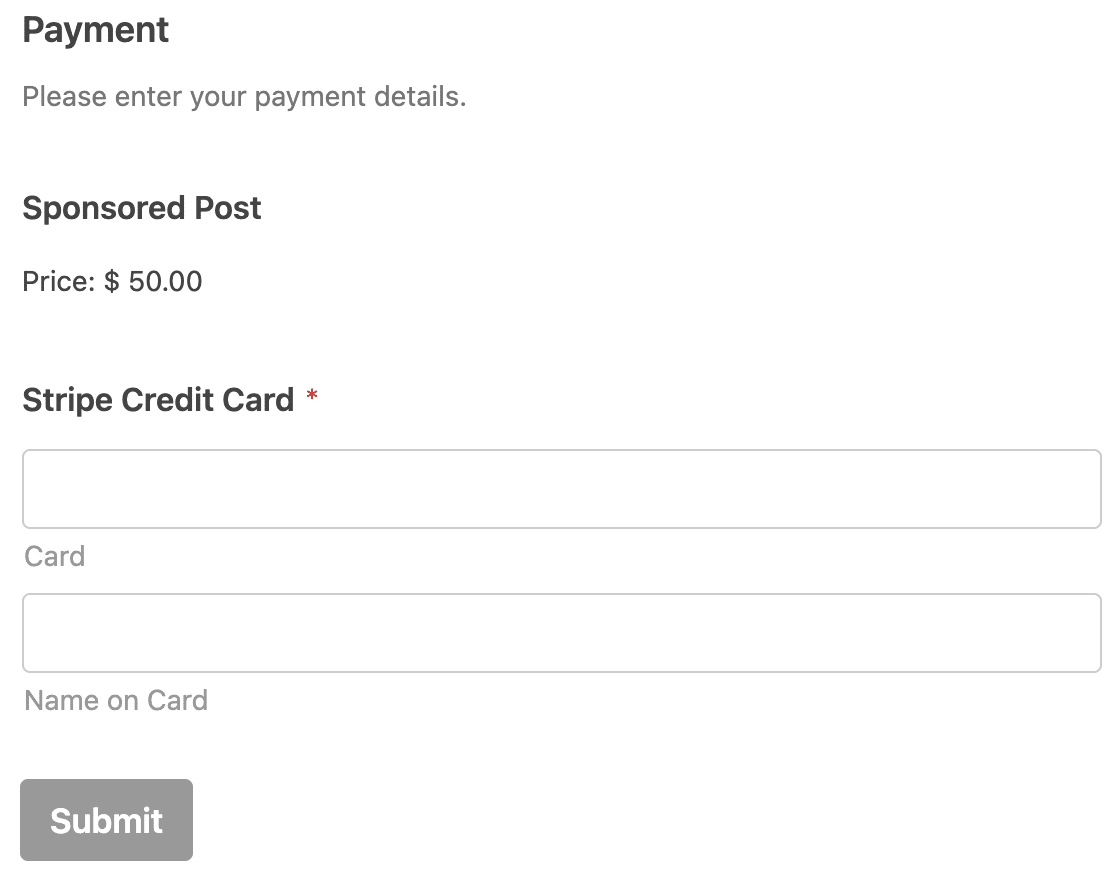
In the Single Item field, you’ll have to customize the label and set the item price. Make sure to set the right sponsored post price that is profitable for you.
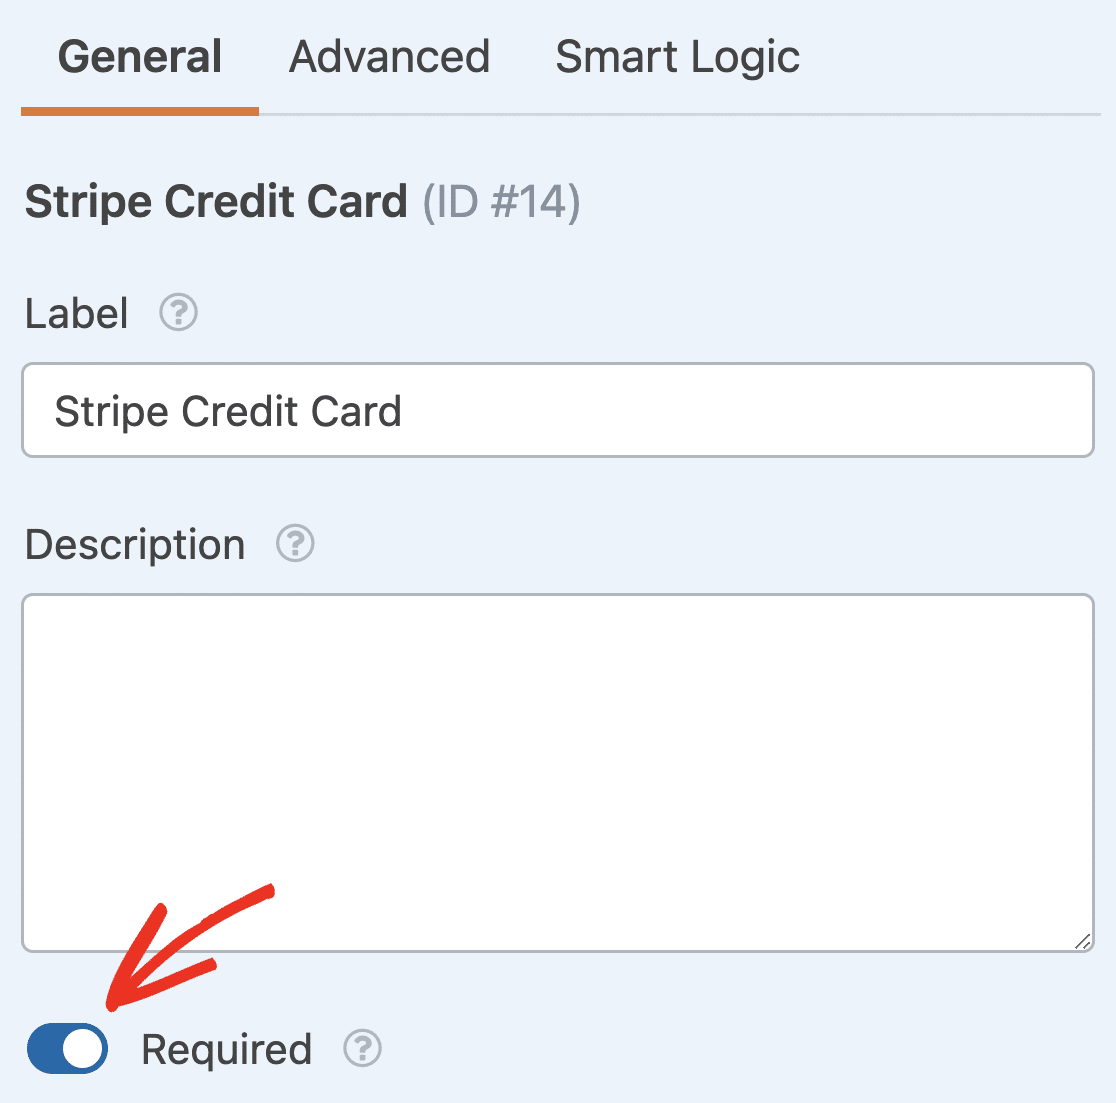
Don’t forget to make the credit card field required. Just click on it on the right side of the form builder and turn on the Required setting in the field options on the left.
Step 3: Set Up Your Post Submissions Settings
Next, you need to configure the post submissions settings. This will make it so writers can add their sponsored posts to your site without logging in.
First, click on Settings on the left side of the form builder. Then click on Post Submissions.

Then fill out the settings on the right. Make sure the Post Submissions dropdown is set to On.

Then map the next 4 settings to the fields in your form.
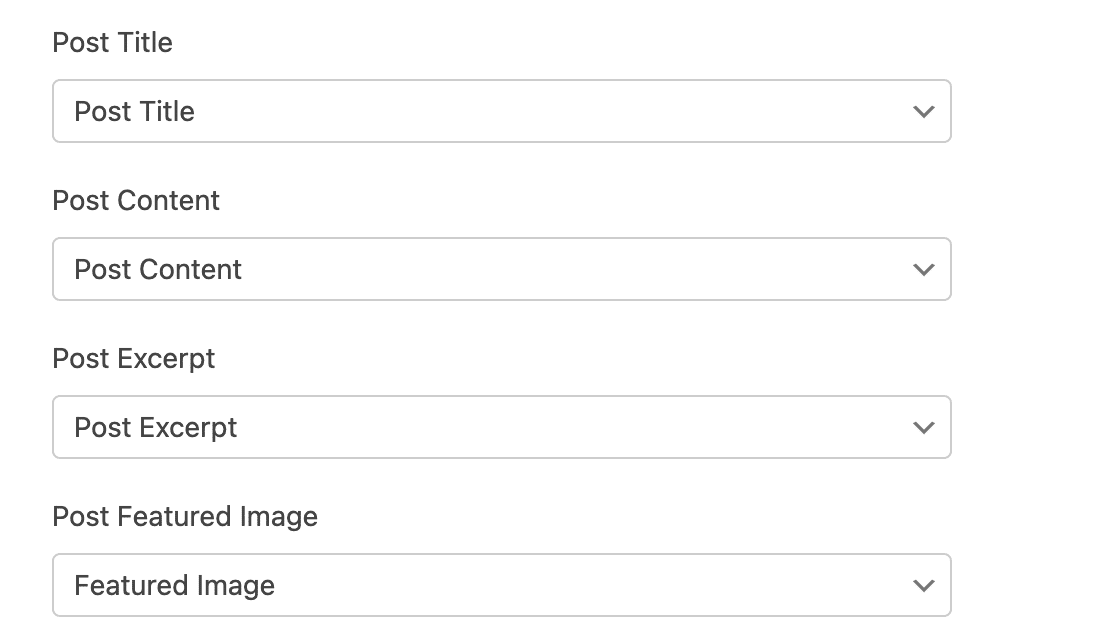
So, choose the field where users will enter the post title from the Post Title dropdown, the field where they’ll put the post’s content from the Post Content dropdown, and so on.
Leave the Post Type dropdown set to Posts. Then choose the status for new posts submitted through this form. We recommend choosing Pending Review so you can check your sponsored posts over before they go live.

Lastly, choose who will be listed as the post’s author. You can select any user from your WordPress site.

When you’re done, you can move on to the payments settings.
Step 4: Enable Payments for Your Sponsored Posts Form
Now click on the Payments tab on the left side of the form builder and choose the payment addon you installed. We’ll be using Stripe.
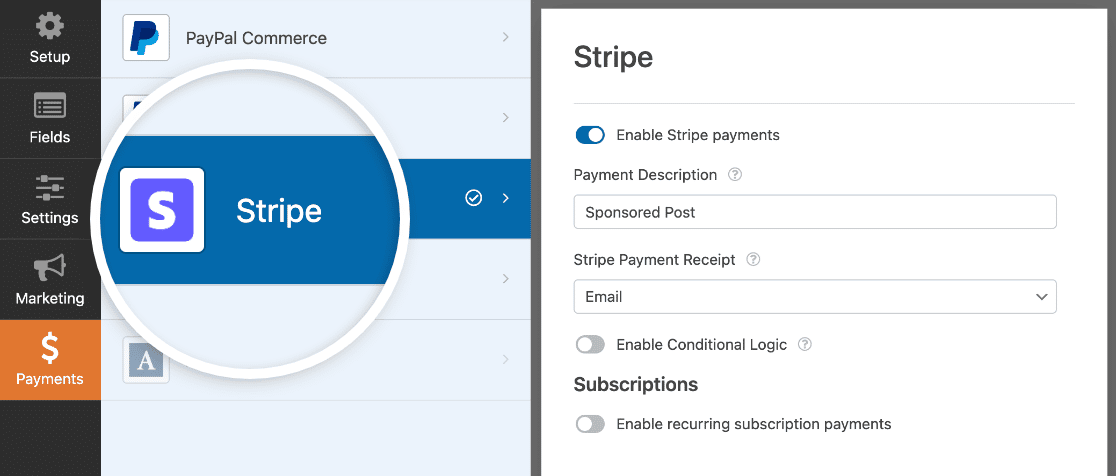
Then fill out the payment settings for your integration. If you need help, check out the documentation we linked in Step 1.
Note that you don’t need the Stripe Pro addon in order to activate the Stripe integration on your site. However, the Stripe Pro addon will unlock conditional logic support for the Stripe Payment field. So if you’d like to have conditional logic for your payment field, it’s a good idea to install the Stripe Pro addon too (available in Pro and above plans).
After you’re done, click the Save button.
Step 5: Publish Your Sponsored Posts Submission Form
Finally, all you have to do is publish your sponsored posts submission form so users can send you their content. WPForms makes this easy. Just click on Embed at the top of the builder.

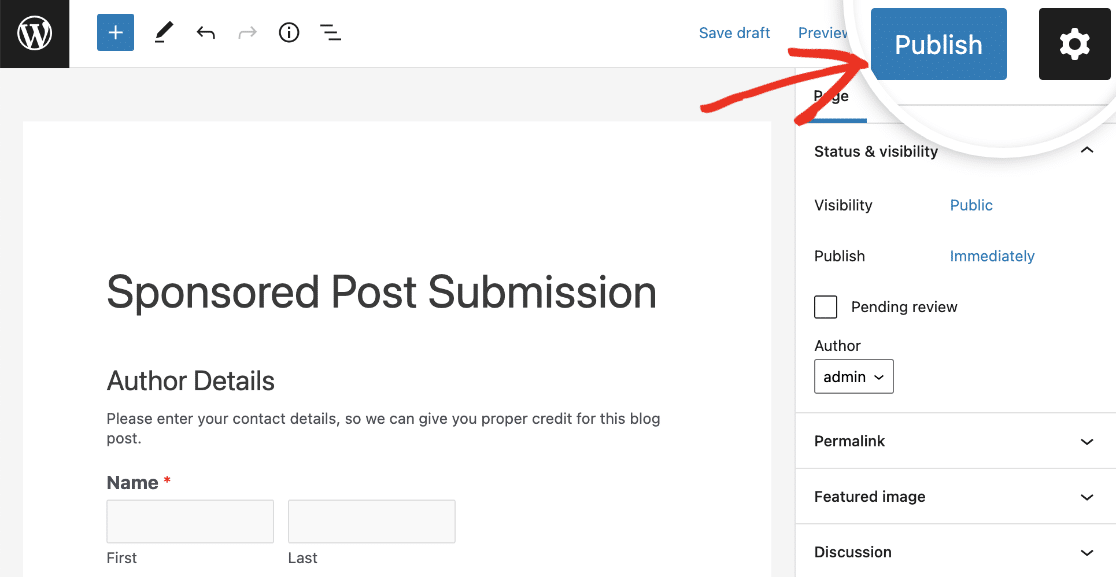
Then you can choose an existing page to add your form to or create a new one. Once you’ve added your form to its own page, you can click Update or Publish to make it live.
Your new sponsored content will be available in the Posts section of your WordPress dashboard. You can also check the WPForms Entries page to see submissions. They’re searchable by keyword as well as the writer’s payment details.
Start Making Money on Post Submissions Now
Next, Increase Your Sponsored Post Submissions
That’s it! You can now start accepting sponsored post submissions on your site by letting users pay per post with a WordPress plugin.
You can also see how to get more guest post submissions to attract more sponsors to your blog.
What are you waiting for? Get started with the most powerful WordPress forms plugin today.
If you like this article, then please follow us on Facebook and Twitter for more free WordPress tutorials.


Great information!
What about if I want to let the user add images in the post or more content, whats the procedure?
Best!
Hi Luis!
Currently, WPForms can only submit new posts but can’t edit or update existing ones. I do agree it would be super helpful, though. I’ve made a note of the feature request and we’ll keep it on our radar as we plan out our roadmap for the future.
Thanks for the suggestion!
Have a good one 🙂
Is there a charge for posting a guest post on WooCommerce?
Hey There,
I am sorry I’m not sure whether I fully understand this question. But I’ll do my best — and please let me know if I misunderstood!
Currently, WPForms is not looking for guest posts at this time. Regarding the WooCommerce guest post, I’d suggest contacting the Woo team directly (https://woocommerce.com/contact-us/)
I hope this helps! 🙂
Can it be used for recurring payments / subscription / I want my users pay for as long as their content is on my blog
Hi Dimo! You can certainly set up to receive recurring payments with WPForms. Please see our guide on how to set this up.
If you have any further questions about this, please contact us if you have an active subscription. If you do not, don’t hesitate to drop us some questions in our support forums 🙂
Can a refund be done if post is not approved via the wpform
Hi Sammy! The payment integrations available with WPForms are only to provide a gateway for payments to be made from your site. All processing itself is done directly by the payment processor, and managing those payments would need to be done in the payment platforms account directly as there are no payment management features available with WPForms. So for example if your form processed a payment via Stripe, you would only be able to issue a refund for the payment by logging into your Stripe account and issuing a refund from there.
I hope this helps to clarify 🙂 If you have any further questions about this, please contact us if you have an active subscription. If you do not, don’t hesitate to drop us some questions in our support forums.
Quick question. Would you be able to activate the payment gateway only if a specific option was chosen in the details above?
We want the service to be free – unless they wish their post to be shared via social media (And could you add the applicable questions in the form of a question to the form)
I guess this might be possible through the use of conditional logic? But just wanted to check.
Hey Matt- Good question!
Yes, you can absolutely achieve what you have mentioned. Here is a complete tutorial on how to achieve this.
Hope that helps! 🙂
Hello
I cannot see this option allowing submitters to add a hyperlink and when the post is published the hyperlink is nofollow by default
It seems to be missing all the required features for paid media
Hi Matthew– We are sorry for any trouble. In order to make sure we answer your question as thoroughly as possible, could you please contact our team with some additional details about what you’re looking to do?
If you have a WPForms license, you have access to our email support, so please submit a support ticket.
Thanks.
Hello
This is a pre sales question, I need to know if this can done before I buy the product
Can a post be make where the user and put in hyperlink
Have the hyperlink nofollow by default
Is all this possible with your plugin. I want to know before I buy it
Hey Matthew – Currently, we do not have a built-in method where users can put in the hyperlink and have the nofollow set by default.
However, I’ve noted your interest in this feature and added your email to our list to receive updates about this feature.
Thanks!
Is it possible to charge a weekly fee that is based on the value they select for one of the custom fields?
Hey John, you can be able to accept recurring payments on your form billed: weekly, monthly, yearly, etc. Here is our great guide on the same.
To ensure we are as thorough as possible and to avoid any confusion, please allow us to get back to you via email support.
Thanks.
When a user cancels with recurring payment, after submiting the post
Do we have any option to set that post automatically to not published?
Hi Dan,
We do not have an inbuilt feature to set the status as not approve/ published based on cancellation of the recurring payment. I have gone ahead and added your vote to consider this as a feature request for future enhancements.
Thank you!
Is it possible to to have checkboxes that increase the price?
Hey Znit – You can consider using the Checkbox items field wherein if user selects the options in Checkbox, the values would increase in the Total field.
Can I ask if you remedied the ability to be able to edit submitted forms? I saw you mentioned it would be considered for the roadmap in 2020.
Hey Sean – Our developers are looking at this feature to be able to edit the submitted entries from the frontend as it’s under consideration, and I apologize for the delay.