AI Summary
Are you a nonprofit wondering how to create a donation tracker with Google Sheets?
It’s important to keep accurate records of any donations you receive, and Google Sheets is one of the best tools for tracking data.
This can be a time-consuming task to do manually. But the good news is that you can automate donation tracking by using the WPForms Google Sheets integration.
In this post, we’ll show how to make a donation tracker in Google Sheets.
Create Your Donation Tracking Form Now
What Tools Do I Need for Donation Management?
You can manage your donations using only WPForms and Google Sheets. WPForms plugin lets you create donation forms that allow donors to either pledge a contribution or make direct donation payments online.
WPForms stores all entries from your donation form within your WordPress dashboard. But if you’d like to maintain an external record of your donations and easily collaborate with other members of the team, it’s a good idea to send your donation entries to Google Sheets.
So, you can manage donation campaigns of all sizes using just WPForms and Google Sheets as we show you in the next steps.
How to Make a Donation Tracker in Google Sheets
In This Article
1. Install WPForms

To get started, you’ll need a WPForms Pro license in order to build donation forms and create a Google Sheets integration.
After grabbing a WPForms Pro account, go ahead and install the plugin to get started. And if you need a bit of help with this step, here’s a guide to installing plugins for beginners.
Once you’ve installed and activated WPForms, the next step will be activating the Google Sheets integration.
2. Activate the Google Sheets Integration
To install and activate the Google Sheets addon, head over to WPForms » Addons.
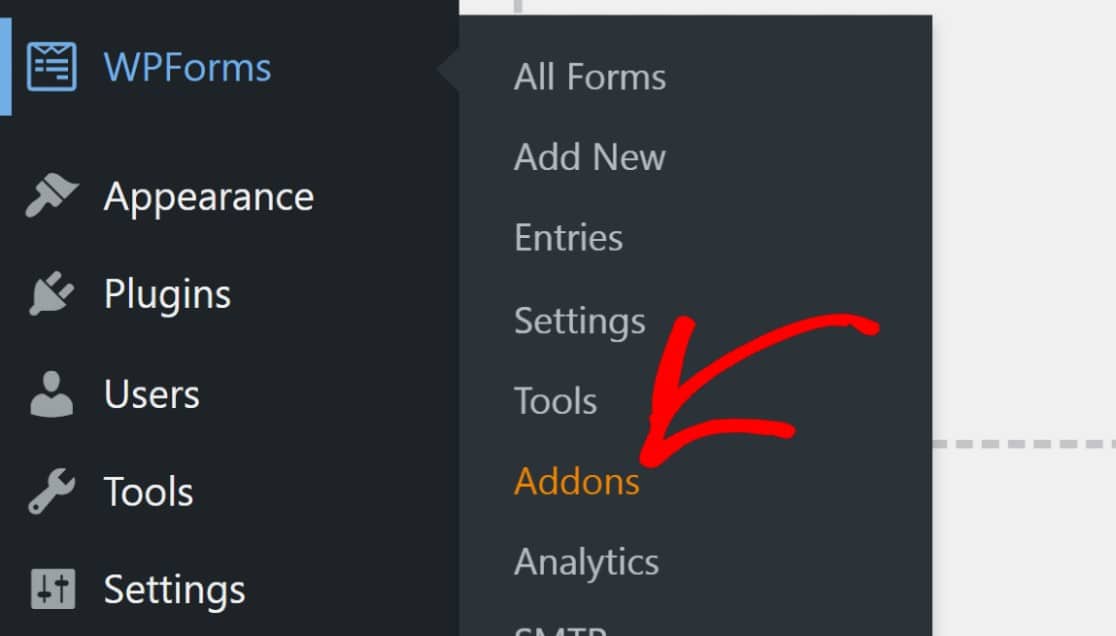
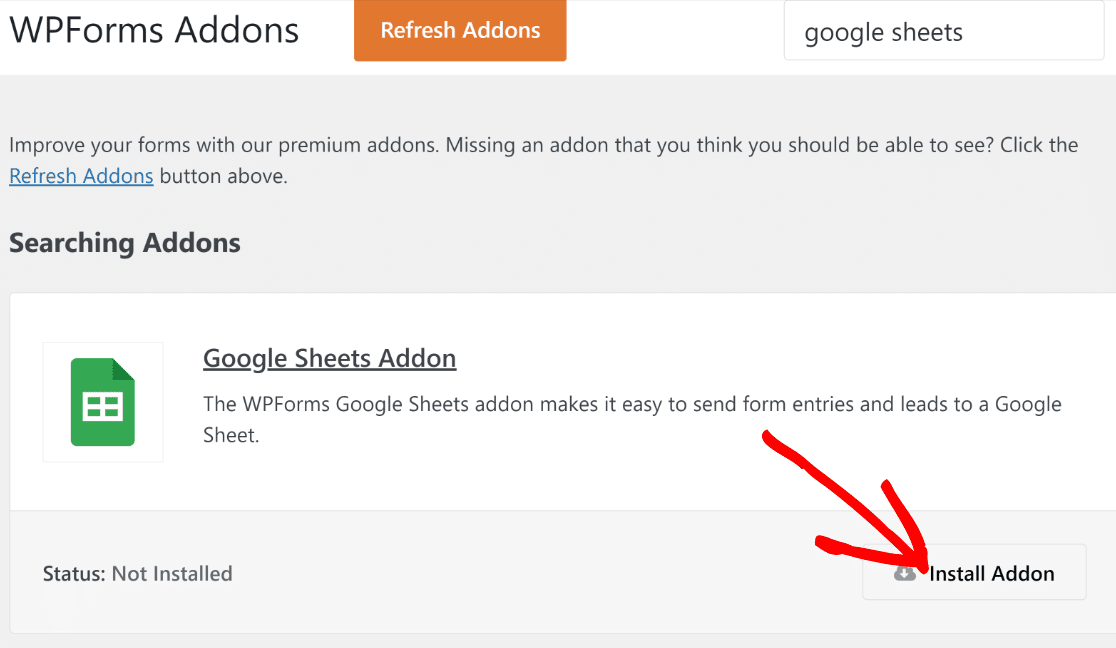
Once you’re in here, scroll down till you find the Google Sheets addon, or simply search for it in the search bar.
When you find it, click the Install Addon under it.
After installing the addon, you’ll need to connect your Google account to WPForms.
Go to WPForms » Settings. Then, select the Integrations tab from the navigation menu.
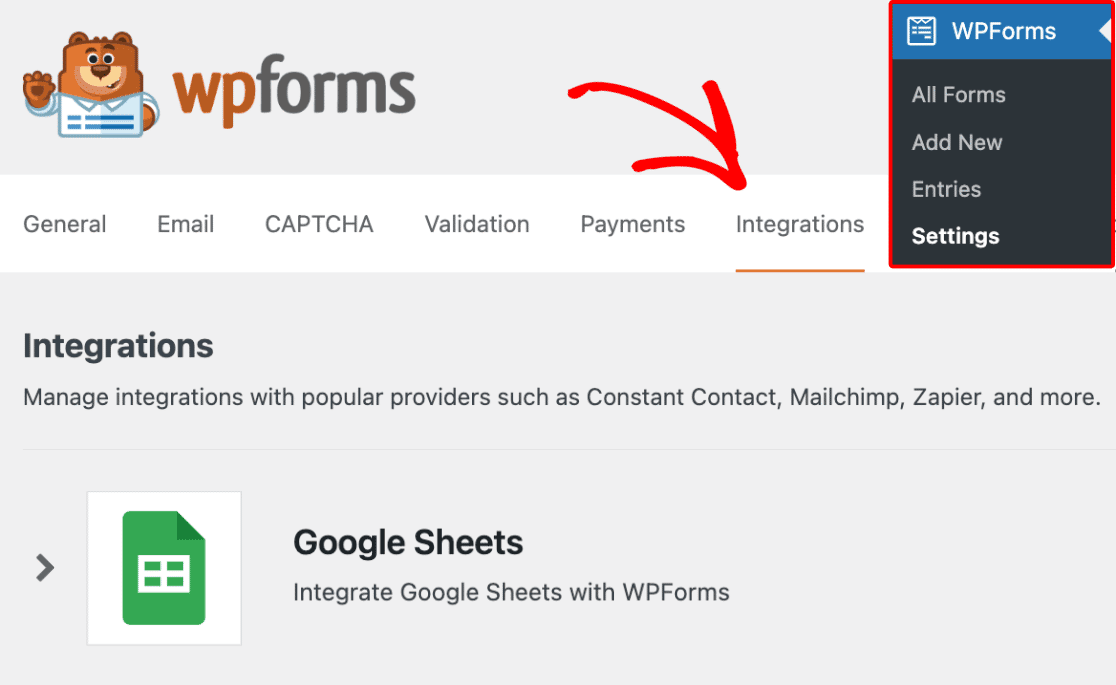
Scroll down till you find the Google Sheets integration, then click on it. This will expand the menu to reveal more options. Click on Add New Account to proceed.
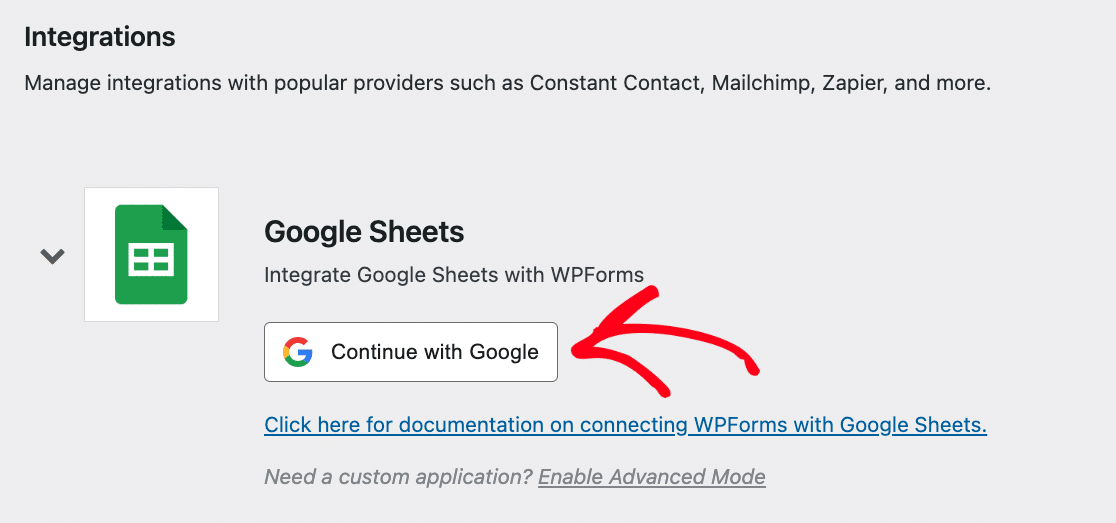
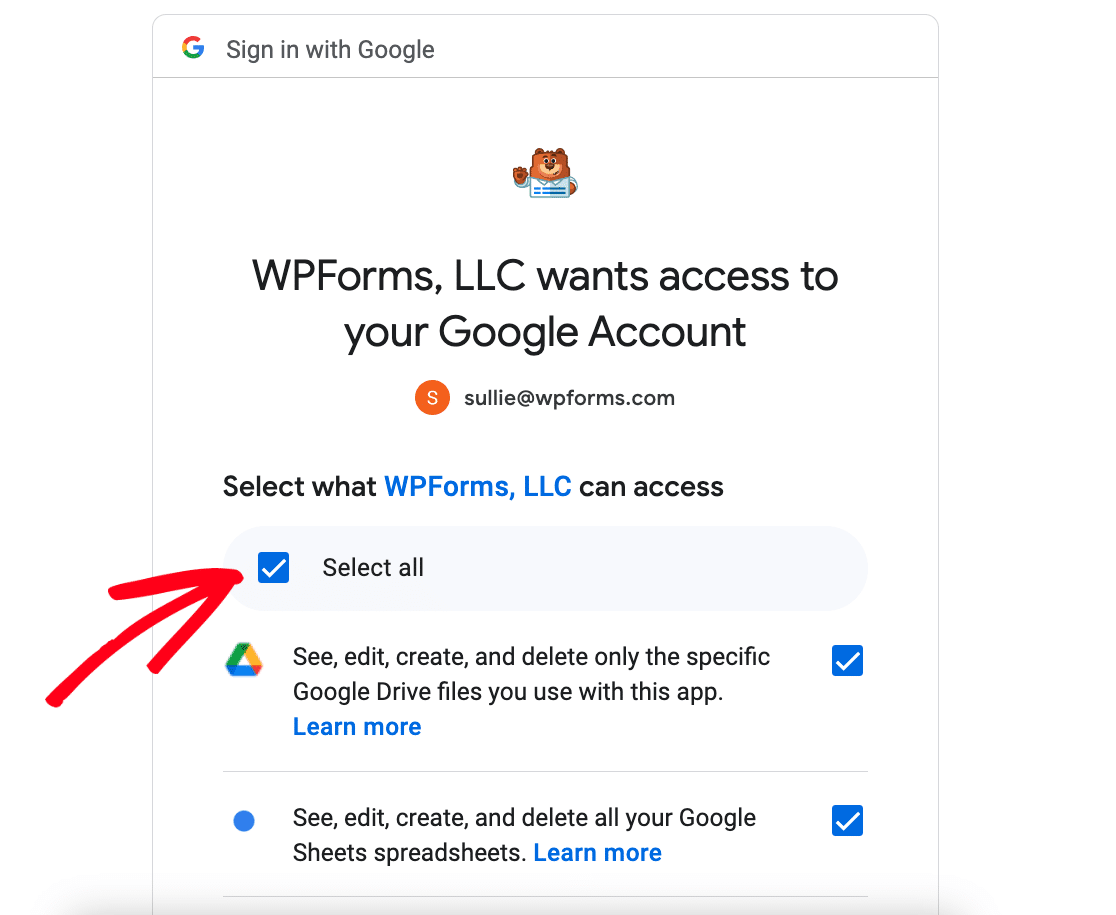
This will prompt you to log in to your Google account to grant WPForms access. Click Select all to give WPForms the correct access.
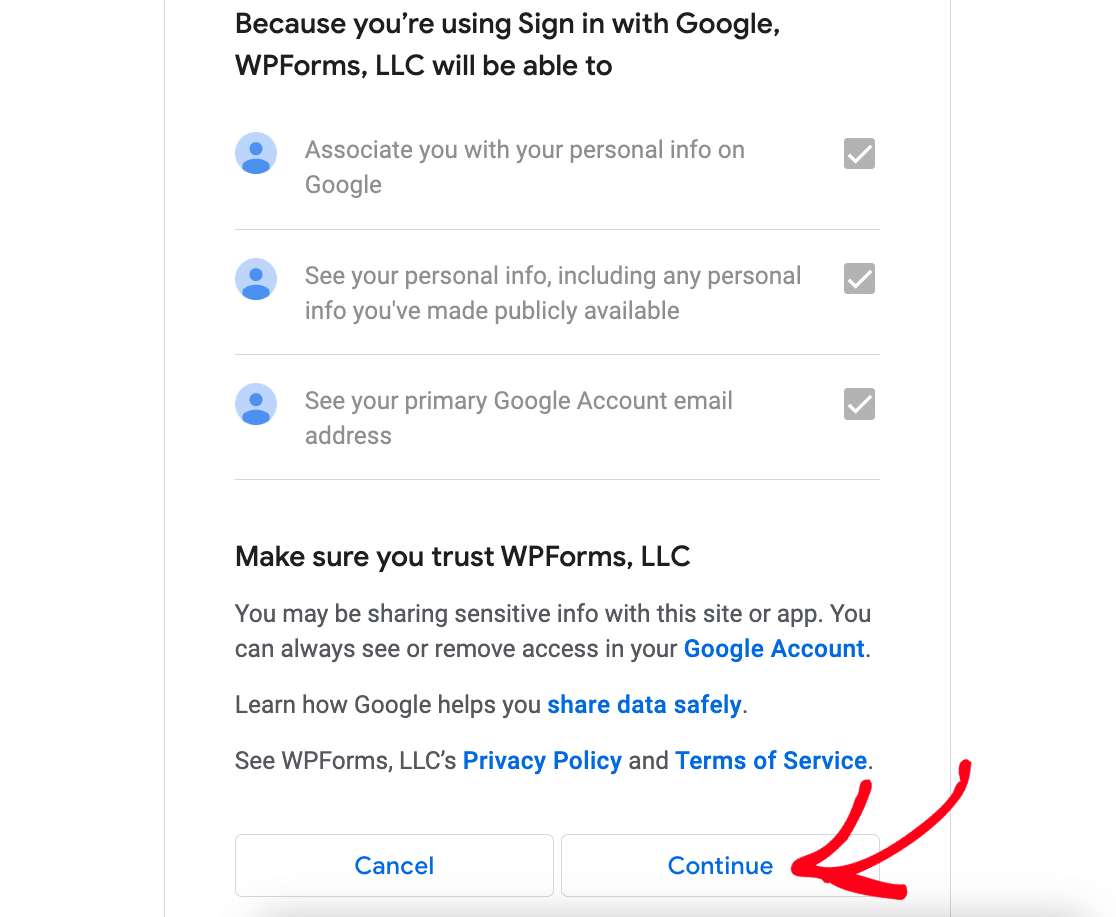
Once you’ve done that, click Continue.
You’ll now be redirected back to the WPForms Integrations page with the Google Sheets integration now active.

To start tracking donations, we’ll need to set up a donation form and enable a Google Sheets connection on that form.
Before we get to that, though, you’ll need a way to collect payments through your form. So, we’ll need to add a payment gateway integration. WPForms offers several payment gateways, including PayPal, Square, Stripe, and Authorize.net.
For this guide, we’re going to use Stripe as we’ll show in the next step.
3. Activate the Stripe Addon
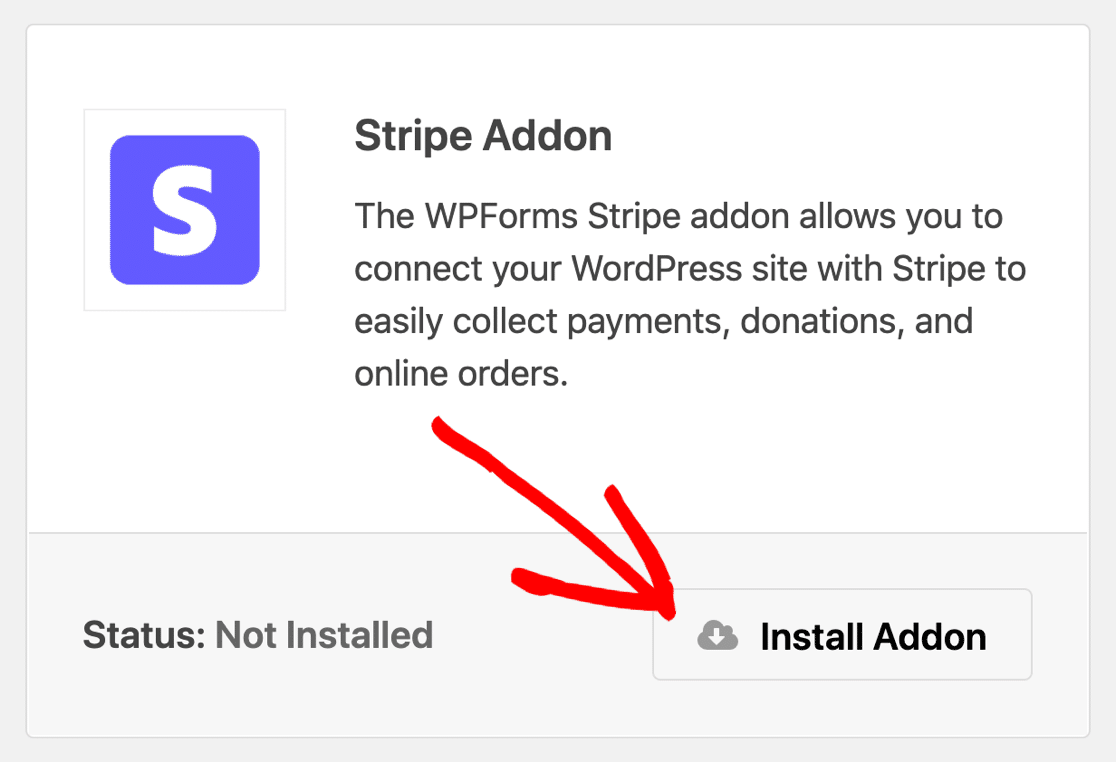
Just as we did with the Google Sheets addon, we’ll need to install the Stripe addon. So we’ll follow the same steps by clicking through WPForms » Addons, and installing the Stripe Addon.
Next, we’ll need to activate the Stripe integration before we can add a Stripe payment field to a form.
We’ll stay in the WPForms Settings area, but we’ll head over to the Payments tab. If you’ve clicked out of the Settings dashboard, you can get back in here by clicking through WPForms » Settings, and then clicking on Payments.
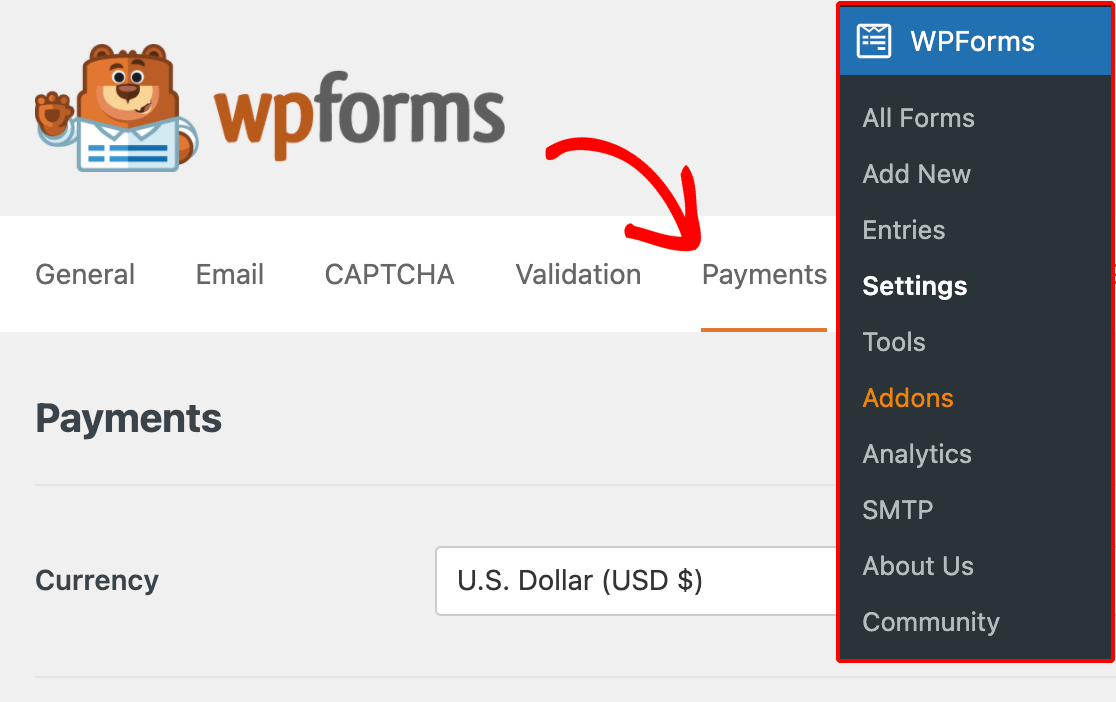
Scroll down to the Stripe section and click Connect with Stripe.
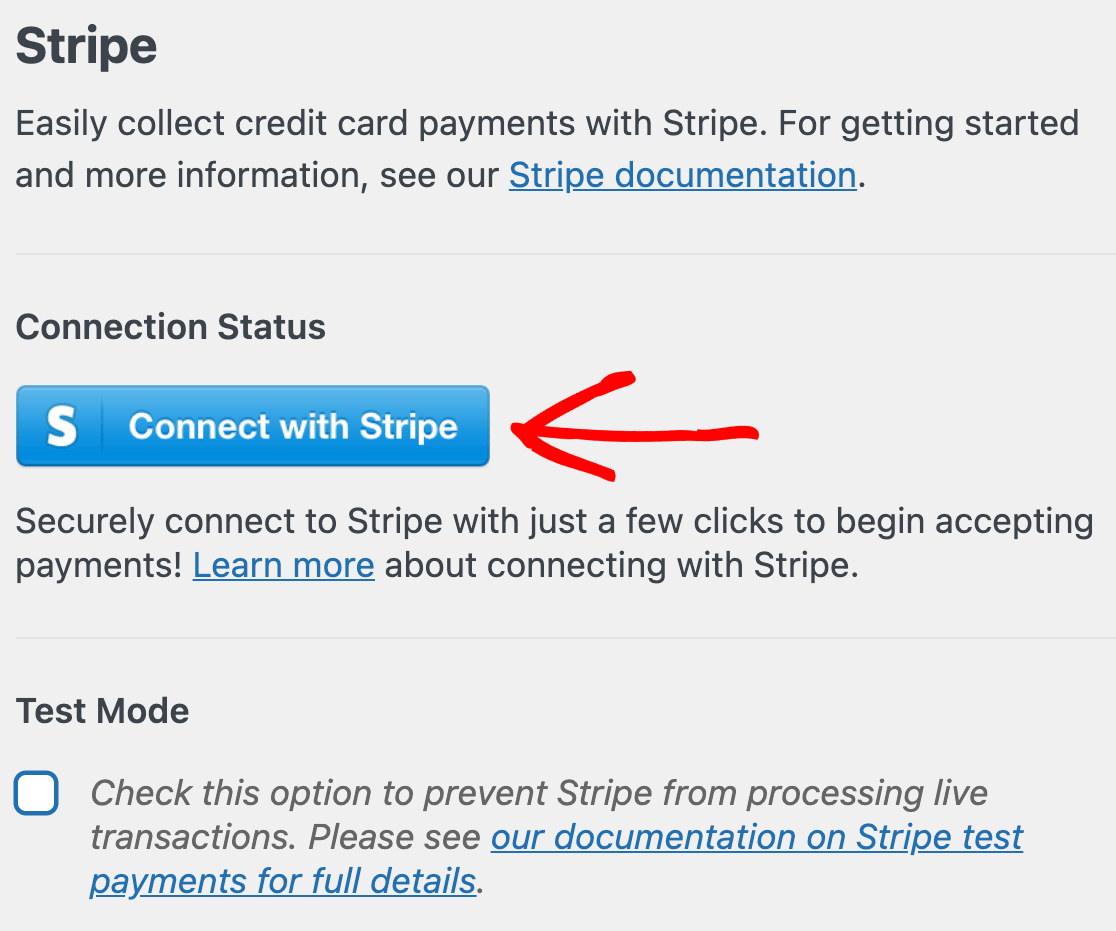
Next, you’ll need to authorize the connection between WPForms and Stripe using the Stripe connection wizard. To do this, enter your email and click Continue.
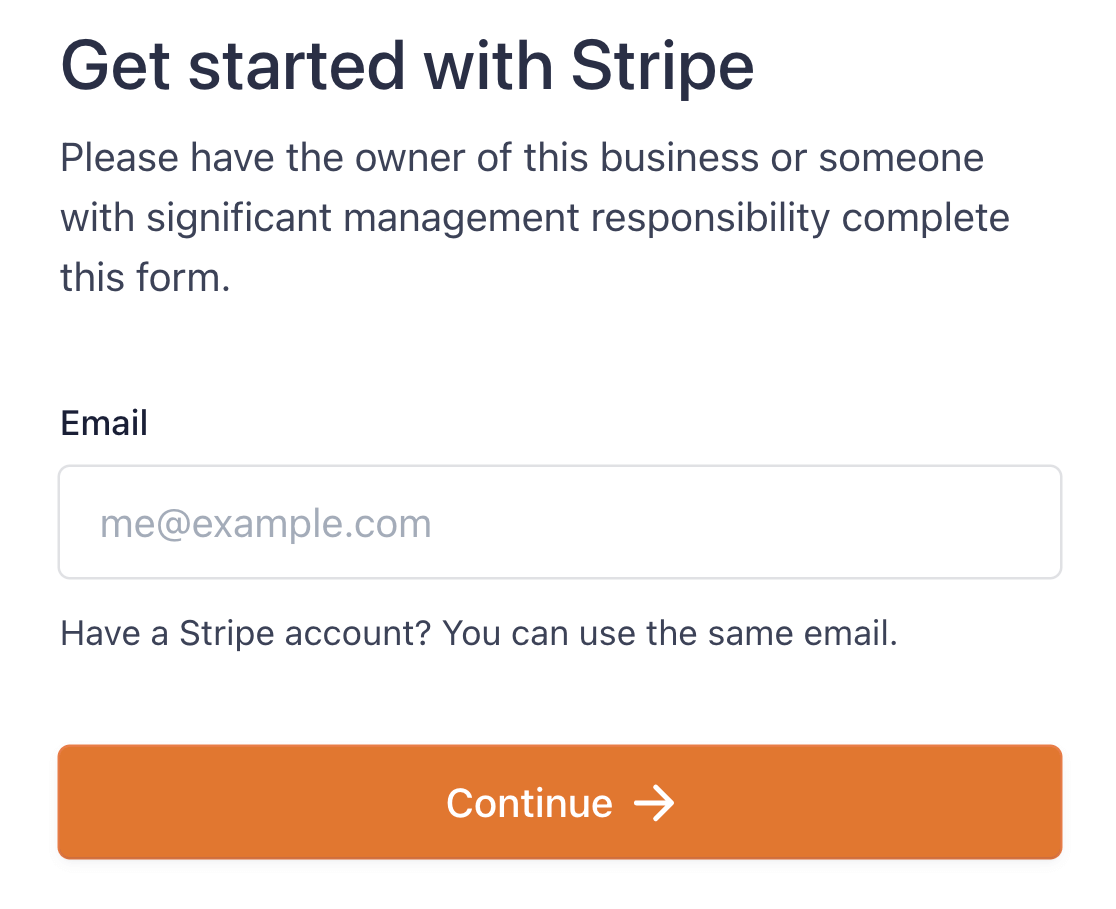
The steps in the connection wizard are straightforward. Once you’re done with them, you’ll see a green checkmark below the Connection Status label back in the Stripe section of the Payments page.

Now that we’ve installed all the different plugins and addons that we need for our donation tracker, the next step will be creating a donation form with a Stripe field.
4. Create a Donation Form
Creating a form with WPForms is quite easy, as there are 2,000+ form templates that will cater to most needs. We have a Google Sheets donation form tracker template that you can import and use right away.
If you have a really unique form design in mind, you can simply customize one of our form templates, or use the drag-and-drop form builder to build one from scratch.
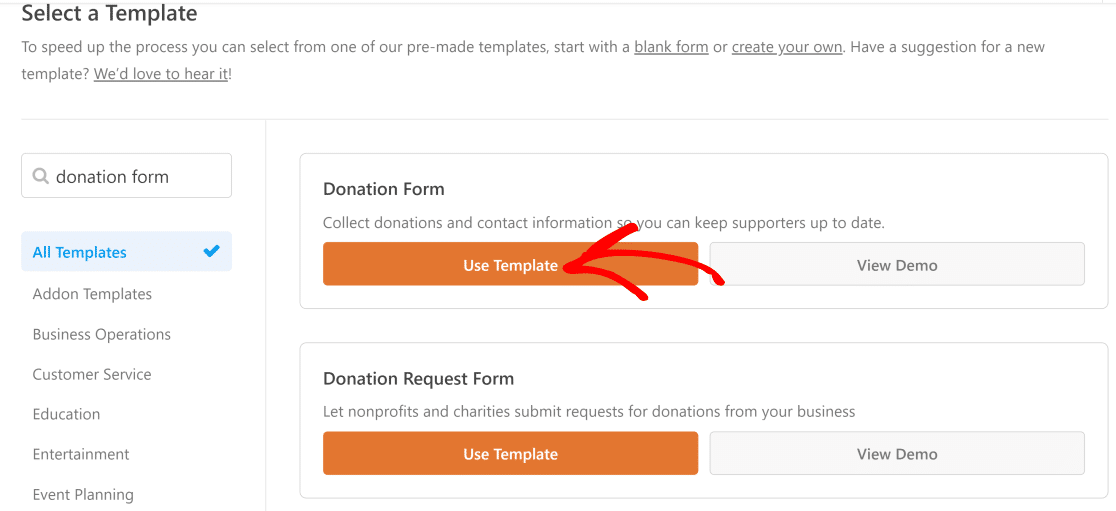
For this guide, we’ll simply use the pre-built donation form template. To find it, click on WPForms » Add New.

Use the search bar to find the Donation Form template, then click Use Template.
Now, you’ll see your donation form template in the form builder, with the form fields panel on the left.
You might want to customize your donation form template to tailor it to your fundraiser. Simply drag any of the form fields from the left and drop them where you’d like them on the form template.
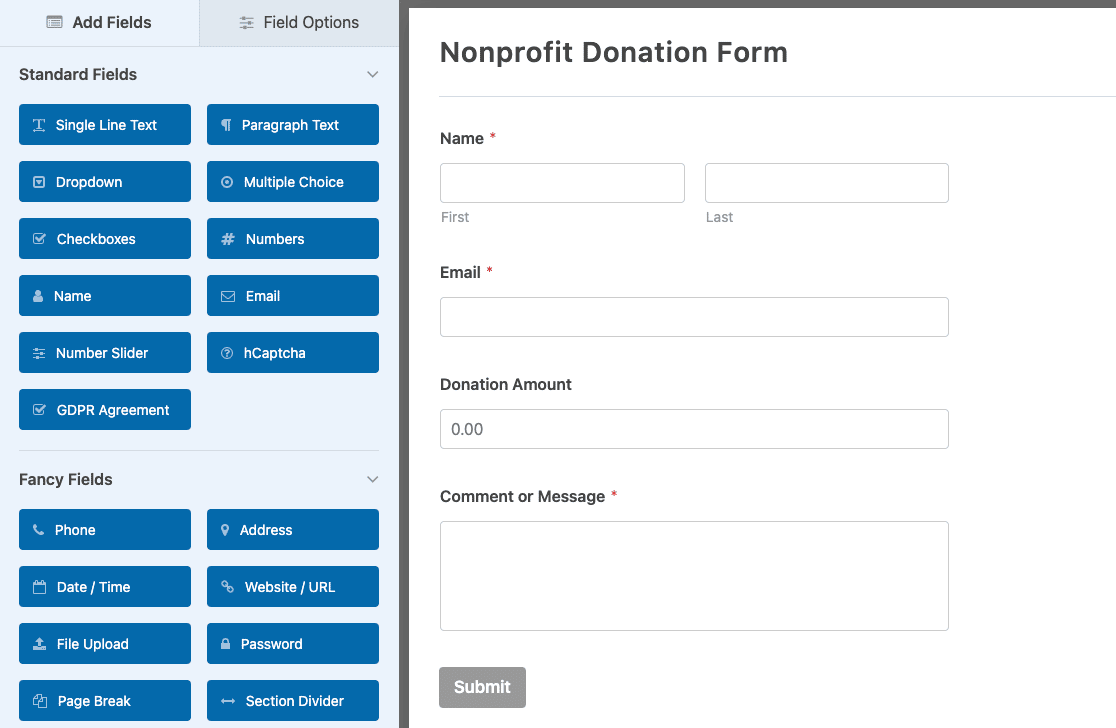
If you’d like some guidance, check out our step-by-step guide to creating a nonprofit donation form. For now, all we’re going to do is add a Stripe payment field that allows us to collect donations within the form.
5. Add a Stripe Field to Your Form
There are two steps to adding a payment field to a form. First, we need to add a payment field for the payment gateway we’ll be using. Then, we’ll need to enable the payment gateway in the form settings.
So we’re going to hop into the Payment Fields section and click on the Stripe field to add it to our form. Next, navigate over to the menu on the sidebar and click Payments » Stripe.
Toggle the button labeled Enable Stripe payments to enable the Stripe payment gateway for the form.
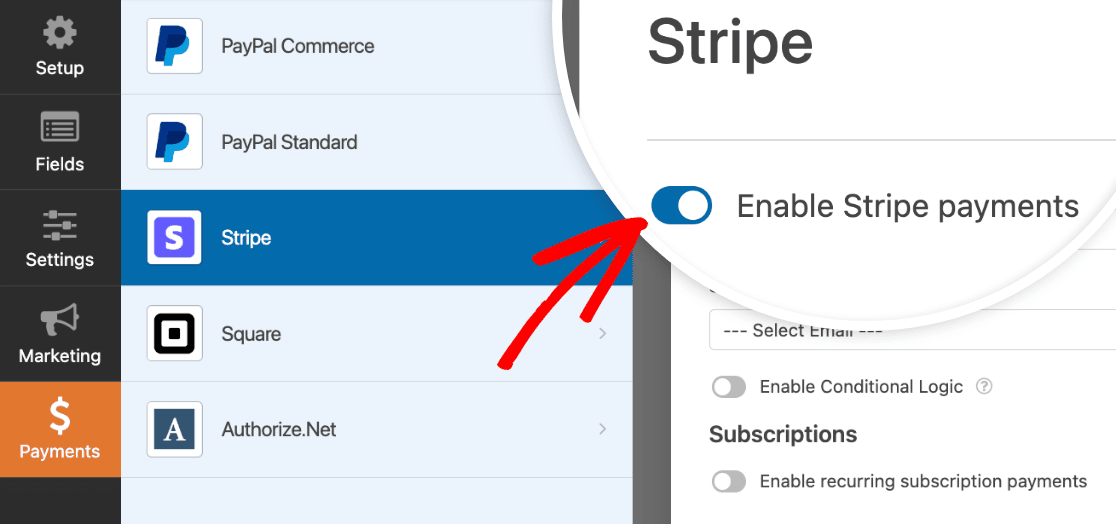
There are a few settings to tinker with before we move on. You’ll see, right below the Enable Stripe button, a few configuration options. The most important ones are:
Payment Description – This is what will show up on your donors’ bank statements to show where a payment went or what it was for.

Stripe Payment Receipt – In this field choose the email field to have payment receipts sent to whatever email is entered into the form.

We’re almost done here, but there’s just one more thing to do. For the Stripe payment gateway to work properly, you’ll need to enable Ajax form submissions.
To do this, simply click on Settings » General. In the Advanced section, toggle the Enable AJAX form submission button.
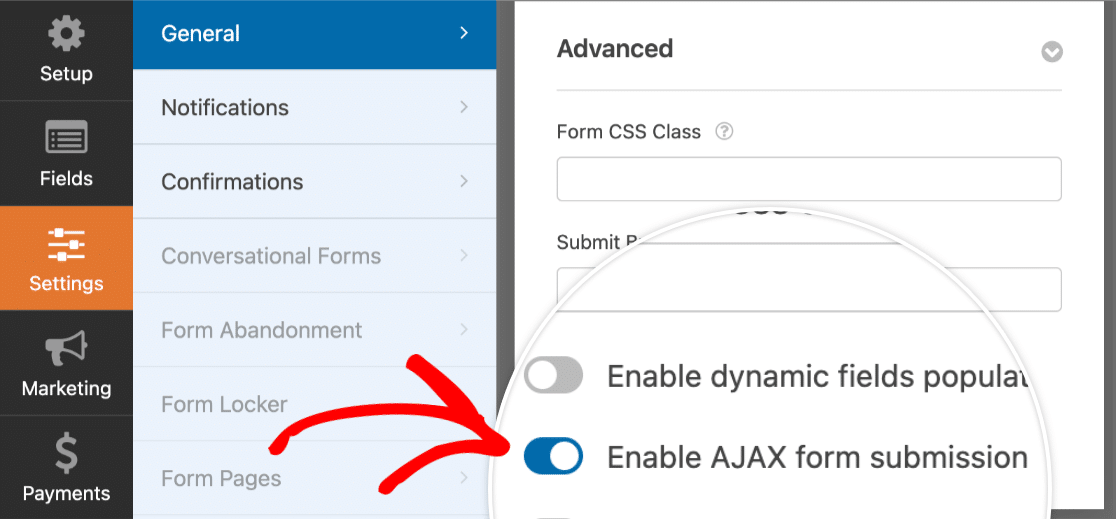
Scroll up and click the Save button, and that will be it for this stage.

Now, we’re going to configure the Google Sheets addon settings.
6. Enable the Google Sheets Integration
Navigate over to the panel on the left and click Settings » Google Sheets » Add new Connection.
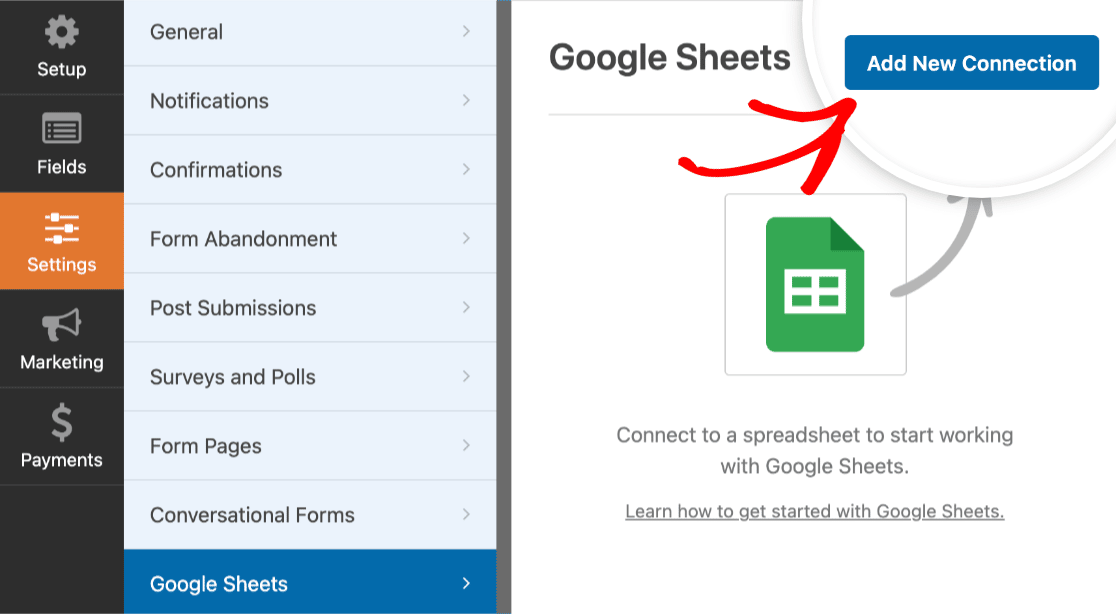
Enter a nickname for the connection—we’ll call ours Donation Form, then press OK to move on.
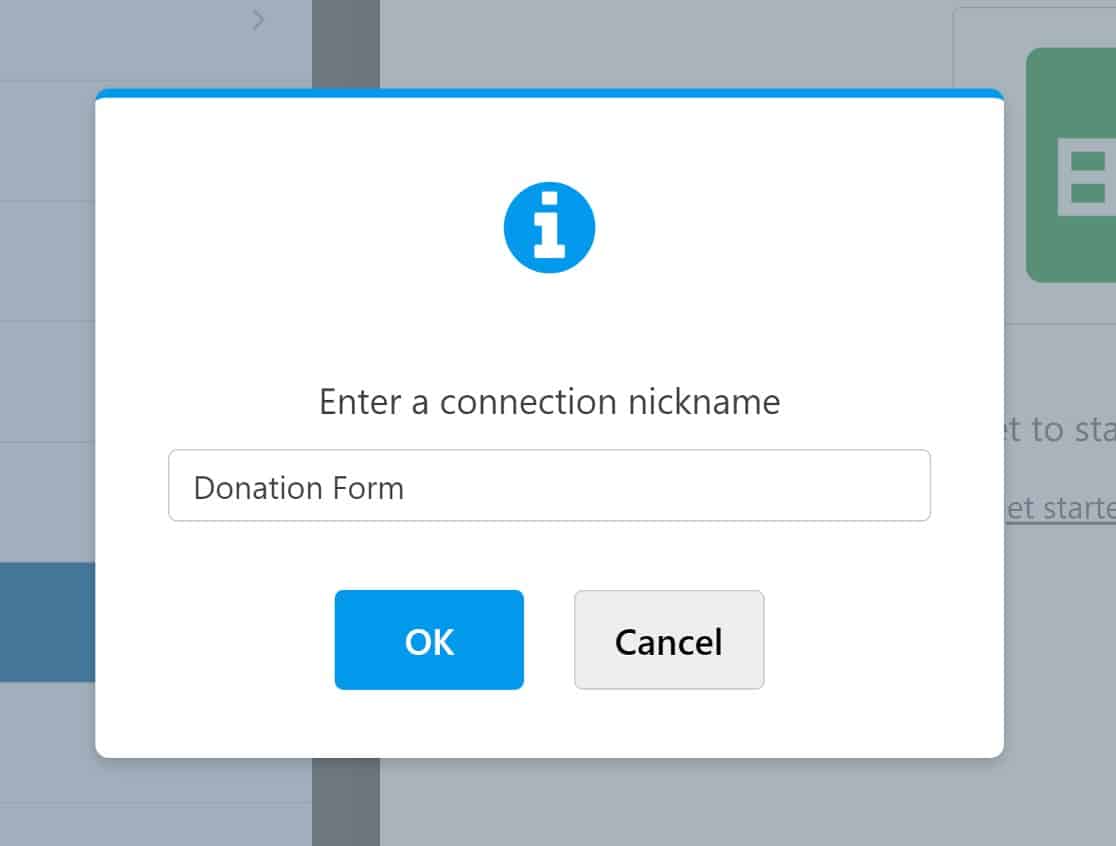
Next, you’ll have the option to either select an existing spreadsheet in your Google Drive or create a new one.
If you’re using an existing Sheet, click on Select Existing and then the Select Spreadsheet button.
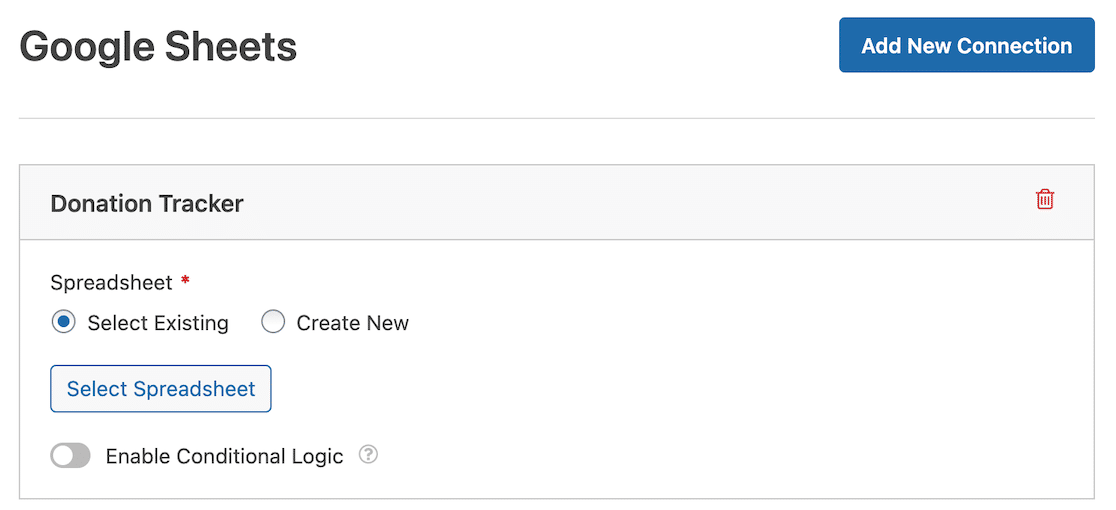
If you want to create a new spreadsheet, you can do that by selecting the Create New option and following the prompts to set up a new Sheet.
Next, you’ll set up form field mapping to sync the columns in your spreadsheet with the fields of your donation form.
To set up form field mapping, simply scroll down to the Field Mapping section. First, choose the column you want to send data to by clicking on the Select a Column field. Then you can map the data you want to include by clicking on Select Form Field.
One thing to keep in mind, as you do, is that you should reserve the first column in your spreadsheet for the Entry ID, which will be generated automatically.
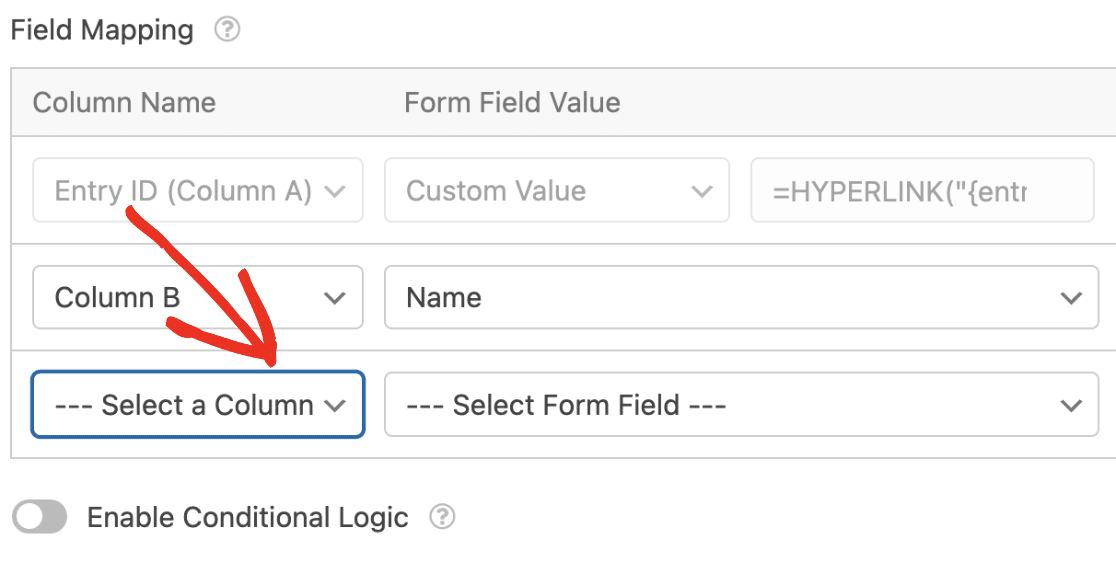
That will be it! The WPForms Google Sheets connection will now be fully set up.
Once you’ve saved these settings, you can then open up Google Sheets, and you’ll see your brand new Donation Tracking form.
![]()
And when you open this sheet, you’ll see all the labels we created, plus the automatically generated Entry ID.

At this point, we’re all set up with an active WPForms Google Sheets integration. Next, we’re going to publish our form and make a test entry to see how it all works.
7. Publish the Form and View Entries in Spreadsheet
Now that we’re done working on the form, you should be ready to take the form live by publishing it. Here’s our guide to embedding forms on a page in WordPres for beginners.
Once you’ve successfully embedded your donation form, go ahead and fill out the form as your visitors would.
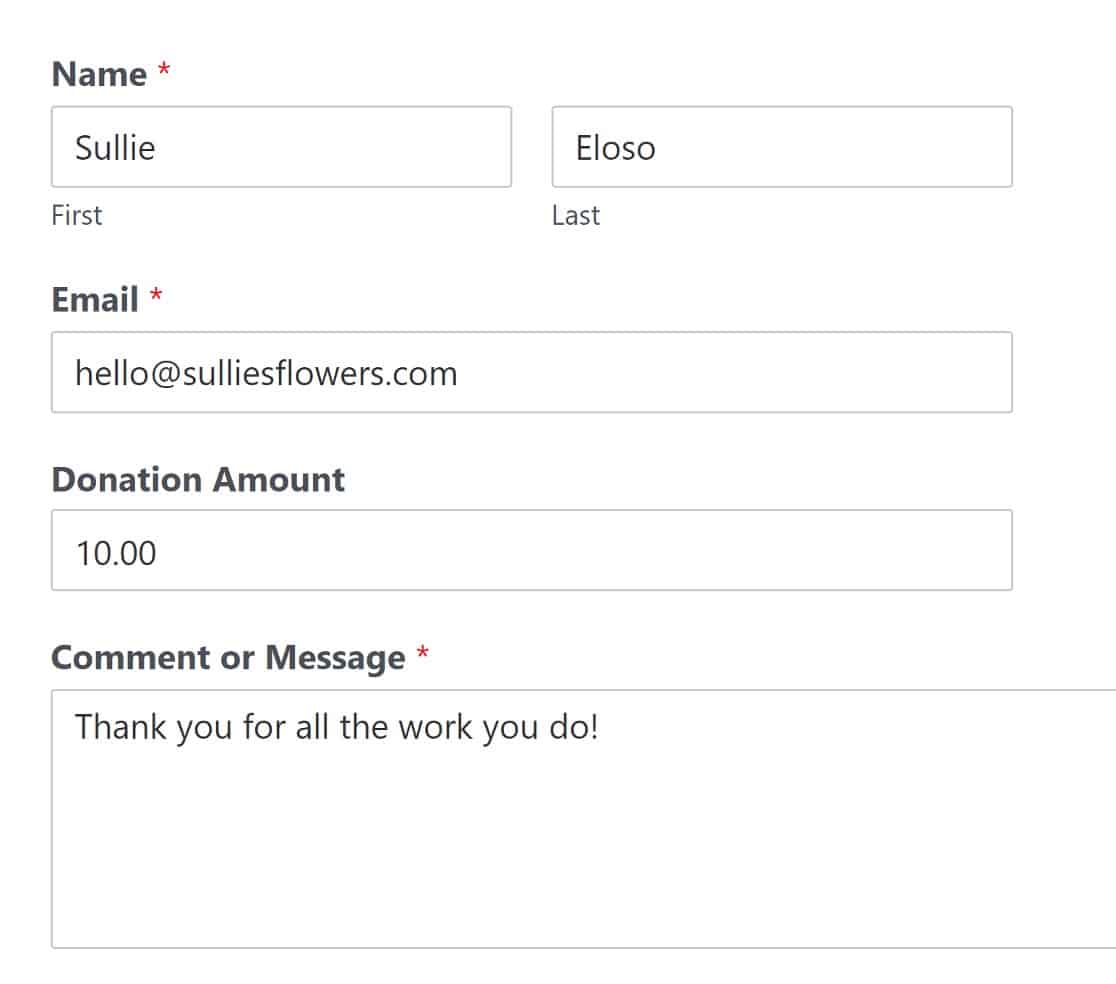
Remember that this form also comes with a Stripe field to collect credit card payments, but this information won’t be added to the spreadsheet because of its confidential nature.
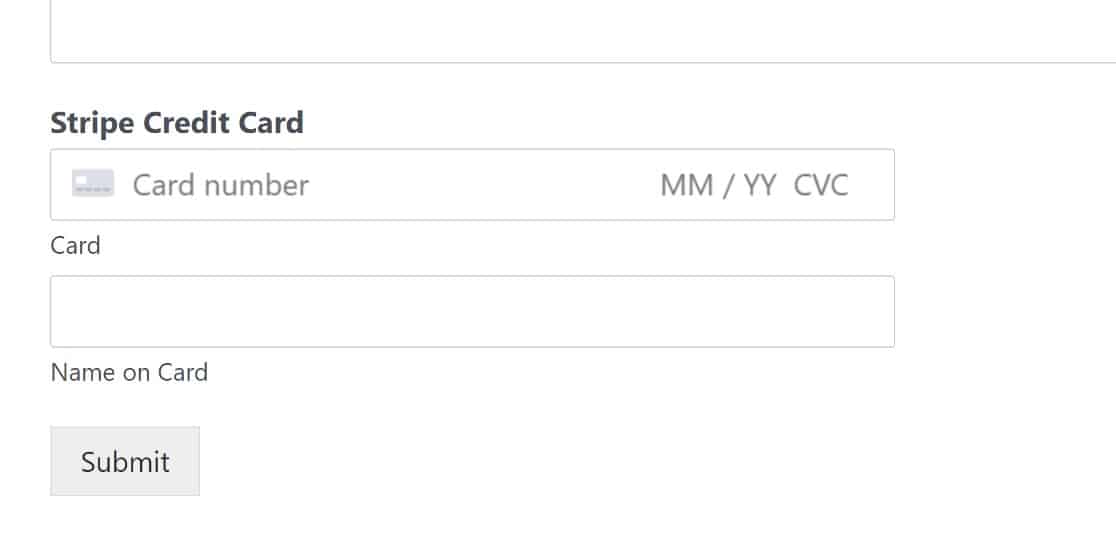
Once the form is submitted, the donor’s name, email, and donation amount will get automatically updated on the form.
Go ahead and check the spreadsheet your form is connected with to view the entry. It will appear exactly as you defined earlier when mapping fields to columns.

And that’s it! That’s all there is to creating a donation tracker using the WPForms Google Sheets addon.
Next, Prevent Bots From Submitting Your Forms
Spam can be a real nuisance when it comes to WordPress, and the last thing you’d want is your spreadsheet getting filled up with spam entries. Thankfully, with WPForms, you’ll have a few useful anti-spam tools to help prevent bots from filling out your forms.
If you’d like some more anti-spam options, here’s our guide to the top anti-spam plugins for WordPress.
And if you’ve found the WPForms’ Google Sheets integration helpful, you may enjoy learning a few more ways to use Google Workspace apps with your WordPress website.
Here are our guides to the top Google Workspace plugins for WordPress, and how to track email opens in Google Sheets.
Create Your Donation Tracking Form Now
Ready to build your web form? Get started today with the easiest WordPress form builder plugin. WPForms Pro includes lots of free templates and offers a 14-day money-back guarantee.
If this article helped you out, please follow us on Facebook and Twitter for more free WordPress tutorials and guides.


