AI Summary
Wondering how to insert a repeater field into your form to capture more data for each submission?
Repeater fields in forms allow users to input multiple sets of similar data while making the forms more intuitive and user-friendly.
In this article, I’ll show you the easiest way to design a repeater field for WPForms to boost your website’s functionality and user experience.
Create Wordpress Forms with Repeater Fields! 🙂
How to Make a Form With a Repeater Field in WordPress
Follow these steps to create a form with repeater fields for your WordPress site:
Step 1: Install the WPForms Pro Plugin
WPForms offers a super intuitive and effortless solution to creating repeater fields. To start, you’ll need a WPForms Pro license.
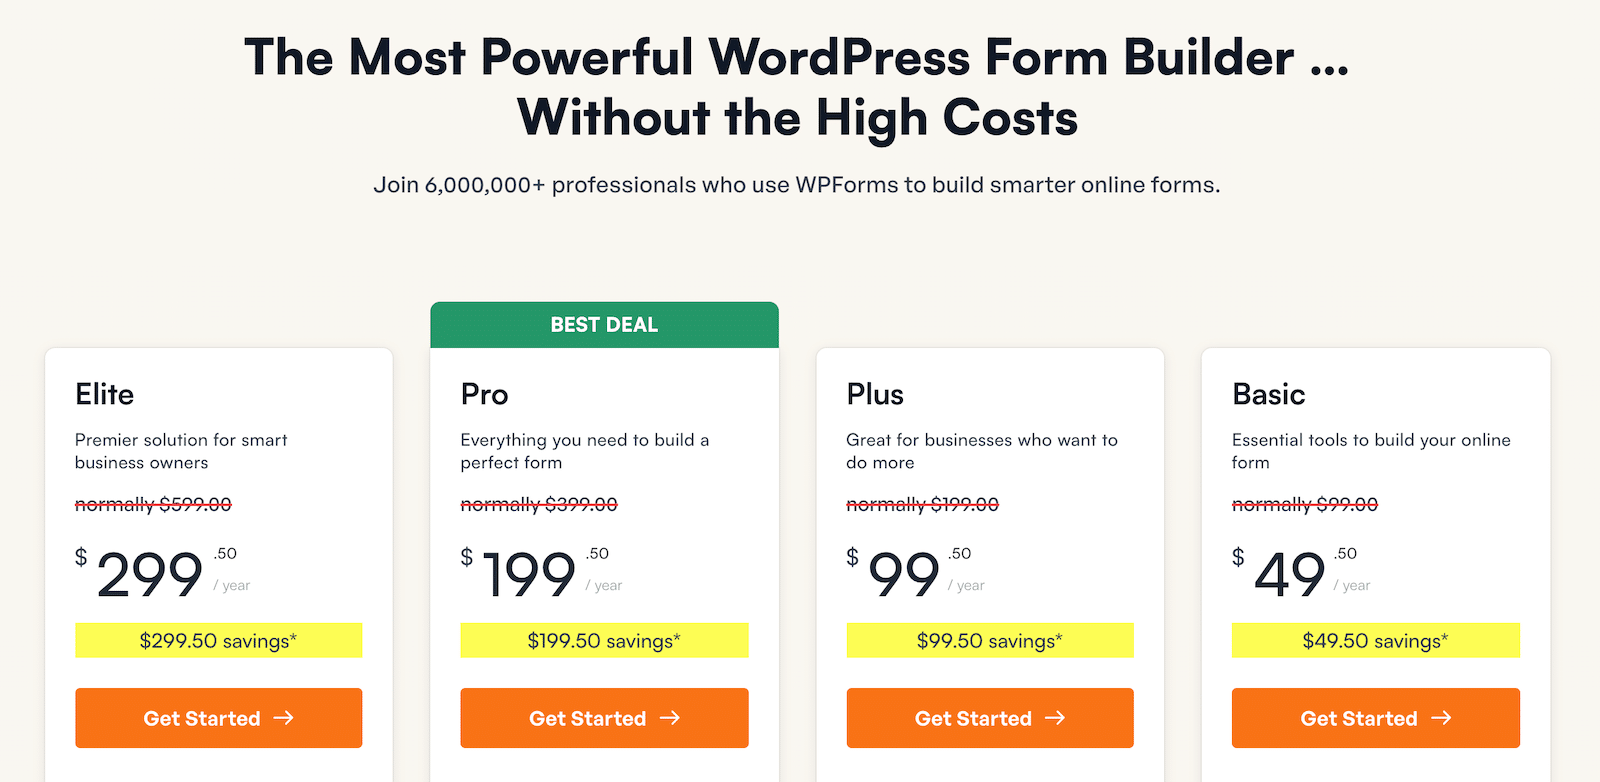
After obtaining WPForms Pro, go ahead and install the plugin on your site. If you aren’t familiar with plugin installation, check out this guide on installing WPForms.
Once WPForms Pro is installed and ready, you’ll be able to create forms with repeater fields and also access tons of impactful features and addons like Geolocation, Google Sheets, and more.
Ready? Move on to the next step to begin creating a form with repeater fields.
Step 2: Create a New Form
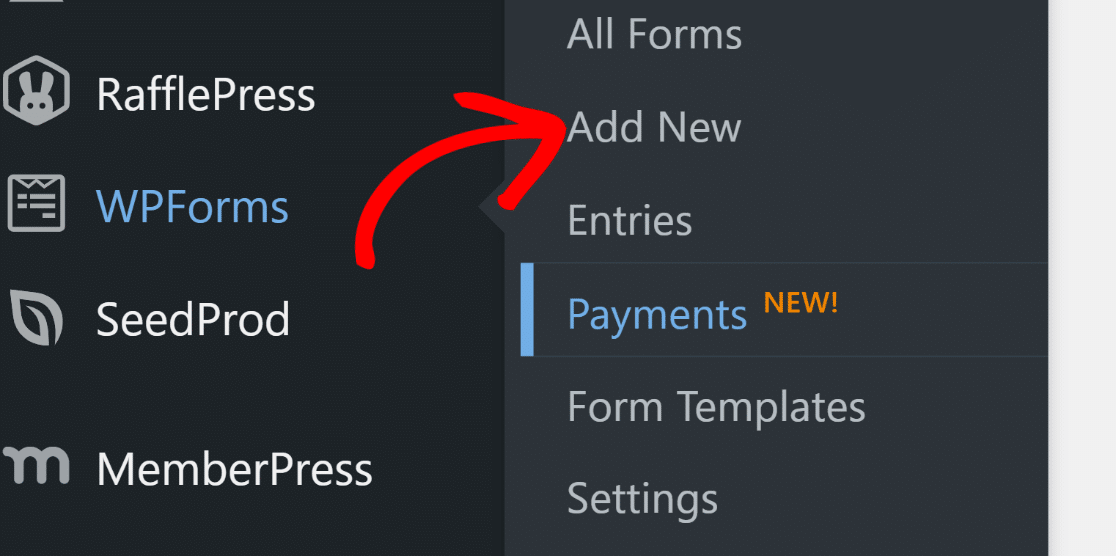
While in your WordPress dashboard, hover your cursor over the WPForms sidebar menu and click Add New.
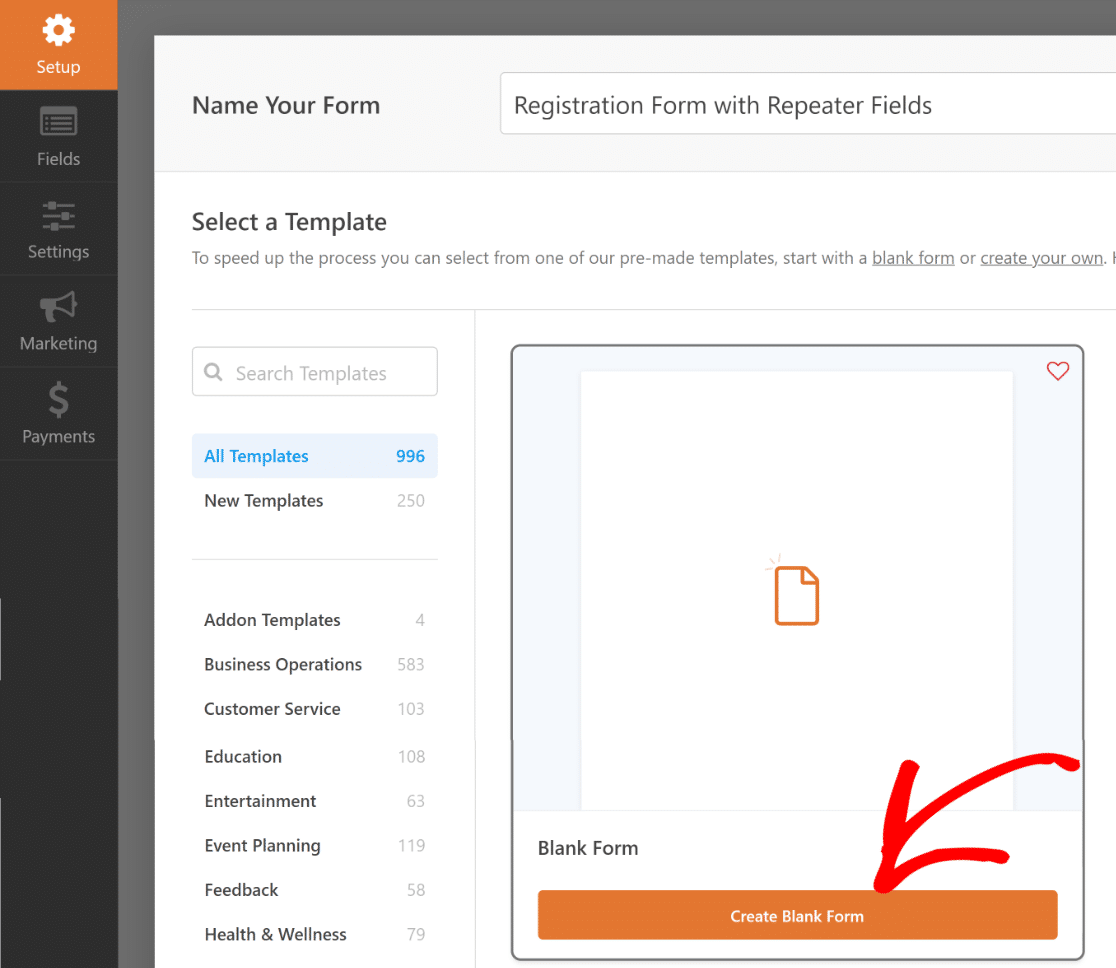
You’ll now need to give a name to your form and either choose a template or build your form from scratch. WPForms comes with 2,000+ form templates, allowing you to create any type of form in WordPress.
But, in order to illustrate working with Repeater fields in WPForms, I’ll start with the Blank Form and build it up from scratch.
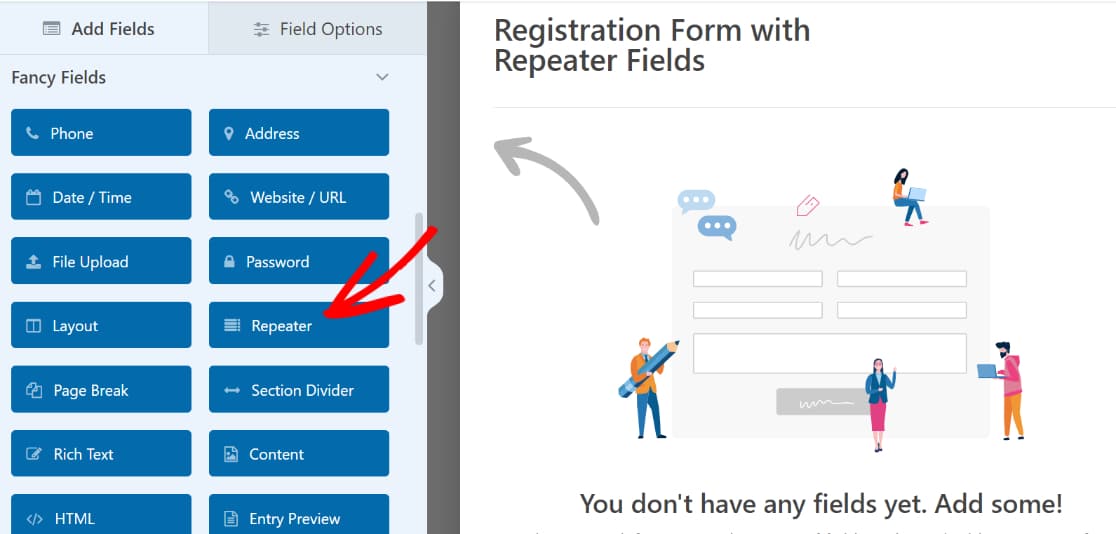
In just a few seconds, the form builder screen will load, where you can build your custom form using drag-and-drop controls. For the sake of simplicity, let’s create a form with just three fields: Name, Email, and Phone.
But if we want these fields to be repeatable, the first thing we need to do is insert the Repeater field by dragging it from the panel on the left to the right.
After inserting the Repeater field, click on it to open the Field Options related to it on the left. I’m going to leave the Display setting to default because this works just fine for my scenario.
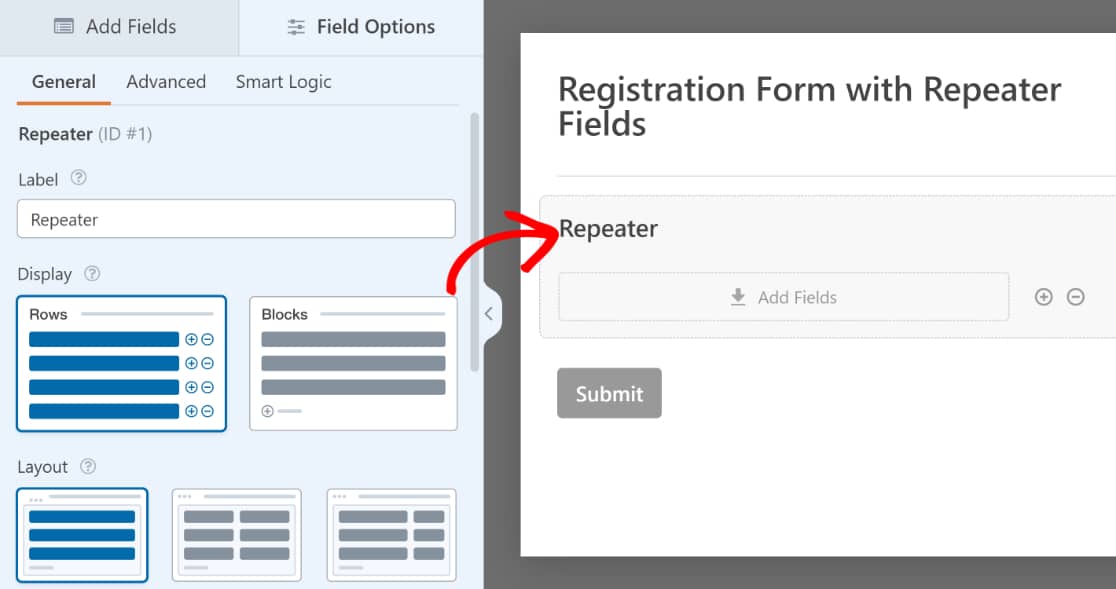
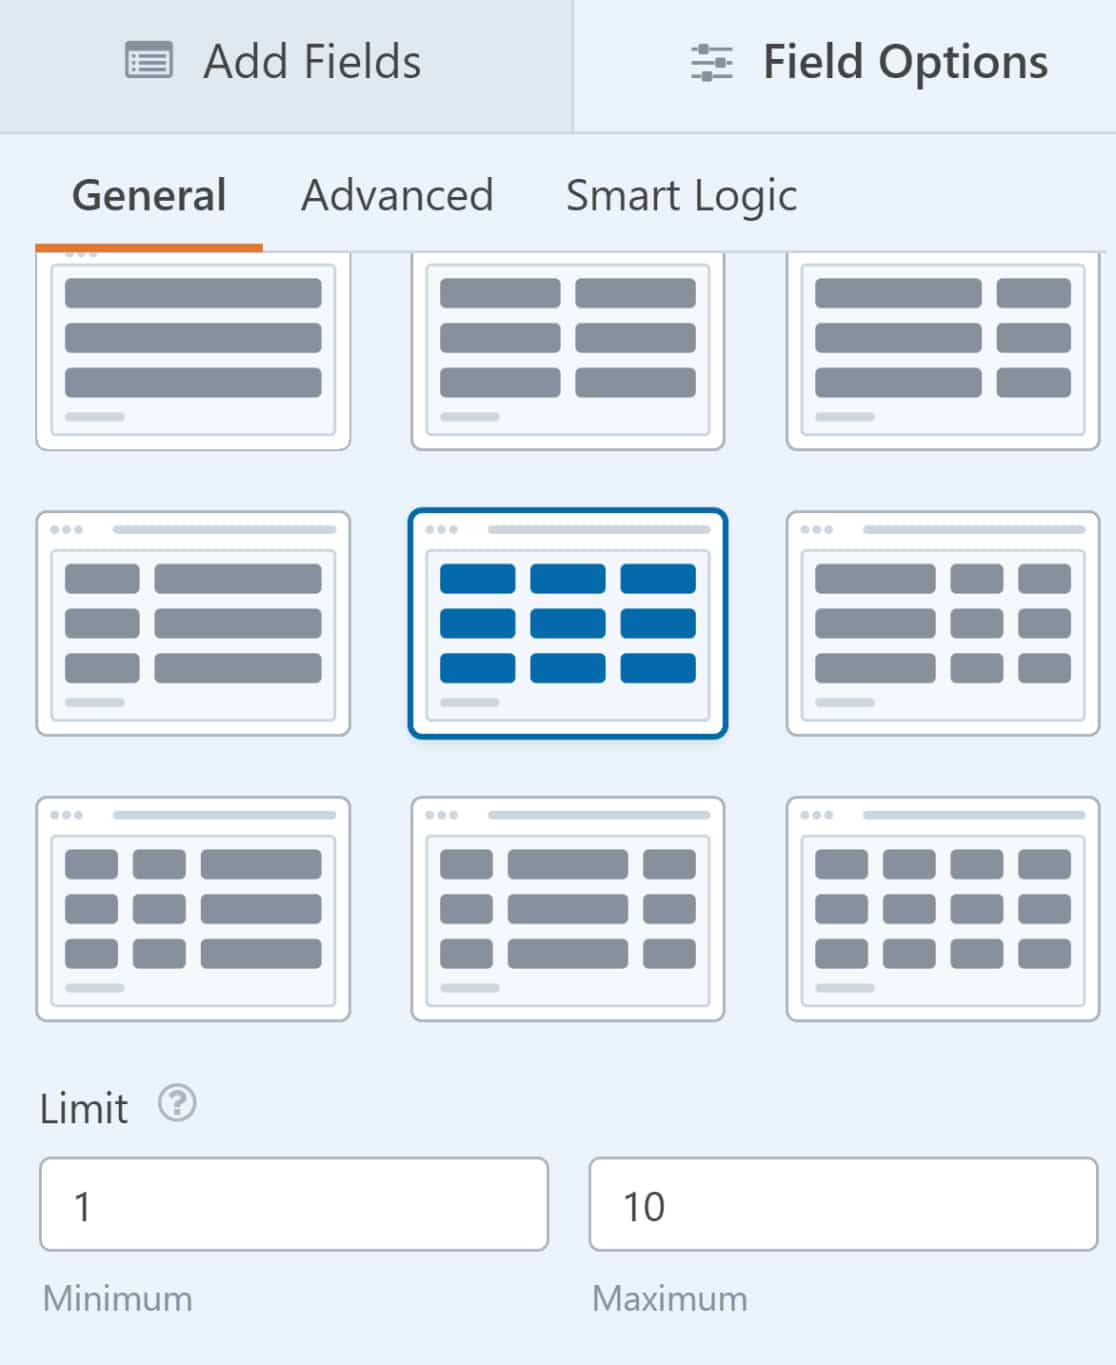
But for my setup, I’m going to need a three-column layout. You’re free to select the layout that works for you by simply choosing one of the 9 layout presets available for the Repeater.
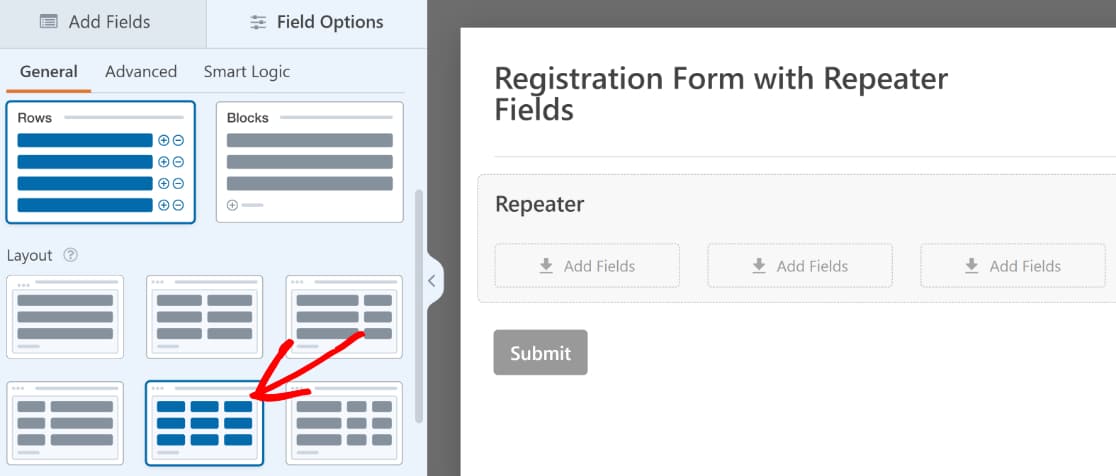
As you select the layout, you’ll see the preview on the right change instantly with drop zones appearing in columns. These are the areas where you can insert any other fields that you want to make repeatable.
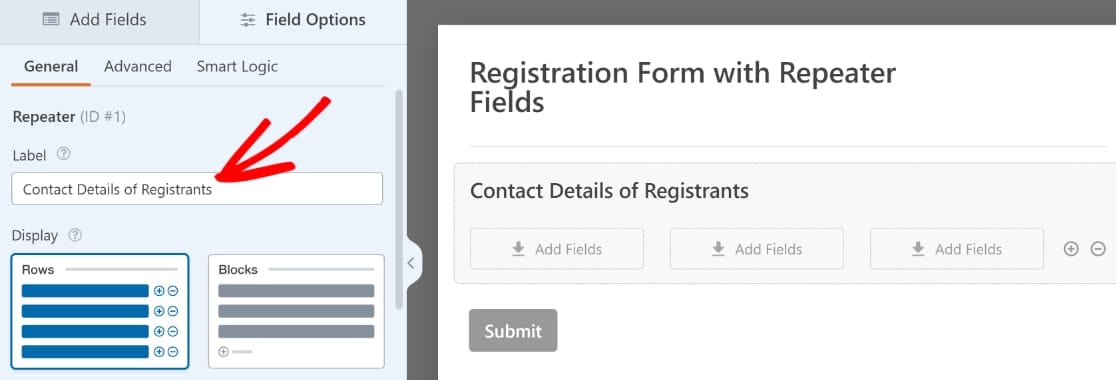
But first, let’s rename the Repeater field while we’re at it. You can do that by editing the label in the Field Options.
Next, it’s time to insert the fields inside the Repeater field drop zones. After dragging the Name, Email, and Phone fields one by one to the Repeater field drop zones, here’s what the form looks like:
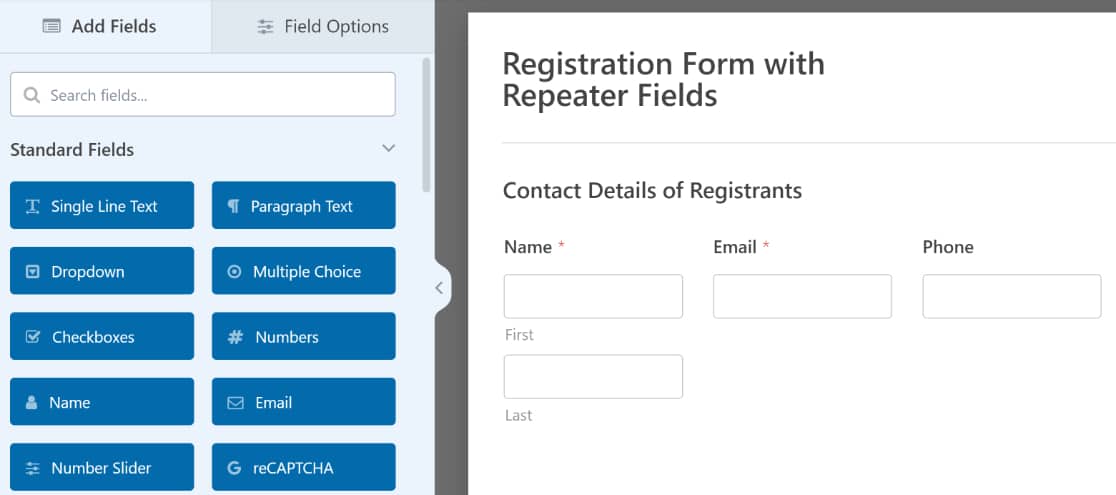
You might have noticed something feels a bit off here. And you’d be right. The Name field is split into two rows, which doesn’t look nice in the current visual context. But this is an easy fix. In the next step, I’ll customize some of the settings and appearance.
Step 3: Customize the Repeater Field
Since I want all the fields in my repeater section to appear in a single row, I’ll change the format of the Name field so that it aligns with the other fields.
You can do that by clicking on the Name field to open its Field Options, where you’ll find the Format dropdown on the left-hand pane. Click on the Format dropdown and select Simple.
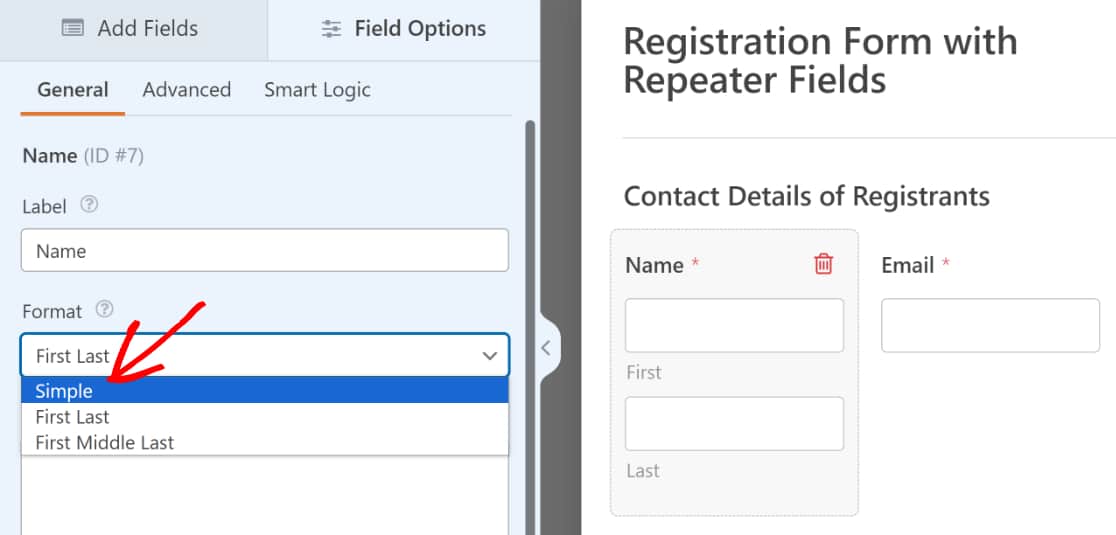
You’ll notice that the Name field has been reduced to just a single field so that it’s in line with the other fields.
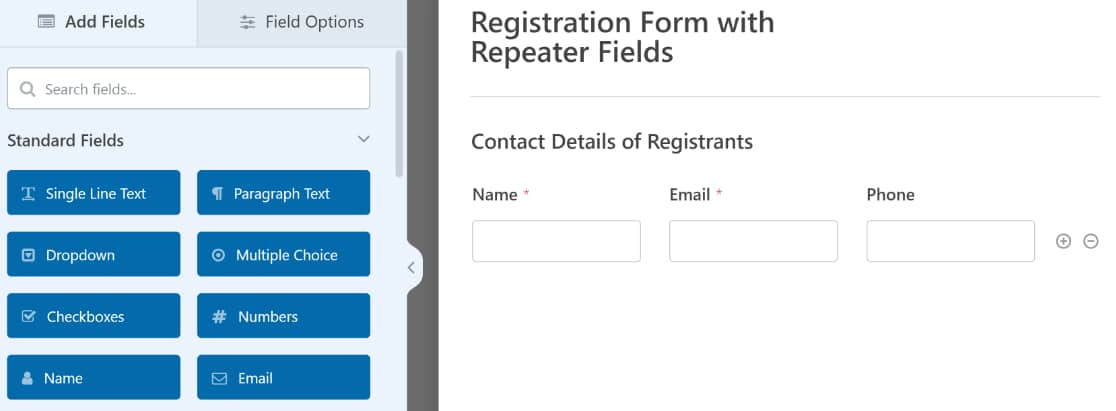
At this point, the repeater field is ready. But before we proceed to publish the form, let’s go over some additional Repeater field settings that you might want to check.
(Optional) Additional Repeater Field Settings
Click on the Repeater field to open the Field Options once again.
If you scroll down the left-hand panel, you’ll see options for setting the minimum and maximum amounts of time the repeater field can be duplicated by the visitor. Simply enter the numbers to conveniently set your limits.
Next, let’s scroll back up to the top of the Field Options panel. This time, click on Blocks under the Display options.
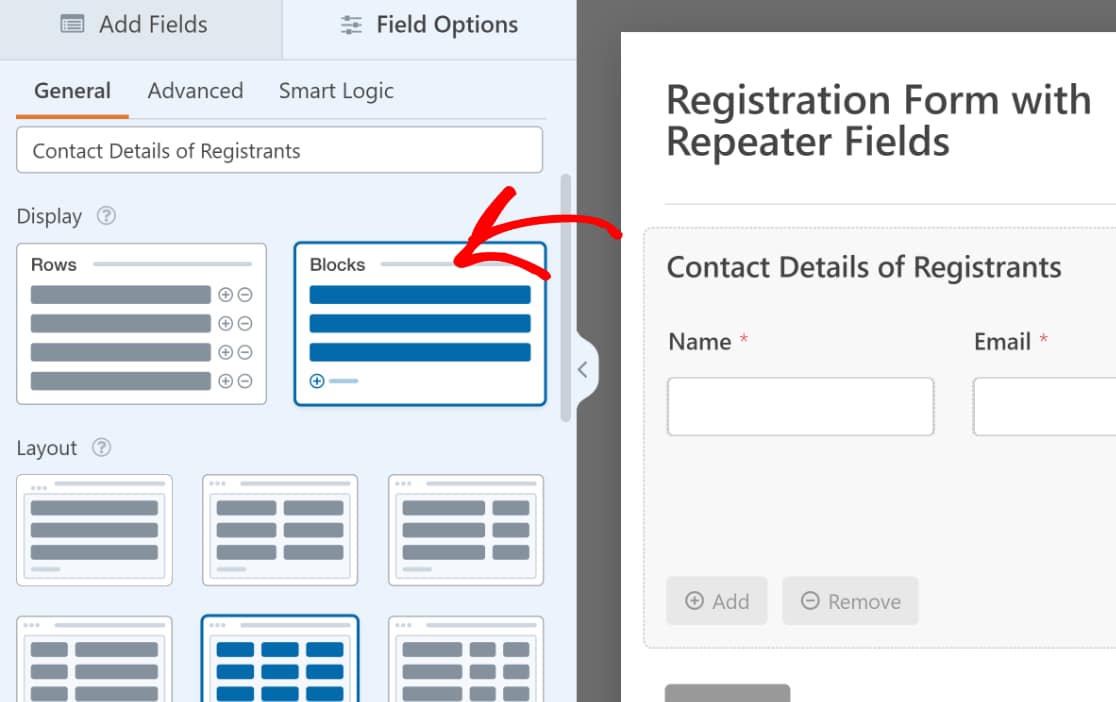
When using the Repeater field in the Blocks mode, you get additional settings. For instance, you can also customize the “add” and “remove” buttons that visitors will use to duplicate the field or remove a copy of it.
You can choose from different Button Types and edit the Button Labels.
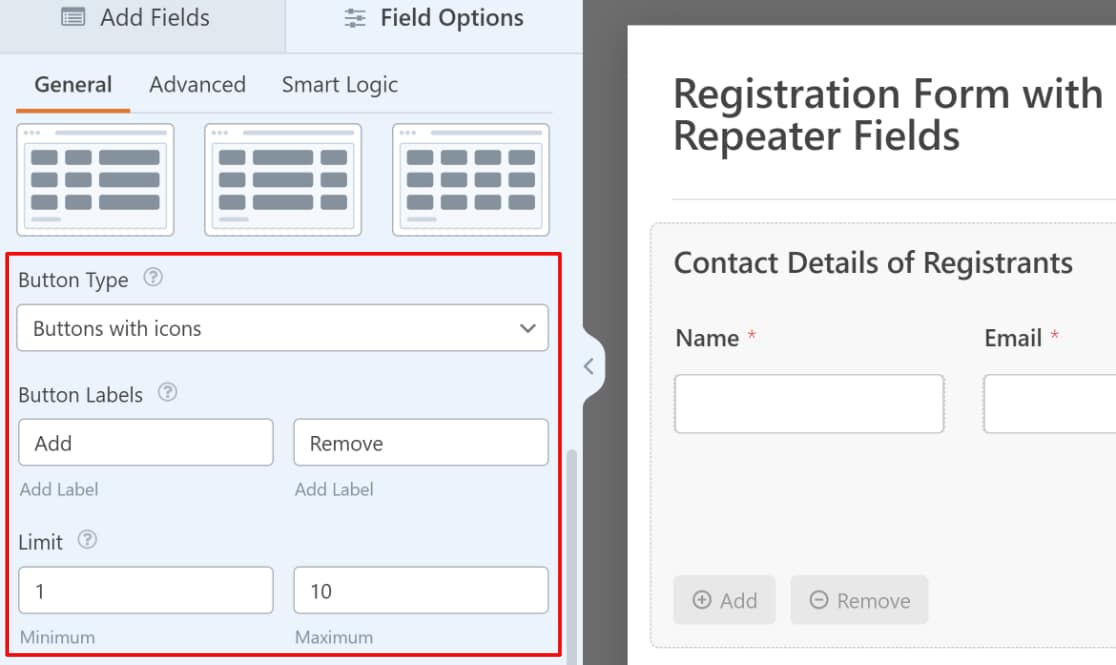
Besides, you also have the freedom to add a group of fields in multiple rows when using Blocks mode. With Rows, you’re only limited to adding fields in a single row.
Rows work just fine for simple requirements, such as the form that I’m building in this tutorial. However, the Blocks option gives you more control for more advanced use cases where you need to make a larger group of fields repeatable.
When you’re done making changes, make sure to press the Save button.
Step 4: Publish Your Form with Repeater Fields
WPForms makes it easy to embed your forms and start collecting submissions. You can begin the embed process by clicking on the Embed button at the top of the form builder.

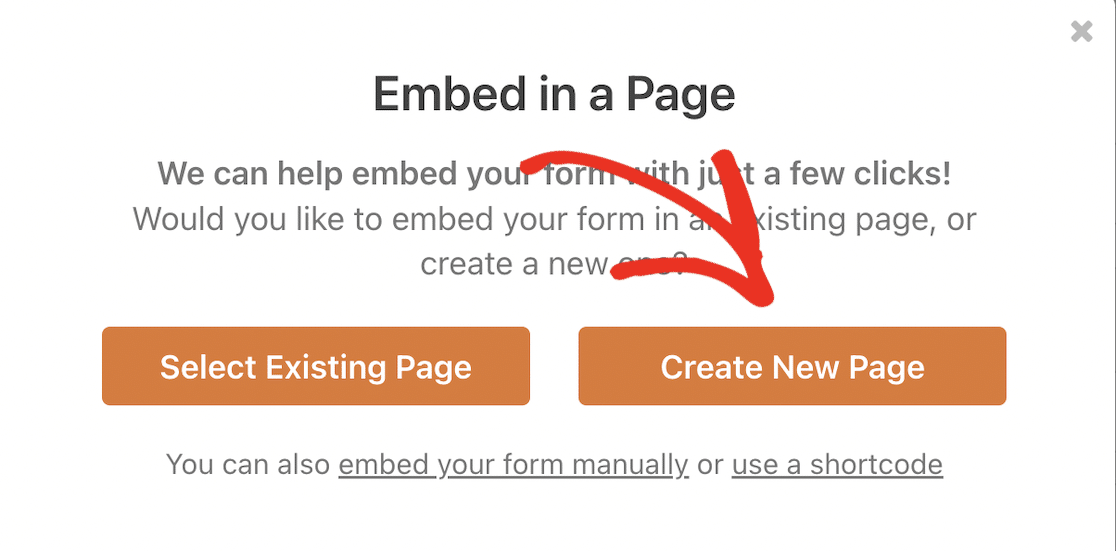
After that, a modal will appear that will let you select your embed method. Let’s select Create New Page.
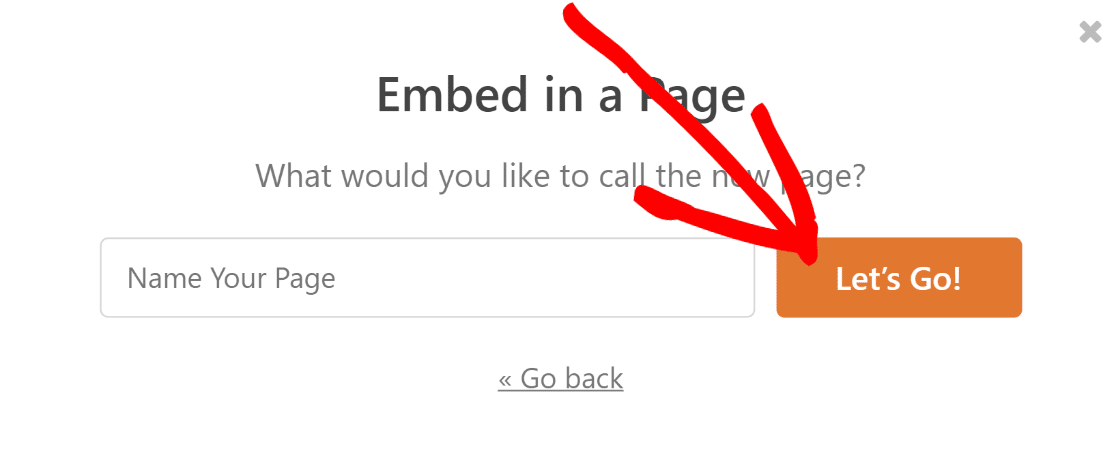
Next, enter a name for your form and click on Let’s Go.
After that, the WordPress block editor will open. The form you just created with the repeater field should already be embedded here.
Now would be a perfect time to style your form using the block editor. In particular, you may want to try adding a theme to your form to give it a modern look.
You can select a theme by clicking anywhere on the form to open the Block options on the right-hand panel. Scroll down to the Themes section and pick one.
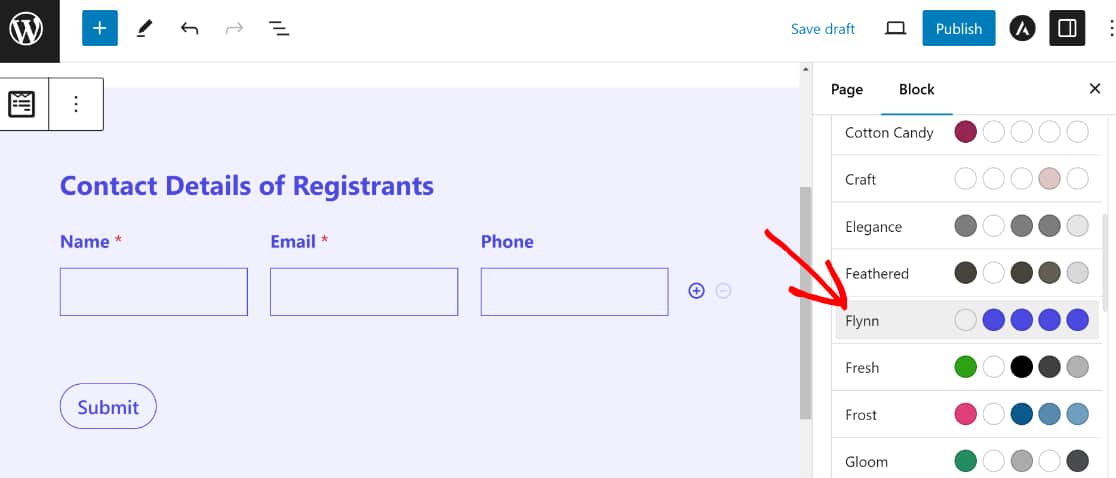
With your form looking all sweet and impressive now, go ahead and publish it when you’re ready. Just press the Publish button at the top.

When you have finished publishing the form, the only thing left to do is test the embedded form to ensure it functions as expected on the frontend.
Here’s a quick demo of me testing out the form and checking everything is OK with the Repeater field functionality by submitting a test entry:
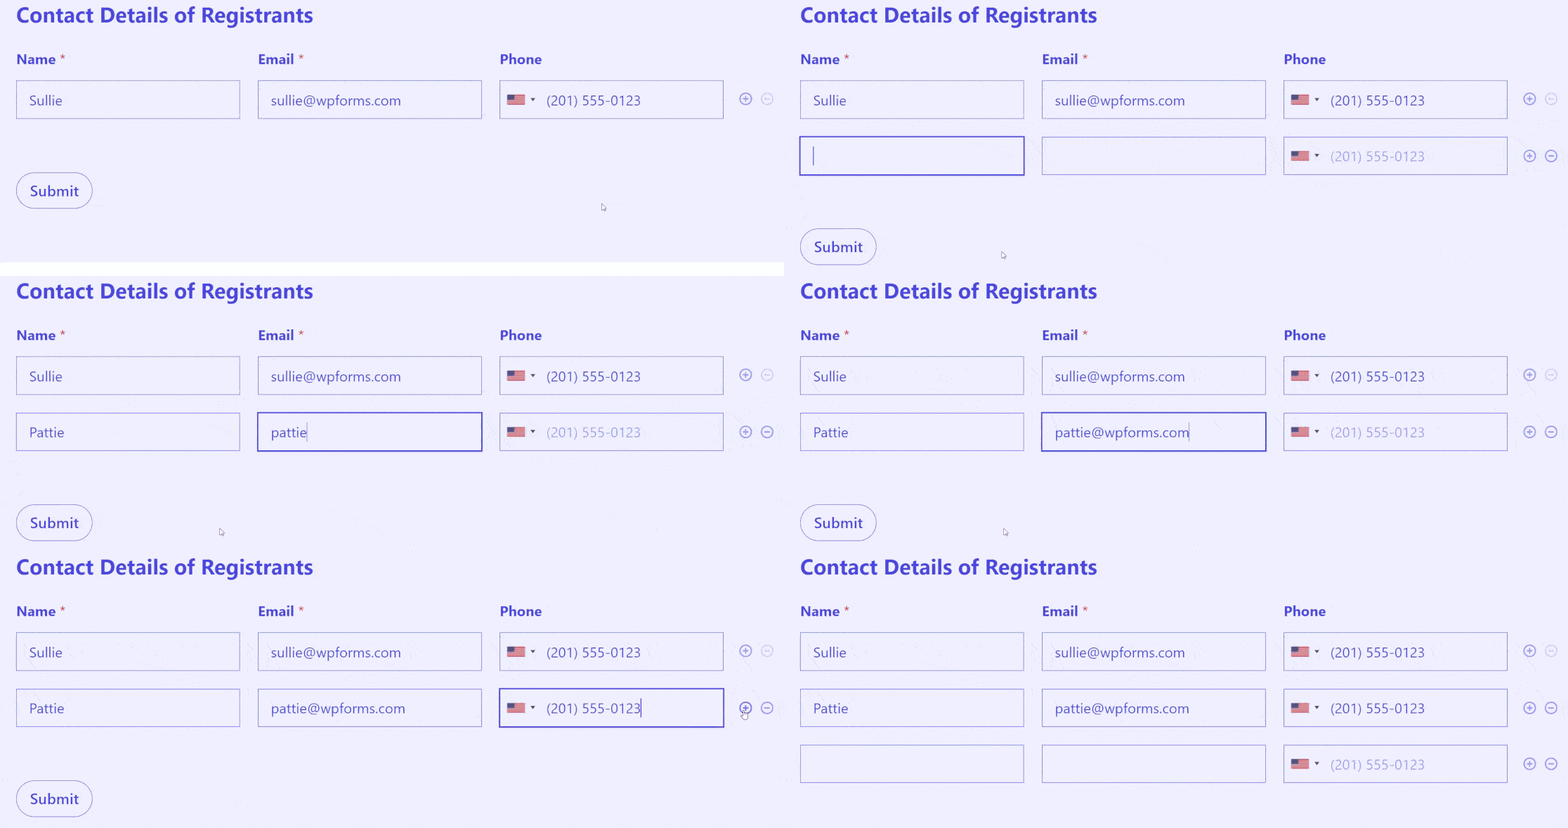
And everything’s working exactly as expected! So there you have it. With the repeater field, you can now easily create dynamic forms that the user can control. That’s the key to boosting user engagement and satisfaction necessary for collecting form submissions at scale.
Also check out this guide to learn whether or not you should use the WPForms Repeater field or Layout field with Conditional Logic to further optimize your form.
Create your Repeater Field Form Now! 🙂
More Questions about WPForms’ Repeater Field
Creating repeater field forms is a popular topic of interest among our readers. Here are some quick answers to a few of the most commonly asked questions:
What is a repeater field?
A repeater field allows users to dynamically add multiple sets of identical fields within a single form. It works like a “duplicate” button for a group of fields.
For example, in an event registration form, users can add multiple attendees by repeating Name, Email, and Phone fields without filling out separate forms for each person.
Why choose the WPForms repeater field?
The beauty of the WPForms repeater field is that it makes data collection easier for you and your visitors.
- User-Centric Design: By introducing repeater fields, you empower users to dictate the extent of their input. It’s a subtle nod to user autonomy and enhances the overall user experience.
- Flexibility in Form Design: Every form isn’t one-size-fits-all. With repeater fields, you can cater to various scenarios—be it a single entry or multiple entries, ensuring your form adapts to diverse requirements.
- Consistent Data Structuring: One of the challenges with multiple fields is inconsistent data. The data remains structured and uniform with repeater fields, simplifying backend processing and analysis.
- Reduced Form Length: Instead of having a long, intimidating form with numerous fields, repeater fields provide a cleaner look, ensuring users aren’t overwhelmed at first glance.
Can I use repeater fields in Contact Form 7?
Contact Form 7 doesn’t have native repeater field functionality. You would need to install third-party plugins or write custom code to add repeating fields, which is complex and unreliable.
WPForms includes repeater fields as a built-in feature in the Pro version with no coding required, making it the better choice for forms needing this functionality.
What are the best use cases for repeater fields?
Repeater fields work perfectly for group event registrations (collecting info for multiple attendees), family membership forms (adding multiple family members), bulk order forms (ordering multiple products with quantities), emergency contact forms (listing multiple contacts), and any scenario where users need to submit the same type of information for multiple people or items.
Can I add repeater fields to WPForms Lite?
No, repeater fields are a Pro-level feature available only in WPForms Basic and higher licenses. WPForms Lite includes basic form fields but doesn’t support advanced fields like repeaters, conditional logic, or payment integration. To use repeater fields, you need to upgrade to WPForms Pro.
What’s the difference between Rows and Blocks display mode for repeater fields?
Rows mode displays repeating fields in a single horizontal row, perfect for simple repetitions like Name/Email/Phone.
Blocks mode allows multi-row layouts within each repetition, ideal for complex information like full attendee profiles with address, emergency contact, and dietary restrictions.
How do I limit the number of times a field can be repeated?
In the Repeater Field settings, use the Minimum Rows and Maximum Rows options to set limits. For example, set minimum to 1 (at least one entry required) and maximum to 10 (no more than 10 repetitions).
This prevents spam submissions with excessive repetitions and helps you plan resources based on realistic maximum attendance or order quantities.
Next, Learn How to Create an Accordion Form in WordPress
Are you looking for a simple way to add an accordion form design to your WordPress website? Check out our post on the simplest method for creating an accordion form using WPForms to boost your website’s usability and user experience.
Ready to build your form? Get started today with the easiest WordPress form builder plugin. WPForms Pro includes lots of free templates and offers a 14-day money-back guarantee.
If this article helped you out, please follow us on Facebook and Twitter for more free WordPress tutorials and guides.



Why it doesn’t work with Zapier integration
Hi Rafa – When you get a chance, please drop us a line with more details about the issue you are facing in support so we can assist further.
If you have a WPForms license, you have access to our email support, so please submit a support ticket.
Otherwise, we provide limited complimentary support in the WPForms Lite WordPress.org support forum.
Thanks 🙂
It would be great if the repeater field worked in test mode before embeding and going live with the page.
Hi Celeste. Thanks for your comment! This sounds like a great feature request. We want this feature to be as helpful as possible!
If you have a WPForms license, you can log it with our trusted advisors in the support team. Please submit a support ticket and share the same details that you posted here.
How do you add the repeater field values to notification forms? The fields do not show up in the smart tags.
Hi Allen.
The fields will be included in the notification email if you use the
{all_fields}tag. If you want to customize the email, please submit a support ticket and our trusted advisors in the support team will be able to give you a solution for your specific use case.Jde do opakovače vložit další opakovač?
Hi Daniel, currently, WPForms doesn’t support adding a repeater field within another repeater. We appreciate your interest in this functionality and will consider it for future updates. In the meantime, you might explore using conditional logic or multiple separate repeater fields to achieve a similar result.
Is it possible to actually use the repeater field with the advanced options (like Payments dropdowns, etc)? This is very much needed and would be great to have
Hi Sasha,
Thanks for your feedback about using payment dropdowns within the Repeater field. While this and some other fields aren’t currently supported, I agree it would be very helpful to have!
I’ve added this as a feature request and we’ll definitely keep it in mind as we plan future updates. You can learn more about all the current capabilities in our complete guide to using the Repeater field.
For personalized advice, you can get in touch with our Trusted Advisors in the support team if you have a WPForms license. Please submit a support ticket and they will get back to you as soon as possible.