AI Summary
Do you need a popup survey WordPress plugin? Putting a feedback form in a popup window is a great way to get more responses from your visitors.
In this article, we’ll look at the best popup survey plugin for WordPress. Then we’ll walk through the process of getting a popup live on your site.
Create Your WordPress Survey Form Now
How Do I Use a Popup Survey Plugin in WordPress?
You can install a popup survey plugin easily in your WordPress dashboard.
After that, you just need to set up the survey questions for the form, then design the popup that will appear when a visitor is on your site.
Popups are a great way to grab your visitors’ attention on any type of survey. And focusing the visitor on the survey will help to increase conversion rates.
It’s really easy to install a popup survey plugin. We’re going to combine 2 powerful plugins in this tutorial.
How to Set Up Your Popup WordPress Survey Plugin
In This Article
Step 1: Install the WPForms Plugin
WPForms is the best form builder for WordPress. It lets you make customized forms and surveys with an easy drag and drop builder.
 Let’s get started by installing the WPForms plugin.
Need a hand? Jump over to this beginners’ guide to installing a plugin in WordPress.
Once you’ve activated the plugin in WordPress, you’ll also want to install and activate the Surveys and Polls addon. This will let you see advanced reports of your survey’s responses.
Head over to WPForms » Addons and click the Install Addon button for the Surveys and Polls addon.
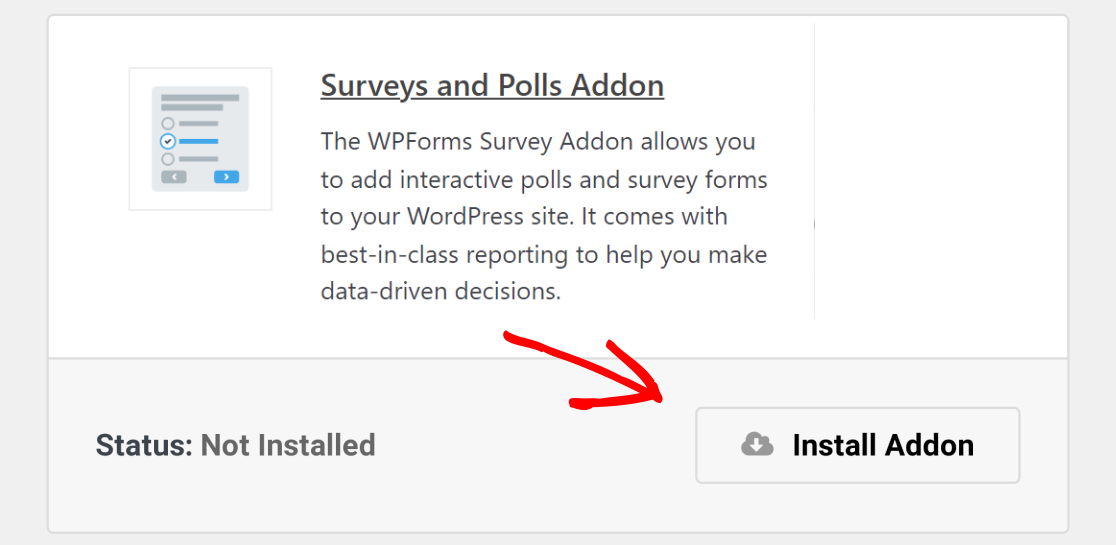
The addon will be installed and then automatically activated.
Now you’re ready to create your feedback form. The great news is that we can use a template for this, so it’ll only take a few minutes.
Step 2: Create a Survey Form in WPForms
In this example, we’ll create a simple survey with 4 fields:
- Name
- Star rating
- A text field for comments
If you’d like to make a more complicated survey, check out these questionnaire templates and examples to learn about the fields you can use.
In the WordPress dashboard, head to WPForms » Add New in the sidebar menu. Here you can name your form and pick from 100s of templates.
For this example, we’ll use the Survey Form template.
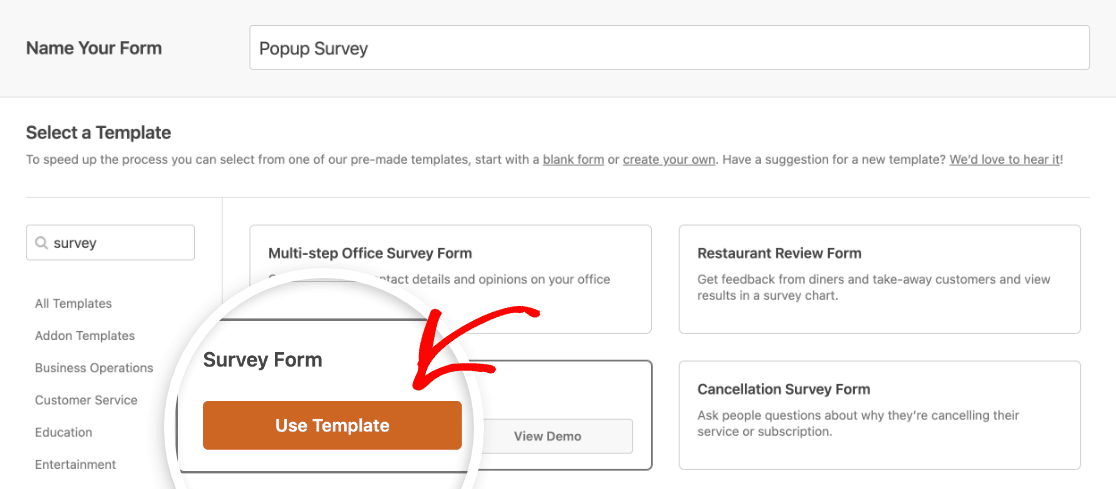
Customizing this template will take just a few minutes.
Shorter forms can decrease form abandonment, so we’re going to simplify this survey a bit. We’ll remove the 2 Likert Scales fields by clicking on the trash icon.

If you want to customize any other fields, just click on them to change the settings. For example, you can use the Advanced options on the Rating field to change the icons.
The last thing to do is add the OptinMonster conversion tracking code to the form. In the form builder, click Settings on the left side of the screen. Then scroll down, expand the Advanced section, and type om-trigger-conversion into the Submit Button CSS Class box.
![]()
Once you’re done, click on the Save button to save your form.
If you’d like to add more complex survey fields to your form, check out this article on how to create a survey form in WordPress.
Now that we have a feedback form ready, let’s move on and install the 2nd plugin.
Step 3: Install the OptinMonster Plugin
OptinMonster is the best popup plugin for WordPress. It can help you to track and increase conversions, and get valuable feedback from your visitors. Check out all of the features in our OptinMonster review.
OptinMonster + WPForms is a powerful combo. Let’s put them both to work.
Go ahead and install the OptinMonster WordPress plugin. Don’t forget to activate it.
If you don’t have an account, click New? Claim Your Free Account and follow the setup wizard to sign up. If you already have an OptinMonster account, select Connect Your Existing Account to add your website.
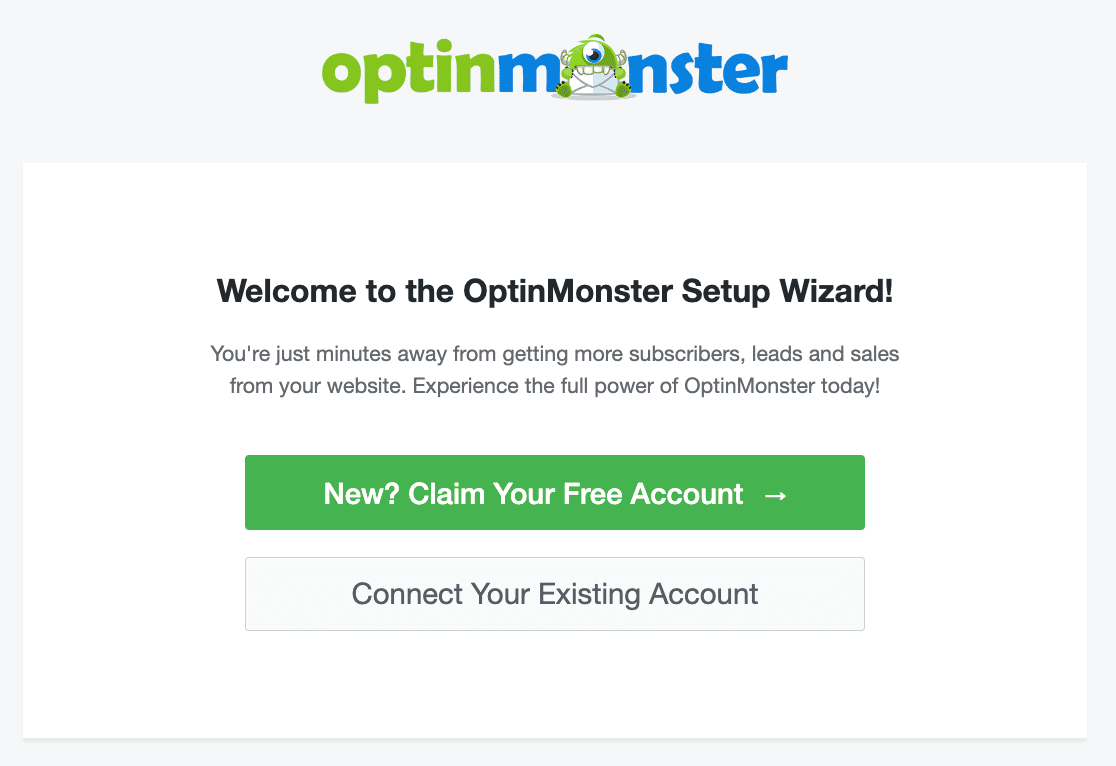
Great! We have our popup survey WordPress plugins ready.
You can keep the WordPress dashboard open in another tab. We’ll need to check back in a second. For now, let’s switch to OptinMonster.
Step 4: Create a Campaign in OptinMonster
Head to OptinMonster in a new browser window and log in. At the top of the screen, click Create a Campaign to start.
First, OptinMonster will ask you want to start from scratch, or use a template for your campaign. We’ll be using a template for this example.
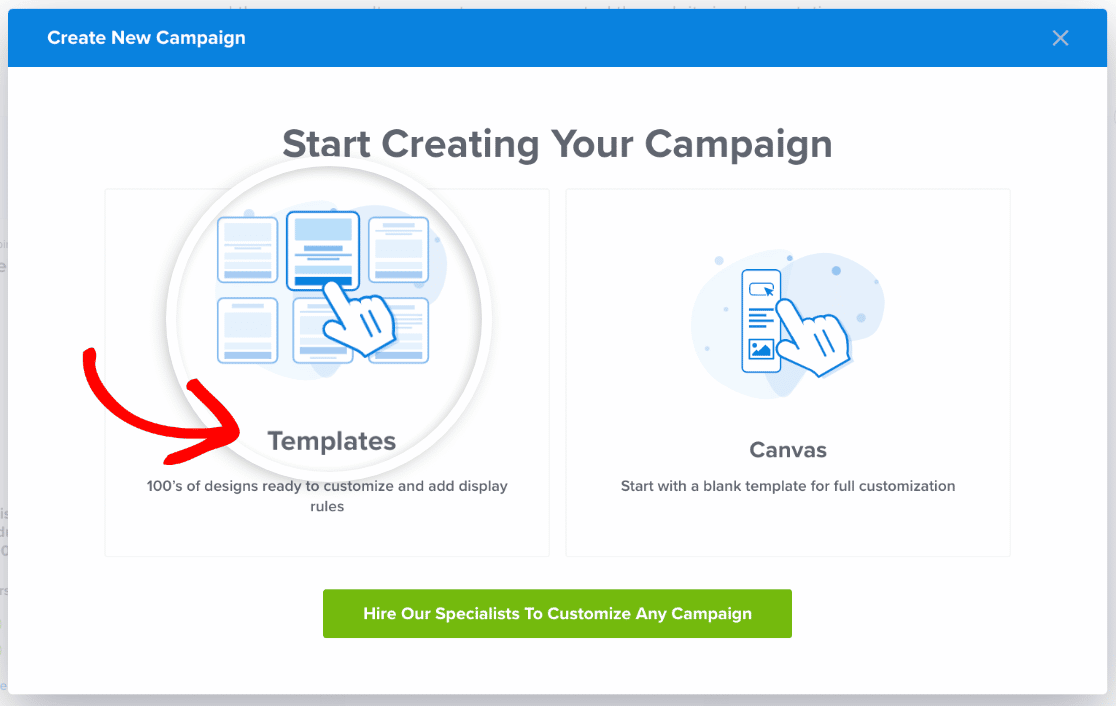
Under campaign type, choose Popup. Then select a campaign template. Let’s choose Basic.
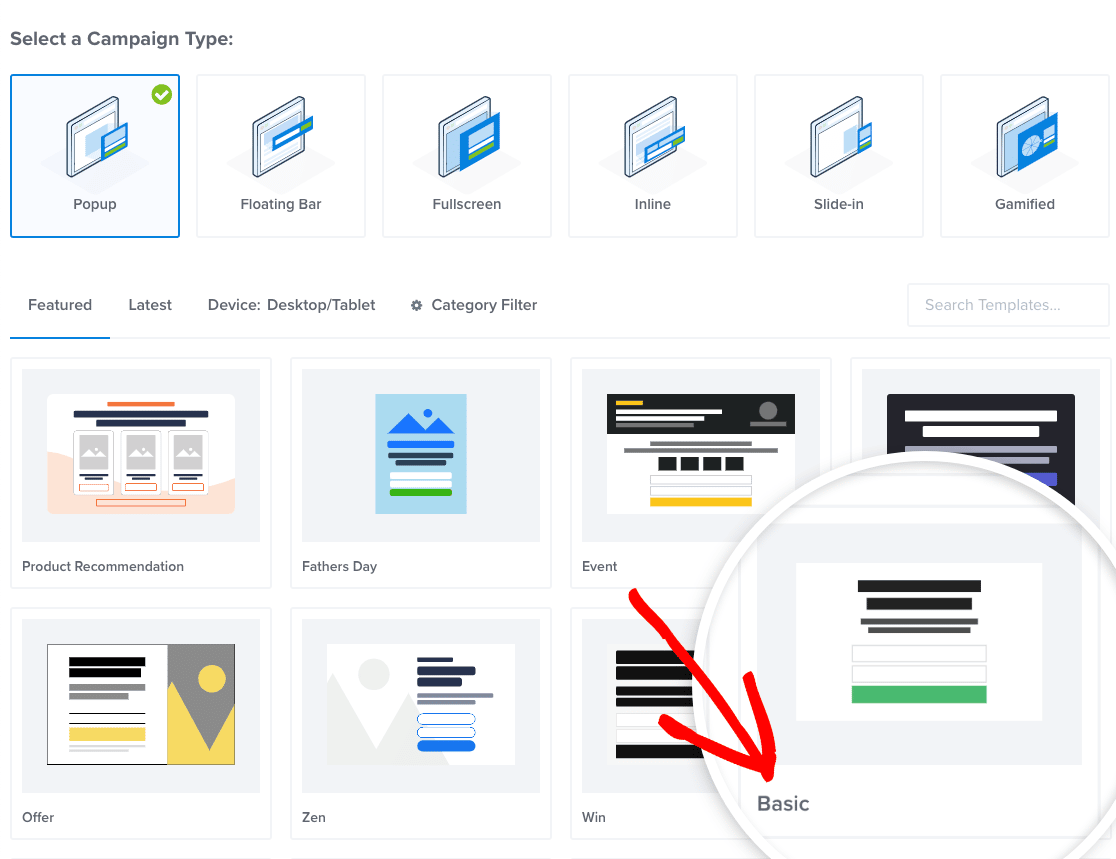
To learn more about the different types of popups you can make, read this article on unique popups you can create with OptinMonster.
OK, back to the OptinMonster wizard.
Now you’ll be prompted to name your popup. Let’s call it Popup Survey, then select our site.
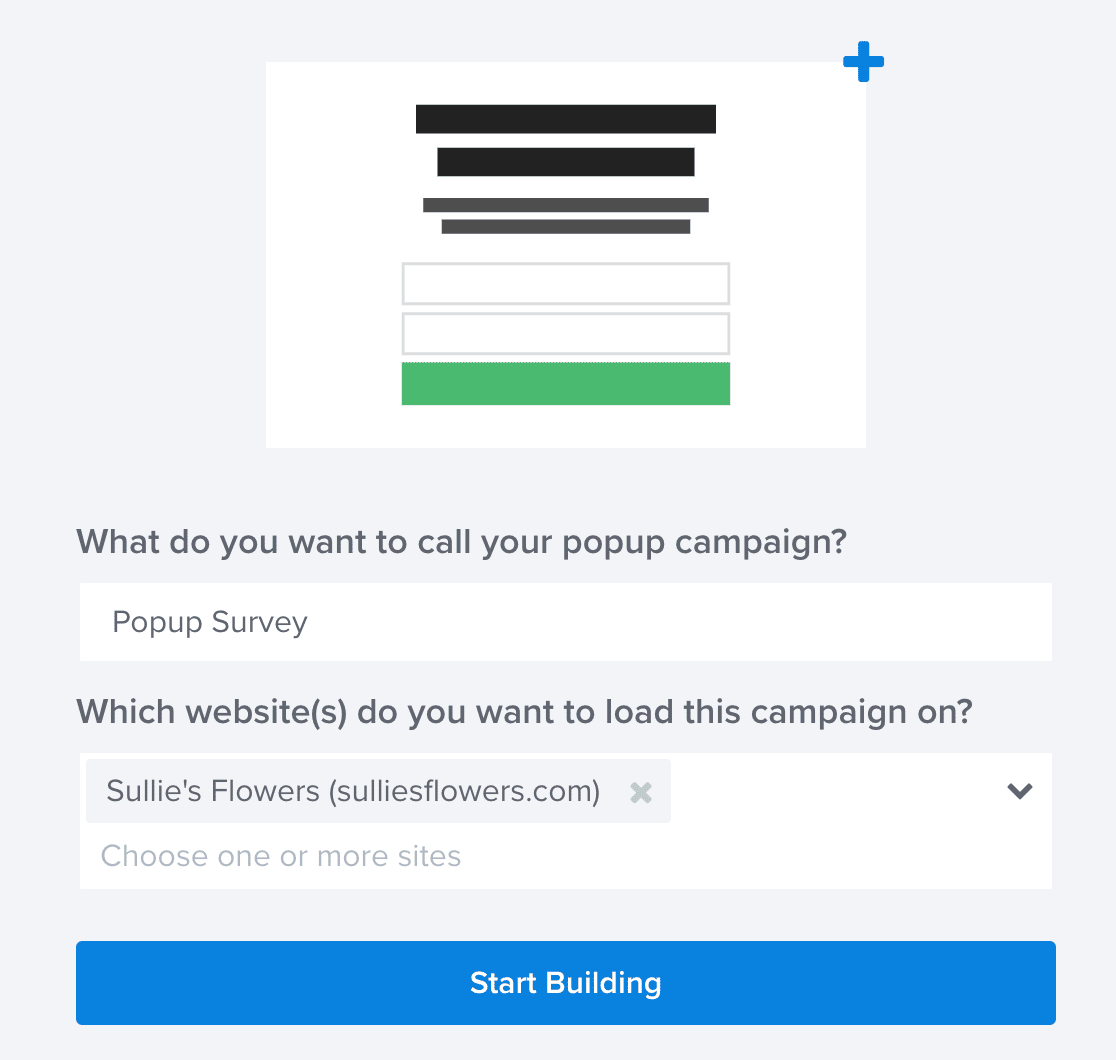
We’re ready! Just click Start Building to proceed.
OptinMonster will load the builder screen. This is where you’ll set up the popup and embed your form.
Don’t worry if you haven’t used OptinMonster before. If you get stuck at any point, take a look at this guide on creating your 1st campaign.
First, let’s customize the popup. We’re going to remove the default content and add an image as well as some text encouraging visitors to fill out our survey.
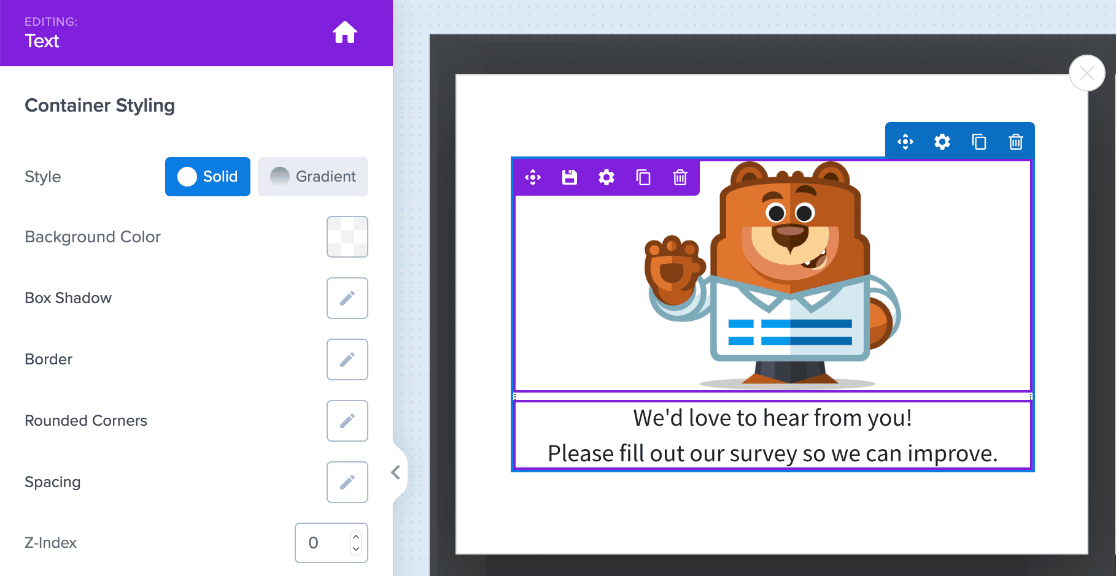
Now let’s add the form to the popup.
OptinMonster makes it super easy to add forms to your popups with the WPForms block. Just drag it onto your popup. Then choose the form you want to embed from the Form Selection dropdown.
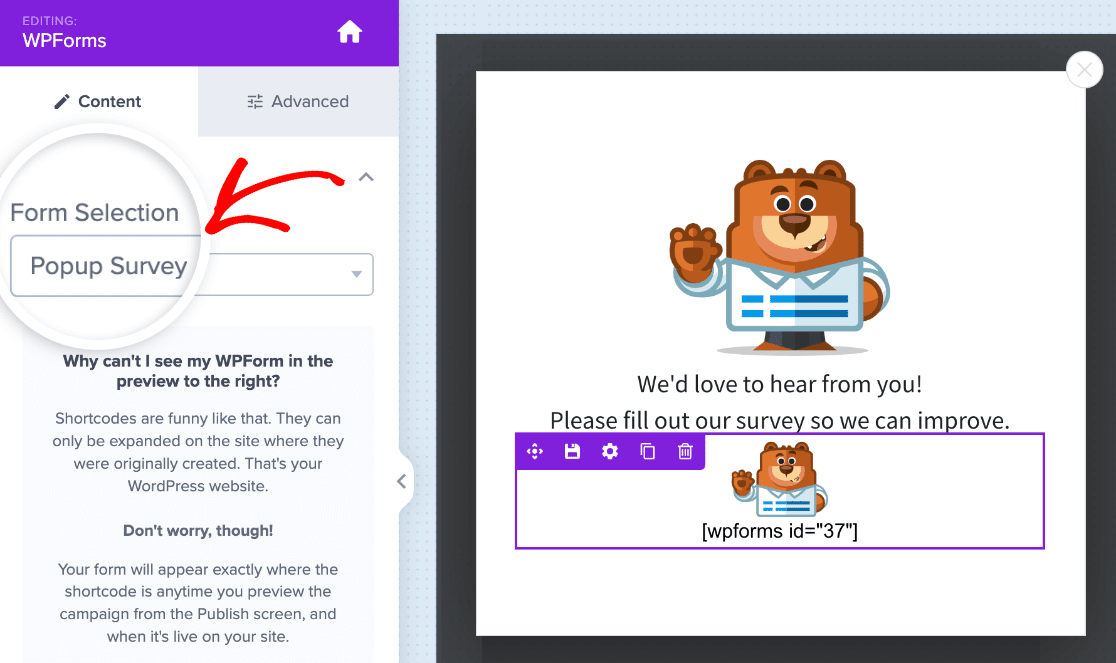
You’ll only see your form’s shortcode in the preview area, but don’t worry. You can see what your form looks like in your popup before you publish it.
Next, we’re going to tell OptinMonster how to display the popup. In this example, we want it to show if someone clicks a link.
Go ahead and click Display Rules at the top of the OptinMonster builder.
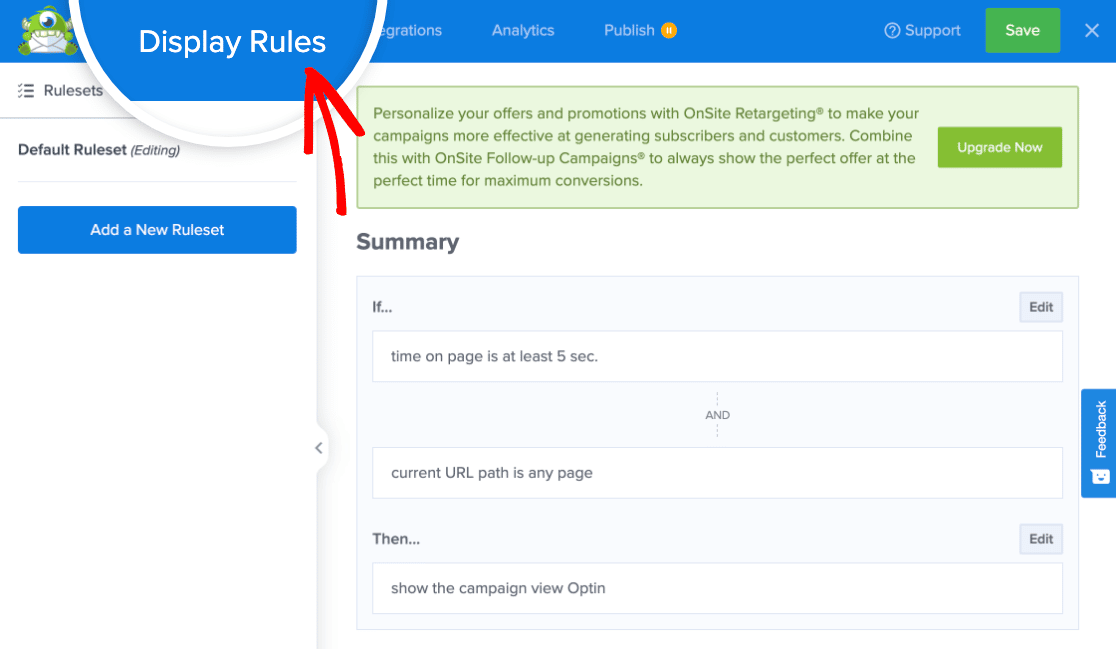
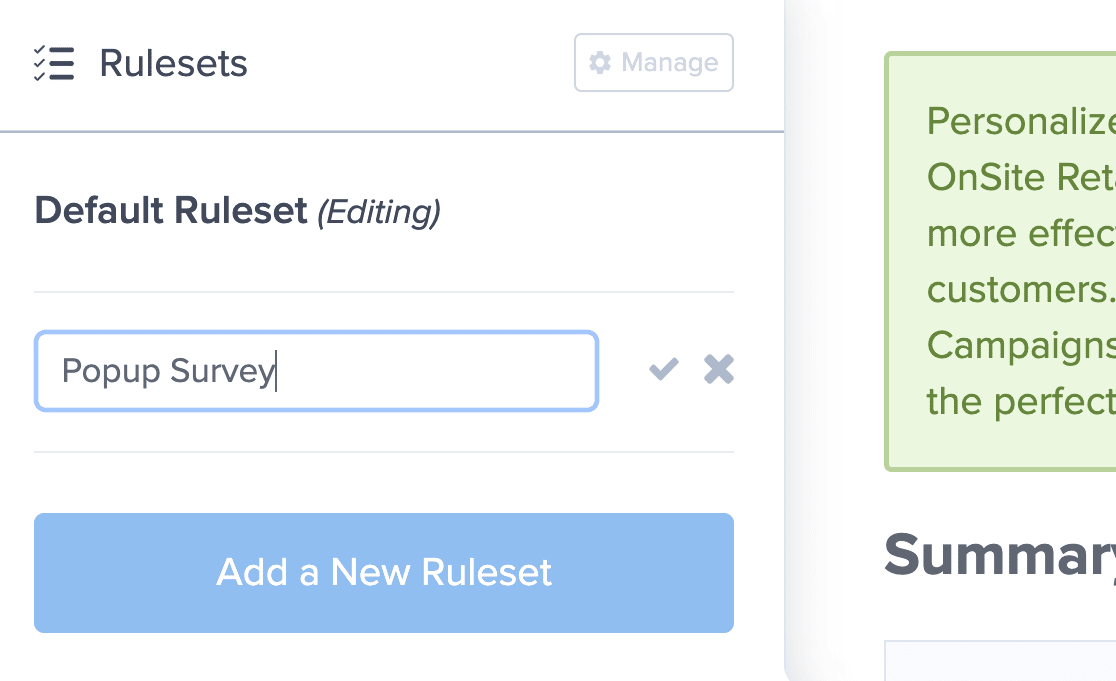
Click on Add a New Ruleset to begin. Enter a name for this display rule in the space provided, then click the checkmark.
Then, click the dropdown that says time on page. Select the MonsterLink (On Click) option on the right.
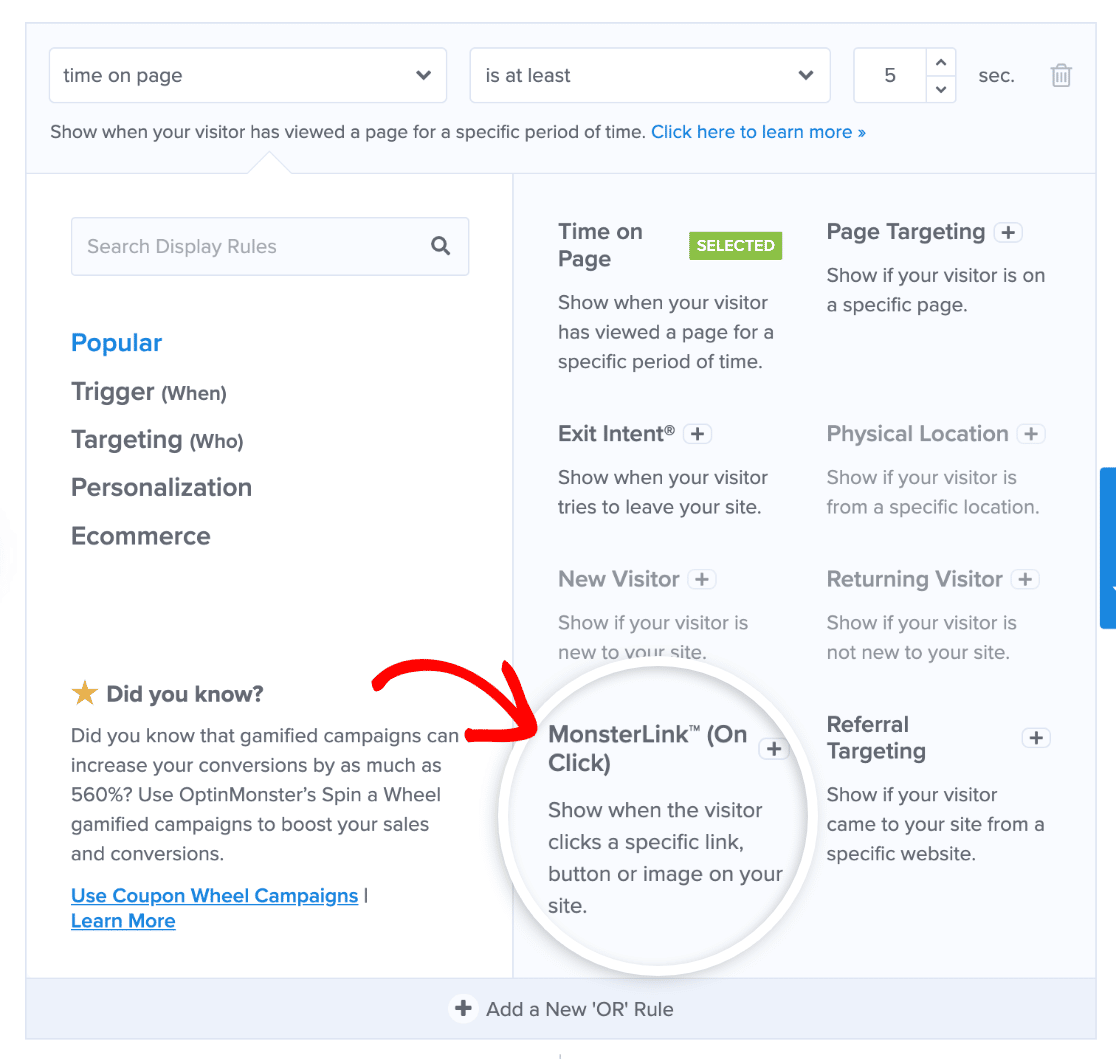
You can go ahead and remove the other rules by clicking the trash icon next to them.
Click Next Step and make sure Optin is selected in the show the campaign view dropdown on the next screen.
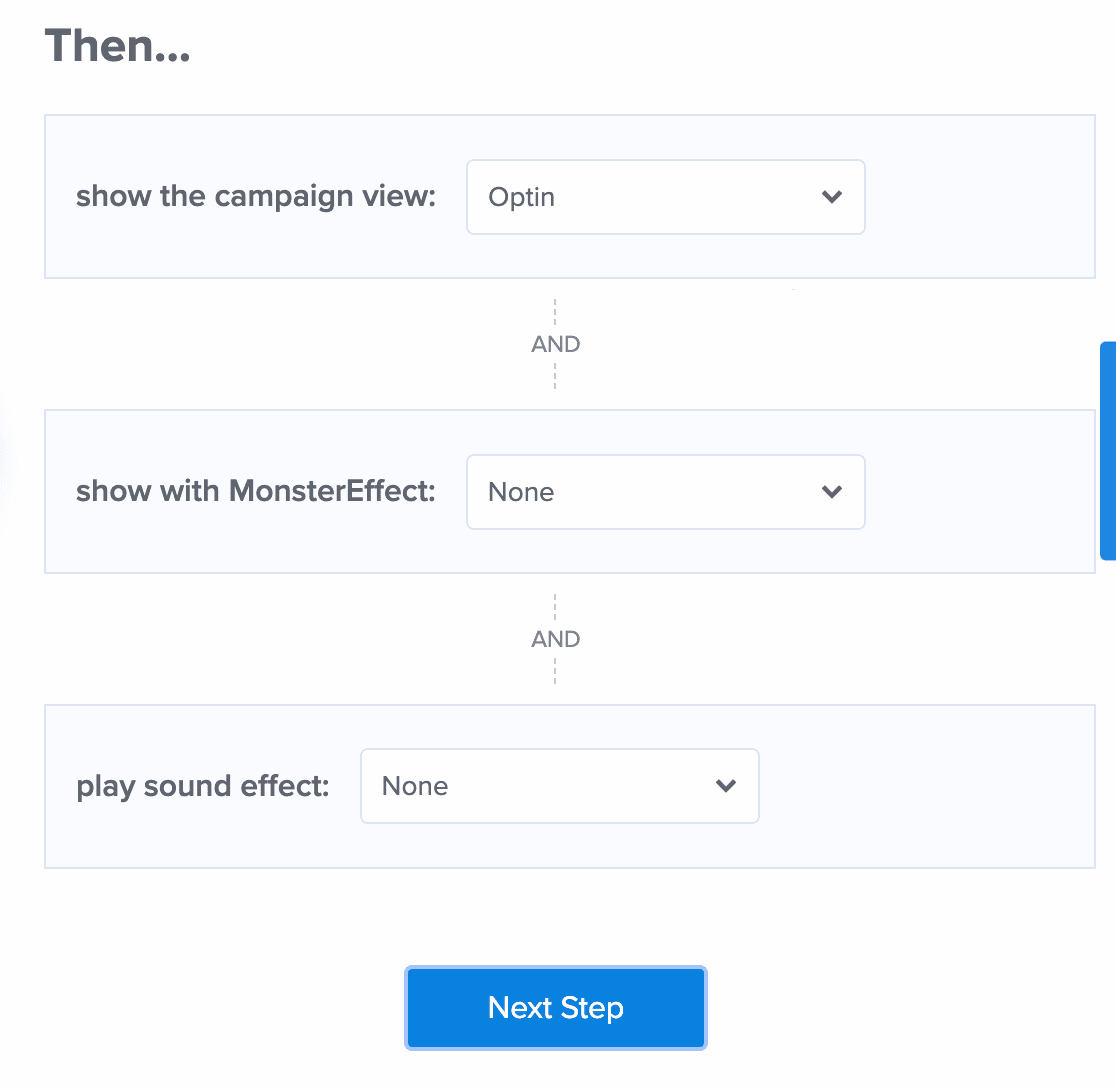
Click Next Step again. You’ll see a summary of your display rule.
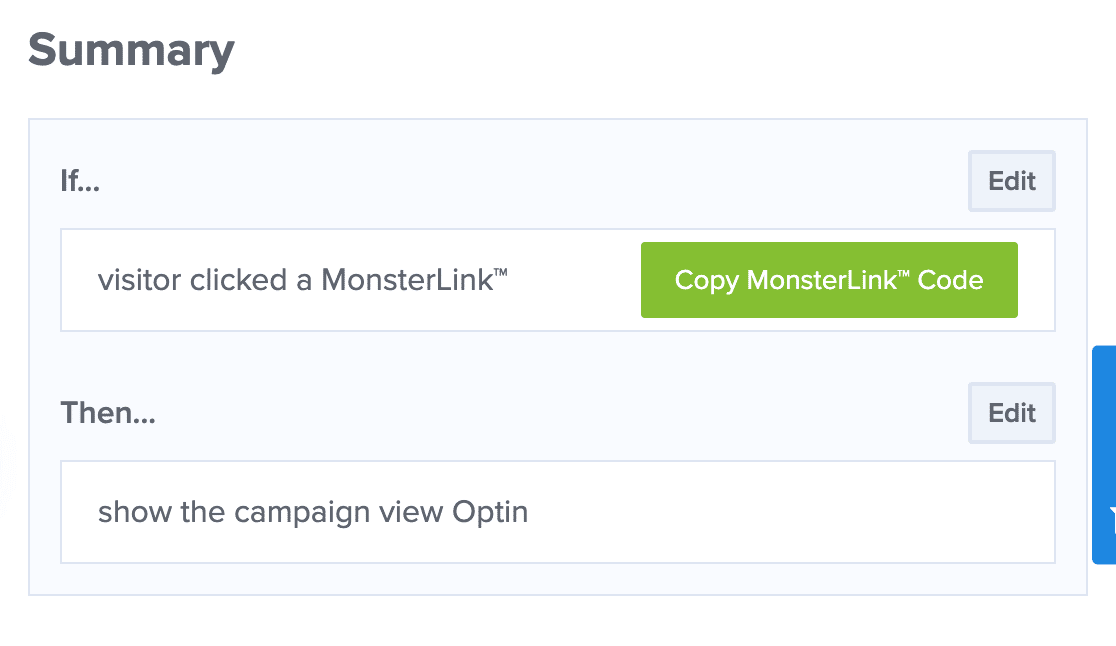
Great! Now your popup will open when the visitor clicks the custom link.
Go ahead and click Copy MonksterLink Code. You’ll need that in a minute.
You’re almost at the finish line! All we need to do now is publish the popup on your website.
Step 5: Publish the Popup Survey on Your Site
So now we need to do the final steps in both plugins:
- In OptinMonster, we’ll publish the popup.
- In WordPress, we’ll add the MonsterLink to a post or page.
So let’s start by publishing the popup.
At the top of the OptinMonster screen, click Publish. Then click on the Preview button to see how your survey looks in your popup.
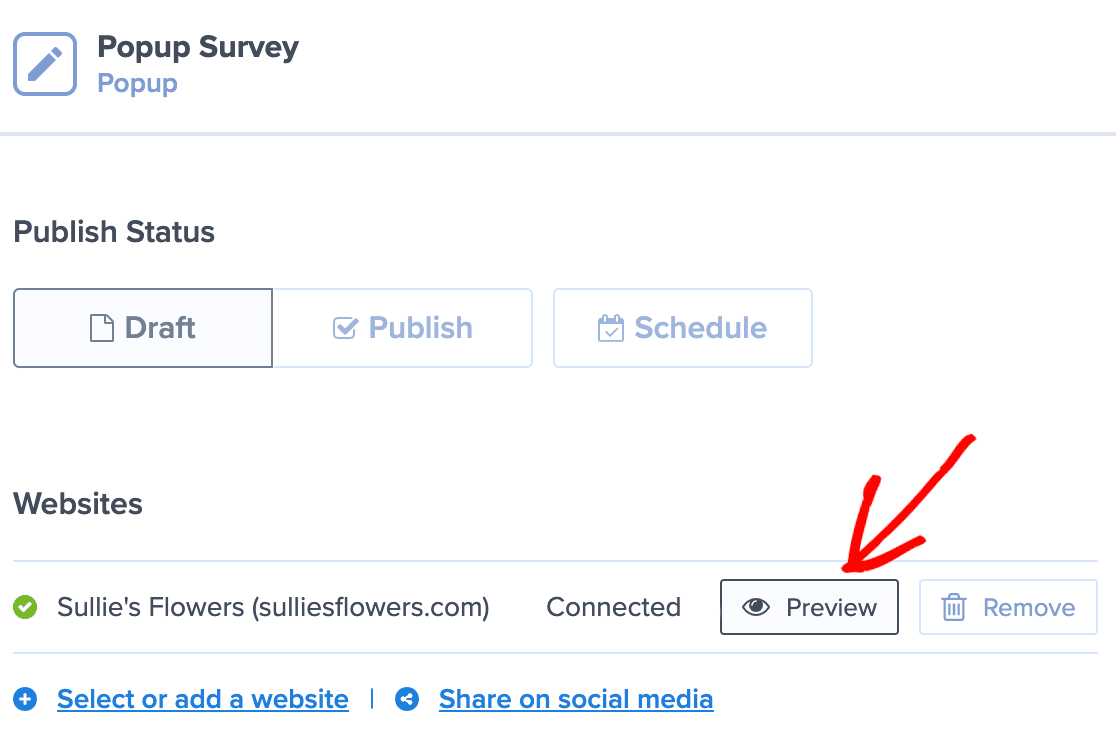
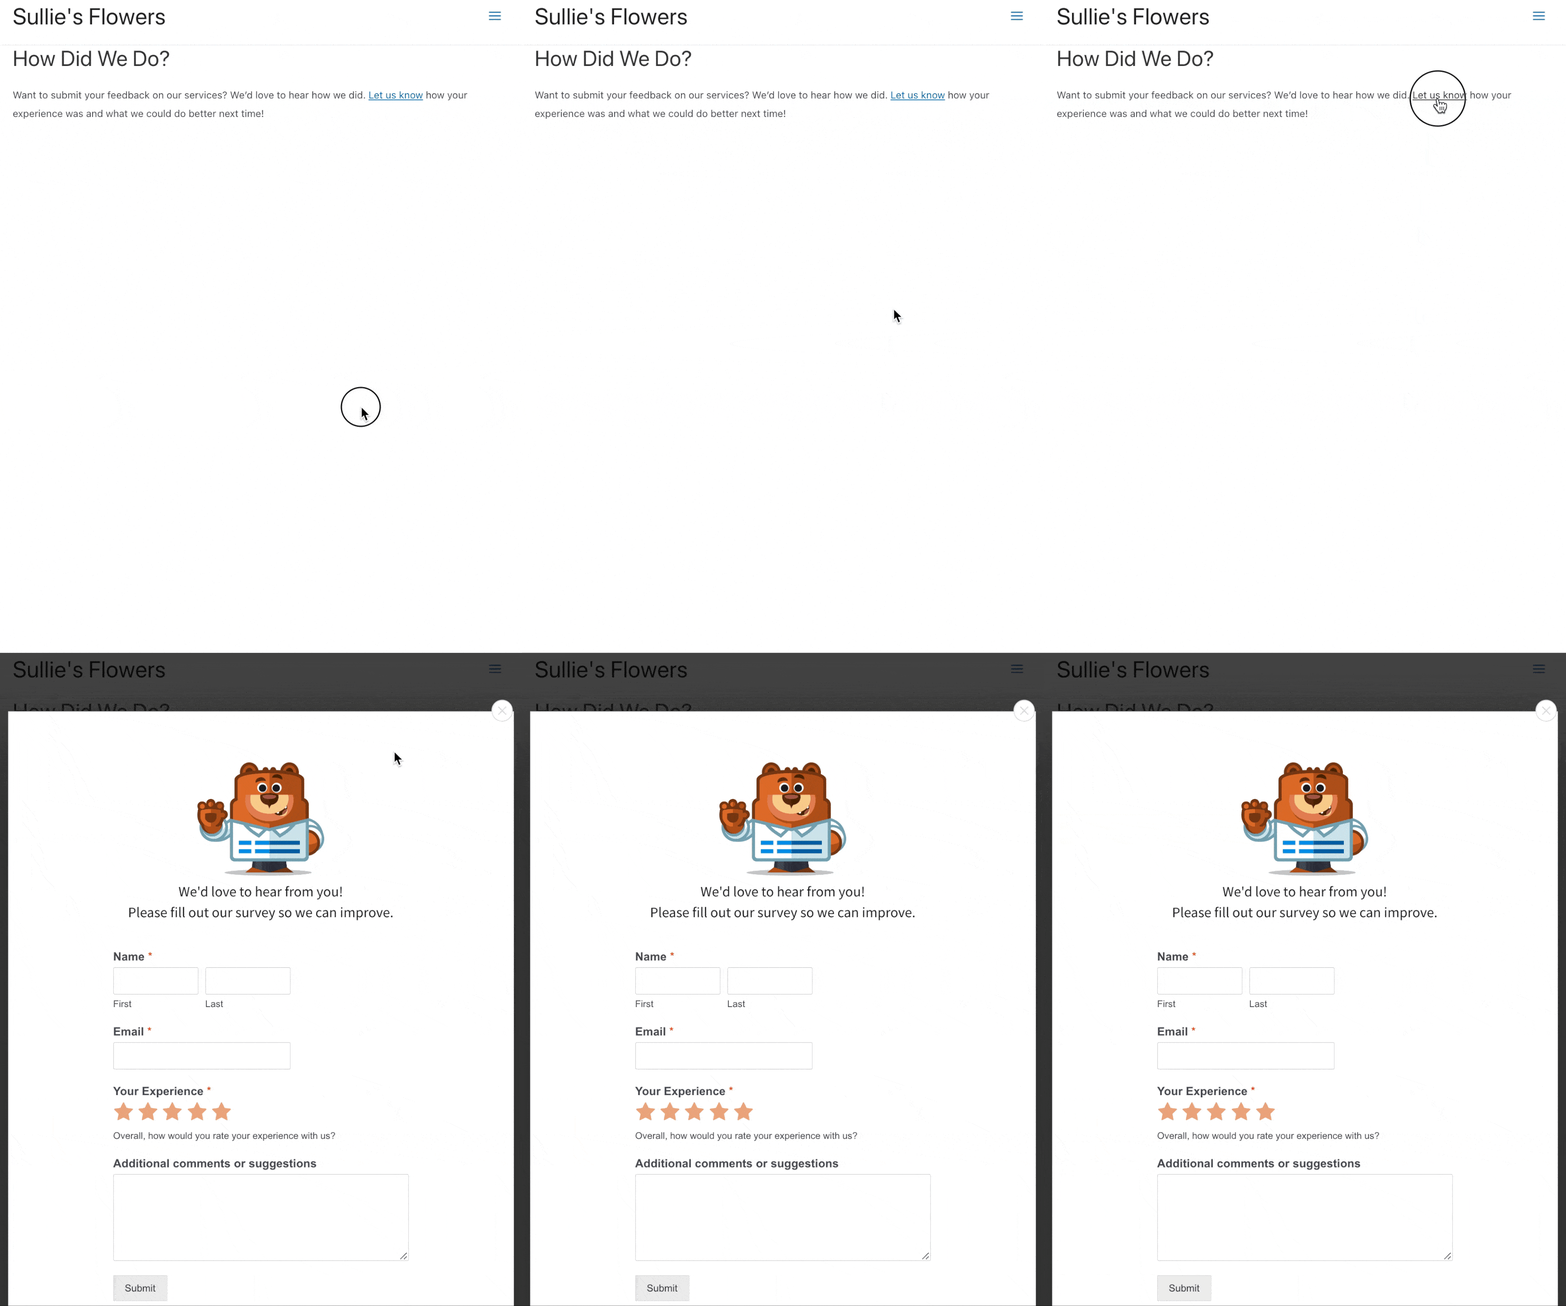
Here’s our example:
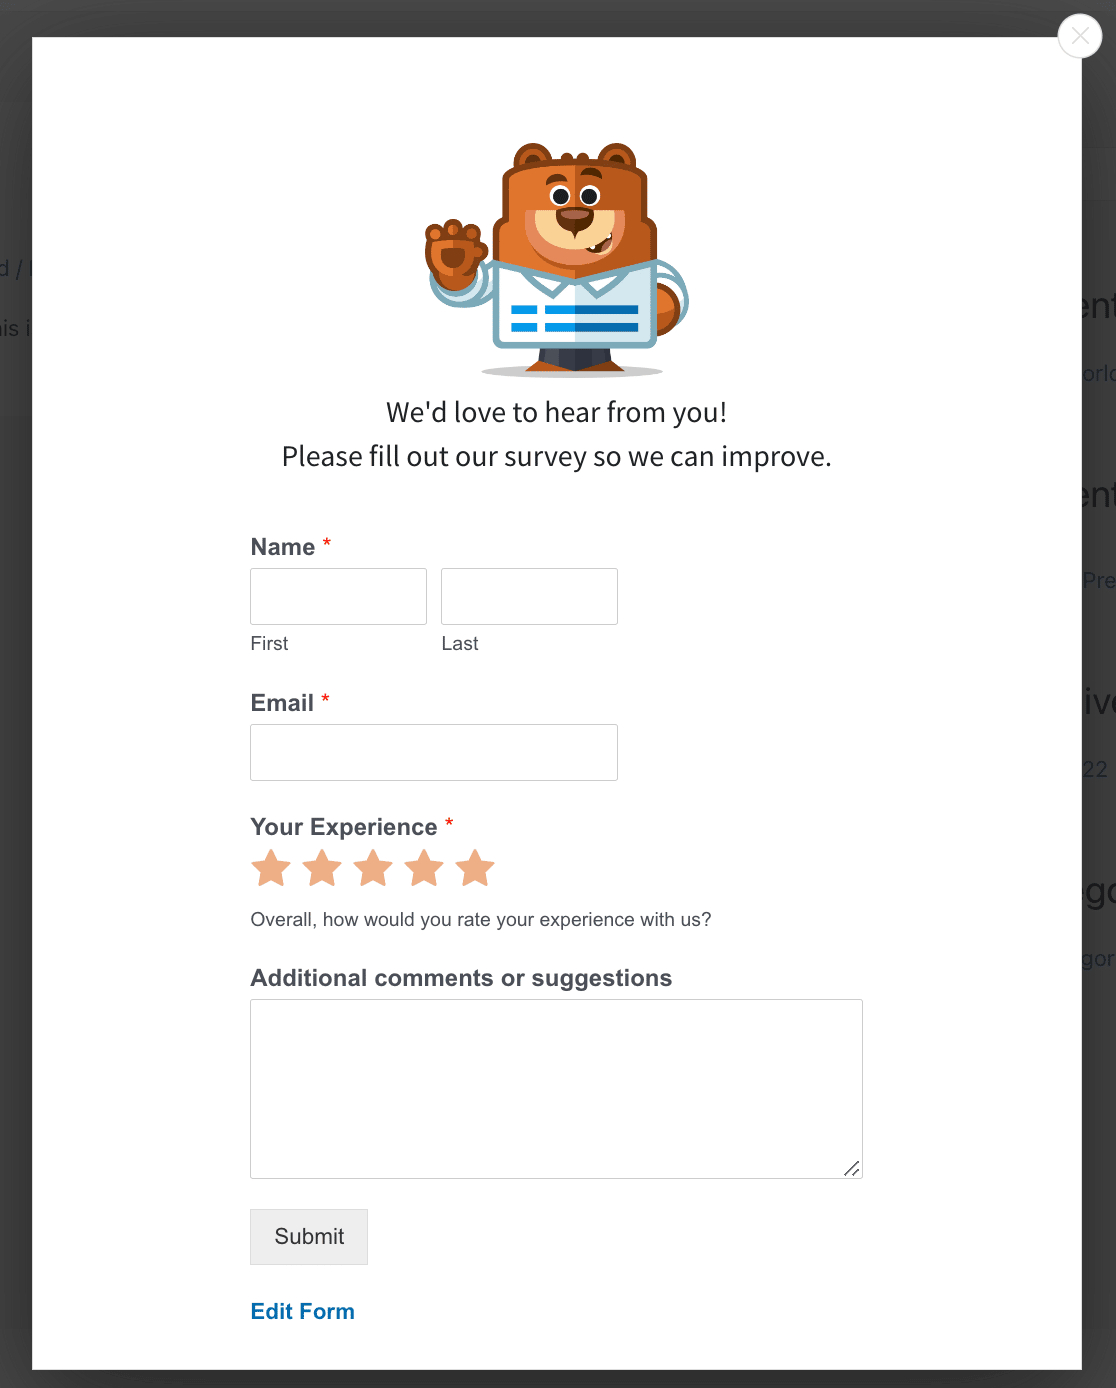
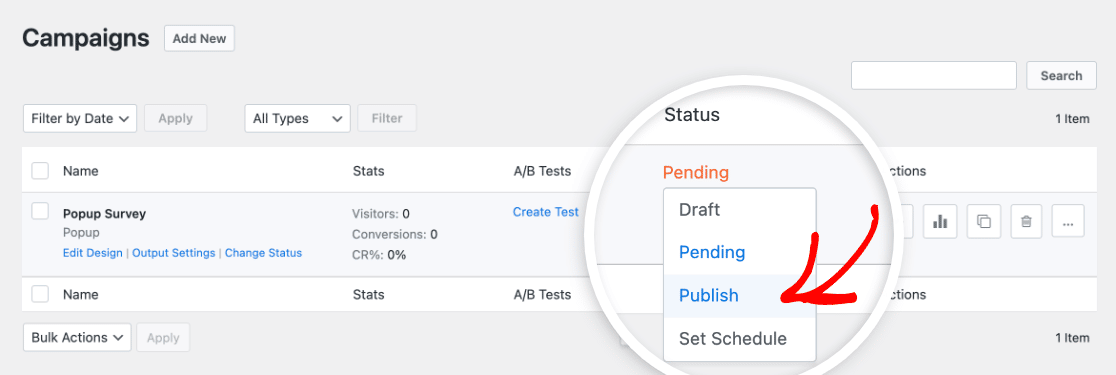
Next, head back over to your WordPress site and go to OptinMonster » Campaigns. You should see your new popup listed here.
Under your campaign’s title, click Change Status and select Published.
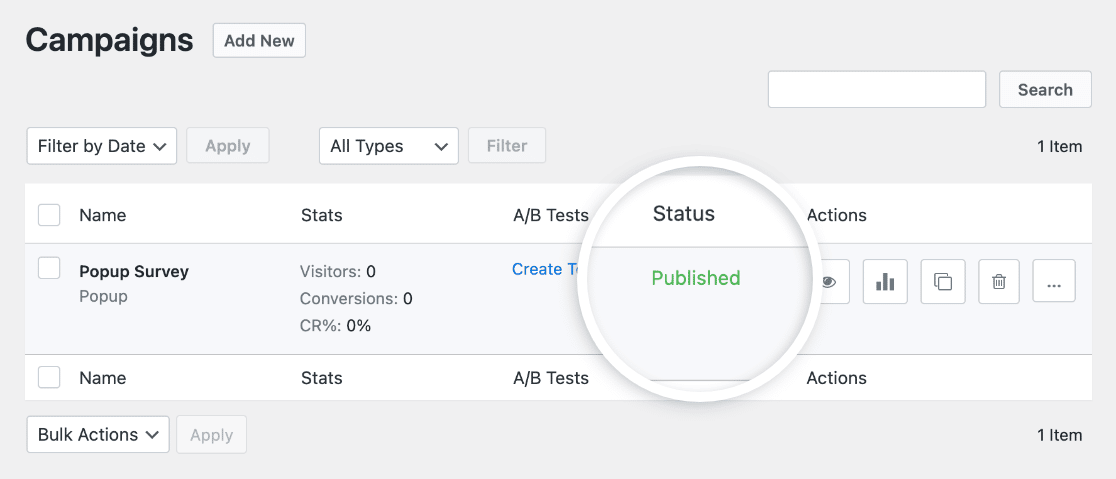
You should then see the updated status listed.
Now edit the post or page where you want to display your survey popup and add the MonsterLink you copied earlier. Then publish or update the page.
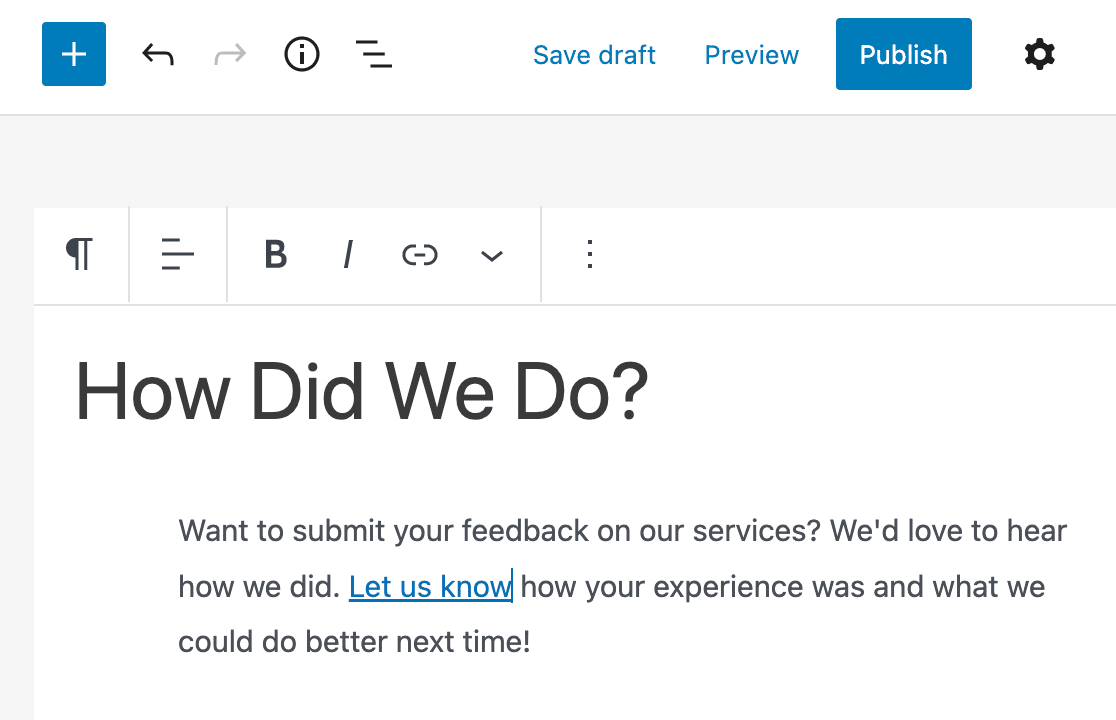
Make sure to click the link and test that your survey popup works!
Create Your WordPress Survey Form Now
Next, Do More With Your Survey Results
That’s it! You’ve just published a feedback form popup on your WordPress site.
Did you know that WPForms can create beautiful charts from your survey results? Learn more in this article on how to display survey results graphically. We can also help you to write a summary of your survey results.
And that’s it! Now you know how to use a popup survey WordPress plugin. Get started by installing the most powerful WordPress forms plugin today. WPForms has tons of features you can use to create professional surveys for your website.
If you like this article, we’d love you to follow us on Facebook and Twitter for more free WordPress tutorials.

