As a business owner, you likely know all too well that time is money.
But most businesses spend an unnecessary amount of time managing their leads and customer information manually (such as by transferring data between your forms and CRM).
Clearly, businesses that value efficiency can’t let this stand. They turn to smarter solutions to automate tasks like these so you they focus on the important stuff.
The good thing is that with WPForms, you can easily sync your form with HubSpot so that all leads are automatically sent to your CRM without requiring any manual effort on your end after the initial setup.
In this article, I’ll show you exactly how to send contacts from your WordPress forms to HubSpot automatically.
Connect WordPress Forms With HubSpot Now
How to Send a Contact From Your WordPress Forms to HubSpot
Here are the steps to create a WordPress HubSpot integration:
In This Article
- 1. Install WPForms and Sign Up For HubSpot
- 2. Install the WPForms HubSpot Addon
- 3. Connect HubSpot With WPForms
- 4. Set Up the WPForms HubSpot Integration
- 5. Configure Form Actions and Settings
- 6. Map Custom Fields to Form Field Values (Optional)
- 7. Embed and Test Your HubSpot Form Using WPForms
- FAQs on HubSpot Forms in WordPress
Let’s dive in.
1. Install WPForms and Sign Up For HubSpot
We’re going to start with installing WPForms on your WordPress site. Remember that you need at least the WPForms Elite license to access the HubSpot addon for integration.
With WPForms, you need zero coding knowledge to integrate your contact forms with HubSpot. It’s the most user-friendly solution when it comes to sending your contacts from WordPress to the HubSpot CRM.
For help with installation, you can check out our WPForms installation tutorial. When the plugin is installed and activated on your site, you need to make sure that you have a HubSpot account. If you don’t already have one, you can create one for free.
Next, we’re going to configure the add the HubSpot addon to your WPForms installation.
2. Install the WPForms HubSpot Addon
Open your WordPress admin area, and on the menu bar on your left, click on WPForms » Addons.
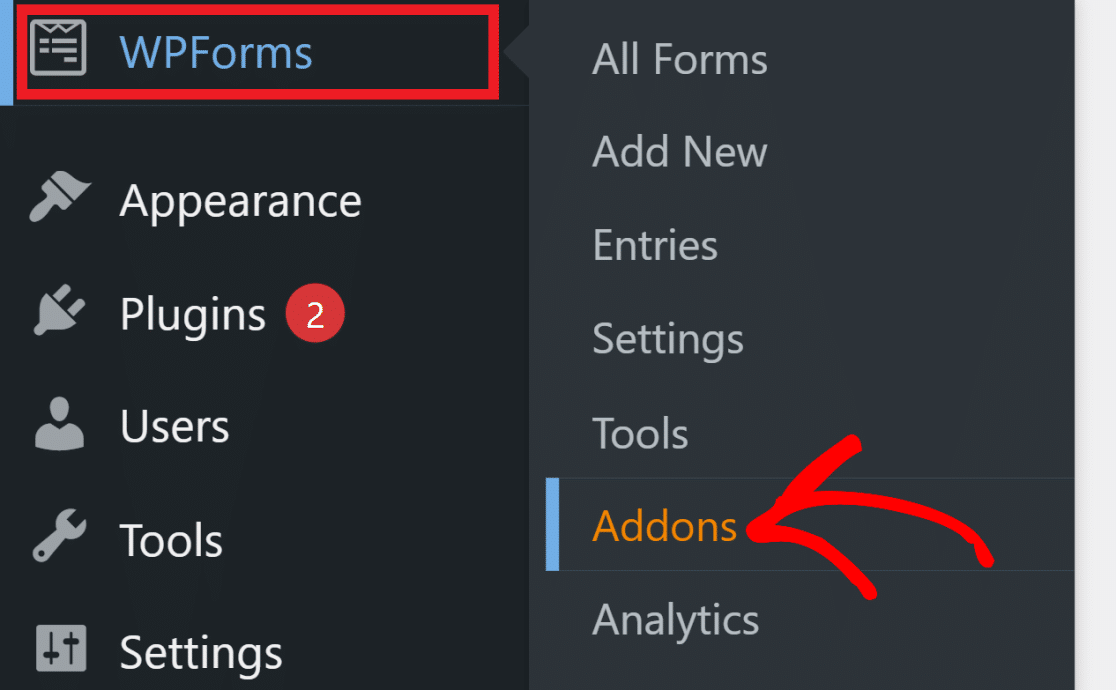
Here, search for HubSpot and then click on the Install Addon button.
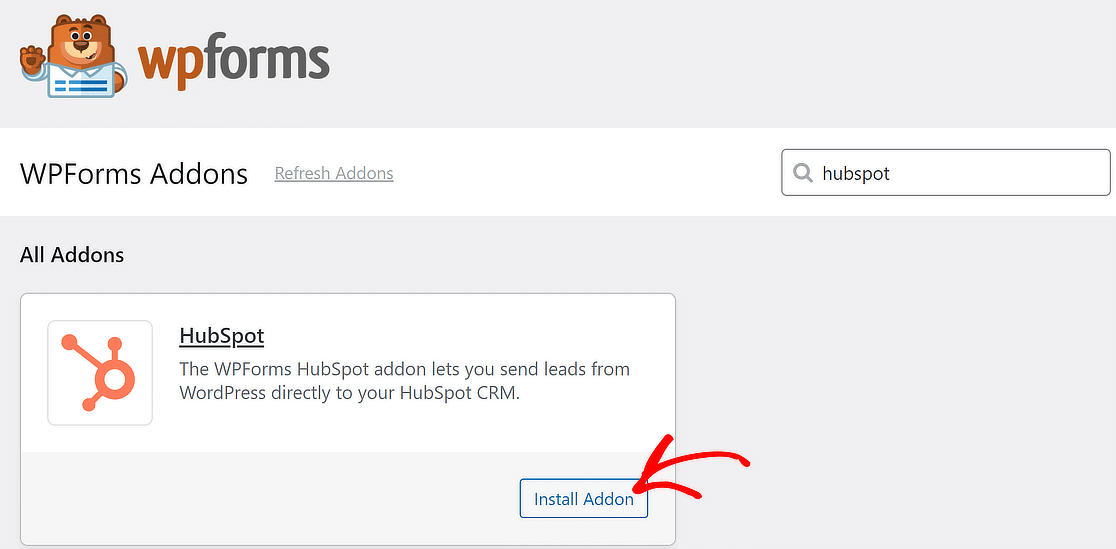
WPForms will take only a few seconds to install and activate the HubSpot addon. When it’s been successfully installed, you’ll see the Activated label appear where the Install Button previously was.
In the next step, you’ll be connecting WPForms with your HubSpot account.
3. Connect HubSpot With WPForms
Now, head over to WPForms » Settings and then click on the Integrations tab on the menu bar.
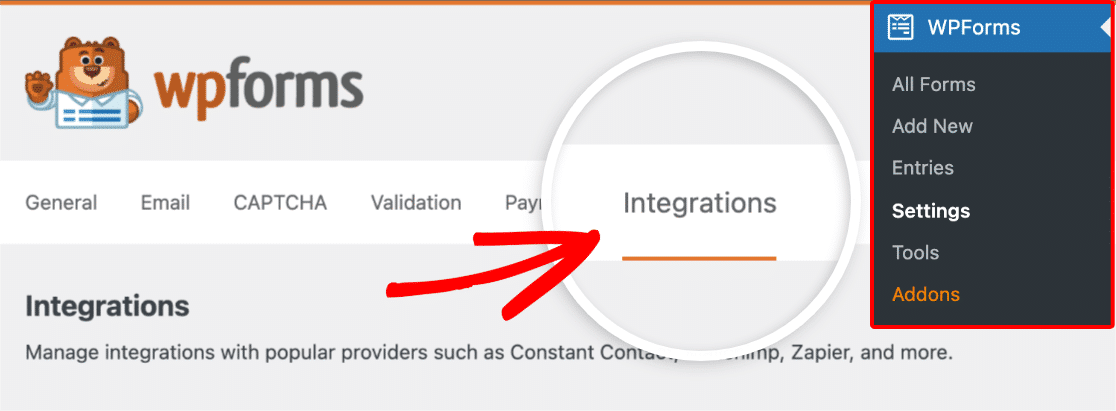
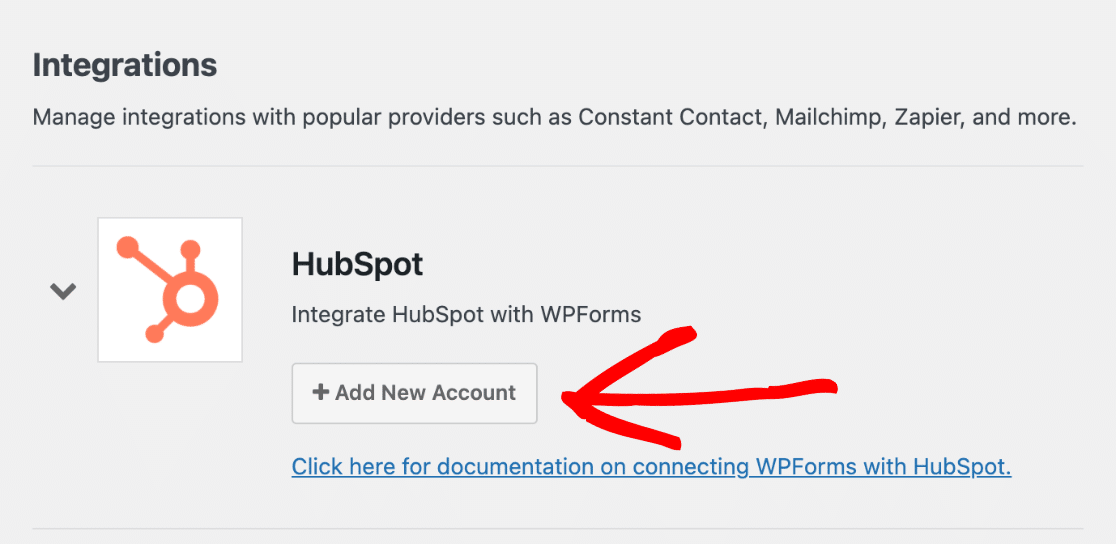
On this screen, you will see a list of all your active WPForms addons. Click on the HubSpot addon to reveal settings, and then click on the Add New Account button.
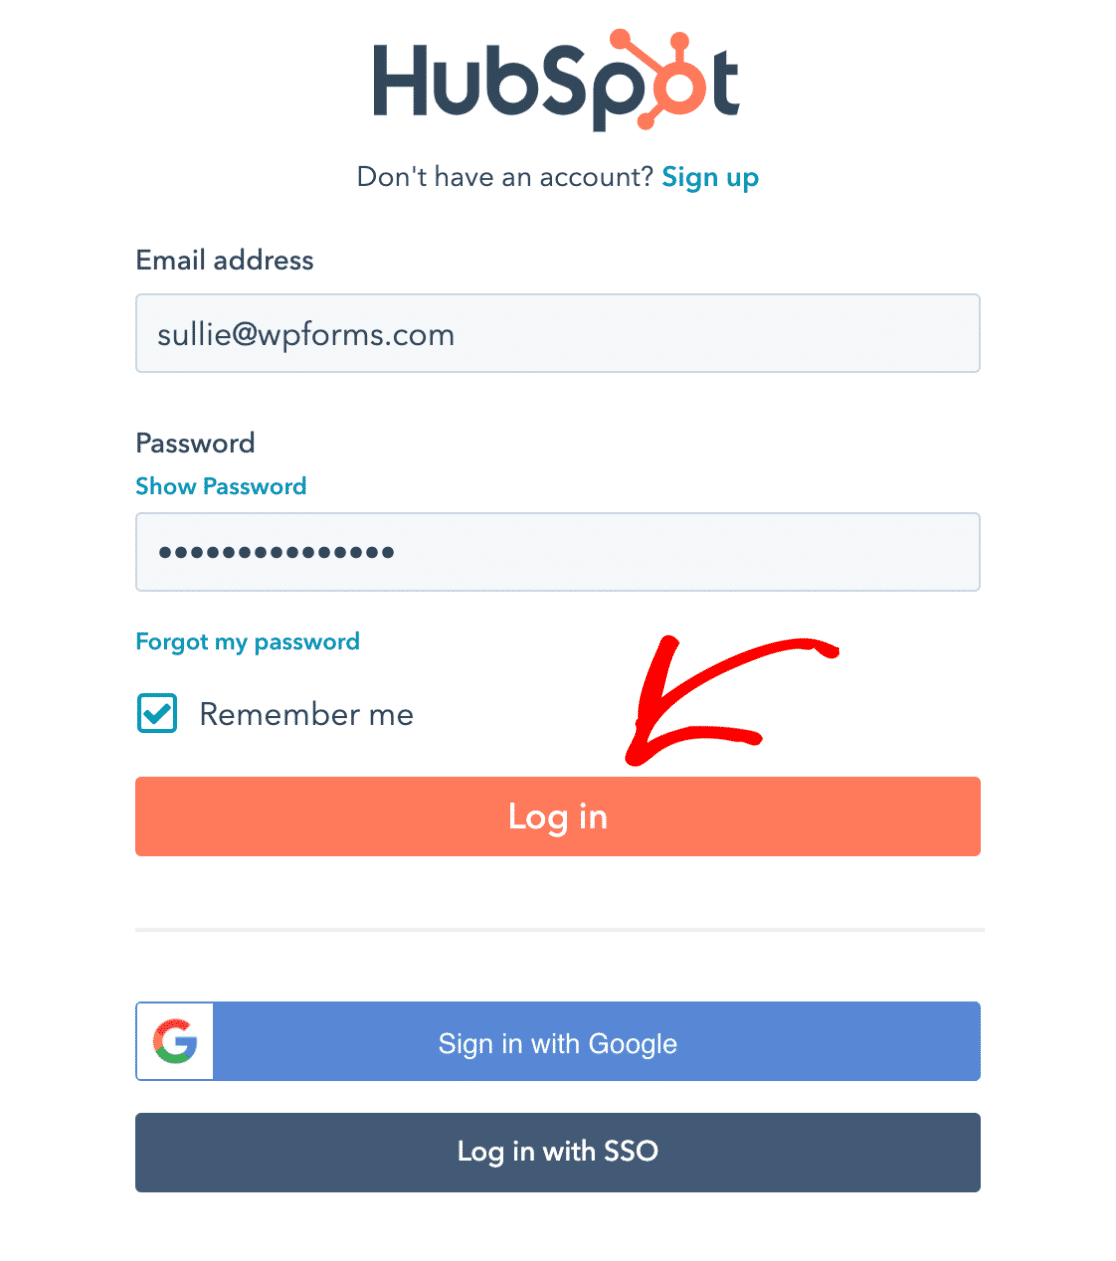
A new window will open for logging in to your HubSpot account. Enter your email and password to log in.
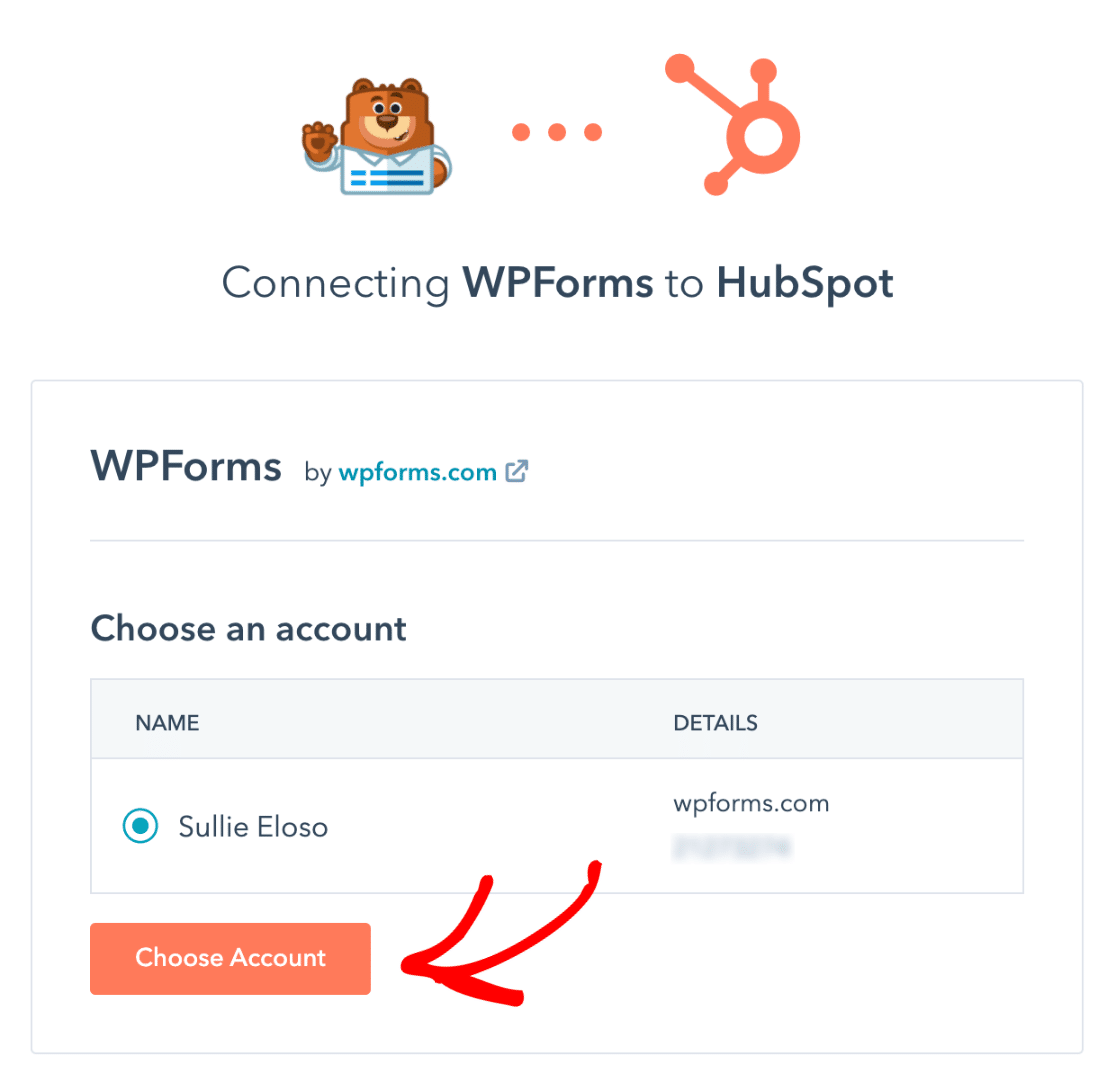
You’ll now be prompted to choose your HubSpot account to connect with WPForms. Click on your account name and then press the Choose Account button to proceed.
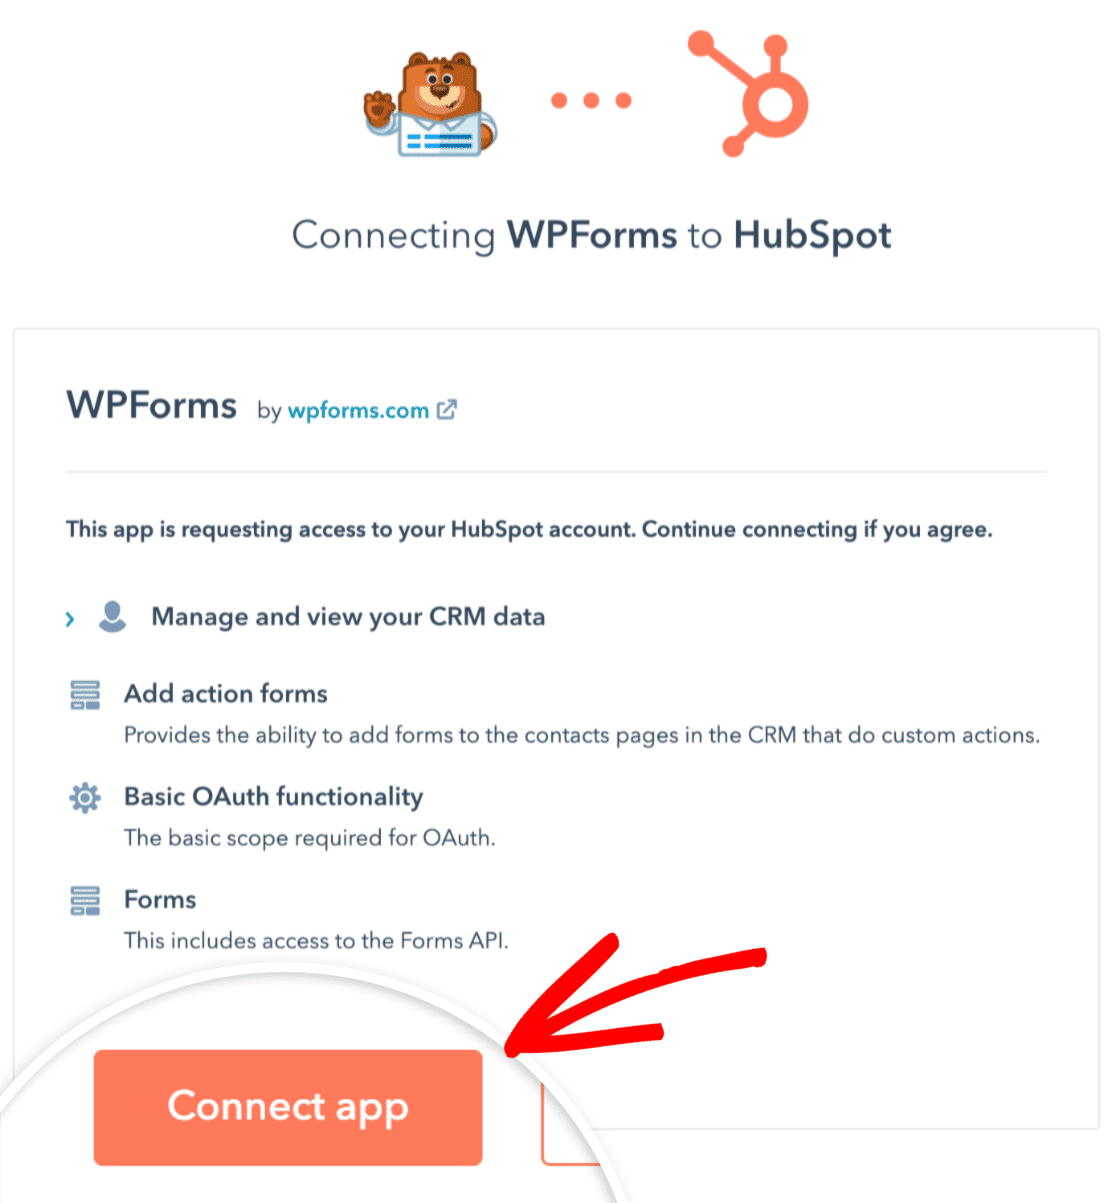
WPForms will now ask for some access permissions in order to connect with HubSpot. Click on the Connect app button to allow permissions.
On your WordPress dashboard, return to the WPForms » Settings » Integrations screen. You should now see Connected marked next to the HubSpot addon.
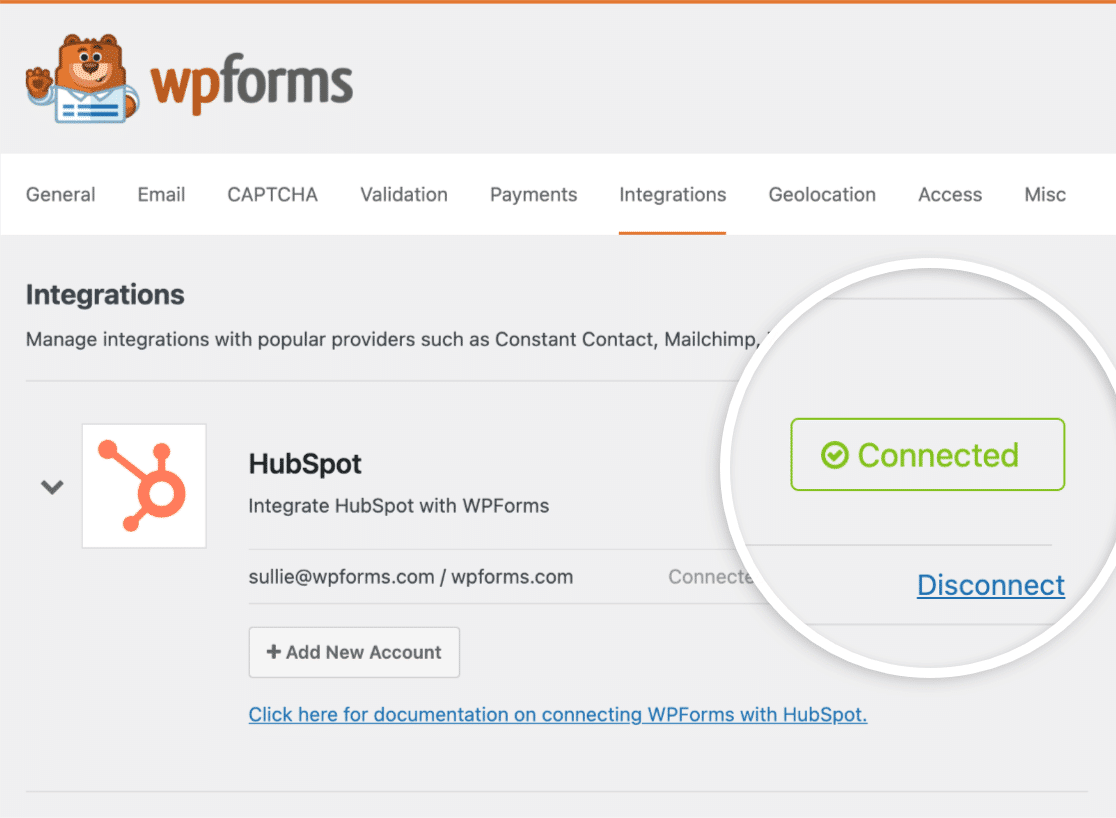
Great! We’re now ready to start creating forms that are integrated with HubSpot.
4. Set Up the WPForms HubSpot Integration
We’re going to create a new form and add our HubSpot connection to it. From your WordPress dashboard, click on WPForms » Add New.

You’ll now see the WordPress form builder screen. You can give your form a name to identify it by and select any template of your choice. WPForms comes with 2,000+ WordPress form templates.
We’re going to use a basic lead generation form template in this example. Note that you can also use this specially designed HubSpot Multi-Step Lead Form Template if you prefer.
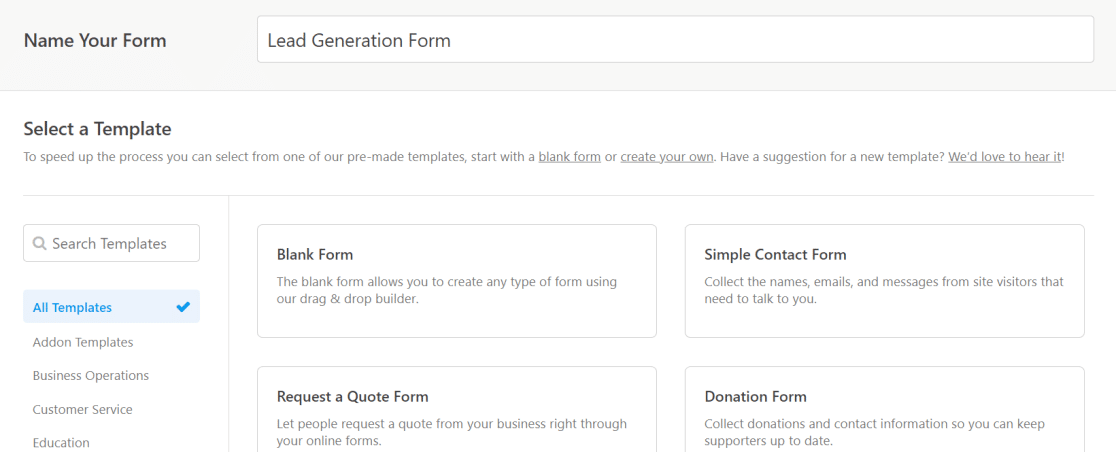
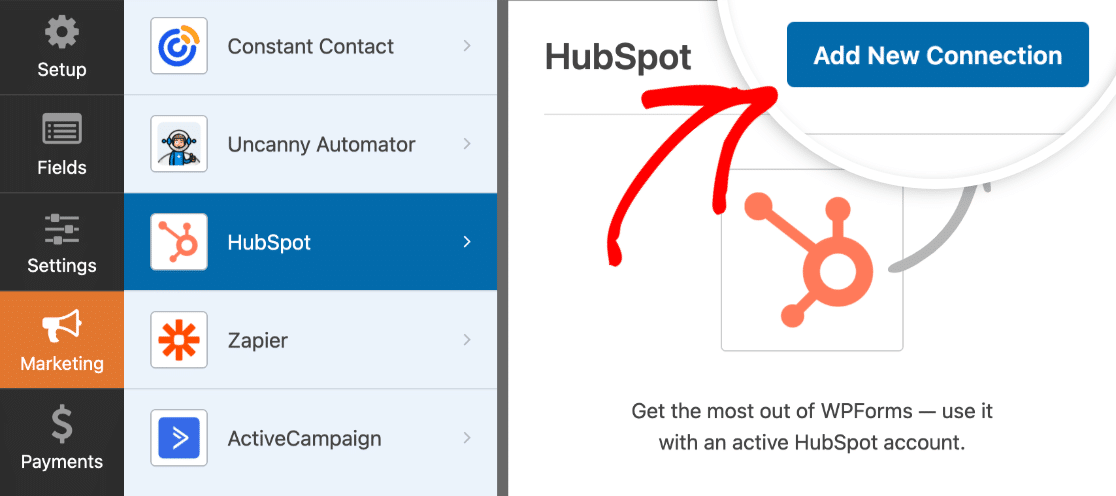
After selecting a template, click on Marketing on the menu bar of WPForms interface on the left. Then select HubSpot from the list and click on Add New Connection.
WPForms will now prompt you to enter a nickname for your new connection. You’re free to choose any name you’d like to give. Click the OK button when you’re done.
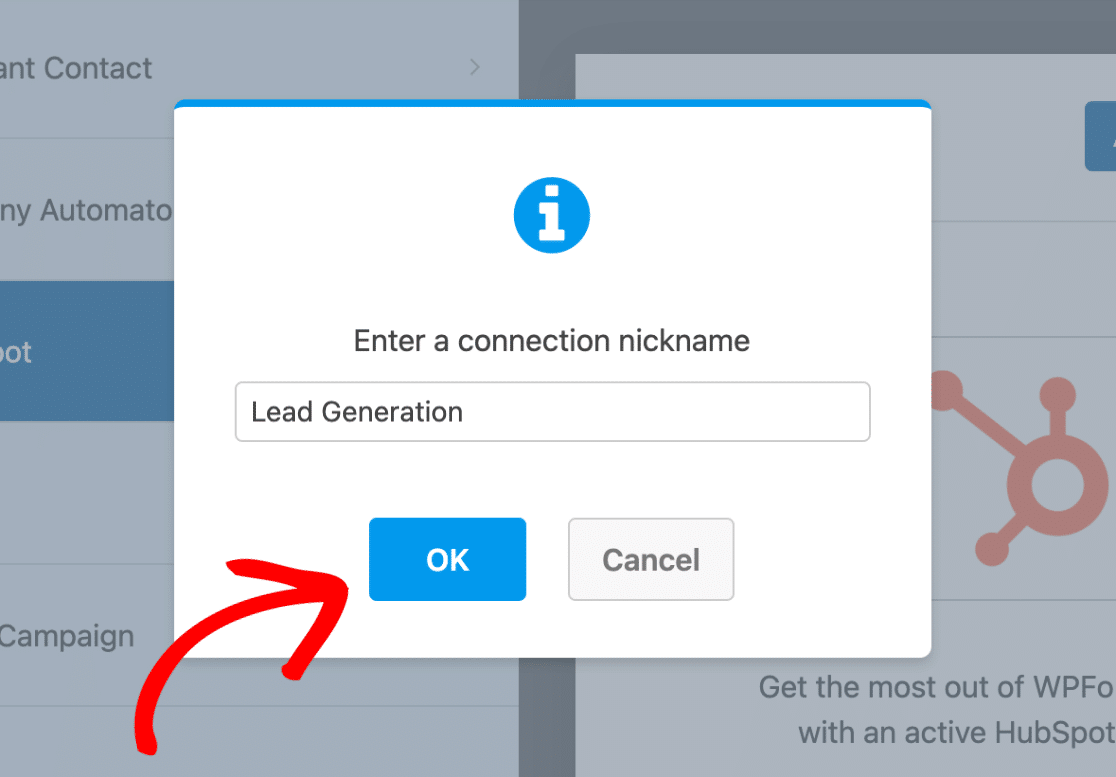
This will create a connection between your current form and your HubSpot CRM. In the next step, we’ll configure the actions we want to perform on HubSpot when a user fills out a WordPress form.
5. Configure Form Actions and Settings
After giving a nickname to your connection, WPForms will ask you to select your HubSpot account and pick an Action To Perform. The action you choose here will determine what changes are made to your HubSpot CRM when a user submits your form.
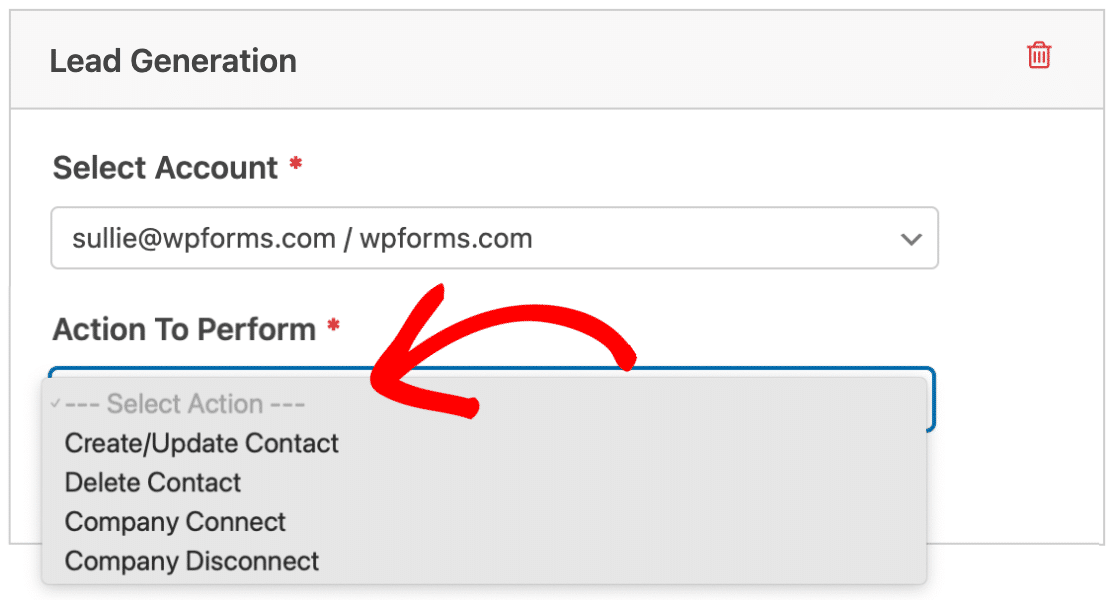
Since we want to send contacts from our WordPress form to HubSpot, we’re going to select the Create/Update Contact action.
After selecting this option, various new settings will appear within the form.
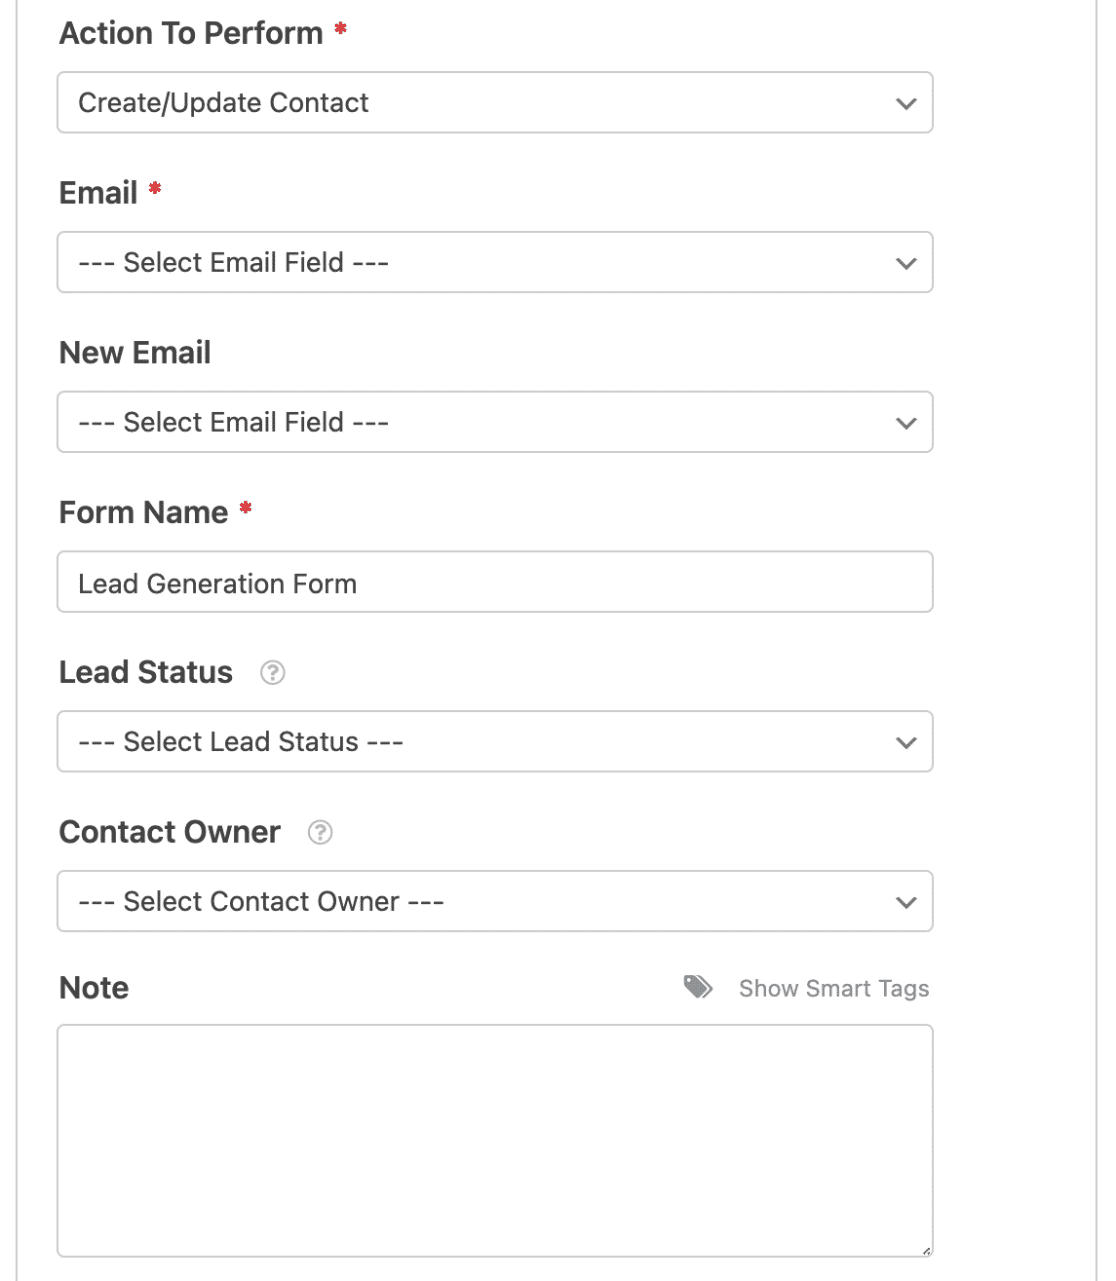
Here’s what each of these options means:
Note: The fields marked with an asterisk (*) are mandatory.
- Email*: This allows you to choose an Email field from your form. The email address entered by users in this field will be sent to your contact database in HubSpot.
- New Email: This is not a mandatory field. You should use this setting only if you want to let your users update their email addresses.
- Form Name*: With this setting, you can change the name of your form as it appears on your HubSpot CRM. By default, it is set to the name that you gave it when the form was first created.
- Lead Status: You can select a lead status to pinpoint where exactly your lead is positioned in your marketing funnel.
- Contact Owner: This allows you to choose an owner for the contact being created.
- Note: Use this to attach a customized note to the contact’s entry in your HubSpot CRM.
When you’re done with these settings, you can move on to the next step where we’ll see how to map additional fields to HubSpot properties.
6. Map Custom Fields to Form Field Values (Optional)
The HubSpot-WPForms integration allows you to map additional fields to your HubSpot account to send more details about your contacts.
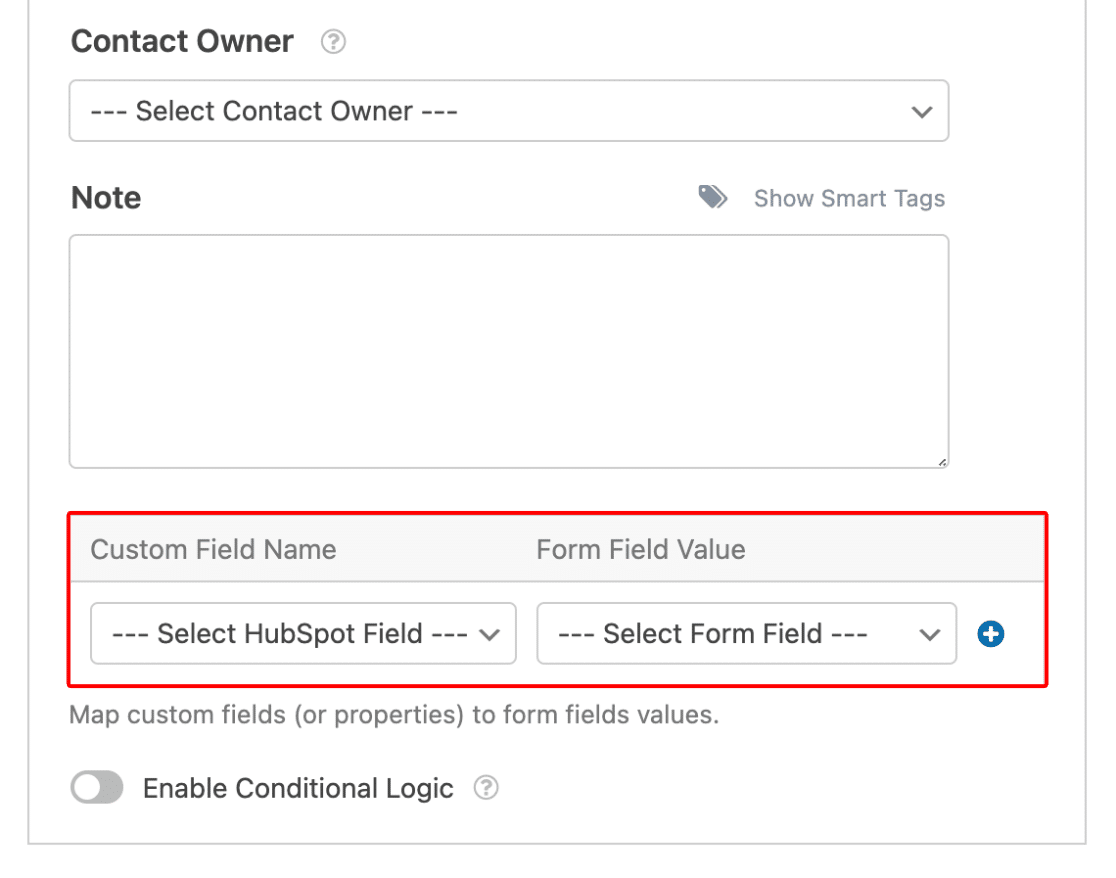
If you scroll down, you’ll see two dropdown menus: Custom Field Name and Form Field Value.
The Custom Field Name is a field within your HubSpot and the Form Field Value is a field within the form that you’ve just created. To map the two, you can select a field from the Custom Field Name dropdown and choose a corresponding form field from the Form Field Value dropdown.
You can add more custom properties to your HubSpot CRM. For more information, check out HubSpot’s managing properties documentation.
7. Embed and Test Your HubSpot Form Using WPForms
We’re almost done! When you’re done making all the changes to your form, click on the Embed button on the top-right of the form builder screen.

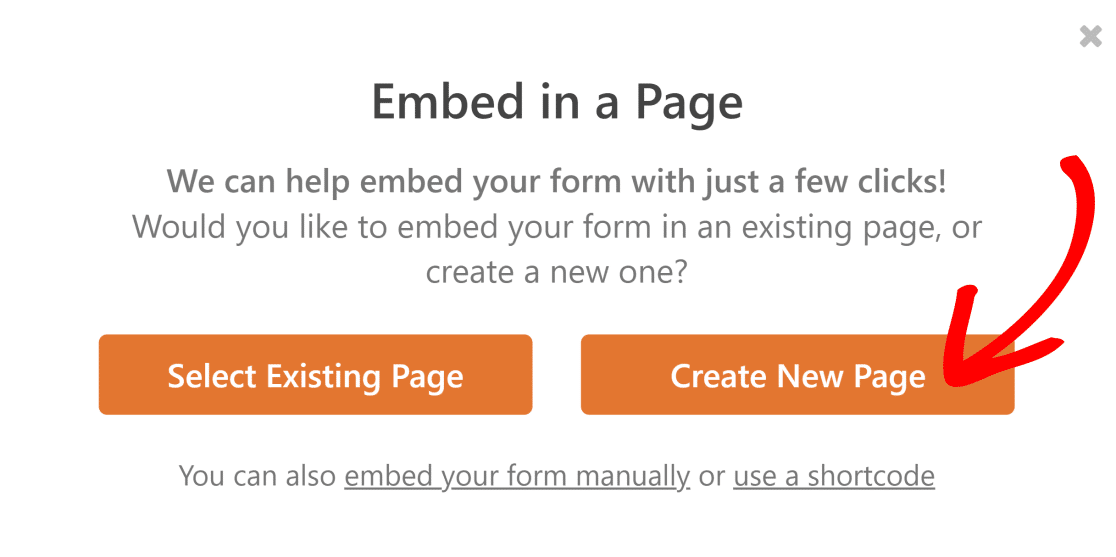
You’ll now see a prompt where you can choose whether you want to embed your form in an existing page or a new one. In this example, we’re going to embed our form on a new page.
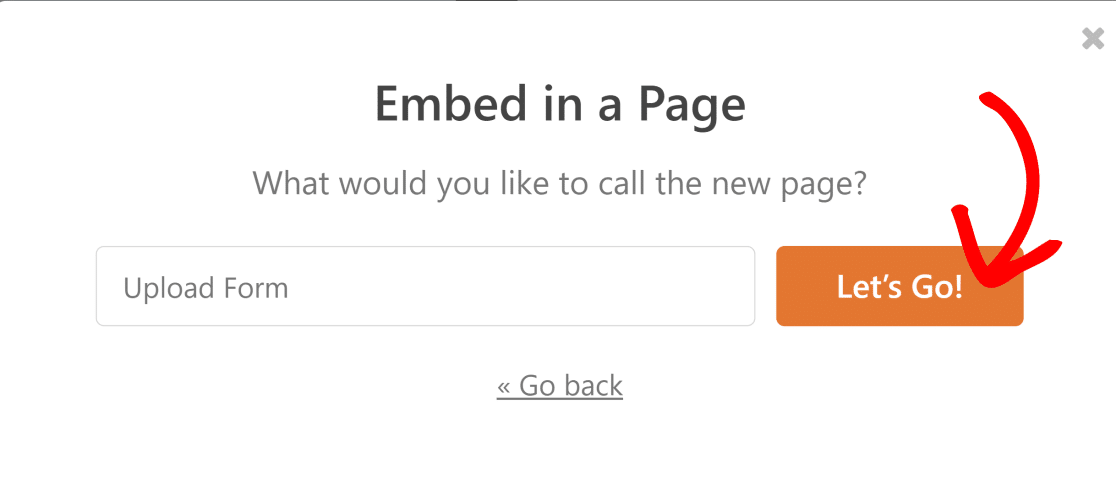
Then, give your new page a name and click on the Let’s Go button.
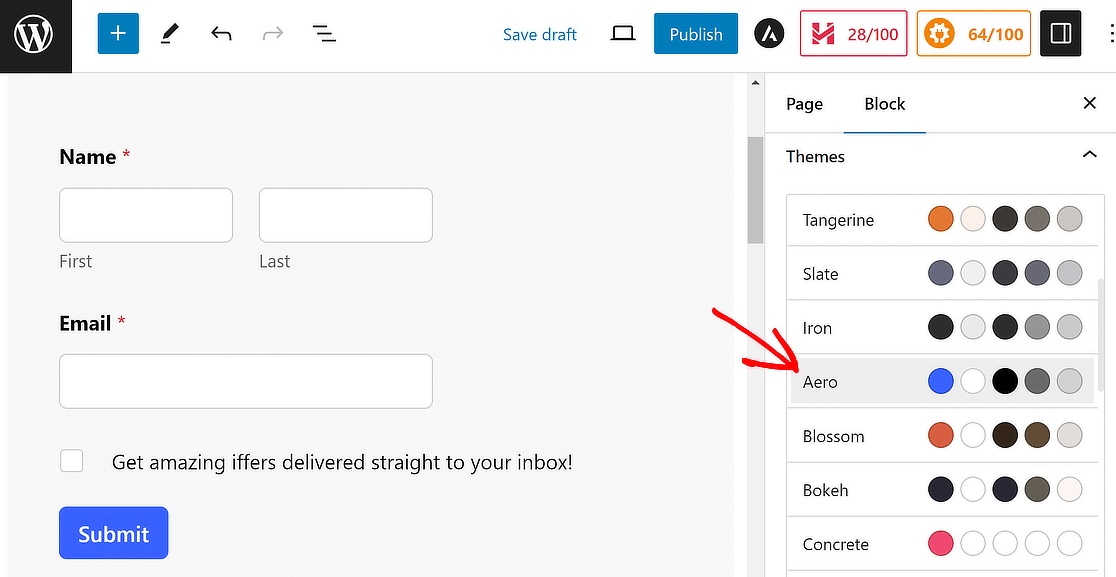
This will take you to the new page with your form already embedded within. At this stage, you have the option to make stylistic changes to your form by changing colors, borders, and backgrounds using easy controls or using a ready-made form theme.
To access form style settings, click on the area around the embedded form. You’ll find style-related options on the right-hand panel.
For this example, I chose the theme called Aero. But you’re free to choose from any other theme or get creative by tweaking the style of different form components manually.
Happy with how the form is looking? Go ahead and press the Publish button when you’re ready.

Click on the Publish button.
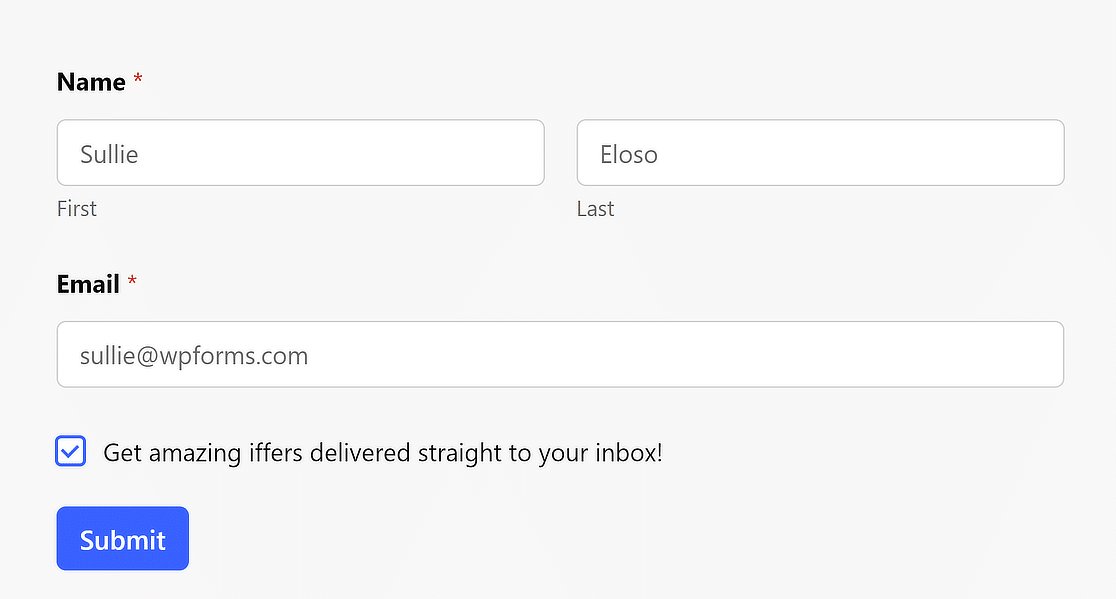
Now, fill out the form to test if it’s sending your contact details to your HubSpot database properly.
Now, log into your HubSpot CRM and check for the test entry.
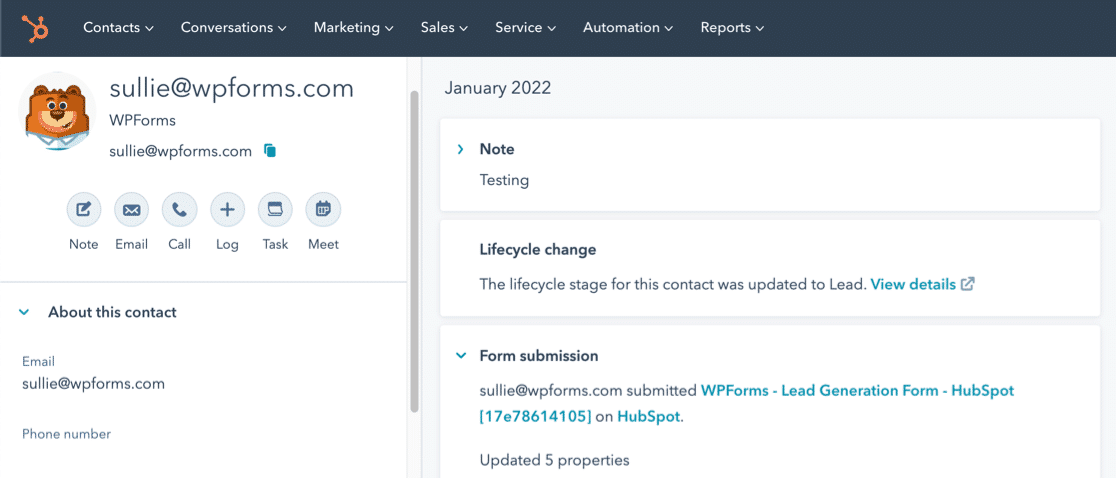
And there you have it! You can now send contacts from WordPress forms to your HubSpot!
FAQs on HubSpot Forms in WordPress
Here are a few commonly asked questions regarding HubSpot forms in WordPress.
Can You Customize HubSpot Forms?
Yes, you can customize HubSpot forms. However, the range of customization options is very limited in HubSpot, and there are only a handful of ready-made templates. A much better option is to use a more flexible alternative like WPForms, which allows you to customize forms more freely and also includes hundreds of pre-loaded form templates.
Can I Embed a HubSpot Form in WordPress?
Yes, WPForms lets you embed forms on any WordPress page using blocks in your Gutenberg editor. You can also use a shortcode.
Why Should You Link Your WordPress Forms to HubSpot?
You should link your WordPress forms to HubSpot because it allows you to automatically update your HubSpot CRM as new entries are filled out on your site.
HubSpot is an excellent CRM platform for managing your leads and contacts. However, if your WordPress website forms are one of your main lead collection sources, then it can be very time-consuming to manually copy and paste each form entry from your site to HubSpot.
How Do I Connect My HubSpot to WPForms?
You can connect your HubSpot CRM to WPForms by installing the HubSpot addon and connecting your account.
WPForms makes it super easy to integrate your contact forms with HubSpot, allowing you to have much more efficient marketing workflows.
Next, Drive More Traffic With Push Notifications
Do you want to drive more traffic to your site? Push notifications can be very effective for this purpose. See our post on how to send push notifications from WordPress and see your traffic grow in no time!
You might also want to check out our SearchWP review, which breaks down this popular WordPress search plugin to see if it’s really as good as it claims.
Connect WordPress Forms With HubSpot Now
Ready to build your form? Get started today with the easiest WordPress form builder plugin. WPForms Pro includes lots of free templates and offers a 14-day money-back guarantee.
If this article helped you out, please follow us on Facebook and Twitter for more free WordPress tutorials and guides.



The name field doesn’t map to Hubspot’s First and Last name fields, and there is no way to specify the Hubspot subscription type, both of which lead to manual work for each submission and hence an inferior integration.
Hey Rob – I apologize for the inconvenience. As a workaround, you can use two single line text fields and map those on HubSpot.
Hope that helps. Thanks 🙂