Do you want to add hCaptcha to WordPress forms so that you can fight spammers and protect your website from hackers?
You’ll be pleased to hear that WPForms supports hCaptcha to safeguard websites against spam submissions!
Add hCaptcha to Your WordPress Form
In this article, we’ll show you how to add hCaptcha to WordPress forms, so you can keep your site safe.
In This Article
How to Add hCaptcha to WordPress Forms
Enabling captcha on WordPress forms no longer requires knowledge of HTML or other complicated coding languages.
WPForms has built-in hCaptcha integration, allowing you to add hCaptcha to your WordPress forms without writing a single line of code.

“Adding a CAPTCHA on your form is very effective as an anti-spam tool. You can consider using hCaptcha for your site forms as it comes with a free and a pro version and is one of the most trusted CAPTCHA services in the market.”
Step 1: Install the WPForms Plugin
The WPForms plugin is widely regarded as the top choice for building forms on WordPress. It provides a range of spam protection features that make the process of creating forms for your website incredibly easy.
These features prioritize the security and privacy of both your website and its users. If you upgrade to a Pro license, you can also take advantage of other more powerful security features, addons, and premium templates.

So, the first thing you’ll need to do is to install and activate the WPForms plugin. If you’re new to WordPress or facing any difficulty during the plugin installation process, you can check this guide on how to install a WordPress plugin.
Step 2: Select hCaptcha Type
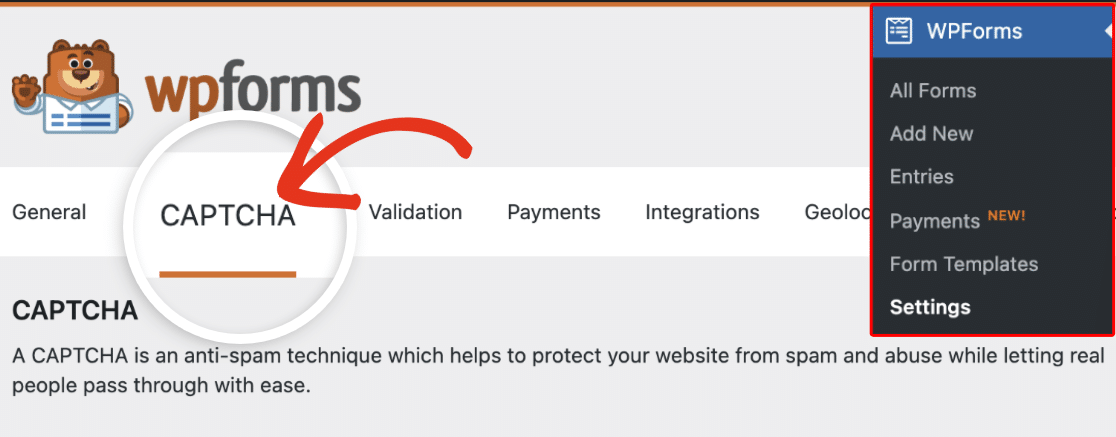
Now, the second step is to select the hCaptcha type. Open WPForms » Settings. Then click on the CAPTCHA tab.
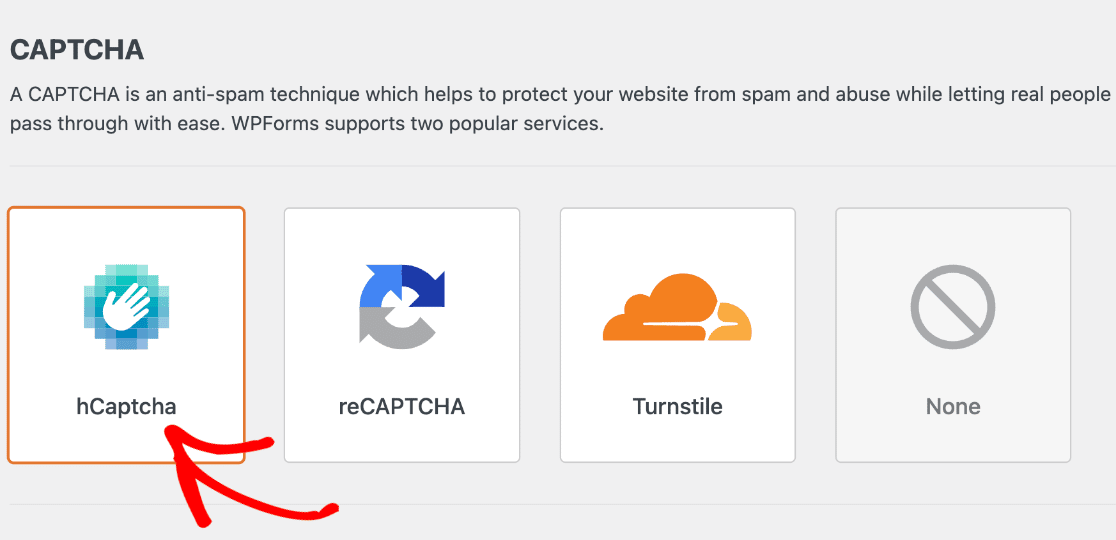
On the captcha page, you will see 3 popular captcha services, hCaptcha, reCAPTCHA, and Turnstile. You’ll need to click on the hCaptcha icon.
When you click on the icon, you’ll see settings for hCaptcha on the bottom. You can see fields to add a Site key and a Secret Key here.
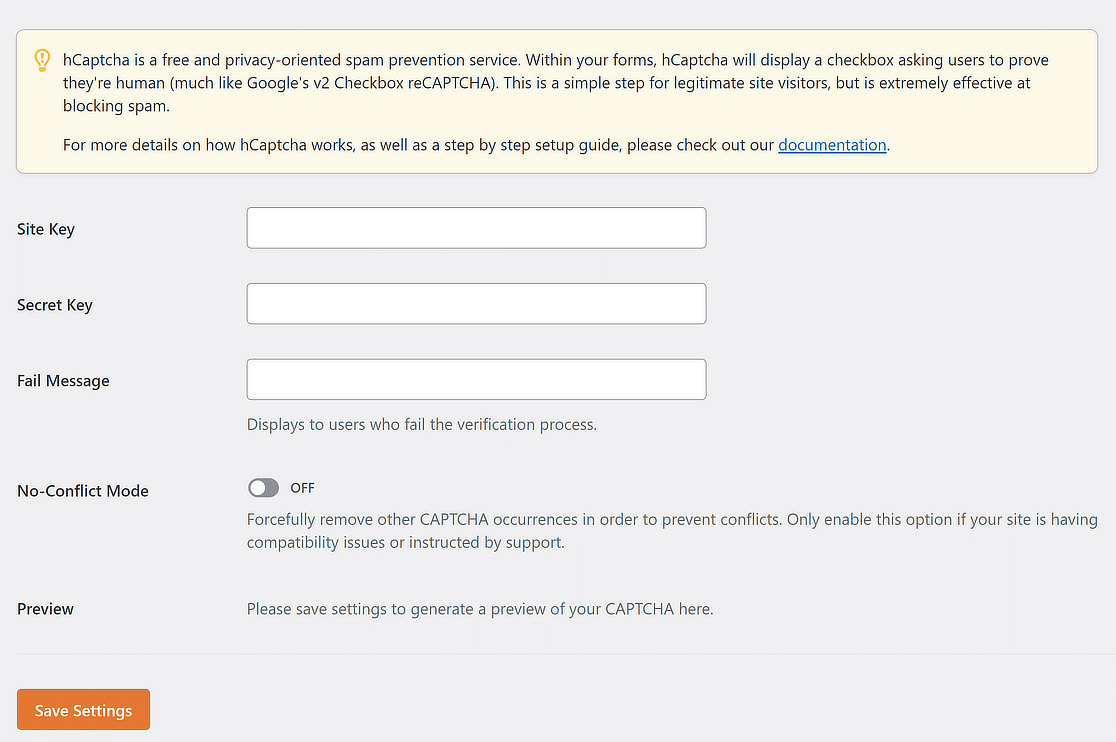
Basically, you need these keys to connect your hCaptcha account to WPForms. So, leave this browser tab open and proceed to the next step.
Step 3: Generate hCaptcha Keys
Open the hCaptcha site in a new tab and keep WPForms open in another tab. If you don’t have an account already, create one through the signup page.

Once you create an account, you’ll be redirected to the Welcome page of hCaptcha, where you can find your generated site key. Copy the Sitekey.
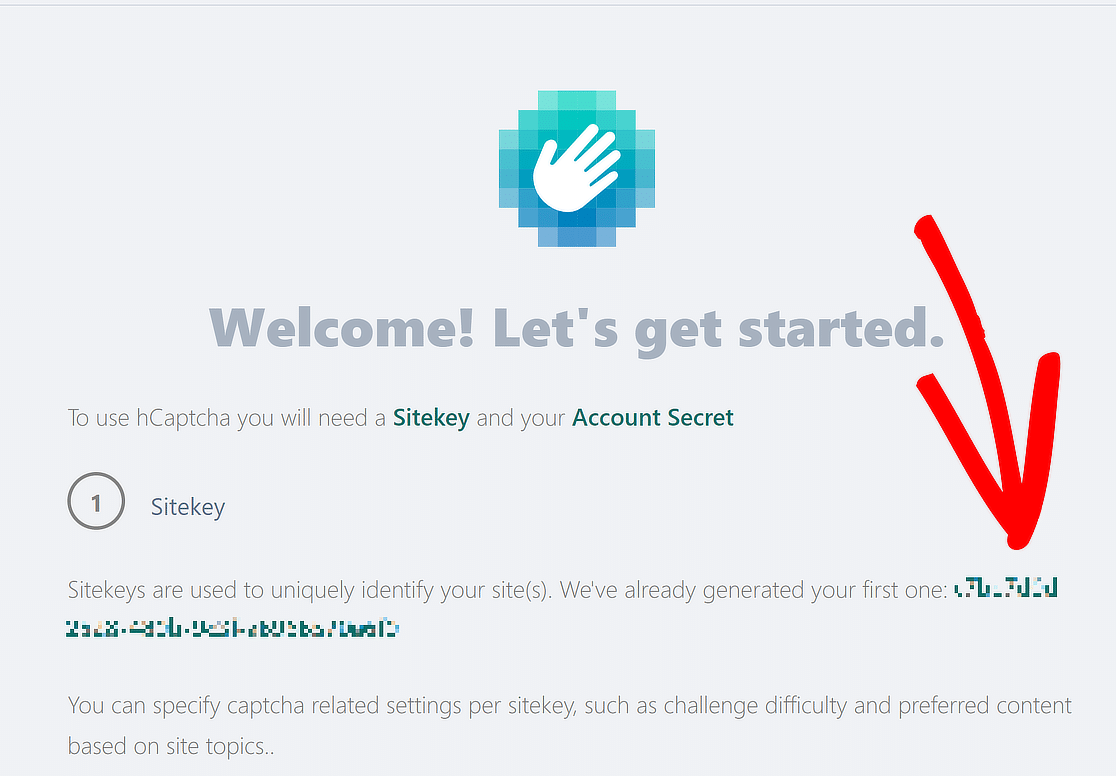
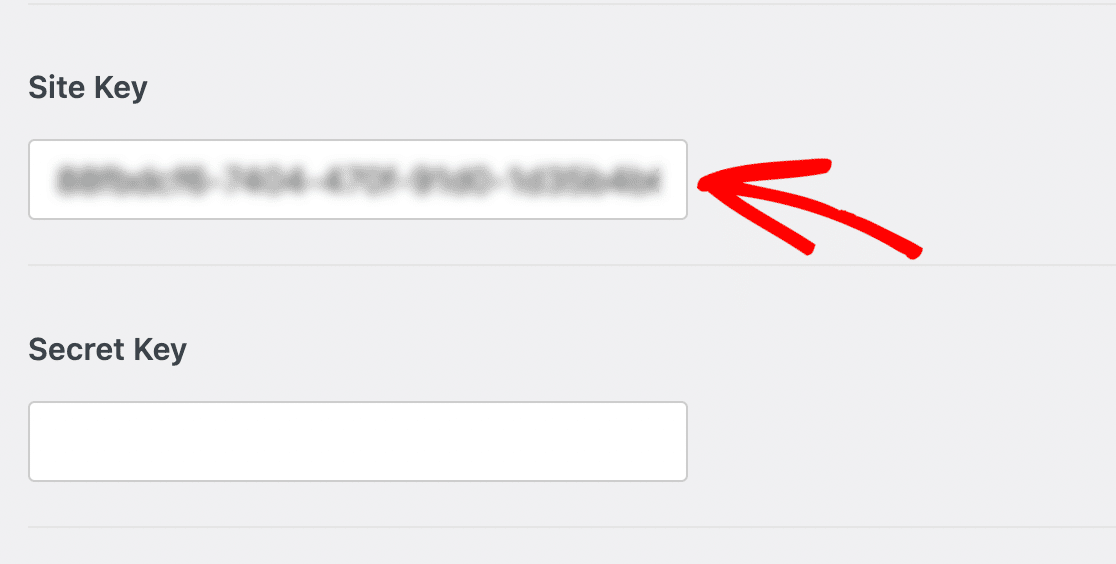
After you’ve copied it, head back to the WPForms settings page and paste your sitekey in the Site Key field.
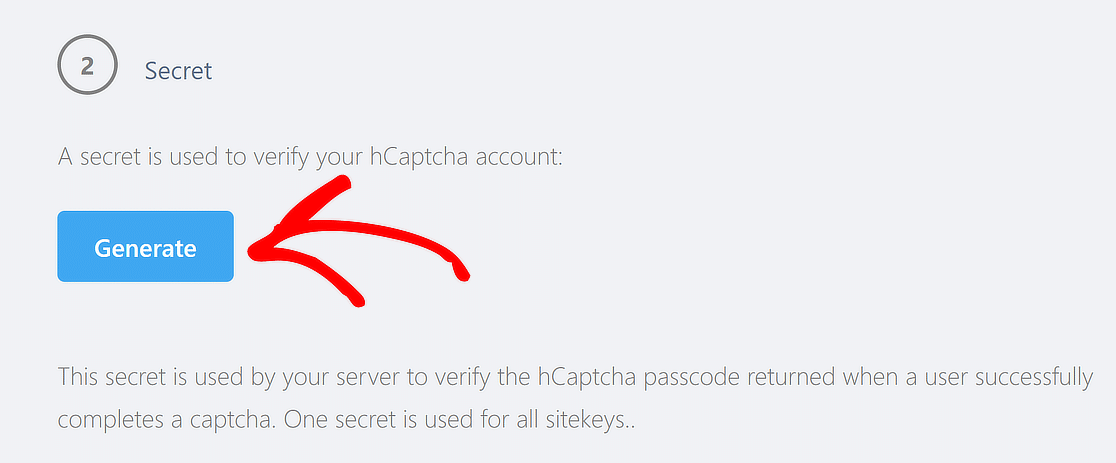
Return to the hCaptcha dashboard, and then click on the Generate button under the Secret heading.
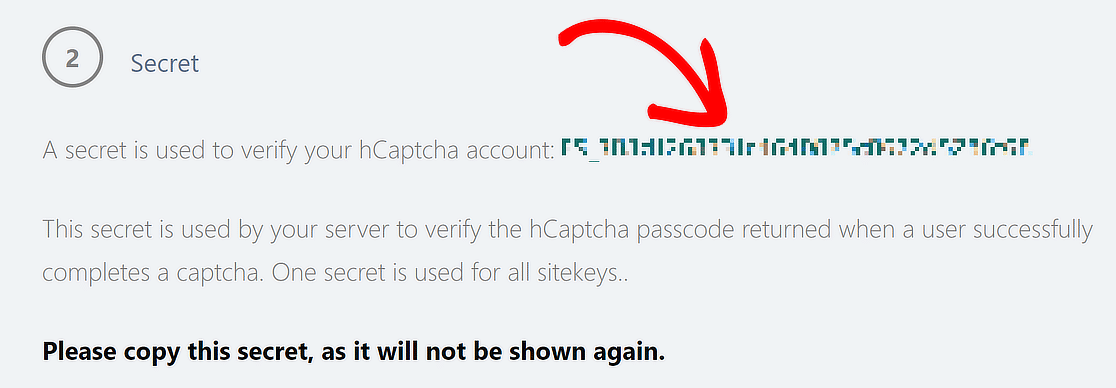
After clicking on the Generate button, hCaptcha will create a Secret Key. Copy and store the key someplace safe.
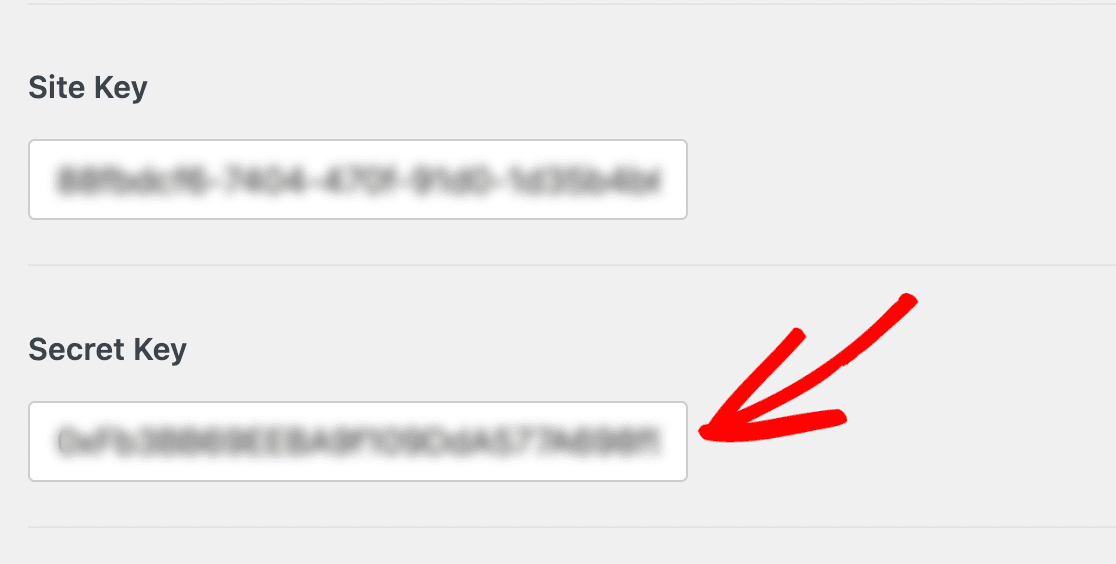
Now, all you need to do is paste the key into the Secret Key field on the WPForms » Settings » CAPTCHA page.
Once done, you can also modify the Fail Message that appears once a user fails the verification process.

After you’ve added the Site Key, Secret Key, and the Fail Message, simply click on the Save Settings button to generate a preview of your CAPTCHA.
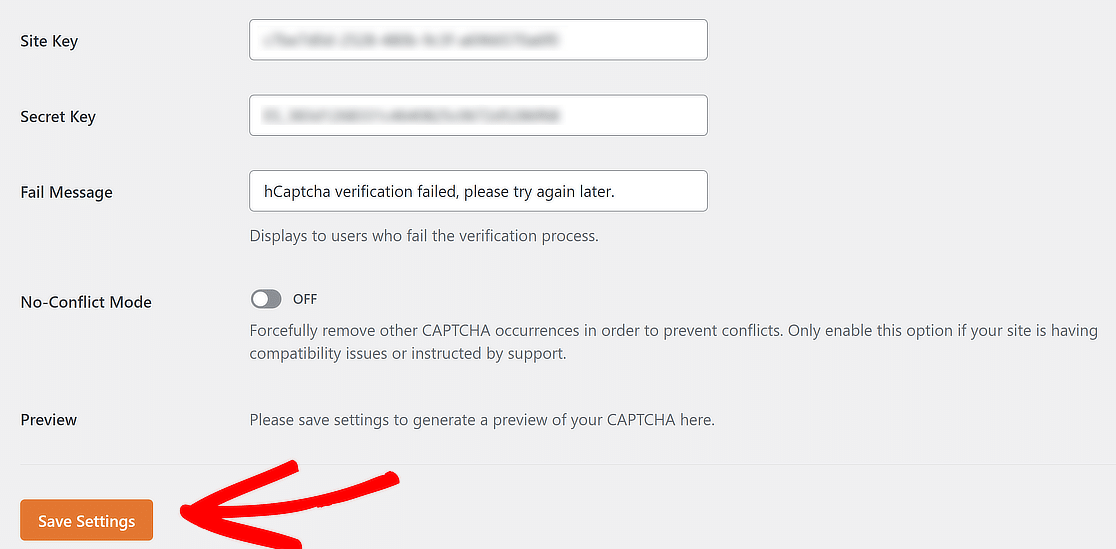
If your keys get authenticated, WPForms will save your settings and display the hCaptcha Preview on the same screen.

You can test it out by clicking on the “I am human” checkbox, which will then display a popup to select an image to verify if you’re a human.

Great job so far! You’ve successfully deployed hCaptcha in WPForms. To view traffic data, select your Sitekey from the hCaptcha dashboard.
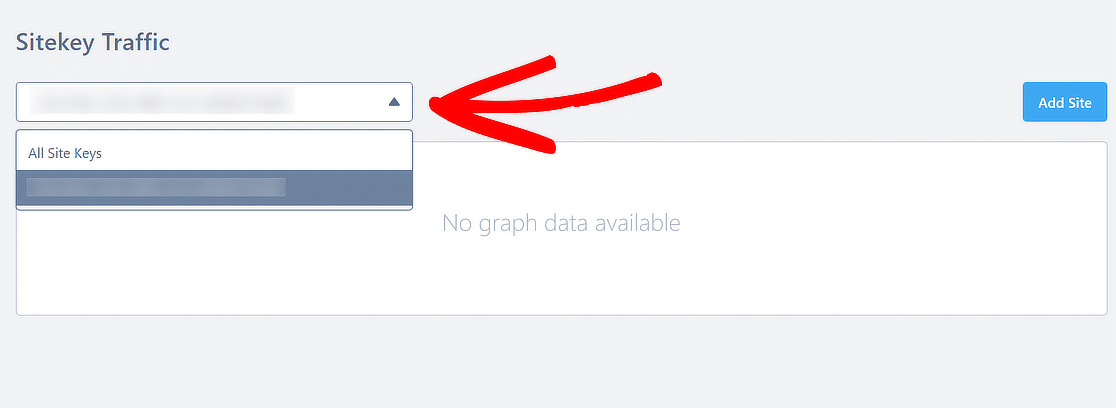
To start getting traffic data, you’ll first need a few form submissions. This is where we’ll enable hCaptcha on your form.
Step 4: Create a Simple Contact Form
Now that we’re done with the settings, it’s time to enable hCaptcha on your form. To do that, go to WPForms » Add New to create a new form.
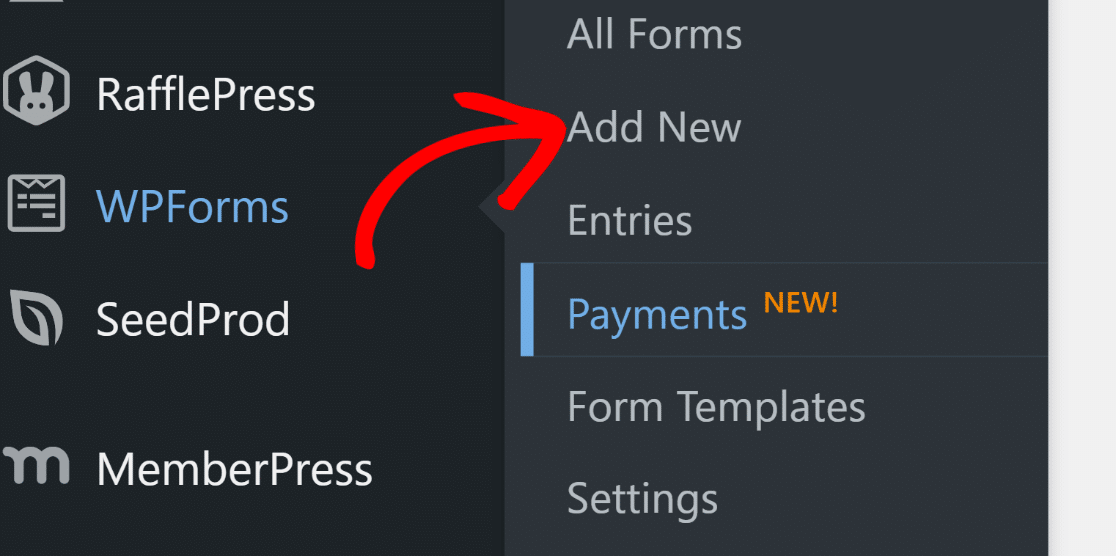
On the setup screen, name your form and select the template you want to use. WPForms offers a number of pre-built form templates.
You can choose any form template depending on your requirements and use it on your website. We’ll choose the Simple Contact Form Template.
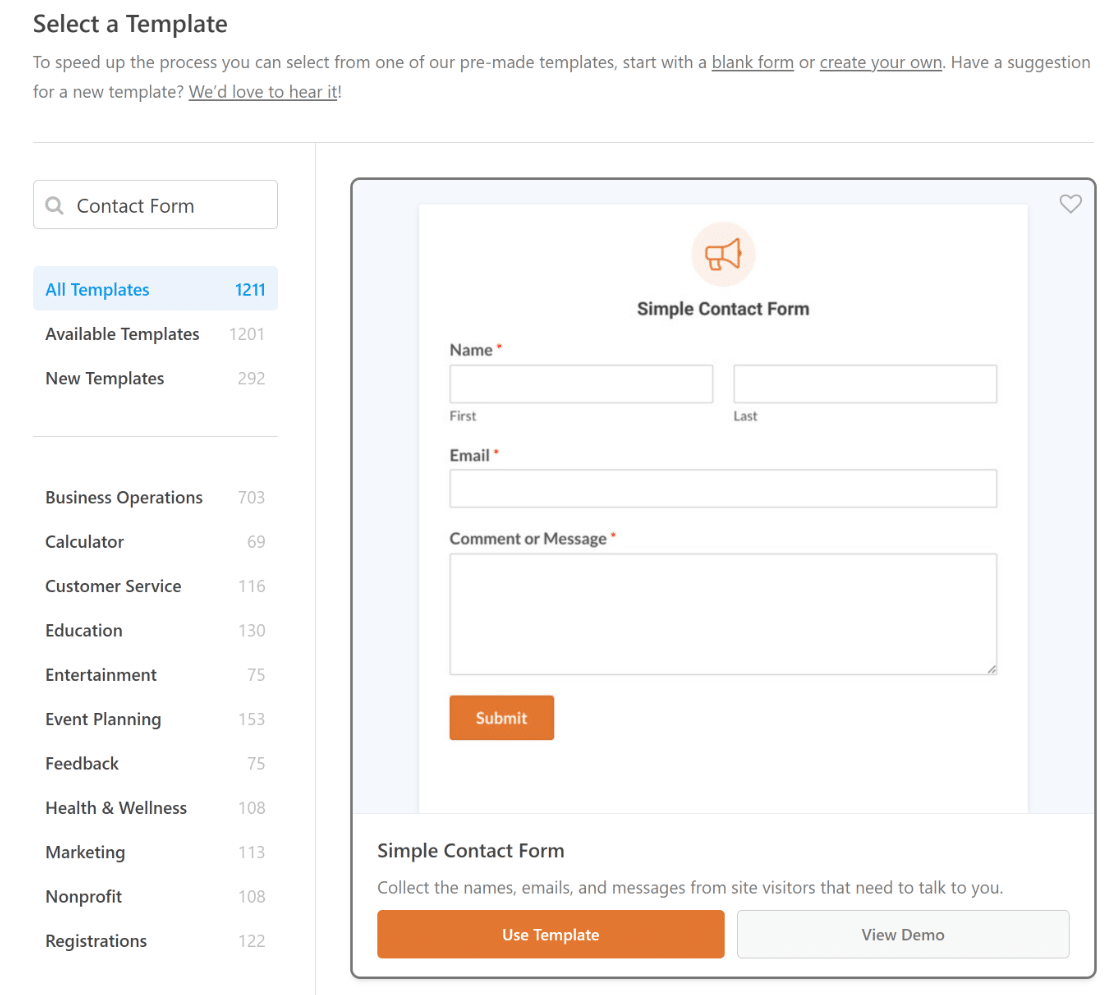
Once you click on Use Template, you can see a simple contact form on the right and a drag-and-drop builder on the left.
From this builder, you can add additional fields. A simple contact form includes all the basic form requirements, i.e., Name, Email, and Comment or Message.
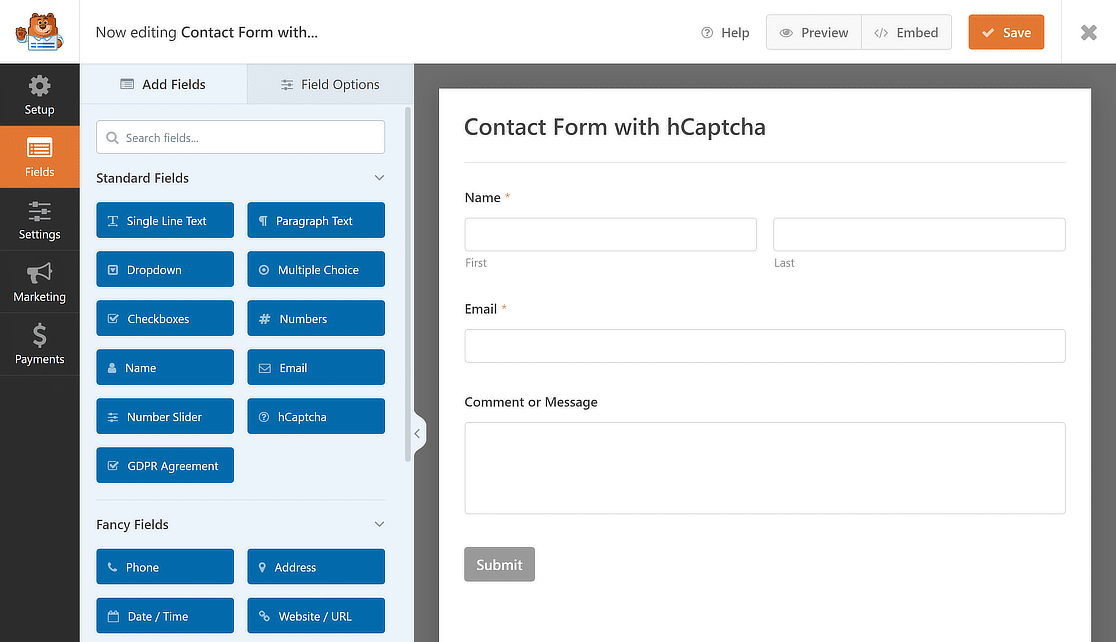
Now that we have our form ready, we just need to add the hCaptcha field. The process is incredibly simple and only takes a few seconds.
Step 5: Add hCaptcha Field to Form
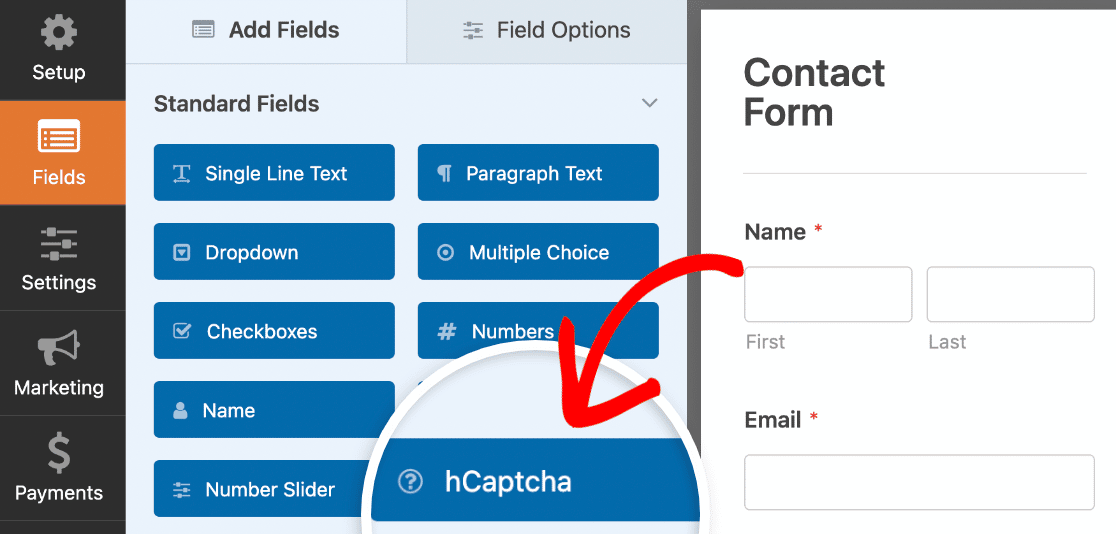
On the left, look under the Standard Fields section and click on the hCaptcha field to add it to your simple contact form.
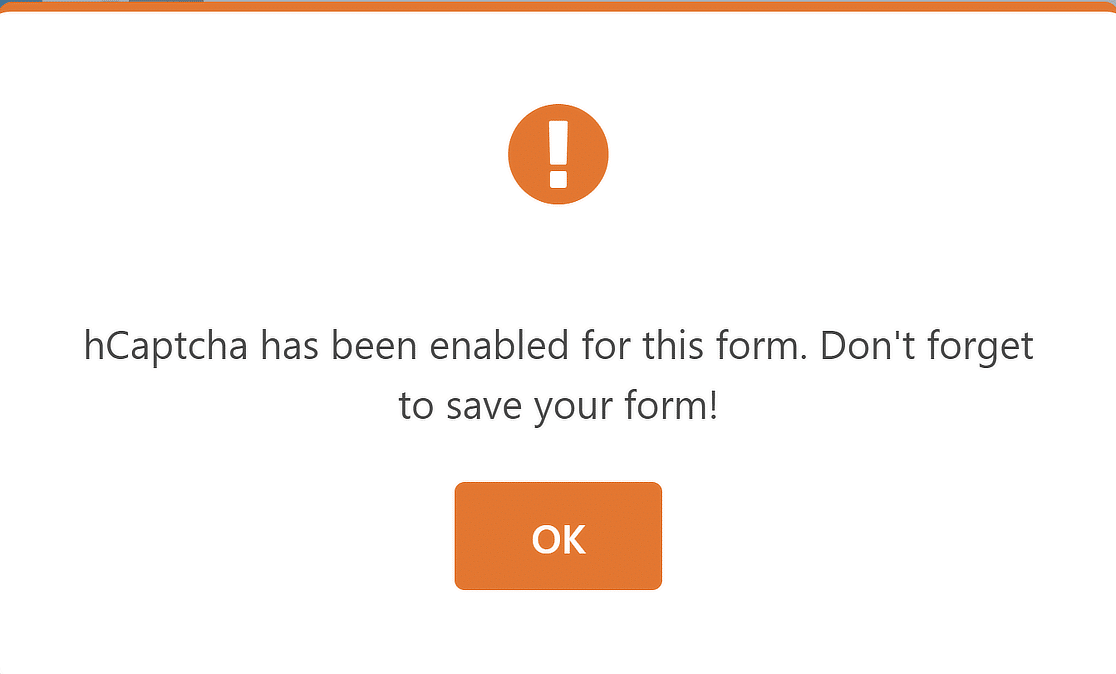
As soon as you click the hCaptcha field, a message will be displayed to confirm that you’ve turned on hCaptcha for this form. Click OK.
Now, to confirm, you’ll see the hCaptcha logo on the top-right of your form. This means the hCaptcha is working!
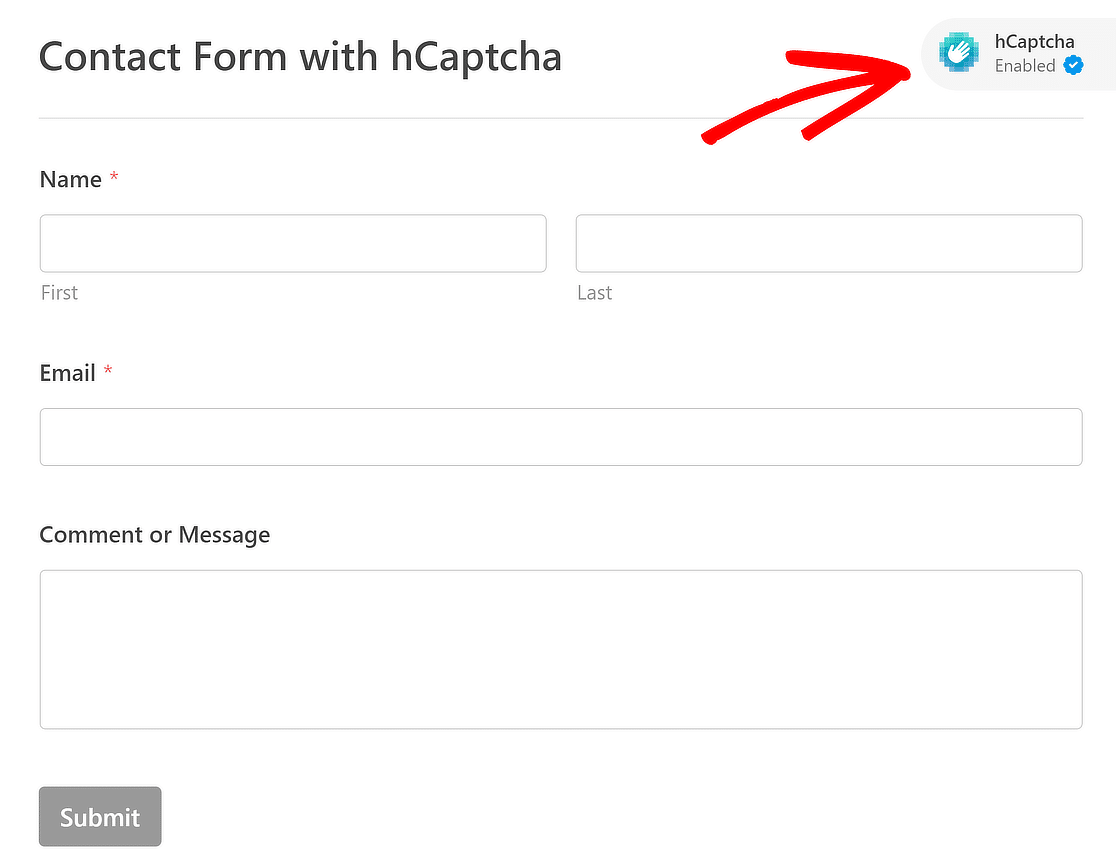
This logo is only displayed on the backend of the form and won’t appear on your published form. It is only to remind you that the hCaptcha is active on your form.
Alternatively, you can also go to Settings » Spam Protection and Security in the form builder and turn hCaptcha on or off for a form.
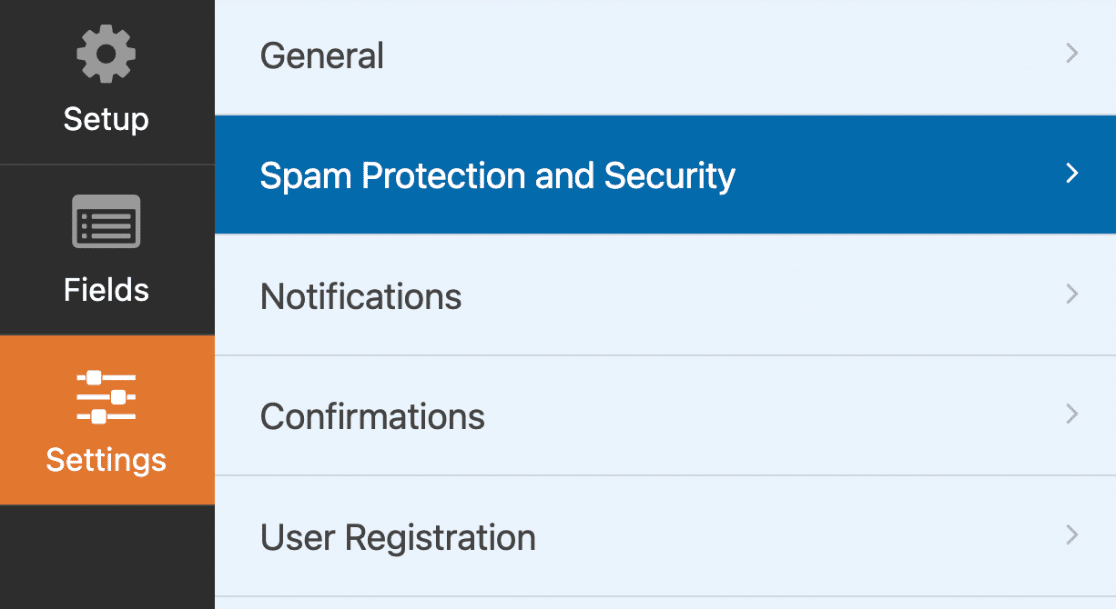
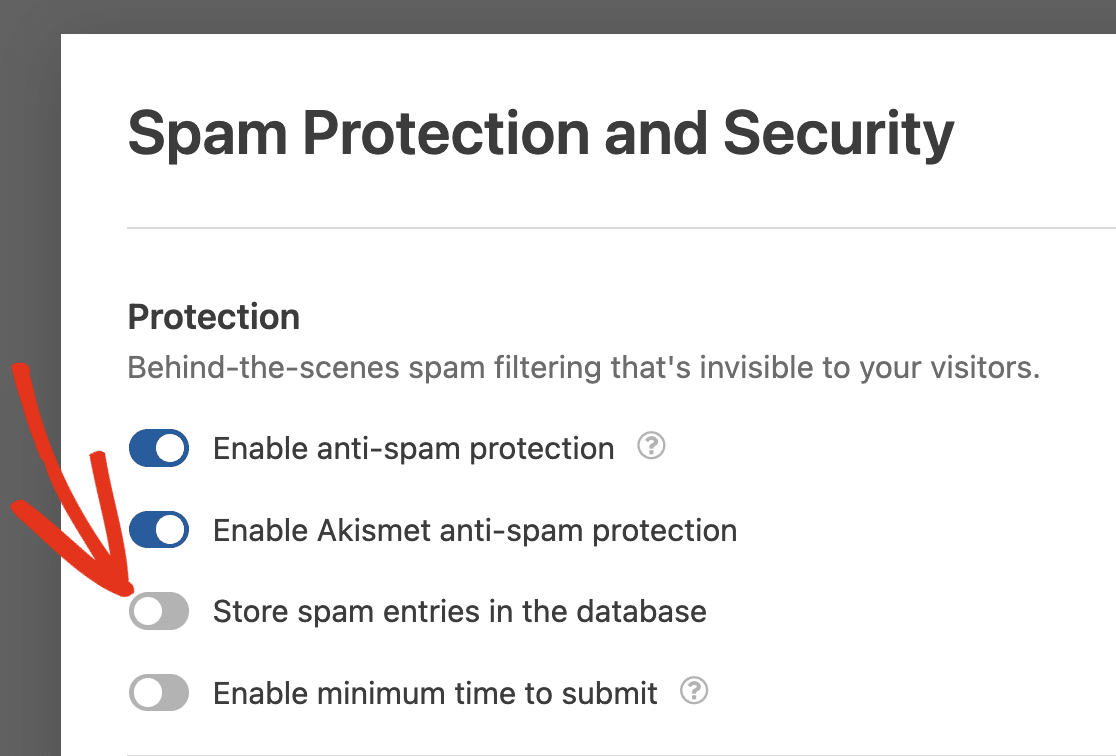
Under the Protection section, you can enable the Store spam entries in the database option if you’d like to review spam entries before deleting them.
We’re almost there! The final step is to test to ensure that hCaptcha works properly with your contact form.
Step 6: Publish Form & Test hCaptcha
Now, let’s add your contact form with hCaptcha to your site. Using WPForms, you can add your form in multiple locations, including a page, post, or sidebar.
We’ll walk you through how you can embed your form on a WordPress page. To add your form, click on the Embed button at the top of your page.
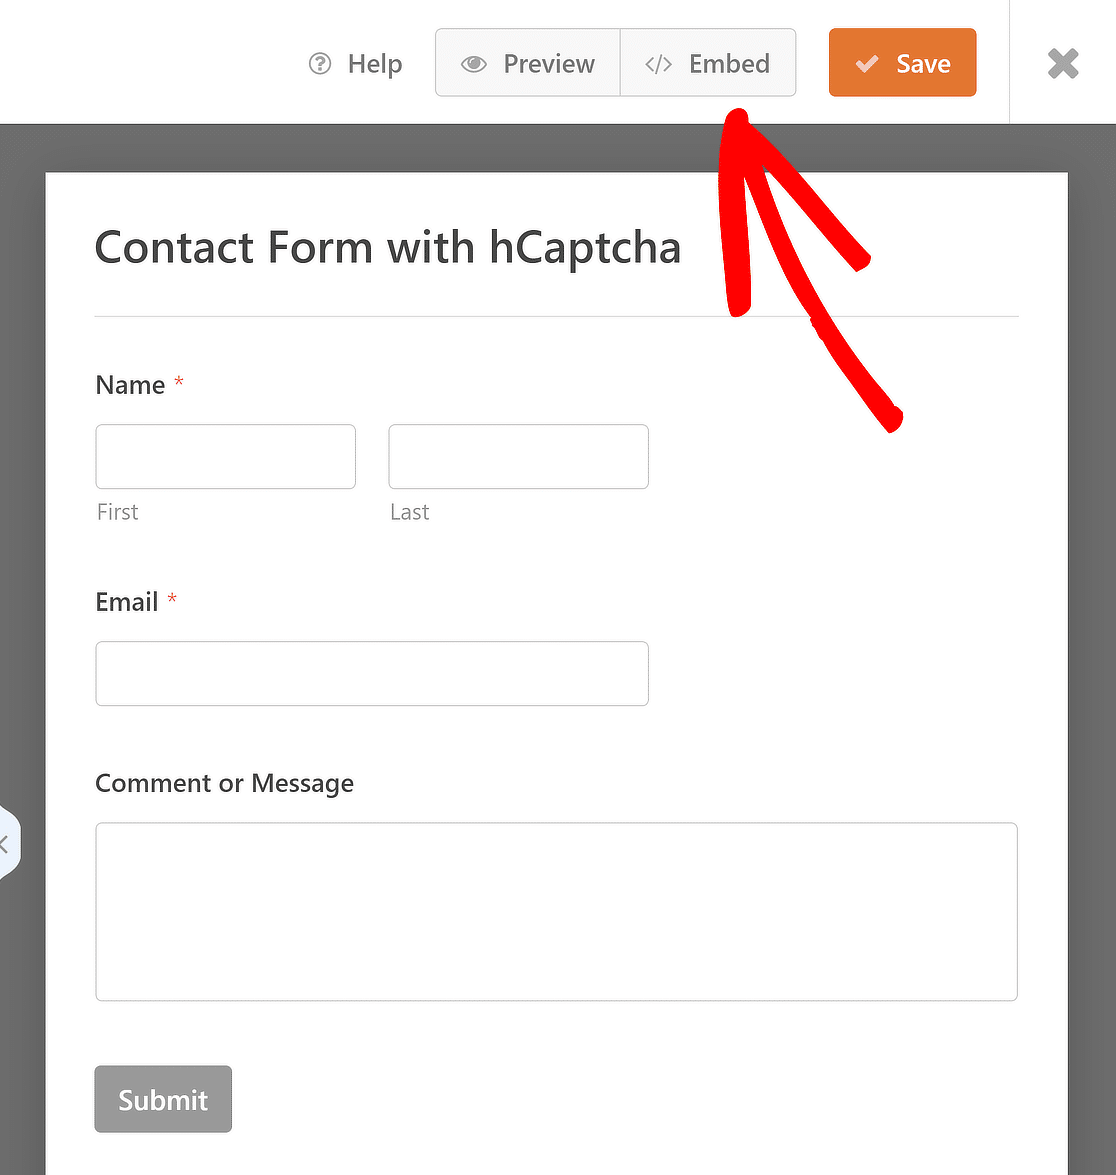
This will open a popup window with 2 form embedding options: Select Existing Page or Create New Page. Choose your option and click on the Let’s Go button.
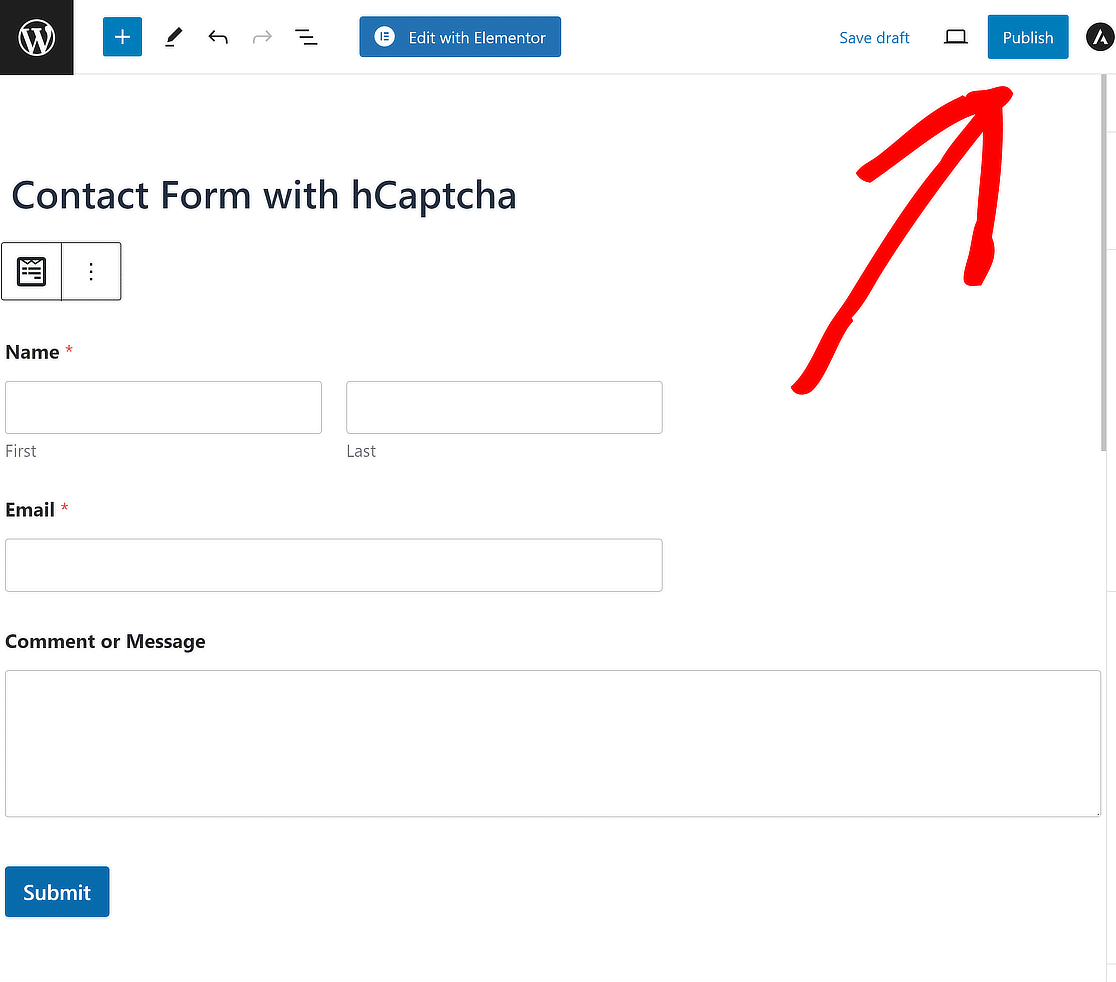
This will take you to the block editor, where you can customize the form further and hit Publish or Update to take the form live.
Now, open the contact form on your site’s front-end, fill your form entries and submit to check. For more details on how to test out your forms, please look at our complete testing checklist.
Note: Test the contact form in another browser or incognito window where you haven’t logged in as an admin on your site.
If you want to adopt a few more techniques to limit spam form submissions, make sure to also check out these CAPTCHA accessibility options & alternatives in WPForms.
FAQs about Adding hCaptcha to WordPress Forms
Using hCaptcha to protect your WordPress forms is a popular topic among our readers. Here are answers to some common questions about it:
What is hCaptcha?
hCaptcha is a popular reCAPTCHA alternative. It is a free anti-spam tool that protects sites from bots, spam, and website attacks. The term hCaptcha is derived from the popular term “CAPTCHA.”
CAPTCHA stands for Completely Automated Public Turing test to tell Computers and Humans Apart. The letter “H“ in hCaptcha denoted humans.

hCaptcha works similarly to Google’s reCAPTCHA but focuses more on the user’s privacy. Their privacy policy is compatible with regulations such as GDPR and CCPA.
If you’re concerned about your site’s privacy and looking for a reCAPTCHA alternative, hCaptcha might be the right tool for you.
Why Add hCaptcha to Your WordPress Forms?
Let’s see some reasons that might help you decide if the hCaptcha service is a good fit for your website or not:
- Setup Process: Creating and setting up an hCaptcha account is super easy. We’ll see a complete hCaptcha sign-up process in our next step.
- Better Privacy: If you’re worried that Google’s reCAPTCHA might use your data, hCaptcha will be a better option for you.
- More Effective: hCaptcha is proven to be more effective in stopping spam and bots. It offers several advanced features for spam protection.
- Get Paid for CAPTCHAs: hCaptcha pays a small reward every time your visitors solve challenges on your forms.
- Freemium Service: hCaptcha includes both free and premium versions. The free version has plenty of features that you can use on your site forms; however, if you are looking for more advanced features such as custom challenges and time-based difficulty scheduling, you can go for the premium version.
Next, Learn How to Secure Your Online Forms
And you’re done! This is how you can help fight contact form spam with WPForms and hCaptcha without adding any code and HTML CSS. If you are looking for more ways to keep your online forms safe, do check out our article on 12 WordPress security tips and tricks for your online forms.
We hope this article helps you understand how to enable hCaptcha with WordPress forms. Similarly, you can also add CAPTCHA in the WordPress login and registration form using the WPForms builder. You might also want to check out our post on how to create a file upload form in WordPress (easily).
Add hCaptcha to Your WordPress Form
Ready to build your form? Get started today with the easiest WordPress form builder plugin. WPForms Pro includes lots of free templates and offers a 14-day money-back guarantee.
If this article helped you out, please follow us on Facebook and Twitter for more free WordPress tutorials and guides.


