AI Summary
Do you need a WordPress invoicing solution for your small business?
There are tons of invoicing tools out there for bonafide eCommerce businesses, but they’re often too large, too complicated, and too expensive for a small business that doesn’t sell quite as much online.
If this is you, and you just need a convenient way to handle invoices from your WordPress order forms, I’m here to help! In this post, I’ll show 2 ways you can handle your invoicing like a pro on a small business budget.
Create Your WordPress Order Form Now 🚀
WordPress Invoicing: 2 Ways to Bill Smarter, Not Harder
Invoicing software is used to perform your business’s accounting and financial tasks. It can automatically generate invoices for payment, and often uses ready-made templates, making your life easier.
If your orders come in through an order form on WordPress, it only makes sense that you’d want to manage invoicing through WordPress, too. Streamline the process, right?
So, in the spirit of simplicity, I’m going to show you 2 ways to go about WordPress invoicing: integrations and plugins.
WordPress Invoicing With Zapier

Zapier is a powerhouse automation tool that makes it easy for you to connect 7,000+ apps to your website. You can use it to create workflows with the tools you use to simplify processes.
As you might imagine, we’re a bit partial to WPForms when it comes to creating order forms. We also have a Zapier addon, available for Pro licenses and above, that makes it super easy to connect your forms to other tools.
In this tutorial, we’re going to integrate WPForms with Zoho Invoice. This will allow us to easily send invoices from our WPForms submissions. That said, if you’re using another tool to create your order forms or for your invoicing, you should be able to connect them similarly. Just be sure to check their requirements and compatibility.
What You’ll Need
To set up WordPress invoicing with Zapier, you’ll need the following to be set up ahead of time:
- A Zapier account (free is fine for this method)
- A Zoho Invoice account (free is fine to start)
- A WPForms account (A Pro license or higher is required to use the Zapier addon)
- WPForms installed and activated on your WordPress website (some tips, if you need them)
- The Zapier addon activated on your WPForms account
- An order form
Making the Connections
Once you have all the necessary accounts set up, it’s time to integrate.
First, connect your Zapier account to WPForms. To do this, from your WordPress dashboard, navigate to WPForms » Settings and then select the Integrations tab at the top of that screen. Scroll down until you find Zapier.
Follow the steps to connect your Zapier account to WPForms. When it’s done, a green check will confirm that it’s connected. Don’t worry about not having any forms connected. That’s what we’re going to do!

Before moving on, double-check that your order form is complete. You are going to need to connect it for this next part.
Now we’re going to create a Zap that will generate and send an invoice from your Zoho Invoice account every time a customer makes a purchase. To set this up, sign in to your Zapier account in a separate tab.
From your home screen, click the orange Create button in the top left corner, and select Zap. You’ll end up on a screen that shows you the workflow in real-time as you set it up.
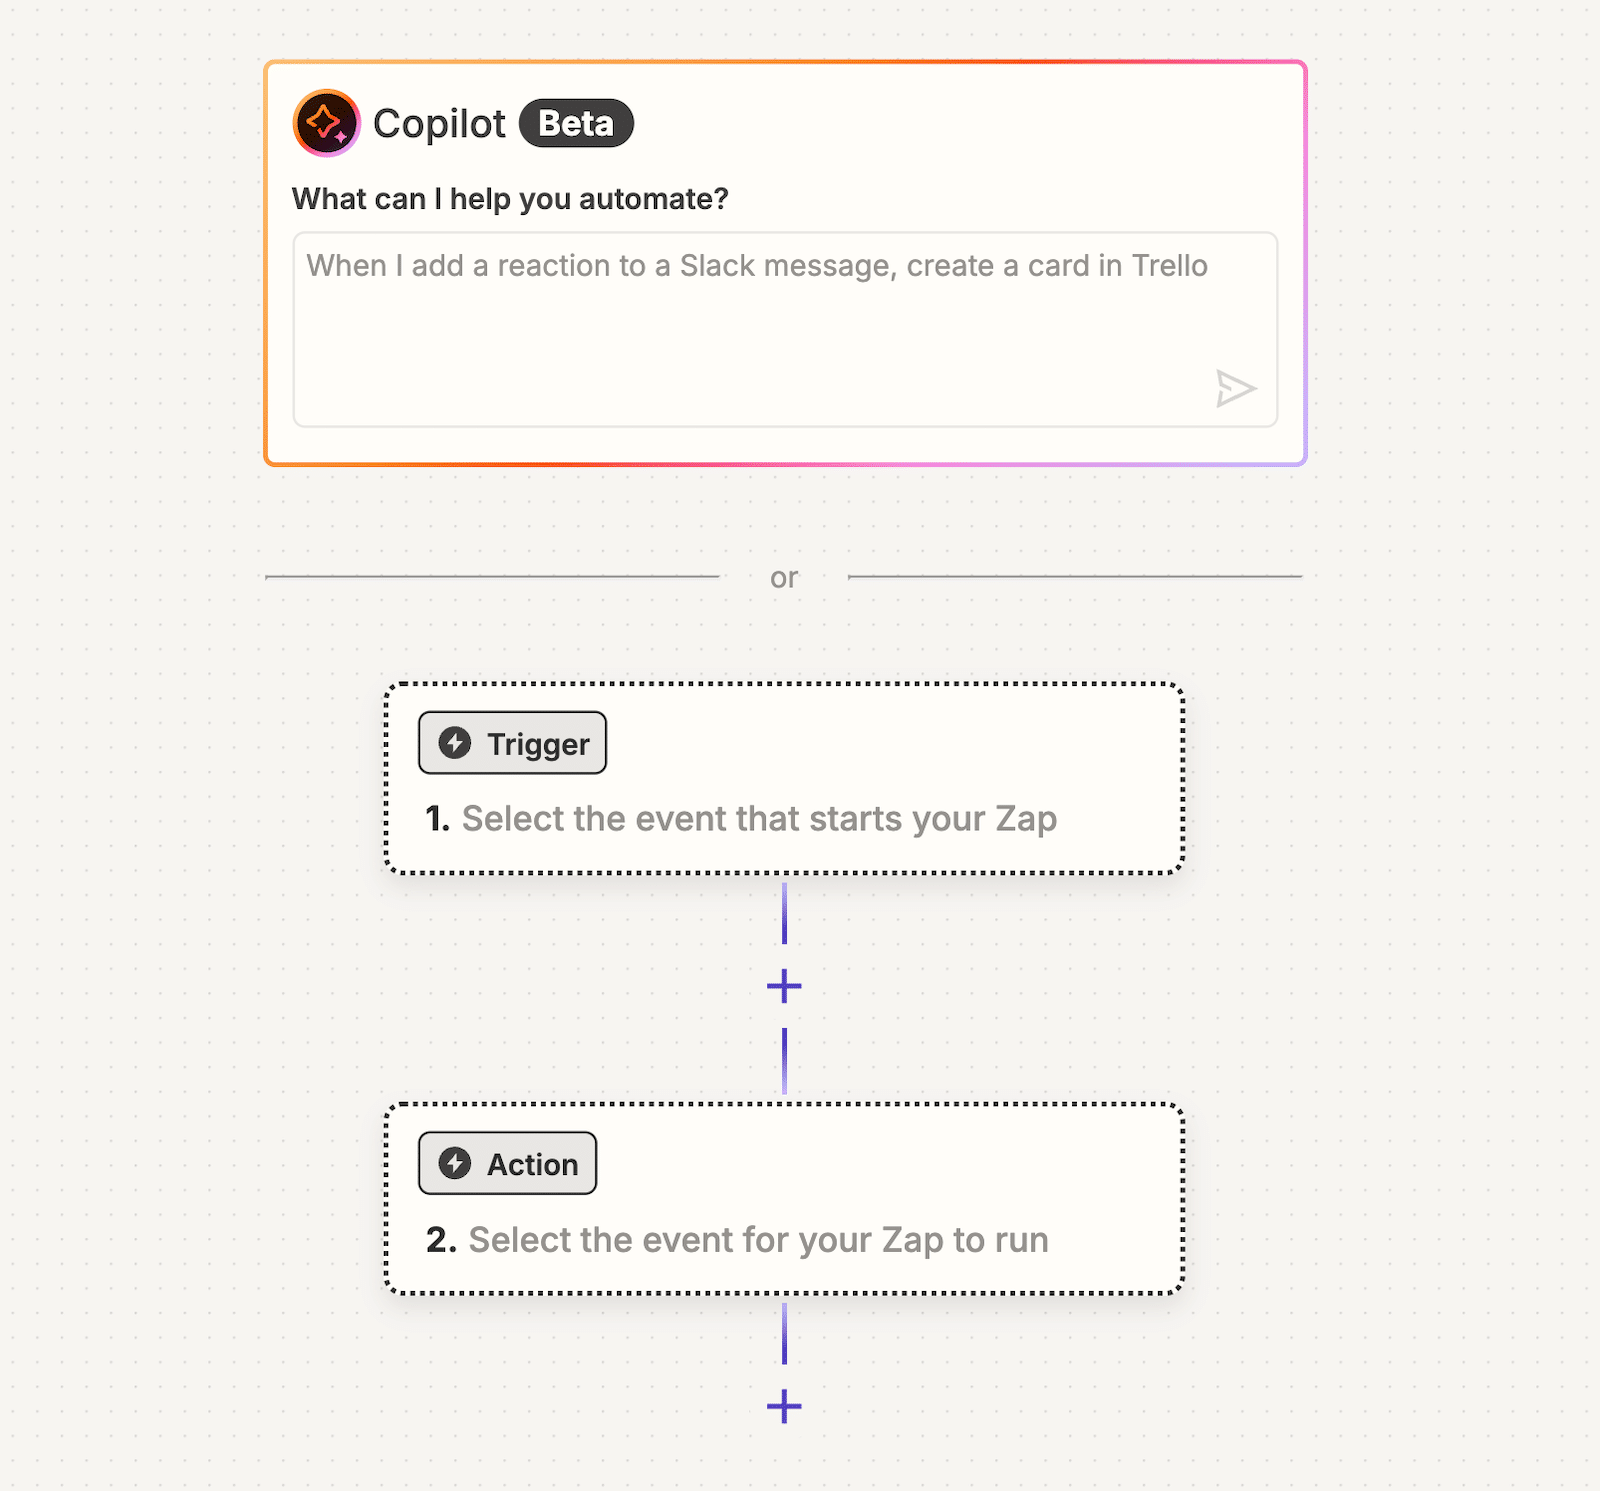
Zapier operates on a series of triggers and actions that follow from them. The workflow we’re going to set up is as follows: When a specific form is submitted through WPForms, it will trigger Zoho Invoice to create a new invoice.
Click on the Trigger box, then search for and select WPForms. It will prompt you to select an event that activates the trigger. Select New Form Submission from the dropdown list.
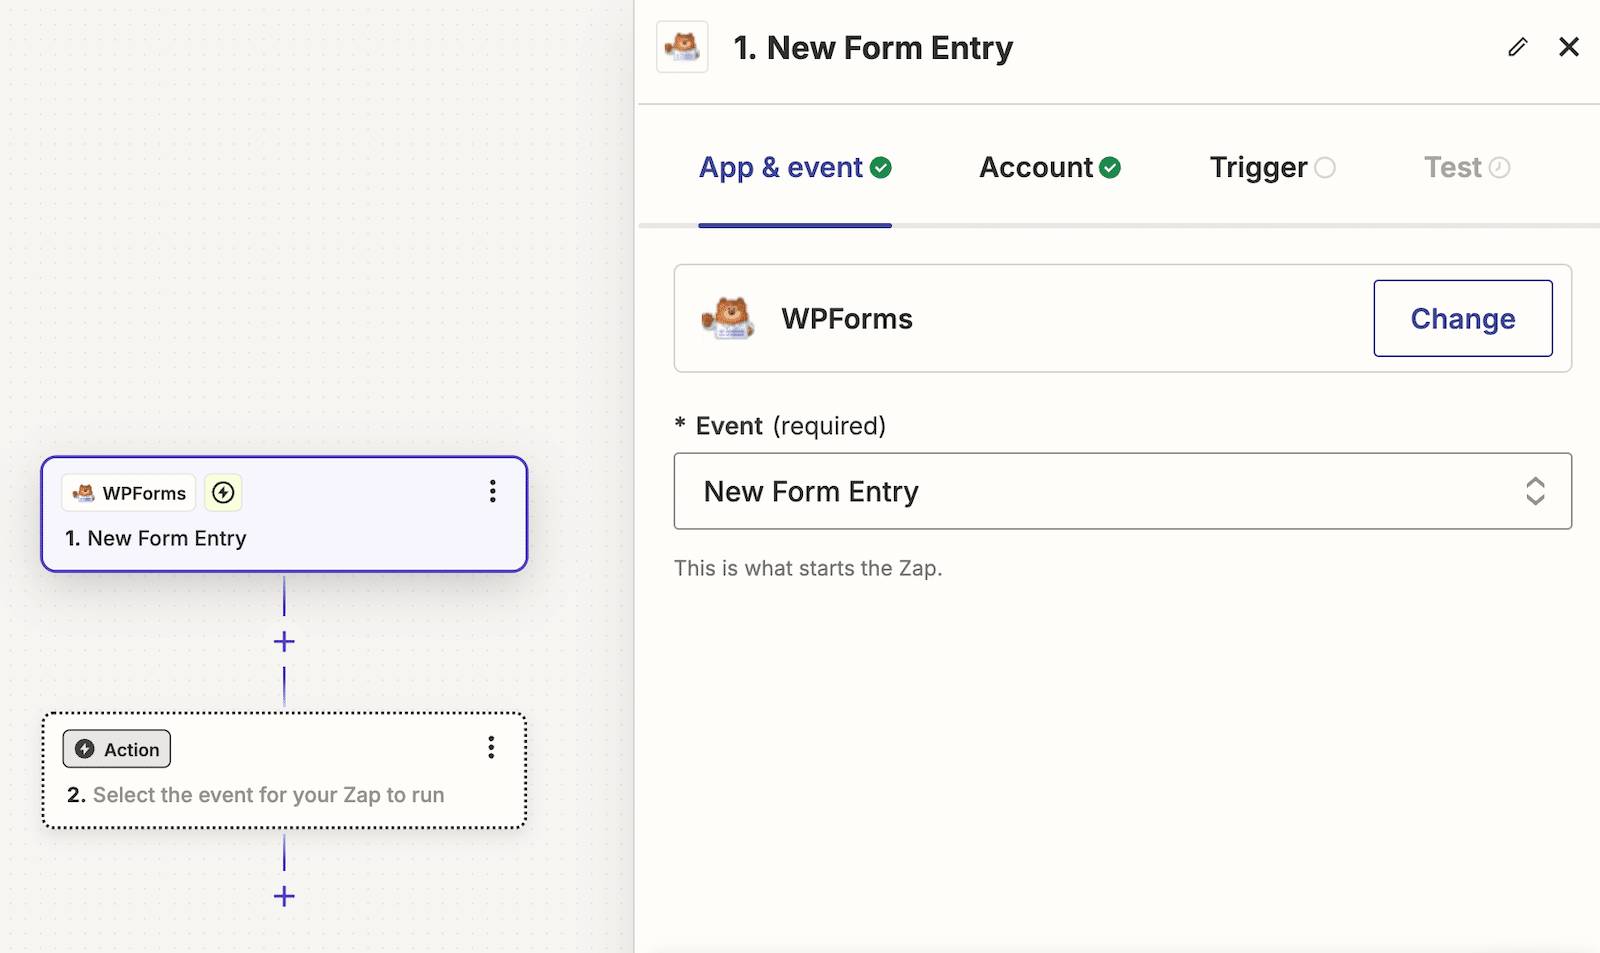
Click Continue and it will ask you to sign in to your WPForms account. If you’re already signed in, it will confirm your account.
Next, you’ll select your trigger, which is the order form you want to use in this Zap. If you have a lot of forms created, they’ll all load and you can use the search function to find the one you want to use. Note that they’ll also have the form ID numbers on them so you can make sure you’re selecting the correct form.
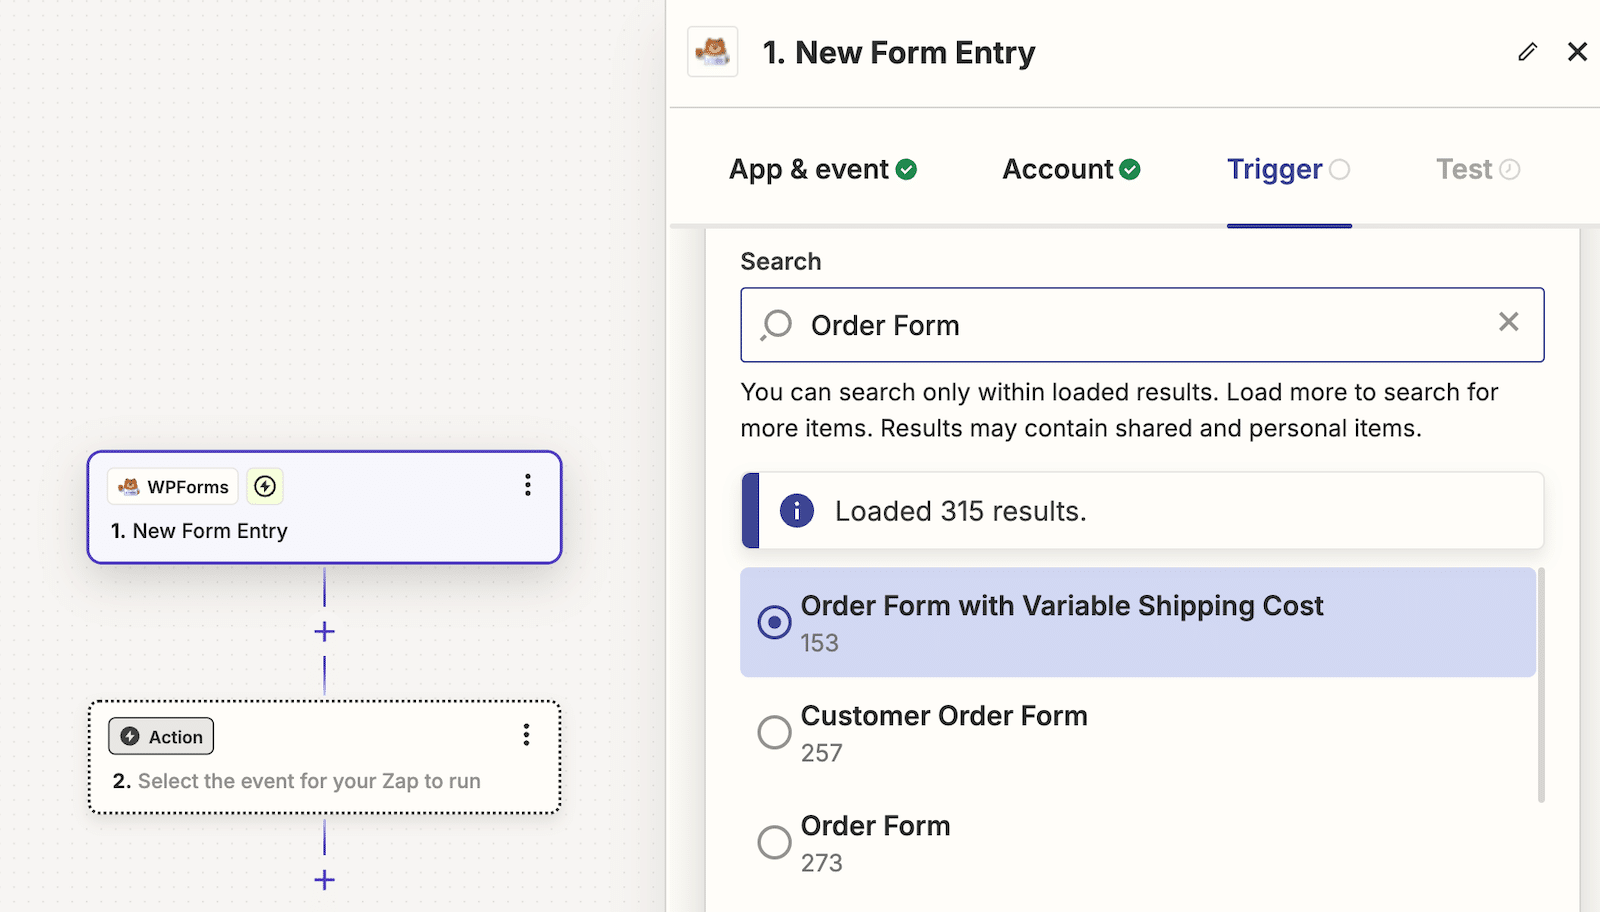
After you select your order form, continue on to test the trigger.
Please note: before you test the trigger, make sure that you have at least one form entry on the form you’re using. Zapier needs to be able to pull form entry data to test. You can enter info yourself if there are no other entries.
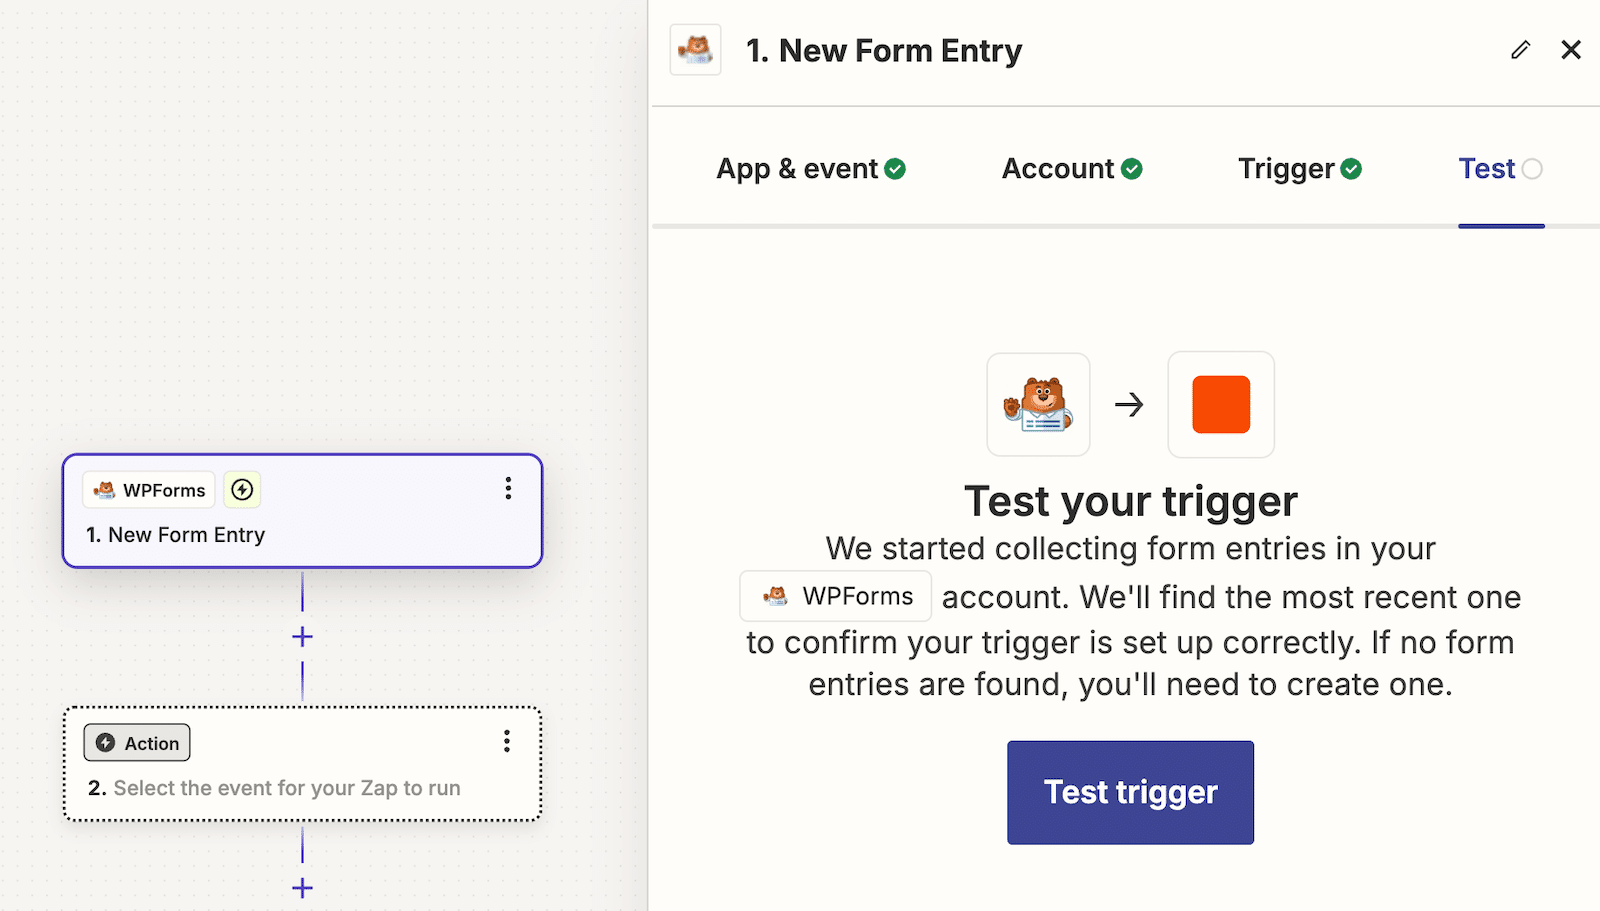
If there are any errors with your test, make the necessary adjustments until the test can be completed.
Then you’ll repeat a very similar process with the Action, starting with selecting the app you want to connect. This will be whatever you’re using for invoicing. Again, I’m using Zoho Invoice here because it’s pretty simple to use and great for newbies.
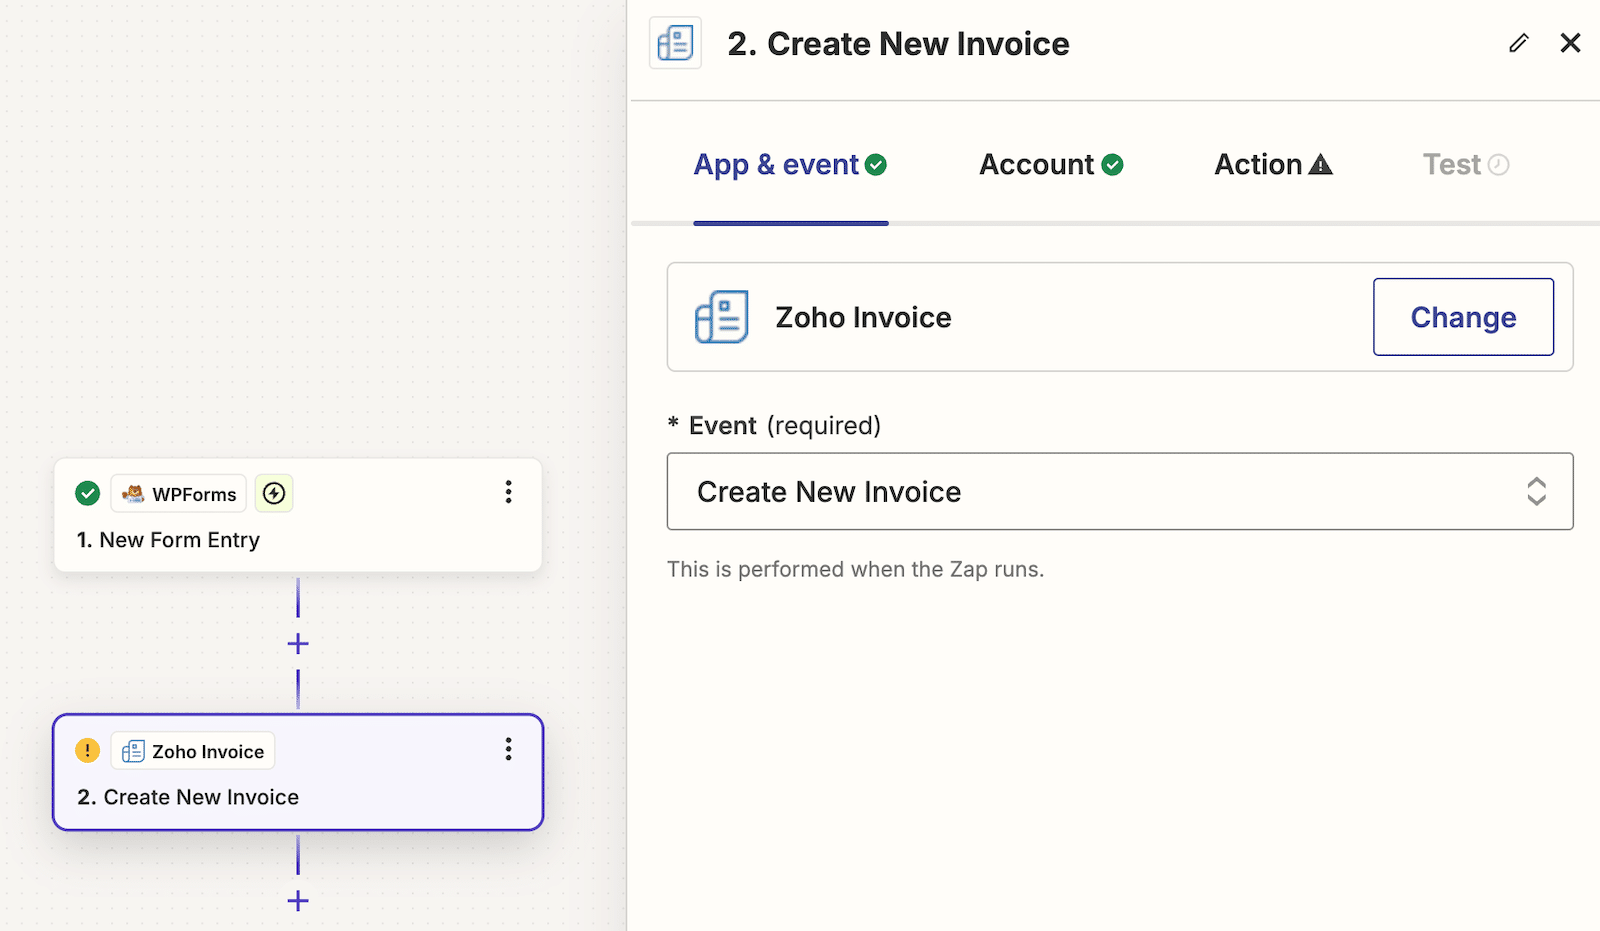
After selecting the app, you’ll choose the Event. This is the action you want to follow the trigger. In this case, it will be creating a new invoice, so I’ve selected that.
Just like you did before, you’ll have to sign in to your account so the connection can be established. As you set up the Action fields, take care with the line items. If this part gives you trouble, refer to Zapier’s line item guidance.
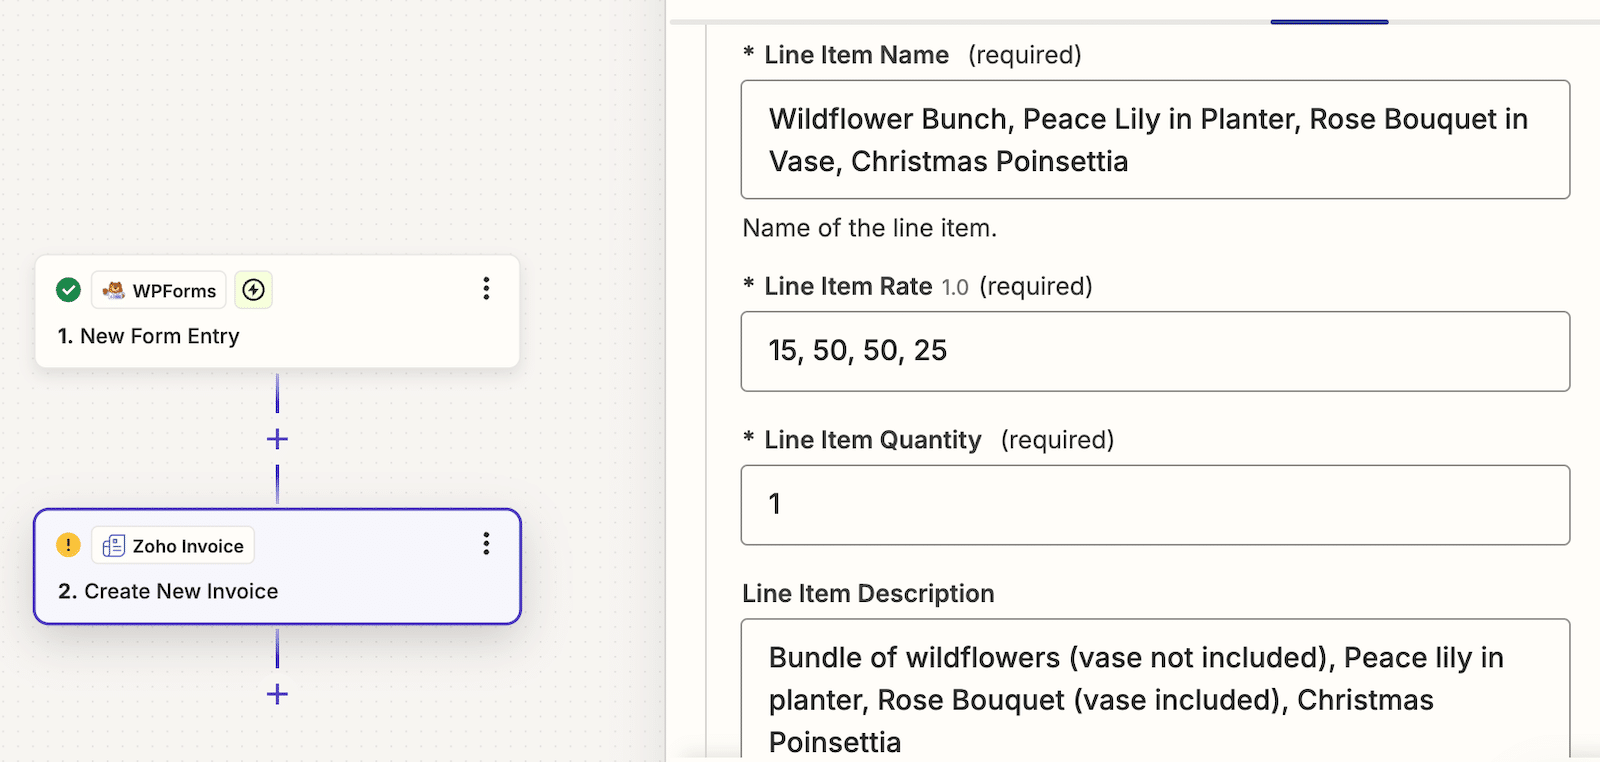
When you’re done with the setup, run the test and make sure everything is configured properly. Make any necessary changes.
Sending the Invoices
Now when someone submits your order form, an invoice will go directly to your Zoho Invoice account. Note that you will need to send it to the customer!
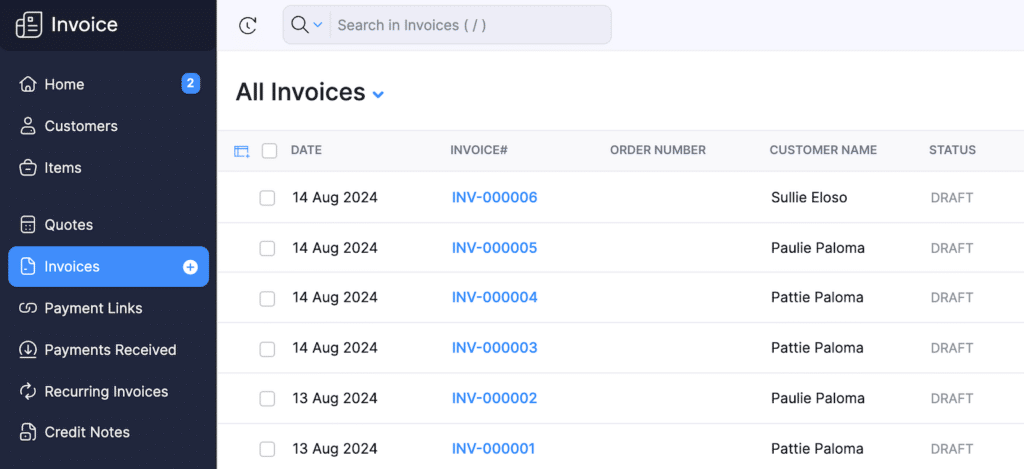
To do that, log into your Zoho Invoice account and navigate to Invoices from the left navigation bar. You’ll see all of your invoices there. Click on any of them to open and view.
When you open an invoice, you’ll see that you have several options. Most notably, there is an Edit option. If you open an invoice and notice that there’s a problem, you can make changes to reflect what should be on the invoice.
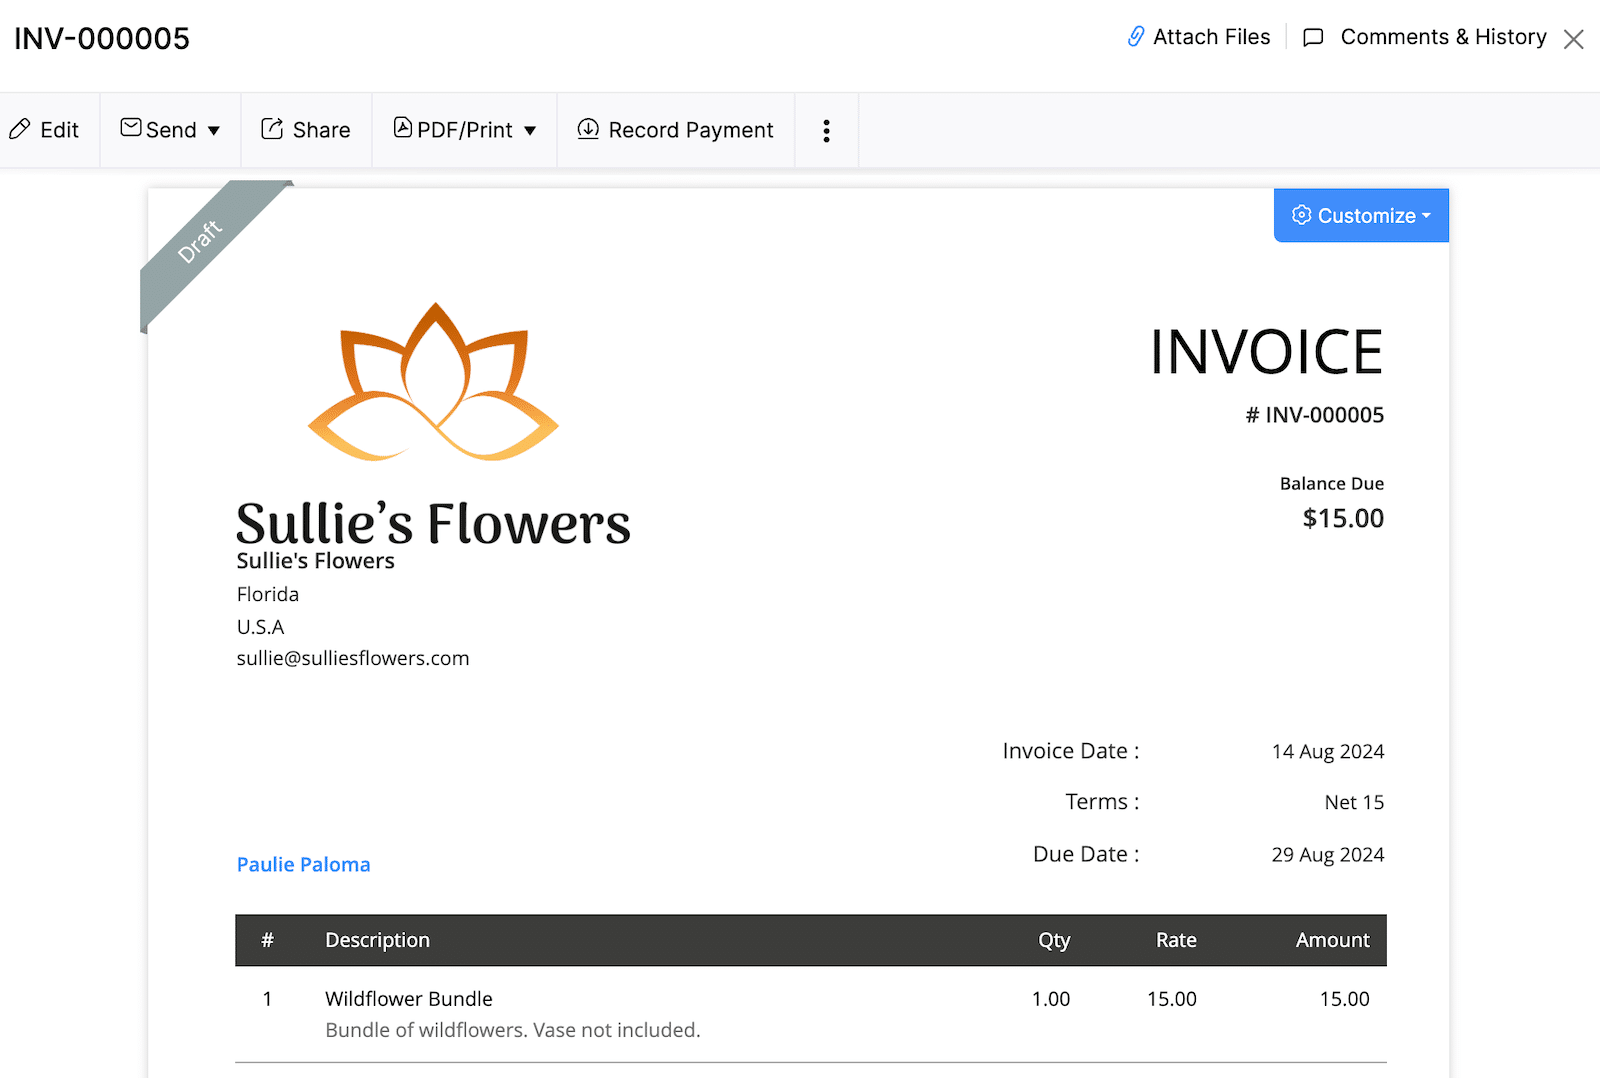
In addition to customizing the invoice, you can also save it as a PDF and print the invoice, delivery note, and packing slip. Once you’ve made any changes that you want to make, you can click Send and either send the invoice immediately or schedule it to send to your customer at a later time.
Alternatives to Zoho Invoice
Maybe you like the idea of using Zapier, but you aren’t quite sold on Zoho Invoice. All good! Here are a few alternatives that you can use with Zapier.
Start Invoicing With WPForms Now 📈
Pros and Cons
As with anything, there are pros and cons to using the Zapier integration method, in this case with Zoho Invoice. In the end, it comes down to personal preference.
Pros
- Use your own forms from your WPForms account
- Connect more than 7,000 apps, so you can use whatever tools already exist in your workflow
- The Zoho dashboard is easy to use
Cons
- Can’t view invoices directly in WordPress; need to go to the Zoho dashboard
- Can sometimes be a little fussy to set up
- Creating line items in Zapier isn’t always intuitive
WordPress Invoicing With a Plugin
If you want to trade the use of your own WordPress forms for the ability to manage your invoicing right in WordPress, a plugin is probably the way to go for you. There are lots of them available and I’ll give you a list of alternatives at the end. For this tutorial, though, I’m going to use Sliced.
Sliced is also easy to set up. If you tried the Zapier method and weren’t a fan (and that’s ok; not everything is for everybody!), give a plugin a go.
What You’ll Need
- The Sliced plugin, downloaded and active on your WordPress site (the free version is okay for this tutorial)
Configuring Your Plugin Settings
For the purposes of our tutorial, everything you do with Sliced is done right in WordPress. That means you have to spend some time configuring your settings, adding your line items, and choosing an invoice template.
Once the plugin is installed, look for Sliced Invoices in the left sidebar. Navigate to Sliced Invoices » Settings.
You’ll see General settings come up first, with other tabs where you can configure specific settings and set preferences.
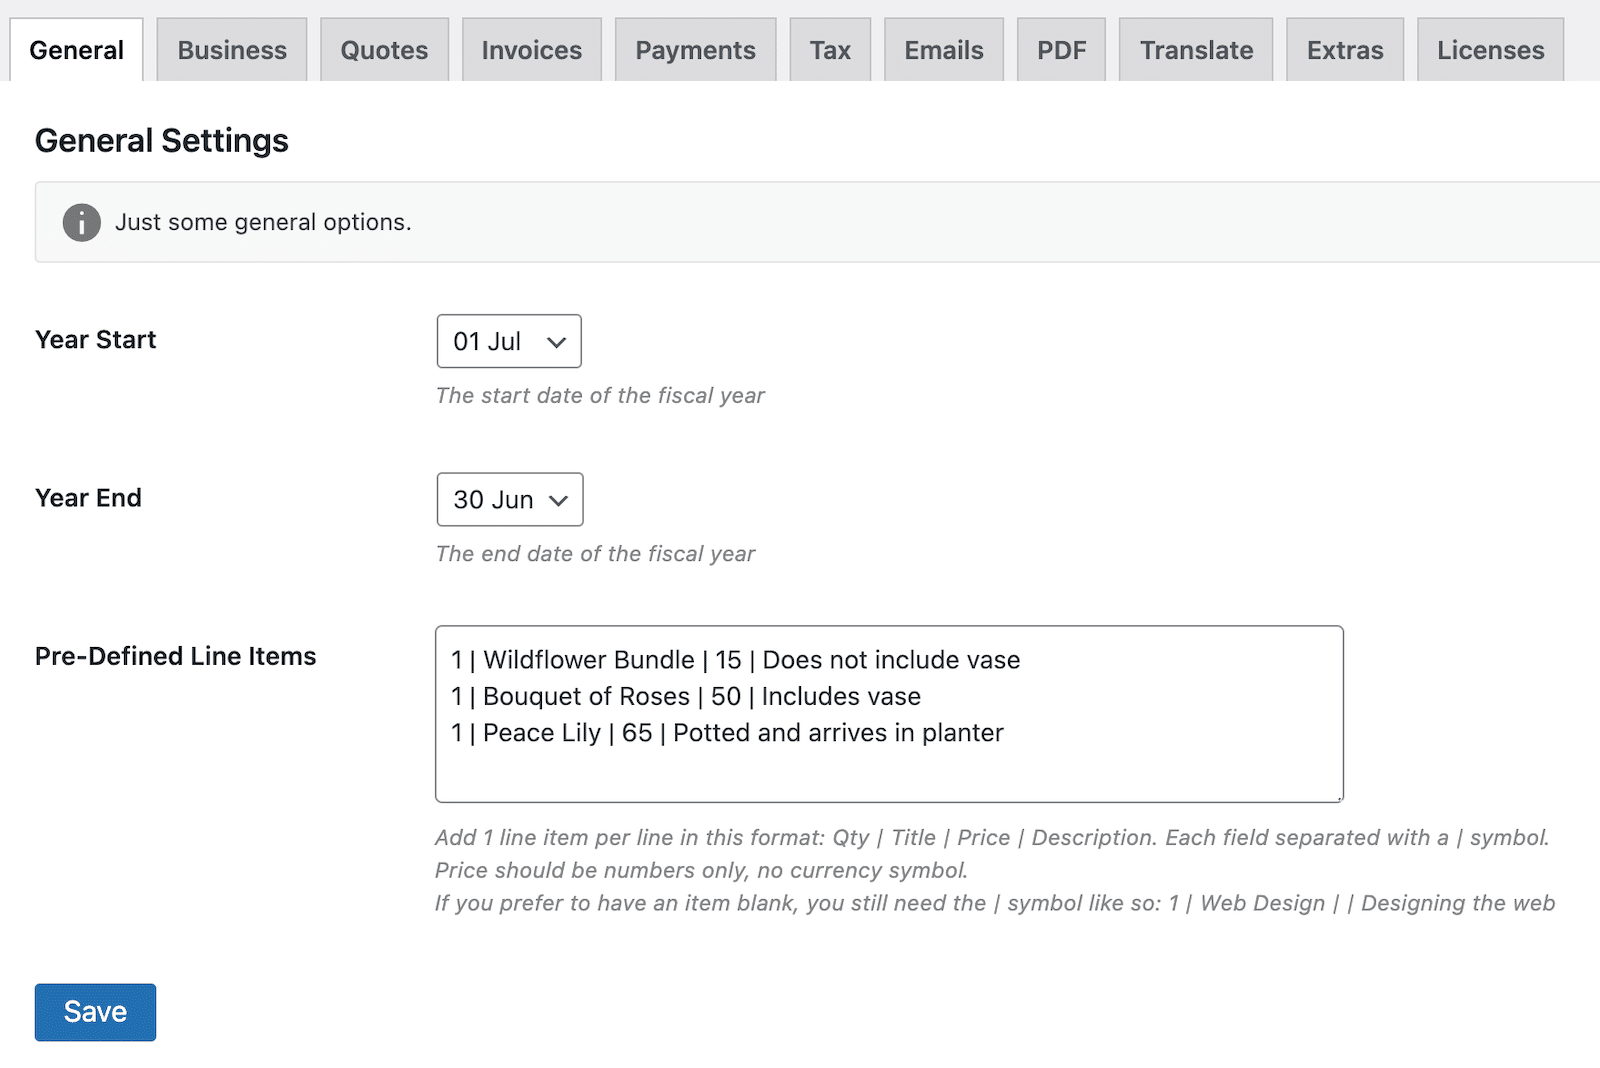
You can set up pre-defined line items here, if you want. It will save you time later when you create the invoice and can simply click on something that is frequently used.
You can also add them to each individual invoice later if you prefer. The instructions are stated clearly so that you know exactly what information to enter and how to enter it to create the line items.
You can and should go down the line through each tab. You’ll find options for setting up your business information and logo, choosing a logo template, enabling the PayPal payment gateway, configuring email settings, and more.
Creating and Sending Your Invoice
In addition to the Sliced plugin that you’ll see in WordPress’s left-side navigation menu, there should also be an item that says, simply, Invoices. When you click Invoices, you can either view the ones you’ve received or create a new one. For our purposes, let’s go ahead and click Invoices » Add New Invoice.
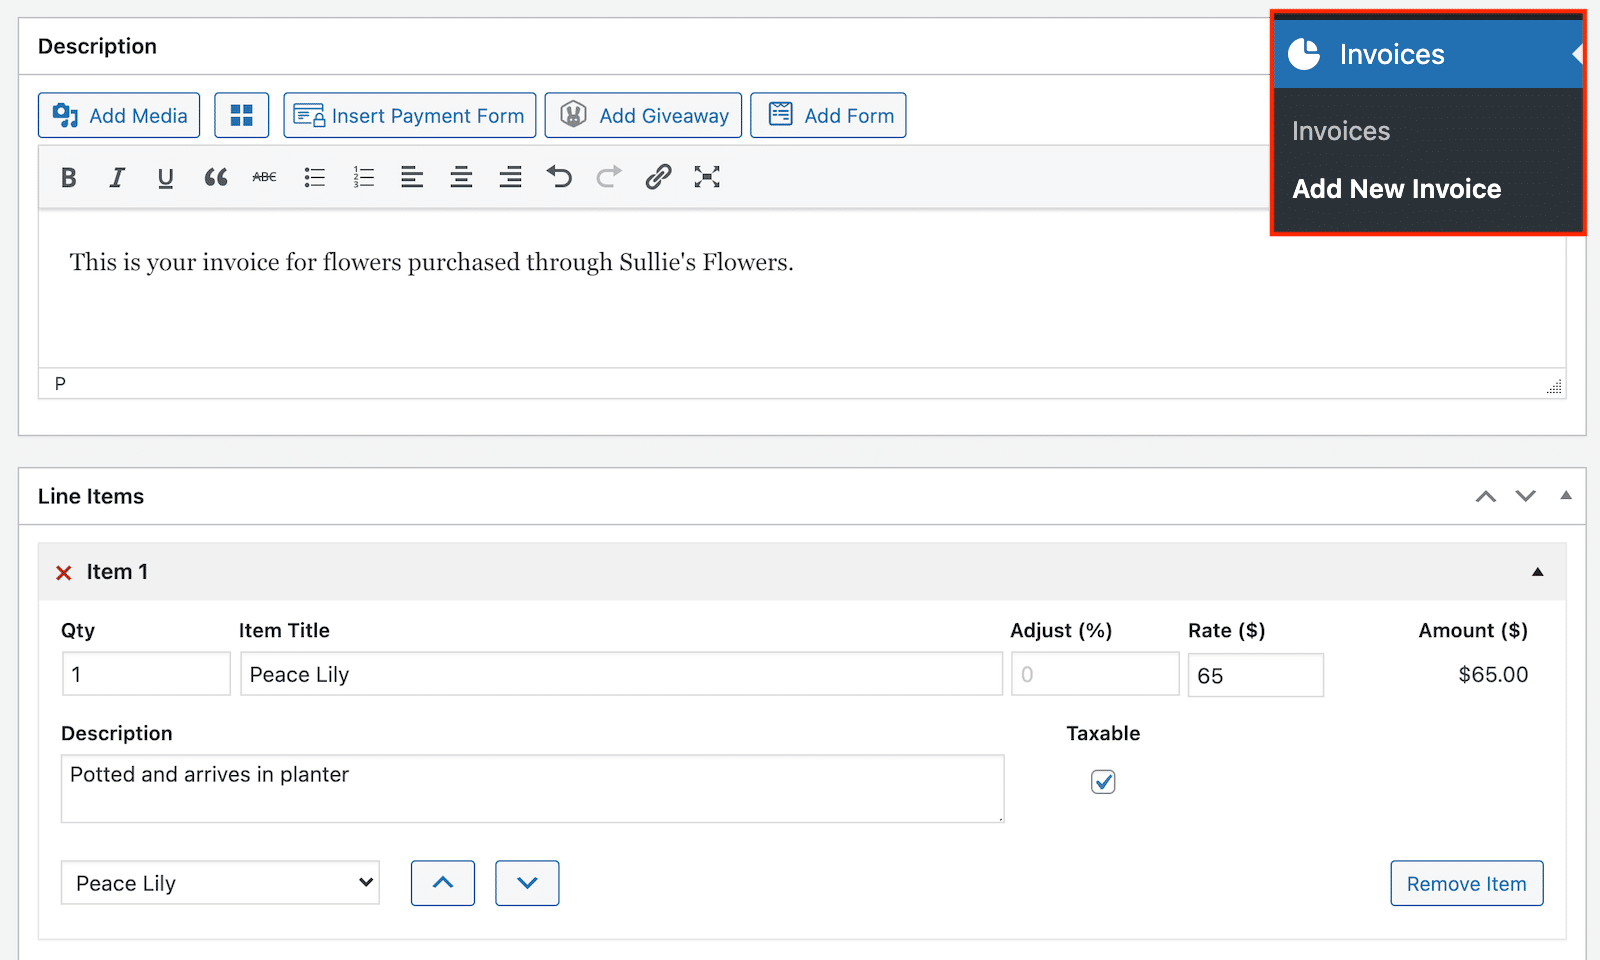
Now you start filling out the details for your invoice.
When it comes to line items, you can enter them manually, or you can set and choose pre-defined line items. All you need to do to add more line items is click Add Another Item.
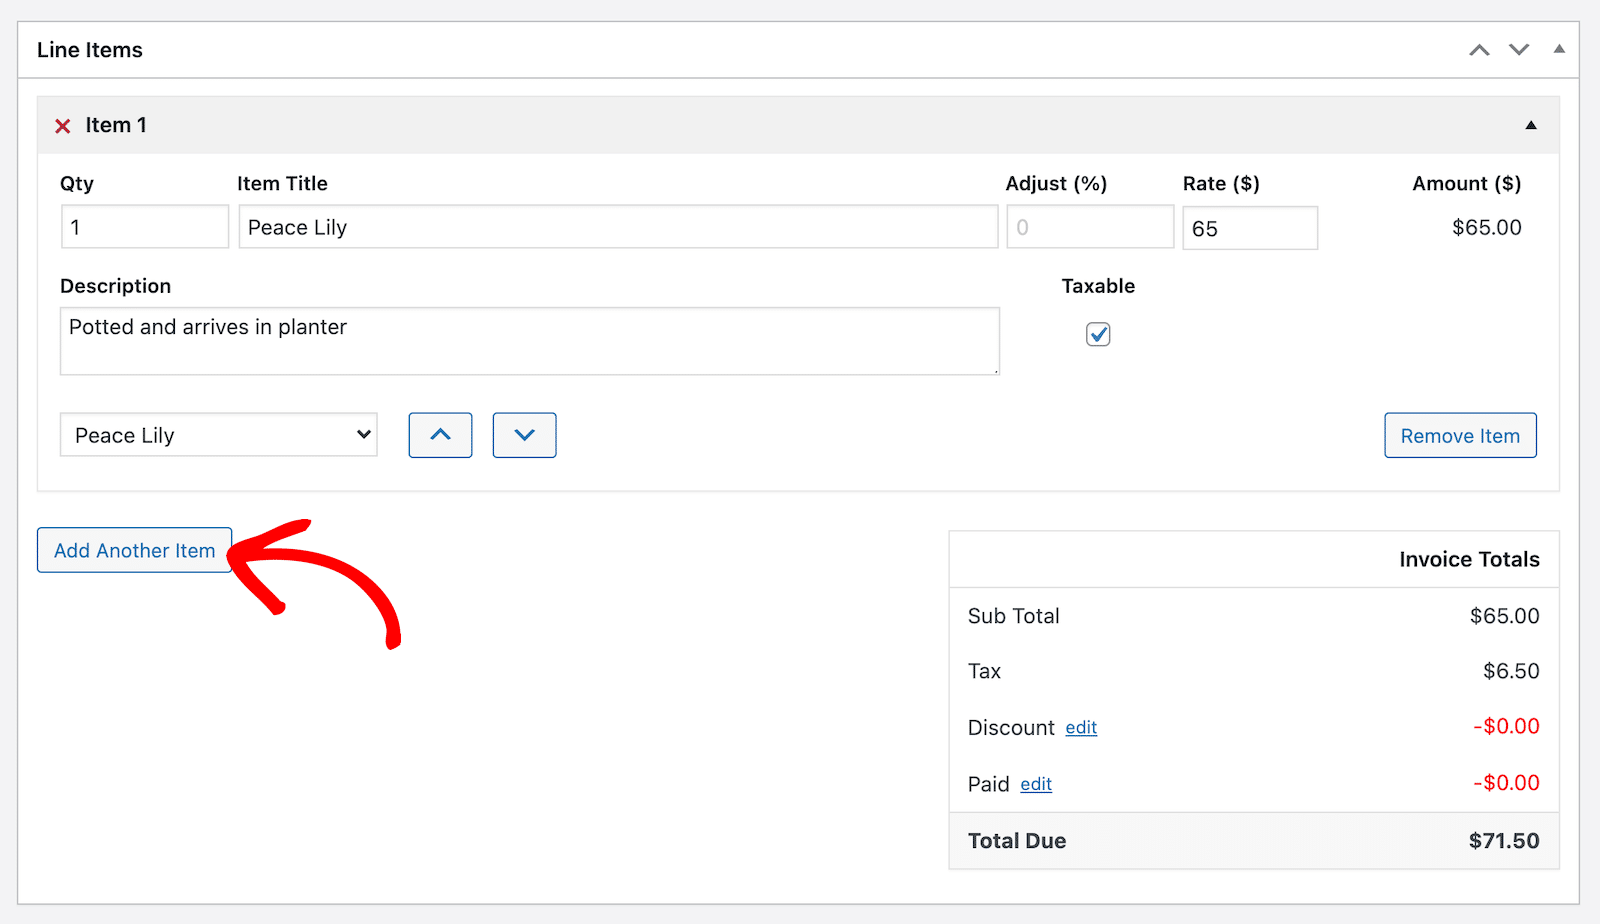
If you were confused by the line items in the Zapier method, this is a lot more straightforward. Recall that you could establish pre-set line items in the settings so that all you need to do here is select them from a menu.
That said, you can also manually add items as you wish. As you add items to the invoice, you’ll see the totals add up on the right side.
Before you get it ready to send to the client, take a quick look at the Description field above the items. Make sure you add something in there that indicates the name of your business and the date of purchase. It’s also where you can add payment links.
If you set up the PayPal gateway in the settings, you can use that. If you have another payment system connected in WordPress, you might see an automatic integration that lets you add a form for payment.
I decided to go the simplest route I could think of: a link to a payment form. Mine is set up on WPForms, but no matter where that payment form lives, you can link to it in the invoice description and send customers there to complete the payment.
Here’s how it looks when you preview the invoice. You can see the payment link included in the message.
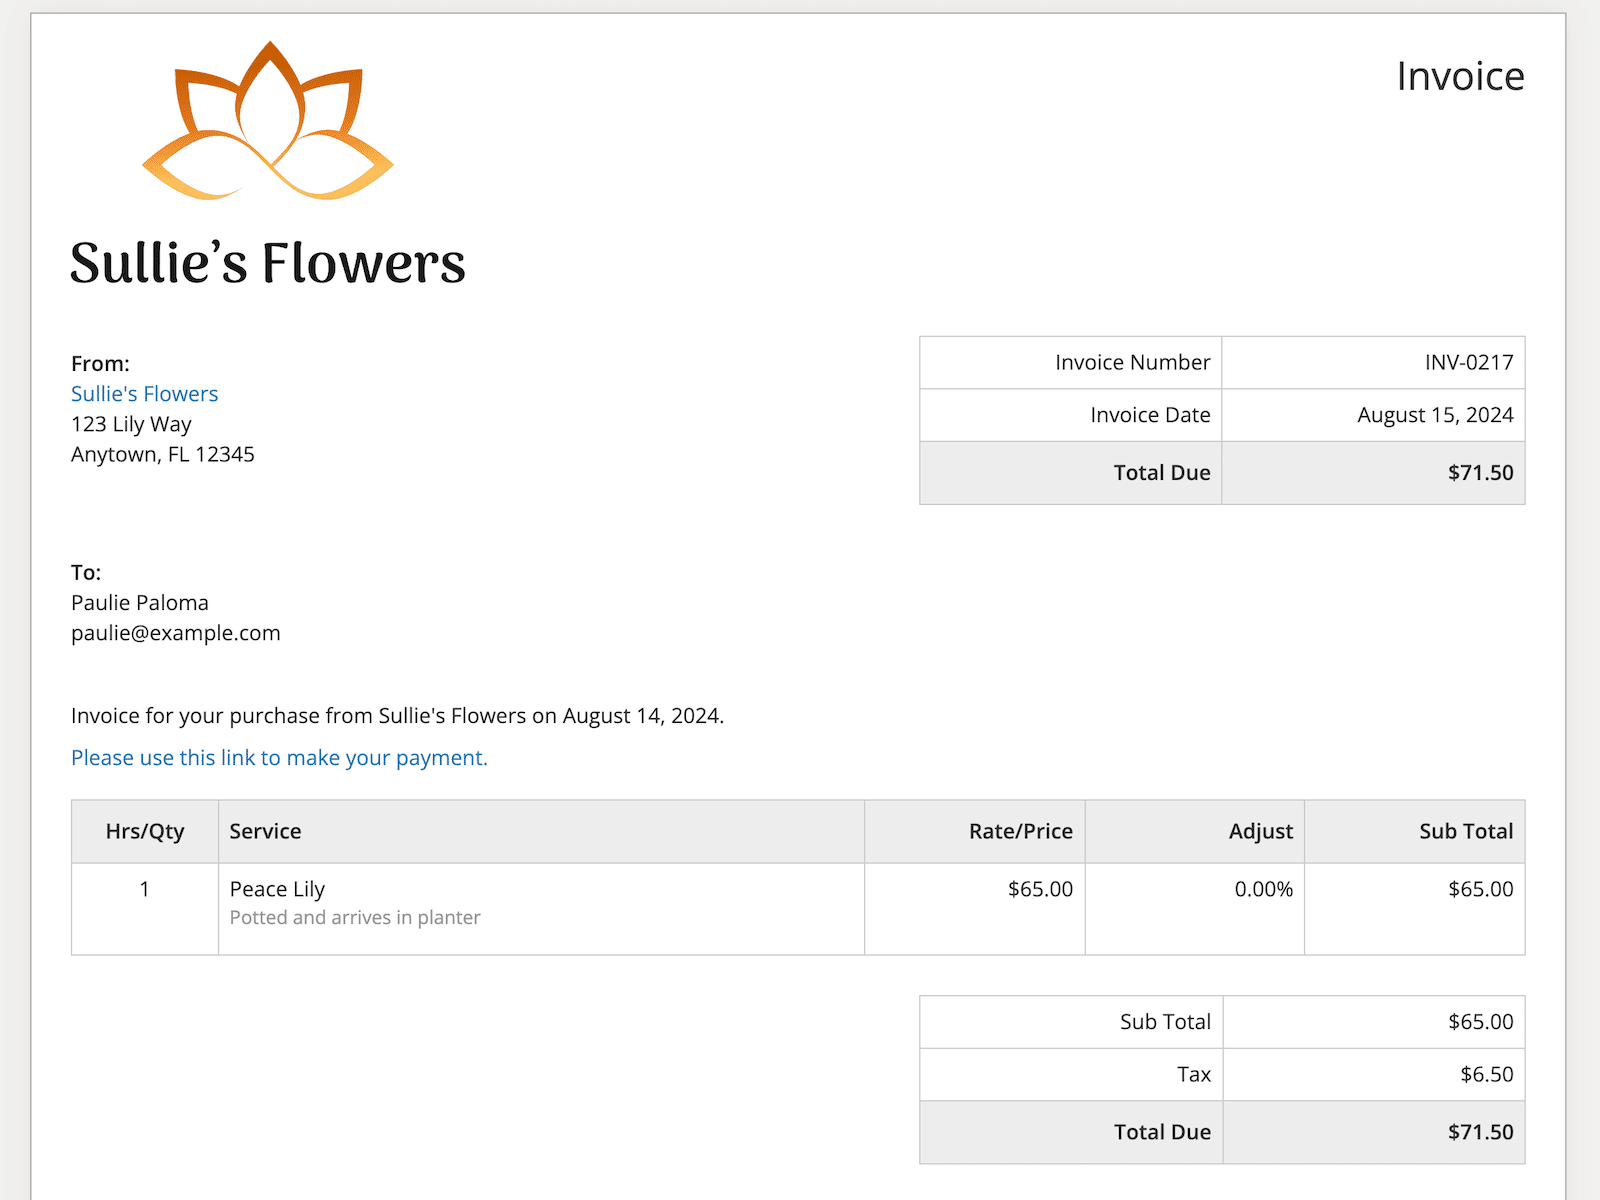
If one of the other options works better for you, feel free to go for it! You should do whatever’s best for your business.
When the invoice is complete and has everything you want to include, look at the Invoice Details section on the right side of the invoice editor. First, select an existing client or add a new one. That will tell Sliced where to send the invoice.
Click the dropdown under Status and make a selection. In most cases, you’ll be marking a new invoice as Unpaid.
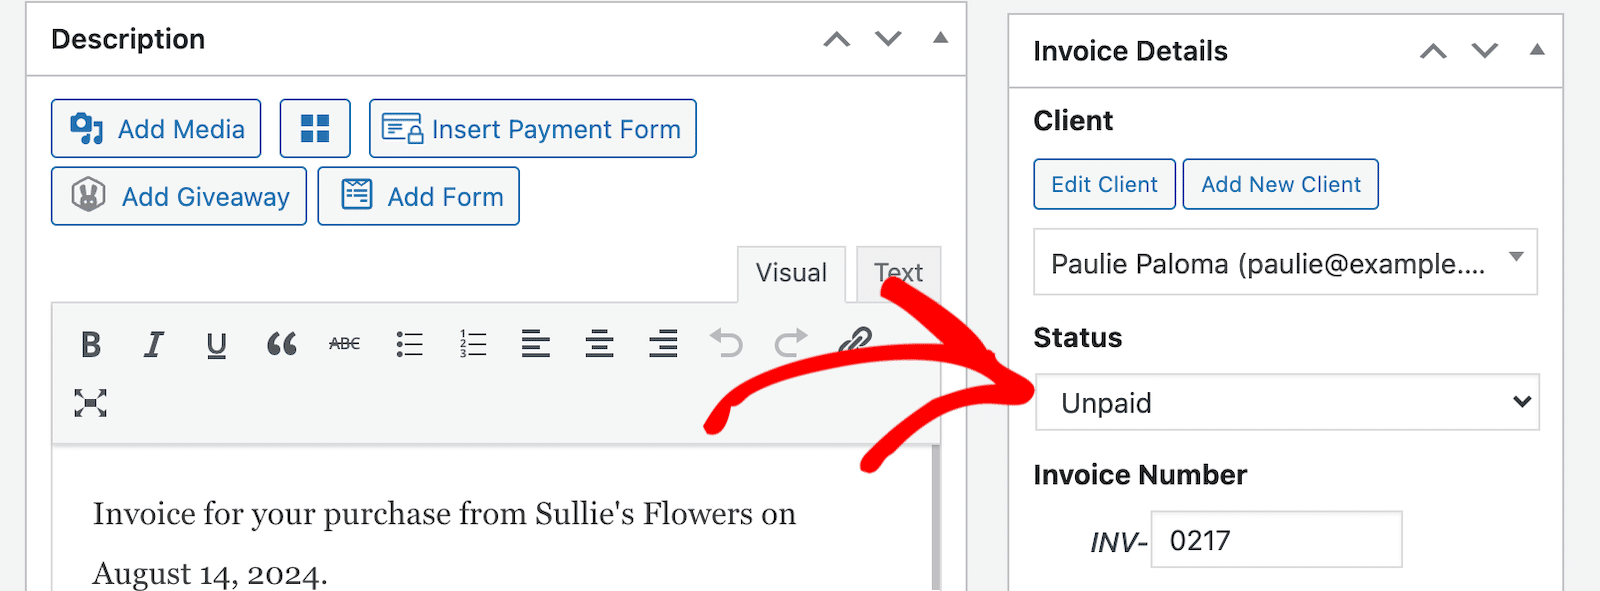
When all the details are sorted, scroll up and Publish the invoice. This will publish the invoice so that you can send a link for customers to view it online.
After publishing the invoice, you’re ready to email it to the customer. There are 2 icons at the top. The one on the left lets you create a PDF of the invoice instead. The one on the right lets you email it. For our purposes, let’s email it.

It will send the email based on the information you added in the settings. The customer will get an email telling them they have a new invoice to view online.
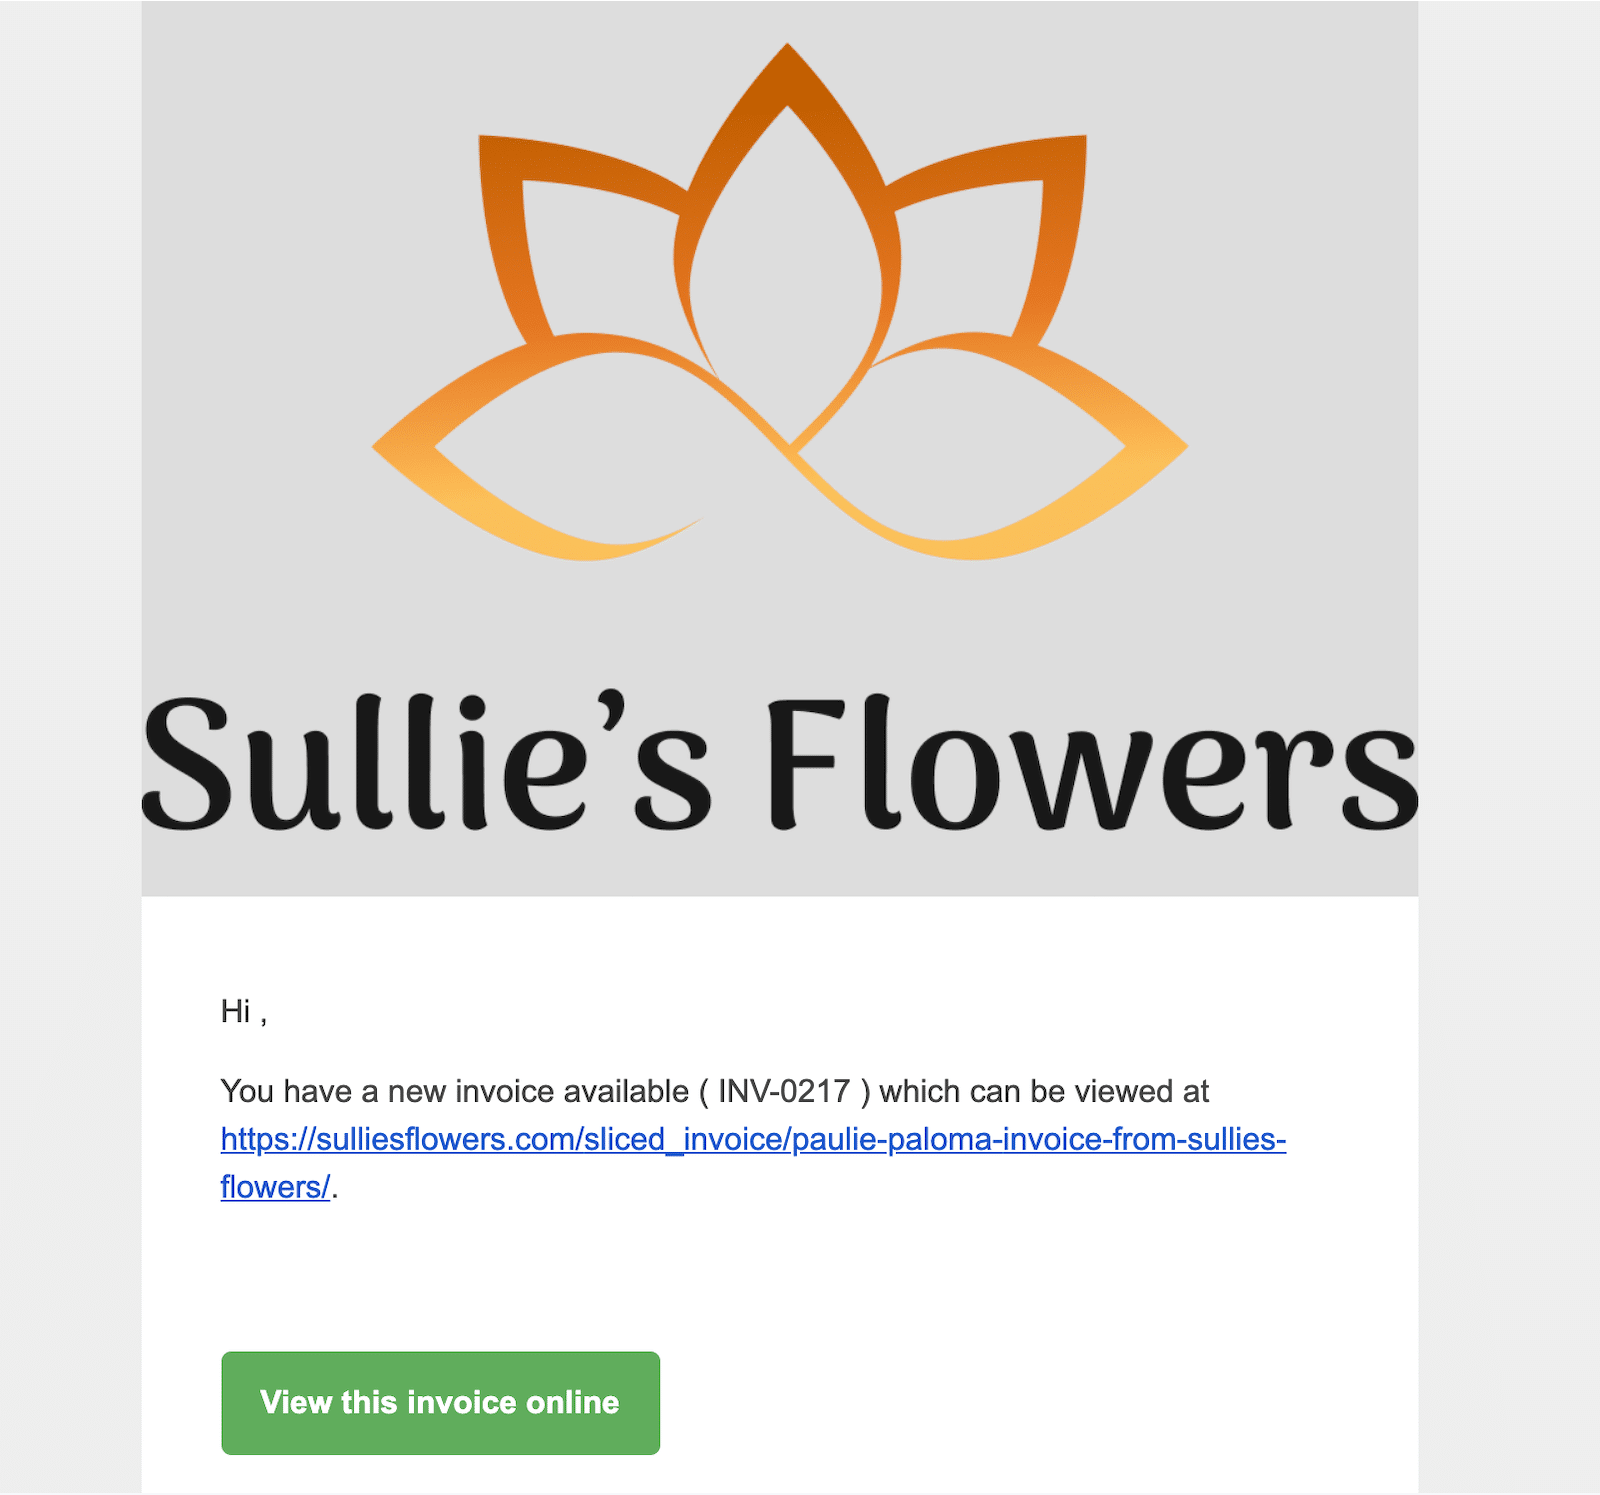
From there, customers can view the invoice online and use the payment link or whatever form of payment method you’ve used. Once the invoice is paid, you can update the status right in WordPress. That’s pretty much all there is to it!
Alternatives to Sliced
Sliced is just the tool that I used for this tutorial. I did, however, promise you that I’d share some alternatives in case that wasn’t the one for you.
- GetPaid
- Client Invoicing by Sprout Invoices
- Jetpack CRM
- PDF Invoices & Packing Slips for WooCommerce
Pros and Cons
Like Zapier, there are definite pros and cons to using a plugin like Sliced for your invoicing.
Pros
- WordPress plugins are generally pretty easy to set up
- You can configure everything you need to create a beautiful and professional invoice
- Can potentially automatically connect to other WordPress plugins you have, like WPForms
- Easy access right in WordPress
Cons
- Need to manually create invoices
- Automatic connection to WPForms didn’t work for us (but there were other ways to send a payment form)
- Publishes each invoice on your website, which may require further security
A Matter of Preference
Both methods of WordPress invoicing have their own pros and cons, so one is not necessarily better than the other. My aim was just to objectively show you 2 different ways to achieve the same end goal. Which you prefer is totally up to you and likely depends on your experience and comfort level.
Give them a try and see what works best for you!
FAQ — WordPress Invoicing
How do I ensure my WordPress invoicing solution is secure?
- Use reputable plugins that update regularly and have good security measures in place.
- Keep WordPress core, theme, and plugins updated to prevent security risks.
- Use SSL encryption on your website.
- Create strong passwords, update them regularly, and enable 2-factor authentication.
- Run regular backups for all of your invoice data.
What should I look for in a WordPress invoicing plugin?
- Ease of use and setup
- Ability to customize templates
- Multiple payment gateway options
- Reporting and analytics
Is it possible to send invoices in multiple currencies with WordPress?
Yes, it is possible. Many plugins and services support multiple currencies. You should always check before you start using a new tool to make sure it has this capability. Also understand that it’s possible that the ability to support multiple currencies might exist only as a paid feature.
How should I handle recurring invoices in WordPress?
- Use a tool that supports recurring billing.
- Create invoice templates for various recurring periods.
- Choose a solution with features that simplify recurring billing for you.
Can I create quotes and convert them to invoices in WordPress?
Several solutions offer the ability to create quotes in addition to invoices. Sliced is one of them. Do your research about whether the functionality is supported in a given platform, and then learn more about how it works to know whether it will be a good fit for you.
Next, Find the Best AI Tools for Your Small Business
While it can certainly seem daunting sometimes, AI can also be a small business owner’s best friend with all the ways it can help assist you in your job. Check out this list of the best AI tools for small businesses, try some of them out, and let us know your favorites!
Create Your WordPress Order Form Now 🚀
Ready to build your form? Get started today with the easiest WordPress form builder plugin. WPForms Pro includes lots of free templates and offers a 14-day money-back guarantee.
If this article helped you out, please follow us on Facebook and Twitter for more free WordPress tutorials and guides.



Can you suggest me a Swedish Invoicing software? If yes then revert me.
Hi Craven, thanks for your question.
Unfortunately, we are not aware of any Swedish invoicing tools.
Have a good one 🙂
I am selling a webinar on WordPress via my PayPal business account.
PayPal does not have the option for sellers like me to send a customizable automated receipt (or a message) as soon as buyers purchase the digital product.
I want to add the link of the webinar with a message in the automated receipt (or an instant automated customized e-mail) that the buyers get immediately after they purchase the digital product.
Which WP plugin or software would you recommend for this?
Hey Amreen – Thanks for reaching out! Yes, you can use notification emails as a receipt and you could add the link to it. When configured, notification emails are automatically sent out when the form is submitted.
If you need more help with that, please feel welcome to contact the support team.
Have a good one. 🙂