
AI Summary
Do you want to redirect users to another page after they press submit on your contact form? Redirections are a simple and effective way of leading users immediately to the next step after form submission.
You can send them to a thank you page, a custom landing page, or any other part of your site that makes sense. And if you’re running any kind of campaign or collecting leads, that redirect can make a big difference in conversions.
In this post, I’ll show you the easiest way to create a form redirect that takes your users to a new page with just a few clicks. Let’s get into it.
Create Your WordPress Form Now! 🙂
How to Create a Form Redirect in WordPress
Adding a redirection after form submission is easy with WPForms. Follow the step-by-step instructions below:
Step 1: Install the WPForms Plugin
To start, you’re going to need an easy contact form redirect plugin for WordPress. WPForms is the best form builder for WordPress, and it’s known for its beginner-friendly form redirection tool.
While you can create basic redirects with WPForms Lite, I often recommend going with WPForms Pro if you want more control over where your users end up after submitting a form.
With WPForms Lite, you can redirect all form submissions to a single thank you page or URL. That works fine for simple contact forms or basic lead generation.
But if you’re collecting different types of submissions (like various service requests or product inquiries), you might want those users to land on different pages based on what they submitted.
With WPForms Pro, you can use conditional logic to create dynamic redirects. For example, if someone selects “Business Inquiry” in your dropdown menu, you can send them to your services page.

If you haven’t installed WPForms yet, go ahead and do that first. It only takes a minute. And if you’re not sure how to install it, you can check out this step-by-step guide for help.
Once you’ve activated the plugin, you can begin creating new forms and adding redirects of your choice to them. I’ll show you how to do that next.
Step 2: Create a New Form
If this is your first time using WPForms, you’ll need to start by creating a form first and then add a redirect to it. Creating a form is super easy with WPForms.
To start, open your WordPress dashboard and go to WPForms » Add New.

This will open the form builder interface. Give your form a name so you can identify it easily later on. Scroll down to the Templates area and select a template for your form by clicking on the Use Template button.

Your selected template will now load and appear on your screen, where you can see the Fields available along with the form preview.

After that, you’re free to customize the form any way you like. Use the drag-and-drop functionality to add, remove, or reorder fields.

“💡 Pro Tip: Before setting up your redirect, think about what information you need to collect. If you’re using WPForms Pro, you might want to add fields that’ll help determine where to send different users (like a “How can we help?” dropdown menu).”
When you’re happy with how your form looks, click Save at the top of the form builder. Now, it’s time to add a form redirect using WPForms’ confirmation settings.
Step 3: Create a Form Redirect
WPForms gives you a lot of flexibility when it comes to configuring form redirect and confirmation settings. You can redirect your site visitors to two places using WPForms. I’ll show you how to set up both options:
- Another page on your website
- An external page to a different website.
3.1. Redirect Users to a Page on Your Website
By default, WPForms shows a simple success message when someone submits your form. If you want to redirect visitors to a specific page on your site, select Settings » Confirmations from the form builder.

After this, choose Show Page from the Confirmation Type dropdown menu. This will then cause a new dropdown menu – Confirmation Page – to appear down below.
Use the Confirmation Page dropdown to select a page on your site to redirect visitors to after form submission. After you’ve chosen the page to redirect users to, click Save.

Note: Make sure that you have the redirection page already created on your website so you can choose it from the Confirmation Page dropdown menu.
3.2. Redirect Users to a Page on Another Website
In some cases, you might want to redirect visitors to a different website entirely when they submit a form. This can be useful if you want to send visitors to your social media pages from your site, for instance.
To do this, go to Settings » Confirmation like before. This time, select Go to URL (Redirect) from the Confirmation Type dropdown menu.
Then, paste the complete URL of the external page you’d like to send the user to in the field labeled Confirmation Redirect URL.

After you have configured where to redirect users after they submit a form on your site, click Save to make sure all your progress is safe.
Step 4: Set Up Conditional Form Redirects (Optional)
WPForms Pro allows you to redirect users to different pages depending on the response provided by them when submitting a form.
For instance, if you have a quote request form that allows users to select one of the many services you’re offering, you can redirect people to specific service pages with details based on their selection.
Usually, this works best if you have fields like Multiple Choice, Checkboxes, or other fields that give your users a choice of options. Then, depending on the user’s choice, you can set up different redirect pages.

In order to set up conditional form redirects, you need to have at least two confirmations. From the Confirmations window, press the Add New Confirmation button.

Name your confirmation and click OK. Then, click on the Enable Conditional Logic button. This will expand into additional options.
You can use the conditional logic fields to define the rules for when a particular form redirection should trigger. In this example, I want to redirect users to the site’s marketing page if a user selects “Marketing” in the Checkbox field.

Repeat this process to define the logic for all available field choices and the corresponding page redirects you want to trigger for each choice. When you’re done, make sure to click on Save.
Step 5: Publish a WordPress Form With Custom Page Redirects
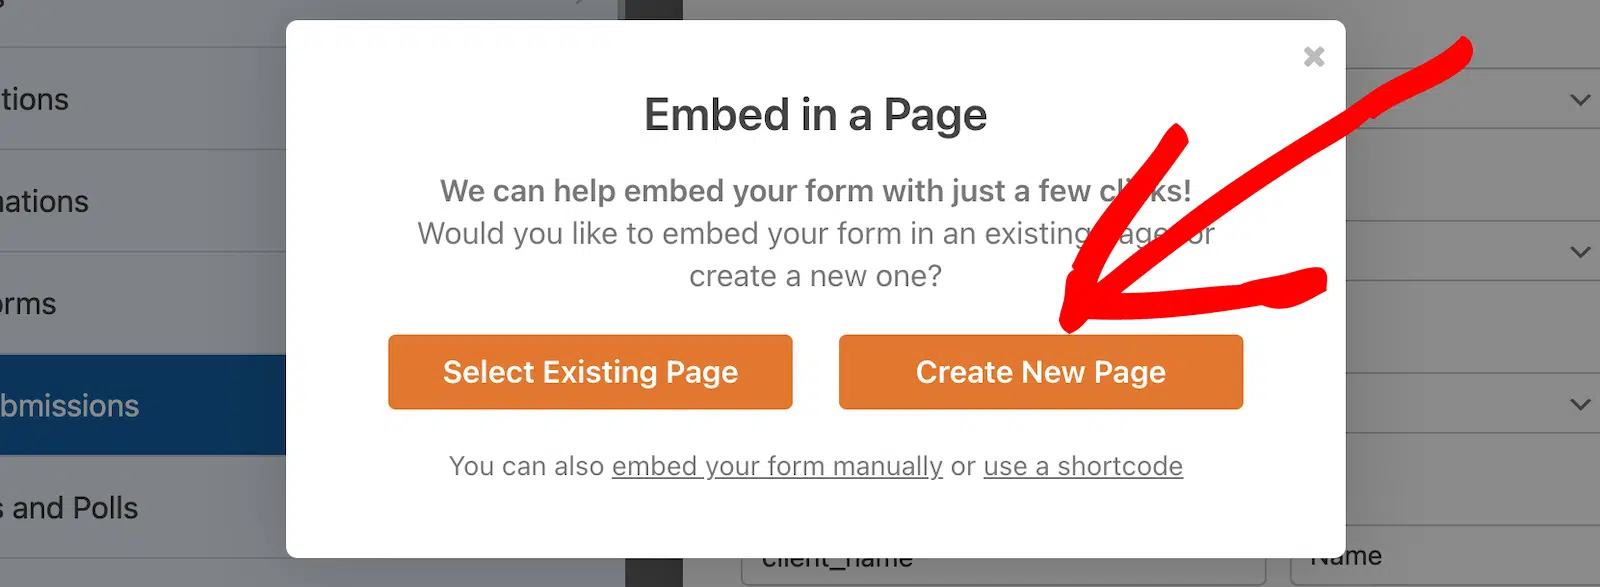
Your form with page redirects is now ready for launch! To embed the form, click on the Embed button next to Save in the form builder.

If you want to add your form to a new page, click on Create New Page or choose the Select Existing Page option, as required!
Then, you’ll be prompted to name the new page. This will become the title of your new page. Click on Let’s Go when you’re ready.

WPForms will take you to the WordPress block editor with a block for your new form already added to it. You can change any settings or add more content to the page if you’d like. When you’re ready, click on Publish.

When users start submitting this form, it will redirect them to the page you specified in the form confirmation settings above. And that’s it! Now, you know how to redirect users after they submit your form.
“💡 Pro Tip: I can’t stress this enough. Always test your form redirects before going live. I’ve seen too many forms send users to broken pages or wrong URLs, and that’s a quick way to lose potential leads.”
FAQs about Redirects After Form Submission
Setting up redirections after form submissions is a popular topic among our readers. Here are answers to some common queries about it.
When are form redirects useful?
Form redirects are very useful when you want to send users to a particular page after they’ve submitted a form.
Instead of simply showing a confirmation message, you can use form submit as an opportunity to connect further with your visitors and lead them to a page that offers exactly what they need.
Depending on the intent of your form, you may redirect users to different types of pages. Here are a few common form redirect page examples:
- Thank You Page: A page dedicated to thanking the user for filling out the form gives you an excellent opportunity to invite users to perform other actions. You can promote your popular blog posts, upsell your product, or offer some other incentive to keep visitors engaged with your brand.
- Gated Content: A lead magnet campaign is a powerful way of collecting leads. You can request visitors to fill out your form in exchange for free access to a valuable resource. For example, you can redirect people to a free download page for an eBook, webinar, podcast, and so on.
How do I redirect a form in WordPress after submitting it?
To redirect a form after submission in WordPress, you can use the WPForms plugin. It’s straightforward:
- First, install and activate the WPForms plugin.
- Then, create or edit a form within WPForms.
- In the form editor, click Settings and then Confirmations.
- Select the Confirmation Type as Go to URL (Redirect).
- Finally, type the URL you want users to be redirected to after they submit the form.
This method ensures that once someone fills out your form, they are automatically taken to a new page of your choosing, enhancing their experience on your website.
How do I redirect the user to another page after submitting the form?
Redirecting users to another page after they submit a form in WordPress can improve user experience significantly. To achieve this, you can utilize the WPForms plugin.
All you have to do is navigate to Settings » Confirmations. Then, change the Confirmation Type to Go to URL (Redirect). Once done, simply input the URL of the page you want users redirected to after form submission.
Why is my form not redirecting after submission?
Your form might not be redirecting after submission because the redirect option isn’t set up correctly inside your form settings.
Double-check that you’ve selected the right confirmation type (like “Go to URL”) and that the redirect link is added properly.
Also, make sure the redirect URL is live and doesn’t lead to a broken or unpublished page.
Next, Allow Users to Upload Files With Forms
You might want to check out our guide on how to create a file upload form in WordPress so you can collect all the information you need from site visitors at once.
Also, if you’re looking for tools to make site management efficient and effortless, here are our top recommended WordPress site management tools.
Ready to build your form? Get started today with the easiest WordPress form builder plugin. WPForms Pro includes lots of free templates and offers a 14-day money-back guarantee.
If this article helped you out, please follow us on Facebook and Twitter for more free WordPress tutorials and guides.

