AI Summary
Do you want to hide your WordPress site until it’s ready?
Hiding your site will give you plenty of time to work on it without showing your visitors any unfinished or broken pages.
In this article, we’ll show you the easiest way to hide your WordPress site until it’s ready with a plugin. We’ll also show you how to easily hide specific sections of your site, which is handy if you need to make more changes after your site goes live.
Can I Take My WordPress Site Offline?
Yes! You can easily take your WordPress site offline using SeedProd.
SeedProd lets you hide your entire site behind a coming soon page. It has an awesome landing page builder that you can use to make your own custom page designs.
With SeedProd, you can easily make:
- Coming soon pages: Use this setting to hide your WordPress site until it’s ready. This is sometimes called an ‘under construction page’.
- 404 pages: Make your own custom page that shows up if someone tries to visit a deleted page on your website.
- Maintenance mode pages: Design a page to display if you need to take your site offline for maintenance.
- Custom landing pages: Create your own beautiful distraction-free landing page forms for newsletter signups, webinars, and more.
Even better, lets you hide all of your site or just the specific posts and pages you need to work on. That means your visitors will never have to see broken or unfinished content.
You don’t have to move or delete your site to show a ‘coming soon’ page with SeedProd, and search engines will still see a valid page when they visit.
Even better, you can add a newsletter signup form so you can continue to get subscribers while your WordPress site is offline. You can read more about these features in our full SeedProd review.
For now, follow the tutorial below to find out how to hide your WordPress site until it’s ready to launch.
Create Your WordPress Contact Form Now
How to Hide Your WordPress Site Until It’s Ready
Are you ready to start working on your site? We’ll walk through it step-by-step.
In This Article
Let’s start by checking you have your hosting set up and ready.
Step 1. Set Up Your New WordPress Site
When you start out with WordPress, you’ll want to buy web hosting. We recommend checking out Bluehost.
With Bluehost, you can get super affordable WordPress hosting and a free domain name in 1 plan. And Bluehost also lets you create a free business email address at your domain.
If you’re new to WordPress, Bluehost is a great option because it’ll automatically set up WordPress for you.
For more help getting started, read this guide on how to start a WordPress blog.
Now your hosting account’s set up, let’s install the SeedProd plugin to hide your WordPress site until it’s ready.
Step 2: Install the SeedProd Plugin
Let’s install the plugin we’re going to use to hide your WordPress site until it’s ready.
First, head to the SeedProd website and grab your copy of the plugin. You can download the zip file from the Downloads tab in your SeedProd account.

Not sure how to use the zip file? Check out how to install a WordPress plugin if you’ve never installed a plugin before.
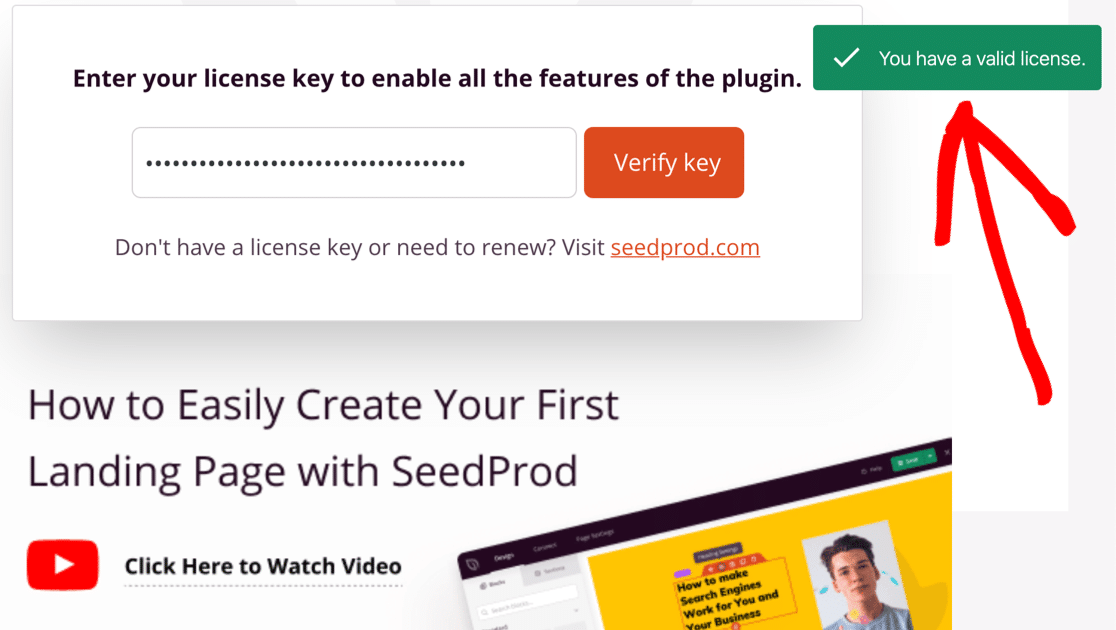
When you activate the plugin, you’ll also want to paste in your SeedProd license key. This unlocks all of the features in the Pro version.
Next, we’ll make the coming soon page that will show up when visitors try to access your new site.
Step 3: Create Your ‘Coming Soon’ Page in SeedProd
In this step, we’re going to use the drag and drop builder to make a completely custom ‘coming soon’ page.
SeedProd pages are totally separate from your WordPress theme, so you can try out different themes on the backend without affecting your ‘coming soon’ page.
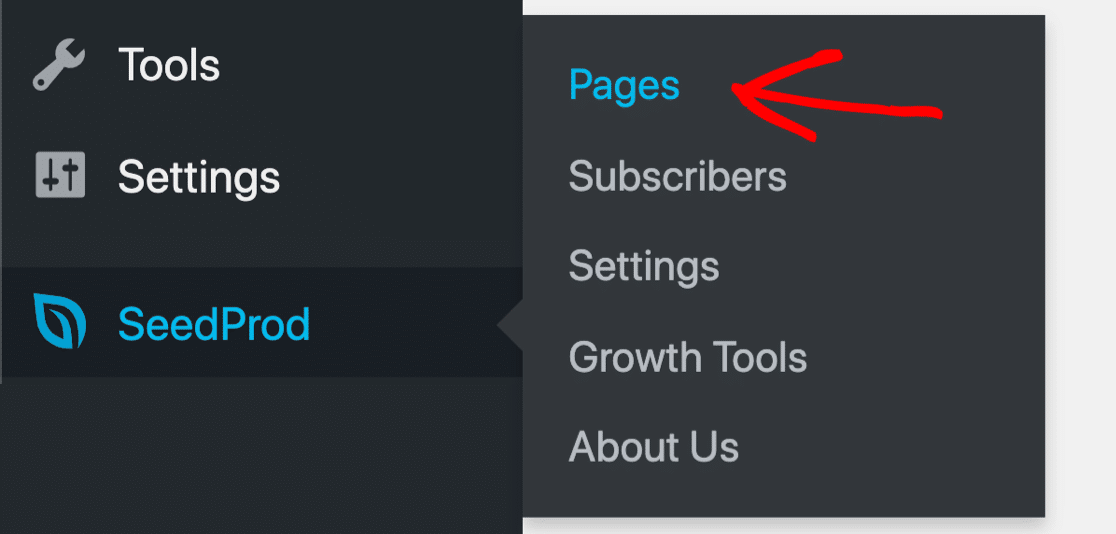
First, look to the left hand side in the WordPress dashboard. To start making your page, click SeedProd » Pages.
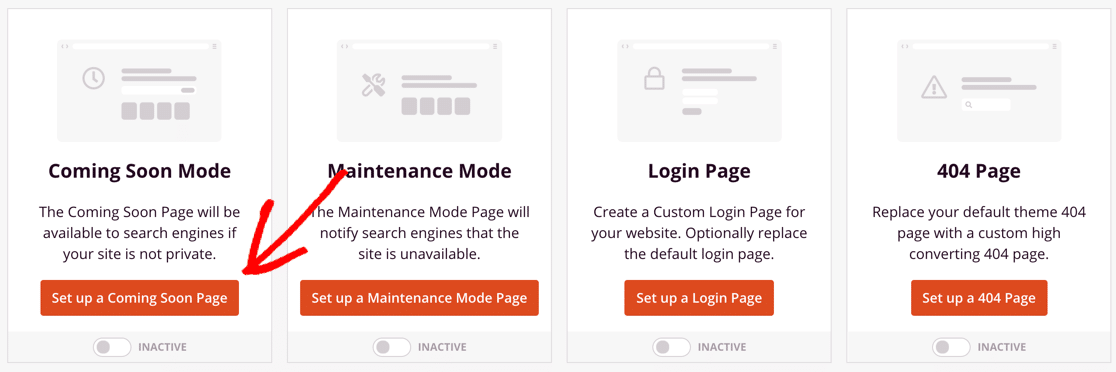
At the top, you’ll see different types of templates you can use in SeedProd:
- Coming Soon
- Maintenance Mode
- 404 Page
- Login Page
- Landing Page
To hide your WordPress site until it’s ready, let’s set up a Coming Soon page.
Now choose your favorite design from the templates and click on it to open it up full-size. In this example, we’ll use the City Coming Soon Page template.

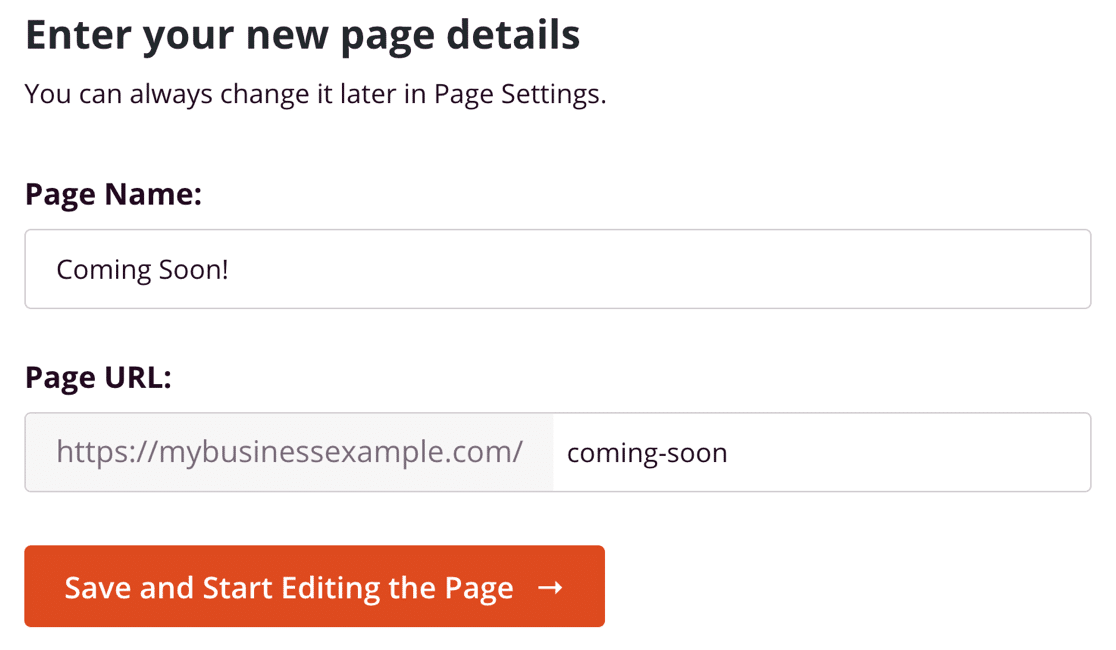
In the popup, type in a name for your page. SeedProd will automatically create the URL, but you can customize it here if you want to.
Now we’re ready to customize your new page.
Step 4: Customize Your Coming Soon Page
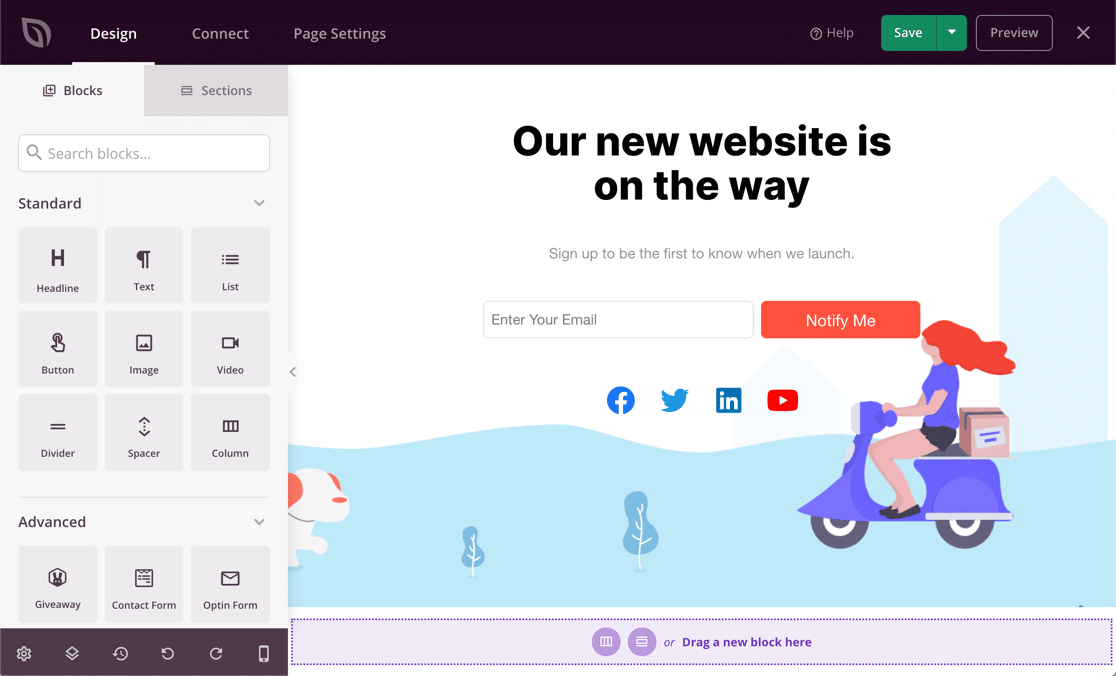
Now we’re in the SeedProd page builder. Let’s take a second to look at how it works.
On the left, you’ll see all of the different elements you can drag onto your page. On the right, there’s a live preview. You can click any part of the preview to edit it.
You can make a page that matches your new site, or create something totally unique.
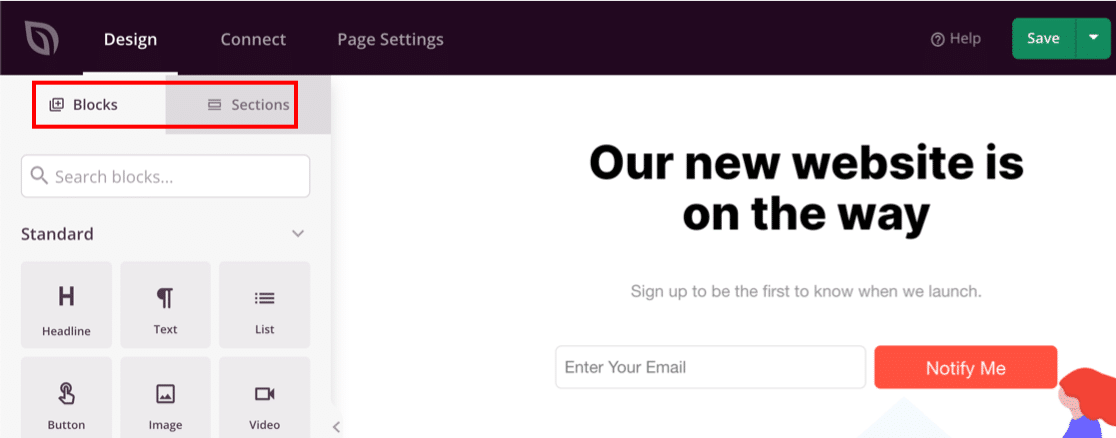
SeedProd lets you add 2 different types of content to your page: Blocks and Sections. You can access these using the tabs at the top left.
You can easily build your page using blocks for:
- Text
- Background images
- Forms
- Call-to-action buttons
- Countdown timers
- Social media links
- Videos
- RafflePress giveaways
- FAQs
- Progress bars
- And more.
Just pick an item and drag it over to your page. When you click on the block, you can easily tweak the colors and settings.
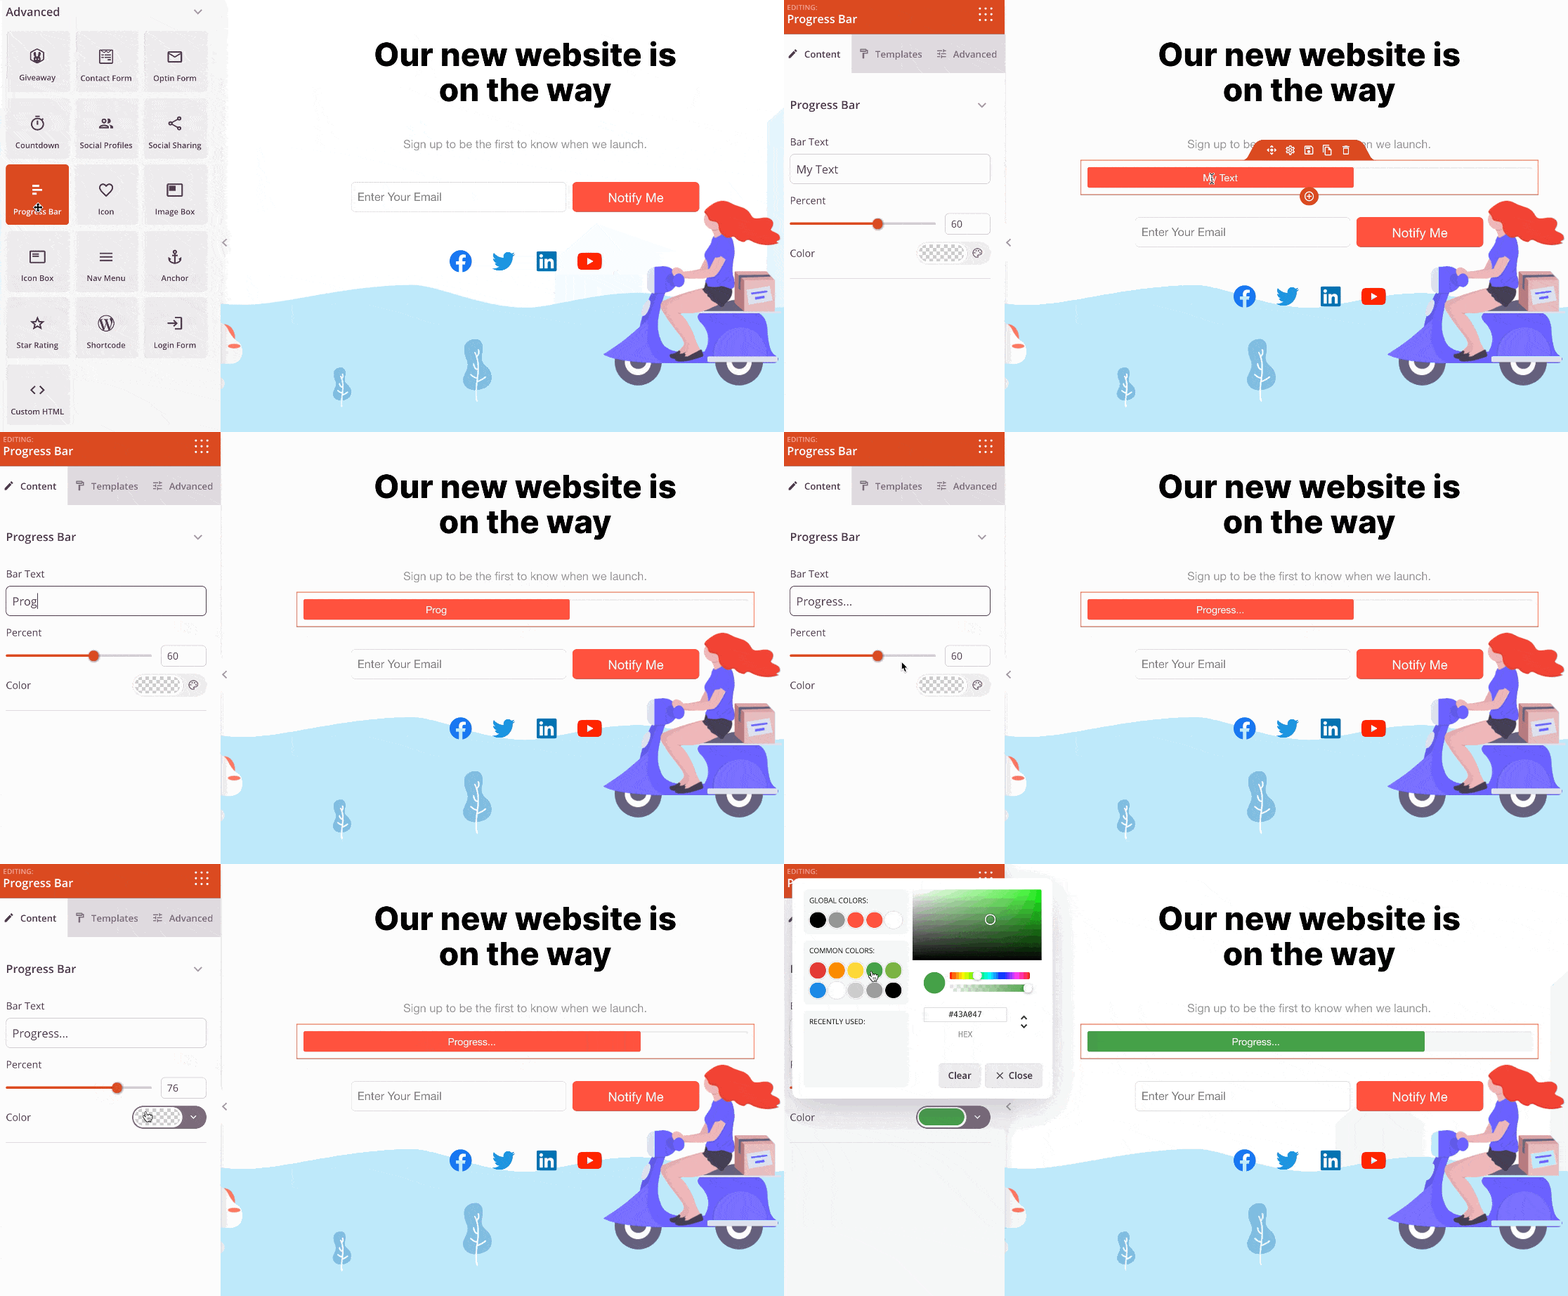
Let’s try adding a countdown timer so we can tell people when the site will launch. We can easily do this without writing any HTML or PHP code.
First, scroll to the Advanced blocks and drag the Countdown timer onto your page.

Next, click on the countdown block to open up the settings.
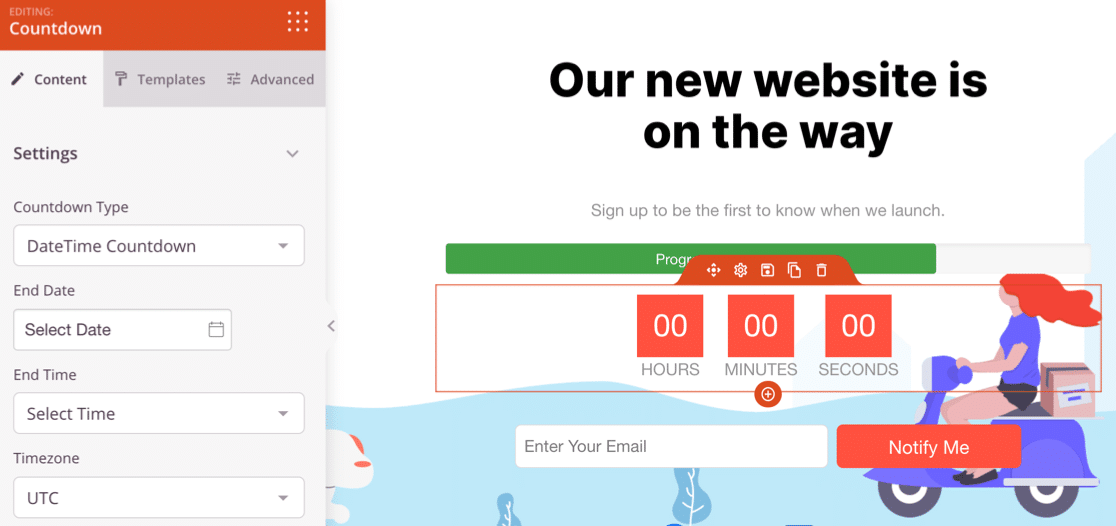
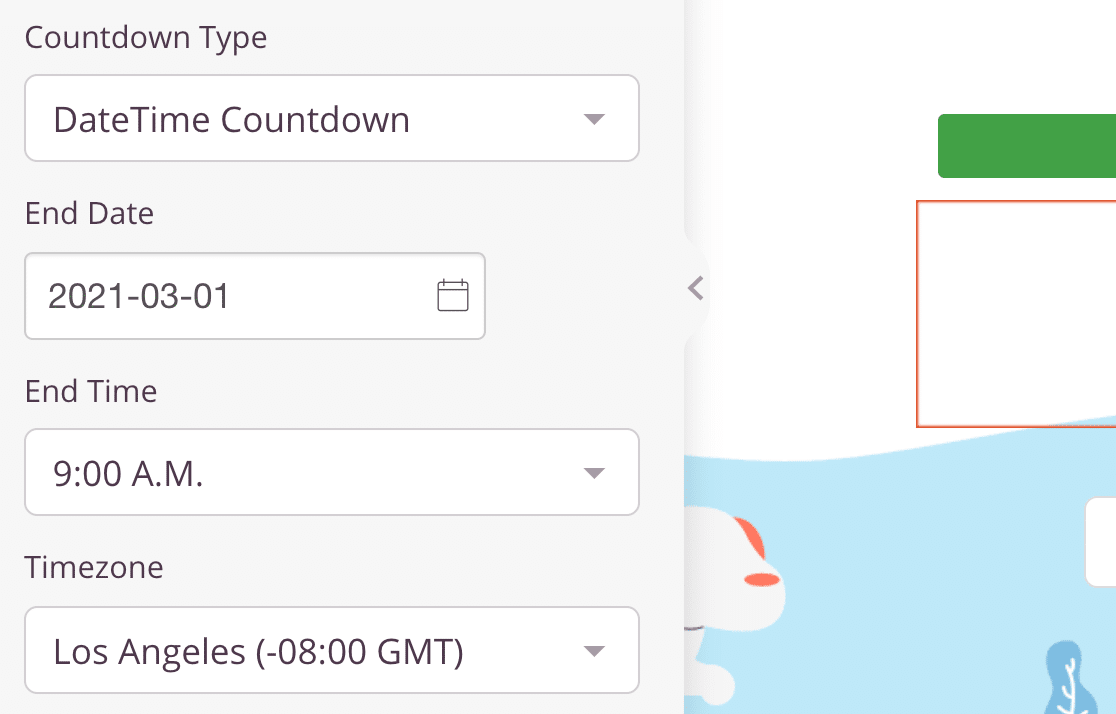
Now use the settings on the left to choose a countdown style. You can also set up the actual launch date for your website.
Now let’s remove the parts of the page we don’t need.
We can delete any element by hovering over it and clicking the trash can.
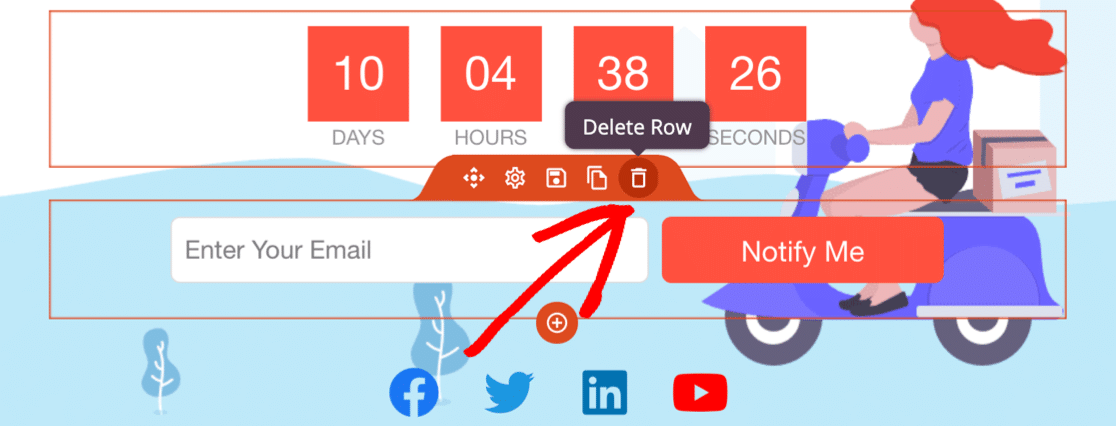
Continue to customize your page until it’s ready to publish. Don’t forget to hit the green Save button at the top to save your progress so far.

Now let’s look at some of the settings you can tweak on your new WordPress coming soon page.
Step 5: Choose When to Show Your Coming Soon Page
Many maintenance mode plugins have 1 coming soon page that shows up for your entire site.
SeedProd is more advanced because it lets you control exactly which pages you want to hide.
For now, you’ll probably want to hide your entire site until it’s ready. But in the future, you might want to hide specific pages or posts. So learning about this setting will be really handy for future development.
To control when your coming soon page shows up on your website, click Page Settings at the top of the SeedProd builder.
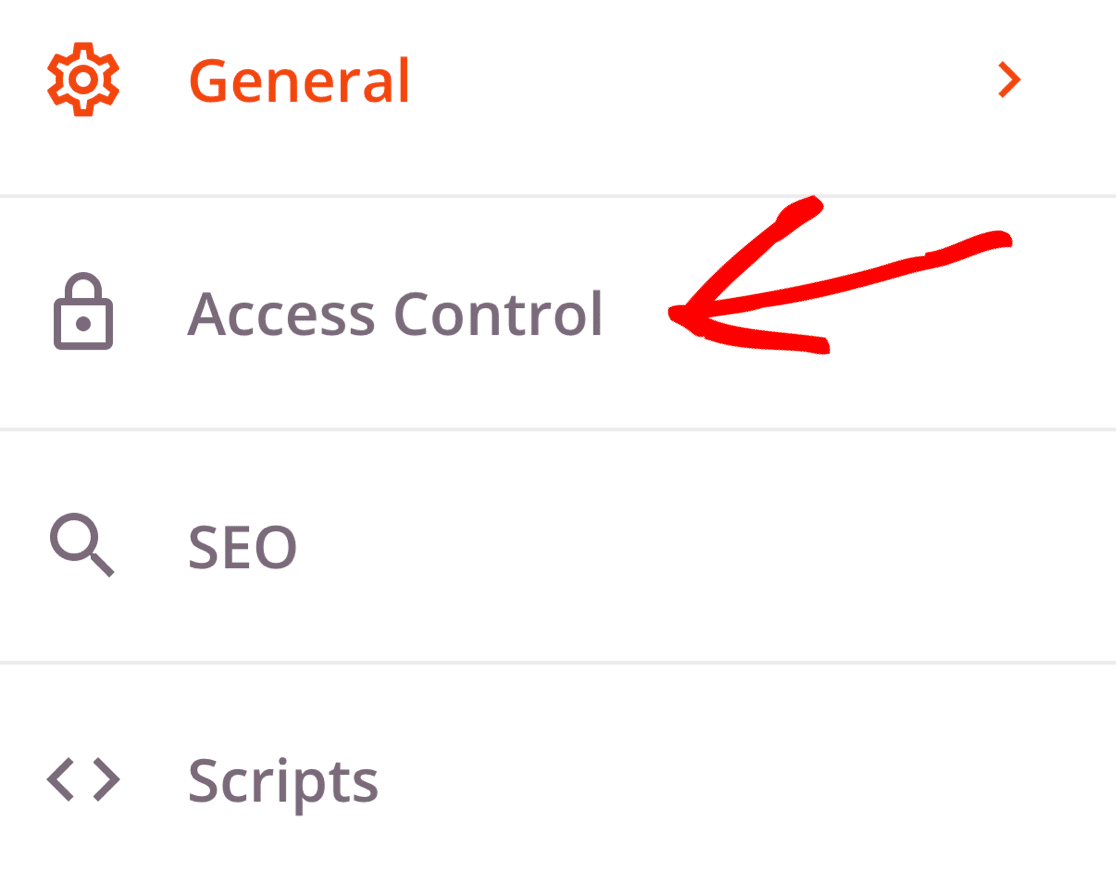
Then click Access Control to open up the settings.
Now let’s scroll all the way down to the Include/ Exclude URLs section. This is where we’ll tell SeedProd how to hide your site.

Here’s what the access control settings mean:
- Show on the Entire Website: This is the default setting, and it’s the best choice if you want to hide your WordPress site until it’s ready. Anyone who tries to view any page on your site will see the coming soon page on the front end.
- Show on the Home Page Only: You can use this to show your new page only on the homepage of your website. All of the other pages and posts will still be in public view.
- Include URLs: Use this setting if you want to choose specific pages for your coming soon page to show. For example, if you’re just writing new content for one of your pages, you can hide just that 1 page and leave everything else on the site visible.
- Exclude URLs: This setting does the opposite of Include URLs. It hides the entire site except for the pages you specify. Choose this if you want to keep certain pages accessible while hiding the rest.
Allowing Access to a Hidden WordPress Site
If you’re working on a website for a customer or a friend, you might want to give them access so they can review your progress.
This is easy in SeedProd too. It lets you hide your WordPress site until it’s ready while also allowing specific people to see the real site.
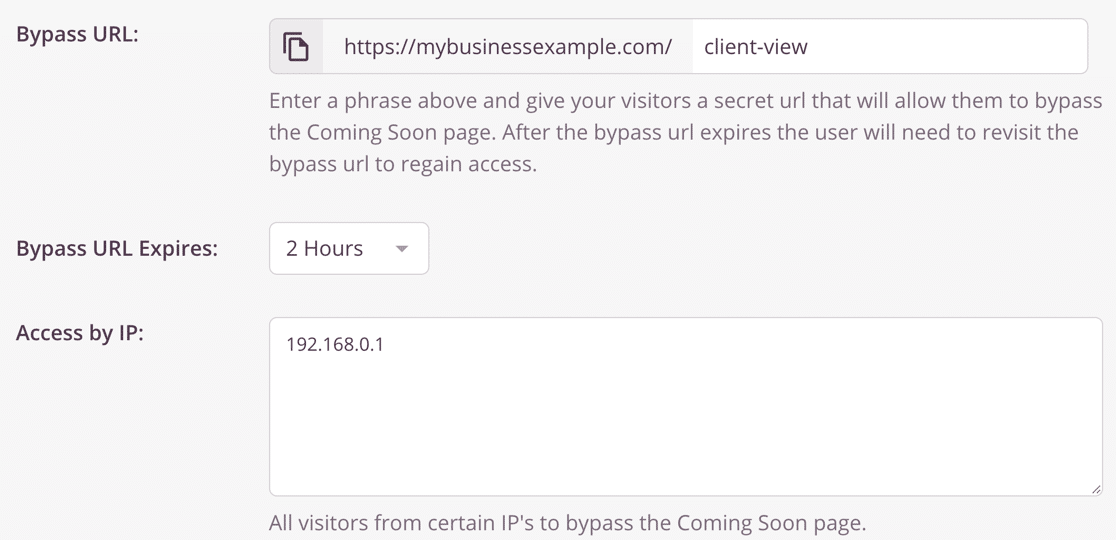
There are 3 ways to let people bypass the coming soon page:
- Bypass URL: The bypass URL is a secret URL that lets your visitor get past your coming soon page. You can share this URL with anyone that needs to see the site. Bypass URL expires determines how long someone can view the site after visiting your secret bypass URL.
- Access by IP: If you know your customer’s IP address, you can type it here so that they don’t see the coming soon page.
- Access by Role: With this setting, you can allow logged-in WordPress users to see the real site if they have a matching user role. For example, if you want to allow your content writers to see the site, and they’re set up as Editors, add the Editor role here.

Now would be a great time to check out the rest of the coming soon page settings if there’s anything else you need to tweak.
All set? Click the green Save button at the top to save your settings.
Step 6: Hide Your WordPress Website
Great! Now the page is set up and we’re ready to hide your WordPress site until it’s ready.
To start, click the dropdown next to the Save button and select Publish.

Next, click See Live Page to see the coming soon page as your visitors will see it.
Finally, click the X at the top right corner to exit back to the WordPress dashboard. The final step is to enable the page in the SeedProd » Pages menu.

Ready to hide your site? Just click the switch under Coming Soon Mode so that it’s Active.
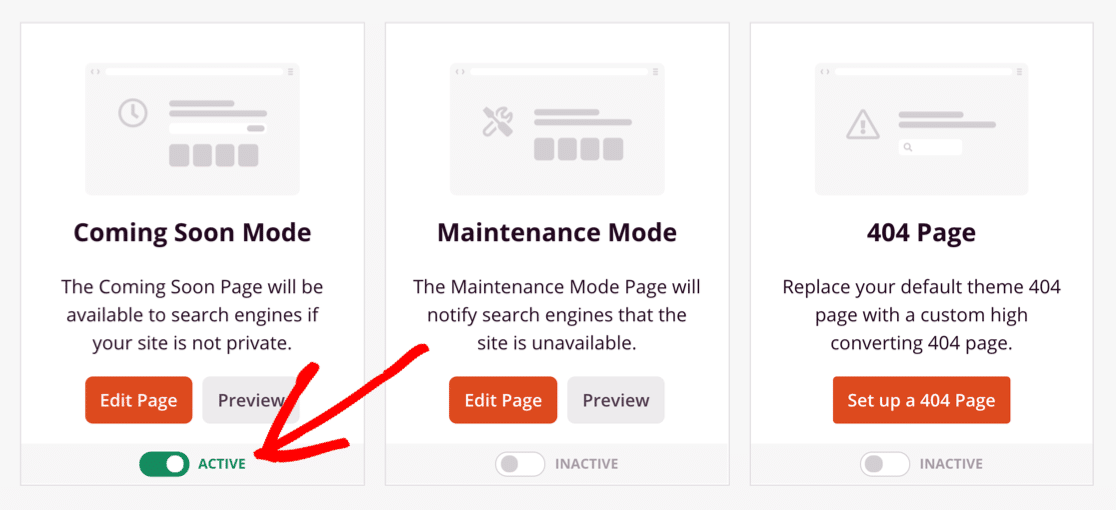
And that’s it. Now you know how to hide your WordPress site until it’s ready with SeedProd!
Create Your WordPress Contact Form Now
Next Step: Add a Form to Your Landing Page
Did you know that you can easily add contact forms to your landing page? Adding a contact form means that anyone can get in touch with you even when you’ve hidden your WordPress site.
To start, follow our guide to creating a simple contact form that you can easily embed using SeedProd.
If you’re not sure which form builder plugin to use on your new website, we made a guide to WPForms Lite vs Contact Form 7 that will help you decide.
Ready to build your form? Get started today with the easiest WordPress form builder plugin. WPForms Pro includes lots of free templates and offers a 14-day money-back guarantee.
If this article helped you out, please follow us on Facebook and Twitter for more free WordPress tutorials and guides.

