


AI Summary
Spacing is a crucial part of form design, and in WPForms, the spacing between fields, titles, and other aspects is set by default to offer the optimal experience to your site visitors.
That said, every website is unique. So, if you want to set custom spacings between fields for better alignment with your specific style, you’re in the right place.
In this article, I’ll show you step-by-step how you can force space between fields in WPForms. While you’ll need to work with a bit of code here, you don’t need to have any prior coding knowledge to follow my method.
How to Adjust the Space Between Form Fields in WPForms
Every spacing change in this guide follows the same shape. You decide which part of the form you want to move, copy the matching CSS, and then pick where to paste it based on whether the change should affect one page, one form, or every form on your site.
Step 1: Install the WPForms Plugin
For anyone starting fresh, WPForms is a drag-and-drop form builder with 2,100+ ready-made templates, so you can usually start from something close to what you need rather than an empty canvas.
If you’ve never built one before, this guide on creating a simple contact form is the fastest way in. What I like most about WPForms for this particular job is how much you can change before you ever touch code.
The visual style controls handle colors, borders, field sizes, and container padding, which covers a surprising amount of what people assume requires CSS.

To get started, buy the Pro license. Then, install WPForms on your website. If you need help, follow these instructions on how to add a plugin to WordPress.
For the examples below I’m using this ready-made survey form template, which has enough fields to make spacing changes obvious.

Step 2: Try the Built-In Spacing Controls First
Before writing any CSS, it’s worth checking whether the visual controls already do what you want. Open your form and head to Settings » Themes in the builder, or click the form inside the block editor to open the same panel there.

Three of those settings change spacing directly:
- Field Styles » Size: This changes field height and, more usefully here, the gap between a label and its input. Switches between Small, Medium, and Large.
- Label Styles » Size: Adjusts label text size, which shifts how much room each label occupies above its field.
- Container Styles » Padding: Sets the space inside the form’s outer edge. Raise it when the form feels like it’s pressed against a background or border.

There’s an honest limitation to flag here, though, because none of these controls set the vertical gap between one field row and the next, which is the single most common thing people want to change.
That gap is fixed at 15px above and below every field, and CSS is the only way to move it. If the built-in controls got you close enough, you can stop here. If the rows themselves are still too tight or too loose, keep reading.
Step 3: Copy the CSS for the Spacing You Want to Change
Each snippet below comes in two shapes, one that applies to every WPForms form on your site and one that targets a single form by its ID, which you’ll want when one form needs different spacing from the rest.
To find a form’s ID, go to WPForms » All Forms and hover over the form name. Or, you can also open the specific form, click on embed, and copy the form’s shortcode from the builder directly.

WPForms already applies its own styles to these elements, so you’ll often need !important for your values to win. I’ve included it in the snippets below where it’s genuinely needed.
Space Between Fields (Vertical Gap)
This is the one most people are after. WPForms gives every field 15px of padding on the top and bottom, so adjacent fields sit 30px apart. Here’s the default spacing on my survey form:

To change it across all your forms:
.wpforms-container .wpforms-field {
	padding-top: 30px !important;
	padding-bottom: 30px !important;
}
Raise both values to push the fields apart evenly, or lower them to tighten the form up. If you only want to grow the gap in one direction, set just padding-top and leave the bottom alone.

For a single form, add the ID:
#wpforms-2294 .wpforms-field {
	padding-top: 30px !important;
	padding-bottom: 30px !important;
}
Space Below the Form Title
By default your page’s H1 sits above the form rather than inside it. WPForms puts 35px below the form title before the first field begins.
That’s a fair bit more than the gap between fields, which is intentional, because the title is a heading and headings earn more room than the content under them.

If you’d rather the title lived inside the form container, click the embedded form in your editor and toggle on Show Title in the right-hand panel.

You’ll probably want to hide the page H1 at that point so the title doesn’t appear twice. Click the H1 and press the eye icon that pops up.

Here’s the title spacing before any changes:
To control it, zero out the container padding and set the title margin to whatever you actually want:
.wpforms-container-full .wpforms-head-container {
	padding-bottom: 0 !important;
}

.wpforms-container-full .wpforms-title {
	margin-bottom: 15px !important;
}
Leave padding-bottom at 0 and change only margin-bottom.
Setting it to 15px makes the title sit the same distance from the first field as the fields sit from each other.
This looks tidy when you want the form to read as one even block. And here’s the result on my survey form:

The single-form version, with the # on both selectors:
#wpforms-2294 .wpforms-head-container {
	padding-bottom: 0 !important;
}

#wpforms-2294 .wpforms-title {
	margin-bottom: 15px !important;
}
Space Between a Label and Its Field
This gap trips people up because it looks like field spacing but it’s controlled separately.
With modern markup, WPForms sets it through a CSS variable called --wpforms-field-size-input-spacing, which defaults to 15px.
Overriding the variable is cleaner than fighting the label margin directly, since it keeps WPForms’ own sizing logic intact:
.wpforms-container-full {
	--wpforms-field-size-input-spacing: 8px;
}
Drop it to around 8px and each label tucks in closer to its input, which visually binds the two together.
That’s genuinely useful on longer forms, because tight label-to-field spacing paired with wider gaps between rows makes it much easier to tell which label belongs to which box.
If you’d rather not touch CSS for this one, the Field Styles » Size control from Step 2 changes the same variable.

Space Between Side-by-Side Fields
When you place fields next to each other using the Layout field or WPForms’ column classes, they’re separated by a 20px gutter. Changing it needs a little care, because the gutter is built from two values that have to agree.
Each half-width column is set to calc(50% - 10px) with a 20px left margin. Change only the margin and your columns will overflow their row. Adjust both together:
.wpforms-container .wpforms-one-half {
	width: calc(50% - 20px) !important;
	margin-left: 40px !important;
}
The rule is that the width subtraction should be half your gutter. A 40px gutter means subtracting 20px, a 30px gutter means subtracting 15px, and so on.
For more on building these rows in the first place, see the guide on multi-column form layouts.
Space Above the Submit Button
Modern markup controls the submit button’s top margin with its own variable, --wpforms-button-size-margin-top, which is set to 10px by default and looks like this on my form:

So you can set your own value for it and leave everything else alone:
.wpforms-container-full {
	--wpforms-button-size-margin-top: 30px;
}
Giving the button more room than the fields have is usually the right call, since it separates the action from the things being filled in, and the difference shows up immediately:

Reducing or Removing Extra Space
Now, everything above works in reverse, and closing gaps is just as common a request as opening them. To tighten the rows, take the field padding below its 15px default:
.wpforms-container .wpforms-field {
	padding-top: 5px !important;
	padding-bottom: 5px !important;
}
If the gap you’re fighting sits between the form and the content around it rather than inside the form, the culprit is usually the container rather than the fields. Set the container padding to zero and remove the title spacing:
.wpforms-container-full {
	--wpforms-container-padding: 0px;
}

.wpforms-container-full .wpforms-head-container {
	padding-bottom: 0 !important;
}
Be careful about going too tight, because once rows sit closer together than the gap between a label and its own field, people start misreading which label goes with which input, and that shows up as bad data rather than complaints. I’d keep at least 8px of padding on each field.
Step 4: Choose Where to Add Your CSS
The same CSS behaves differently depending on where you paste it, and picking the right spot saves you from either repeating yourself on every page or accidentally restyling forms you meant to leave alone.
| Where you add it | What it affects |
|---|---|
| WPForms Builder | That one form, everywhere it’s embedded |
| Block Editor | That one embed, on that one page |
| WPCode | Every form on your site |
Method 1: The WPForms Builder
Open your form and go to Settings » Themes, then switch to the Advanced tab. You’ll find a Custom CSS box there. Paste your snippet in, then click Save.

Styles added here are stored with the form itself, so they follow it to every page. That applies whether you embed it with the WPForms block, the shortcode, or the Divi module.
For most people this is the right default, because it means one change instead of one change per page. The full set of options is covered in the docs on styling your forms in the form builder.
Method 2: The Block Editor
Click the form block in your page or post to open the styling panel on the right, then open the Advanced section and add your CSS there.
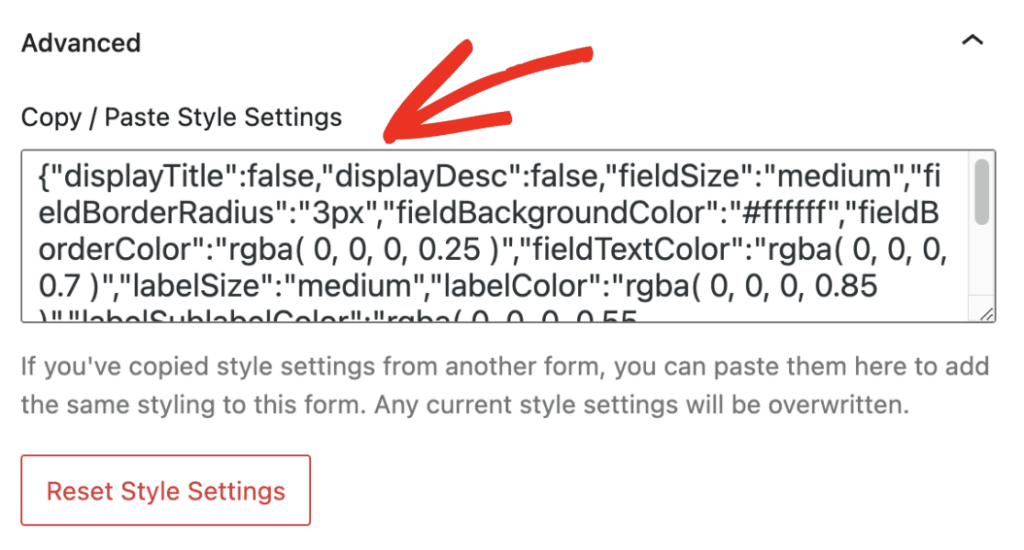
Publish or update the page to apply it. The difference here is reach, since anything you add in the block editor affects only that specific embed.
You can run one contact form site-wide with roomy spacing on a dedicated contact page and tighter spacing in a sidebar, without duplicating the form.
Note that this panel only appears for forms embedded with the WPForms block, so a form dropped in via shortcode won’t have it. The docs on styling your forms in the block editor go through the rest of the controls.
Method 3: WPCode (Sitewide)
The two methods above are scoped to a single form or a single embed, which is exactly what you want most of the time. But if you’re standardizing spacing across a dozen forms, setting it once sitewide beats opening each one.
Sitewide CSS also survives a theme change, which CSS added through your theme’s customizer does not. WPCode is a free plugin that makes this straightforward. From your WordPress admin menu, go to Plugins » Add New.

Search for WPCode, then click Install Now next to it in the results. Once installation finishes, the button changes to Activate. Click it.

With WPCode active, go to Code Snippets » + Add Snippet.

Click Use Snippet under the Add Your Custom Code (New Snippet) option.

Give your snippet a name, then choose CSS Snippet from the Code Type dropdown. This matters, because WPCode won’t apply the code correctly if it’s still set to PHP.

Paste your CSS in and leave the insertion settings underneath the Code Preview at their defaults. None of the snippets in this guide need anything different.

Save the snippet, then activate it with the toggle at the top right. Nothing changes on your site until that toggle is on, which catches almost everyone the first time.

Since this applies to every form, use the form ID version of your snippet if you want to exclude some. You can also add your own class names to specific fields and target those instead, which is covered in the docs on custom CSS classes.
How Much Space Should You Put Between Form Fields?
The main principle is proximity, which means a label should sit closer to its own field than that field sits to the next one.
Equal spacing everywhere leaves people guessing which label belongs to which box, and that’s exactly why the label-to-field variable defaults to 15px while adjacent fields sit 30px apart.
A common guideline among design systems is to space fields at 50% to 75% of the field height. WPForms fields are 43px tall at the Medium size, which puts the recommended range at roughly 21px to 32px.
The 30px default sits comfortably inside it, so if you’re unsure whether to change anything, the answer is probably no. A few more things worth keeping in mind:
- Give sections more room than fields: When a form has distinct groups like contact details and payment details, double or triple the gap between groups so the structure is visible at a glance.
- Keep mobile and desktop consistent: WPForms handles responsive spacing already, so resist adding mobile-specific gaps unless something is genuinely broken.
- Change one value at a time: Spacing problems are usually one culprit, not five. Adjust the field padding, look at the form, then move on.
For more on the design side of this, our guide on form design best practices goes further into layout and field order.
FAQs on Form Spacing in WPForms
Form spacing in WPForms comes up a lot in support, usually around gaps that look too wide or CSS that won’t take effect. Here are the questions I see most often.
How do I reduce the space between fields in WPForms?
Lower the field padding below its 15px default. Use .wpforms-container .wpforms-field { padding-top: 5px !important; padding-bottom: 5px !important; } and adjust from there. Keep at least 8px so labels stay visually attached to their own inputs.
Why is there so much space between my form fields?
Each field carries 15px of padding top and bottom, so neighboring fields sit 30px apart before your theme adds anything. If the gap looks bigger than that, your theme is probably applying its own margins to form elements or paragraphs inside the form container.
Can I change form spacing without using CSS?
Partly. Field Styles » Size changes label-to-field spacing and Container Styles » Padding changes the space inside the form’s edge, both without code. The vertical gap between field rows has no visual control, so that one needs CSS.
How do I add space between two fields on the same line?
Side-by-side fields use a 20px gutter built from a calc() width and a matching left margin. Change both together, keeping the width subtraction at half the gutter, or the columns will overflow their row.
Why isn’t my spacing CSS working?
Most often it’s a missing # on a form ID selector, or WPForms’ own styles taking priority. Add !important before the semicolon and confirm your selector matches the form. Our guide on troubleshooting CSS that isn’t working covers the rest.
How do I center a form in WPForms?
That’s a container width question rather than a spacing one, so the snippets here won’t do it. Setting a max-width on the form container with margin: 0 auto is the usual approach.
Next, Customize the Rest of Your Form Design
Field and label spacing is one of the few parts of form design that still benefits from a line or two of CSS, but almost everything else is point-and-click in the same Settings » Themes panel you used above. Our guide on form styling with block editor walks through the full set of controls.
If you’re rethinking layout rather than just spacing, designing form layouts covers column structure and field order, and how to style contact forms in WordPress is a good next read for contact forms specifically.
Style Your WordPress Forms Now
Ready to build your form? Get started today with the easiest WordPress form builder plugin. WPForms Pro includes lots of free templates and offers a 14-day money-back guarantee.
If this article helped you out, please follow us on Facebook and X (Twitter) for more free WordPress tutorials and guides.





