AI Summary
Do you want to set an automatic expiration date on a WordPress form? Adding an expiration date to a form is useful if you need to set a response deadline.
Whether you’re running a limited-time promotion or collecting event registrations, it’s crucial to ensure that your form stops accepting submissions after a certain date.
In this article, I’ll explain how to schedule a form to automatically open and close on your chosen dates and close your form when you reach the maximum number of entries.
Create a Form With Expiry Date Now 📆
How to Add an Expiry Date to a Form with WPForms
You can easily set a deadline in your WordPress form using the WPForms plugin and the date/time picker field. Follow the steps below to get started immediately:
1. Install the WPForms Plugin
Setting your forms to expire on a given date is easily achieved with the right tools. To create an automatically expiring form, the quickest way is to get the WPForms Pro license.
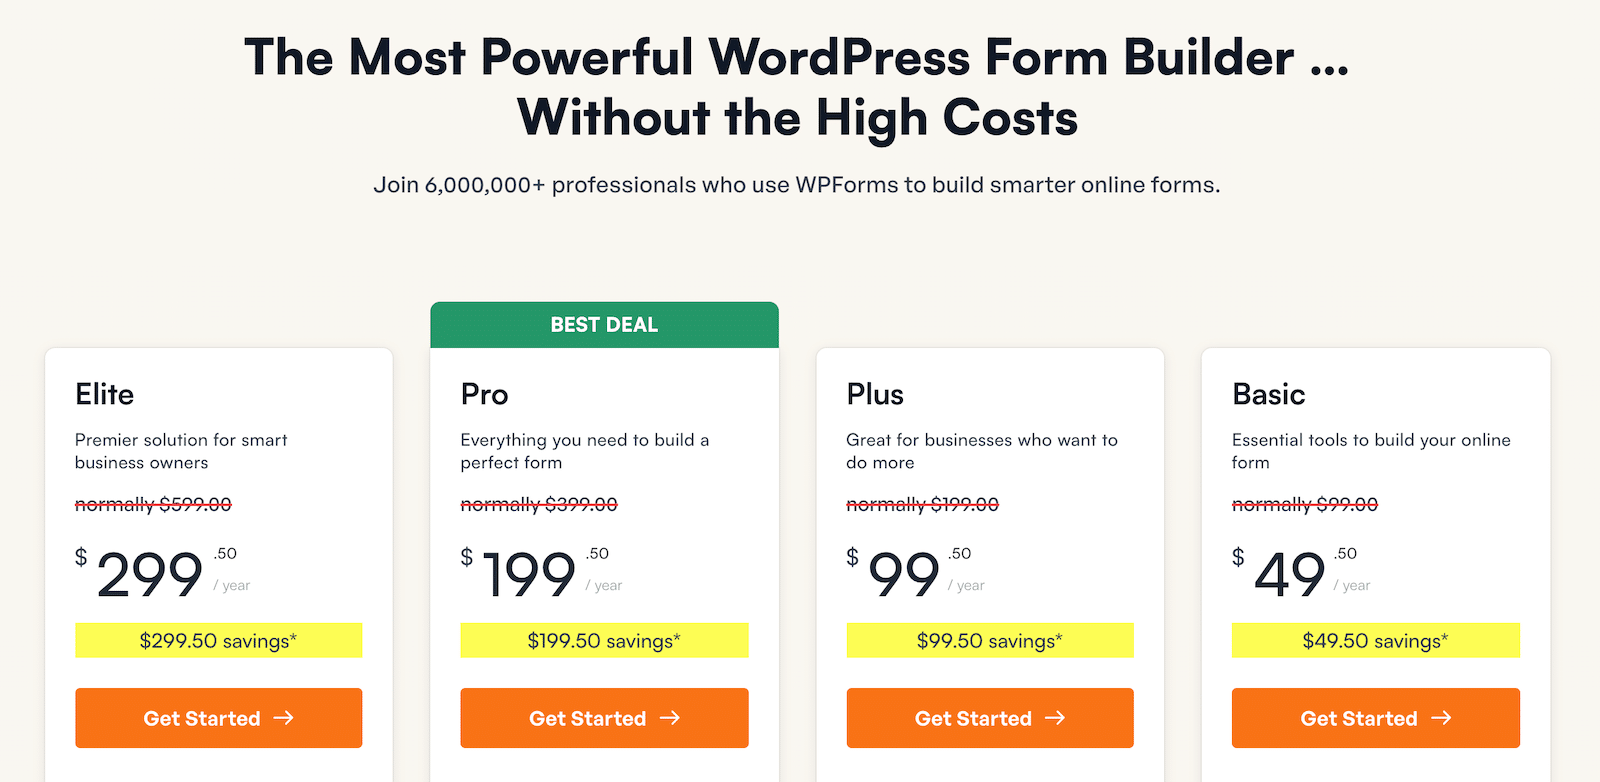
When you’ve purchased your license, it’s time to install the WPForms plugin. If you need help installing the plugin, jump over to this guide on how to install a plugin in WordPress.
2. Install the Form Locker Addon
Next, you’ll want to install and activate the WPForms Form Locker addon, which will enable the form scheduling features on your form. To do this, go to WPForms » Addons.
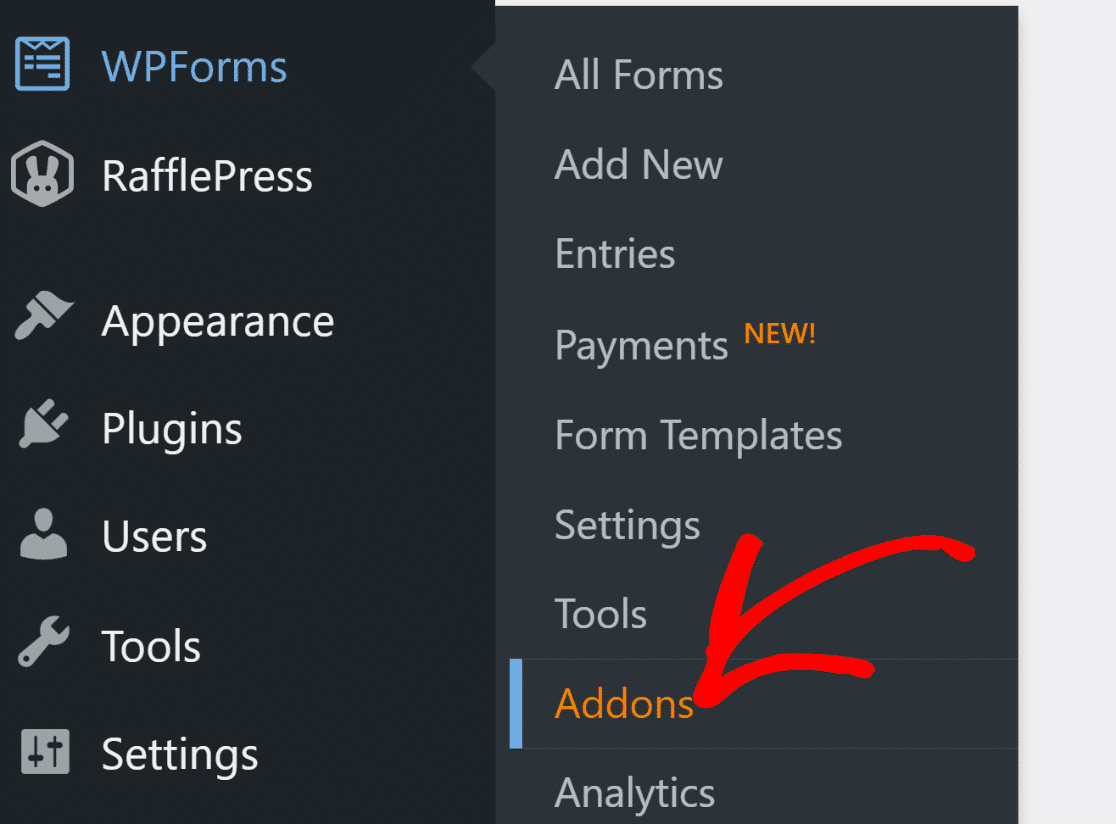
Now, look for the Form Locker addon inside the addons page. You can also look it up by using the search box.
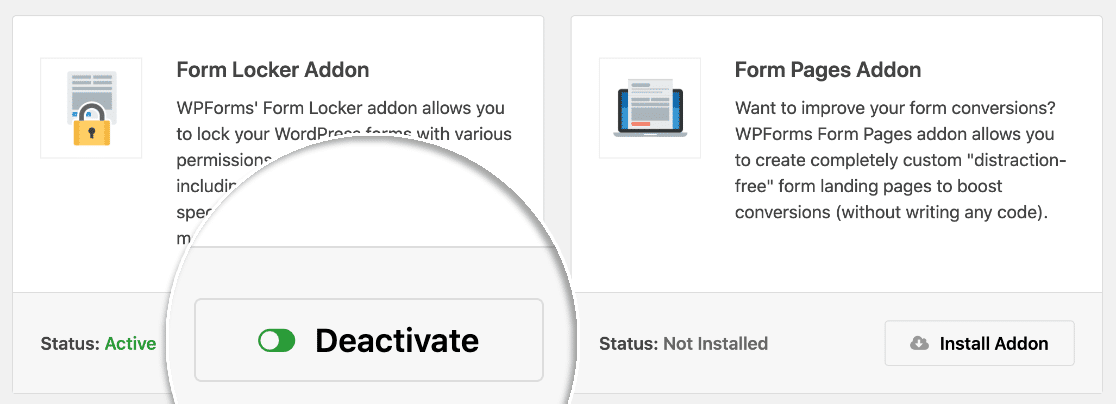
Click the Install Addon button under the Form Locker Addon and click Activate.
You’ll know that it’s active when the switch here turns green.
In this example, I’ll create a new job application form. I’m going to set a time limit on the form so that it automatically closes on the submission deadline.
3. Choose a Form Template
Creating a job application form with WPForms is really easy. First, go to WPForms » Add New.
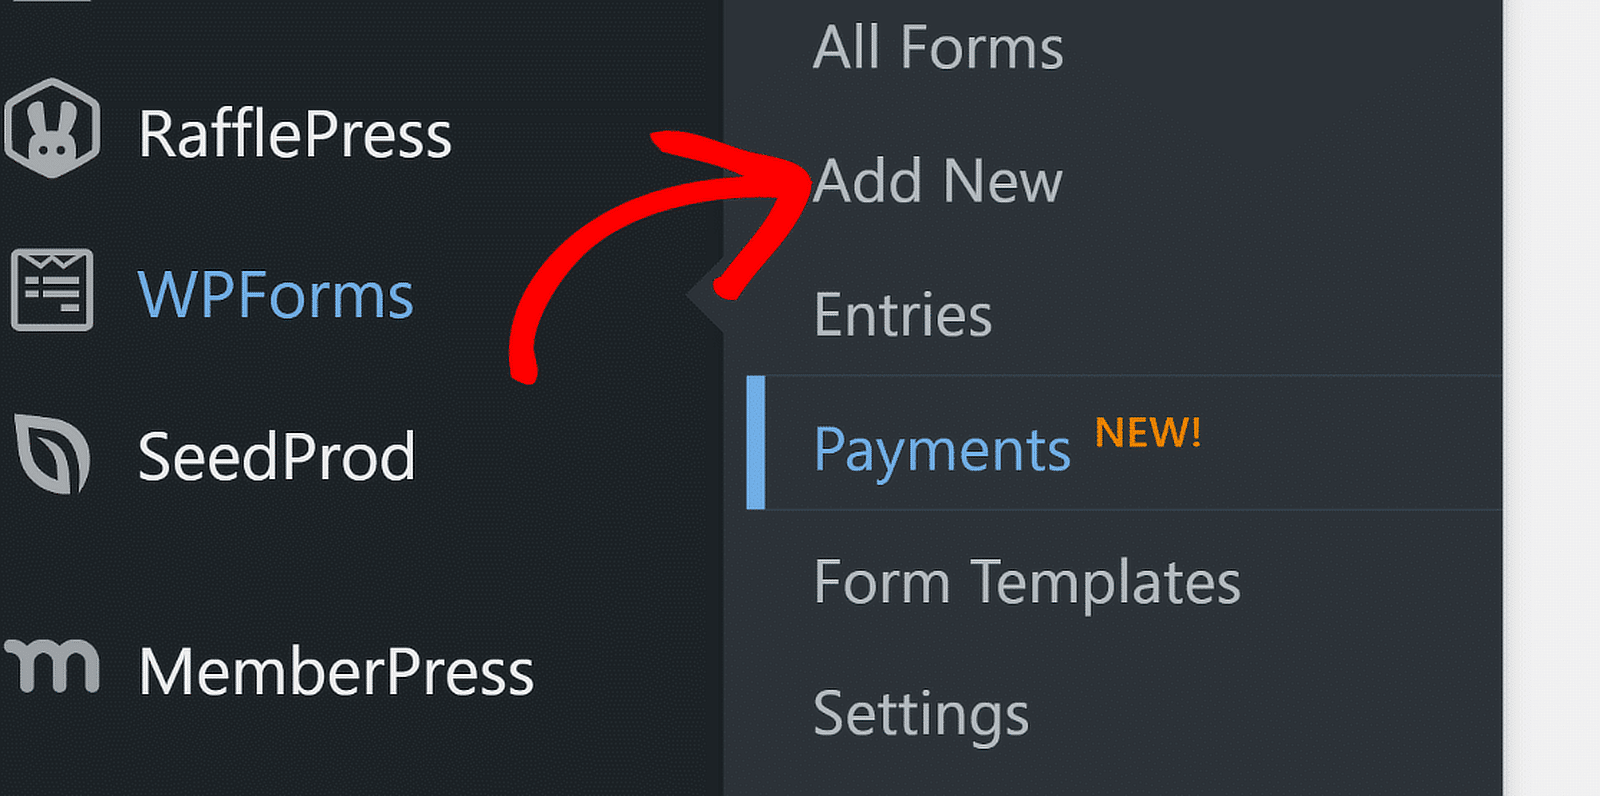
After that, you can give a name to your form so you can easily find it later on your dashboard. Plus, you’ll need to select a template.
WPForms comes with 2,000+ WordPress form templates to help you get started. This makes the process a lot faster.
For this tutorial, I’ll use the Job Application Upload Form template.
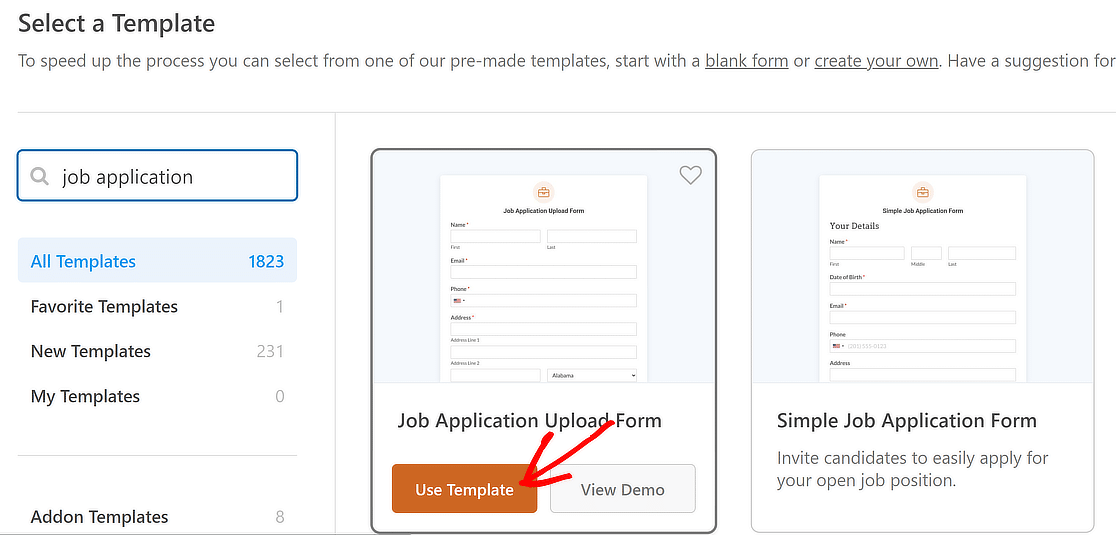
Once the form opens up, you’re free to customize it any way you like.
You can add additional fields to your form by dragging them from the left-hand panel to the right-hand panel.
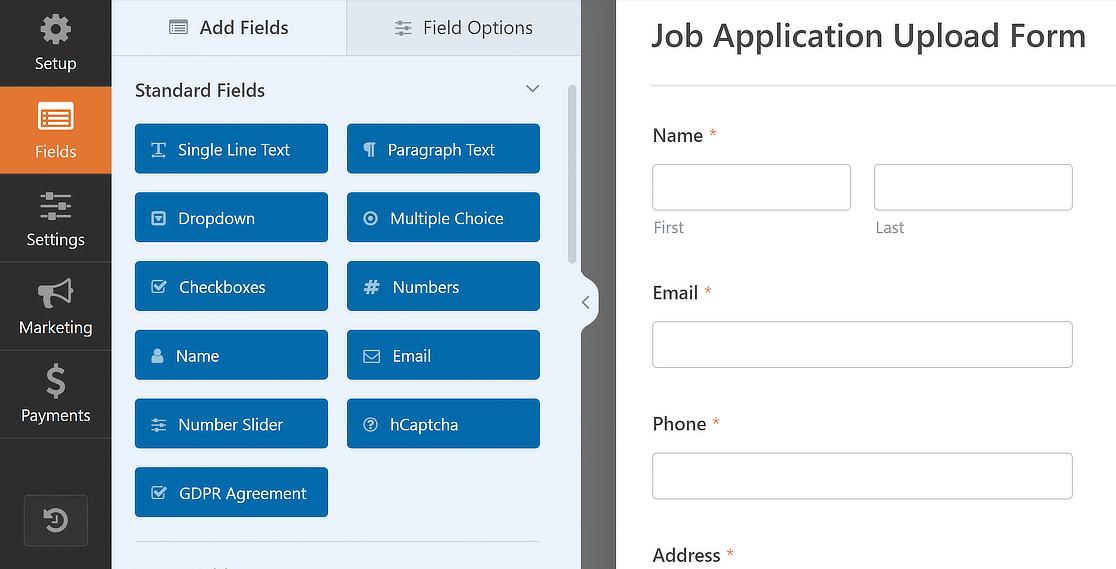
You can also click on a form field and drag it to a different place if you want to reorder the fields.
When your form looks the way you want it to, click Save at the top of the form builder window.
4. Set an Expiration Date
Now, we can set the form expiry date.
This will automatically set the deadline so that no form submissions can be sent after our chosen date and time.
On the left, click Settings. and then click Form Locker.
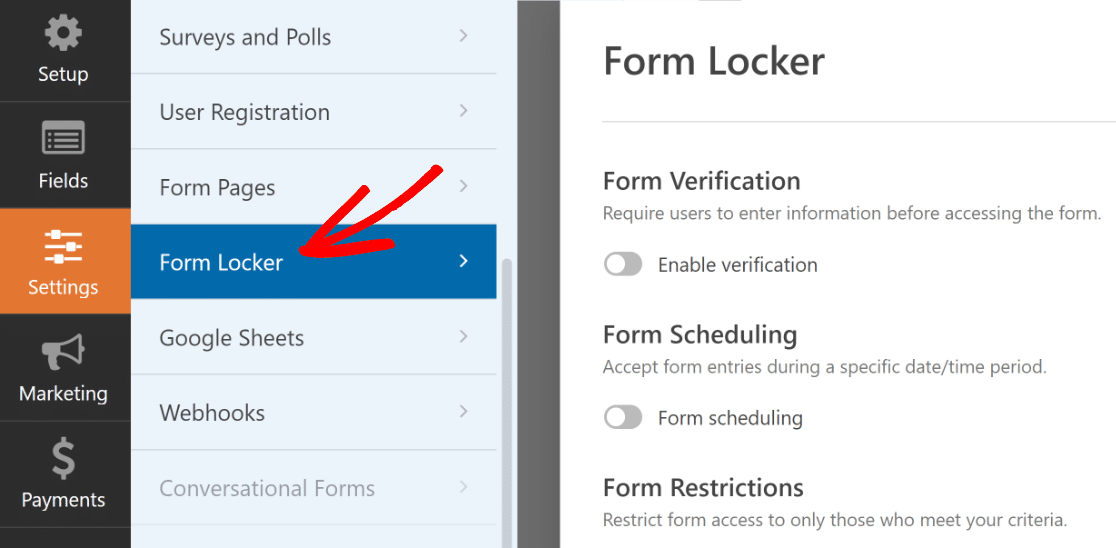
Now, click on the Form Scheduling toggle button.
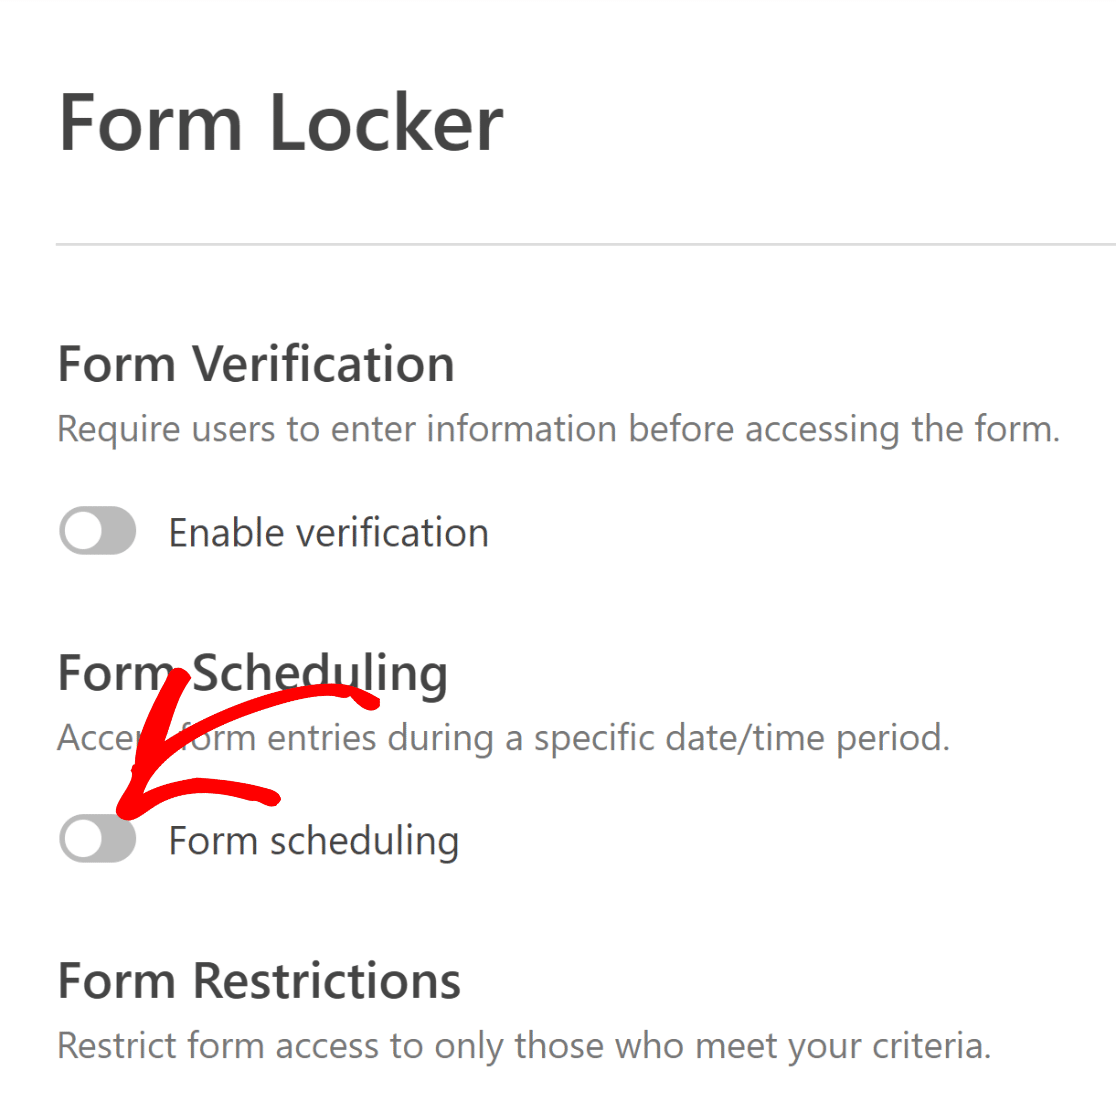
You’ll now see additional options for setting the start and end dates for your form.
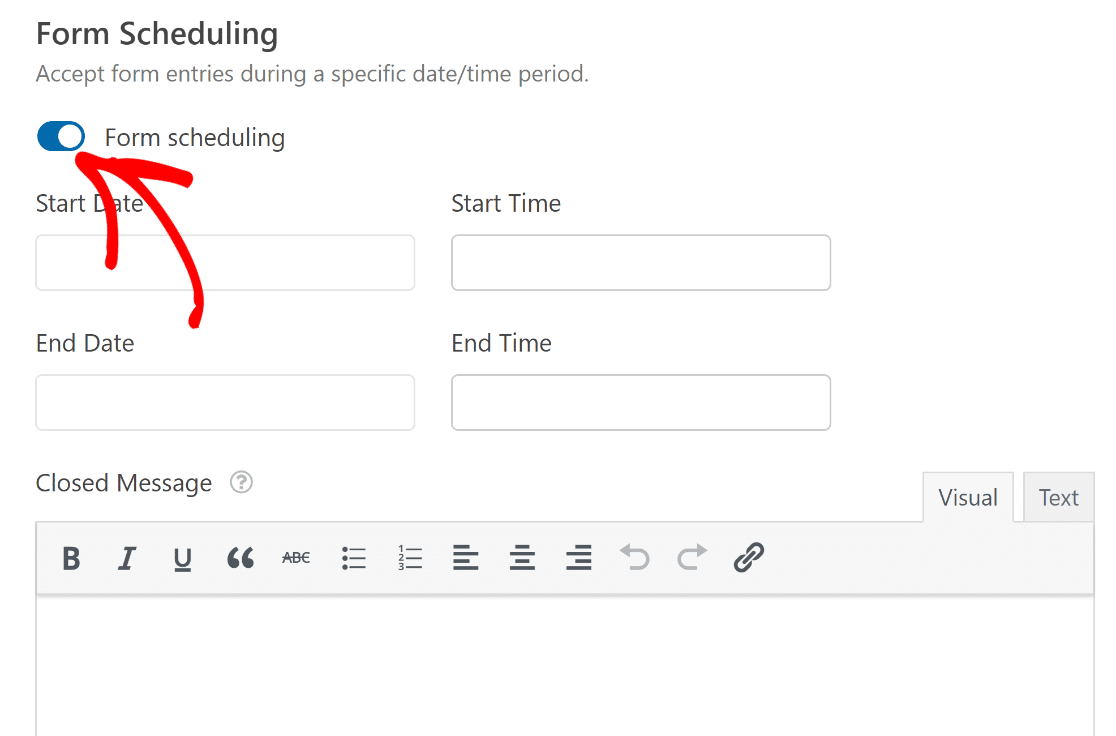
Here’s how to use the scheduling settings:
- Set the Start Date and Start Time to automatically open form submissions on the date you choose. You can click the red X icon to delete the time or date here.
- Set the End Date and End Time to set an end date for form responses.
- Enter a Closed Message that will be displayed if someone visits the form when it’s closed.
You can set just a Start Date and Time, or just an End Date and Time. You don’t have to set both if you don’t want to.
Pro Tip:
Keep in mind that the times here need to match the timezone you’re using in WordPress. This article on changing the date and time format in WordPress will show you how to check all of the time settings on your site.
Before you finish up, it’s a good idea to click Notifications on the left to set up the email notifications.
By default, WPForms will send you an email notification.
You can click Add New Notification if you also want to send your visitors an email when they fill out your form.
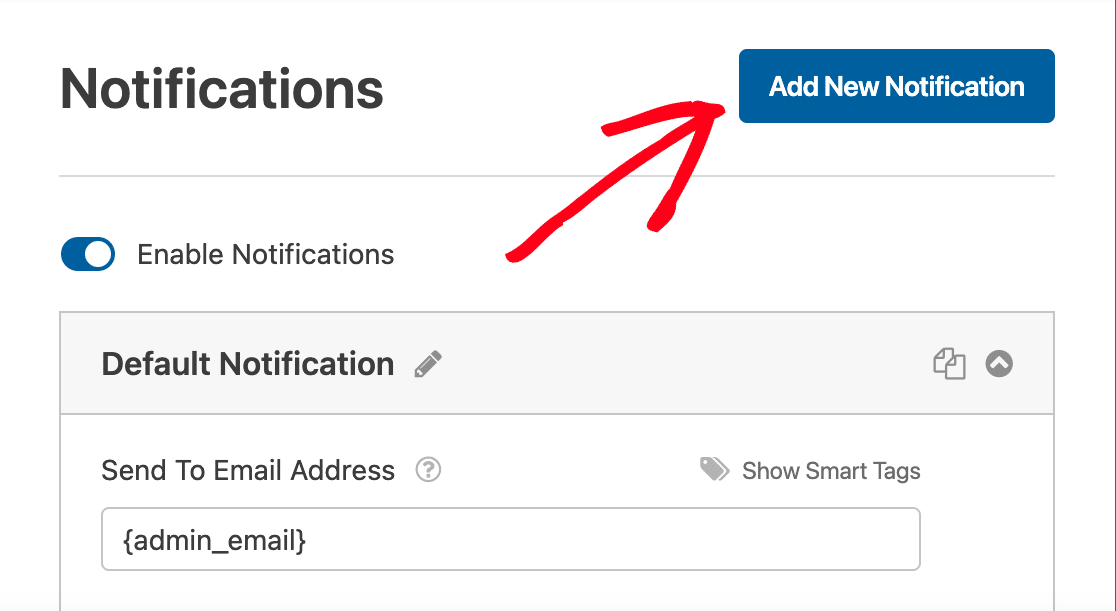
To help set this up, check out this guide on how to create multiple form notifications in WordPress.
We’re ready to save our settings here, so let’s click Save.
5. Publish Your Form On Your Website
WPForms lets you add forms anywhere on your website. You can put forms in pages, posts, or the sidebar.
In this example, I’ll create a new WordPress page for our new form. You don’t need to use any code for this step.
Go ahead and click the Embed button at the top of the form builder window.

Now click Create New Page.
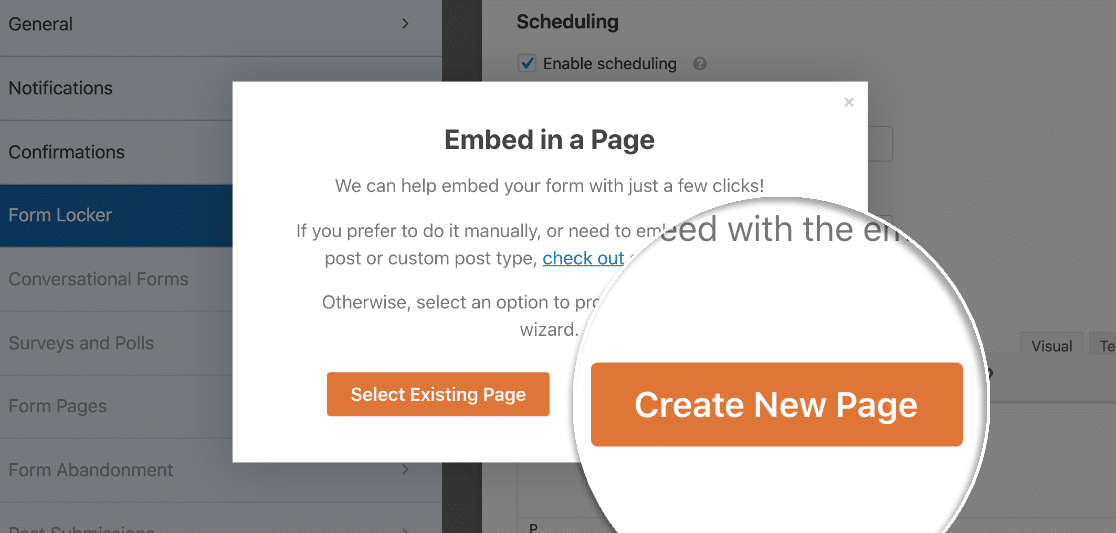
Name your page and click Let’s Go.
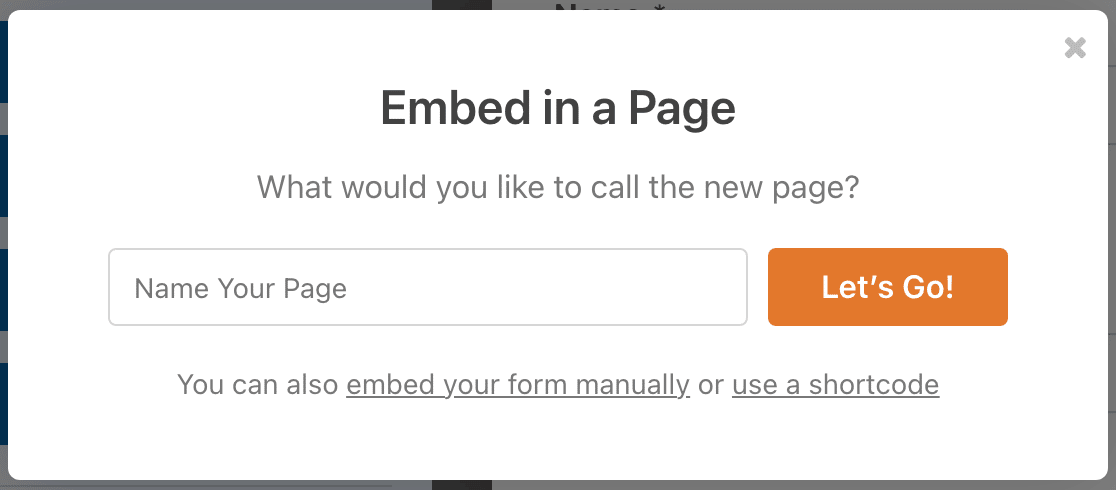
WPForms will automatically create a new page for your form. You’ll see a preview of how the form will look when submissions are open.
While you’re inside the WordPress block editor, you can also change the appearance of your form without any code.
Click on your form inside the block editor to open the settings panel on the right-hand side. You’ll find the Themes section here, which includes dozens of professionally-designed form themes.
Select a theme, and you’ll see changes occur in your form instantly. I’m using the Elegance theme in this example, which is one of my favorites.
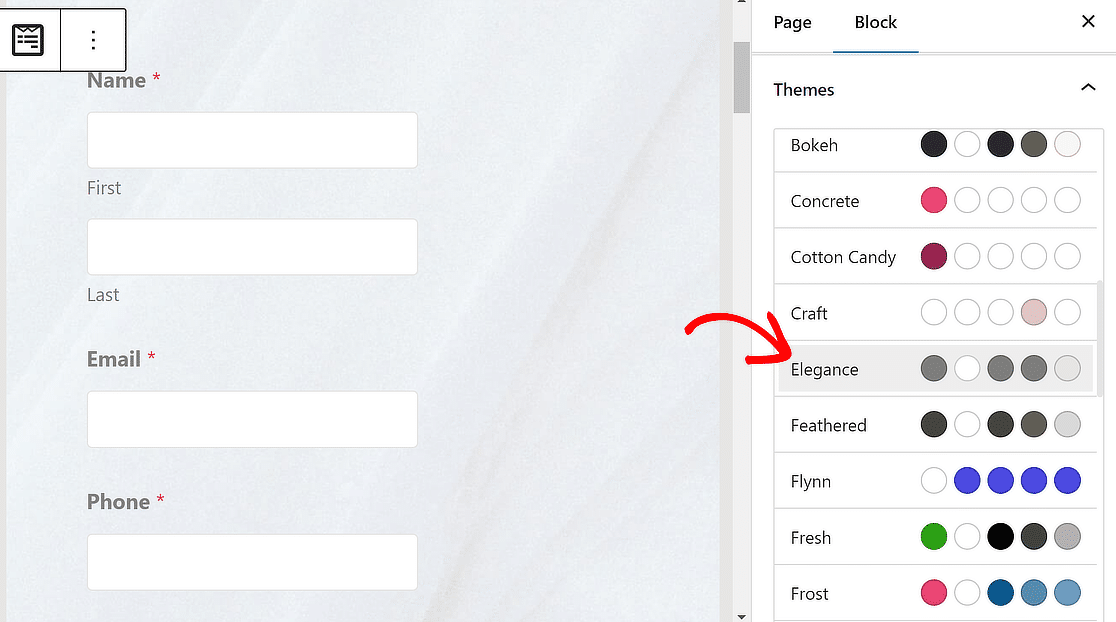
You can also style individual elements of your form manually. See our form styling guide for more details.
When you’re ready to publish your form, click the blue Publish button at the top of the block editor.

Now that the Form Locker is active, your form will only be available between the start and end dates you specified earlier. After publishing the form, here’s what it looks like on my website:
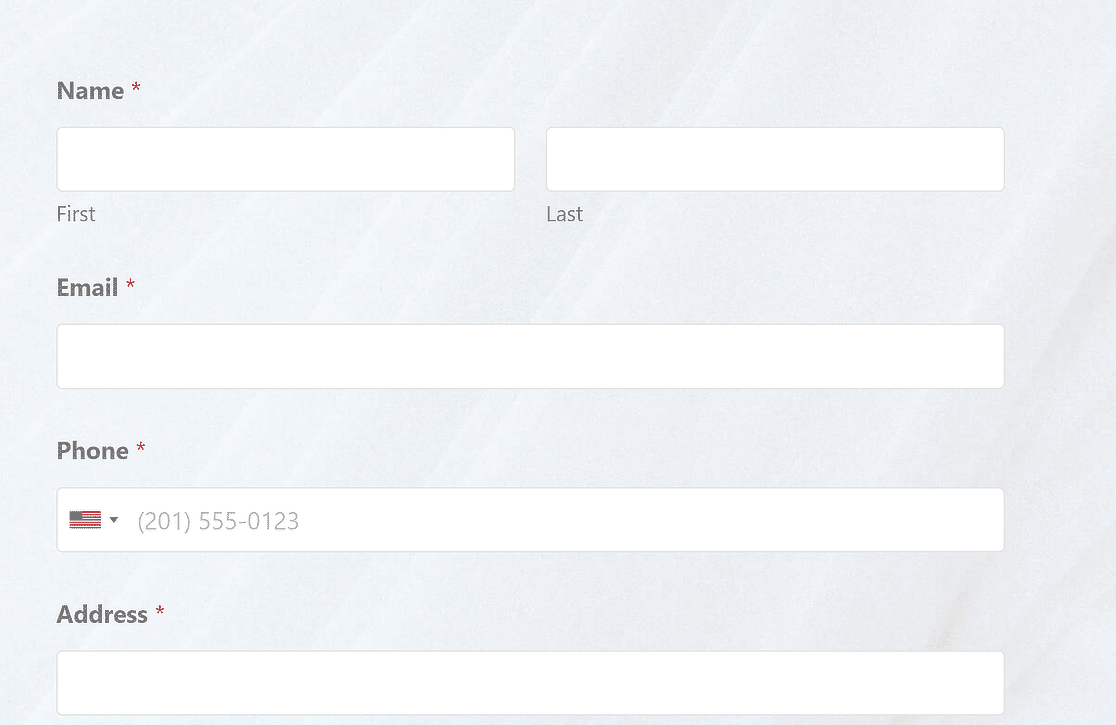
Once the end date has passed and the form expires, your visitors will see the closed message that you set up earlier:

You can customize this message however you want. For example, you could add a link back to the main Jobs page on your website here too.
Create a Form With Expiry Date Now 📆
6. Limit Entries (Optional)
Do you want to limit the number of form entries that you receive? For example, if you’re taking registrations for an event, you can close the form when the capacity has been reached.
This method works with the form expiry date settings we already talked about. When you hit maximum capacity for your event, your form will close automatically, even if the expiry date is still in the future.
Under Entry Limit, click the checkbox to set a maximum number of entries before the form expires:
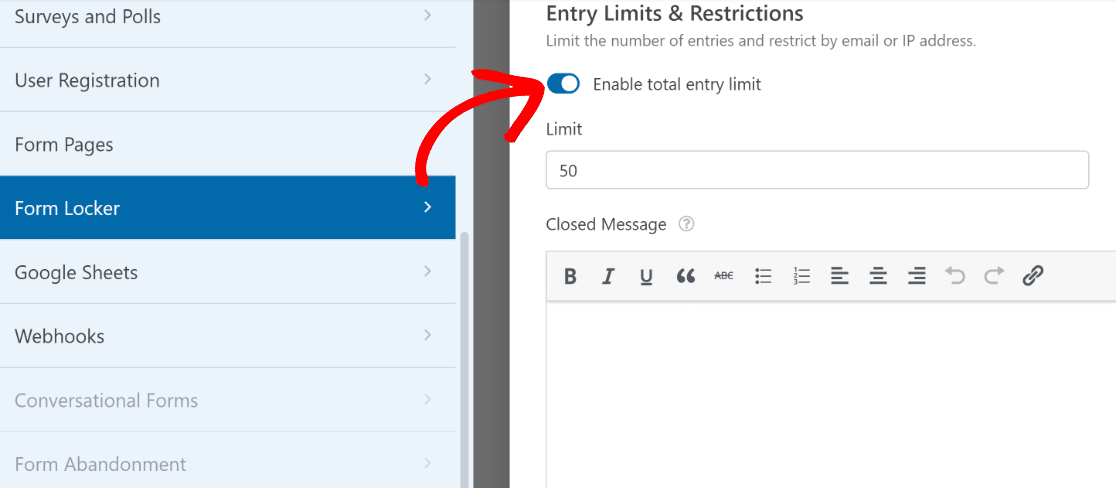
WPForms will automatically close your form when you hit the number of entries in the Limit field. Once the maximum number is reached, anyone who visits your form will see the Closed Message you set up.

You can also use the Form Locker addon to:
This gives you lots of control over when your forms are available on your website.
Adding Expiry to a WordPress Form – FAQs
I’ve compiled a few frequently asked questions about setting expiry to a WordPress form. If you’ve got your questions, chances are you might find your answer below. 👇
Will users be notified when a form is about to expire?
This is entirely up to you. WPForms gives you a lot of customizability, so you can add a line anywhere in the form to mention the expiry date of the form if you want.
Can I extend the expiry date of a form if needed?
Absolutely. The form scheduling settings in WPForms aren’t permanent; you’re free to update the expiry date at any time by following the steps as shown in the tutorial above.
Will adding an automatic expiry date affect the performance of my website or form?
No, the automatic form scheduling features are all part of the WPForms functionality, and it’s been carefully designed and tested to have no effect on website performance. So you can safely schedule your forms without worrying about any side effects to your site speed.
What happens to the data submitted through a form after it expires?
WPForms stores all the data collected from a form on your WordPress site. Even if your form expires, the data you obtained through it will remain on your website until you manually delete it.
How to create an online booking system on WordPress?
You can use WPForms to create an online booking form. As the world’s best form builder, WPForms comes with many features and functionalities that can help you manage and organize your business online.
Next Steps: Review Your Form Entries
Now that you’ve set up your form, you’ll want to review your entries and download the file attachments. WPForms lets you save your form data in the WordPress database. This makes it super easy to review all of your entries in 1 place.
Create Your WordPress Form Now
Ready to build your form? Get started today with the easiest WordPress form builder plugin. WPForms Pro includes lots of free templates and offers a 14-day money-back guarantee.
If this article helped you out, please follow us on Facebook and Twitter for more free WordPress tutorials and guides.

