AI Summary
Do you want to edit and customize your WordPress Contact Page? Editing your Contact Page is yet another way to personalize a webpage to better reflect the contents of your website.
Often, your WordPress site will already have a Contact Page included, but the page usually needs some editing work to fit your needs.
But with WPForms, editing your Contact Page is simple. And we’ll show you how to do it!
Why Should I Edit an Existing Contact Page in WordPress?
If you’re utilizing a WordPress theme on your website, you likely already have a pre-built Contact Page. Many theme options include demo content that is imported to your site, so that your website can closely resemble the theme demonstration.
So, pages, posts, and other sample content might appear in your WordPress dashboard after activating your theme. You may decide, though, that you need to edit and change this content to better complement your website.
But what about the Contact Page? There is probably some kind of form on the page, which is important for allowing your website visitors to reach out to you.
Luckily, it’s incredibly easy to edit your Contact Page to suit your liking, while also utilizing a secure and reliable form to collect information on that page.
In this post, we’ll show you what to do about the pre-built Contact Page that comes with your theme, and how to create the Contact Page you really want.
How to Edit the Contact Page in WordPress
Follow these simple steps to edit your own Contact Page in WordPress.
In This Article
1. Remove Forms From Current Contact Page
Like we mentioned, you might already have a Contact Page saved in your WordPress dashboard.
Go ahead and navigate to your Pages and select the Contact Page that’s currently used on your site to edit it.
Next, you’ll need to delete any forms that are already on it.
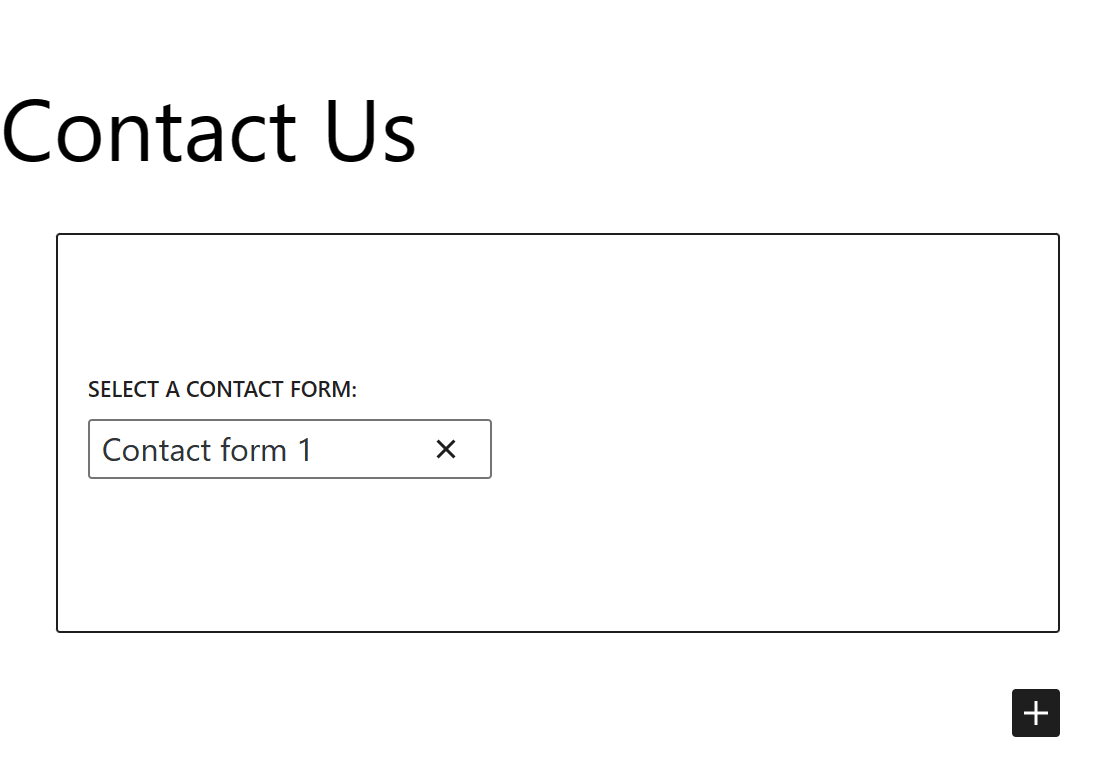
Simply remove this form from the page.
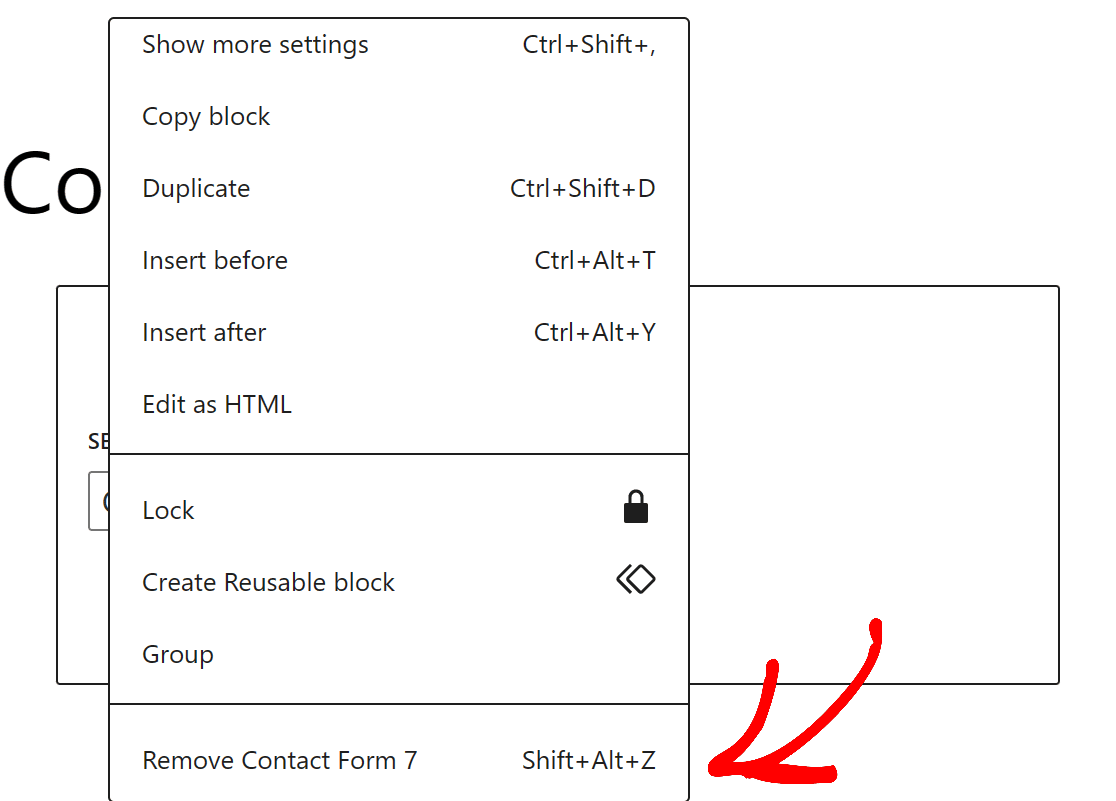
Now you’re working with a clean slate and can add a customizable form to your Contact Page.
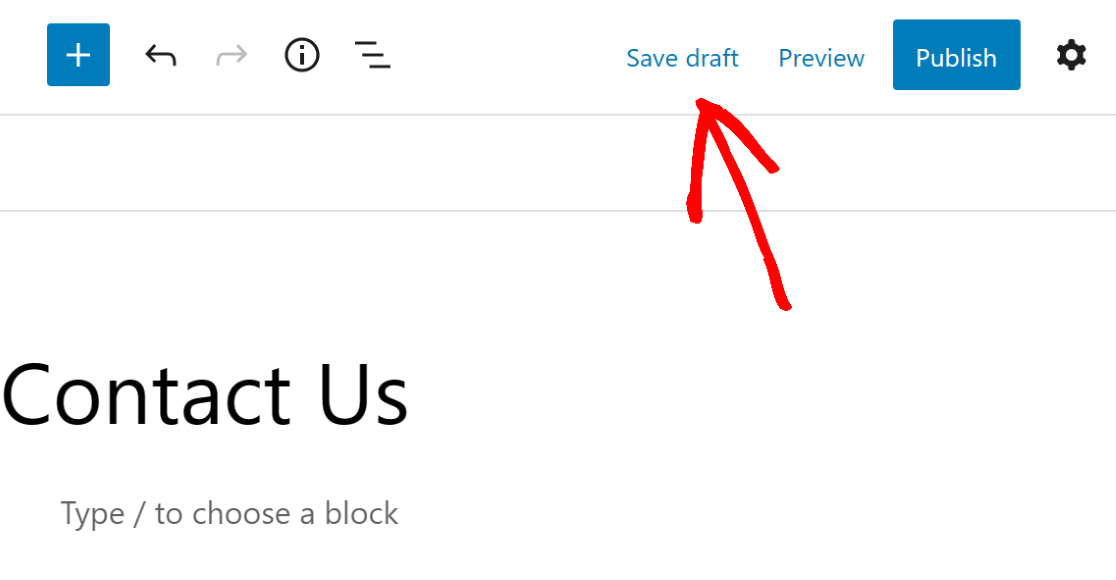
Be sure to Save your Contact Page to use it later.
2. Install WPForms
Next, you’ll need a new form to place on your already-existing Contact Page.
Since you want a form that’s highly customizable and that can be edited to coordinate with your website, you need to get one from WPForms.
WPForms is an easy-to-use drag-and-drop form builder plugin, and will make editing your Contact Page a breeze.
So, first, Install and Activate the WPForms plugin.
You can download the plugin from our website here at WPForms, or you can add it as a plugin from your WordPress dashboard.
For additional help with installing WordPress plugins, here’s a step-by-step guide for beginners.
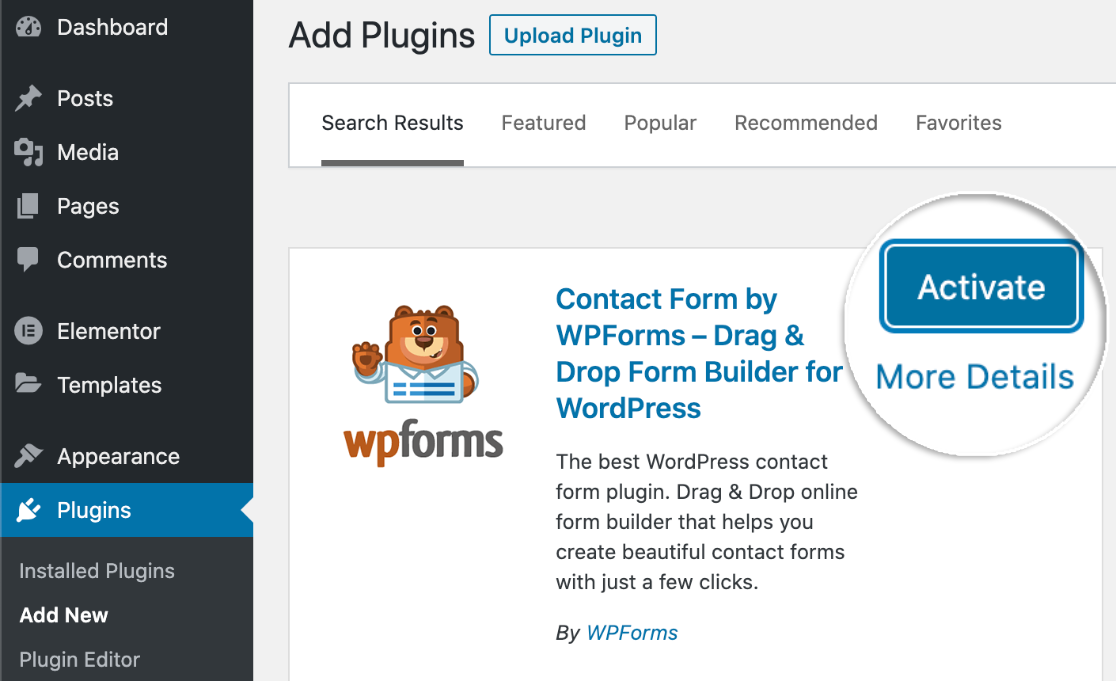
Keep in mind that the getting the plugin from your WordPress dashboard will start you off with WPForms Lite. This version of the plugin is great for creating contact forms, but if you want access to more features, you’ll need to upgrade.
We suggest purchasing WPForms Pro so that you can get all the features and addons you want. To learn more about the types of addons offered by WPForms, check out our documentation.
3. Select a Contact Form Template
With WPForms installed and activated on your WordPress site, you now have access to a selection of forms that are pre-made for you as templates.
Navigate to the WPForms tab in your dashboard and go to the Form Templates to get one of these templates.
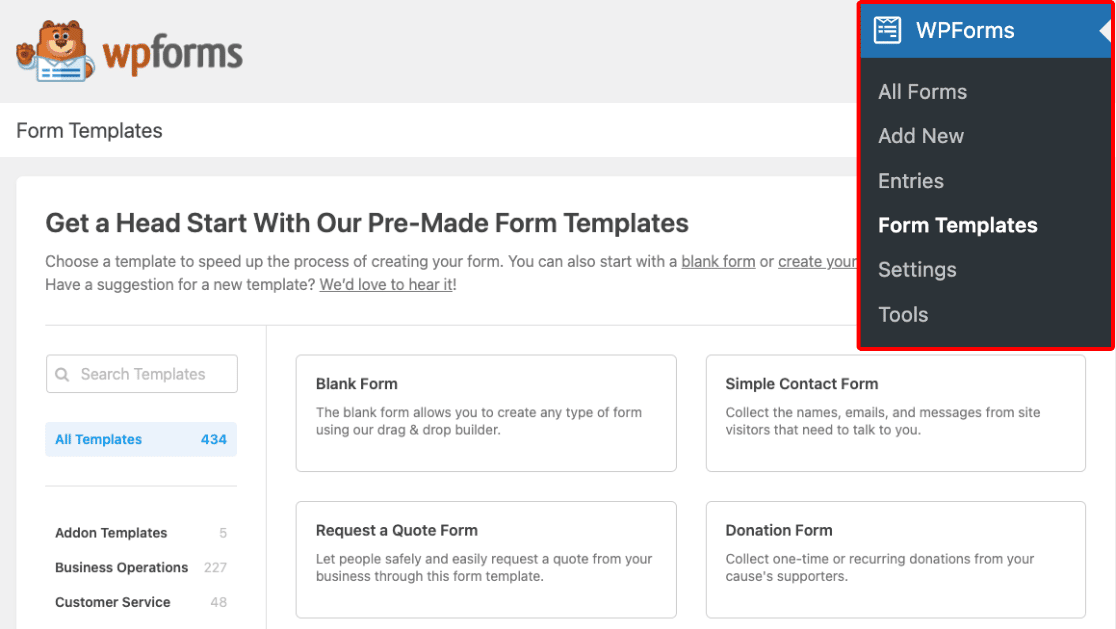
And keep in mind that with an upgraded license from WPForms, such as the very popular Pro Plan, you’re given access to hundreds of templates from the Library, along with other additional features.
Since you’re editing the Contact Page of your WordPress site, go ahead and select the Simple Contact Form template from this screen.
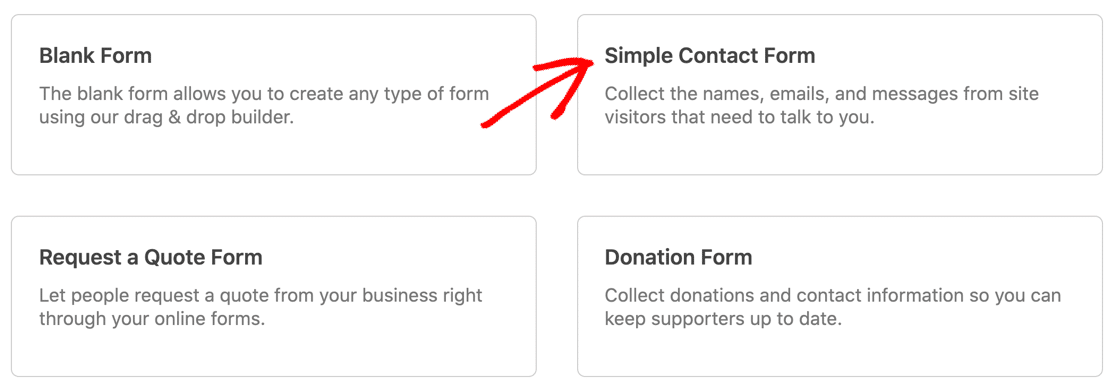
You’re now able to edit and customize this form template with our easy-to-use form builder, which you’ll find in the next step.
4. Customize Your Contact Form
Once you’ve selected a template, you’re taken to the drag-and-drop form building page.
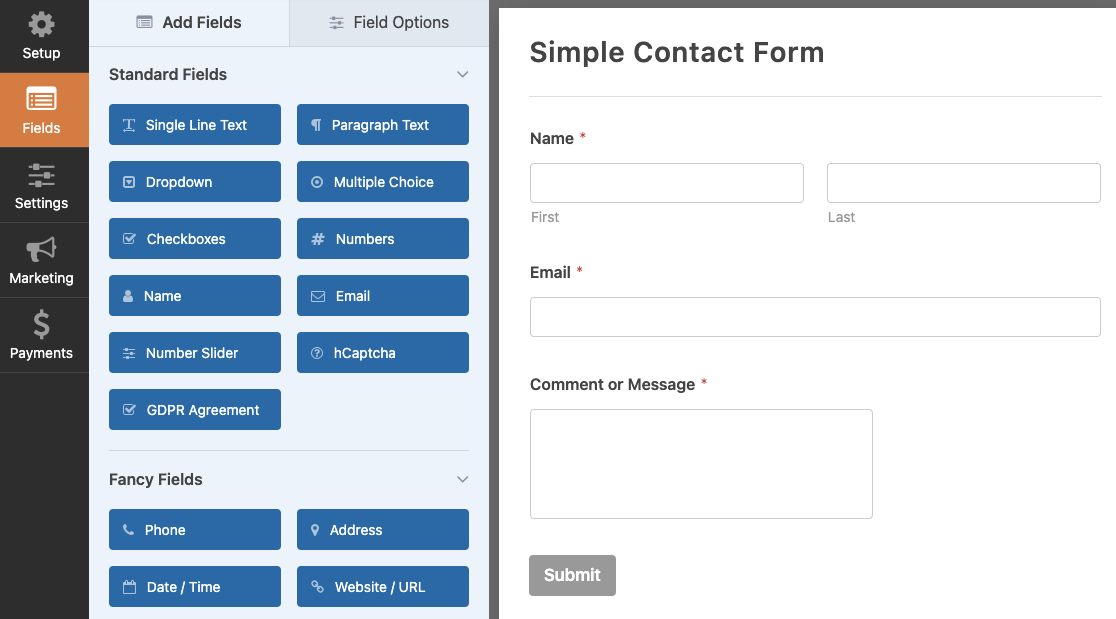
We use the term ‘drag-and-drop’ to describe the form builder because that’s all it takes to build and edit your form.
You simply click on a field from the group on the left-hand side of the screen, drag it over to your form, and drop it where you want it.
For example, you may want to add a Multiple Choice field to your contact form to have your users choose from a selection of reasons for contact.
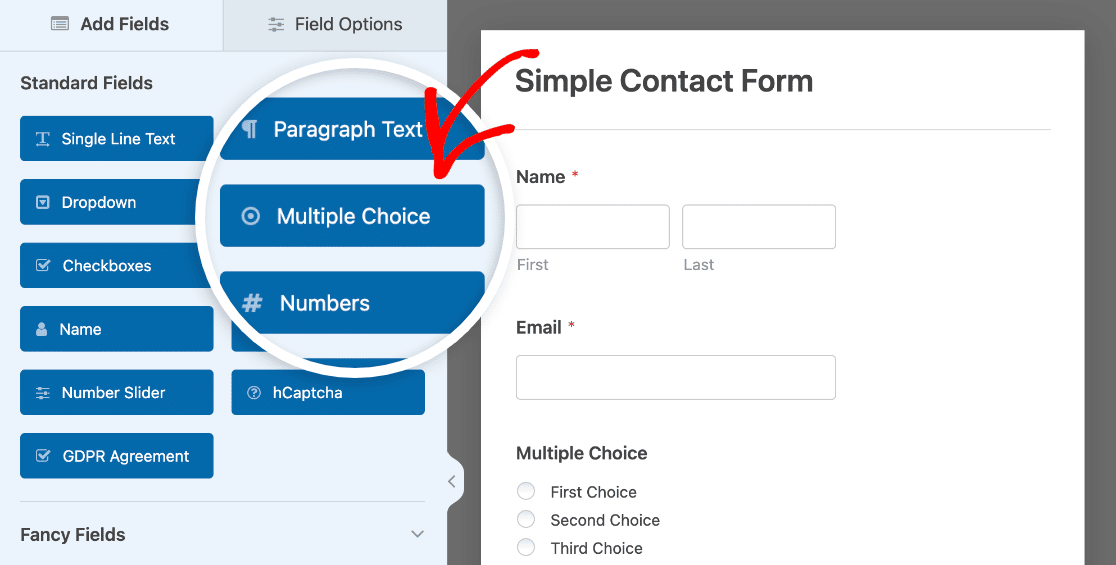
Just click on it with your mouse and drop it on your form. By dragging and dropping, you can add, remove, and reorganize the fields provided in your form template.
Then, to customize any of the fields you’re using on your form, just click on the field to open its editing options.
You can see how we’ve customized the Multiple Choice field in our example by editing the user choices like we mentioned above.
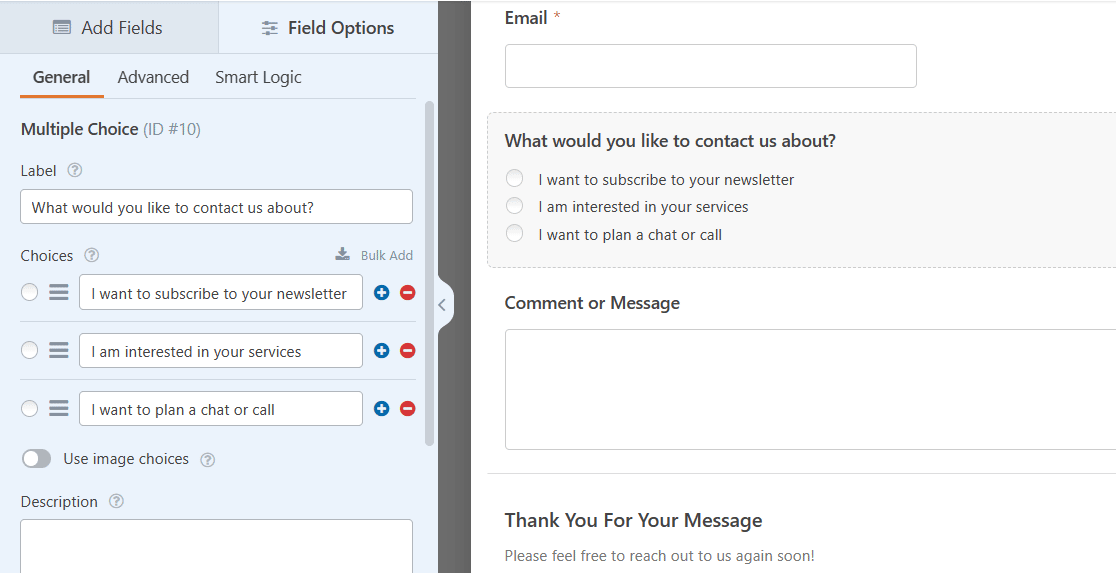
With the many field options available with each template, coupled with the ability to further edit each field, your possibilities for a customized Contact Page are extensive and incredibly useful.
For details on how to create a custom contact form, see our tutorial on creating a simple contact form.
Don’t forget to Save your form when you are finished editing!

By saving your form, you’re then always able to find it among all your forms in your WordPress dashboard.
5. Embed Your Form in Your Existing Contact Page
Now you can place this form on a page you already have in your WordPress dashboard, and there are a couple of ways you can do it.
First, you can embed your form directly from the form builder.
After you’ve saved your form on the form building page, click the Embed button.
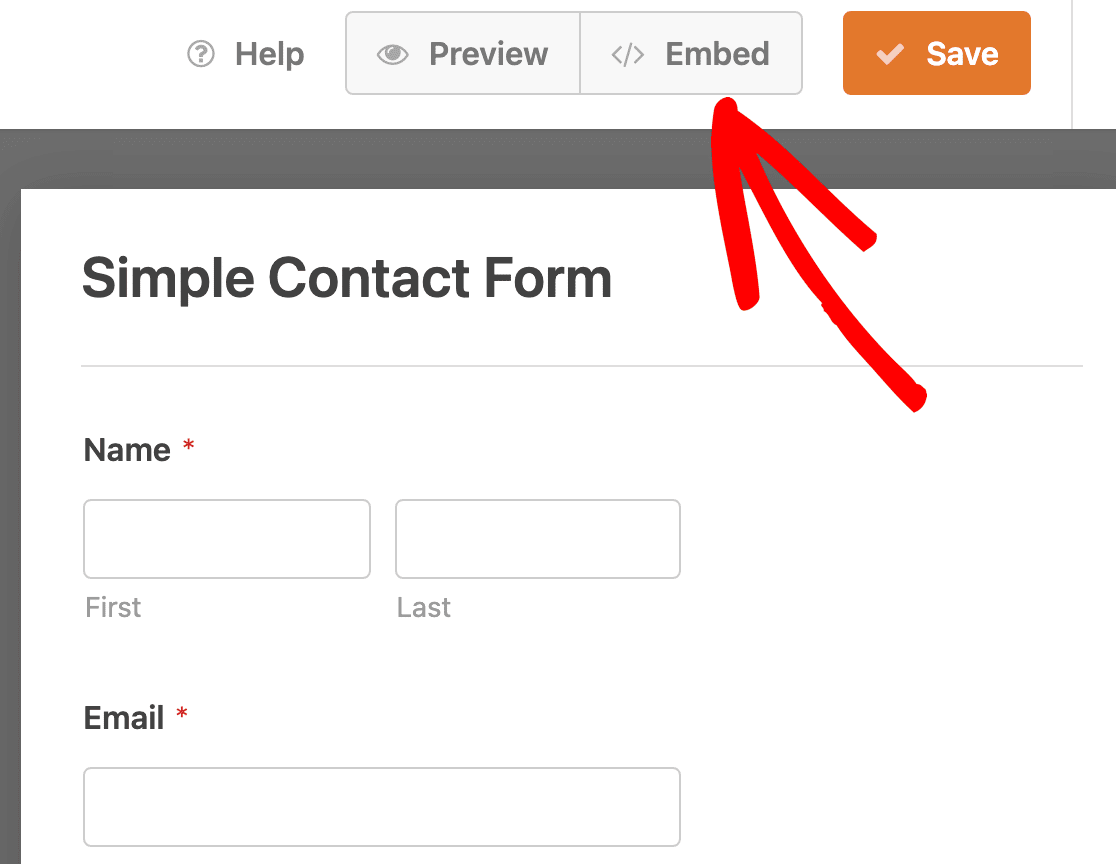
When you’re asked where to embed your form, click on Select Existing Page.
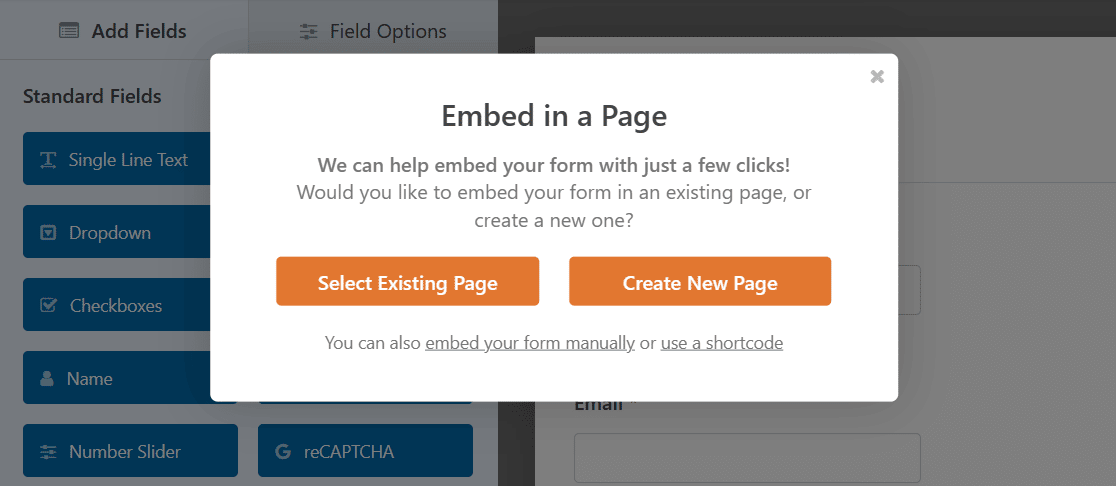
Now, select the page that you want this form embedded in.
In this case, you’ll embed your contact form in your Contact Page.
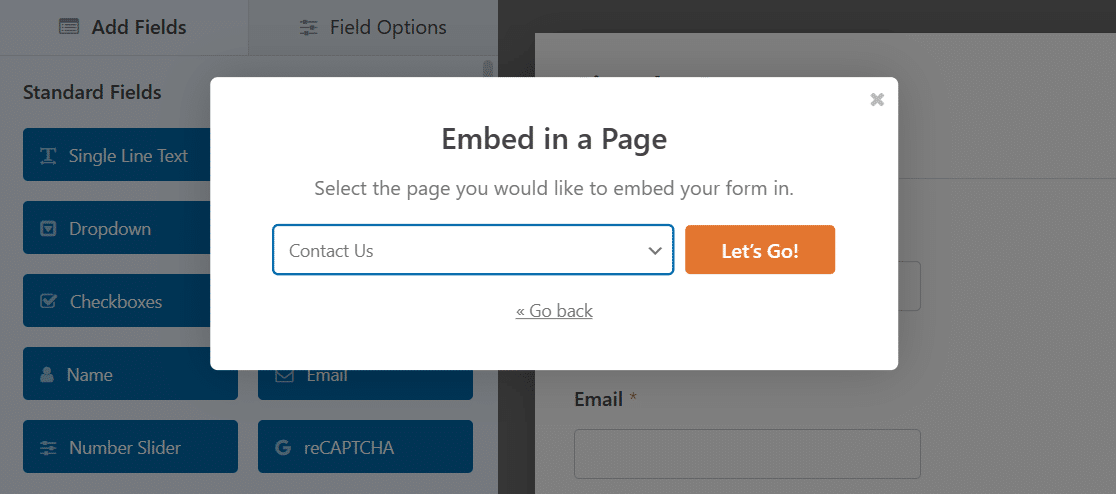
Click the orange Let’s Go! button to go to your Contact Page with your form now placed on it.
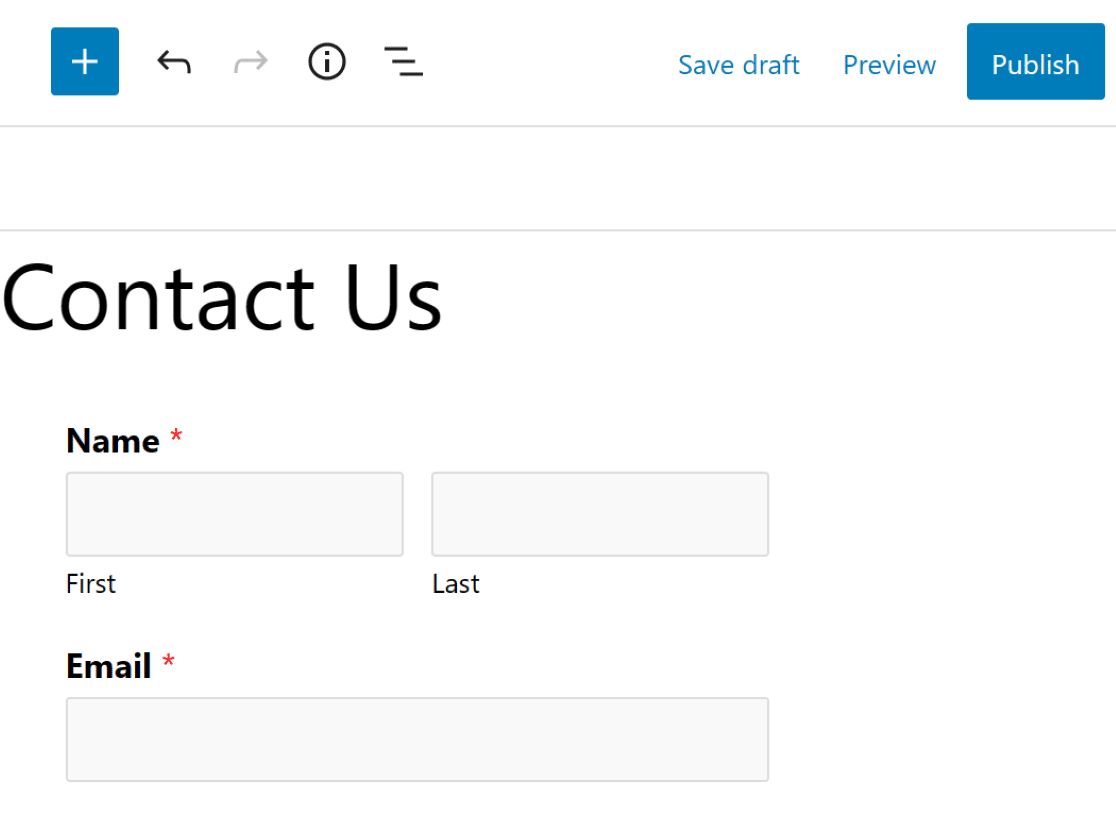
Another way to embed the form of your choice on a page is to edit the page itself.
From your WordPress dashboard, open the Contact Page that you removed the other contact form from in step 1.
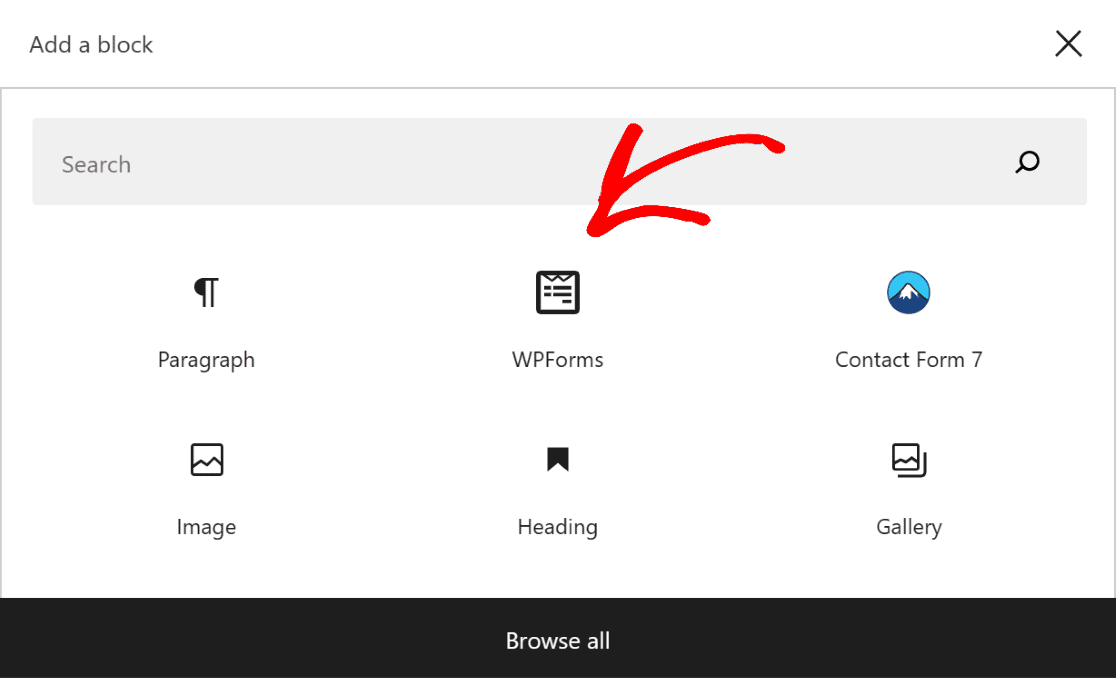
In the block editor, add the WPForms block to your Contact Page.
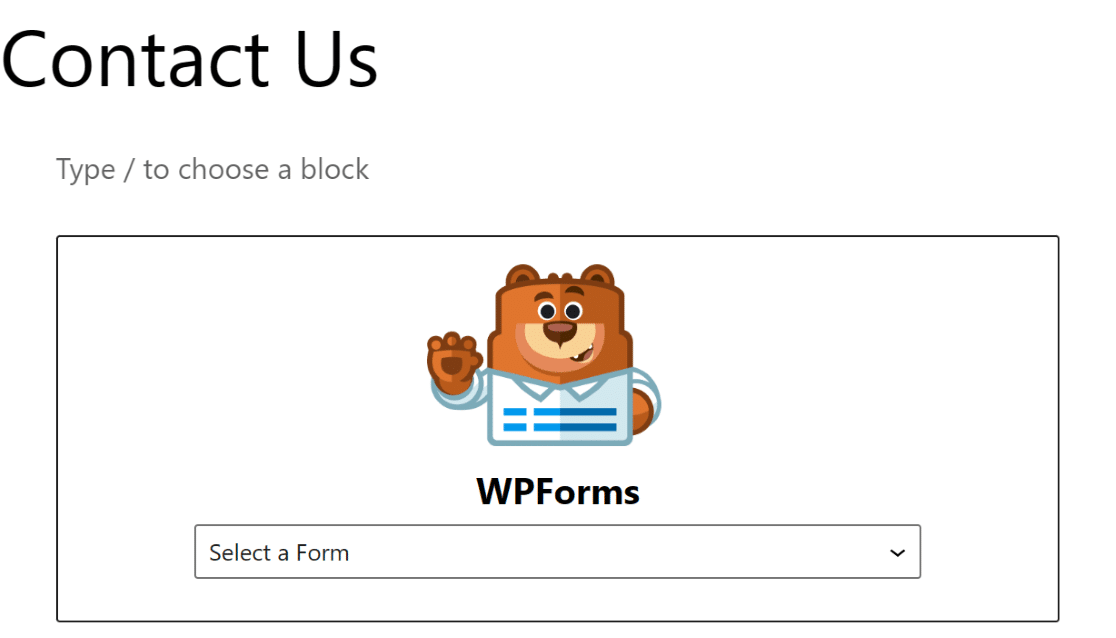
Then select the form you want from the dropdown menu.
When you select the Simple Contact Form that you recently saved, it will appear on your Contact Page.

Keep in mind that if you take the route of embedding your form directly from the form building page, then you don’t need to add it later with the block editor. You simply need to select the page from the form builder.
Like any WordPress page, you’ll need to Publish this page to take it live on your site.
And that’s it! You now know how to customize your contact form and Contact Page as extensively as you’d like, and personalize your website even further.
Visitors to your website have a great way to reach you thanks to the Contact Page, but you could make communication even more streamlined with chat options, if you like. Check out some additional reading on the best live chat software that you can implement on your site.
Next, Connect Your Forms to Brevo
Now that your Contact Page is customized to your liking, consider connecting your contact form to your Brevo account. Having your website forms automatically send data to your email marketing provider is super important to turn web visitors into paying customers. And luckily, it’s easy to do with WPForms.
Ready to build your form? Get started today with the easiest WordPress form builder plugin. WPForms Pro includes lots of free templates and offers a 14-day money-back guarantee.
If this article helped you out, please follow us on Facebook and Twitter for more free WordPress tutorials and guides.




Hi, i created rhe simple contact form, i tested and it say is working but i do not receive any message in my inbox. What setting should i check?
Thanks
Hey John – It seems to be an email delivery issue. Please drop us a line in support so we can assist.
If you have a WPForms license, you have access to our email support, so please submit a support ticket.
Otherwise, we provide limited complimentary support in the WPForms Lite WordPress.org support forum.
Thanks 🙂