AI Summary
The default WordPress password reset form is pretty basic. It gets the job done, but it doesn’t exactly scream “professional” or match your brand’s look and feel.
Without a custom password form WordPress solution, you’re missing out on keeping that brand consistency intact. Plus, you can’t add helpful instructions or customize the messaging to guide users through the reset process smoothly.
That’s where the WPForms User Registration addon comes in handy. It lets you create a fully customized password reset form that actually looks like it belongs on your site.
You can match your website’s colors, fonts, and overall design while providing clear, helpful instructions. So, without further ado, follow the steps in this guide to customize your WordPress password reset form!
Create Your Custom Password Reset Form Now! 🚀
How to Create a Custom Password Reset Form in WordPress
To create a custom password reset form, you’ll need to subscribe to WPForms’ premium version. The Pro license includes the User Registration addon that lets you create custom password reset, user registration, and login forms for your WordPress website. Let’s get started!
- Step 1: Install the WPForms Plugin
- Step 2: Activate the User Registration Addon
- Step 3: Use the Password Reset Form Template
- Step 4: Configure Your Password Reset Email
- Step 5: Customize the Password Reset Form Appearance
- Step 6: Add Password Reset Form to Navigation Menu
- Optional: Add Redirection to Custom Password Reset Form
Step 1: Install the WPForms Plugin
First, download and install WPForms. For this tutorial, you’ll need the pro version instead of WPForms Lite. If you need some help, check out this guide to installing WordPress plugins.
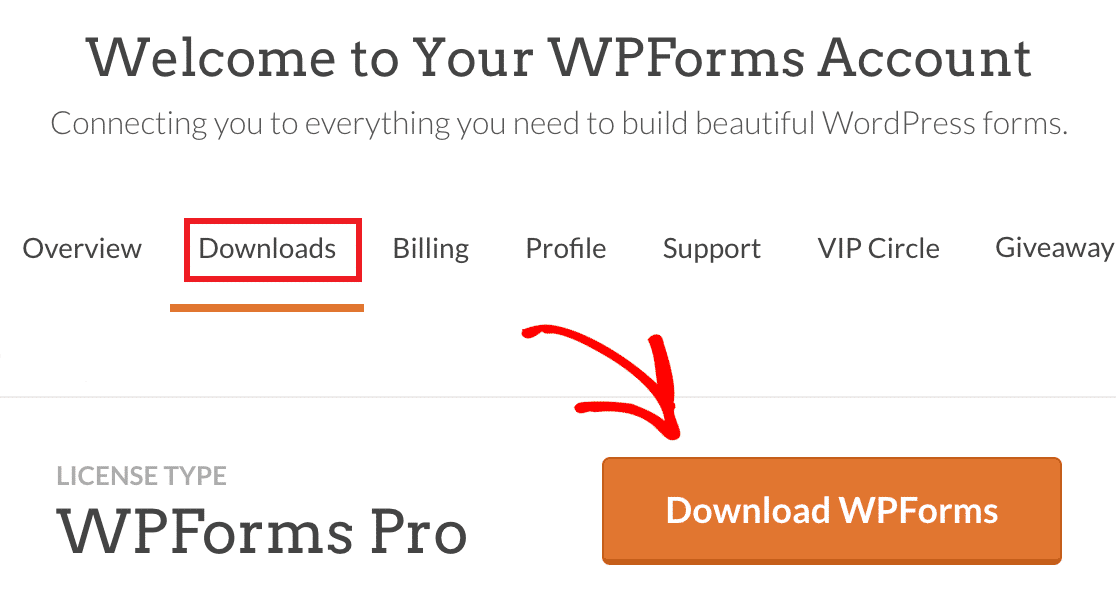
After you’ve installed the plugin, log in to your WPForms account and click on the Downloads tab. This is a page with all of your available licenses.

To download the plugin, click on the Download WPForms button next to the pro license. This will save a zipped file of the WPForms plugin to your computer.
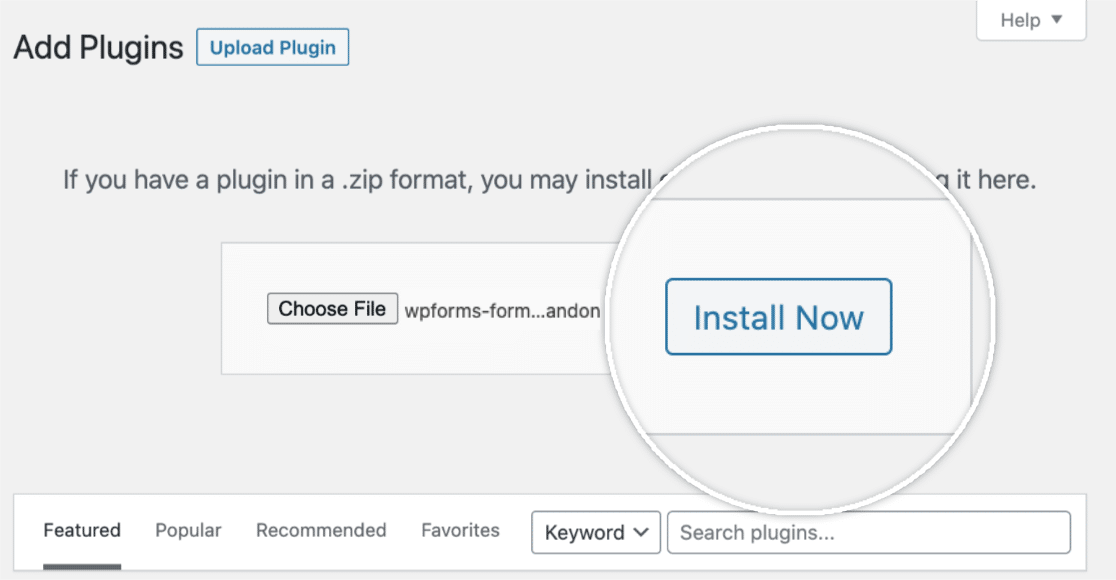
After you’ve downloaded your zip file, head to your WordPress site where you’d like to install WPForms. Then, on the admin dashboard, click Plugins » Add New and then the Upload Plugin button.

From here, click on the Choose File button and select the WPForms zip file you just downloaded. After your file is uploaded, click on the Install Now button.
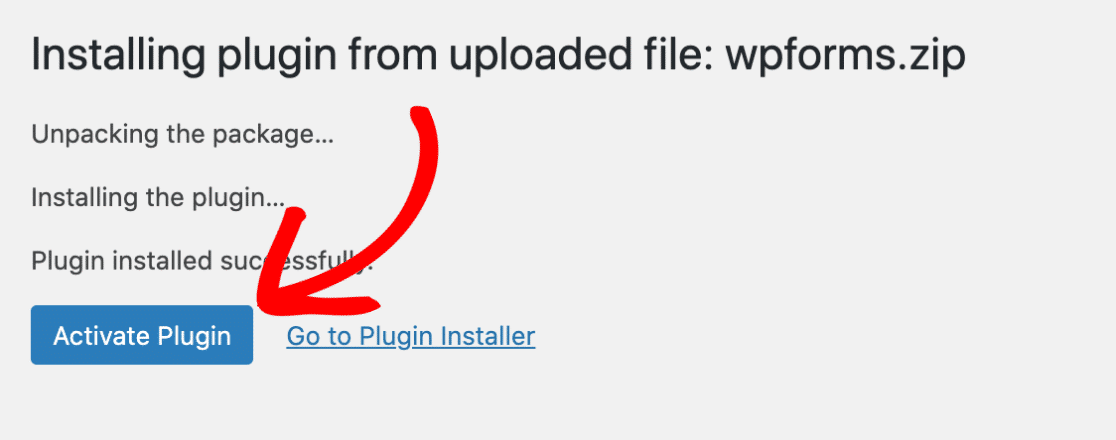
Once the plugin is installed, click on the Activate Plugin button to activate WPForms on your site. After activating the plugin, remember to verify your WPForms license key to receive automatic updates and plugin support.
Adding your license key will also allow you to easily install and activate WPForms addons from inside your WordPress dashboard.
Step 2: Activate the User Registration Addon
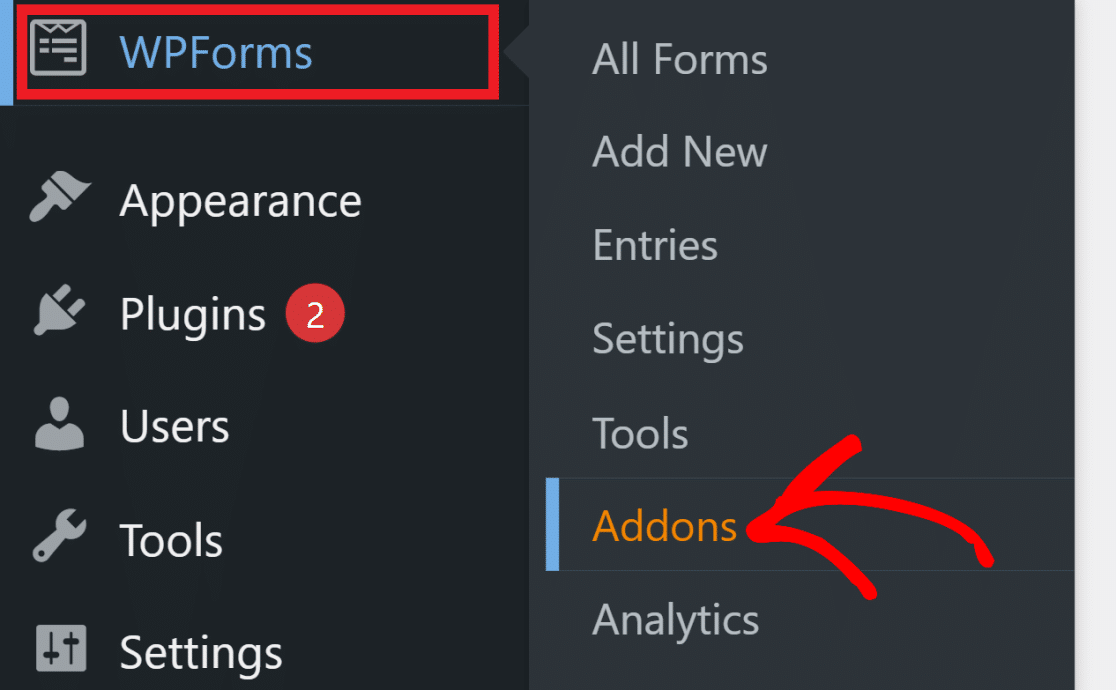
Now that WPForms is ready to go, you’ll need the User Registration addon to create custom password reset forms. In your WordPress admin area, head to WPForms » Addons in the left sidebar menu.
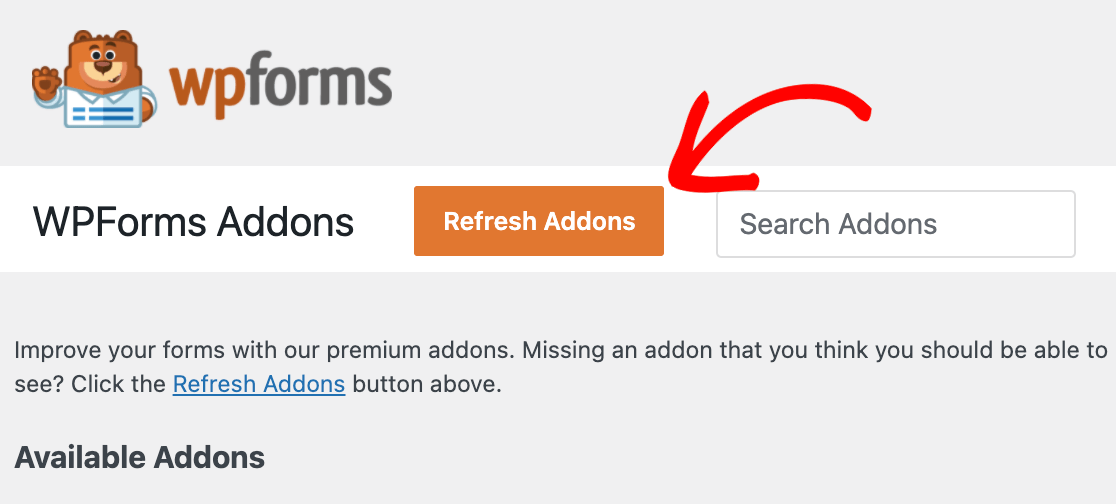
If you don’t see any addons for your license level, click on the Refresh Addons button to force a refresh.
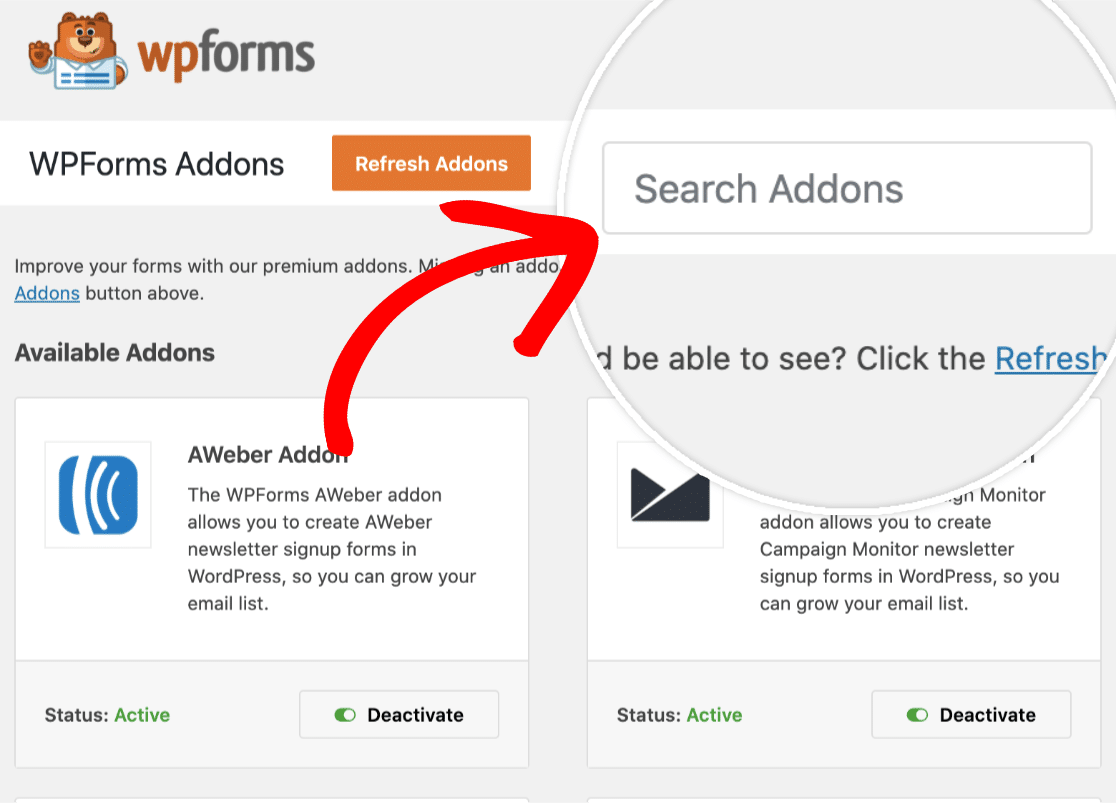
To search for the User Registration addon, type its name into the Search Addons field located in the top-right corner of the page.
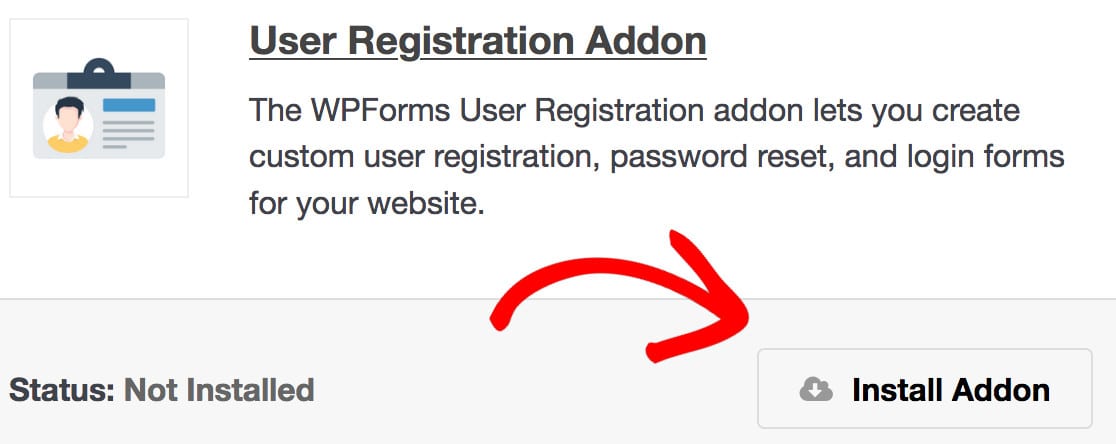
Once you’ve found it, simply click on the Install Addon button.
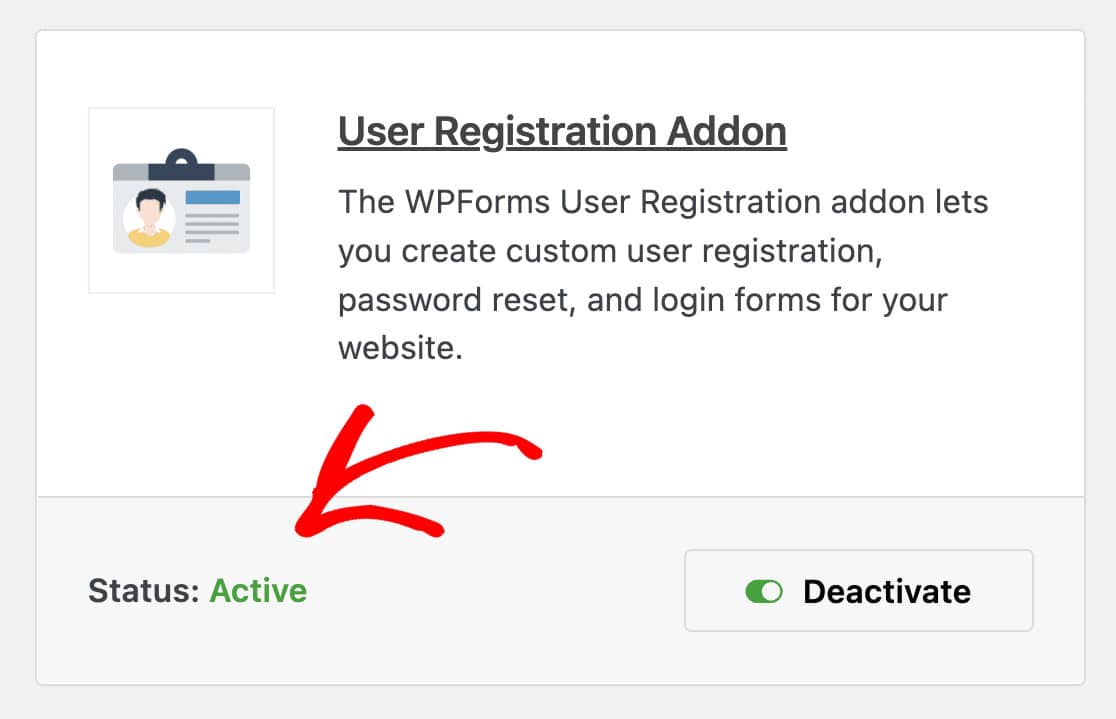
This will automatically install and activate the addon for you. Any addon that’s installed and ready to use will show Status: Active.
Step 3: Use the Password Reset Form Template
Now, it’s time to build your custom password form in WordPress. Head to WPForms » Add New in your dashboard to start creating your new form.
Search for “Password Reset” in the template library, then hover over the User Password Reset Form option and click Use Template.
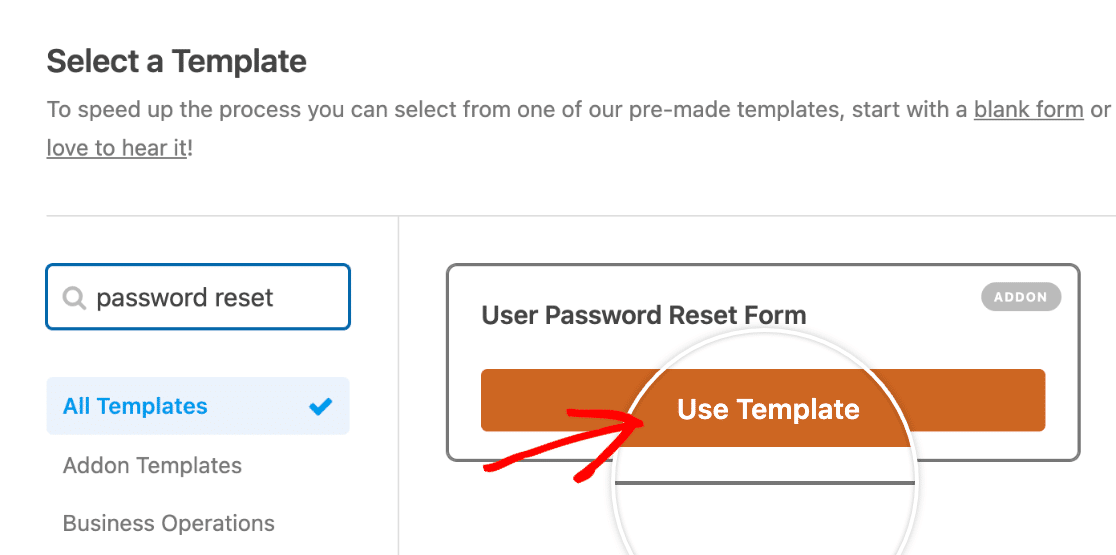
Once you’ve selected the template, the password reset form will load on your screen. This template is specifically designed for password reset functionality and comes with all the essential fields already set up.
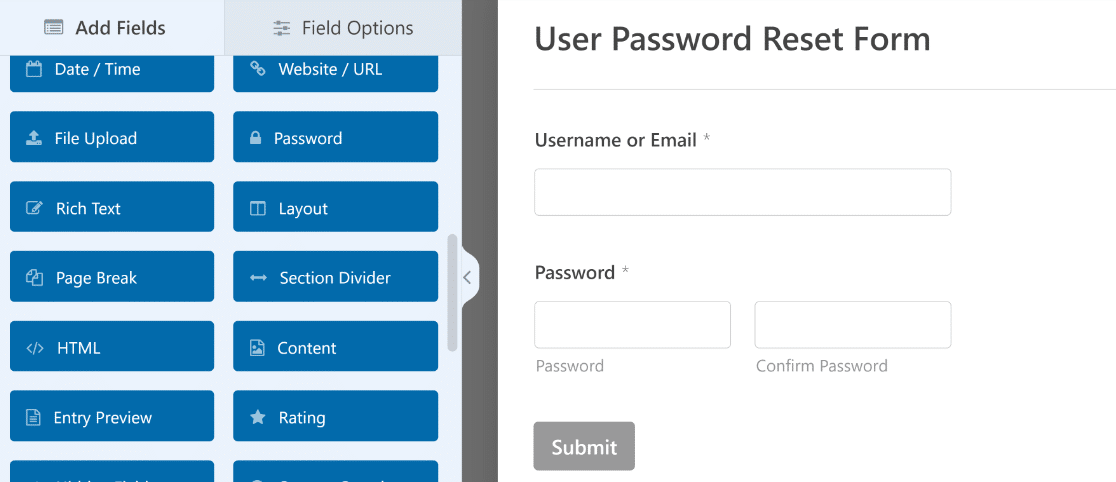
The form automatically includes an Email field where users can enter their registered email address. This is the core component that makes the password reset process work.
I always customize the form title and description to match the website’s branding. Click on the form title at the top to edit it. You might change it from the default to something like “Reset Your Password” or “Forgot Your Password?”
It’s not a good idea to add or delete any fields from this template because it serves a highly specific purpose in the optimal way. Let’s look at the reset email settings in the next step.
Step 4: Configure Your Password Reset Email
Now it’s time to fine-tune how your password reset process works. Head over to Settings » User Registration in your form builder to access all the password reset options.
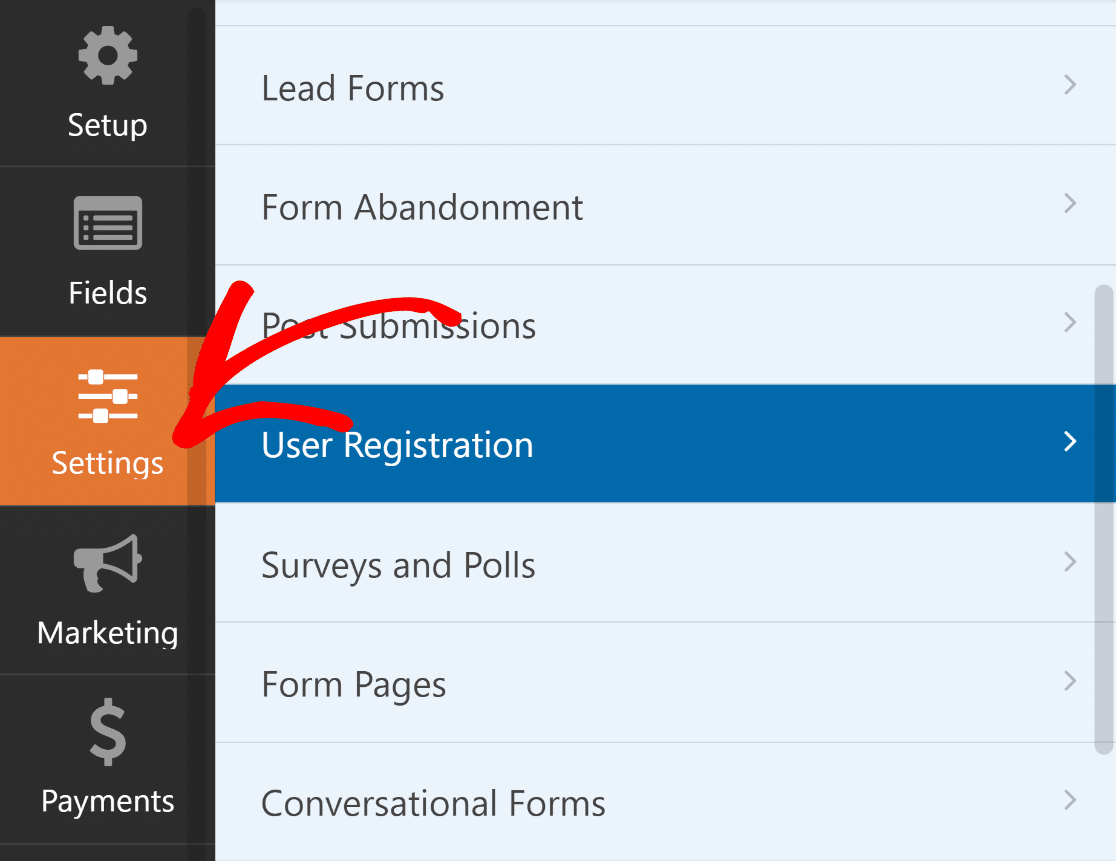
The first thing you’ll want to do is enable the Password Reset functionality. I always make sure this toggle is switched on, otherwise your users won’t be able to reset their passwords through your custom form.
Once that’s enabled, you can customize the reset email subject line. The default might work, but I prefer to make it match my brand voice. Something like “Reset Your [Site Name] Password” feels more personal than generic text.
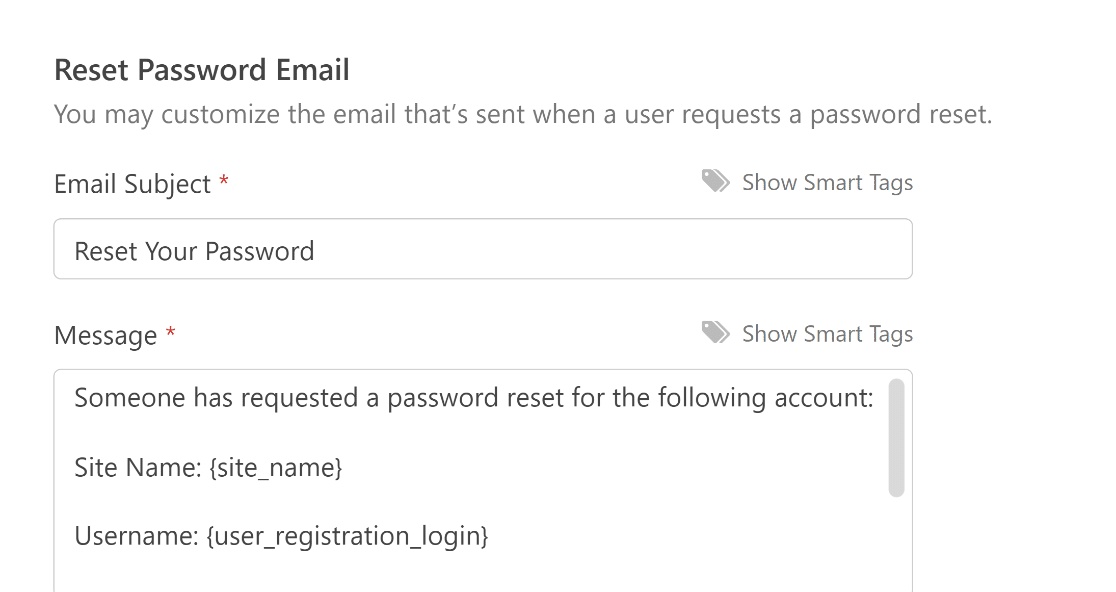
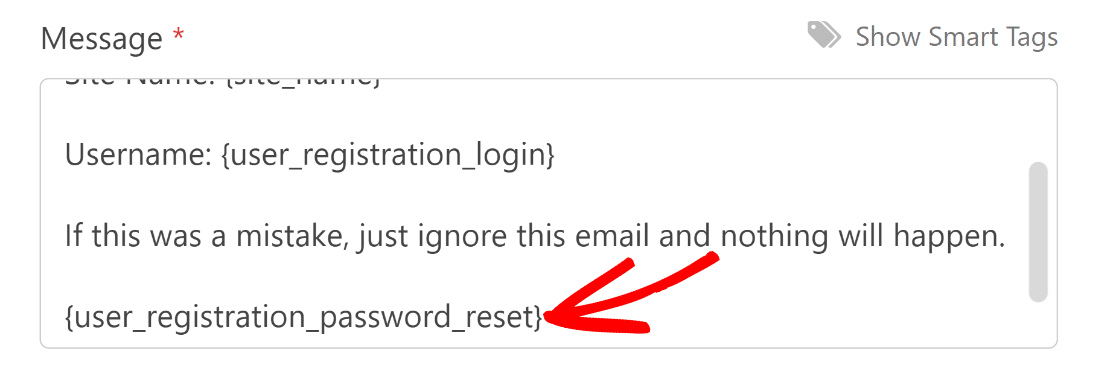
If you do want to edit the reset email message, make sure not to remove the {user_registration_password_reset} smart tag. This smart tag creates the reset link for the user to click.
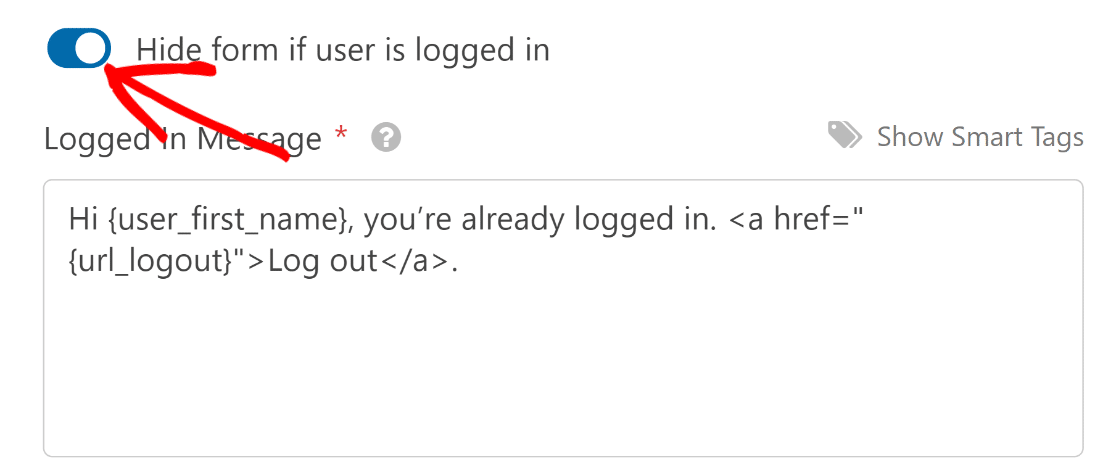
Scroll down further and you’ll see an option to hide your password reset form from logged-in users. If you enable this option, you can edit the message to display when a logged-in user opens the form.
Excellent! Once you’ve customized the settings, make sure to click Save on the top. In the next step, we’ll embed the form on a new page.
Step 5: Customize the Password Reset Form Appearance
Your password reset form is functional, but now it’s time to make it look great. A well-designed form builds trust and makes the reset process feel more professional.
WPForms has a convenient embed wizard that enables you to place your form inside a new or existing page directly from the form builder, and then you can customize its appearance directly in the block editor.
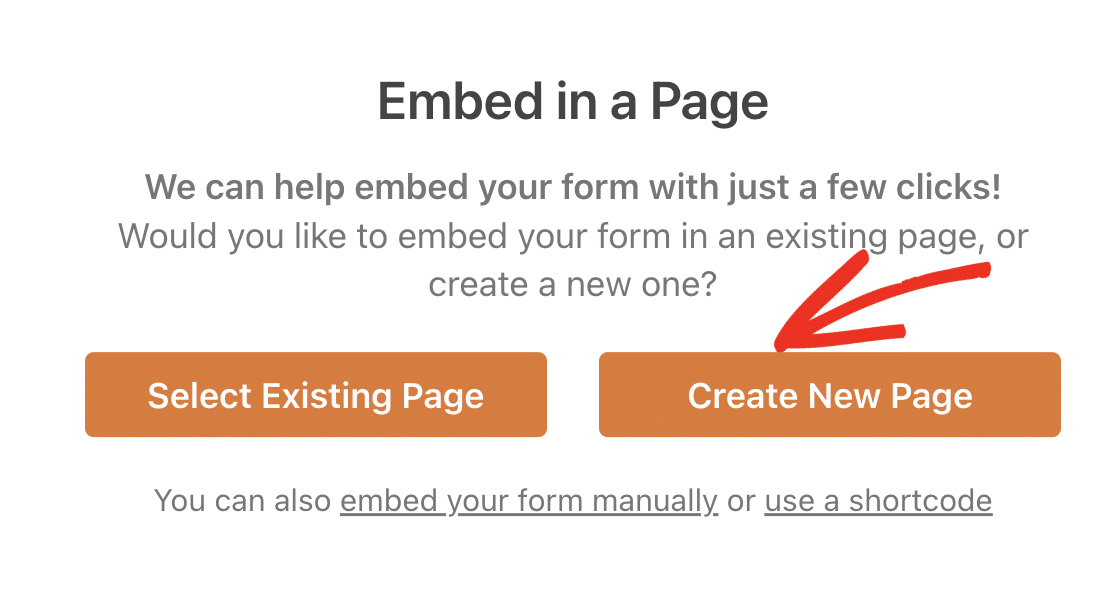
Once your form has been saved, click the Embed button. Because we want to embed our form in a new password reset page, we’ll select Create New Page option.
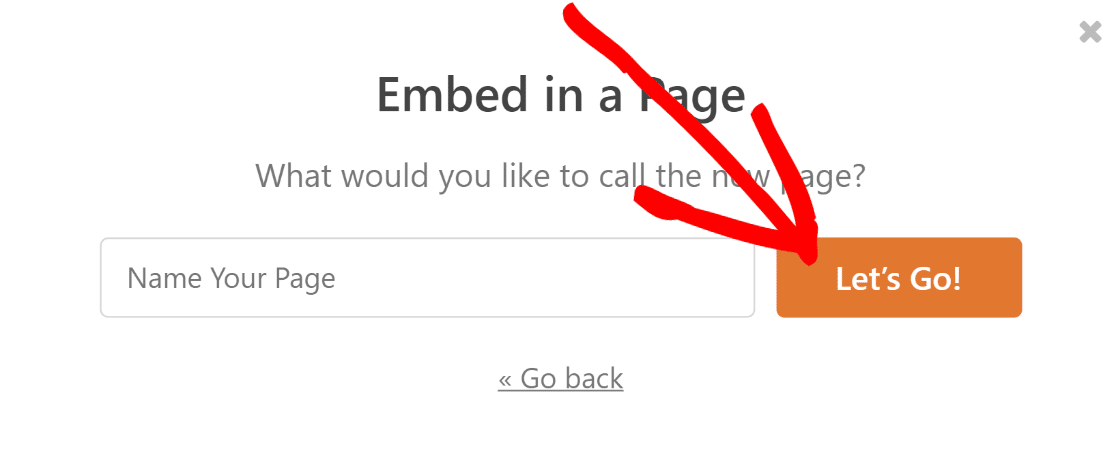
Give your page an appropriate name and then click Let’s Go. After that, WPForms will open the WordPress block editor where you’ll find your password reset form embedded.
Now, use the WPForms block options on the right to use the form styling features and customize your labels, fields, and buttons in a few clicks.
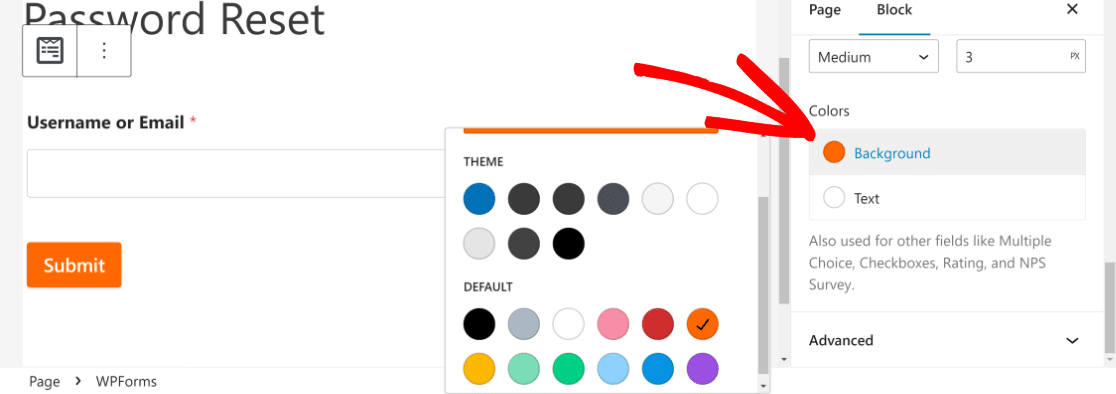
When you’re satisfied with your form, go ahead and press Publish to launch it. Your password reset form is now live and ready to use!

But we’re not finished yet. It’s important to ensure that this form is easy for your users to find in case they need to reset their password. In the next step, we’ll add the password reset form to your site’s main navigation.
Step 6: Add Password Reset Form to Navigation Menu
It’s a good practice to make your password reset page easy to find for your users. We’ll do that by adding the newly created form page to your site’s navigation bar at the top.
This is easy to do. Simply open your WordPress dashboard and go to Appearance » Menus. You may already have a navigation menu added to your site.
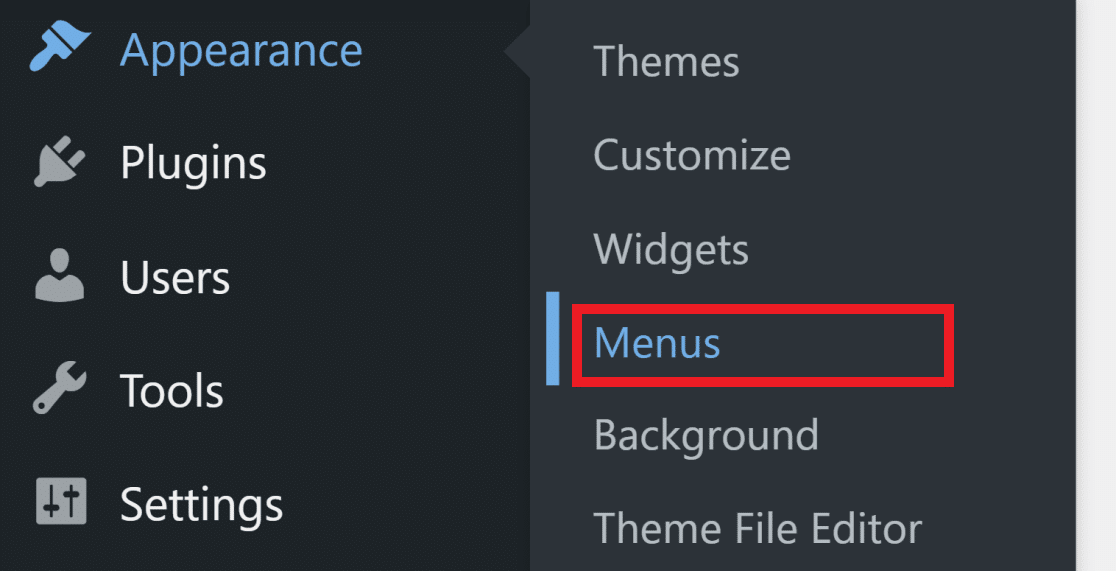
In that case, you’ll just have to add the password reset page to the menu. Once inside the Menus screen, click on your password reset form in the left-hand column and then press Add to Menu.
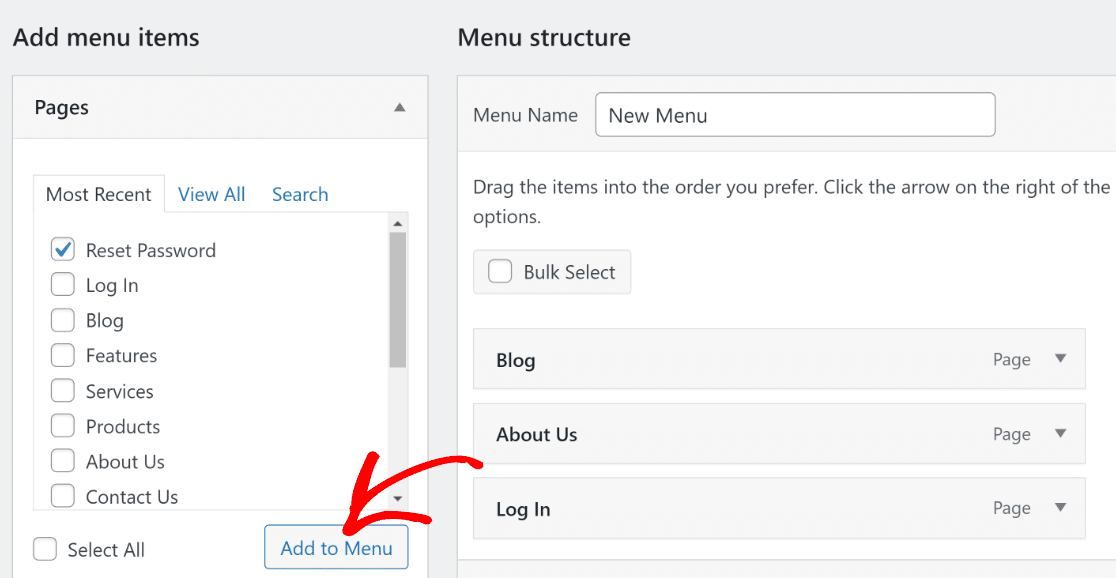
With this, the password reset page will be added to the stack of pages currently in your menu on the right. Press the Save Menu button to update it.
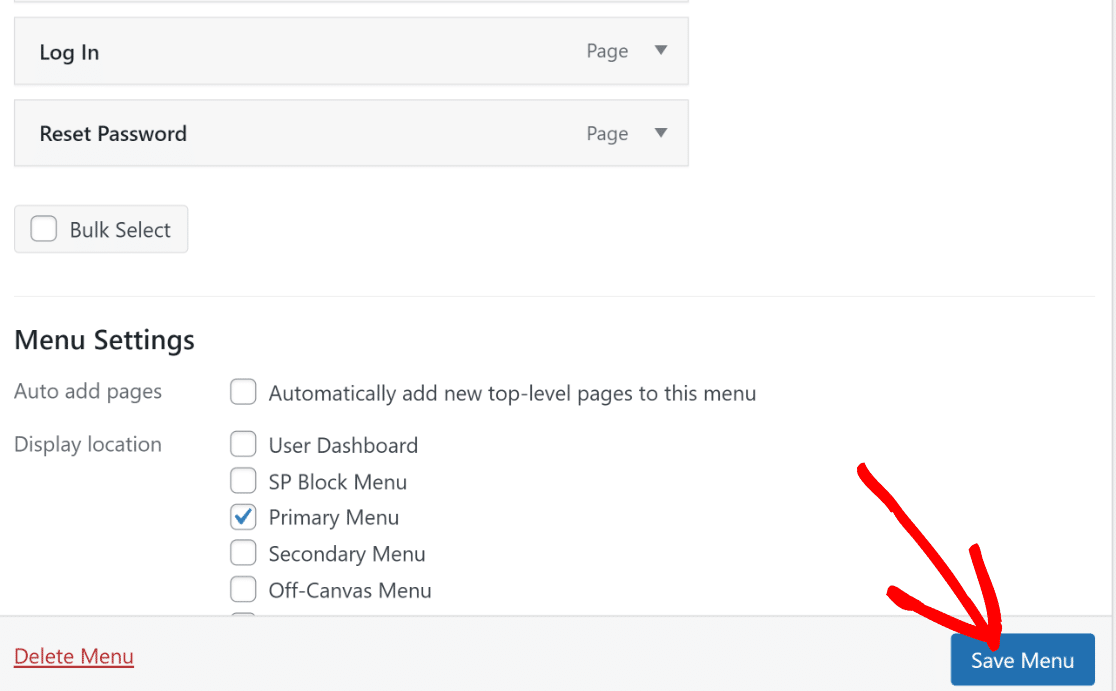
The process for creating a menu for the first time is almost similar. You’ll just have to name your menu first and then press the blue Create Menu button at the bottom.

When you’ve done that, you can add pages to your menu using the steps shown above. Here’s an example of how the navigation looks like for us:

All we need to do now is to add a redirect so that visitors trying to access your default WordPress reset page are automatically redirected to your new custom password reset page.
Optional: Add Redirection to Custom Password Reset Form
If you’re making a custom form to reset passwords on your website, it might be a good idea to also create a custom branded login form for your site.
Also, make sure to add a redirection to replace the default WordPress login page with the new custom page. But if your default login page is still accessible, you should add a redirection to the password reset form.
This way, if a user clicks the “Lost your password?” link from the WordPress login page, they’ll be redirected to the custom password reset page you just created above instead of the default WordPress password reset form.
Don’t worry; it’s easier than it sounds. First, we’re going to install the free WPCode WordPress plugin. On your WordPress dashboard, head to Plugins » Add New.
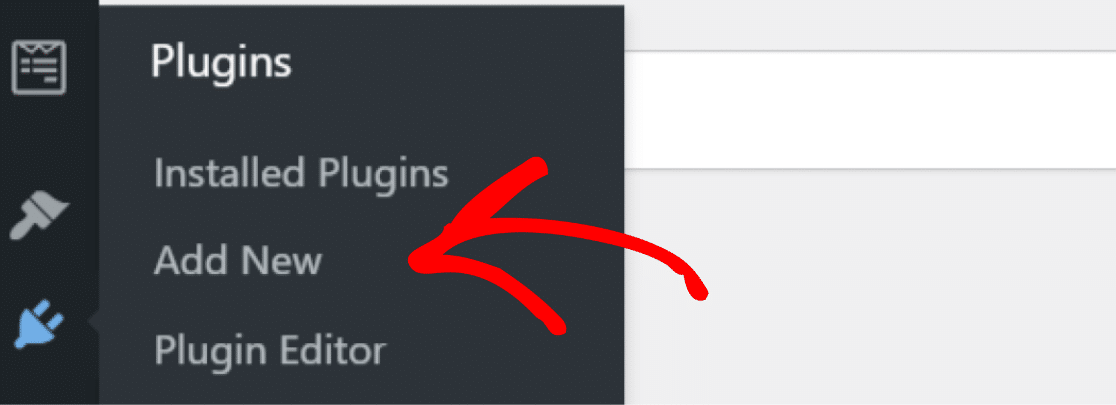
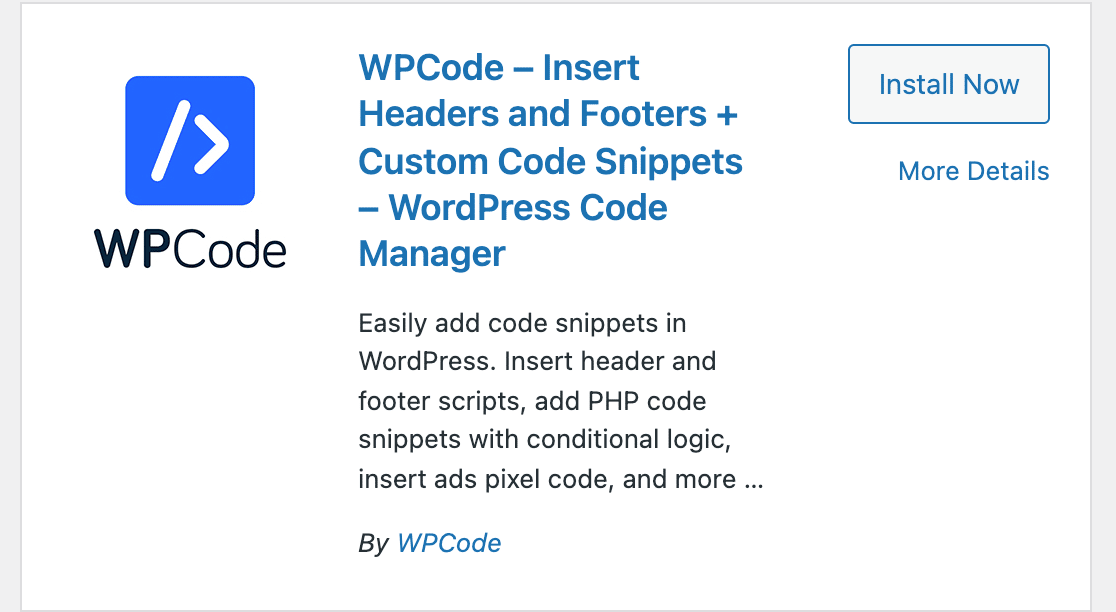
From there, search WPCode and click Install Now.
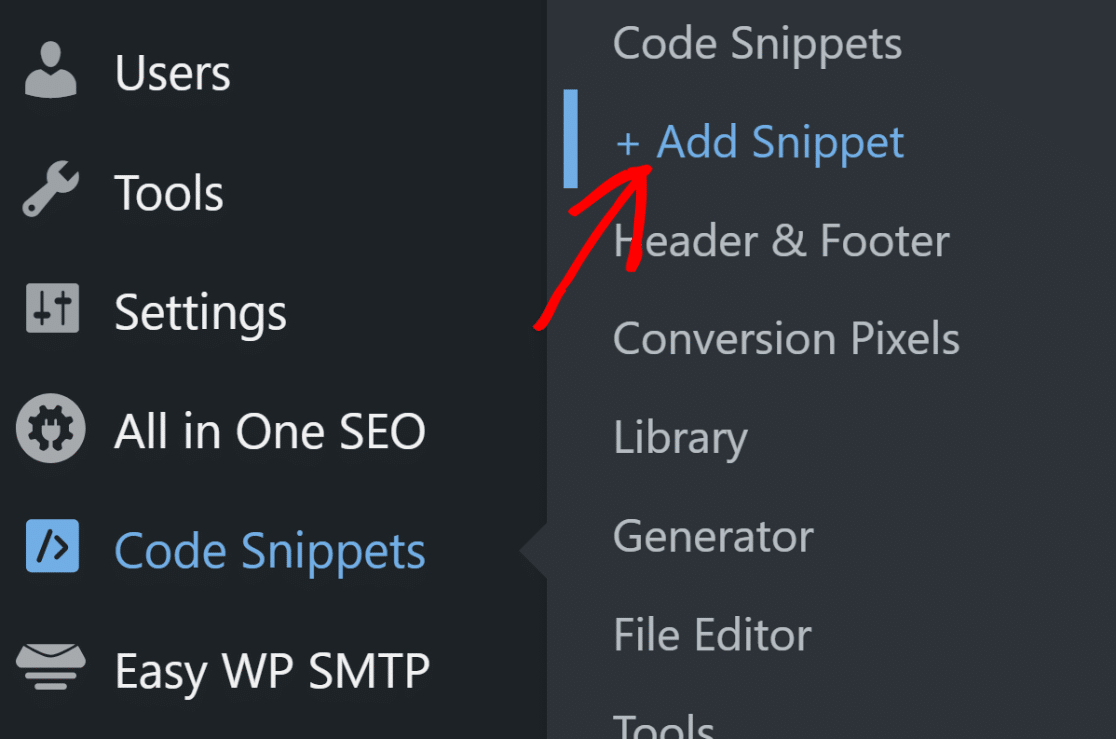
Once you’ve clicked Activate, it’s time to add our code. On your WordPress dashboard, click Code Snippets » + Add Snippet.
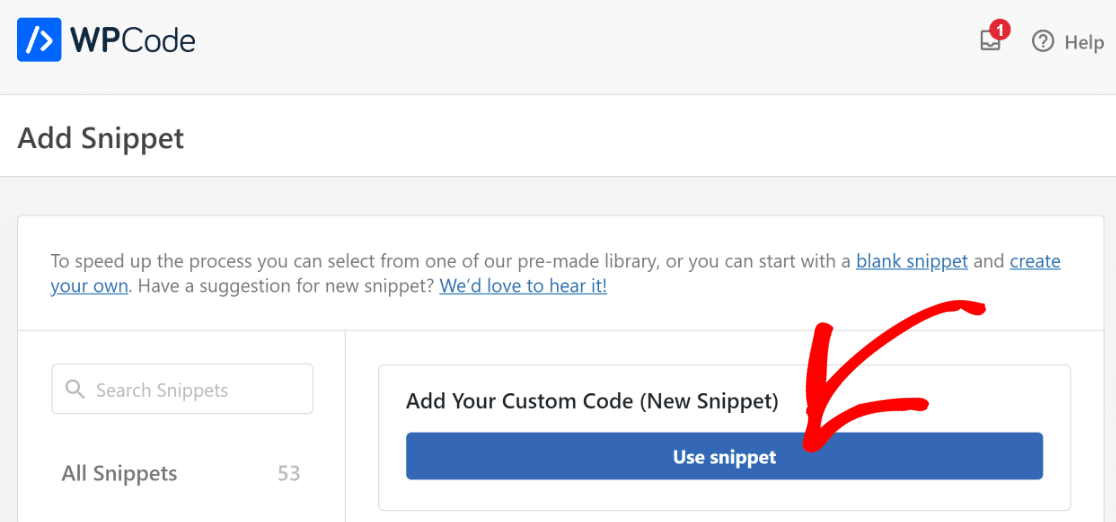
After clicking that, you’ll see the pre-made library with different code options you can choose. Click on Use Snippet under the Add Your Custom Code (New Snippet) option,
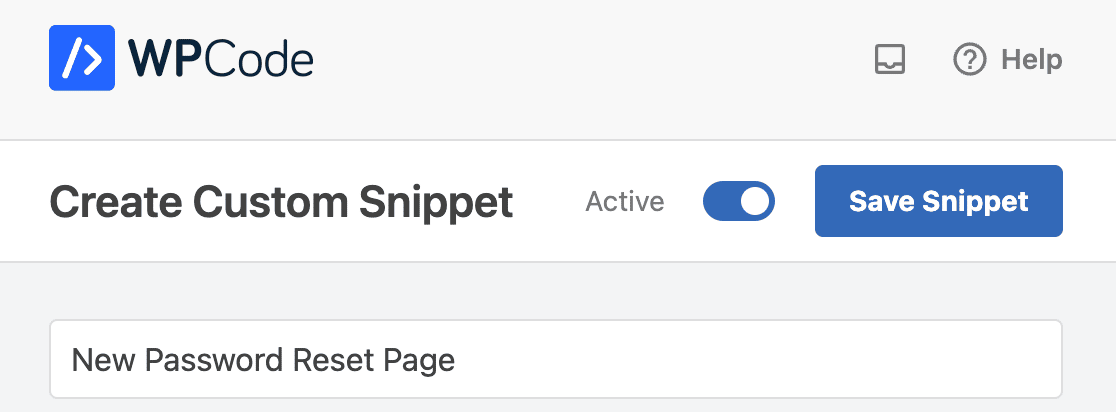
After you’ve titled your snippet (we’ve gone for “New Password Reset Page”), click on the Code Type dropdown to the right of the Code Preview and select PHP Snippet.

Now, you can copy and paste the following code into editor:
Remember to replace reset-password in the code above with the slug of your new custom password reset page.
Next, scroll down to the Insertion section, which is where you can specify the insertion method and location.
I recommend keeping the default location selection Run Everywhere and Auto Insert for the Insert Method.

When you’re finished, click the Save Snippet button on the top right. Then click the toggle switch next to it to activate the code snippet.
Excellent! Now, users will always land on your custom password reset page whenever they click on the lost password link.
Moving from a standard WordPress password reset form to a custom WPForms reset form brings you lots of benefits apart from improved branding.
For instance, you can add spam protection features using WPForms’ built-in anti-spam along with useful options like setting a minimum time to submit a form to keep spambots at bay.
For more details, you can follow our guide to preventing unauthorized password resets in WordPress, and eliminate these spam requests!
FAQs on How to Customize the Password Reset Form
Here are some common questions I get about customizing the WordPress password reset form with WPForms.
Can I customize the password reset email template?
Yes, you can customize the password reset email that users receive. In your form’s Notifications settings, you can modify the subject line, email content, and even add your own branding.
I usually include clear instructions and set expectations about what happens next. You can use Smart Tags to personalize the message with the user’s name or other details from their submission.
How do I redirect users after they submit the password reset form?
You have a few options for this. Go to Settings » Confirmations in your form builder and choose Show Page or Go to URL (Redirect).
I often redirect users to a custom “check your email” page that gives them clear next steps. This feels more professional than just showing a generic success message.
Can I add additional fields to the password reset form?
Absolutely. While the basic password reset only needs an email field, you can add security questions, phone numbers, or other verification fields using any of WPForms’ available field types.
Just remember that adding too many fields might discourage users from completing the form. I try to keep it simple while still getting the verification I need.
What happens if a user enters an email that’s not registered?
The User Registration addon will handle this automatically. If someone enters an email that doesn’t exist in your user database, they won’t receive a reset email, but they also won’t get an error message (this prevents people from fishing for valid email addresses).
From the user’s perspective, they’ll see the same confirmation message regardless. This is a security feature that I really appreciate.
How can I style the password reset form to match my theme?
WPForms gives you several styling options right in the form builder. Click on your embedded form in the page editor to access the styling panel, where you can choose from pre-made themes or customize colors, fonts, and spacing.
For more advanced customization, you can add custom CSS to your theme. I find the built-in styling options handle most cases without needing code.
Can I disable the default WordPress password reset and use only my custom form?
Yes, but this requires some technical work. You’d need to add custom code to your theme’s functions.php file to override WordPress’s default password reset behavior.
I usually recommend keeping both options available. Your custom password form wordpress can be the primary method, while the default WordPress reset serves as a backup for users who need it.
How do I prevent spam submissions on my password reset form?
WPForms includes several anti-spam features you can enable. Turn on the Custom Captcha field or enable hCaptcha in your form’s Settings » General tab.
You can also limit form submissions by IP address or enable the honeypot feature. I’ve found these methods work well together to stop most spam without frustrating real users.
Can I track how many password reset requests I receive?
Yes, WPForms automatically logs all form entries, including password reset requests. Go to WPForms » Entries to see submission details, dates, and user information.
If you need more detailed analytics, you can connect your form to Google Sheets using the Google Sheets addon to track patterns over time. This helps me spot unusual activity or identify if users are having trouble with specific parts of the process.
Next, Customize Your Password Reset Page
After you’ve embedded your password reset form onto your new page, you’ll want to brand it.
Why? By branding your password reset form and page, you’ll solidify the notion to your customer that you’re a legitimate company and increase your brand’s overall credibility.
Follow our complete guide to creating and customizing form pages on WordPress. In addition, you may want to learn how to customize a password protected page in WordPress.
Also check out our guide on how to customize your WordPress theme colors and style your forms to match your brand colors.
Ready to build your form? Get started today with the easiest WordPress form builder plugin. WPForms Pro includes lots of free templates and offers a 14-day money-back guarantee.
If this article helped you out, please follow us on Facebook and Twitter for more free WordPress tutorials and guides.



When I click the reset password link sent by the email, the password field of the form doesn’t show.
Hey Ayomikun – We’d be happy to help! When you get a chance, please drop us a line in support so we can assist.
If you have a WPForms license, you have access to our email support, so please submit a support ticket.
Otherwise, we provide limited complimentary support in the WPForms Lite WordPress.org support forum.
Thanks 🙂
Same here. Did you happen to find a solution for this?
Hey Wagner – We’d be happy to help! When you get a chance, please drop us a line in support so we can assist.
If you have a WPForms license, you have access to our email support, so please submit a support ticket.
Otherwise, we provide limited complimentary support in the WPForms Lite WordPress.org support forum.
Thanks 🙂