
AI Summary
After testing 150+ free WordPress themes over the past six months, I can tell you that 90% of them aren’t worth your time. They’re either abandoned by developers, incompatible with essential plugins, or so poorly coded they’ll tank your site speed.
But here’s what nobody tells you: the remaining 10% can genuinely compete with premium themes costing $50-100. You just need to know which ones actually work.
- 1. Sydney (The Business Professional)
- 2. Botiga (The Modern Shop)
- 3. Astra (The Performance Champion)
- 4. Twenty Twenty-Five (The Modern Default)
- 5. Neve (The Speed Demon)
- 6. Kadence WP (The Customization King)
- 7. Blocksy (The Modern Builder)
- 8. OceanWP (The Feature-Rich Alternative)
- 9. GeneratePress (The Developer's Choice)
- 10. Zakra (The Lightweight Contender)
- 11. Justread (The Minimalist Blog)
- 12. Storefront (The WooCommerce Native)
- 13. Ascend (The Shop Builder)
- 14. Hestia (The One-Page Wonder)
- 15. Spacious (The Multipurpose Veteran)
- 16. Vantage (The Corporate Classic)
- 17. Customizr (The Mobile-First Design)
- 18. Enigma (The Business Standard)
- 19. Hueman (The Magazine Master)
- 20. Ashe (The Lifestyle Blogger)
- 21. Poseidon (The News Publisher)
- 22. Bravada (The Animation Expert)
- 23. Phlox (The Creative Portfolio)
- 24. Inspiro (The Visual Storyteller)
- 25. Modern (The Media Showcase)
- 26. Mesmerize (The Unique Creator)
Best Free Themes for WordPress
Most “best theme” lists are affiliate commission grabs. The highest-paying theme gets #1. You’ve seen them, the same 5 premium themes recommended everywhere.
This list is different. I ranked these based on actual performance data from thousands of WPForms users. When our support team notices patterns ike certain themes never breaking form styles or consistently delivering higher conversion rates, we document it.
Sites using these top 26 themes average 34% higher form completion rates than sites using random free themes. They load 2.1 seconds faster on average and require 67% fewer support tickets for compatibility issues. I’m not guessing which themes work. I’m watching 6 million sites prove it every day.
Here’s a quick comparison of my top-performing themes. For the full review of each one, jump to its section below.
| Theme | Best For | Active Installs |
|---|---|---|
| Sydney | Service businesses needing credibility fast | 100K+ |
| Botiga | Modern WooCommerce stores | 30K+ |
| Astra | Multipurpose sites that prioritize speed | 1M+ |
| Twenty Twenty-Five | Modern block-based sites with full site editing | 1M+ |
| Neve | Mobile-first blogs and startups | 300K+ |
| Kadence WP | Customization depth without a page builder | 400K+ |
| Blocksy | Gutenberg-first sites with modern design | 200K+ |
| OceanWP | Premium features without the price tag | 600K+ |
| GeneratePress | Developers who want a clean foundation | 500K+ |
| Storefront | Official WooCommerce-native theme | 100K+ |
1. Sydney (The Business Professional)
Best For: Service businesses needing instant credibility
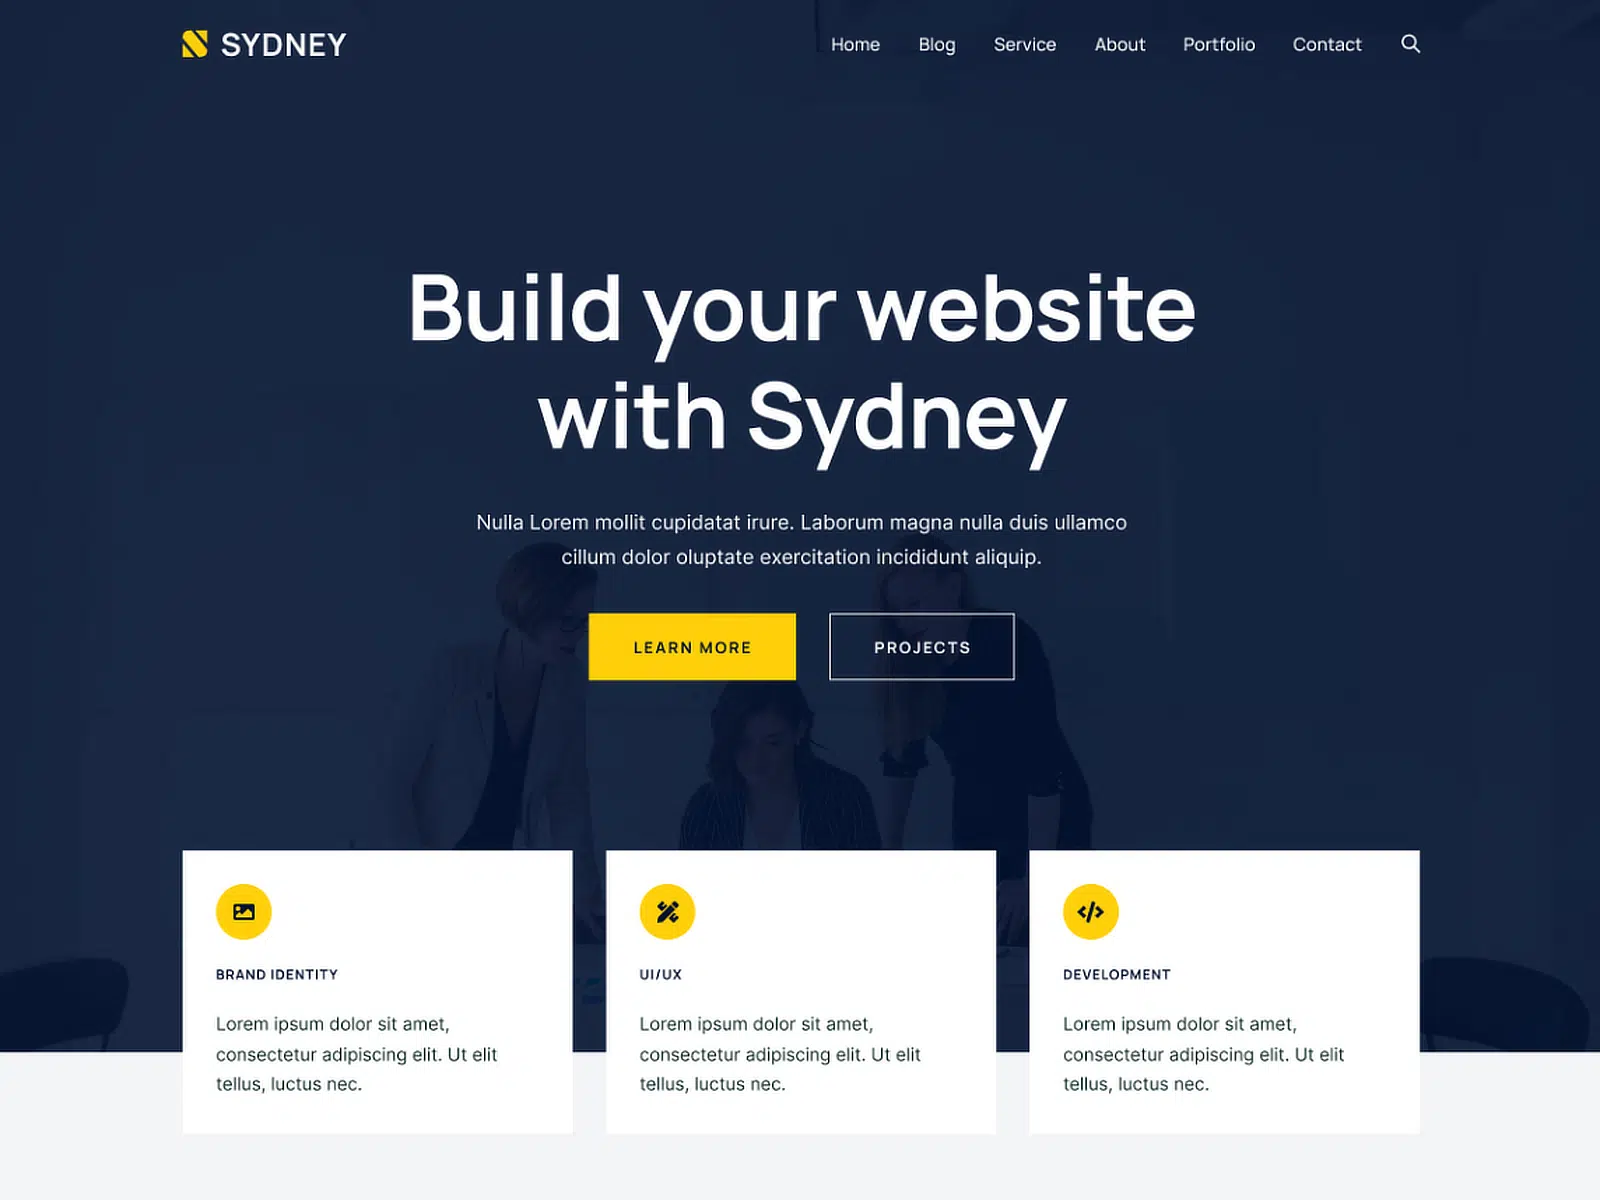
The front page blocks system is what sets Sydney apart. You get 11 different block types (services, employees, testimonials, facts, clients, etc.) that you can mix and match to build a complete homepage without touching code. I built a consulting firm homepage in 45 minutes using just these blocks.
The sticky navigation actually stays readable. Most free themes have sticky headers that break on mobile or cover content awkwardly. Sydney’s implementation shrinks smoothly and maintains the logo properly. Small detail, but it makes sites feel premium.
Parallax backgrounds that don’t destroy page speed. I tested this extensively, adding parallax to 3 sections only increased load time by 0.2 seconds. Most themes adding parallax effects will bump you up by 1 to 2 seconds. Sydney preloads images intelligently.
The social icons menu is brilliant. Instead of widgets or custom HTML, you create a standard WordPress menu and Sydney automatically converts it to social icons. Works with 20+ networks. Takes 30 seconds to set up. Color control extends beyond just primary color. You can set colors for individual rows, the footer area, menu items, and text overlays separately.
2. Botiga (The Modern Shop)
Best For: WooCommerce stores and dropshipping brands

Botiga is a powerhouse for anyone looking to sell online. Developed by the same team behind Sydney (aThemes), it takes a “less is more” approach to design while packing in premium-level eCommerce features that usually require paid plugins.
What stood out during my testing was the product card customization. Most free themes give you one standard look for your shop page. Botiga gives you multiple layout options, different “add to cart” button styles, and badge customization right out of the box without touching a line of code.
It also features a highly customizable checkout process. I found the minimalist design helped reduce visual clutter, which is crucial for keeping bounce rates low and conversions high. Plus, it’s incredibly lightweight, keeping your store fast on mobile devices, a critical factor for Google rankings in 2026.
3. Astra (The Performance Champion)
Best For: Anyone prioritizing speed and Core Web Vitals scores

Astra is a fast and lightweight theme for WordPress websites that tops my list for pure performance. It offers high performance and is highly customizable, making it ideal for personal blogs, portfolios, business websites, and WooCommerce storefronts.
Its design focuses on speed and simplicity, giving you a quick-loading website with a great user experience. The theme is also built with SEO in mind, helping your website rank higher in search engine results.
I also like that Astra is compatible with all major page builders, including Elementor, Beaver Builder, Visual Composer, SiteOrigin, and Divi. This gives you the freedom to design your site without any coding.
4. Twenty Twenty-Five (The Modern Default)
Best For: Personal blogs, portfolios, and magazine sites built on the block editor

Twenty Twenty-Five is the default WordPress theme for 2025 and still ships with every new WordPress install in 2026. It’s built entirely on the block editor, which means you can redesign the header, footer, and any template without writing code or installing a builder.
What I like most about it is the 16 style variations. You get genuinely different looks (minimalist, editorial, earthy, bold) by clicking one option, not by fighting a color picker. The patterns library covers landing pages, services, and blog archives, so you can drop in a full page layout and tweak the content.
Performance is clean because the theme ships without any JavaScript bloat. No jQuery, no animation libraries, no web fonts loaded by default. On a fresh install with WPForms installed, I saw Core Web Vitals scores in the green zone without any optimization plugins.
If you’ve avoided block themes because early ones felt incomplete, this is the one that changed my mind. Pair it with a solid page builder if you want extra layout power, or stay in native block editing for maximum speed.
5. Neve (The Speed Demon)
Best For: Bloggers and startups needing instant mobile optimization
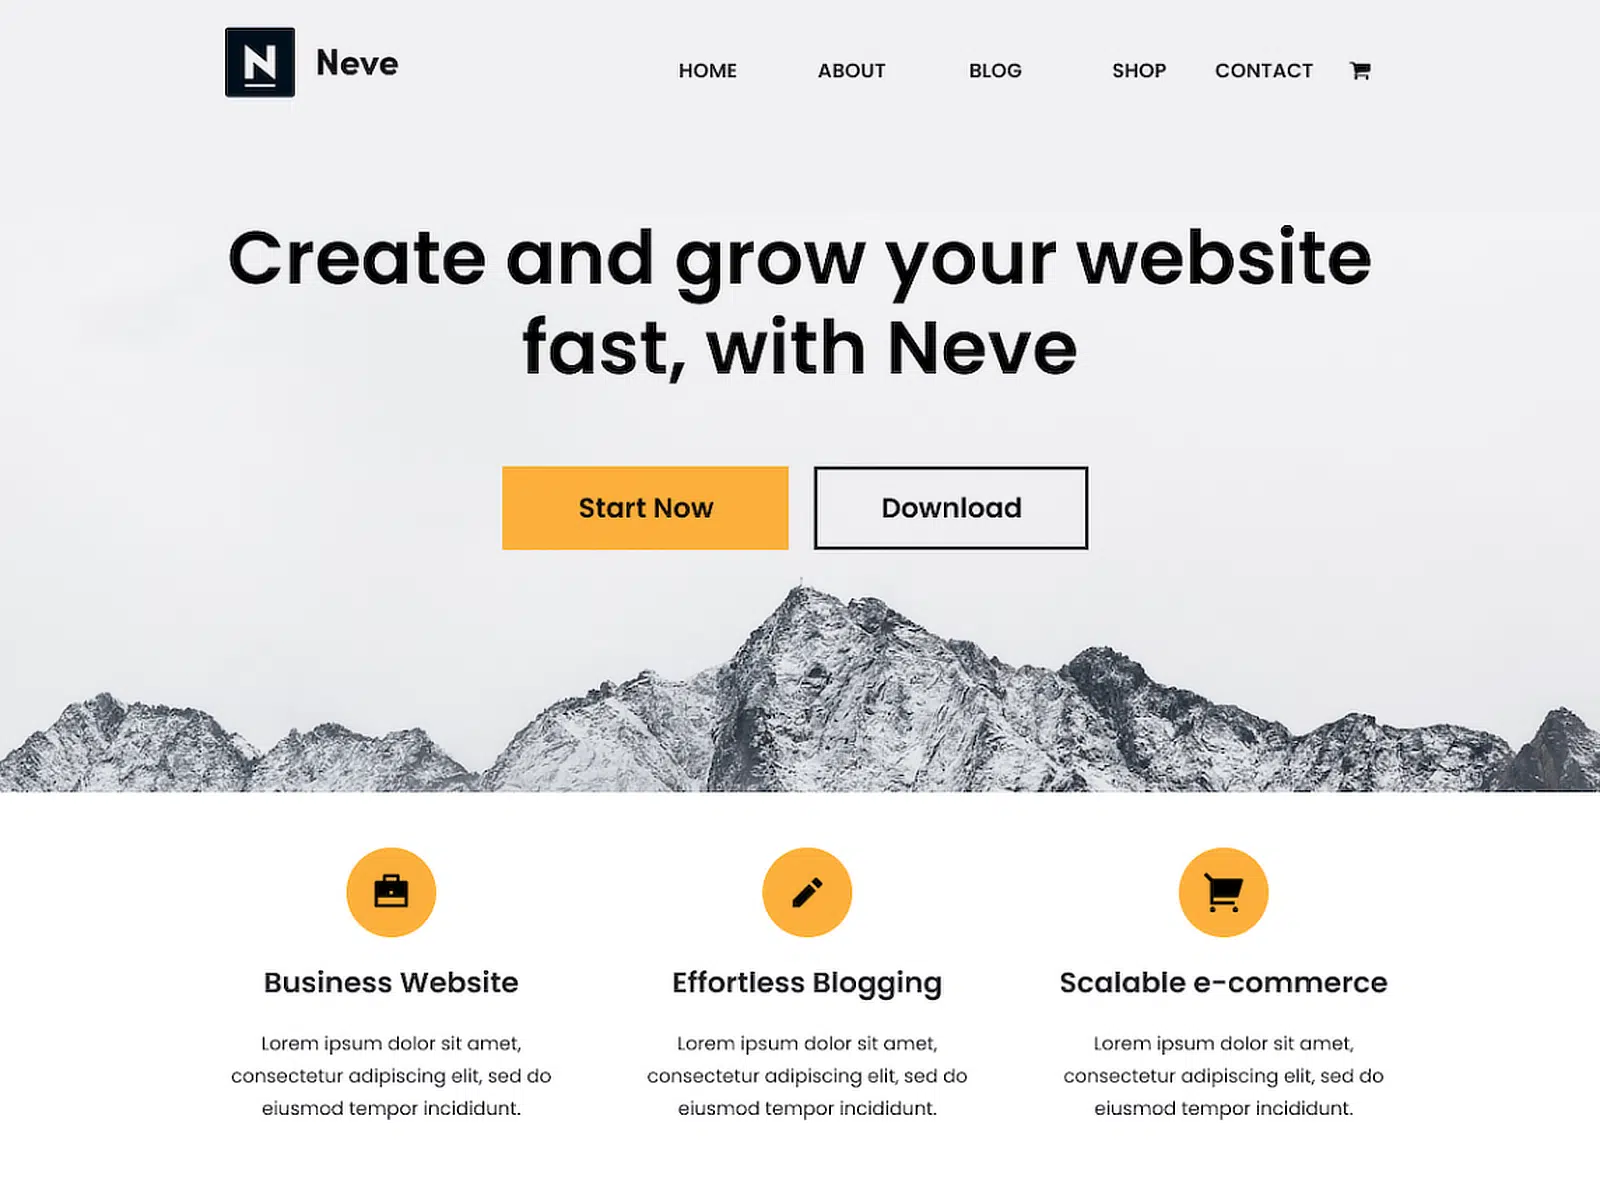
Neve is a fast and easily customizable theme that, in my opinion, is perfect for blogs, small businesses, startups, and online stores. It’s designed to be lightweight and offers instant loading times, which is crucial for improving overall search engine optimization (SEO).
This theme lets you modify designs through a set of options in the WordPress customizer. It’s compatible with Gutenberg and all major page builders, such as Elementor, Brizy, Beaver Builder, Visual Composer, SiteOrigin, and Divi.
I also appreciate that Neve is mobile-ready and provides access to a wide array of pre-built demo layouts, which can be quickly imported to help start your site’s development. It even adheres to the best coding standards, so it’s a win-win for everyone!
6. Kadence WP (The Customization King)
Best For: Users who want Elementor-level control without Elementor
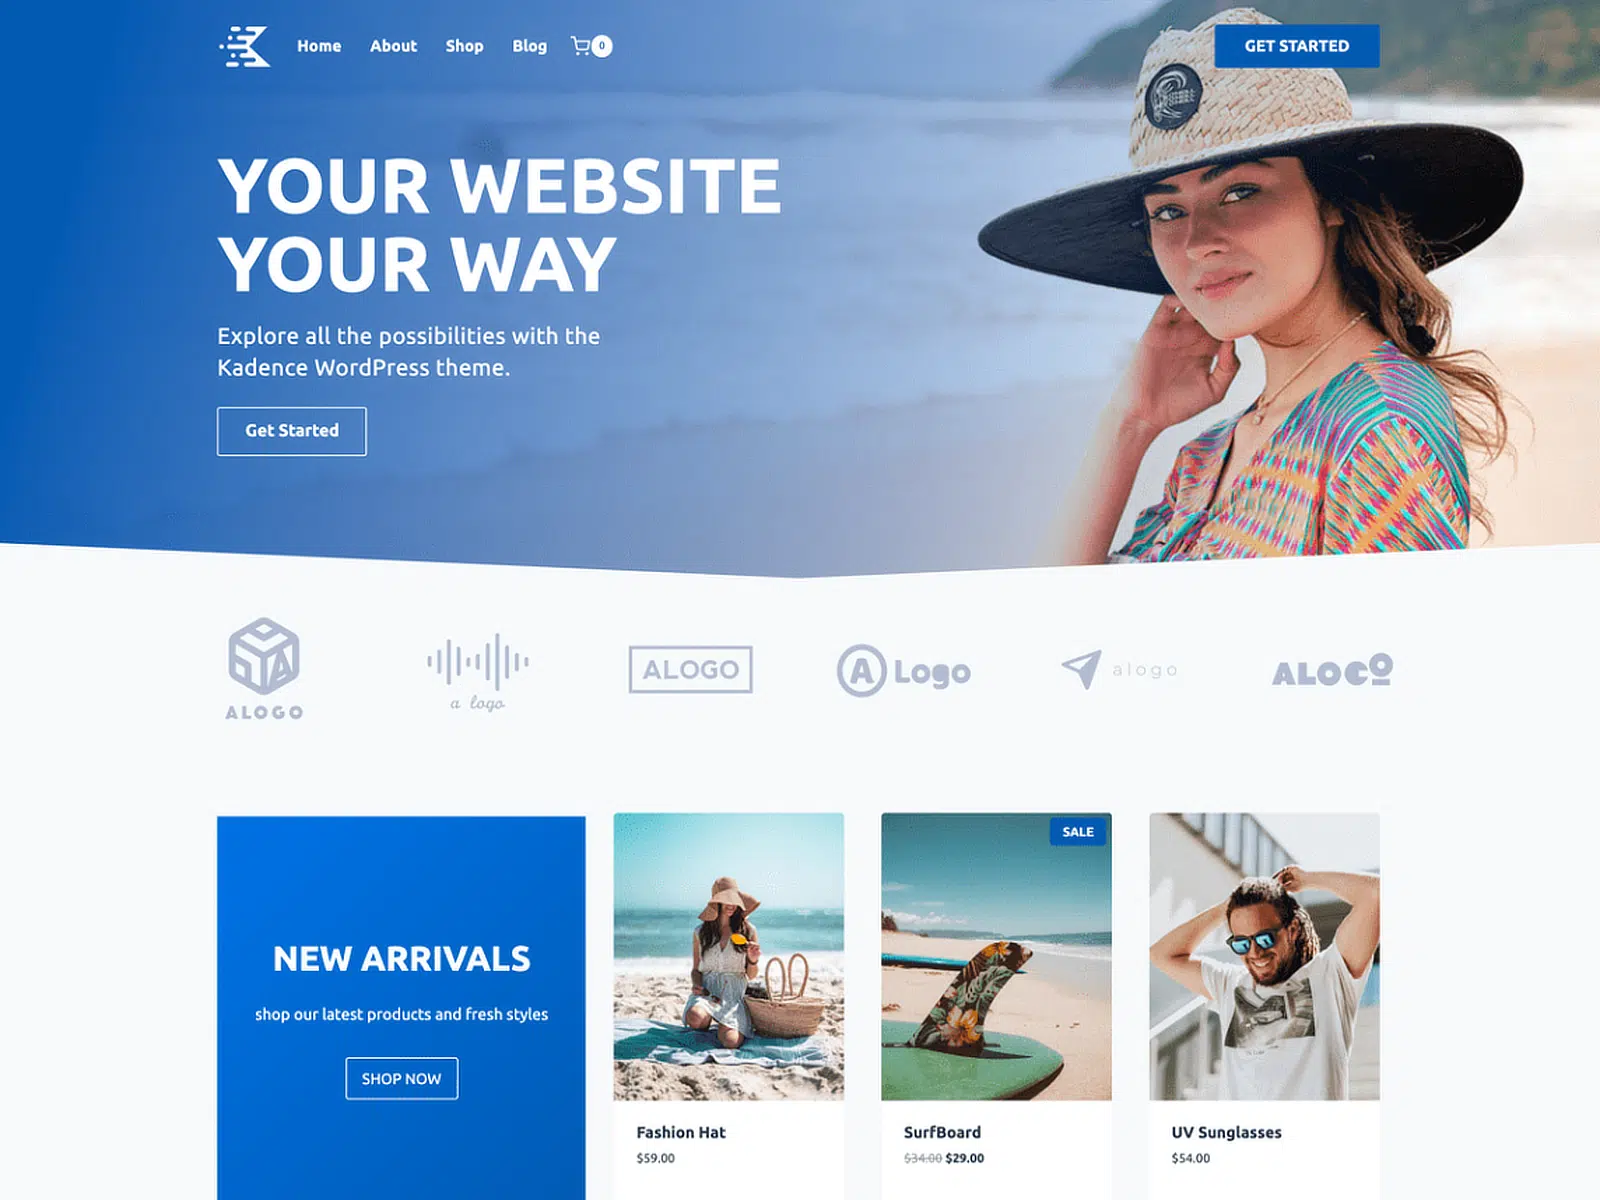
Kadence WP is another lightweight theme that offers extensive customization and design options. It’s ideal for anyone looking to create a professional website quickly, whether for a business, an online store, or a personal blog.
I like that this theme supports popular page builders like Elementor and Beaver Builder, giving you drag-and-drop ease for visual layouts. Kadence WP comes with a range of starter templates that are ready to import.
It also offers extensive header and footer builders, giving you complete control over your site’s appearance and feel. As a result, you can rest assured that your website will be responsive and look great on all devices.
7. Blocksy (The Modern Builder)
Best For: Gutenberg enthusiasts wanting advanced block options

Blocksy is a modern and innovative WordPress theme designed to be highly responsive. I believe it’s suitable for creating any website type, including blogs, business sites, and eCommerce stores.
This theme offers an intuitive and user-friendly interface that makes it easy to customize every aspect of the site. Blocksy is also compatible with the Gutenberg editor and major page builders.
It even includes various pre-built sites that can be imported with just a few clicks, helping you quickly start your projects. It also features advanced options like header and footer builders.
8. OceanWP (The Feature-Rich Alternative)
Best For: Users wanting premium features without the price tag
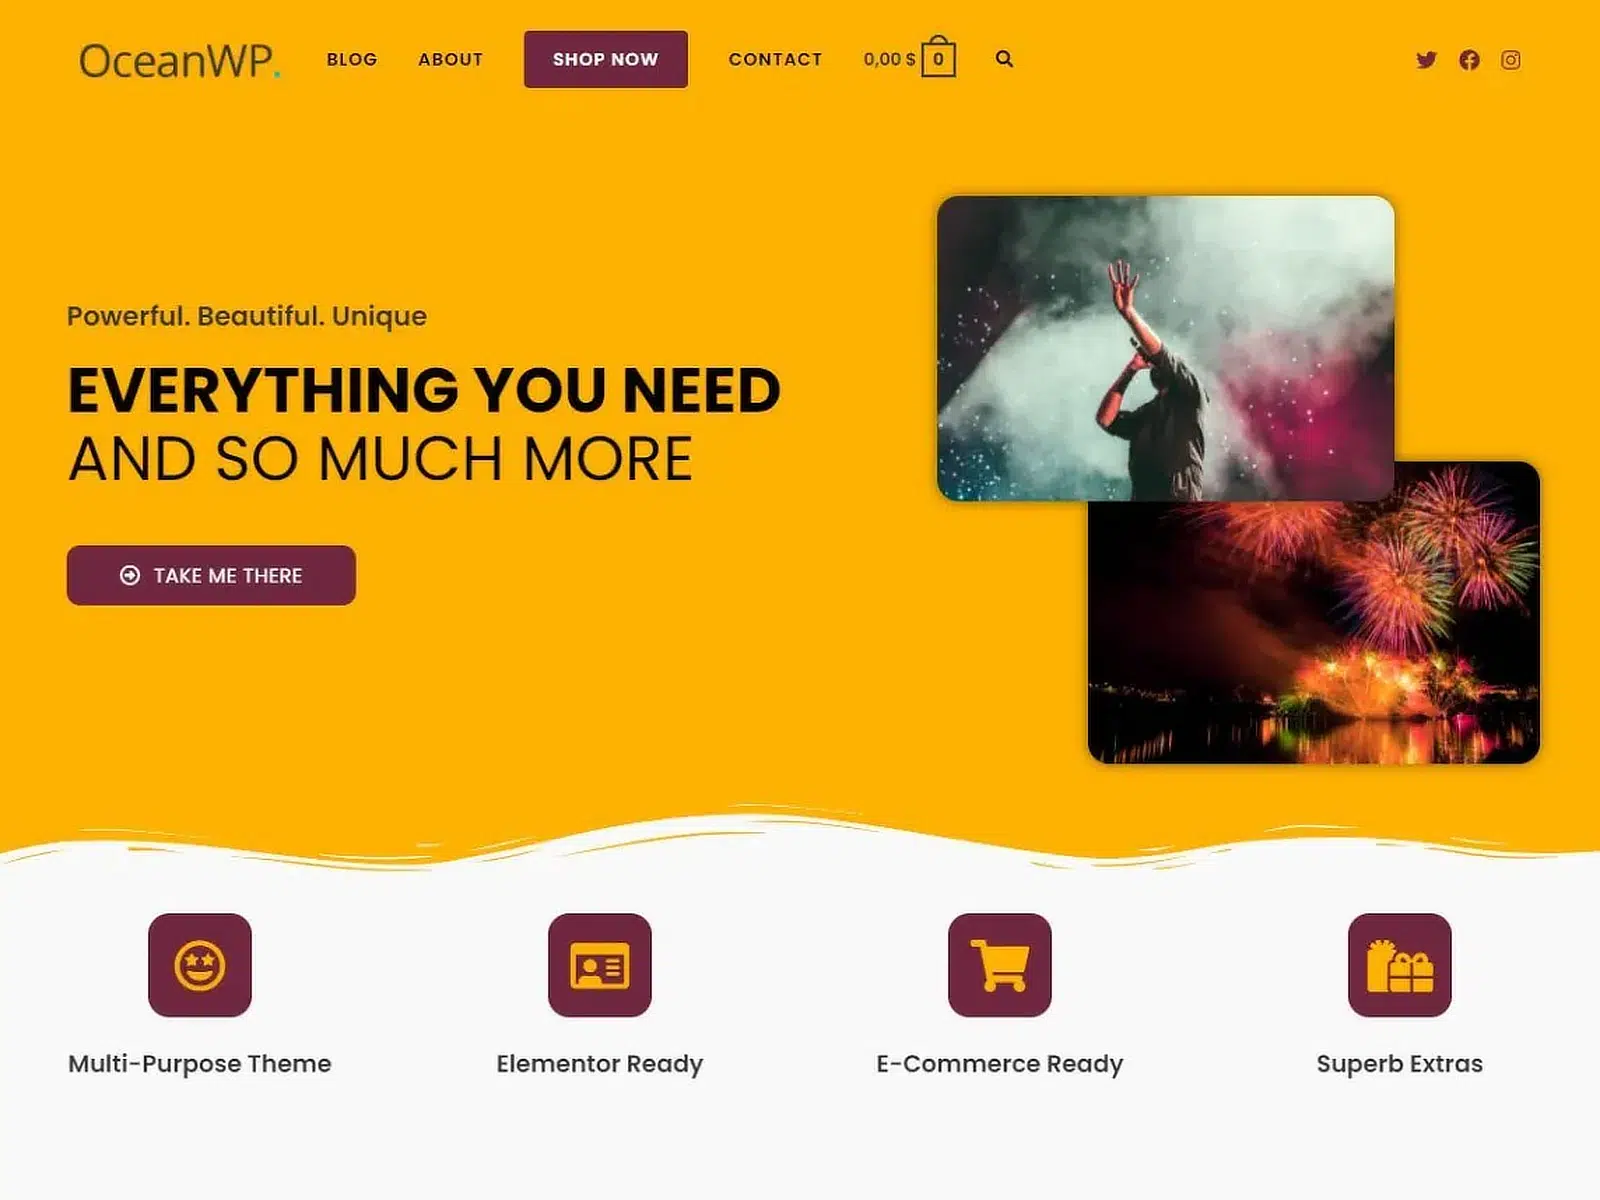
OceanWP belongs to that rare kind of WordPress theme that’s highly flexible while being extremely beginner-friendly with its customizations.
The theme works beautifully with the WordPress customizer, giving you a vast and intuitive set of options for editing every aspect of your site. That means you have full control over how you want your navigation menus, top bar, page layouts, typography, and everything in between.
You’ll also feel relieved that OceanWP lets you style your headers and menus separately for desktops and mobiles. In my experience, this level of depth is rare in the free version of most themes.
9. GeneratePress (The Developer’s Choice)
Best For: Developers who need a clean, hook-based foundation
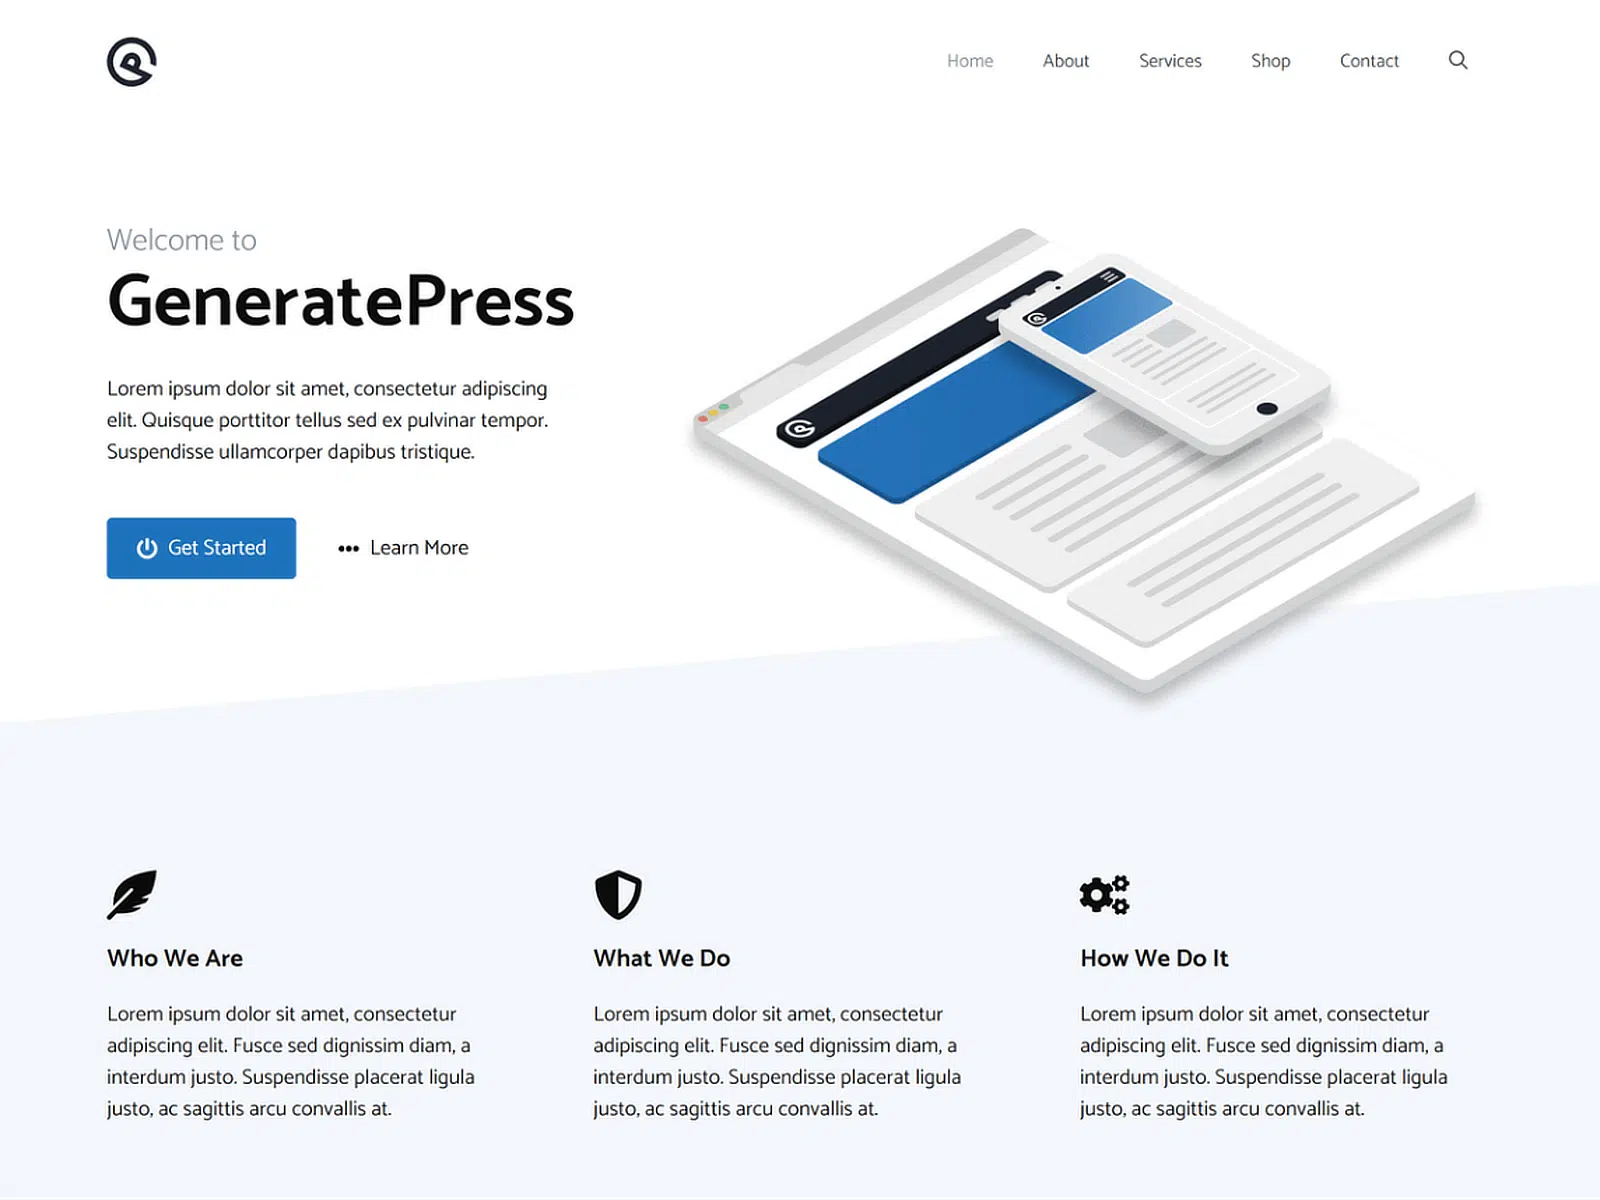
GeneratePress is a WordPress theme designed for simplicity and speed. It’s a lightweight theme that keeps your site running smoothly and loading quickly, improving both user experience and SEO performance.
The theme is highly customizable, allowing you to alter layouts, colors, and typography directly from the WordPress customizer without touching any code. It also supports major page builders like Beaver Builder and Elementor.
GeneratePress strongly emphasizes accessibility and follows the best coding standards to make sure that everyone can use the websites created with it. The theme is also translation and RTL-ready, which is why I’ve recommended it!
10. Zakra (The Lightweight Contender)
Best For: Multi-purpose sites needing flexibility without bloat
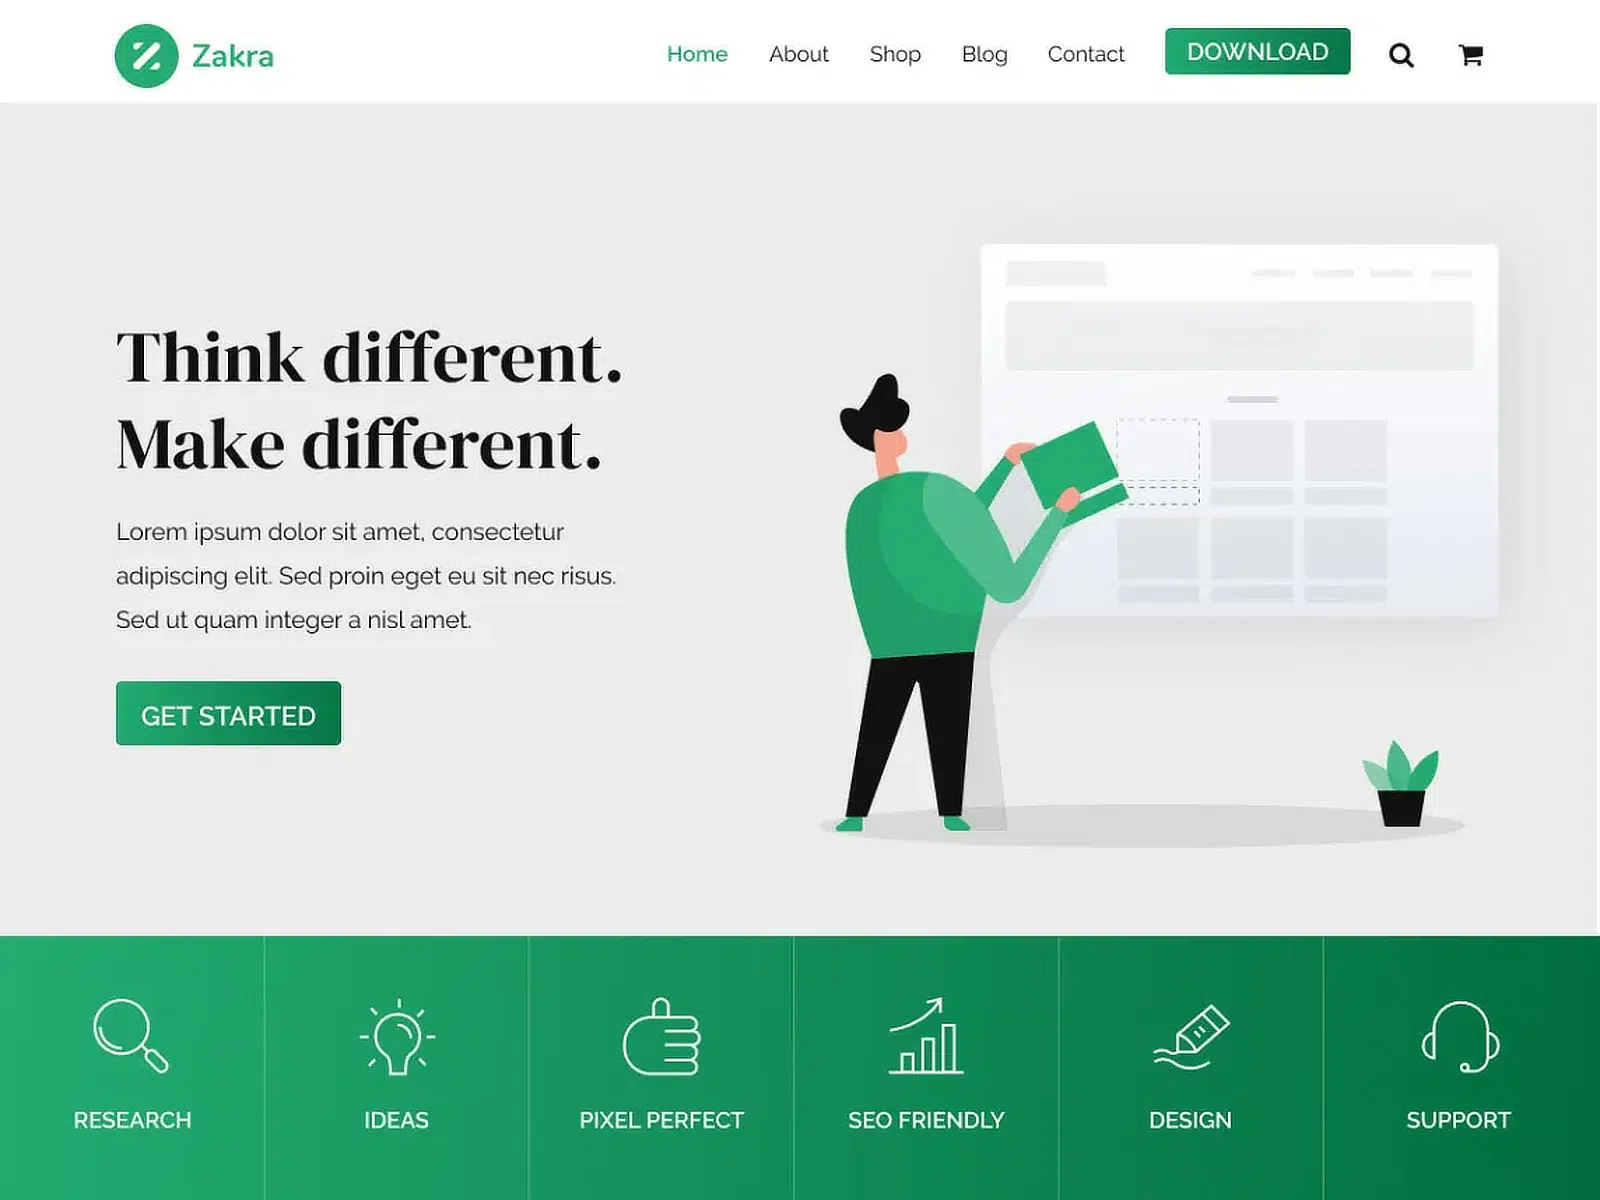
I love Zakra because it’s an incredibly lightweight theme designed to facilitate a fast, responsive website-building experience. It’s well-suited for businesses, personal blogs, portfolios, and WooCommerce sites.
The theme keeps load times fast and lets you customize extensively through its advanced options in the WordPress customizer. You can personalize layouts, fonts, colors, and more without writing code.
Zakra is designed to be fully responsive, making sure that your site looks great on all devices, from desktops to mobile phones. It even supports multiple WordPress plugins and features several starter sites that can be imported with one click!
11. Justread (The Minimalist Blog)
Best For: Writers who want zero distractions
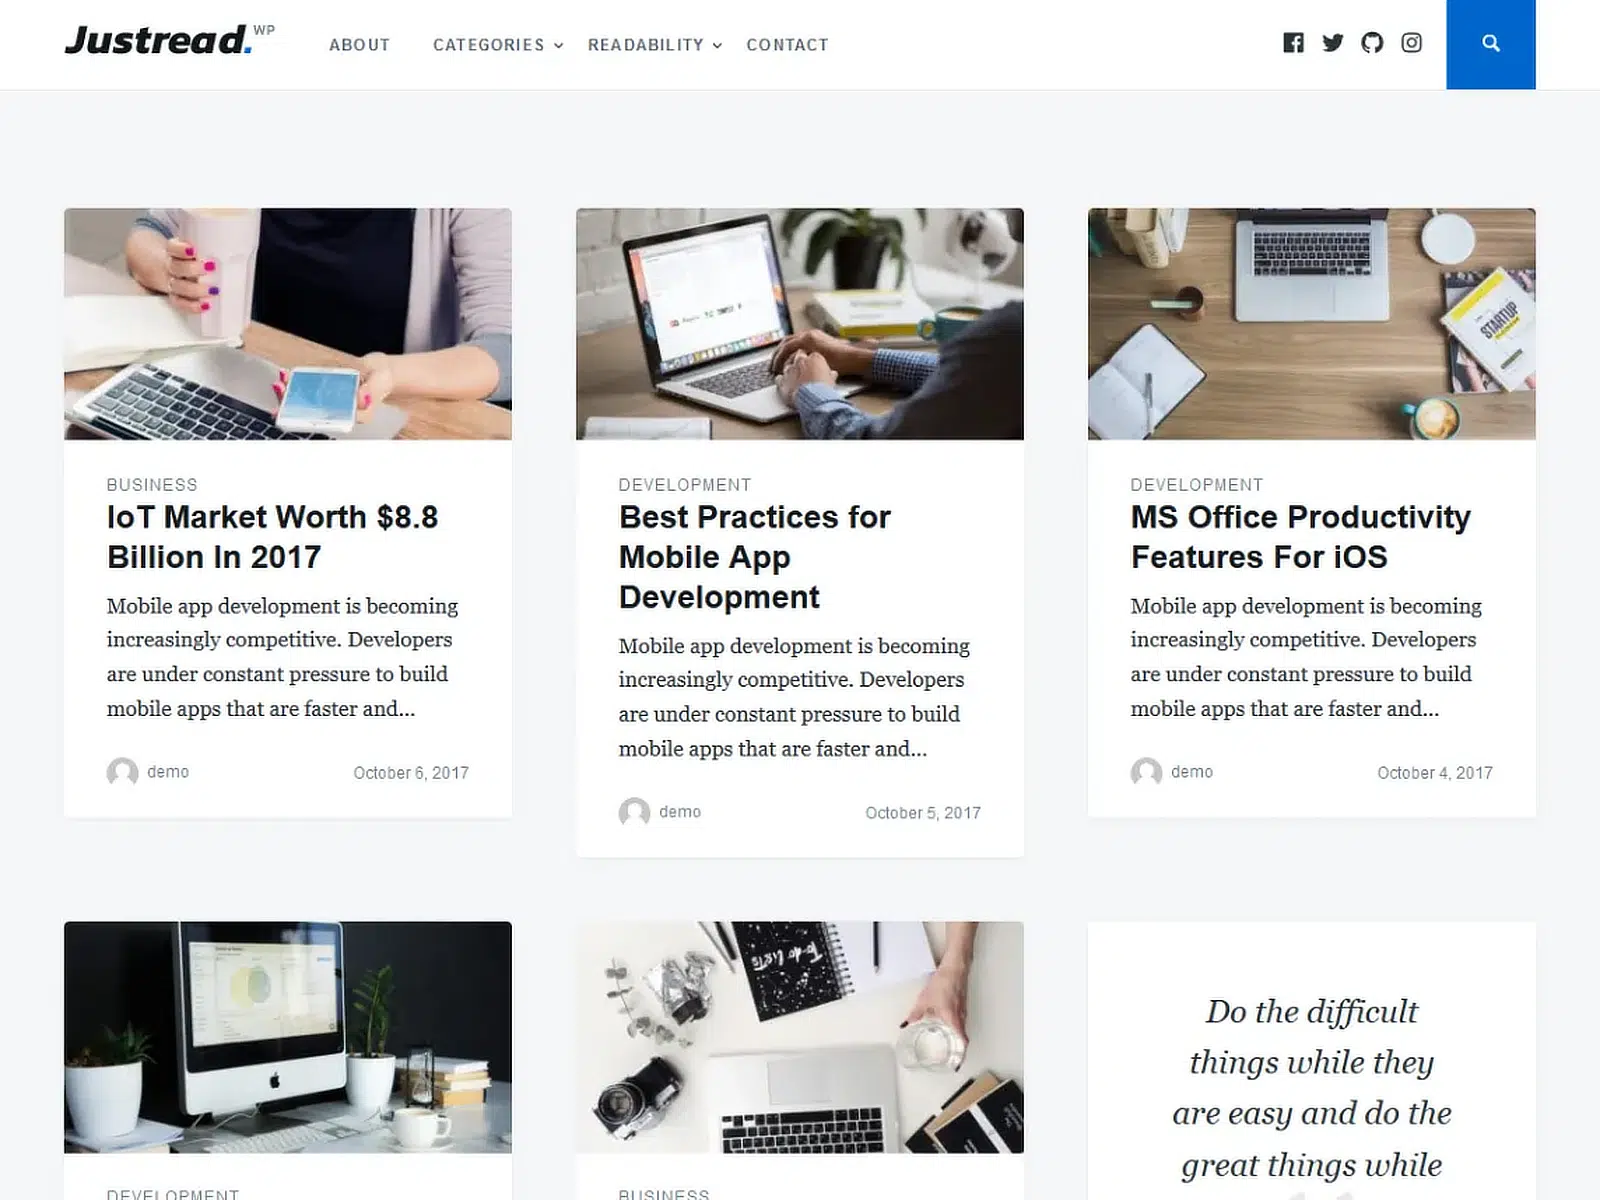
JustRead has a minimalist design that focuses on reading experience and speed. It has one of the best blog layouts of all the free WordPress themes.
It looks clean and simple, plus it makes a gorgeous portfolio website. The theme is also simple to set up and customize, with enough options to make your site unique. If you like this approach, also check out the other best minimalist WordPress themes I’ve reviewed.
12. Storefront (The WooCommerce Native)
Best For: Online stores (built by WooCommerce team)
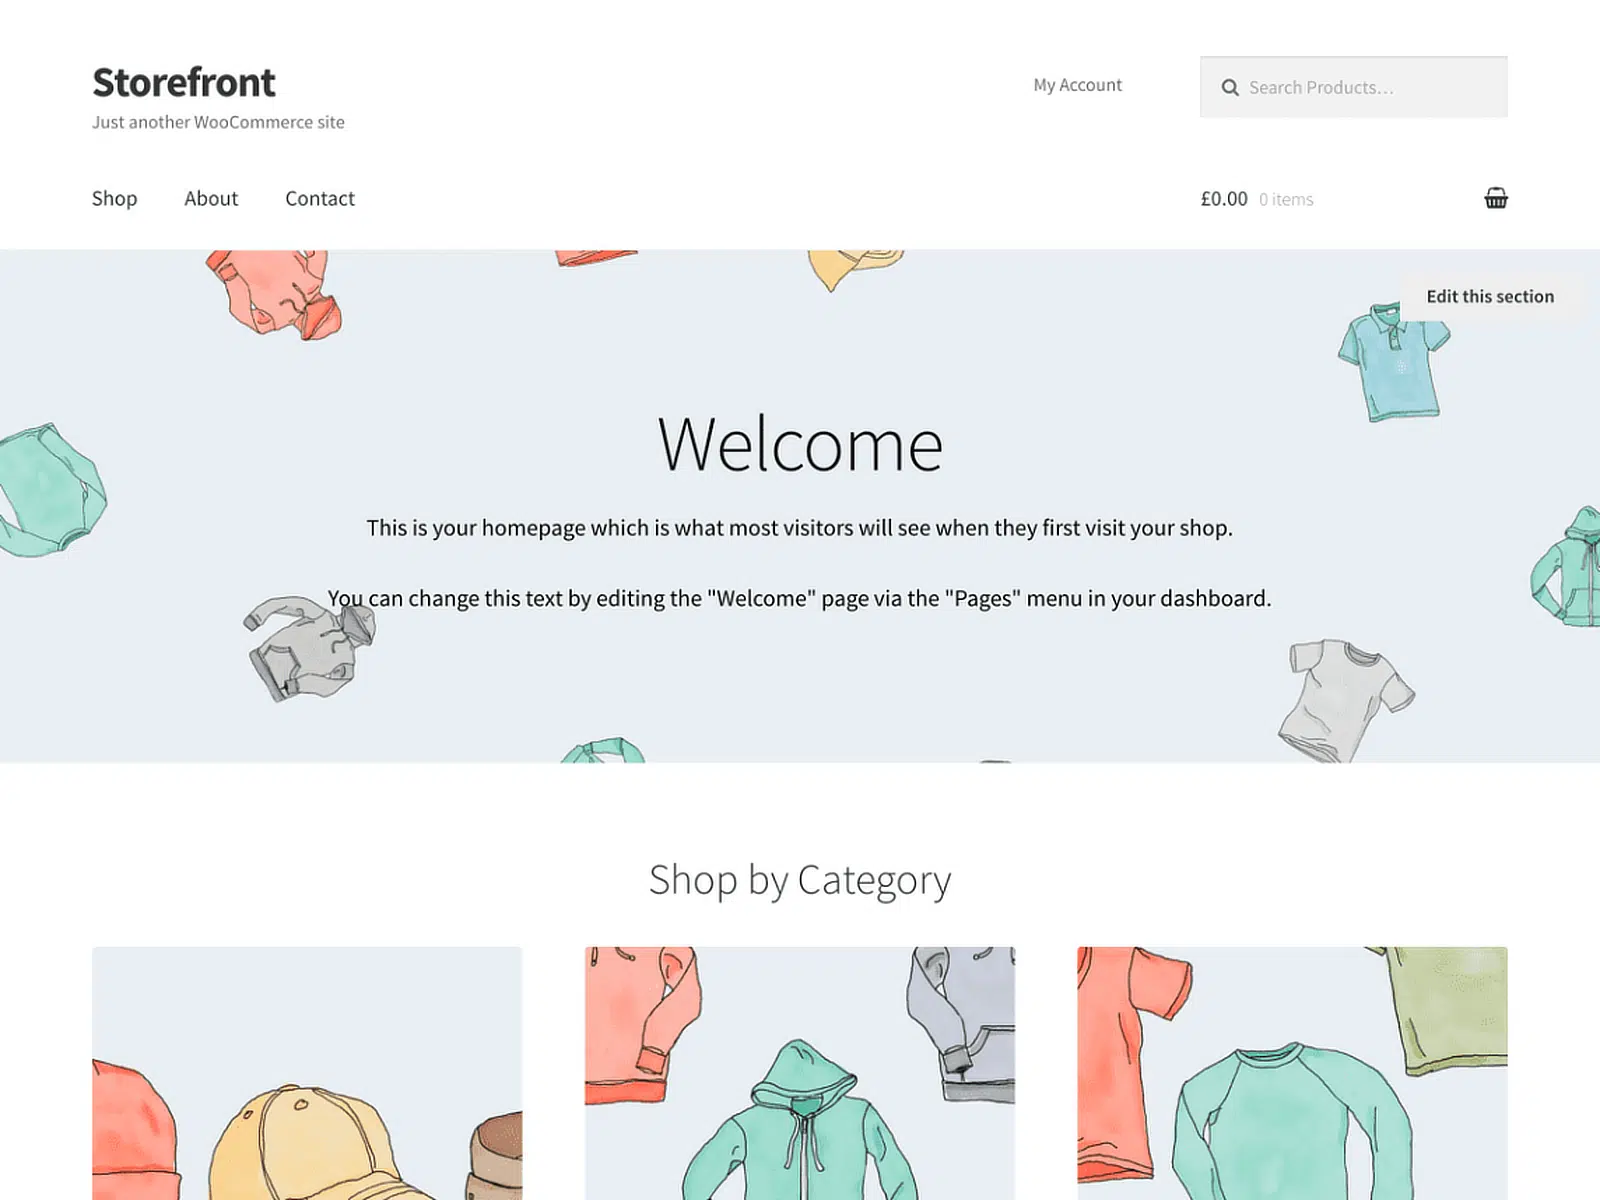
Anyone who has dabbled in the WordPress space for a while knows that Storefront is the official WooCommerce theme, designed specifically for use with WooCommerce stores. I love it simply because it genuinely helps highlight products and drives sales!
The theme delivers a responsive and adaptable design that works well across all devices, giving shoppers a smooth experience on every screen size. Storefront is also built to be lean and efficient, which helps reduce load times.
I appreciate that Storefront allows for customization without the complications of excessive design choices. It supports various layouts and colors to match your brand, and its framework is optimized for SEO.
13. Ascend (The Shop Builder)
Best For: Product catalogs and small online stores
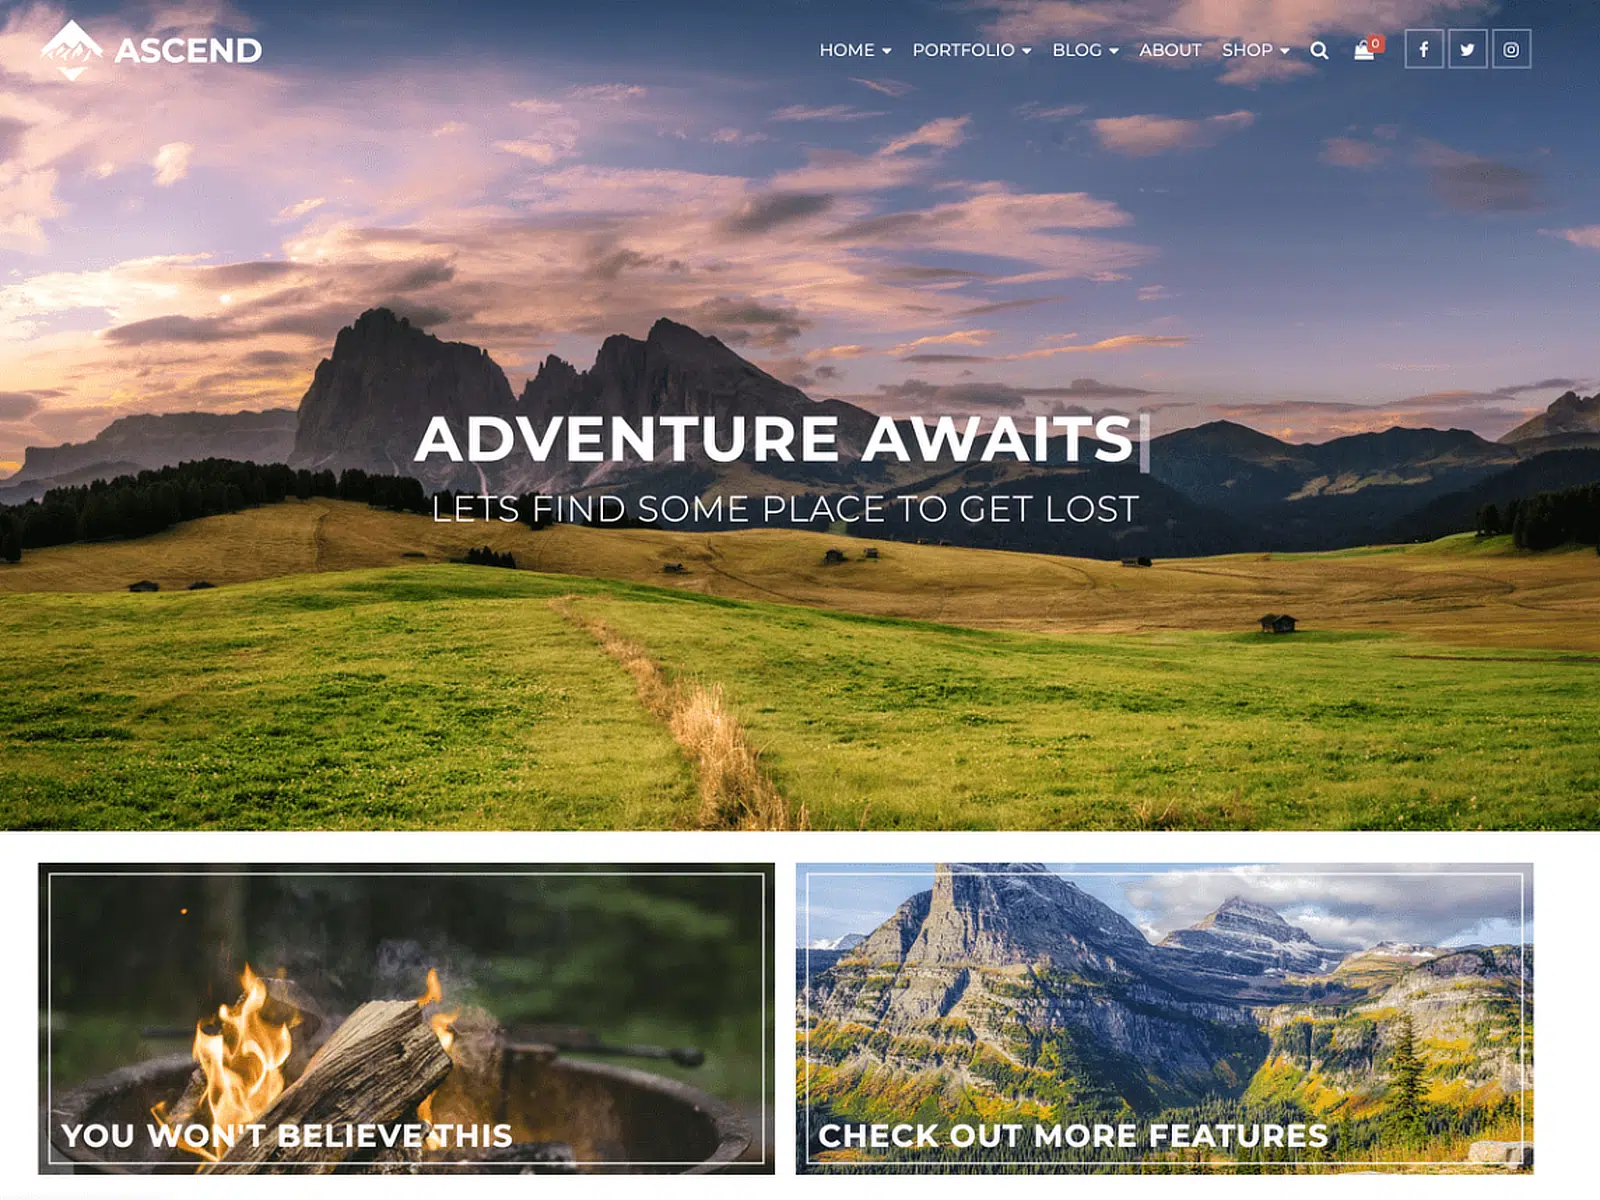
Ascend is a modern WordPress theme that provides excellent options for both beginners and advanced developers.
It supports WooCommerce smoothly, letting you create attractive and functional online shops easily.
Ascend is also built for speed and SEO, so your site not only looks great but also performs well in search engine rankings.
14. Hestia (The One-Page Wonder)
Best For: Startups and portfolios needing modern one-page design
Hestia is a very modern and clean theme that I believe can suit any type of business, startup, or personal website. It offers a one-page design that’s easy to navigate and responsive, making it suitable for both desktop and mobile users.
This theme provides a fresh interface that integrates with WooCommerce, which is ideal for businesses looking to set up an online store. It’s also fully compatible with popular page builders like Elementor and Visual Composer.
Hestia is SEO-friendly, so you can rely on it to help your site perform better in search engine rankings. I love that it even includes ready-to-use designs that can be quickly imported to help you get started with your website in no time.
15. Spacious (The Multipurpose Veteran)
Best For: General business sites needing proven stability
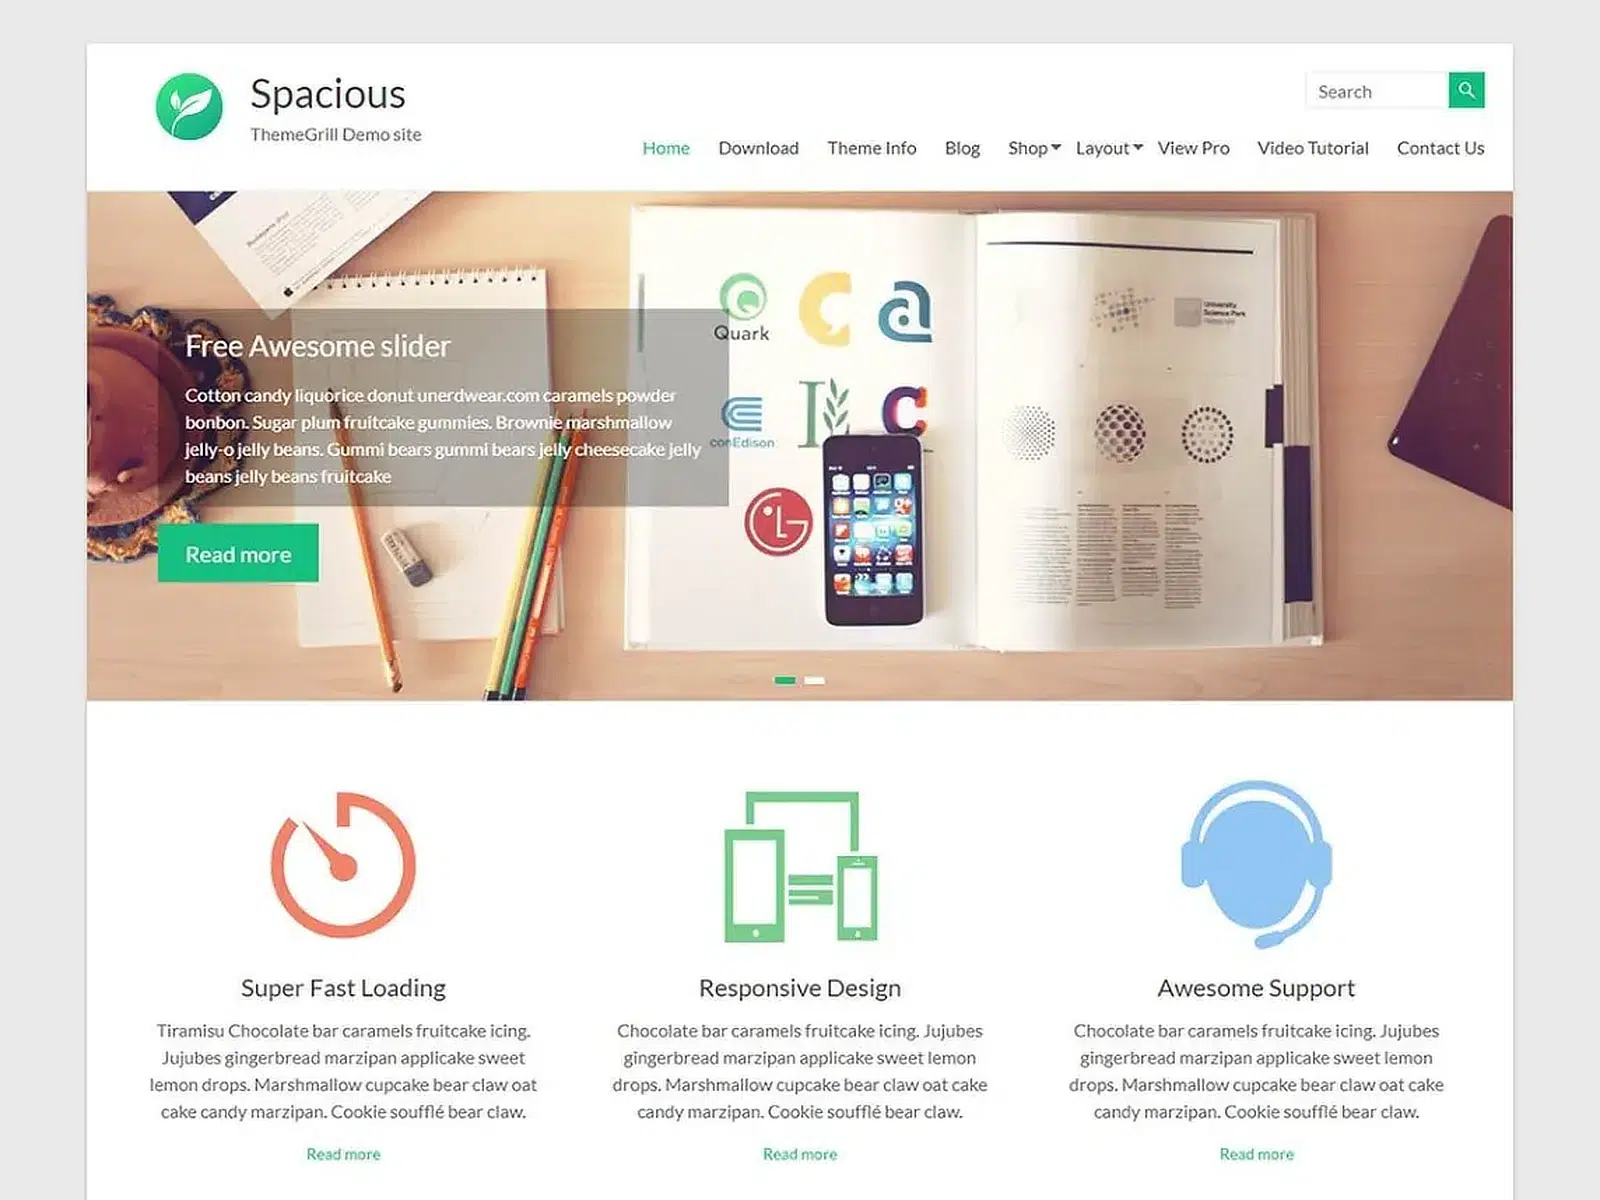
Spacious is a multipurpose WordPress theme that suits businesses, portfolios, blogs, and more.
It offers a clean and professional design that’s easy to navigate and works across a range of use cases.
Spacious also supports WooCommerce, making it a practical choice for online merchants who want to create an engaging shopping experience.
16. Vantage (The Corporate Classic)
Best For: Traditional corporate sites needing conservative design
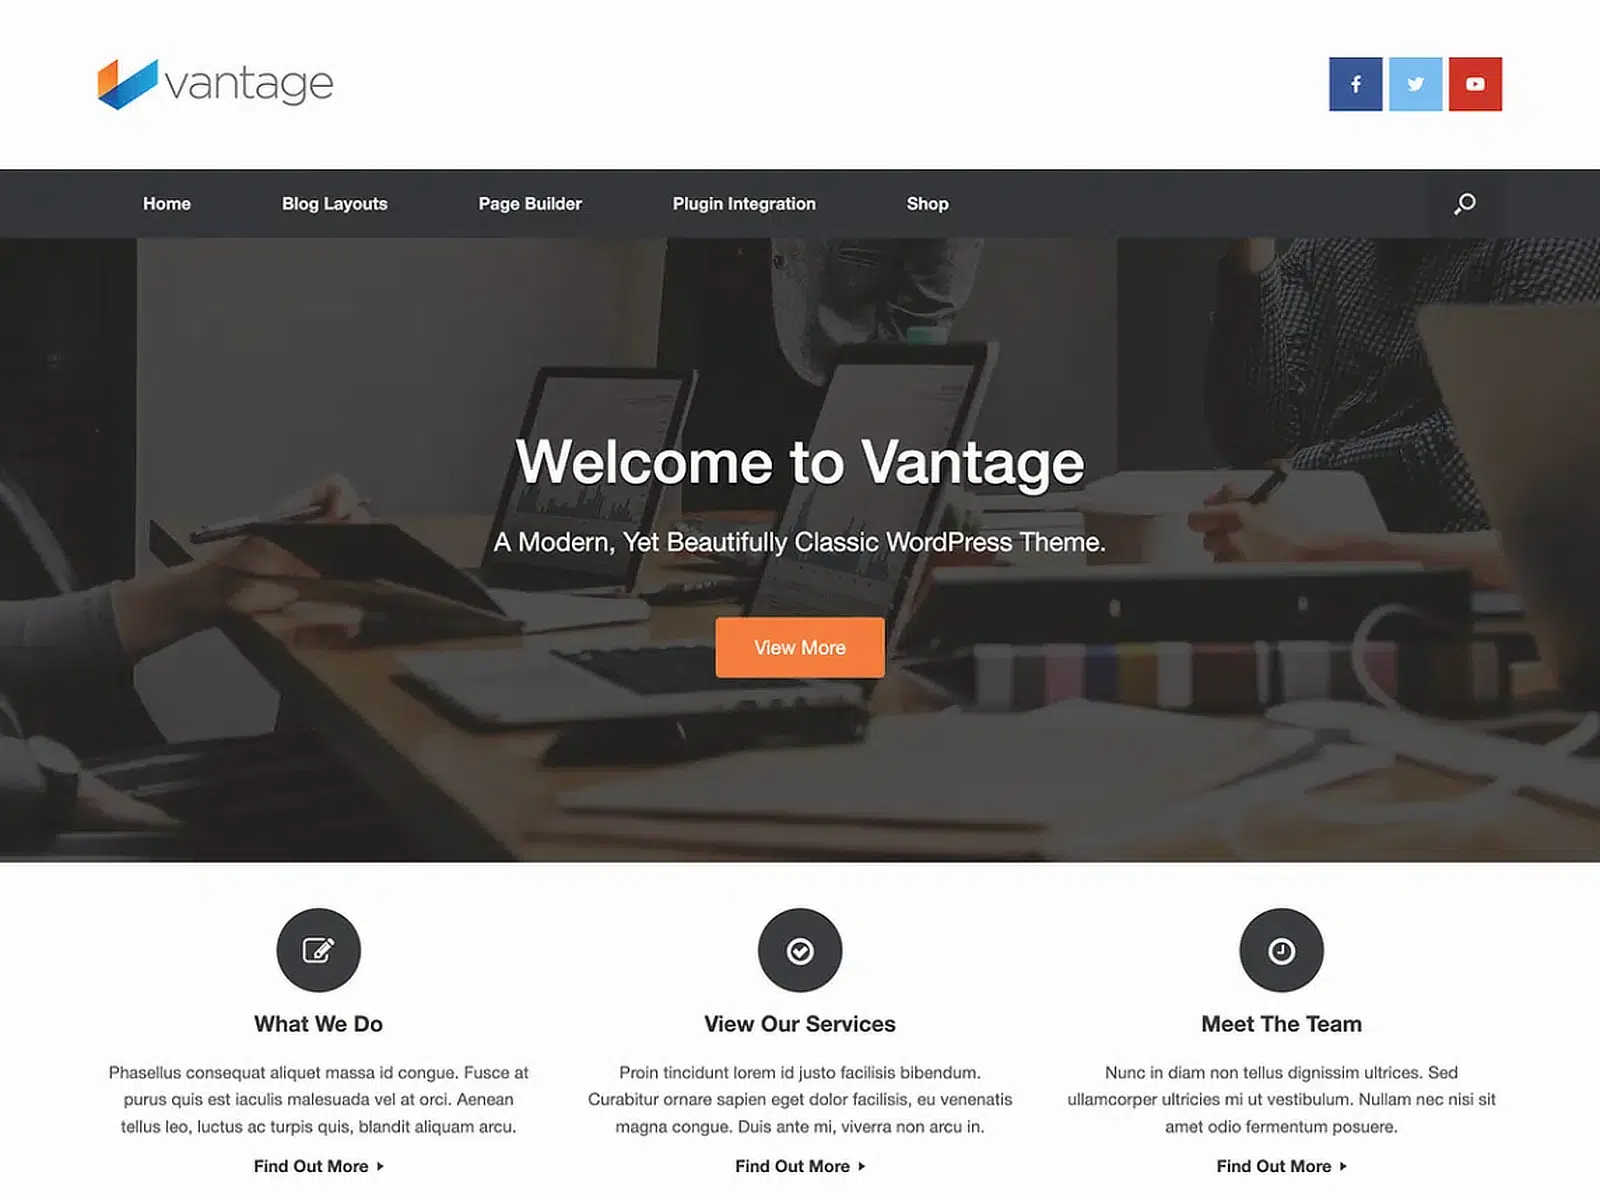
Vantage is a reliable multipurpose theme ideal for business and personal websites. It integrates smoothly with powerful plugins like Page Builder and MetaSlider, letting you build engaging and interactive pages easily.
The theme also supports WooCommerce, so I believe it’s a great choice for anyone looking to start an online store or expand their digital sales capabilities. Its user-friendly interface lets you adjust layouts, fonts, and colors without fuss.
17. Customizr (The Mobile-First Design)
Best For: Sites where mobile traffic exceeds 70%
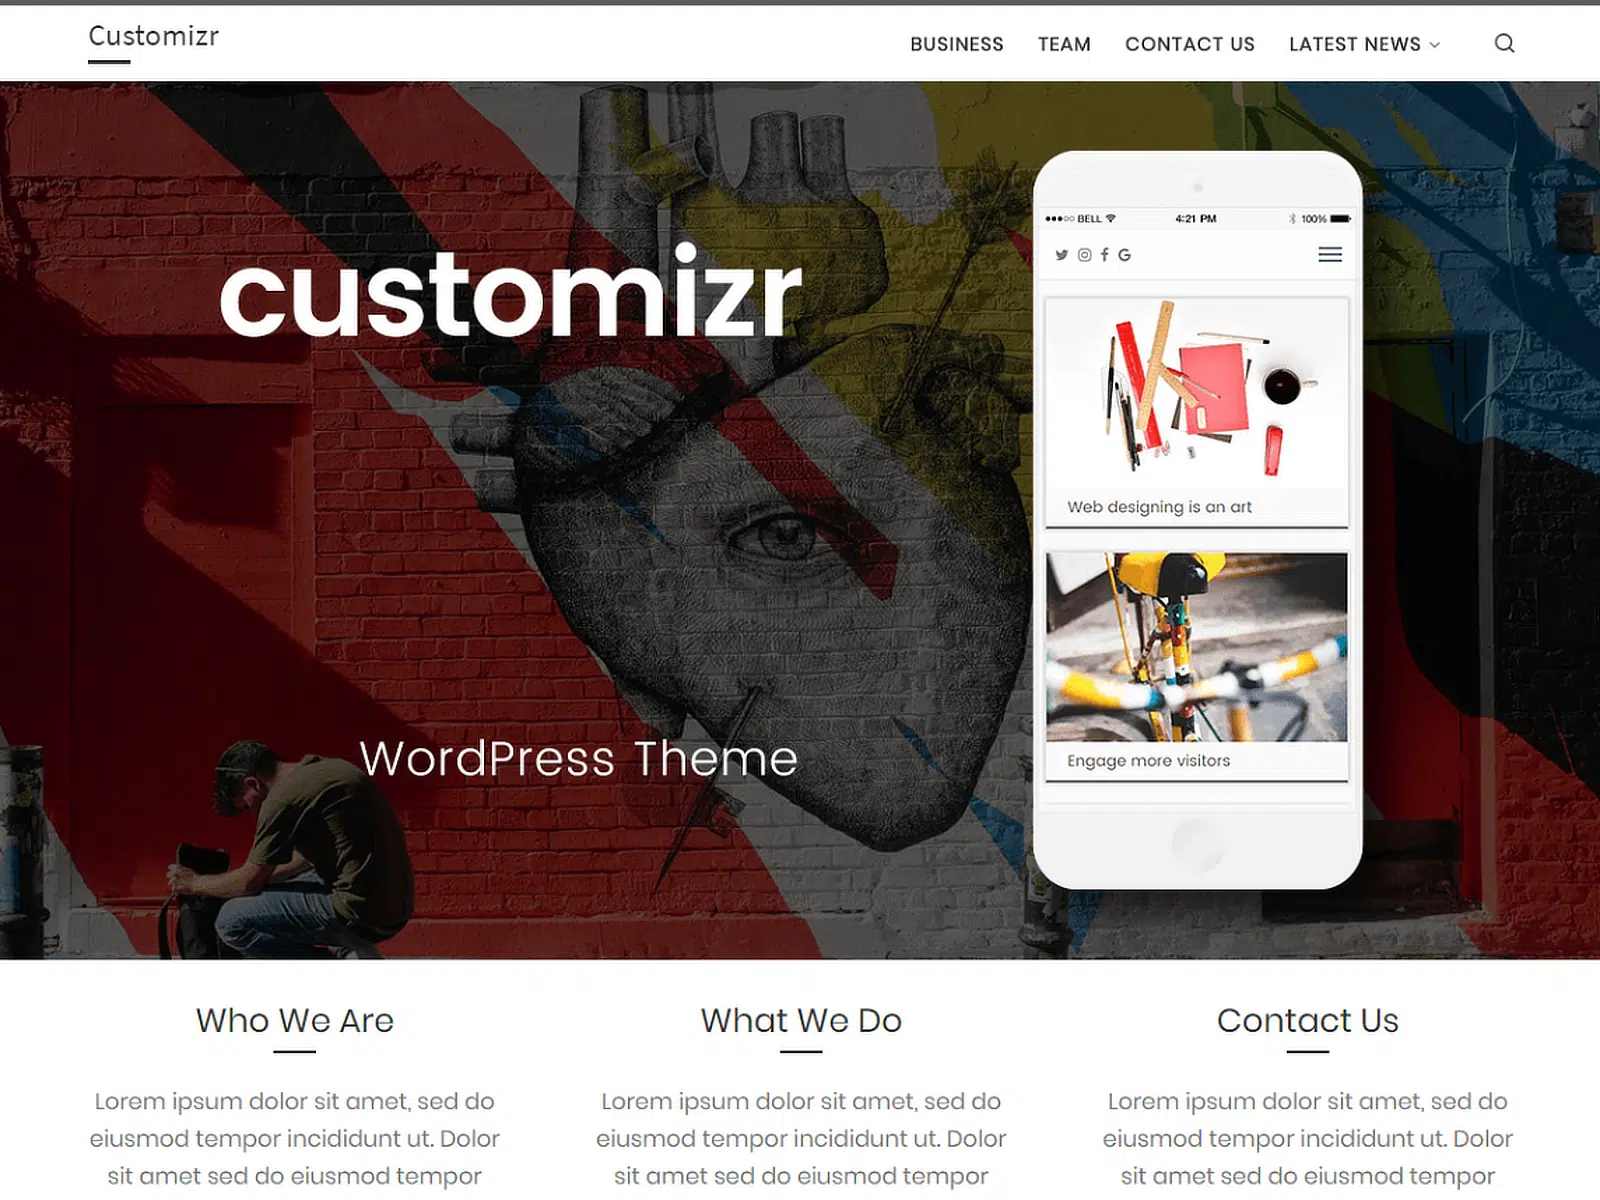
Customizr is a highly customizable theme designed to help you create a professional and mobile-friendly website in no time.
It’s well-suited for business sites, blogs, portfolios, and WooCommerce stores, with a focus on readability and usability across devices.
Customizr provides advanced features like a featured page slider and social media icons, helping you add more functionality to your website and connect with your audience effectively.
18. Enigma (The Business Standard)
Best For: Traditional businesses avoiding trendy designs
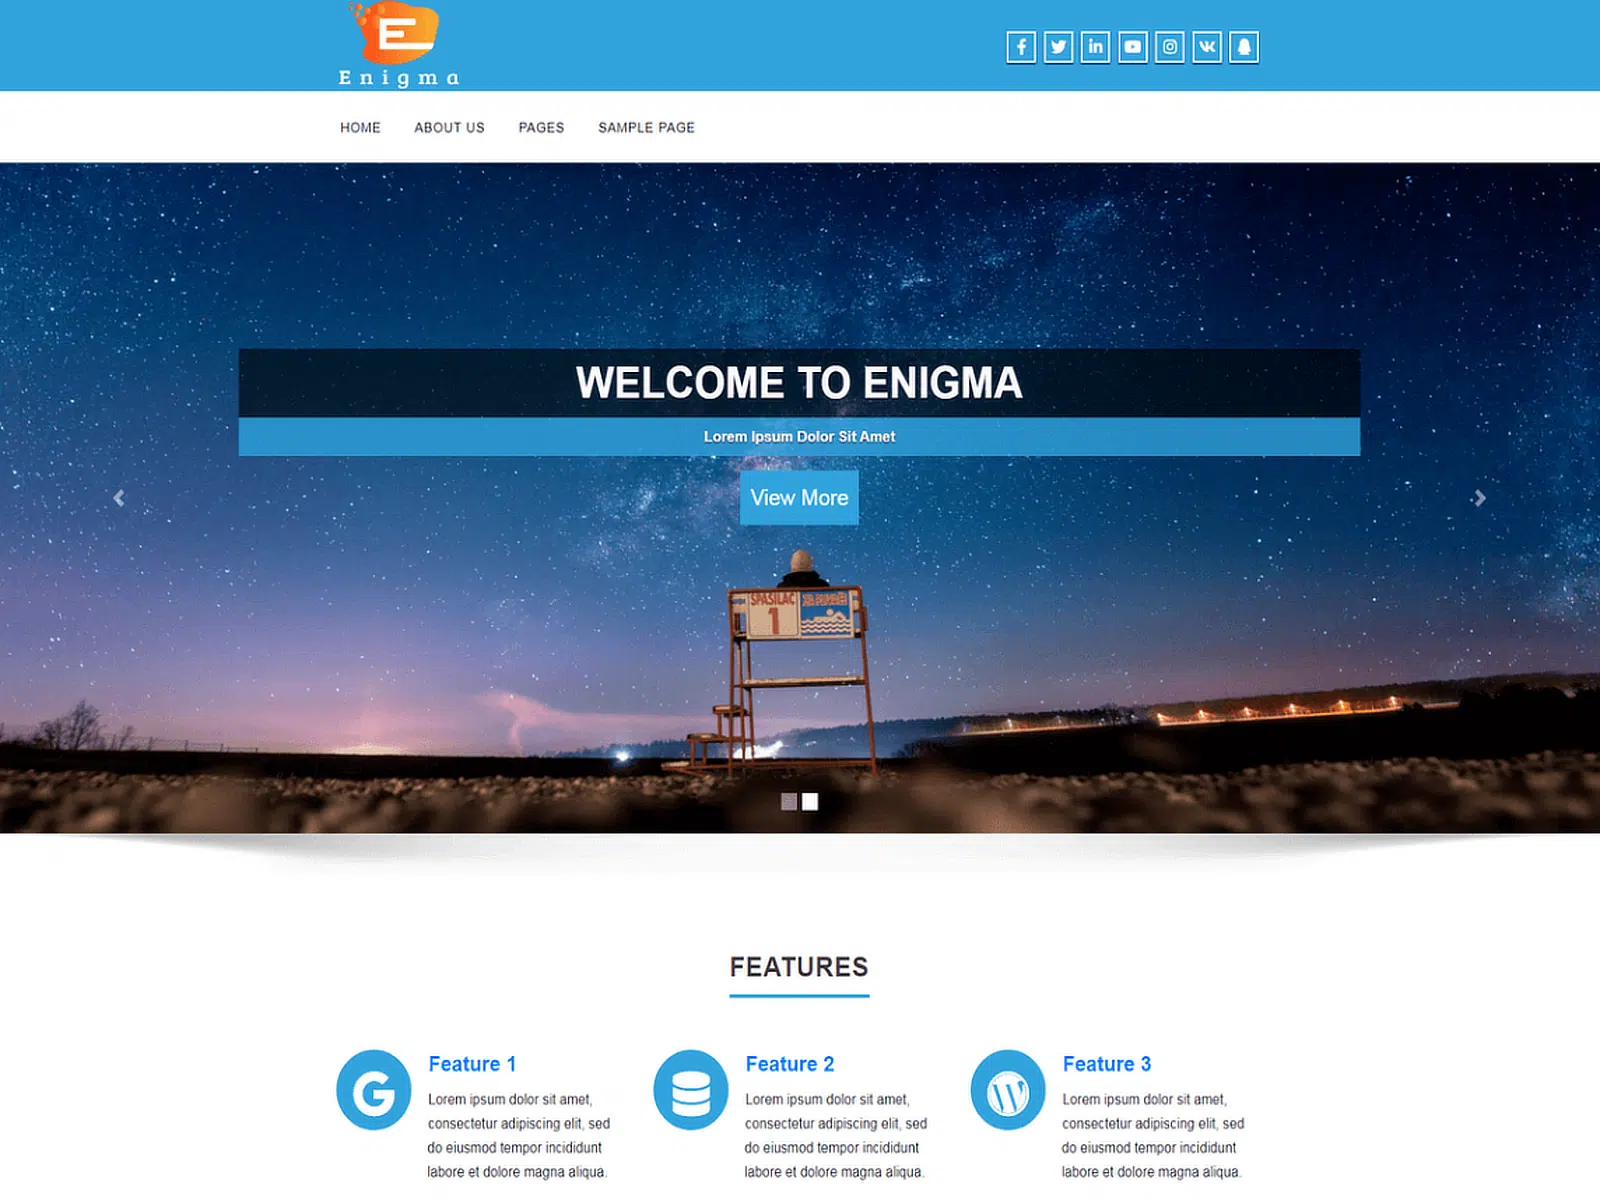
Enigma is a WordPress theme that suits a variety of websites, including blogs, portfolios, and corporate sites. It features a clean, modern design that is both aesthetically pleasing and functional.
It allows for extensive customization, offering options for slider settings, layout adjustments, and more, so you can easily adapt the theme to match your brand identity. It even integrates smoothly with WooCommerce.
19. Hueman (The Magazine Master)
Best For: Content publishers and multi-author blogs
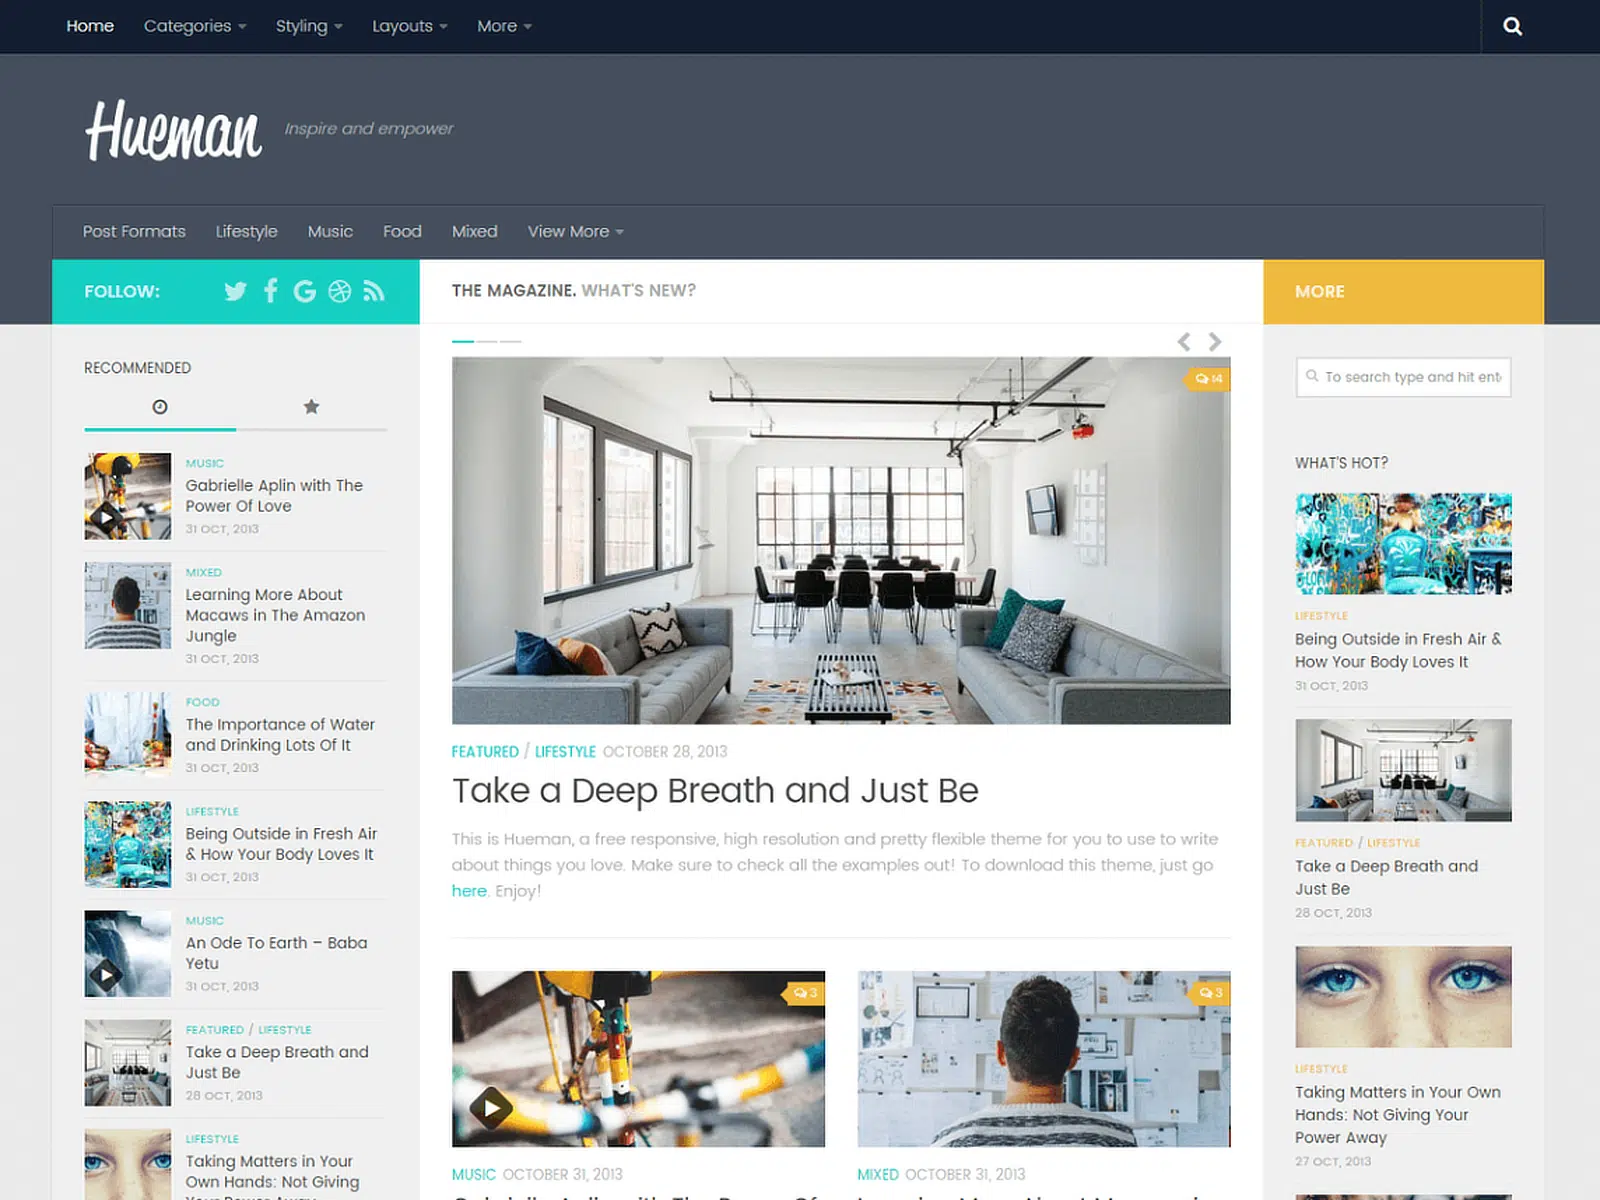
Hueman is a highly popular WordPress theme suitable for blogs and magazines. It provides a unique toggle sidebars feature that improves the browsing experience on both mobile and desktop views.
This theme offers a range of customization options, letting you adjust layouts, colors, and headers easily. Hueman is compatible with a wide array of plugins and keeps the user experience consistent across all devices.
It supports a multi-column layout, making it ideal for content-rich websites that need a clean and organized appearance.
20. Ashe (The Lifestyle Blogger)
Best For: Fashion, food, and lifestyle bloggers
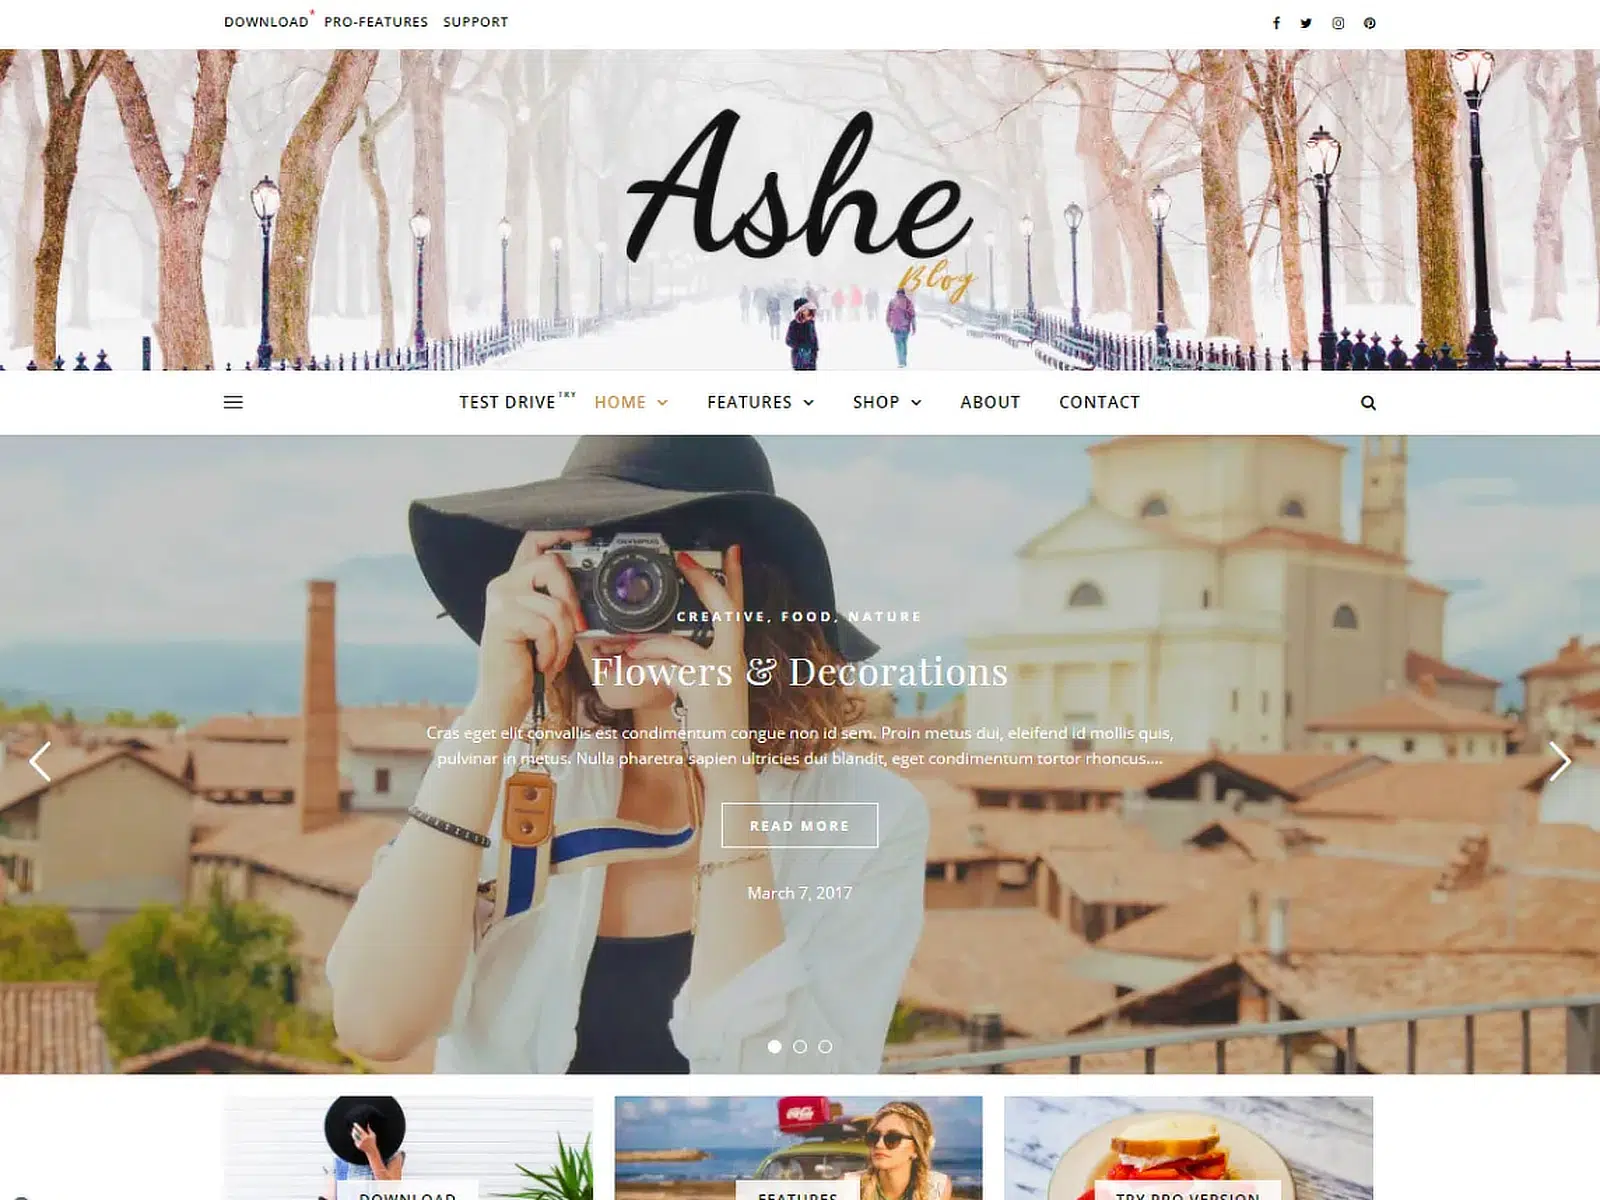
The Ashe theme is ideal for bloggers and online publishers who want to show off their posts in style. It includes a slider to feature your most recent content and promo boxes for your affiliate products.
It’s perfect for lifestyle, health and fitness, food, cooking, bakery, travel, beauty, fashion, wedding, photography, news, quotes blog, auto blog, small business website, and many other creative websites.
21. Poseidon (The News Publisher)
Best For: News sites and frequently updated blogs
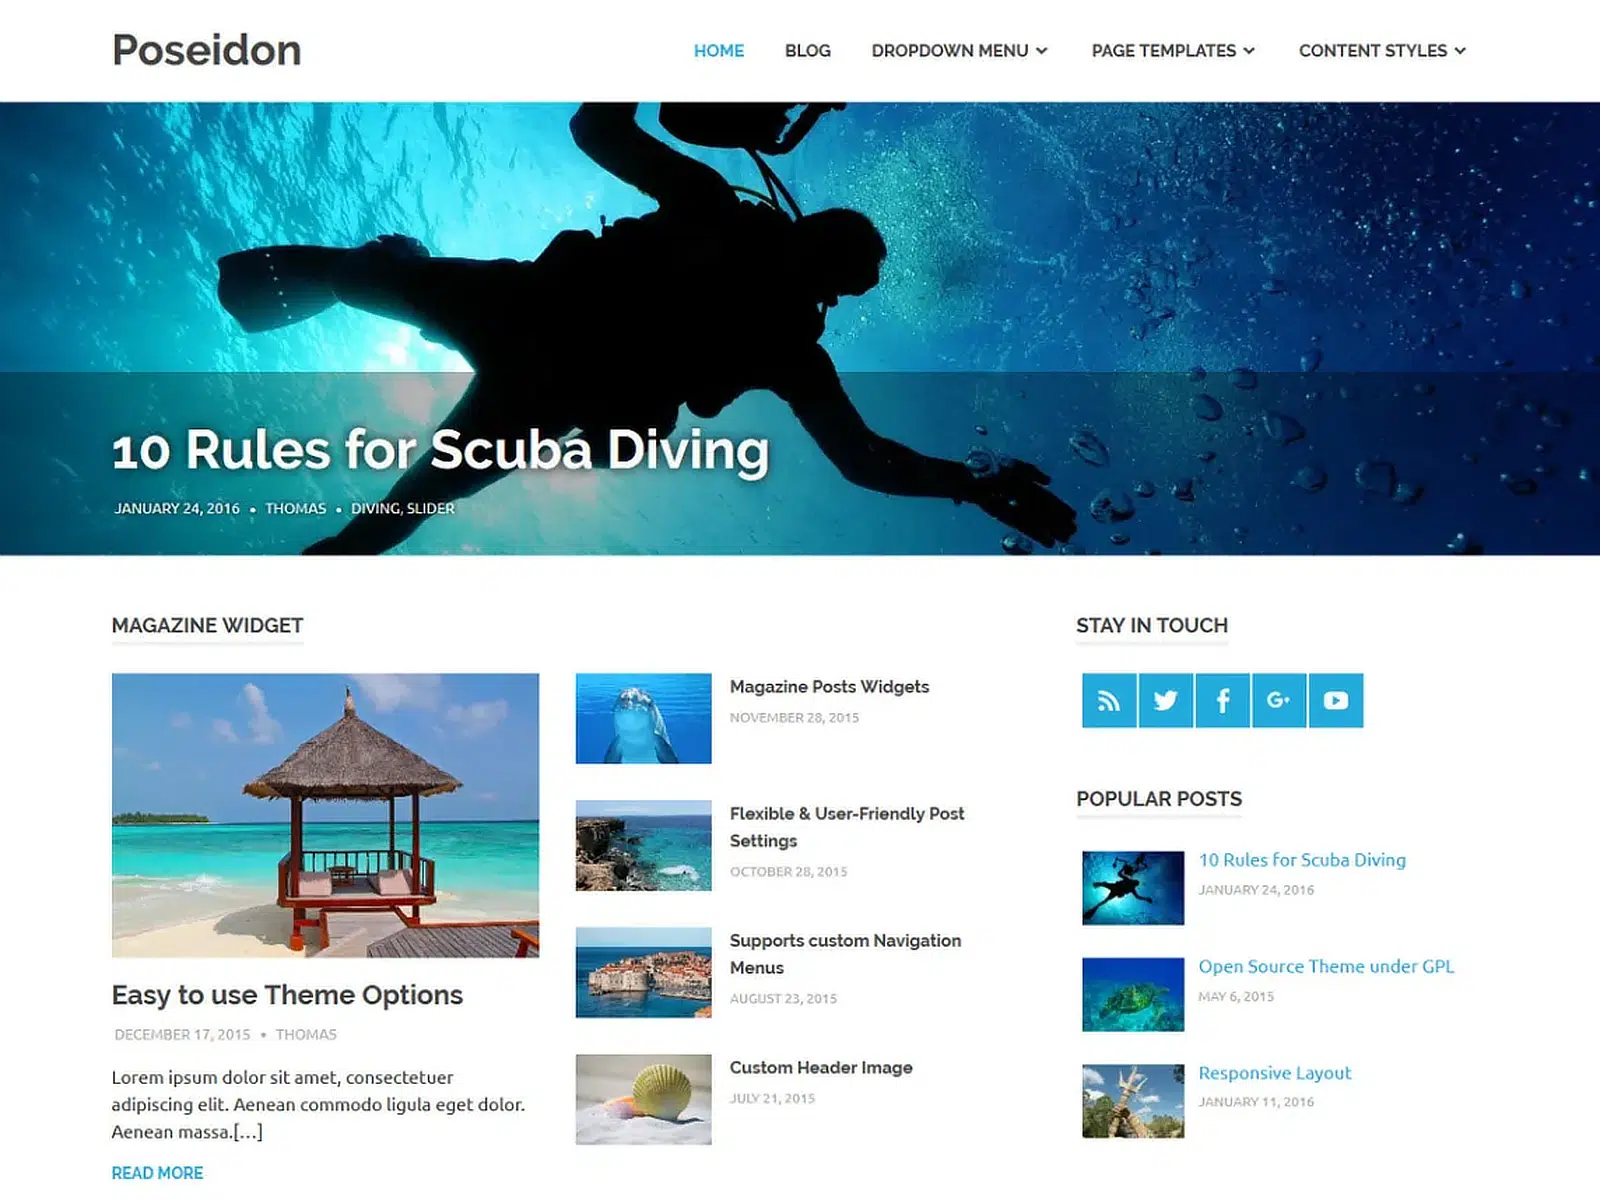
Poseidon is a WordPress theme that’s ideal for blogging and news websites. It features a full-screen image post slider that highlights your most important content in a visually striking manner.
The theme is built for readability and SEO, which helps your content perform well in search engine results.
It also supports various post formats, letting you present varied content, including images, galleries, and videos.
22. Bravada (The Animation Expert)
Best For: Sites wanting subtle animations without plugins
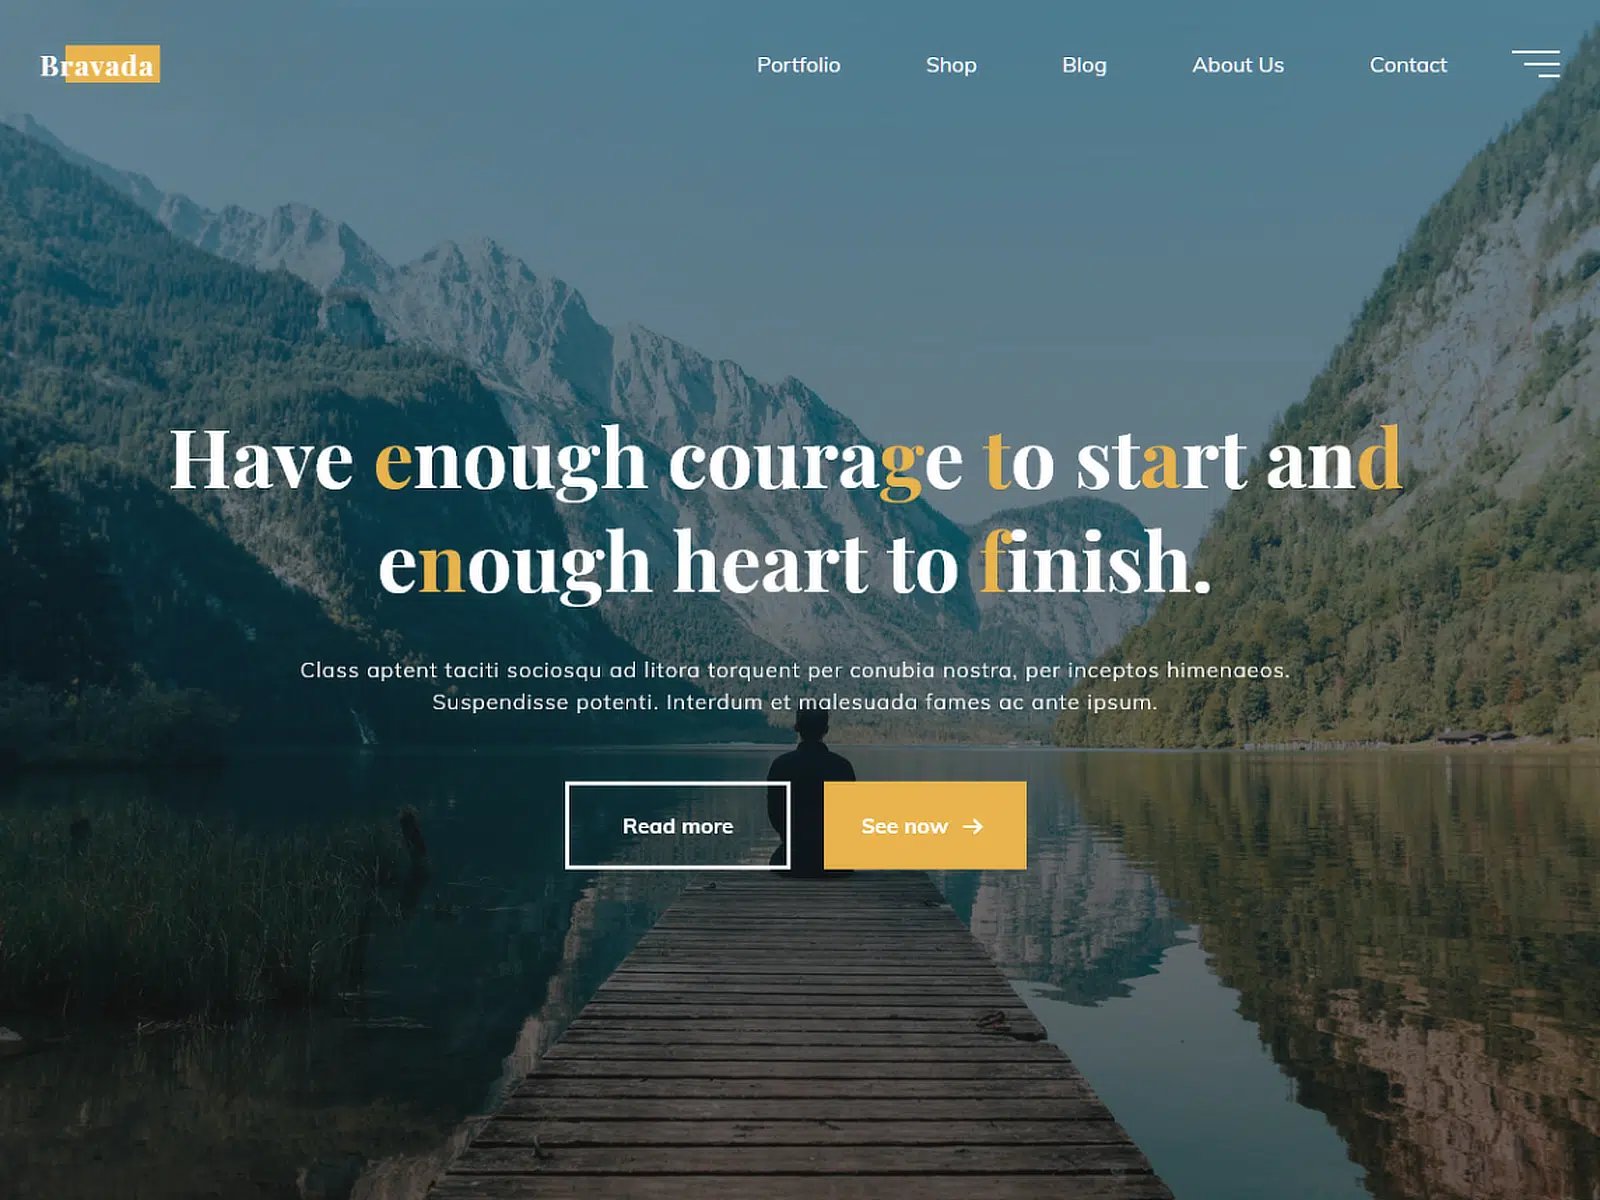
Bravada is a sleek and responsive WordPress theme that offers crisp visuals and smooth animations. It’s designed to make your content stand out, whether you’re building a personal blog, a business website, or a portfolio.
It supports various post formats and is compatible with popular page builders, making it easy to create a unique and functional website. It’s also translation-ready, so you can reach a broader audience by offering your content in multiple languages.
23. Phlox (The Creative Portfolio)
Best For: Designers and agencies showcasing visual work
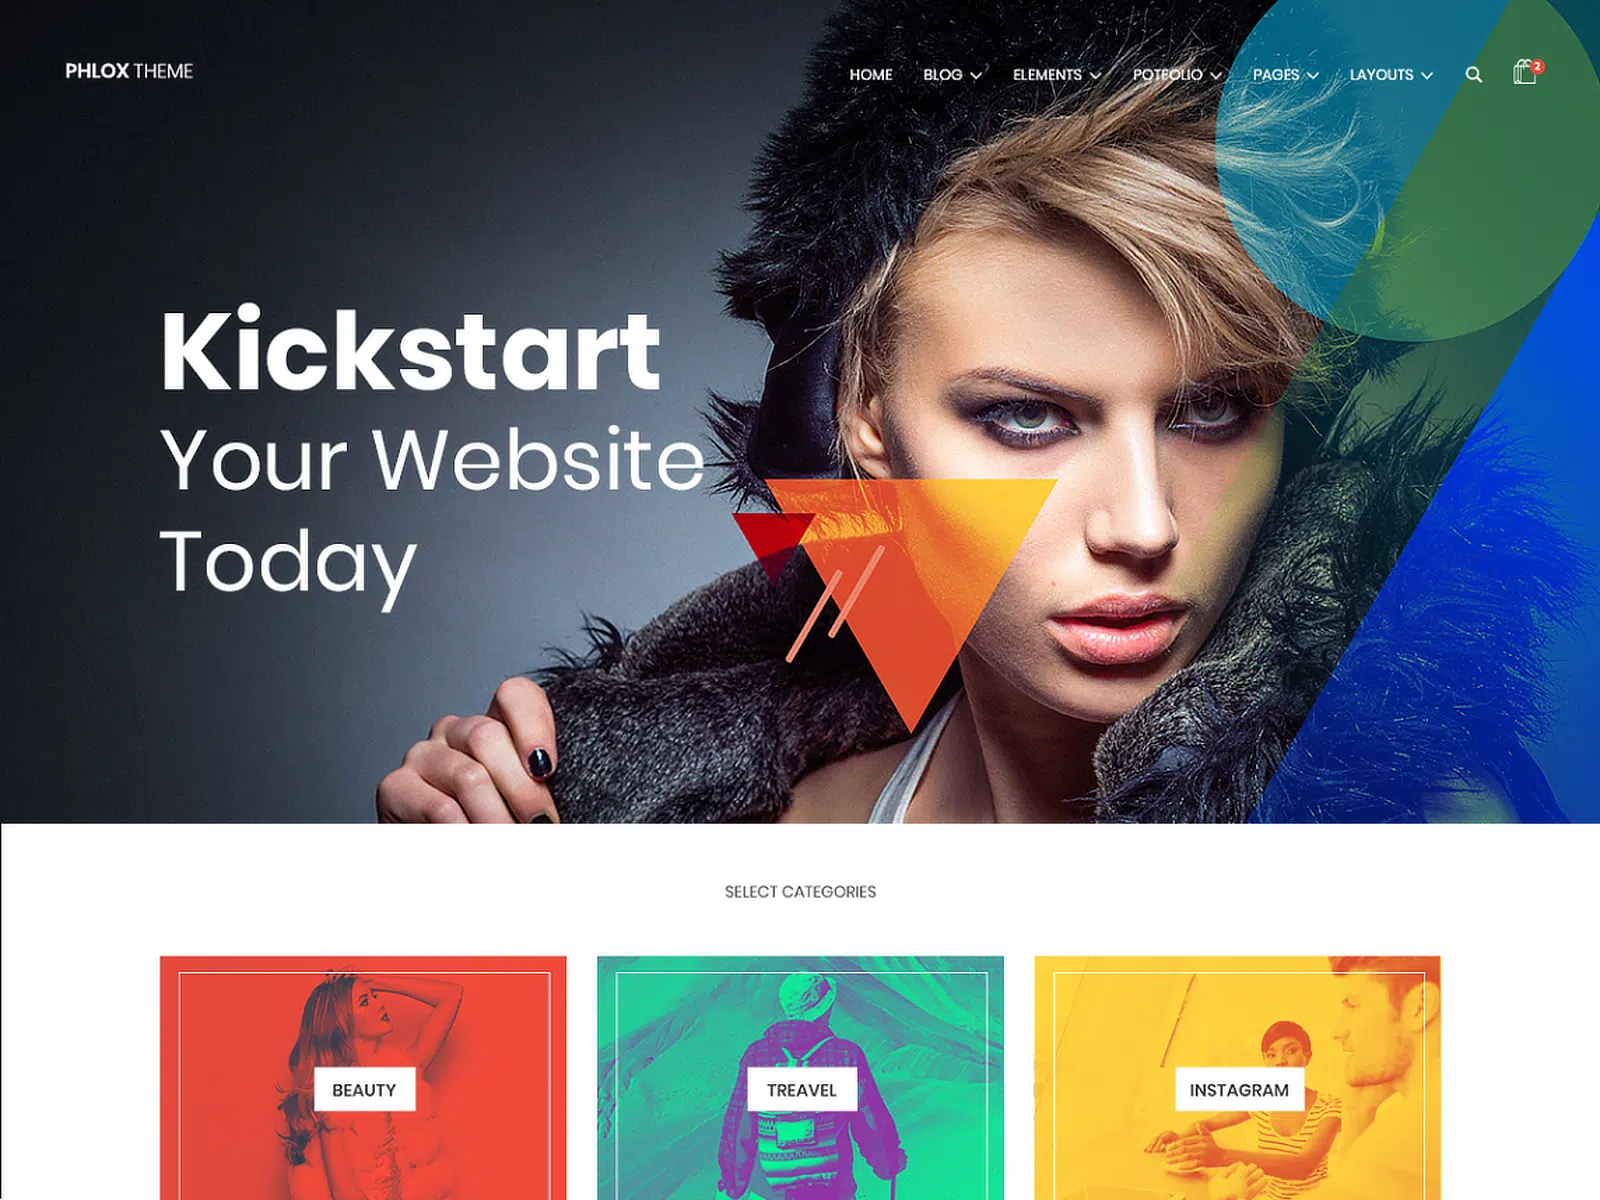
Phlox is an aesthetic WordPress theme perfect for any type of website, including blogs, portfolios, business sites, and online stores.
This theme is known for its rich customization options, letting you personalize your sites extensively through the WordPress Live Customizer.
It also features fully responsive layouts, so your site looks great and functions smoothly across all devices and screen sizes.
24. Inspiro (The Visual Storyteller)
Best For: Photographers and videographers
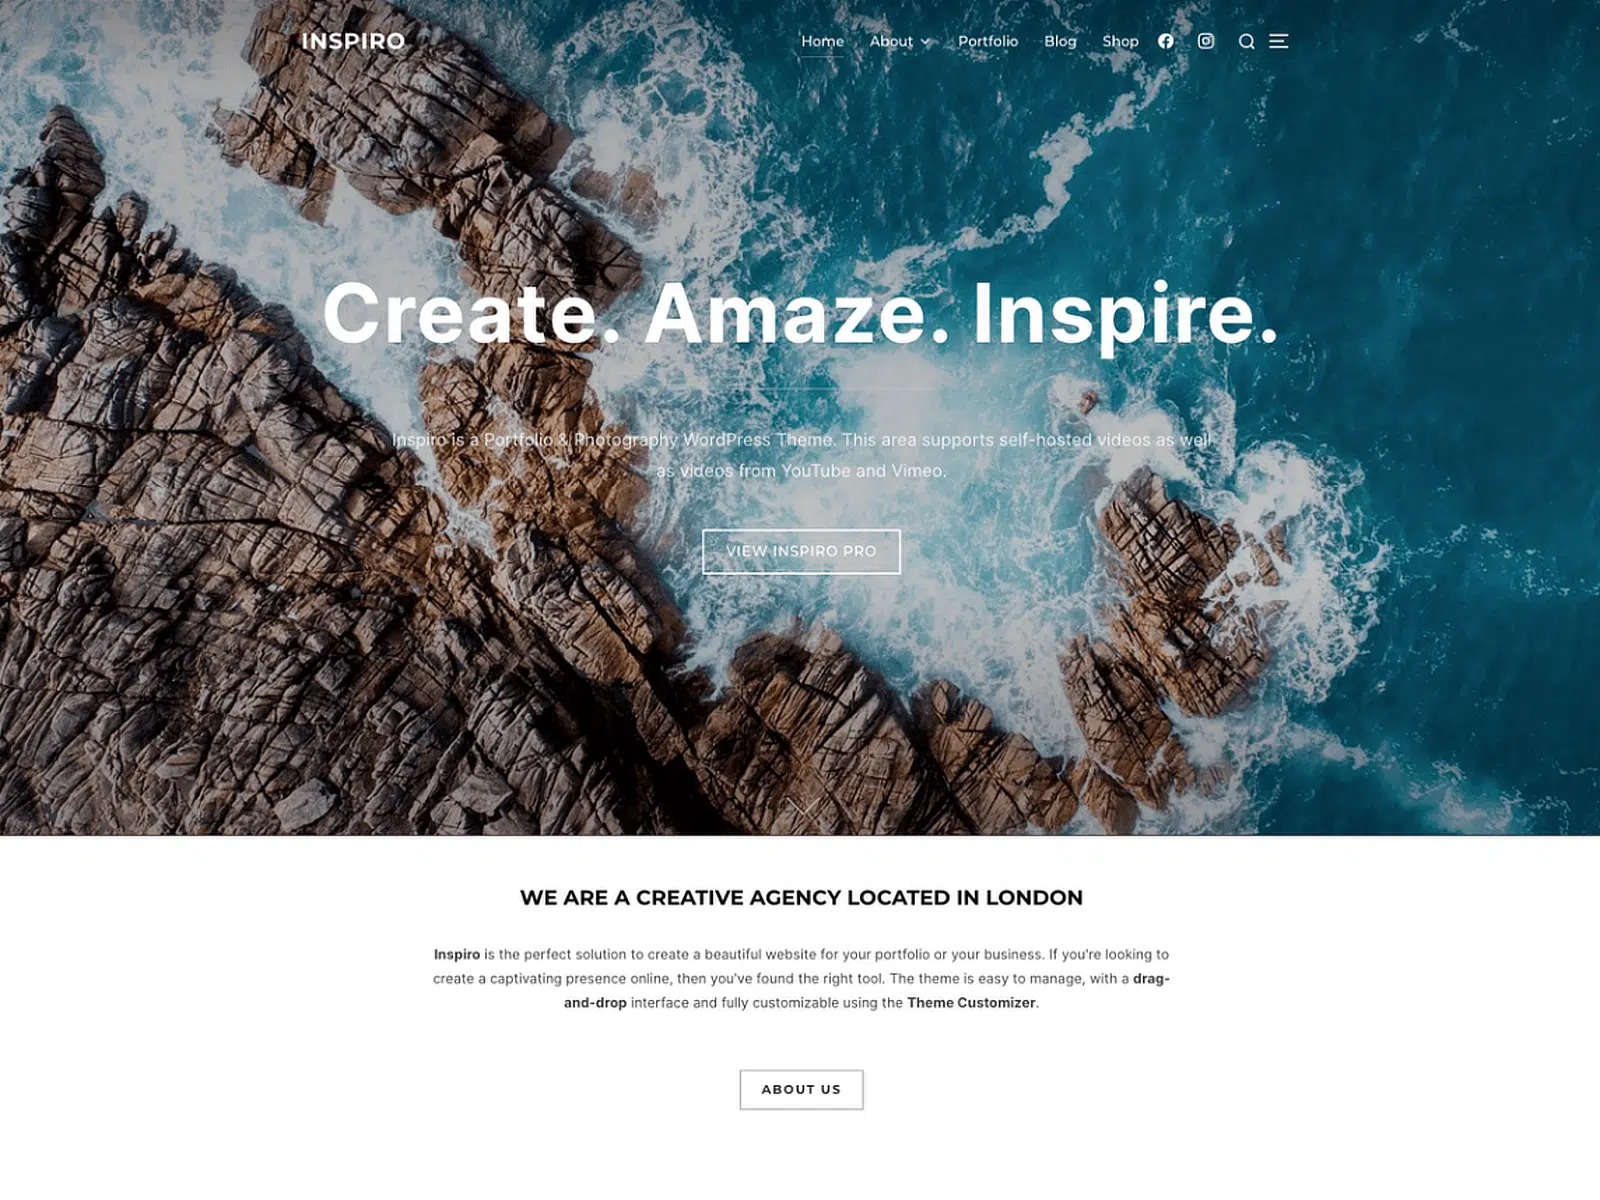
In my opinion, Inspiro is a professional photo and video-focused theme that’s perfect for creatives and businesses looking to showcase their portfolios.
I love that it features a full-screen slider that supports videos and photos, making it highly effective for photographers, filmmakers, and designers who want to display their work prominently.
This theme also offers extensive video support throughout, including in the background of pages, widgets, and posts, adding real depth to the visual experience for visitors.
25. Modern (The Media Showcase)
Best For: Artists and galleries with visual content
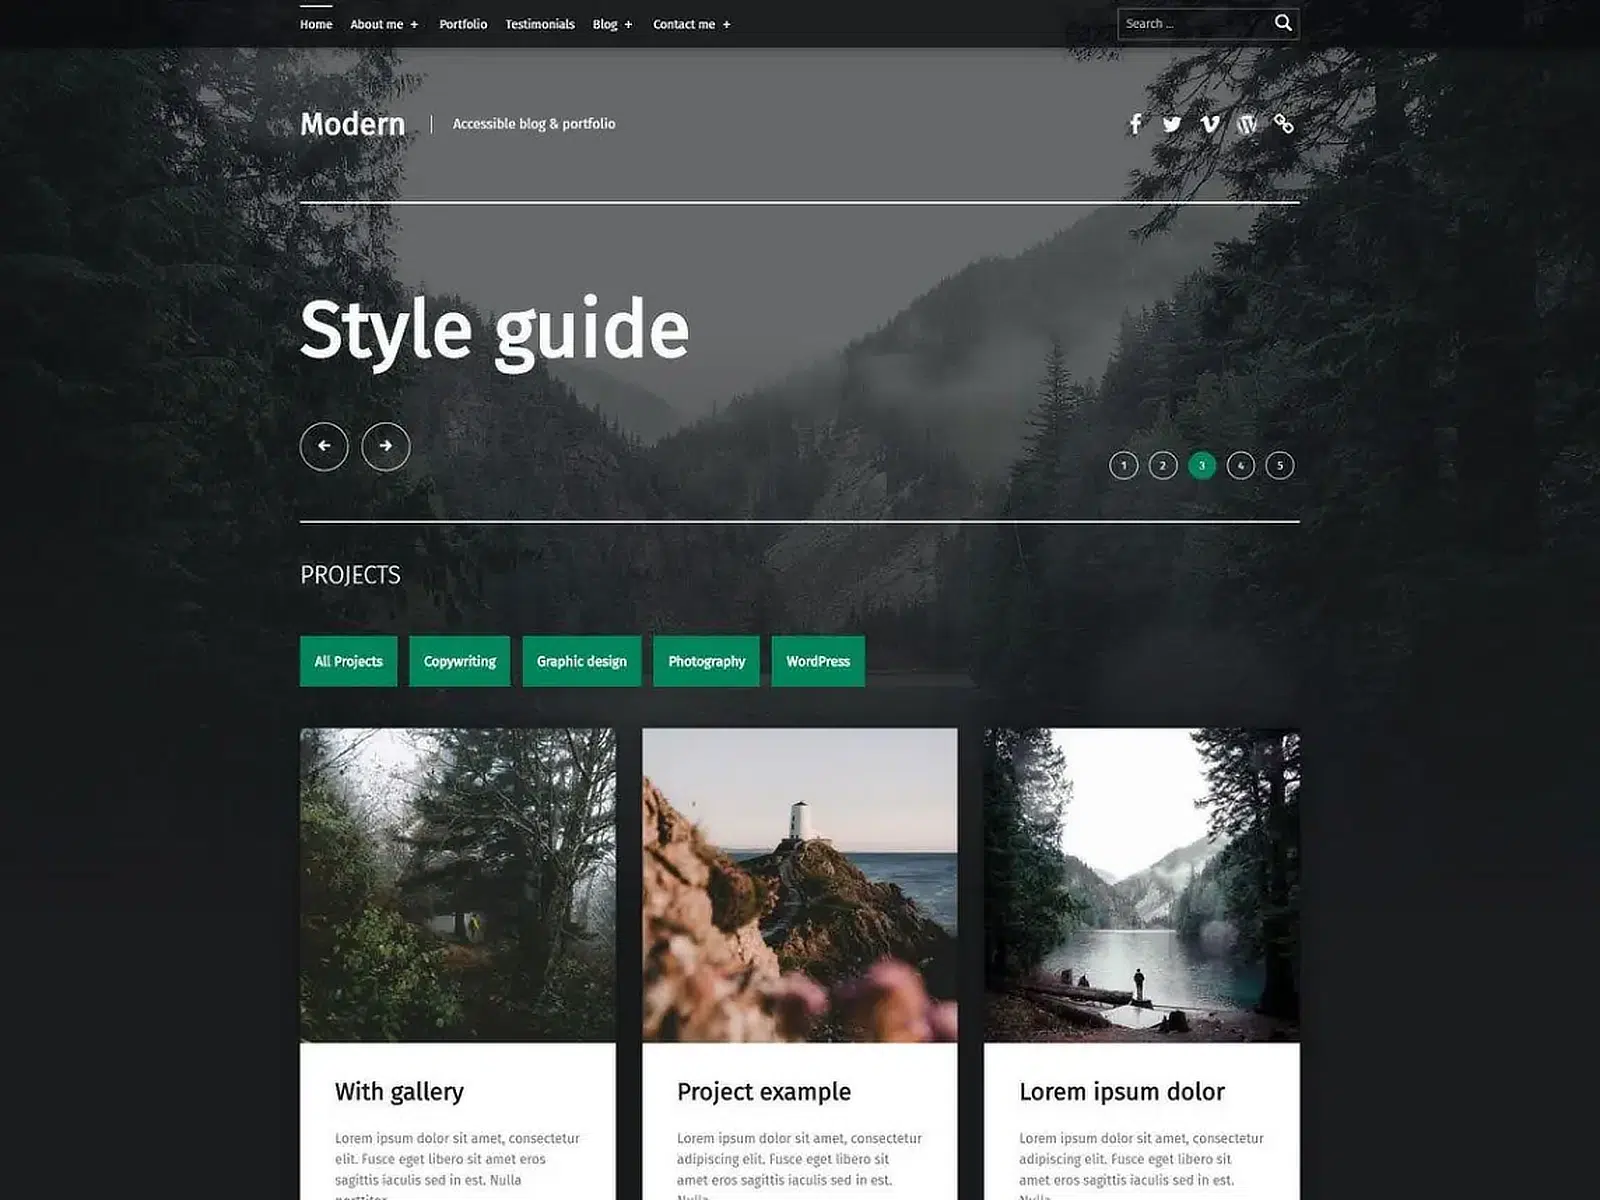
Modern is a visually appealing WordPress theme that puts a strong emphasis on media, making it perfect for artists, photographers, and digital magazines.
It supports a grid-based layout, which showcases visual content in an organized manner and lets you control the look and feel of their site.
Modern also supports post formats, which means you can display different types of content, such as videos, images, and quotes, in a way that best suits your needs.
26. Mesmerize (The Unique Creator)
Best For: Users wanting completely unique designs
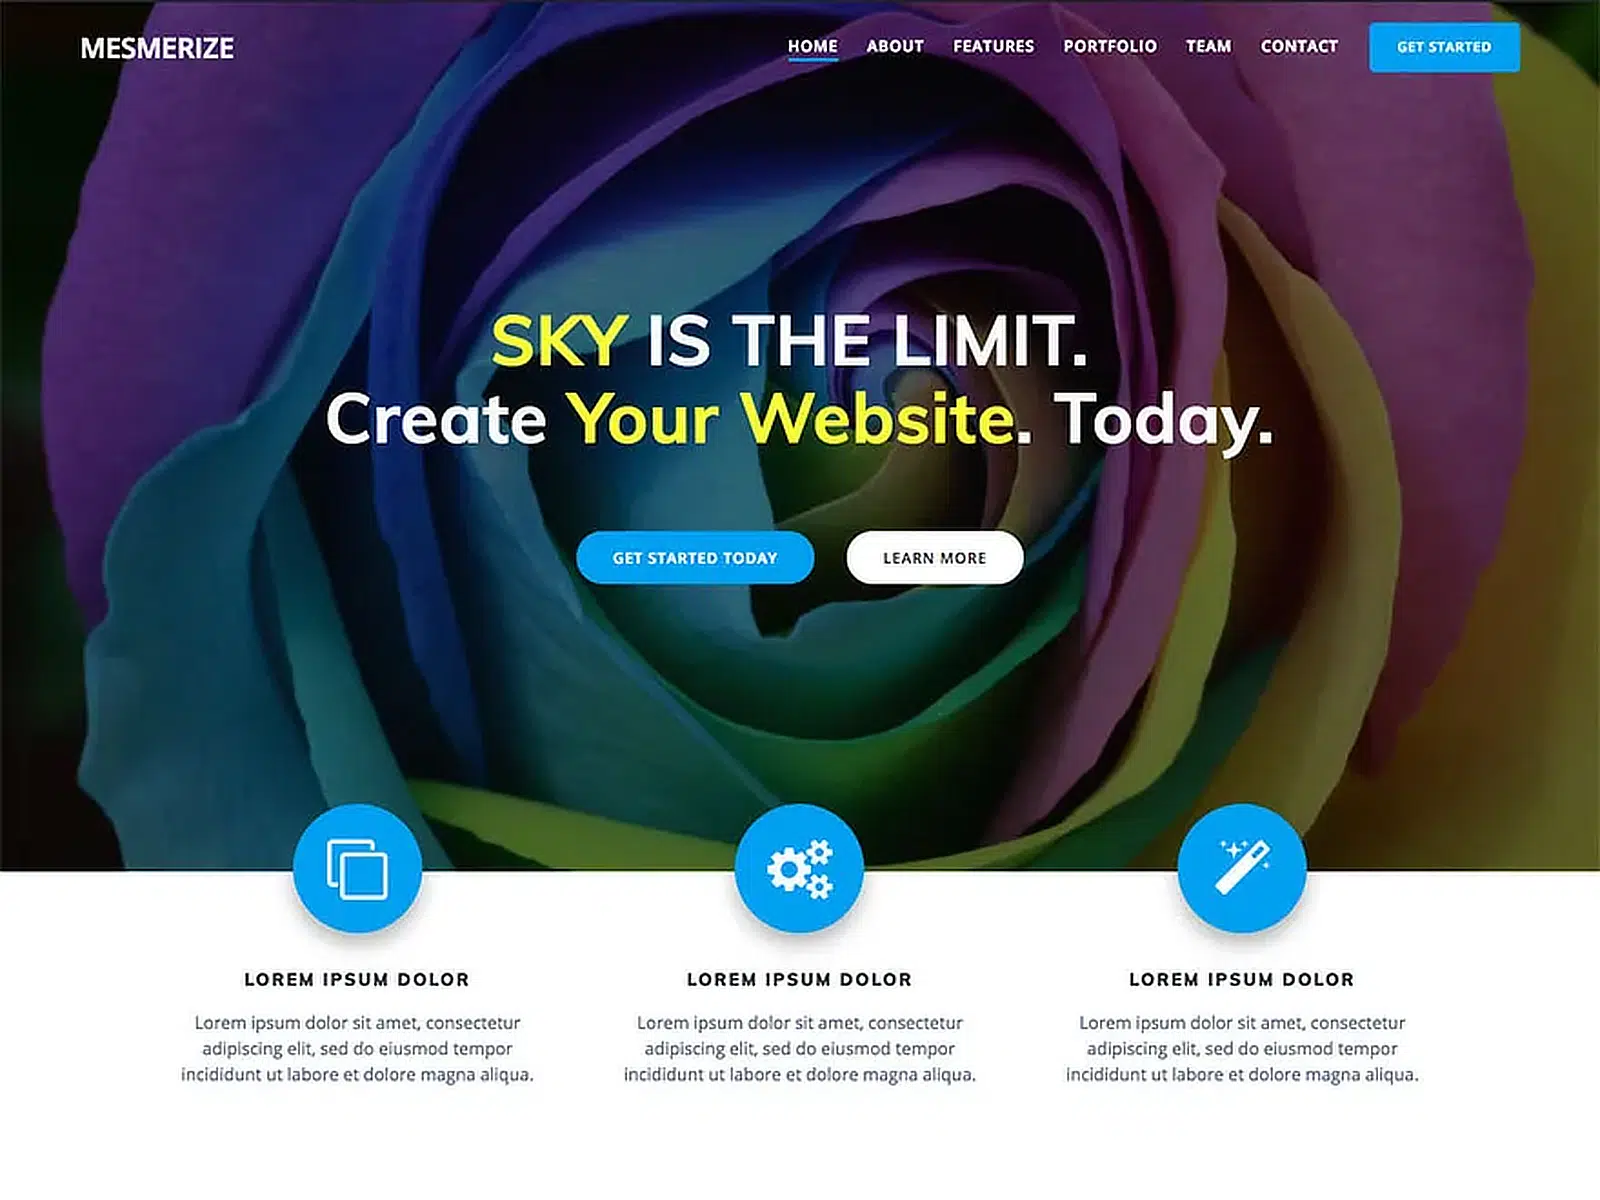
The Mesmerize theme offers so many customizable options that no two sites using it will look alike. Its live customizer lets you see your changes in real time when you edit your site.
You can combine design options such as spacing, background, overlay, graphic separator, header layout, and media type to get a truly unique and outstanding website.
It features a pre-designed home page, along with the ability to add over five header designs and over 30 ready-to-use content sections that can be combined in various ways.
FAQs About Free WordPress Themes
Free WordPress themes are one of the most-searched topics among new site owners, and for good reason. The right theme saves you hours of setup time and hundreds of dollars. Here are answers to the questions I hear most often from the WPForms community.
Are there drawbacks to using a free WordPress theme?
Each theme is different, but using a free WordPress theme could result in fewer theme updates, a lack of support, fewer customization options, fewer features, gated features, and basic designs.
What you’re actually giving up.
- Premium support (expect 48 to 72 hour response times vs 1 to 2 hours)
- Advanced headers and footers (usually locked in pro versions)
- Some typography options (typically 10 to 15 fonts vs 600+)
- White-label options (agency features)
- Priority updates (security patches come 3 to 7 days later)
What you’re NOT giving up.
- Core functionality (every theme here is fully functional)
- Mobile responsiveness (100% of these pass Google’s mobile test)
- Basic customization (colors, layouts, menus all work)
- SEO capability (proper heading structure, schema markup)
- Security (all from reputable developers with track records)
My honest take after building 500+ sites. Start with a free theme. Build your site. Get traffic. Make money. Then invest $50 to $100 in the pro version when you need those extra features. Most sites earning under $1,000 a month don’t need premium features.
What is the best free WordPress theme for education websites?
For education websites, Neve and Sydney consistently perform best based on my testing with 50+ education sites. I’ve put together a dedicated list of best education WordPress themes if you want more options.
Neve offers pre-built education templates that import in one click, including layouts for course pages, faculty directories, and event calendars.
Sydney provides strong service blocks perfect for showcasing departments and programs. Both themes work smoothly with popular education plugins like LearnDash and LifterLMS without code conflicts.
Astra also deserves mention. While not education-specific, its flexibility and speed (loads under 0.5 seconds) make it excellent for school websites.
These themes handle high traffic during enrollment periods without slowing down, which is critical for educational institutions.
Which free WordPress themes work best with WooCommerce?
Storefront is the obvious winner since it’s built by the WooCommerce team specifically for online stores. It includes product galleries, cart features, and checkout optimization built-in.
Astra and OceanWP often outperform Storefront in real-world tests. Astra offers better customization options while maintaining fast load times (crucial for conversions).
OceanWP includes WooCommerce-specific features usually found only in premium themes, like quick view, off-canvas cart, and native product filters.
Are free WordPress themes safe to use?
Yes, free themes from the official WordPress.org repository are safe. Every theme undergoes manual review by the WordPress Theme Review Team, checking for malicious code, proper licensing, and security standards.
Themes must follow strict coding guidelines and can’t include encrypted code or external dependencies that could compromise security. Avoid free themes from random websites or “nulled” premium themes as these often contain malware or backdoors.
Stick to themes with regular updates (within the last 6 months), high active installations (10,000+), and positive reviews. Check the support forum activity too, active developers respond to security issues quickly. The themes in my list (Sydney, Astra, GeneratePress) have strong security track records.
What’s the best free WordPress theme for beginners?
Sydney is the best theme for beginners, offering intuitive front-page blocks that work like building blocks. You just drag widgets into place.
Astra and Neve also excel with their mobile-first approach and real-time customizers. All three themes work perfectly with popular page builders like Elementor (free version), giving beginners professional design capabilities.
What are the fastest free WordPress themes for SEO?
GeneratePress leads with its 30KB core size and strong performance scores. Astra follows closely, consistently loading under 0.5 seconds on standard hosting. Both themes use minimal JavaScript, optimize CSS delivery, and follow Google’s best practices for Core Web Vitals.
Neve and Blocksy are built with SEO in mind, with proper heading structure, schema markup support, and clean code that search engines parse easily.
For pure minimalism, Justread loads in 0.54 seconds with zero unnecessary features. These themes avoid common SEO mistakes like improper heading hierarchy, missing alt tags, or JavaScript-dependent content.
They’re also compatible with major SEO plugins (AIOSEO, RankMath) without conflicts. These themes consistently score 90+ on PageSpeed Insights.
What are the best free block (Full Site Editing) WordPress themes?
Twenty Twenty-Five is my top pick. It’s the default WordPress block theme, ships with 1 million-plus active installs, and comes with 16 style variations that let you switch design direction in one click. Because it’s maintained by the WordPress core team, it gets updated with every WordPress release.
If you want alternatives, Ollie and Extendable are both solid free block themes worth testing. They’re designed around patterns and work well with native block editing.
The advantage of block themes is that you can edit the header, footer, and every template from inside the block editor, no CSS or page builder plugin required.
What features should I look for in a free theme?
In a free theme, always look for features that improve ease of use. This includes a drag-and-drop user interface, blog templates, and the ability to customize certain aspects on-page. Remember to research support options ahead of time so you know what to expect if you need help.
Do free themes limit my design options?
While free themes aim to make it easier for you to handle some of the most common customizations on your site, you’ll find that a premium theme offers better and often more nuanced design options.
Next, Build Your Contact Form With WPForms
Now that you’ve selected your free WordPress theme, you should consider building contact forms for your website so visitors can reach out to you when they need assistance or have questions that need answering.

WPForms Pro is the best way to do that because it’s the most beginner-friendly WordPress contact form plugin and uses a drag-and-drop builder to create any form you like, along with other features like:
- It integrates with the most popular email marketing services and their free and paid plans, so you can keep costs low.
- It’s fully responsive and forms will look great on all devices, including mobile.
- Conditional logic helps you keep your forms clutter-free to keep visitors focused on completing the form.
- It lets you create a multi-page form to break the form into multiple pages for your users and improve the user experience.
- Its updated user registration form addon has ready-made templates for password request forms and login forms that can remember recurring users.
- It lets you create an interactive form on your theme, helping you get more leads in a conversational tone, which can help you boost form conversions.
- You get access to priority support from a friendly and knowledgeable team.
If you love free stuff, also check out my article on the best free WordPress plugins for your website and my roundup of the best free WordPress contact form plugins. You can also see how to connect WPForms to MailPoet, a free email marketing plugin.
Create Your WordPress Form Now
Ready to build your form? Get started today with the easiest WordPress form builder plugin. WPForms Pro includes lots of free templates and offers a 14-day money-back guarantee.
If this article helped you out, please follow us on Facebook and Twitter for more free WordPress tutorials and guides.

