AI Summary
If your team pays for work expenses out of pocket, the receipts probably end up in wallets and email threads. At year-end close, someone is left hunting for one missing parking stub.
This guide gives you a free expense reimbursement form template, then an online version in WordPress where employees photograph their receipts and the total adds itself up.
Create Your Reimbursement Form Now! 🙂
How to Create a Reimbursement Form in WordPress
Each employee reimbursement form submission lands in one searchable list in your WordPress dashboard, ready for whoever handles payouts.
Managers hear about a claim the moment it’s submitted, and at month-end, finance can pull the whole period into a spreadsheet.
This setup suits small businesses and nonprofits that don’t need a full expense app.
- What to Include on an Expense Reimbursement Form (Free Template)
- Step 1: Install the WPForms Plugin
- Step 2: Create Your Form From the Reimbursement Form Template
- Step 3: Set Up Expense Lines That Total Themselves
- Step 4: Collect Receipts as Uploads or Phone Photos
- Step 5: Add Mileage Reimbursement to Your Form
- Step 6: Send Each Claim to the Right Approver
- Step 7: Publish the Form and Process Claims
What to Include on an Expense Reimbursement Form (Free Template)
Paper or online, a reimbursement claim answers the same questions about who spent what, when, why, and where the receipt is. Use this checklist to write your own, or copy the reimbursement form template below it.
The list covers employee expense claims, since insurance and FSA claims use your plan’s own form (the FAQ explains where to find it).
An expense reimbursement form should include these 11 things.
- The employee’s name, email, and department
- The manager who approves the claim
- The expense period the claim covers
- The date of each expense
- The merchant and business purpose of each expense
- The amount of each expense
- Miles driven and the reimbursement rate, for mileage claims
- An itemized receipt for every expense
- The total amount to be reimbursed
- A signed statement that the claim is accurate
- The manager’s approval
Match the deadline and the expense categories to your own policy before you use it.
A spreadsheet or fillable PDF still leaves someone chasing receipts by email, which is why the rest of this guide builds the form online.
Step 1: Install the WPForms Plugin
WPForms gives you a drag and drop form builder with 2,100+ form templates, including ready-made finance forms like the Reimbursement Form template you’ll use in this guide.
What I like most about WPForms for expense claims is that the whole claim, receipts included, stays on your own WordPress site instead of in a separate expense app your team has to log in to.
The core build in this guide works on WPForms Basic or higher, which covers the Reimbursement Form template, receipt uploads, searchable saved entries, and notifications with conditional logic.
WPForms Pro adds the Calculations addon for the mileage formula and the large-claim rule, along with Signatures, Google Sheets, and Form Locker.
The free Lite version can total amounts and email them, but without uploads or saved entries, as the FAQ explains.
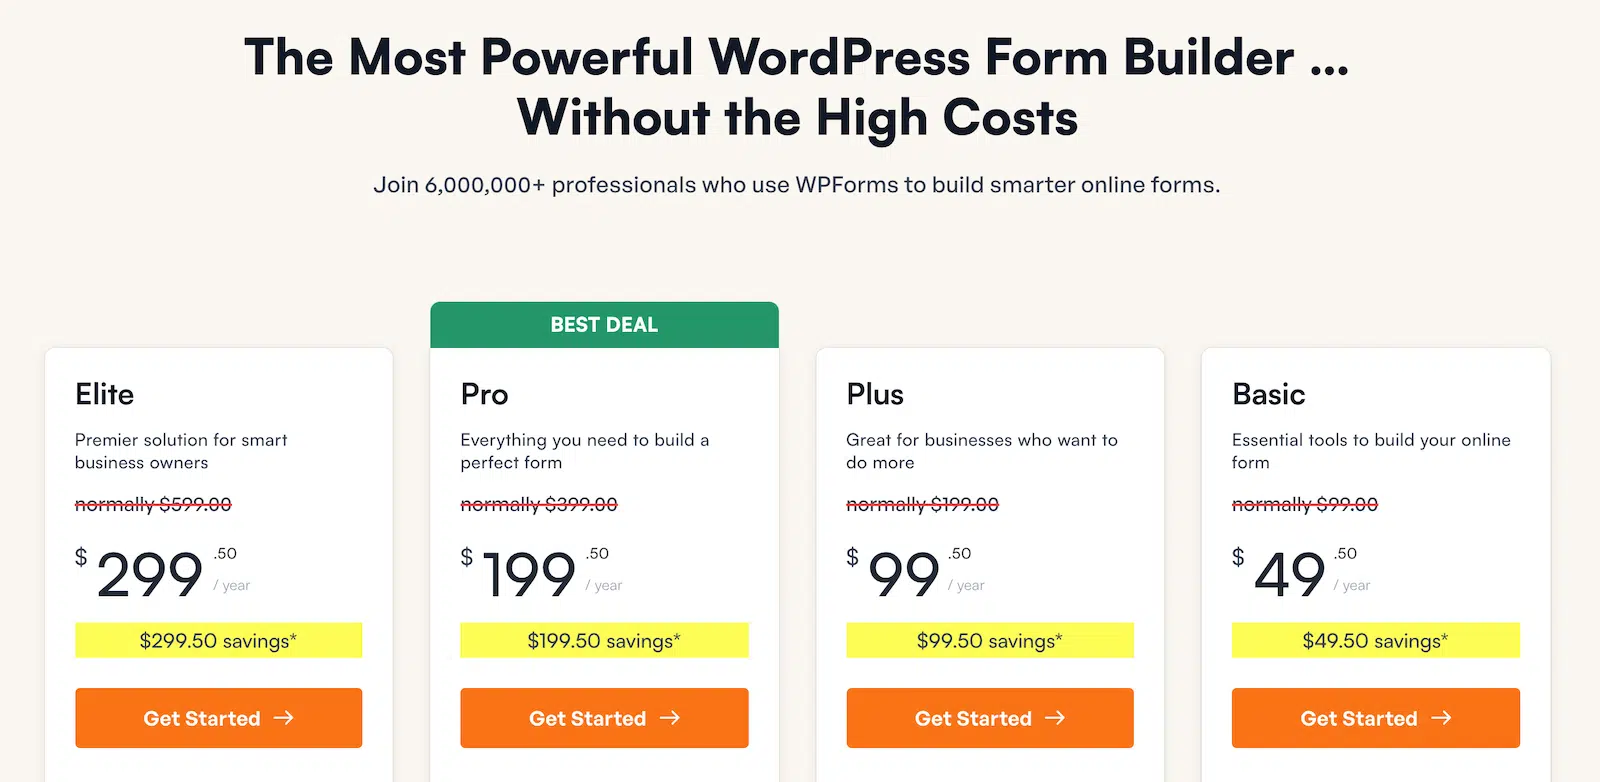
To get started, buy a WPForms license at Basic or higher. Then, install WPForms on your website. If you need help, follow these instructions on how to add a plugin to WordPress.
Step 2: Create Your Form From the Reimbursement Form Template
Start from a form that already adds up expenses and collects receipts, then add the one field it’s missing.
Go to WPForms » Add New in your WordPress dashboard. At the top of the screen, type a name for your form, such as Expense Reimbursement Form.
In the template search box, type “reimbursement” to narrow the library down. Several templates appear, and options like the Employee Expense Reimbursement Form need WPForms Pro for their signature field.

Hover over the Reimbursement Form card and click Use Template. The builder opens with the template’s fields already on the canvas.

The template already covers the main parts of a claim.
- The People: Employee Name, Email, Manager Name, and Manager Email
- The Dates: Expense Period Begin and Expense Period End
- The Expenses: 10 rows of Date, Description, and Total Spent
- The Mileage: Total Mileage, a rate note, and Total Owed Mileage
- The Payout: Total Reimbursement Owed, Upload Images of Receipts, and Comment or Message
The Reimbursement Form template page has a live preview if you’d like to click through it as an employee would.
To let finance sort claims by budget, drag a Dropdown field from Standard Fields to just below Expense Period Begin and Expense Period End, above the first expense row.
Label it “Department” and replace its choices with your own, such as Delivery, Front Counter, Design Studio, Events, and Office.

Switch on Required, because every claim needs a department. Then open the Advanced tab and add Placeholder Text such as Select your department.

Without a placeholder, the dropdown preselects its first choice, and any claim where the employee skips it gets filed under Delivery.
Step 3: Set Up Expense Lines That Total Themselves
The template’s expense rows add up on their own because of the field type behind each amount.
Click the first Total Spent field to open its Field Options. Its Item Type is set to User Defined, which lets the employee type in the amount.

Because Total Spent is a Single Item field and Total Reimbursement Owed is a Total field, the total updates as employees type.
These are WPForms payment fields, but with no payment gateway such as Stripe or PayPal connected, nobody is charged and the form simply records the amounts.
Next, click the first Description field and open its Advanced tab. Set Placeholder Text to Merchant and business purpose.

Each row already asks for the date and the amount, and the IRS expects business expense records to also show where the money went and why, which this placeholder prompts for.
Step 4: Collect Receipts as Uploads or Phone Photos
These settings make receipts easy for employees to send and hard for anyone to lose.
Click the Upload Images of Receipts field to open its options on the General tab. In Allowed File Extensions, enter jpg, jpeg, png, pdf.
Set Max File Size to 10, which WPForms reads as megabytes. Leave Max File Uploads at 10, and keep Required on to stop claims arriving without proof.

Including pdf in that list lets employees upload emailed receipts and invoices just as they arrived.
Now open the Advanced tab and switch on Enable Camera, with Format set to Photo. The field preview then offers Capture With Camera next to Choose Files to Upload.
On the live form, the link reads Capture With Your Camera and lets employees photograph a receipt without leaving the form.

Still on the Advanced tab, switch on Enable File Access Restrictions. Set User Restriction to Logged-in Users.
Only the roles in User Roles can then open the files, and Administrator is always one of them.
Add your approvers’ role there, or pick them by name under Users. It’s the simplest way to keep receipt files private.

Approvers open the entry in WordPress to see restricted files, because they can’t be sent as email attachments.
If your managers don’t log in to WordPress, set User Restriction to None and use Password Protection instead, then share that password with approvers.
Ask employees to explain any lost receipt in the Comment or Message box at the end of the form.
Step 5: Add Mileage Reimbursement to Your Form
Mileage is often the biggest line on a claim for anyone who drives for work. The template’s mileage block works as soon as you load it, but the rate it suggests is out of date.
Click the HTML / Code Block field between Total Mileage and Total Owed Mileage. Its Code box says Multiply by .625 (current rate), which was the IRS business rate for the second half of 2022.
Replace that text with your own rate, such as Multiply your miles by $0.76.

For 2026, the IRS business rate is 72.5 cents a mile from January through June and 76 cents from July 1.
Many employers reimburse at that rate, but you can set your own, and the IRS standard mileage rates page always has the current figure.
Switch off Required on Total Mileage and Total Owed Mileage too, and people who didn’t drive can submit.
Basic users multiply by hand using the edited note, while the Calculations addon in WPForms Pro can do the multiplication. The docs explain how formulas work if you’re new to them. Click Total Owed Mileage and open its Advanced tab.
Switch on Enable Calculation and type a formula that multiplies your Total Mileage field by your rate, such as round($F40 * 0.76, 2).

Swap in your own Total Mileage field number, then click Validate Formula.
The result is read-only for employees and recalculated on the server at submission. Keeping the rate inside the formula leaves one number to change when the IRS updates it.
To test it, click Preview at the top of the builder and type 120 into Total Mileage. Total Owed Mileage fills in as $91.20, and the total at the bottom updates with it.

Step 6: Send Each Claim to the Right Approver
Claims get approved by email, since WPForms entries don’t have an approve or reject status. This step decides who receives each claim and where their replies go.
Open Settings » Notifications in the form builder. Click the pencil icon next to the default notification’s name and rename it Manager Approval.
In Send To Email Address, click the tag icon at the right end of the box and choose Manager Email. Add the Employee Name smart tag to the Email Subject Line too, and managers will see who’s claiming before they open the email.
Then set Reply-To to your accounts inbox, such as [email protected]. When a manager replies Approved, the reply goes straight to the person who pays the claim.

Click Add New Notification and name the new notification Employee Copy. In its Send To Email Address, use the tag icon to choose the Email field. Employees then get a record of exactly what they claimed.

Because the Total field can’t trigger conditional logic, WPForms Pro users copy the total into a field that can. Go back to the Fields panel and drag a Hidden Field from Fancy Fields onto the form.
Label it Claim Total for Routing, a name that’s easy to spot in your notification rules. On its Advanced tab, switch on Enable Calculation, then enter a formula that reads the Total field’s amount, such as $F44_amount, with your own field number.

Go back to Settings » Notifications and click Add New Notification. Name it Large Claim Review and send it to the owner, such as [email protected].
Switch on Enable Conditional Logic in that notification. Set the rule to Send this notification if Claim Total for Routing is greater than 500. These conditional notifications work on WPForms Basic, and only the calculated field needs Pro.

Calculations works out the total and this field on the server before any email goes out, which keeps the rule reliable.
Basic users can still route claims with rules on choice fields, such as copying a department head when Department is Events.
If you’d rather have managers sign off inside the form, the Pro Simple Reimbursement Form template adds a Share with Approver step through the Save and Resume addon.
Step 7: Publish the Form and Process Claims
Put the form where only your team can reach it, then work through claims from one list.
Click Embed at the top of the builder and choose New Page. Name the page something like Expense Claims and click Add to Page.
Set the page to Password protected in the editor’s page settings before you publish it, and share the password with your team. Pro users can switch on the Form Locker addon instead and allow logged-in users only.
Then submit a test claim the way an employee would.

Next, go to WPForms » Entries and click your form’s name. Every claim sits in one list with the employee’s name and total, and the entry management in WPForms Basic lets you search and filter it.

Click View on a claim to open its details, including each expense line, the total, and links to the receipt files. T
urn on Maintain Layouts under the gear icon at the top right to see each expense line in one row. Use Add Note to record the approval and payment, such as “Approved by Sullie Eloso, paid by direct deposit.”
The star icon works well for flagging claims that are still waiting on a receipt.

At month-end or year-end close, go to WPForms » Tools and open the Export tab. Under Export Entries, select your form and set a Custom Date Range for the period you’re closing.
Check Export in Microsoft Excel (.xlsx) if finance prefers Excel, and tick Entry Notes under Additional Information to include your approval notes. The guide on how to export claims to a spreadsheet explains the rest of the options.

With WPForms Pro, the Google Sheets addon adds each claim to a spreadsheet as it arrives, where finance can keep their own Approved and Paid columns.
And that’s it! Each new claim now arrives with its receipts attached and its total already added up.
Start Collecting Expense Claims Online! 🙂
FAQs About Expense Reimbursement Forms
Here are answers to common questions about expense reimbursement forms, from submission deadlines to the 2026 mileage rate and where the free reimbursement form template fits in.
What is a reimbursement form?
A reimbursement form is how employees ask to be paid back for business expenses they covered with their own money, such as travel, meals, supplies, or mileage.
Each claim lists the date, purpose, and amount of every expense, includes the receipts, and goes to a manager for approval.
What’s the difference between an expense approval form and a reimbursement form?
Use an expense approval form before anyone spends money, and a reimbursement form afterward to claim it back with receipts. Teams that use both get big purchases approved first, then repaid once the receipts come in.
Is a reimbursement form the same as an expense report?
People often use the two names for the same thing.
Strictly speaking, an expense report summarizes spending over a period, often by category, while a reimbursement form asks to be paid back for it.
The form in this guide does both, which means you won’t need a separate expense form template.
How long do employees have to submit expense reimbursements?
Your expense policy sets the deadline, and 30 days after the expense is a common choice. Under the IRS’s accountable-plan rules, the safe harbor gives employees 60 days to account for an expense and 120 days to return any unused advance, and amounts that miss those windows can be taxed as wages.
Add the deadline to the form itself, for example in the Description of the Expense Period Begin field, where employees will see it. This isn’t tax advice, and your accountant can confirm the details for your business.
What is the IRS mileage rate for 2026?
The IRS business mileage rate is 76 cents per mile from July 1, 2026, after 72.5 cents from January through June. Employers can reimburse at a different rate, and it’s worth checking the IRS page each January and again mid-year.
If most of your claims are miles, the Pro Mileage Reimbursement Form template has three journey blocks with tolls, parking, and receipts for each trip.
Where can I find a reimbursement claim form?
For medical, FSA, or insurance claims, the form comes from your insurer or benefits administrator, usually in its member portal. For work expenses, ask your HR or finance team, or build your own with the template above.
How do you write a reimbursement letter?
Use a clear subject line, such as Request for reimbursement of travel expenses. List each expense with what it was for and what it cost, then add the total.
Attach the receipts and say how you’d like to be paid. A form covers the same points with less back and forth.
Can I make a reimbursement form with WPForms for free?
With the Single Item and Total fields in WPForms Lite, a free form can add up amounts and email them to you.
Lite has no File Upload or Date / Time fields and doesn’t save entries in your dashboard, leaving you without receipts or a record.
For a real claims process, start with WPForms Basic, or print the free template above.
Next, Create an Online Travel Request Form
Reimbursements go more smoothly when trips are approved before anyone books them. Our guide to building a travel request form shows how to collect trip details and get a manager’s OK up front.
The approved request also gives managers the trip details to check each claim against.
Make Your Expense Reimbursement Form Today! 🙂
Ready to build your form? Get started today with the easiest WordPress form builder plugin. WPForms Pro includes lots of free templates and offers a 14-day money-back guarantee.
If this article helped you out, please follow us on Facebook and Twitter for more free WordPress tutorials and guides.