
AI Summary
Online applications are now the norm, and students will expect to be able to fill out a form on your portal with their academic information.
An online college application form helps potential students send all the details required to see if they’d be a good fit for your school.
Create Your College Application Form Now 🎓
In this post, I’ll walk you through the steps to easily create a college application form with a template using the WPForms plugin.
How to Make a College Application Form in WordPress
The WPForms plugin makes it super easy to create nearly any type of WordPress form you need. Follow the steps below to get started:
- Step 1: Install the WPForms Plugin
- Step 2: Get the Form Locker Addon
- Step 3: Design Your College Application Form
- Step 4: Add a Repeater Field to the Form
- Step 5: Set Up Applicant Form Notifications
- Step 6: Set Up Your Application Form Closing Date
- Step 7: Publish Your College Application Form
- FAQs about College Application Forms
- Next, Learn How to Create a Group Registration Form
Step 1: Install the WPForms Plugin
WPForms is an ideal choice for creating an online college application form due to its ease of use, flexibility, and powerful features. It allows you to build forms quickly with a user-friendly drag-and-drop interface.
To follow this guide, you’ll need the WPForms Pro license that includes the Form Locker Addon. This addon lets you control form access, set entry limits, and specify closing dates, ensuring your application process runs smoothly.

Once you’ve purchased the license, download, install, and activate the WPForms plugin on your WordPress site. If you need help with this step, check out this beginner’s guide to installing a plugin in WordPress.
Step 2: Get the Form Locker Addon
Next, let’s install the Form Locker addon. This helps give your college application form a deadline so that it automatically closes after a set date and time.
From your WordPress dashboard, navigate to WPForms and click on the Addons option from the menu.
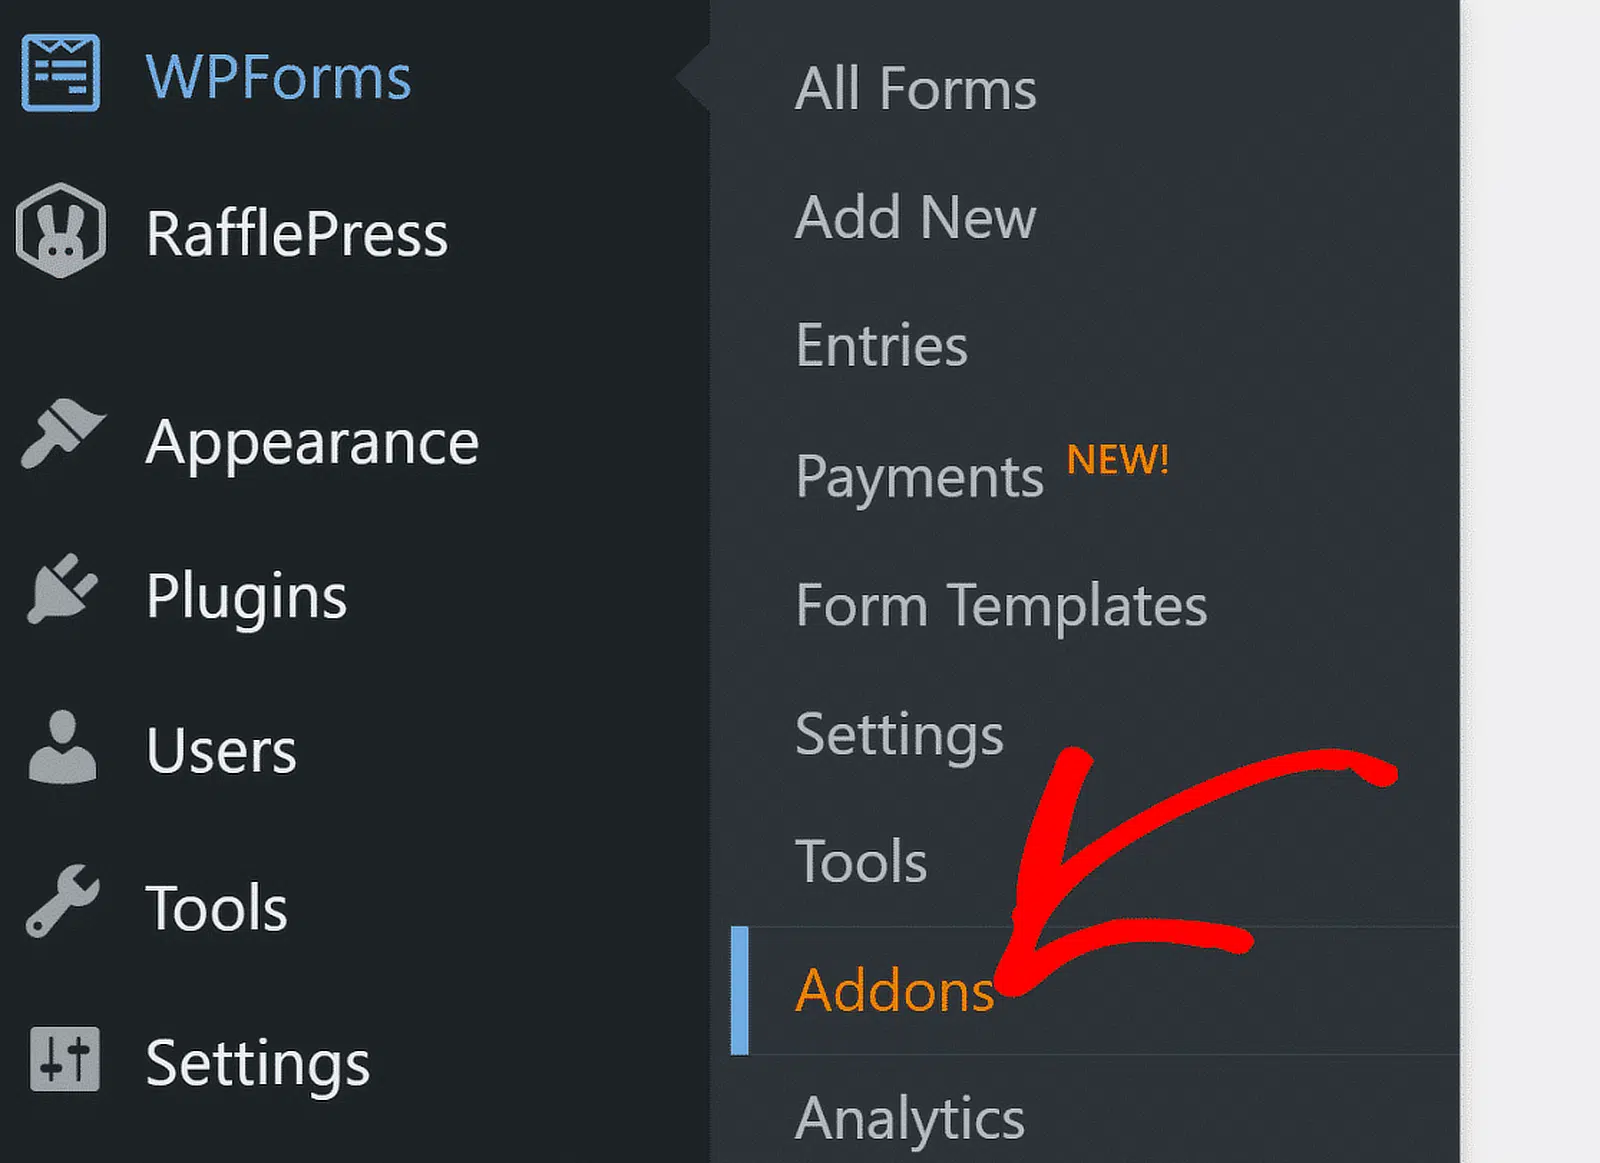
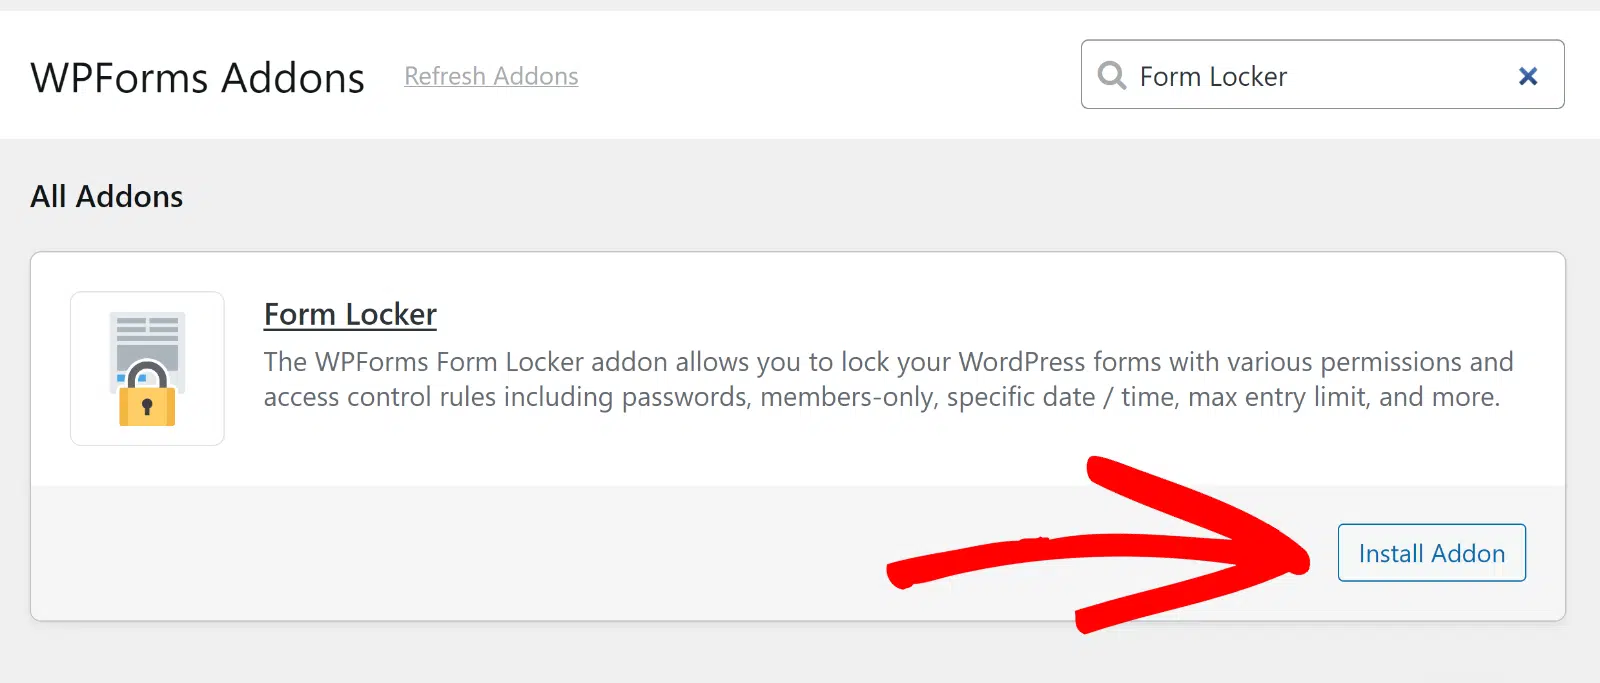
Next, use the search field or scroll down to find the Form Locker Addon and then click on the Install Addon button.
Great, you’re all set to create your form. Let’s open up the college application form template next to kick off the form creation process.
Step 3: Design Your College Application Form
Creating forms is so easy with WPForms. And because you can use a template, most of the work of designing the form is already done for you!
So, let’s use the College Application Form template to speed things up. From your WordPress dashboard, go to WPForms » Add New.

The form builder will open up in a fullscreen window. Go ahead and name your form in the Name Your Form area.
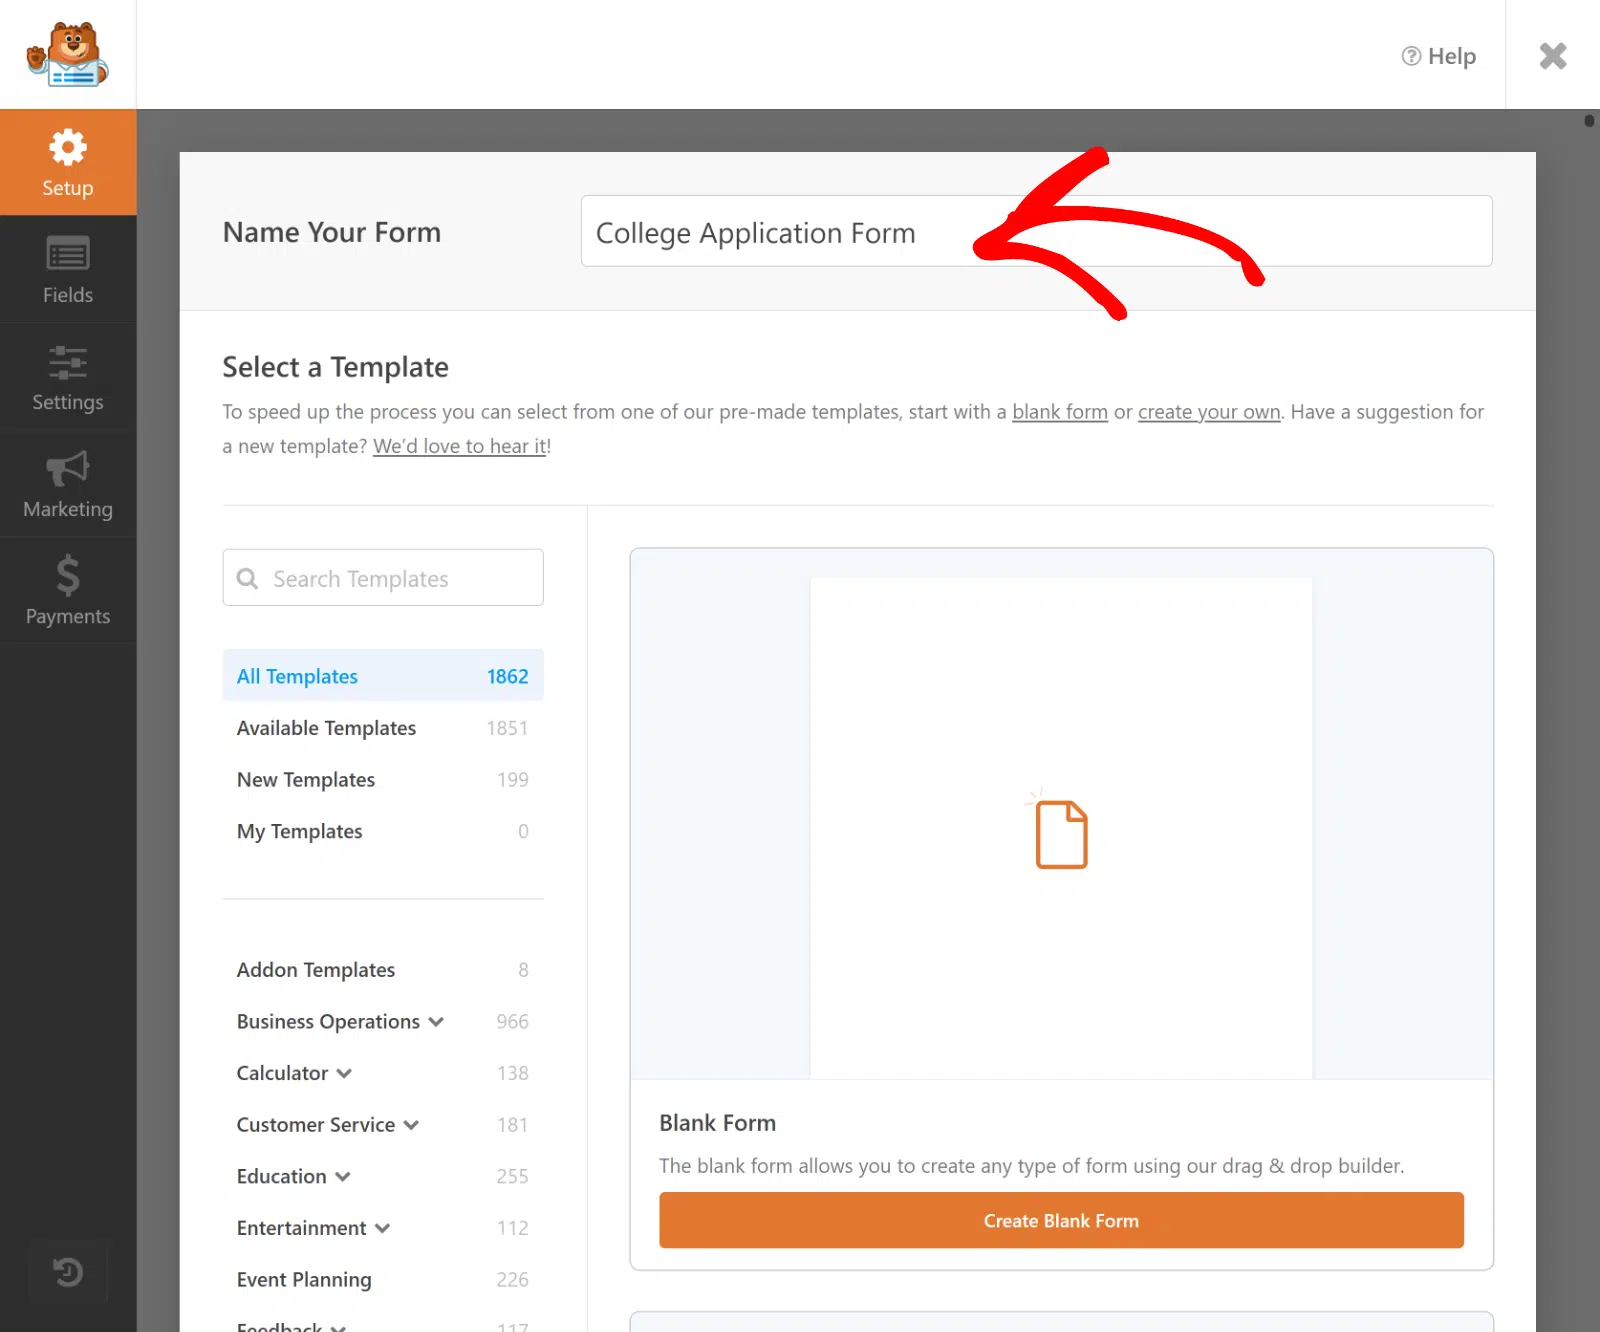
Next, scroll down to the Select a Template section. WPForms comes with 2,100+ WordPress form templates, all of which you can customize however you like.
Go ahead and search for “college.” Then click on Use Template under the College Application Form template to open it.
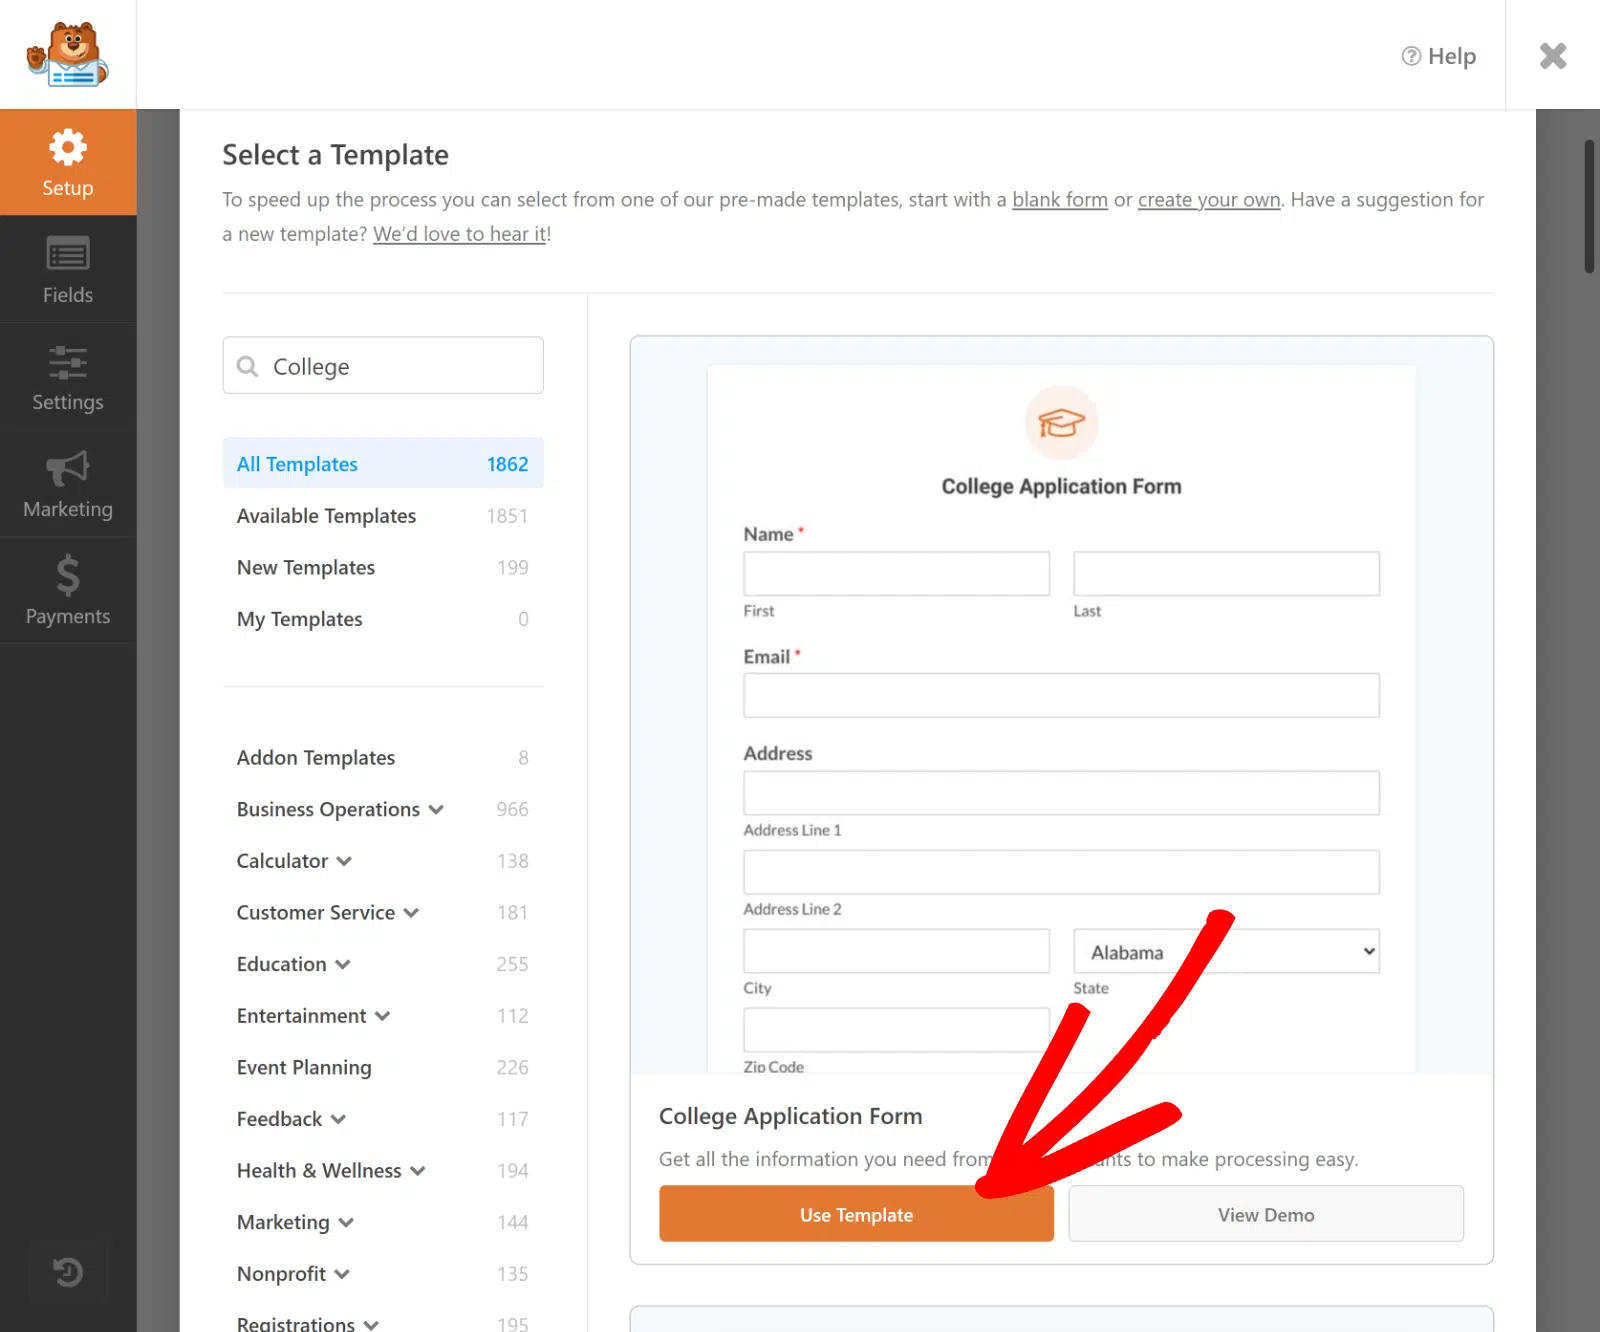
The template will open up in the form builder, where you’ll notice that your college application form has a ton of fields already set up for you, like:
- Contact Information
- Emergency Contact
- Demographics
- High School Details
- Extracurricular Activities
- File Uploads
- Parent Details
- Citizenship Status
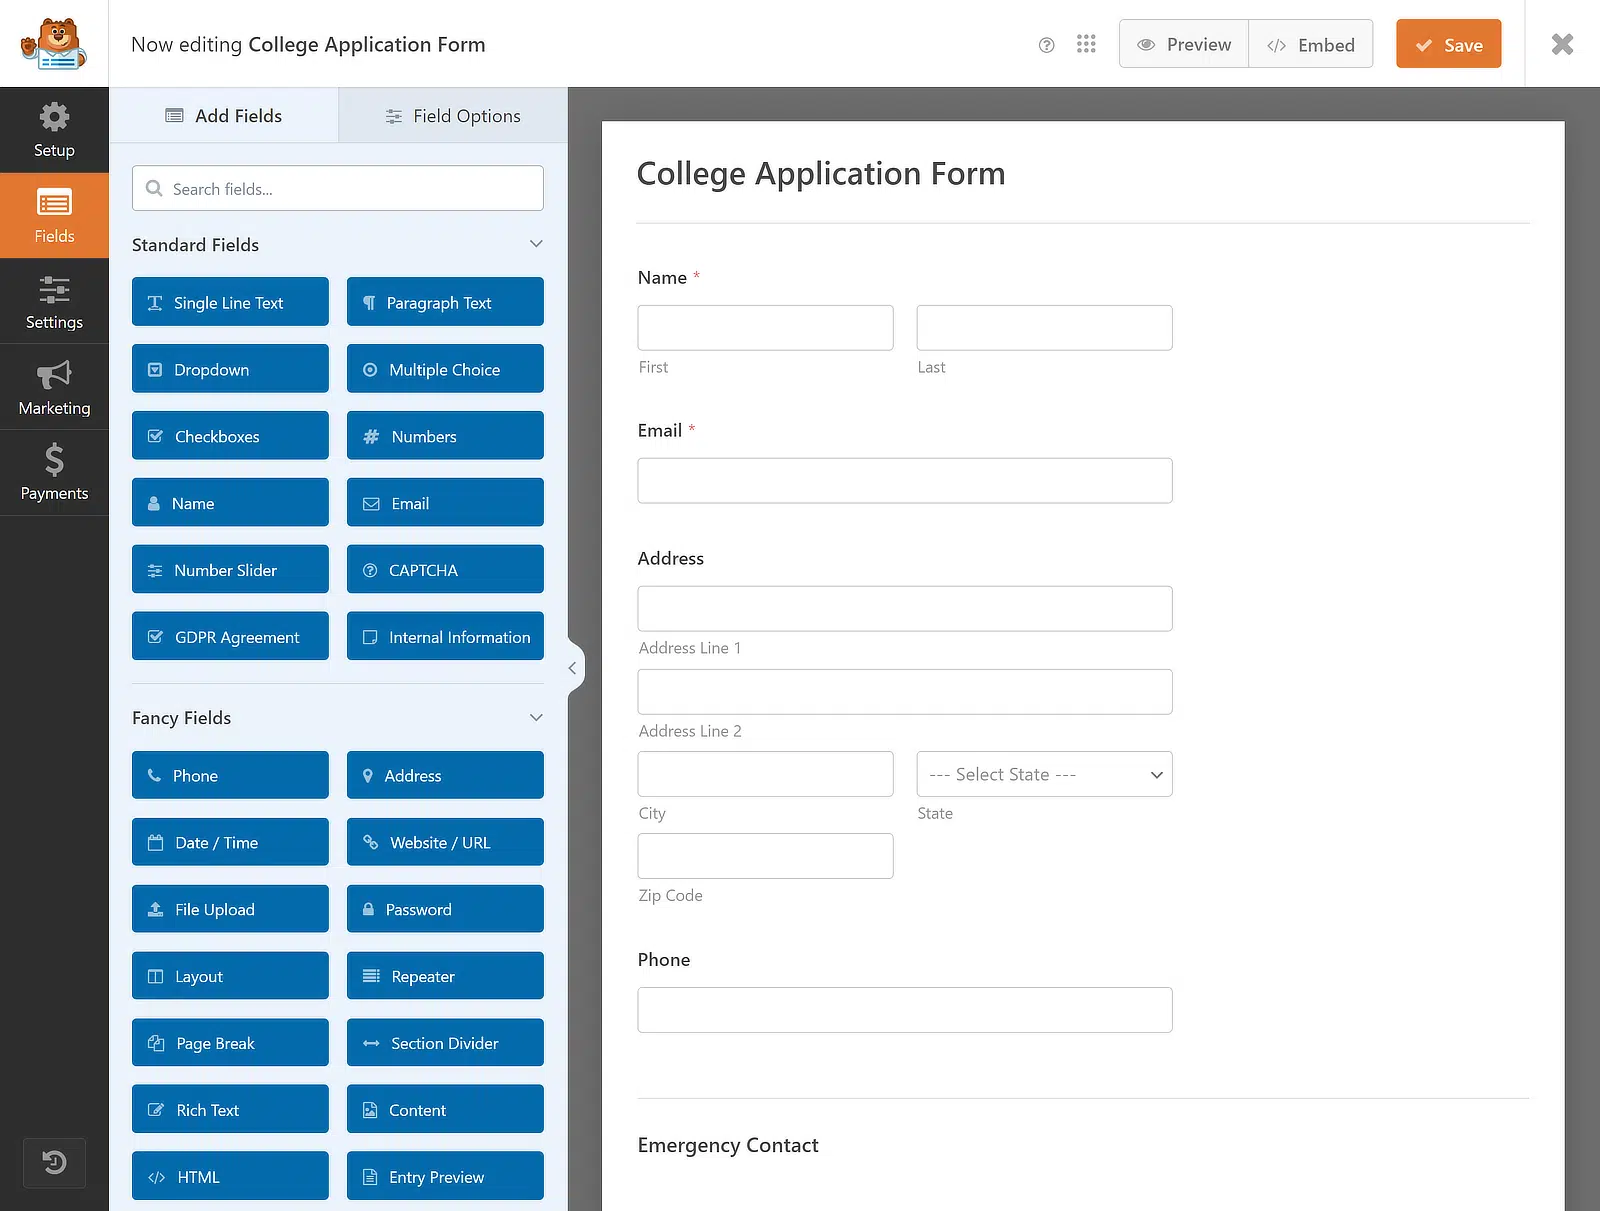
You can now drag and drop a field to rearrange the order of your college application form or click on any field to open its options and customize it.
For instance, if you want to use the template to accept multiple sets of similar data, I recommend adding a Repeater field.
Step 4: Add a Repeater Field to the Form
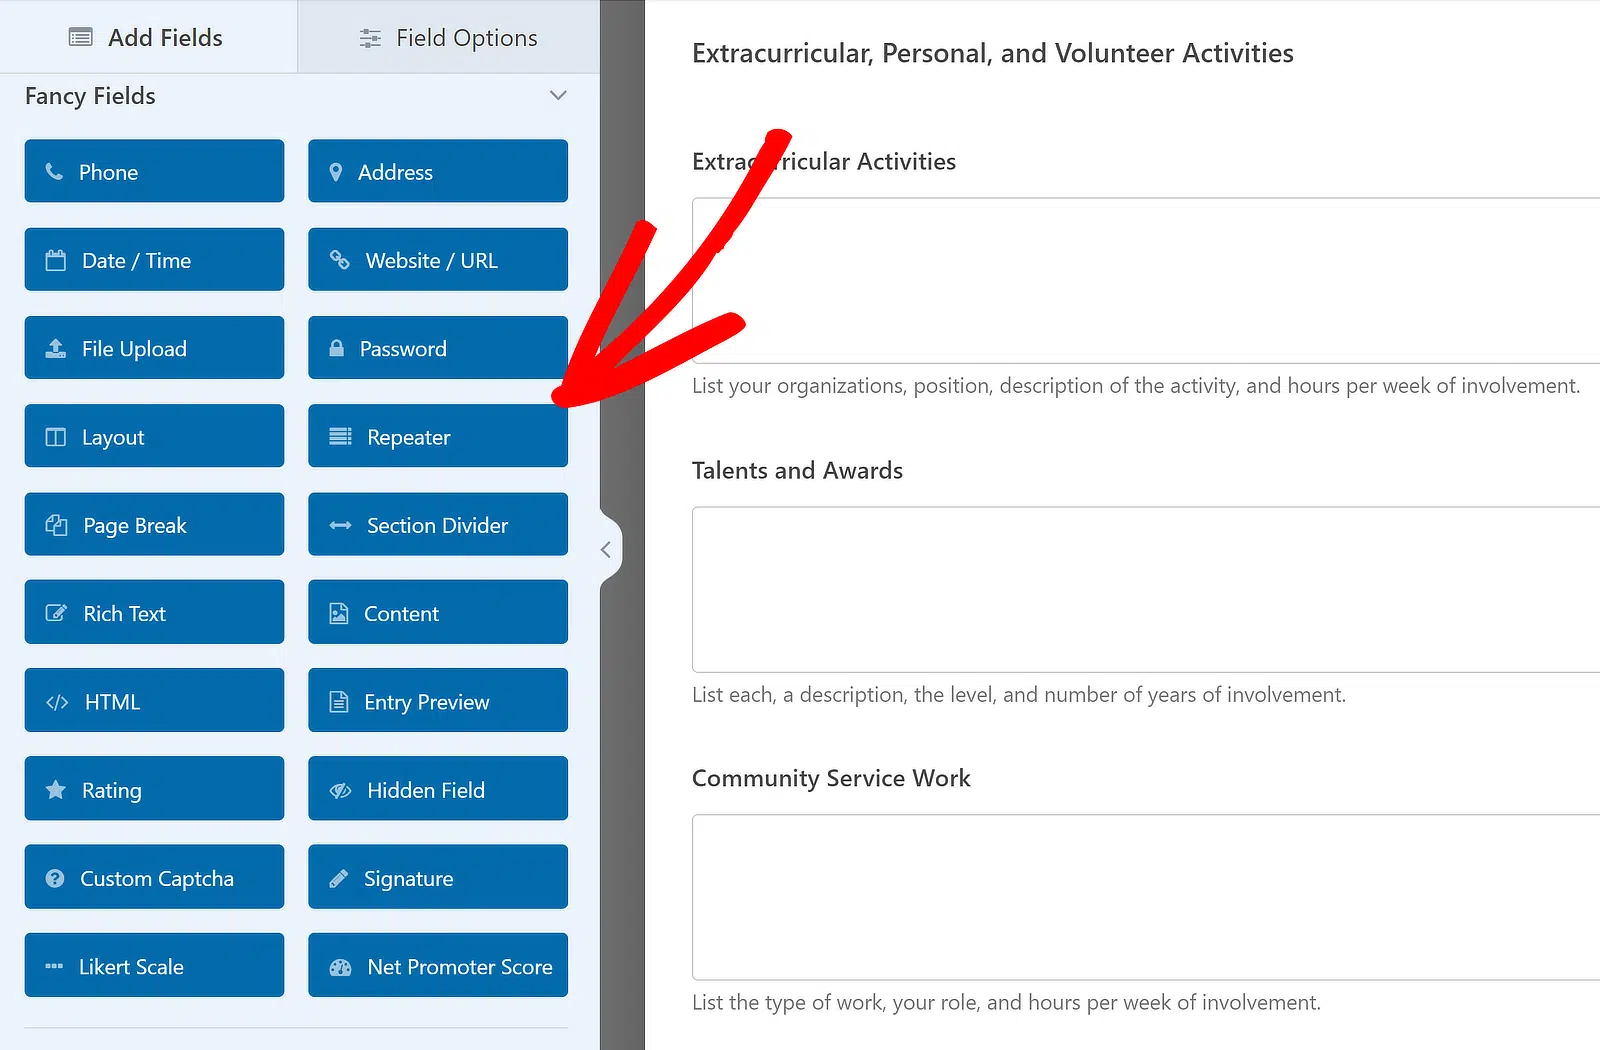
The College Application Form Template comes equipped with numerous fields to collect all vital student information.
Among these is the Extracurricular, Personal, and Volunteer Activities section, where a Repeater field may be handy.
If we want these fields to be repeatable, we first need to insert the Repeater field by dragging it from the panel on the left to the right.
Once the Repeater field has been inserted, click it to display the associated Field Options on the left.
You can now choose whether to display the Repeater field in Rows or Blocks. I’ll select the Rows option since it works best for this case.
At the same time, you’ll be required to choose a Layout for the field. I’ll opt for the default layout, but feel free to pick anything from the nine presets available.
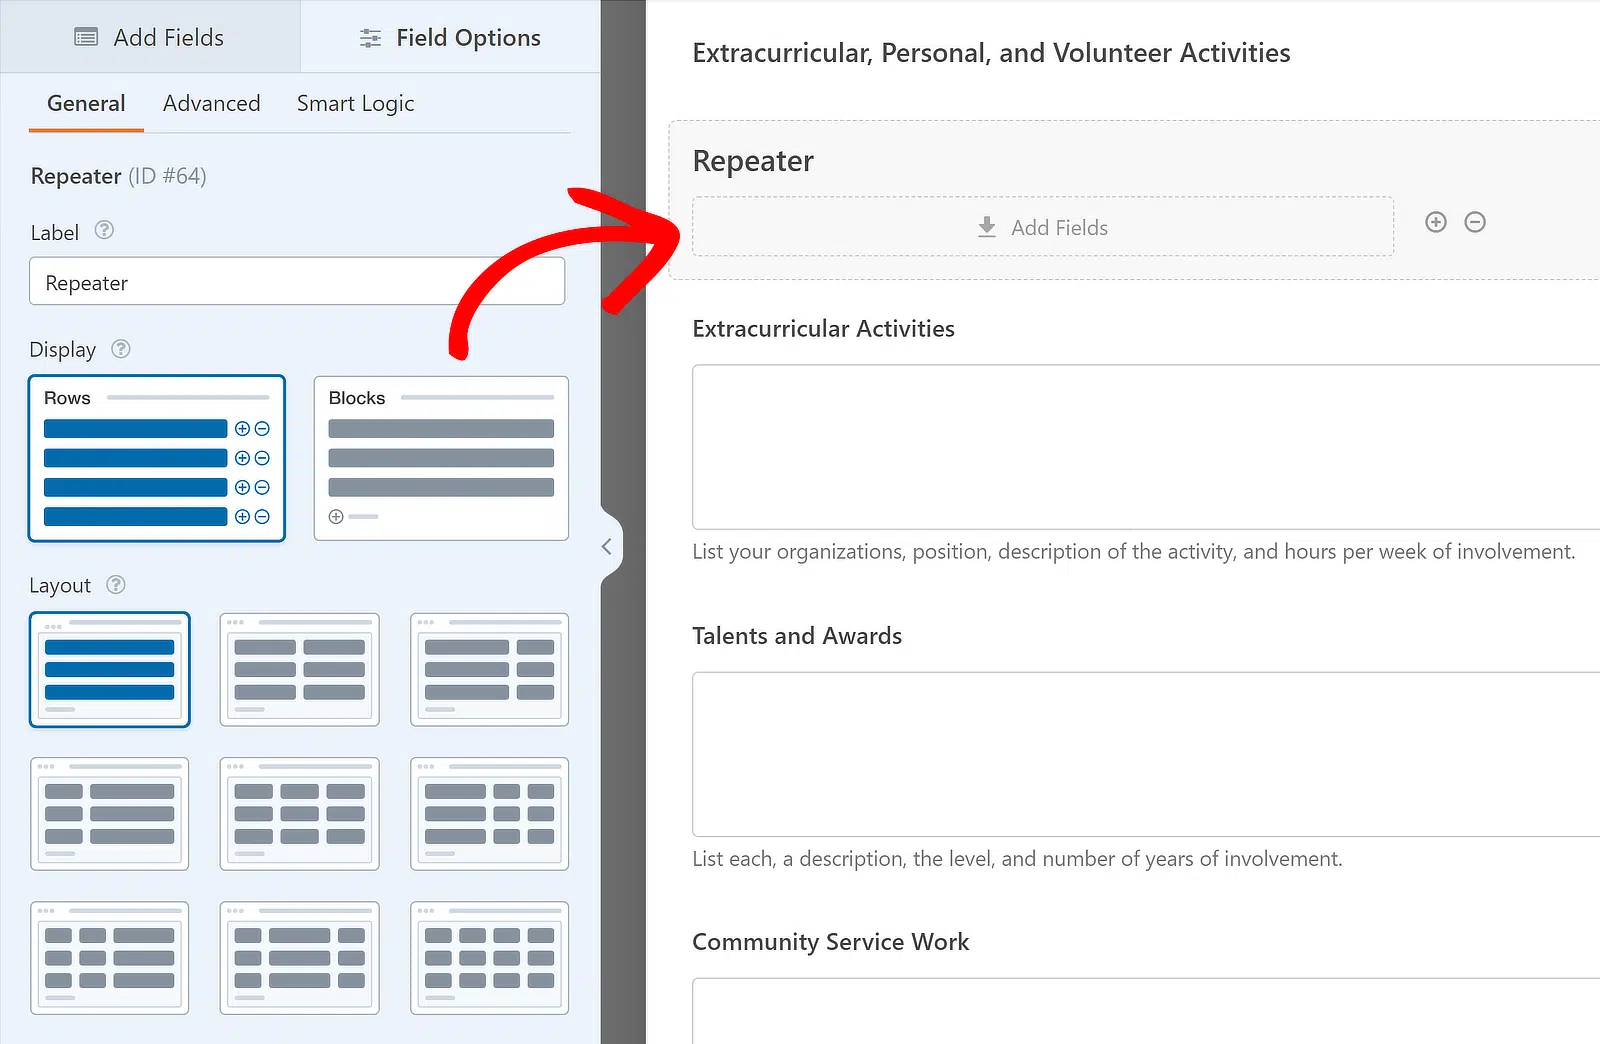
As you select the Layout from the presets available, the preview on the right will update immediately, and a drop zone will appear.
This will allow you to add any fields you want to make repeatable. For instance, I’ll first add the Extracurricular Activities field inside it.
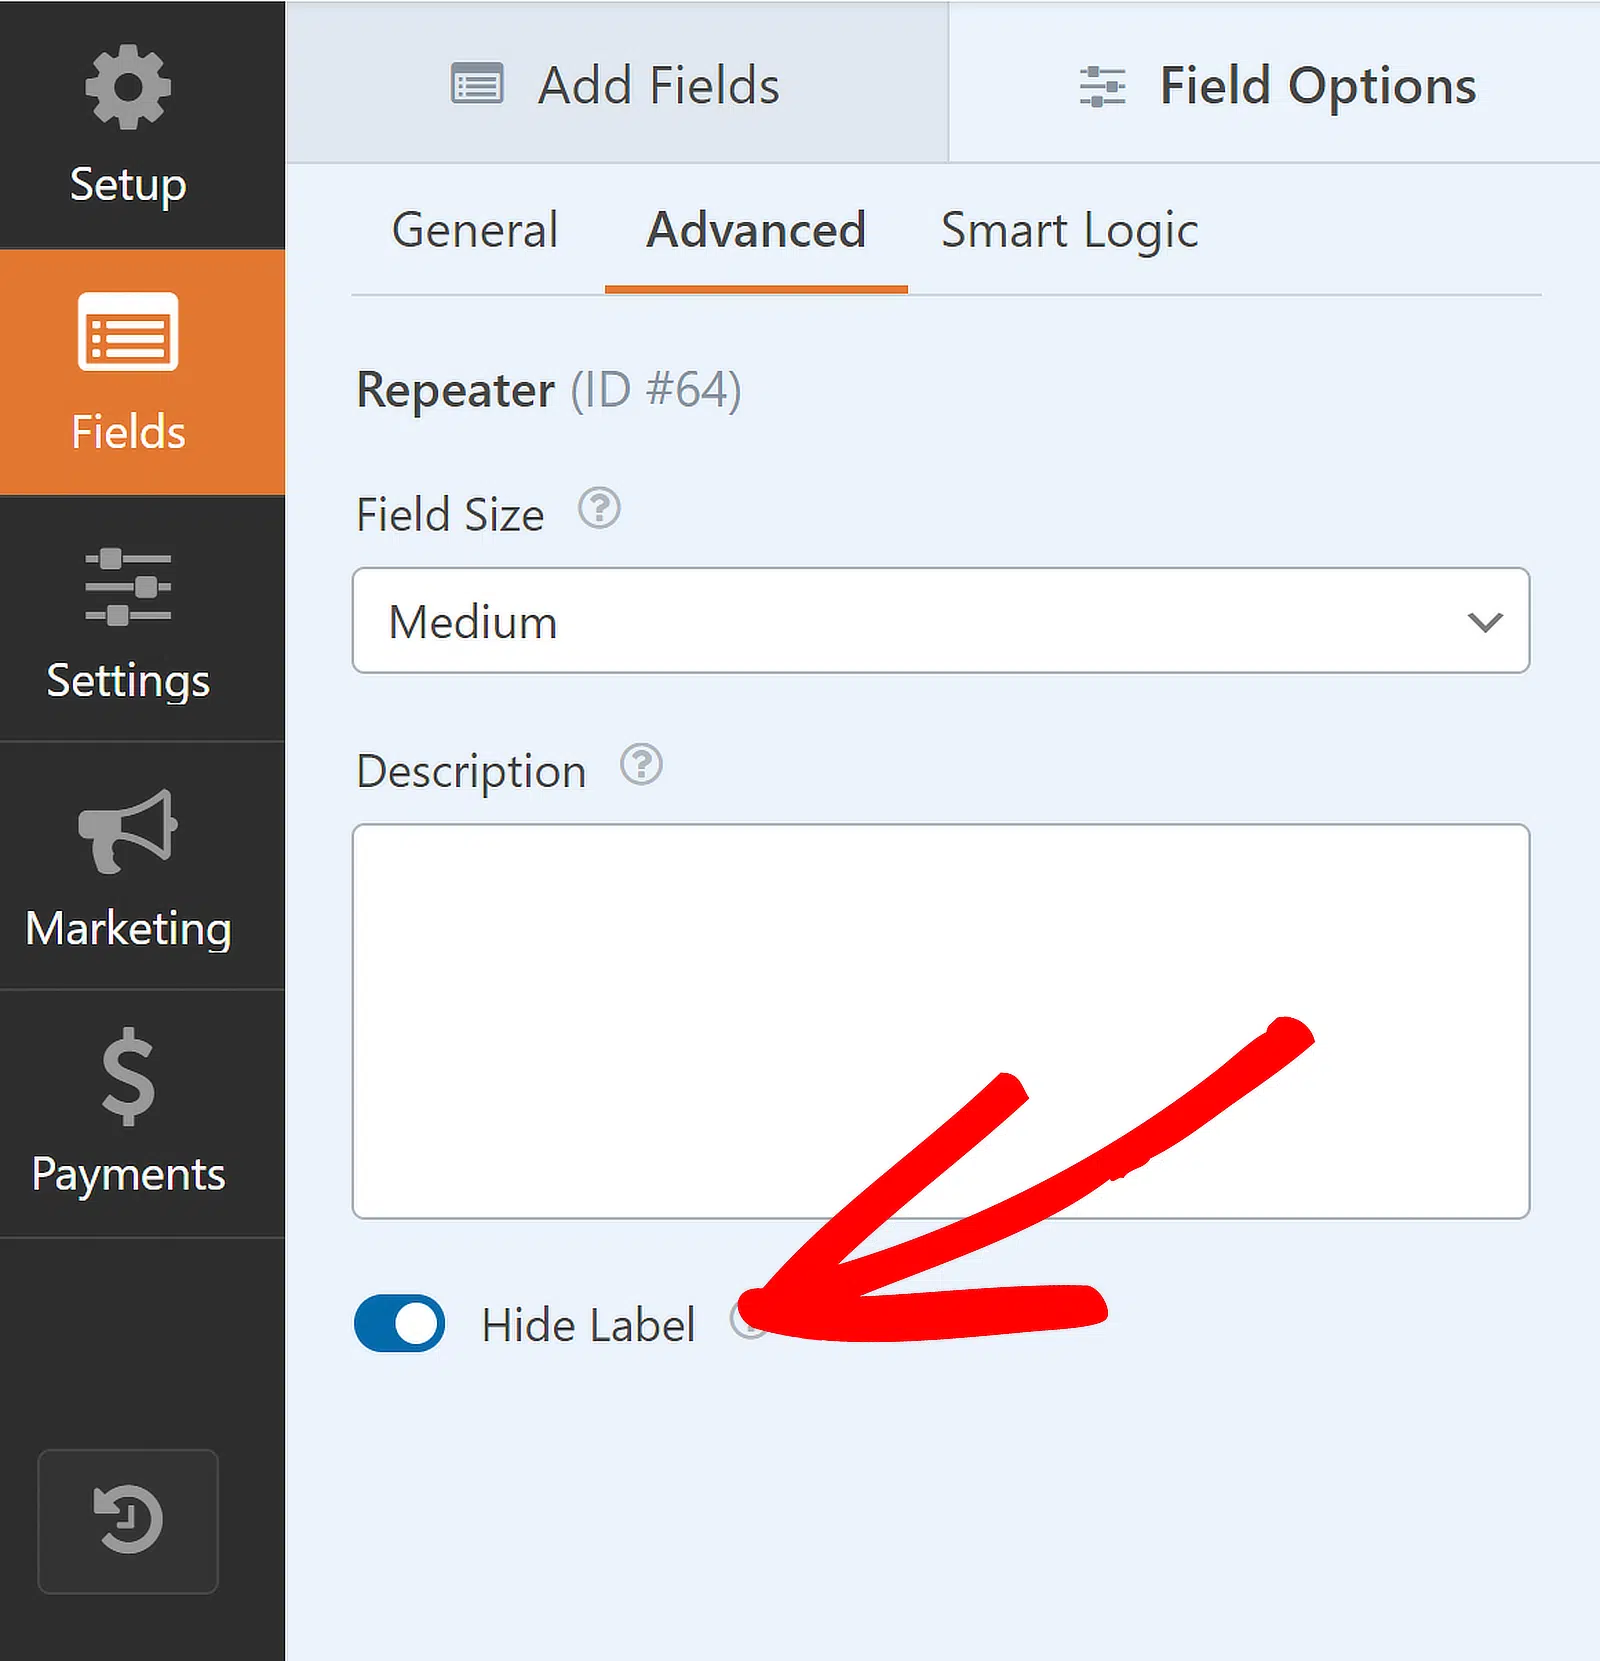
Then, I’ll edit the Label of the Repeater Field; if required, you can disable/hide them from the Advanced menu.
Now, I’ll create separate Repeater fields for Talents and Awards, Community Service Work, and Employment. Here’s what it looks like:

You can also control how many times a user can repeat a field in a form submission. The default minimum is 1 entry, and the maximum is 10.
To adjust the limits, go to the Field Options panel for the specific Repeater field and find the section labeled Limit.

You’re doing a great job so far! Now, with the Repeater field added, I’m going to show you the steps to customize your form settings.
Step 5: Set Up Applicant Form Notifications
Let’s set up the notification emails that will be sent when someone fills out your college application form.
To start, click Settings on the left-hand side of the form builder. Then click Notifications to open up the email settings.
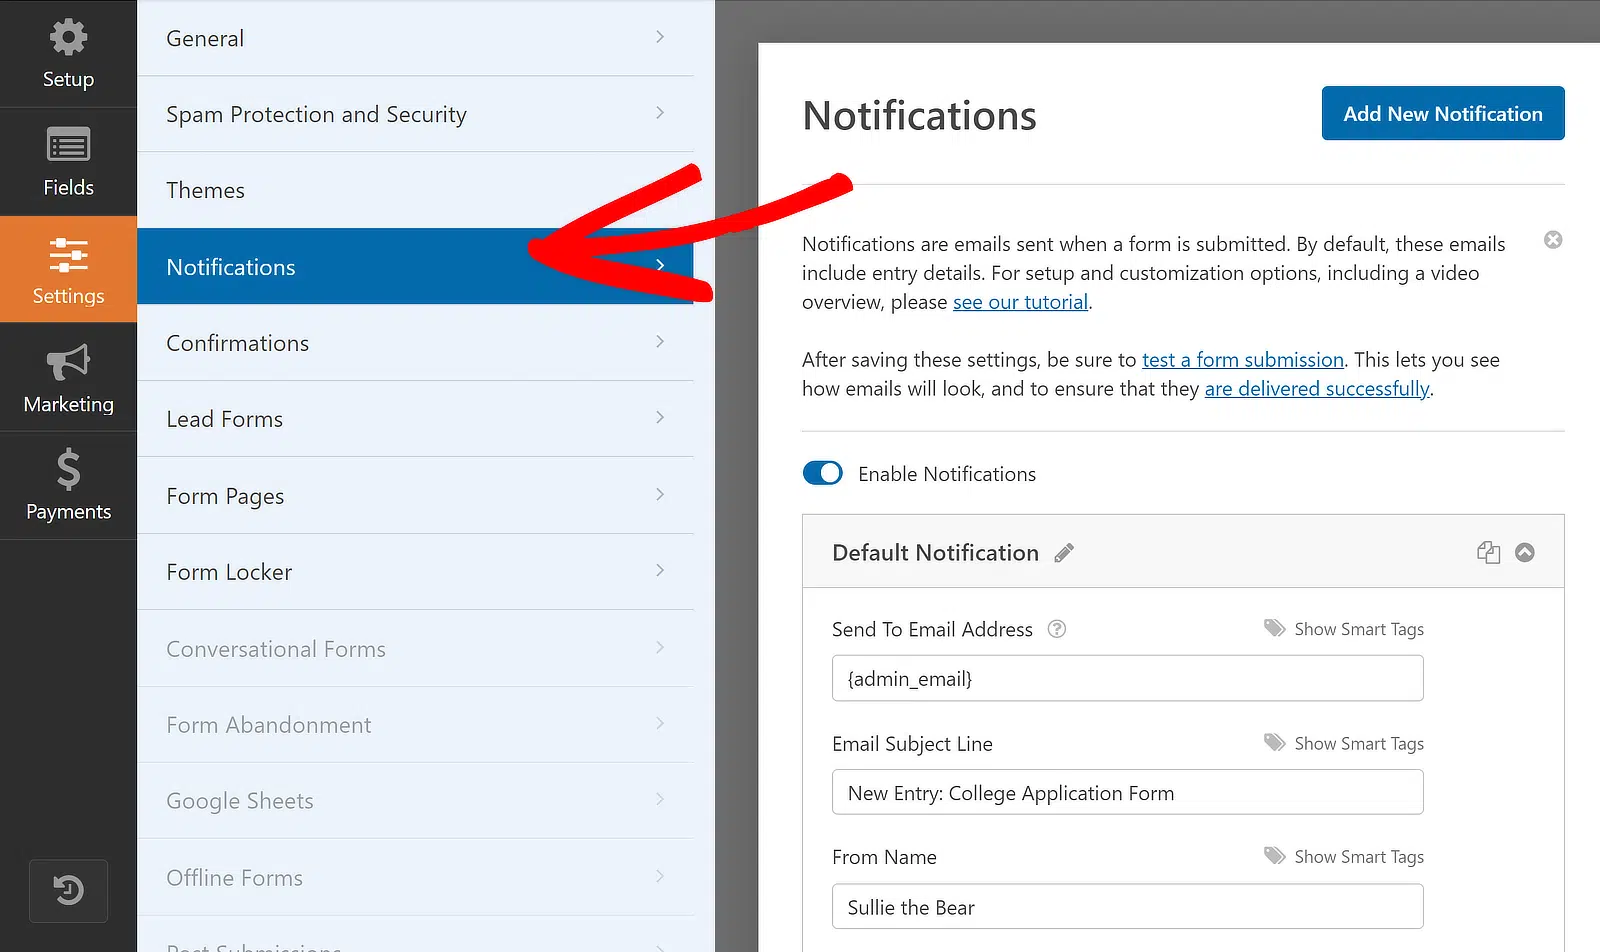
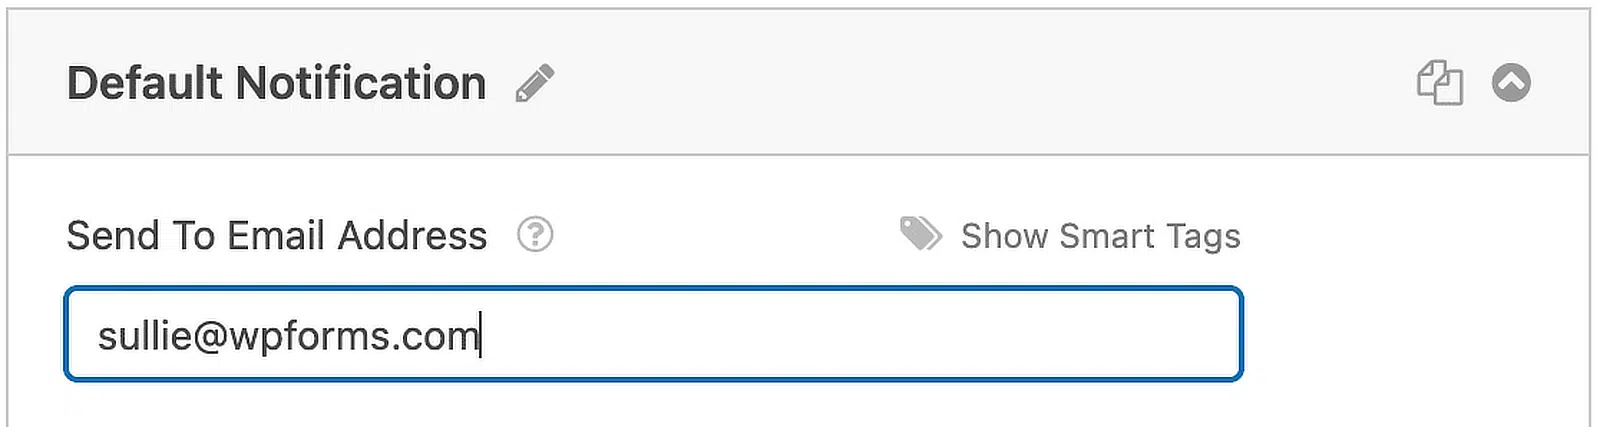
By default, WPForms sends notifications to WordPress’s admin email, but you can also easily change that to a different email.
All you have to do is delete the {admin_email} tag and type in the email address you want to use instead.
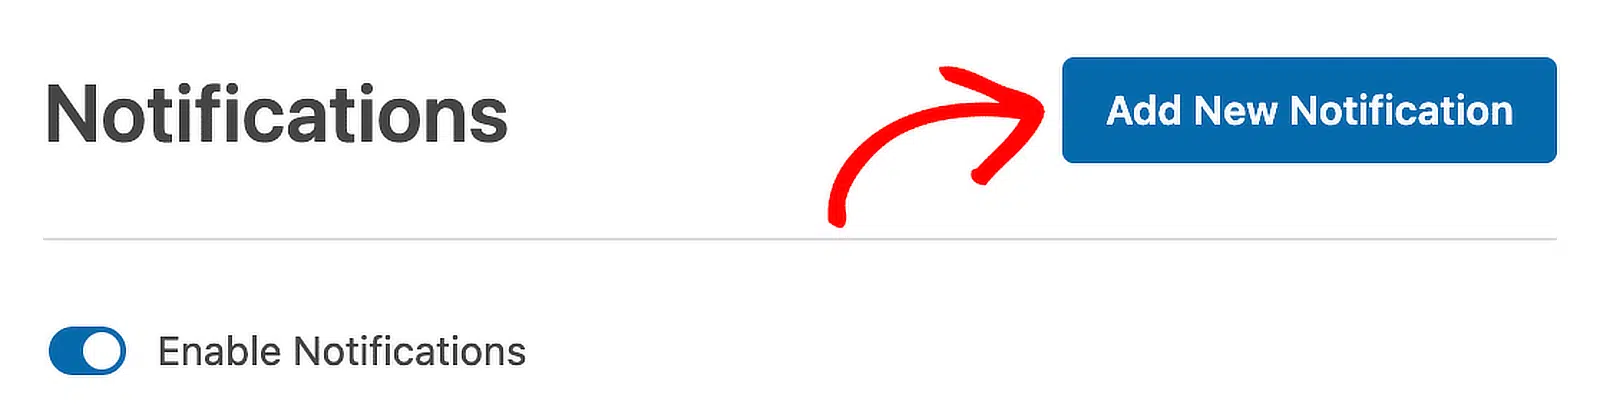
It’s also important to email the applicant once they apply to let them know their college application was received. To do that, click on Add New Notification.
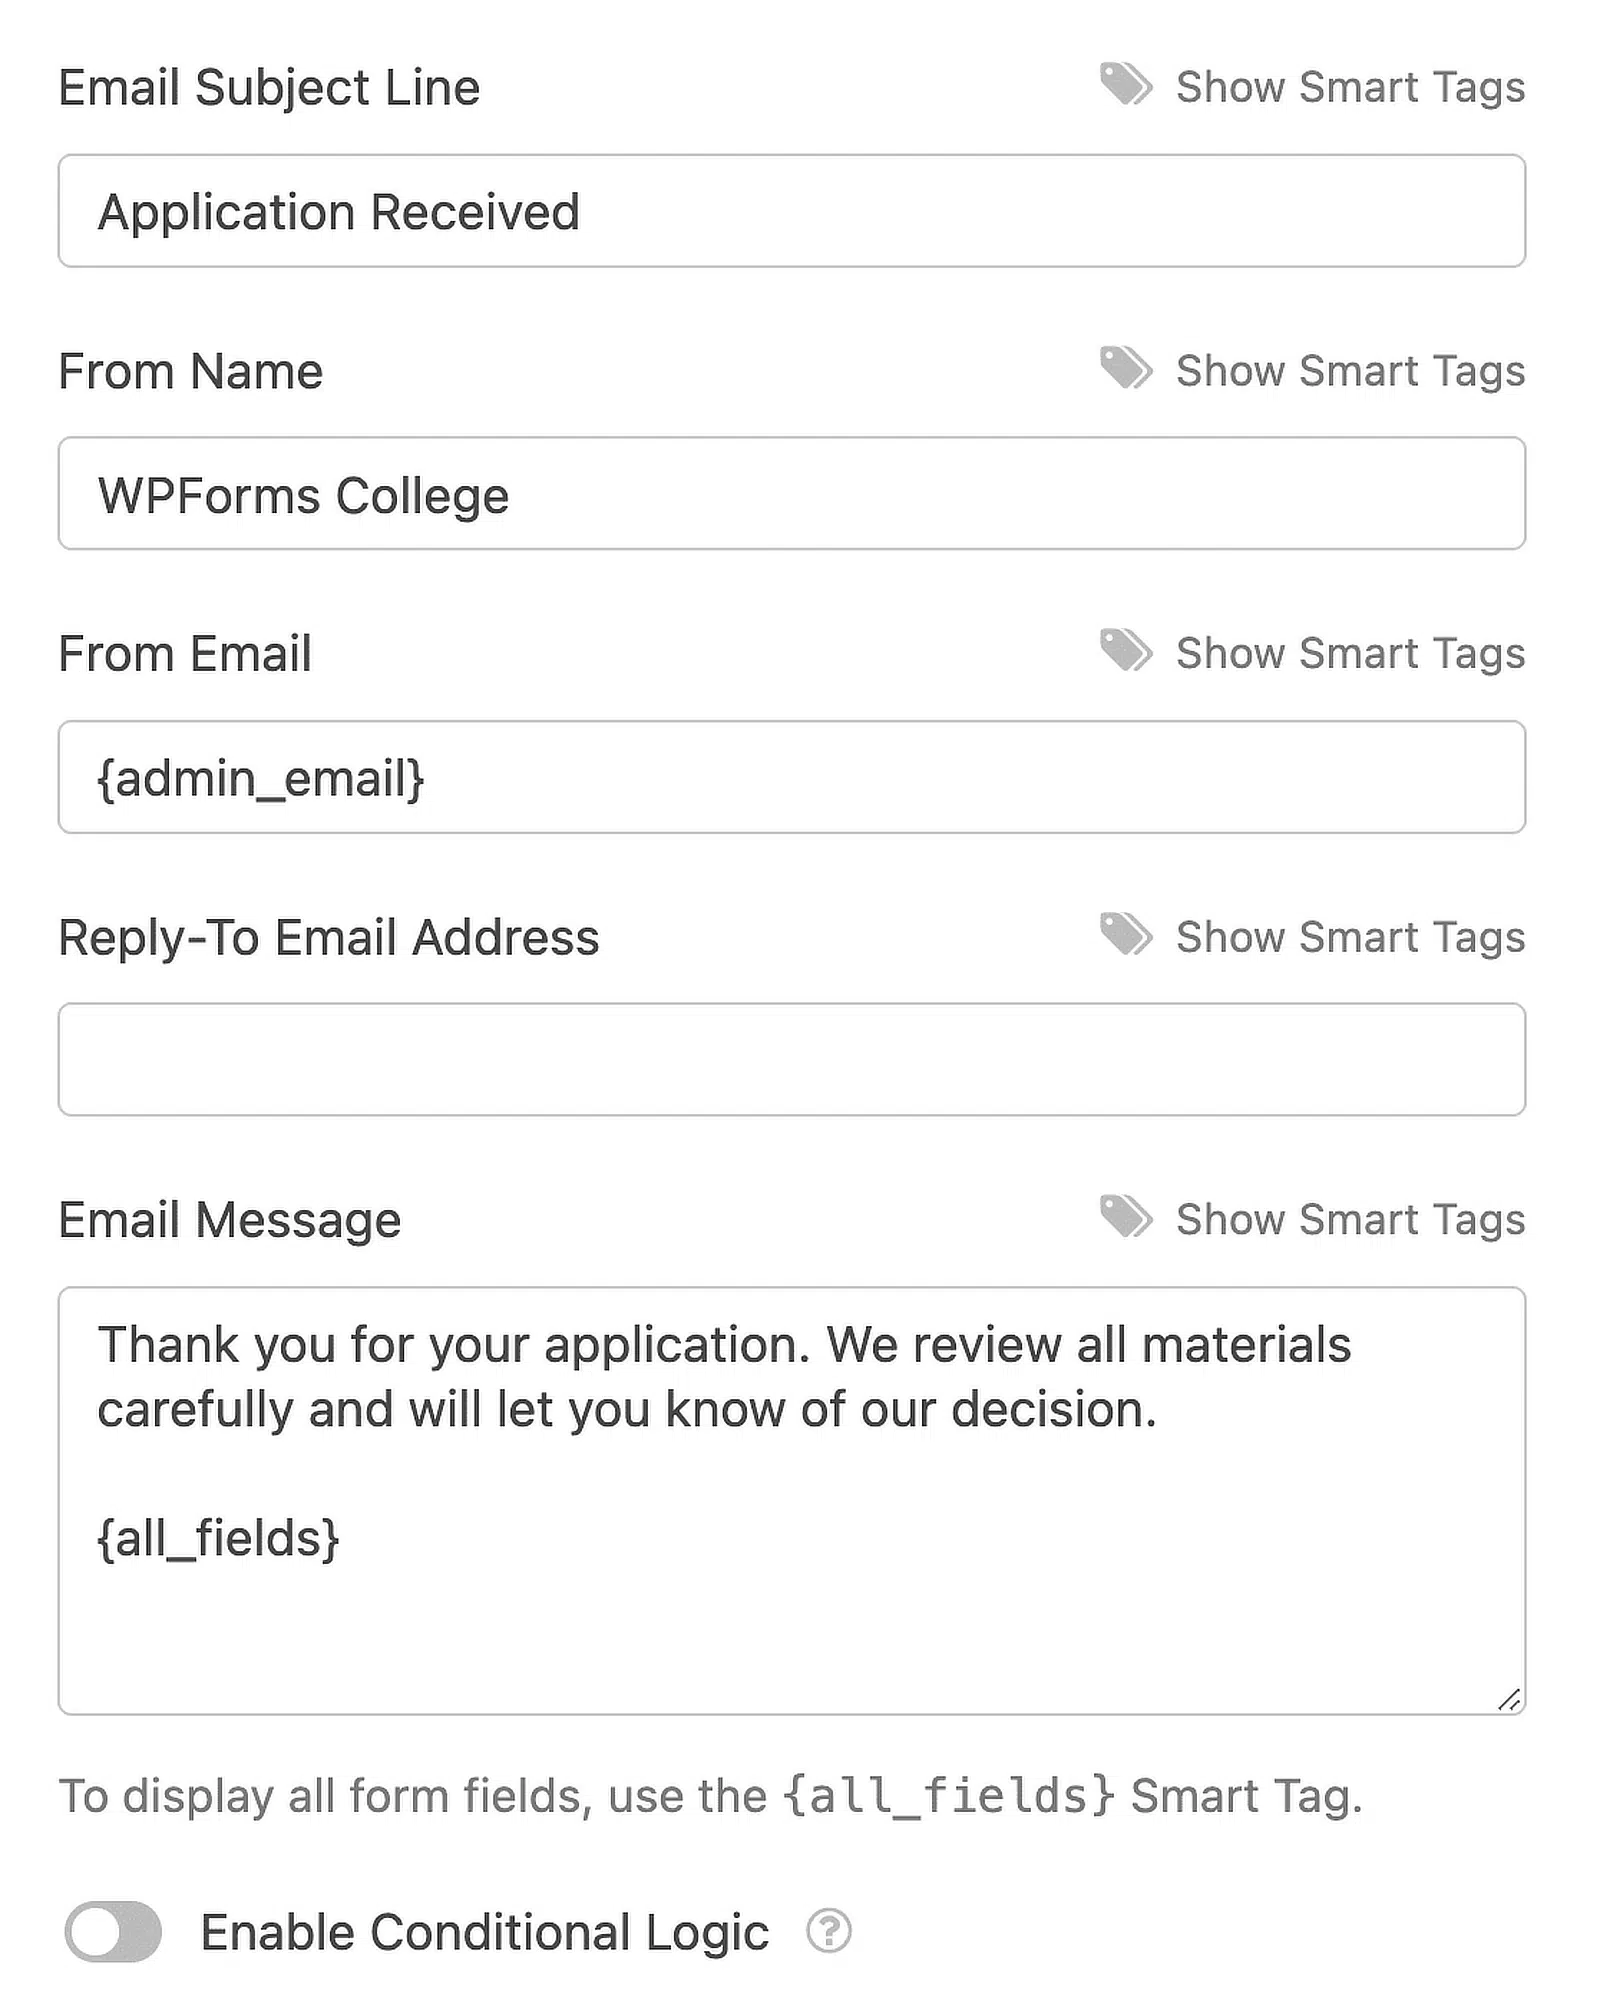
Let’s give the new notification a distinctive name so we can easily find it later and change the message if required.
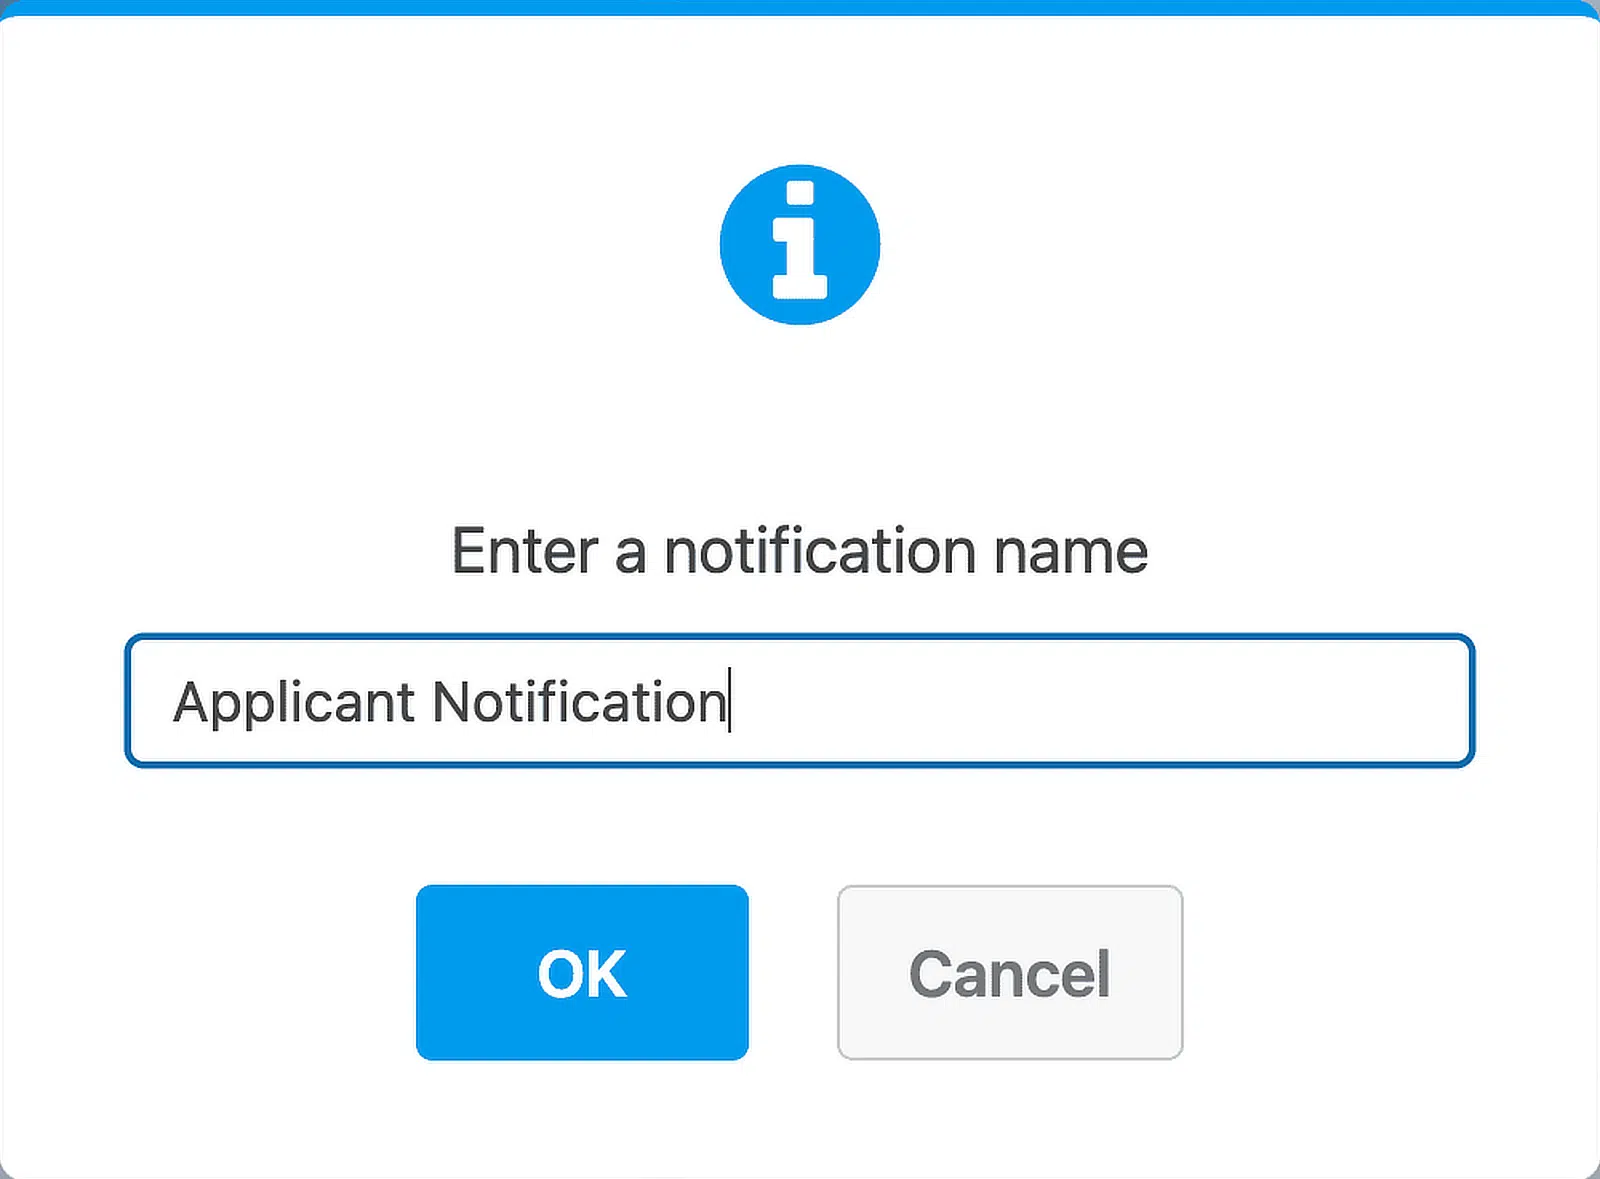
If you scroll down, you’ll see two notifications on the right-hand panel. Let’s edit the one you just created.
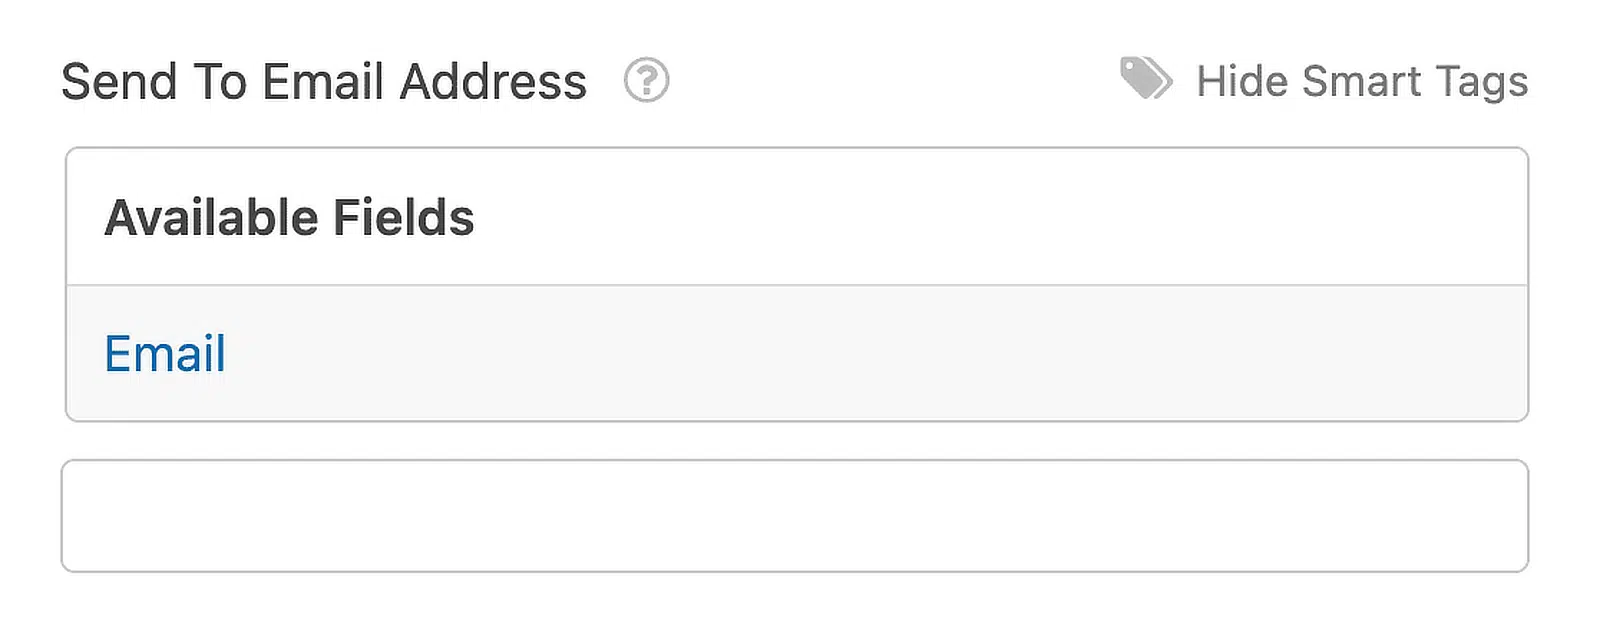
In the Send To Email Address field, use the Email Smart Tag. That way, WPForms will automatically send this notification to the applicant’s email address.
You can also customize the text in the subject and email body if required to inform the applicant of any additional steps.
OK, great. Everything’s set up. Let’s click Save. Now, you can set the closing date on the application form.
Step 6: Set Up Your Application Form Closing Date
Since you’re using your college application form to collect applications, closing the form before the school year or term starts makes sense.
This is where the Form Locker addon we installed earlier will come in handy. It lets you easily add an expiration date to your form.
So from the Settings panel, click Form Locker. This will open up a new menu on the right-hand side of the screen.

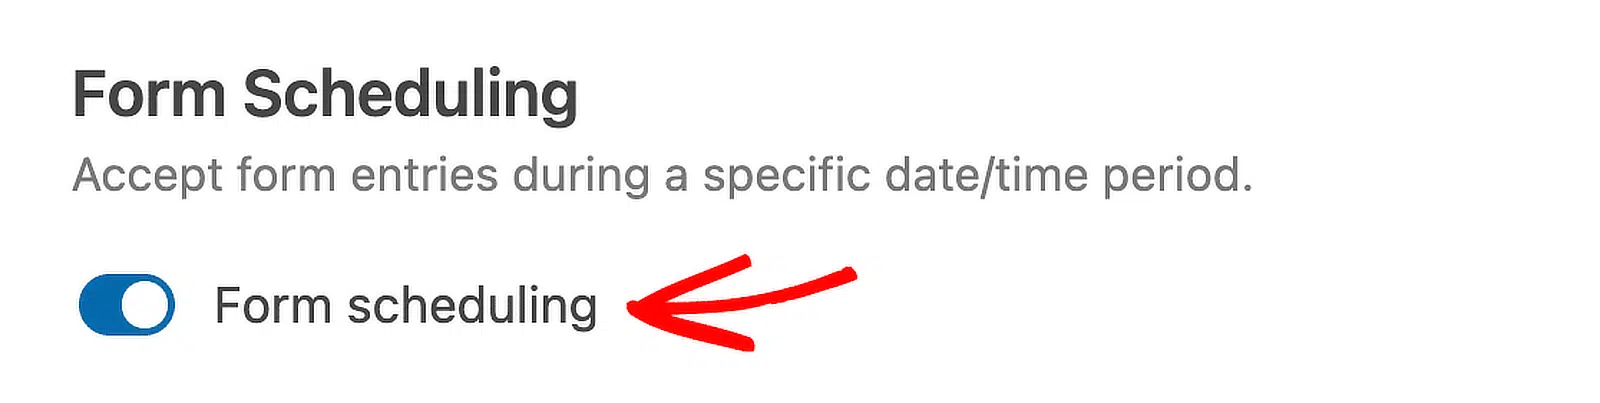
From the list of options available, simply move the toggle to the ON position below the Form scheduling option.
Now, set the closing date for the form using End Date and End Time. This will only allow applicants to
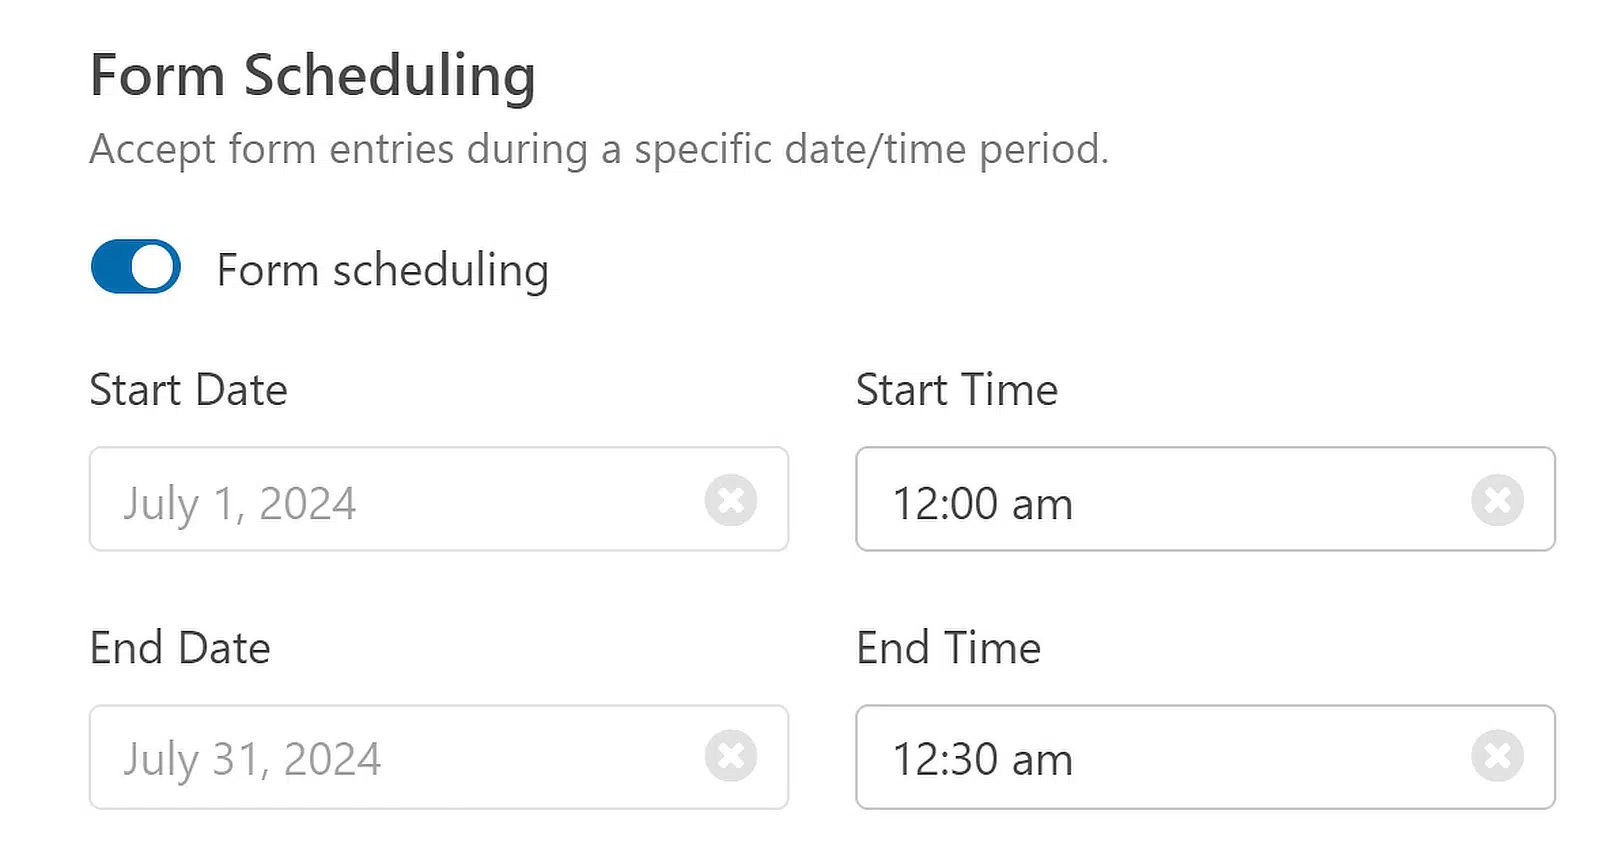
This field uses WordPress’s timezone. Here’s a guide to changing the time and date in WordPress if you need to check the time settings.
The form will automatically close on any date you set, stop taking applications, and disappear. When that happens, a Closed Message will appear in its place.
Underneath the date and time, you can customize the Closed Message, which will appear once an applicant tries submitting the form.
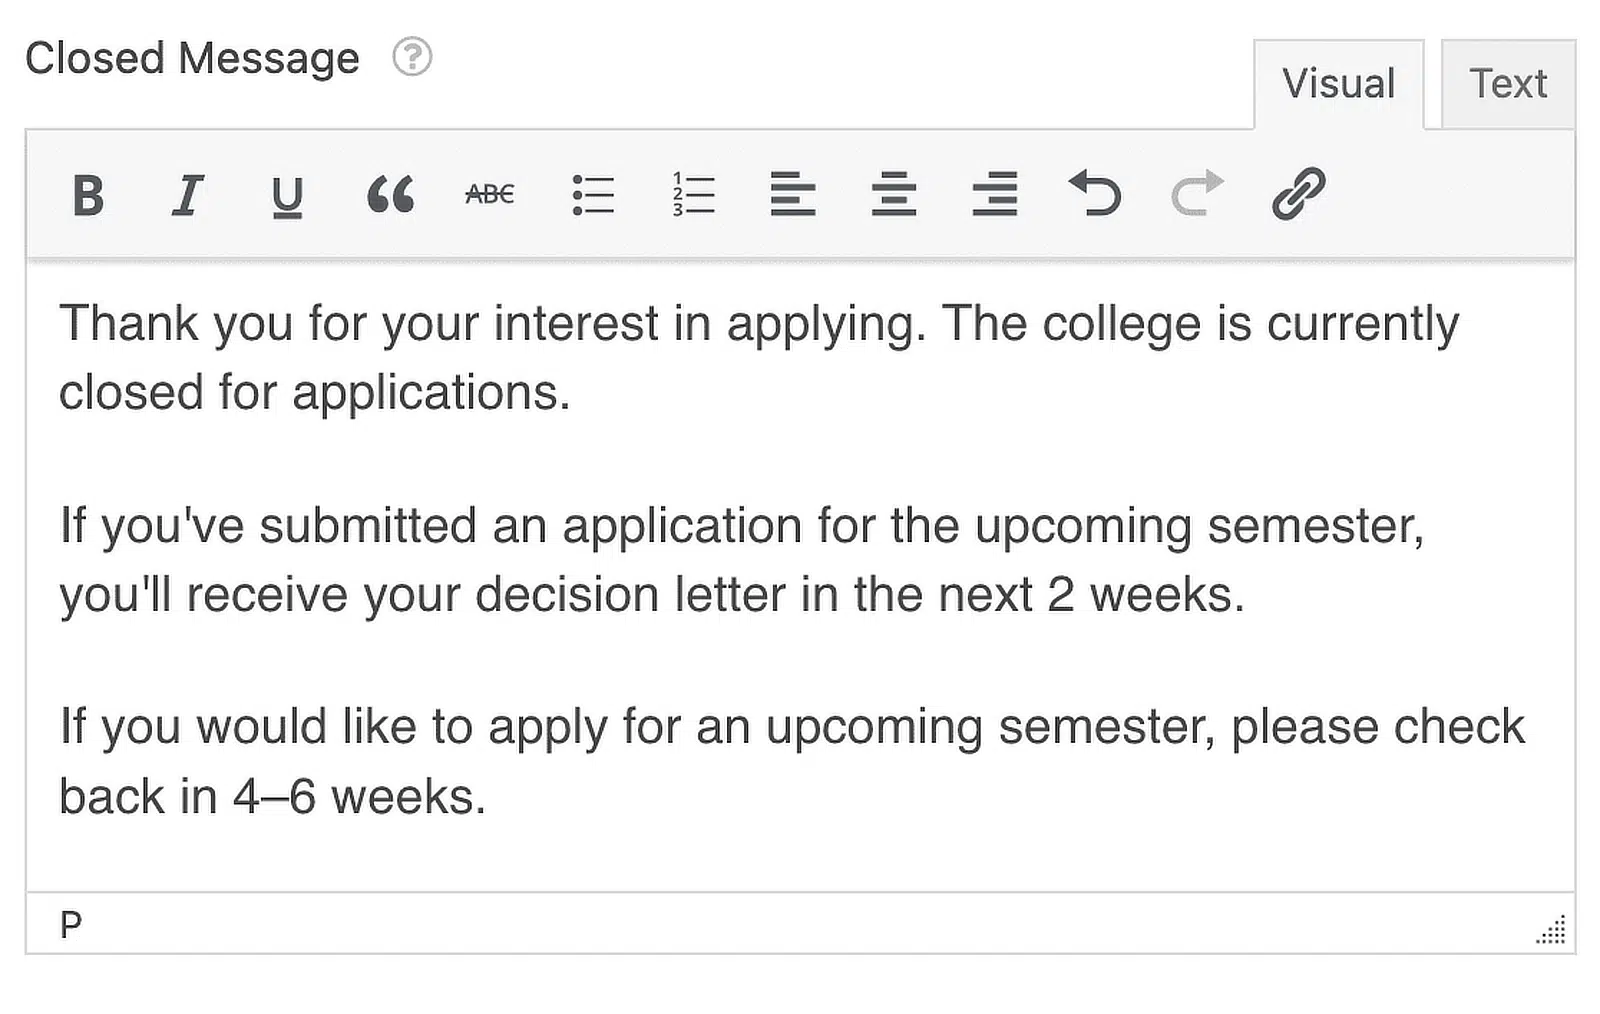
You can also add a link to another page or an external link like a social media page so people can stay updated on when your next enrollment period begins.
Your form is nearly all set. Now, you just need to publish the college application form to your WordPress site.
Step 7: Publish Your College Application Form
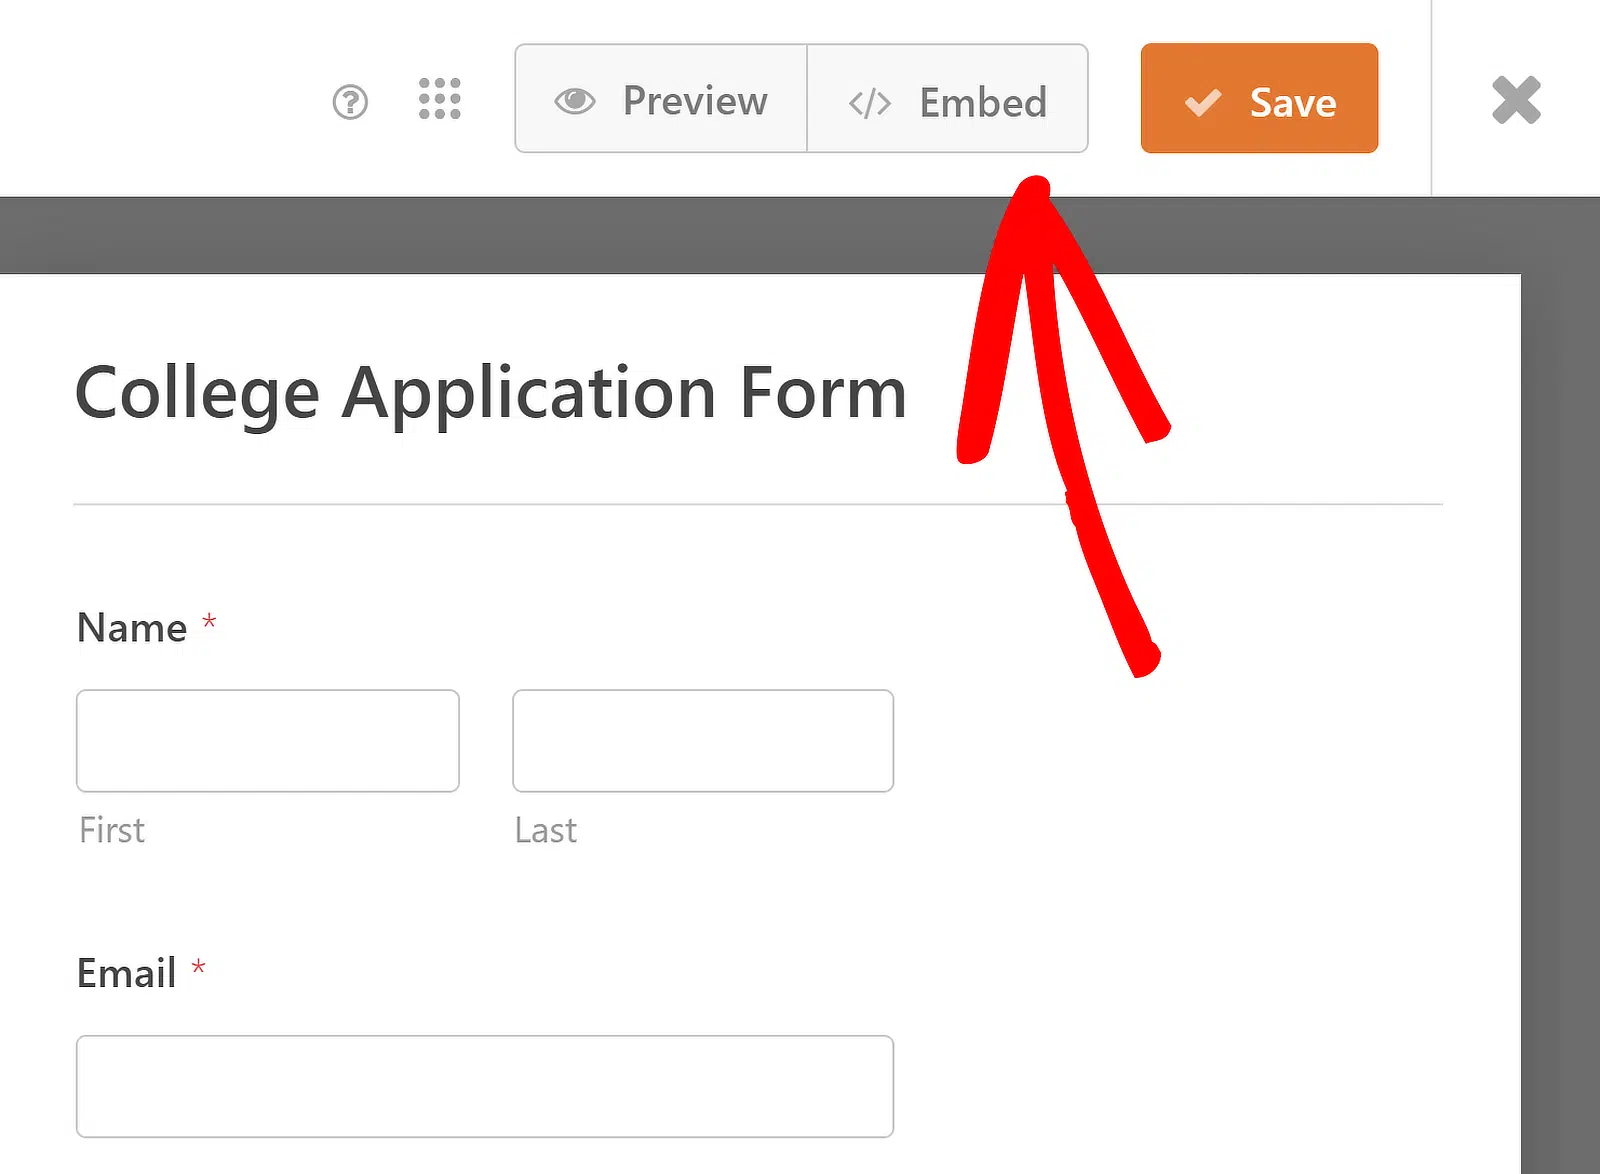
Now that your college application form is complete, let’s publish it online. Start by clicking the Embed button at the top of the form builder.
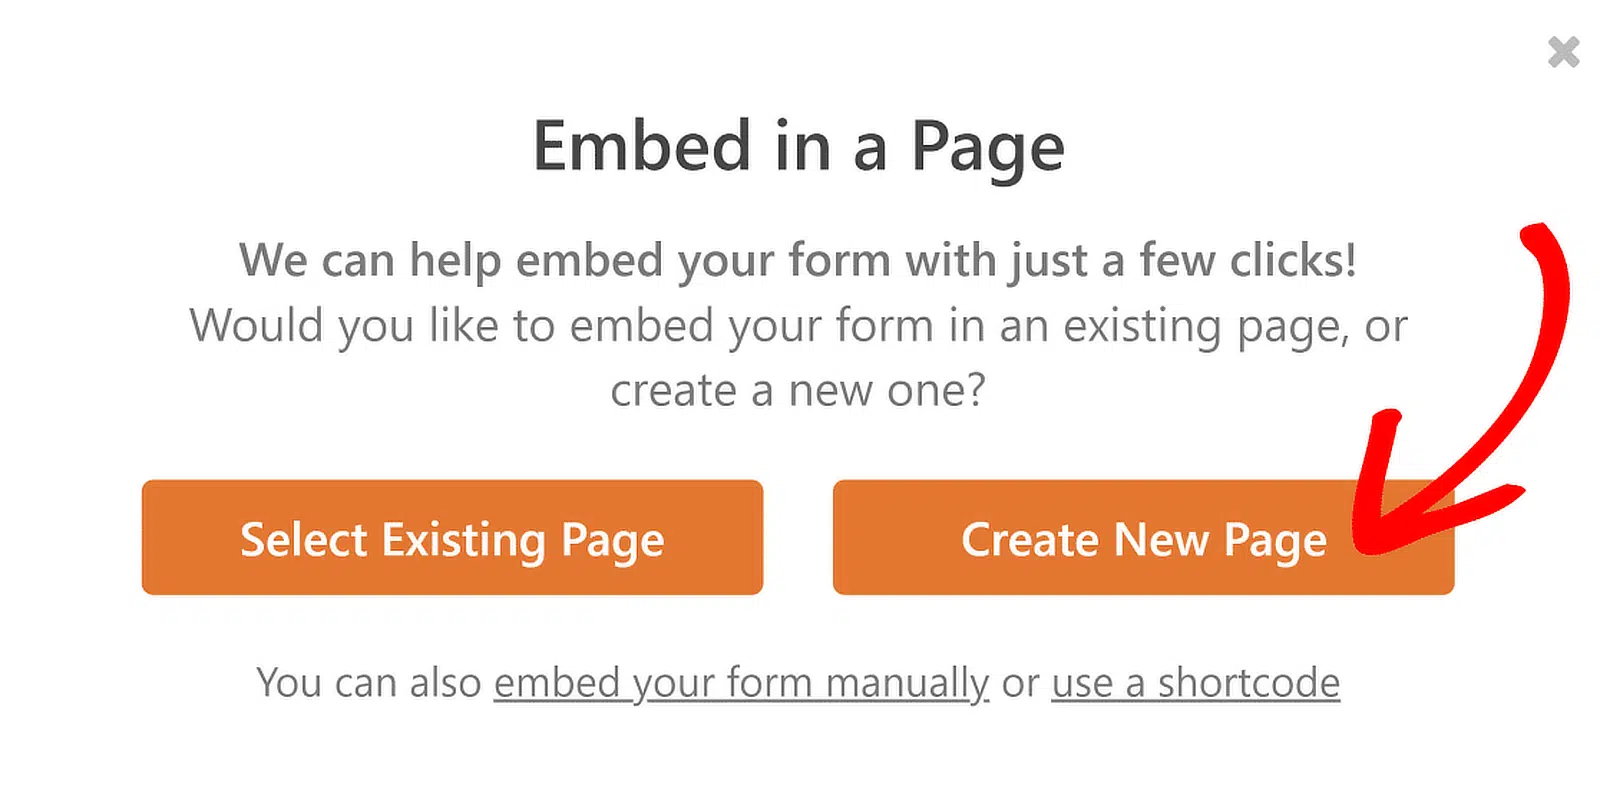
Then, when this notification pops up, go ahead and click the Select Existing Page or Create New Page option, whatever seems best. If you already have a page where you want the College Application Form to appear, you can select an existing page.
Next, WPForms will ask you to name your page. Type the title for the page into the box and click Let’s Go.

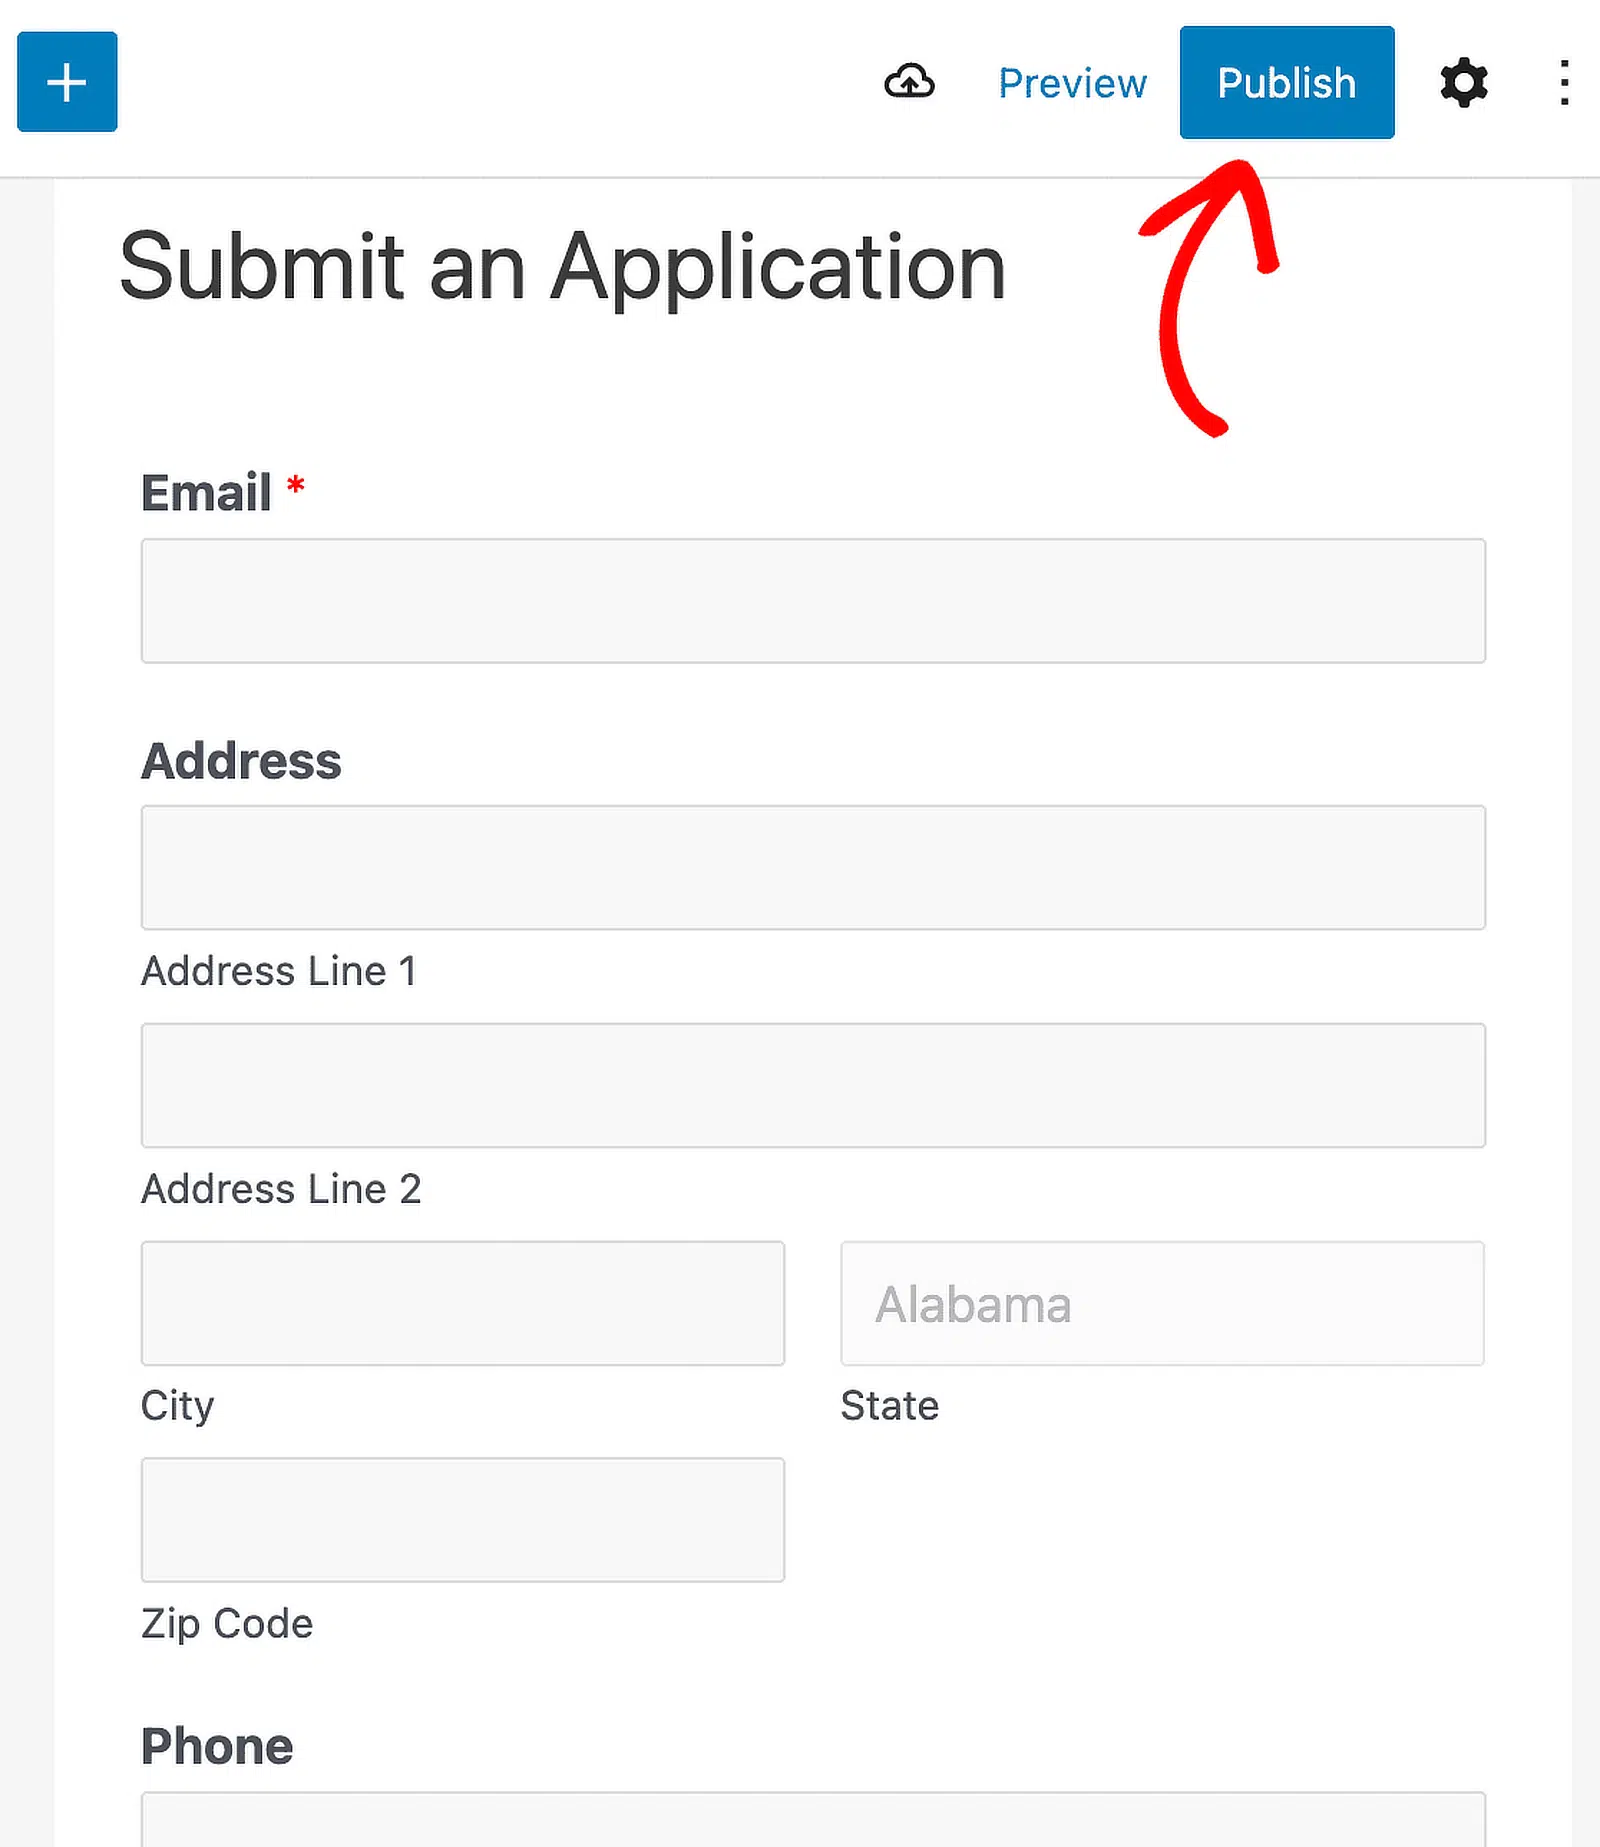
WPForms will open up a new page for your form. Next, go ahead and click Publish at the top to publish the form on your site.
Great job. You can now start collecting college applications online, sort and filter your form entries to see each application, and follow up with candidates. KLH Technology solutions is one long-time WPForms user that builds applications forms like this for client sites, streamlining the collection and management of data.
Create Your College Application Form Now!
FAQs about College Application Forms
College application forms are a popular topic of interest among our readers. Here are answers to some common questions about them:
What should you consider when creating a college application form?
Here are some good tips to consider when building your college application form.
- Keep the application as short as possible — Try using conditional logic and multi-step forms to keep your college application form conversion rate high.
- Accept online payments — It’s a good idea to collect the application fee electronically instead of through the mail with a cheque.
- Make it look good — If you’re targeting a younger audience with your college application form, you want to make sure your form looks modern.
- Use a file upload field — If you’re asking for documents like essays or high school transcripts, make sure to use accept file uploads on your form. You can combine our 1st tip with this one and require payment on a file upload form.
How do I create a student application form in WordPress?
To create a student application form in WordPress, use the WPForms plugin. Install and activate WPForms, then use the drag-and-drop builder to add necessary fields like name, email, and student details. You can also use the Form Locker Addon for added security and restrictions.
How do I add an admission form in WordPress?
Adding an admission form in WordPress is easy with WPForms. After installing and activating WPForms, choose a form template and customize it with the fields needed for admission, such as personal information, course preferences, and documents. Publish the form on your website using the provided shortcode.
How do I create a career form in WordPress?
Creating a career form in WordPress involves using the WPForms plugin. Once installed and activated, select a job application template and customize it with fields for personal details, job positions, and resume uploads. Embed the form on your careers page to start collecting applications.
Next, Learn How to Create a Group Registration Form
Organizing events, workshops, or classes often requires registering multiple participants simultaneously. This guide will walk you through each step of creating a group registration form in WordPress.
Ready to build your form? Get started today with the easiest WordPress form builder plugin. WPForms Pro includes lots of free templates and offers a 14-day money-back guarantee.
If this article helped you out, please follow us on Facebook and Twitter for more free WordPress tutorials and guides.

