AI Summary
Growing an email list doesn’t have to be an overly clever process. In my experience, the most effective ways of growing your email list are often the simplest, such as adding a simple email signup checkbox inside your regular contact form.
Many of our readers use Mailchimp for their email marketing. So, I wanted to show you how a Mailchimp user can create a signup checkbox in their contact form in WordPress.
This is a simple and super customizable way that requires you to have no technical knowledge whatsoever.
Create Contact Form With Signup Checkbox Now
Here’s a table of contents if you need to jump ahead:
Let’s begin!
How to Add a Mailchimp Signup Checkbox to Your Contact Form
Follow this step-by-step tutorial to connect your Mailchimp account with WordPress so you can add a signup checkbox to your site’s forms.
Step 1: Install and Activate the WPForms Plugin
The first thing you need to do is install and activate the WPForms plugin. I recommend getting the WPForms Pro license because this supports Mailchimp integration natively (that means you don’t need to pay for a third-party connector app to sync your custom WPForms forms with Mailchimp),
If you face any difficulty in the plugin installation process, you can check our guide on how to install a WordPress plugin.
Step 2: Install and Activate the Mailchimp Addon
To add a Mailchimp signup checkbox, first, you need to integrate WPForms with Mailchimp.
WPForms includes a built-in addon for Mailchimp. This allows you to connect your Mailchimp account with WordPress easily.
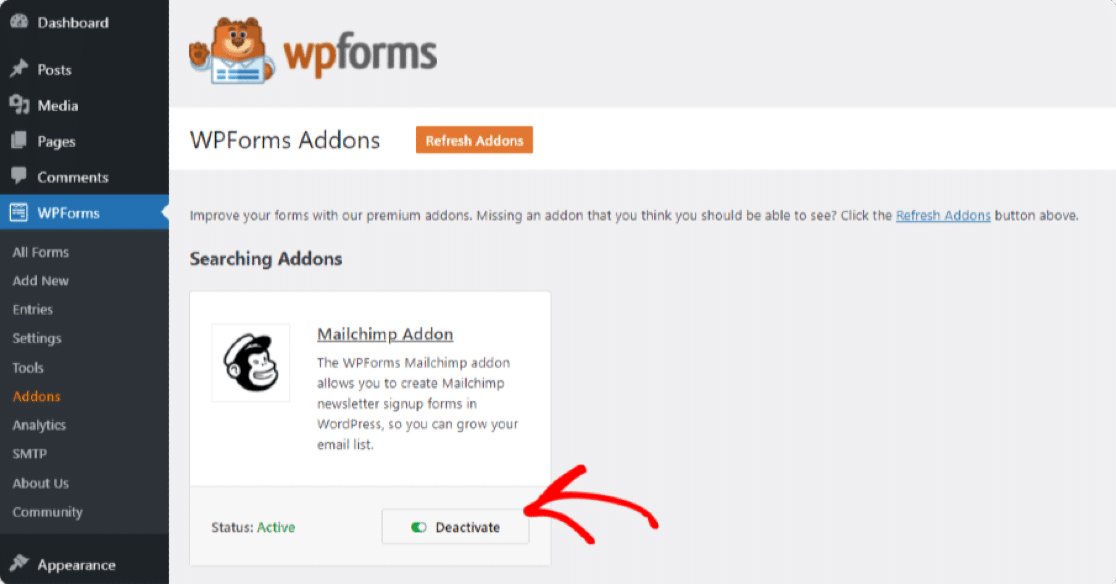
Next, you need to install and activate the Mailchimp addon. To do that, go to WPForms » Addons and find the Mailchimp Addon.
Click on the Install Addon button under the Mailchimp Addon, and it will install within a few seconds.
Step 3: Create a New Form
Once you’ve activated the Mailchimp addon, go to WPForms » Add New to create a new form.

At this point, you’ll find the form setup page open. Here, you can add your form name and select the template you want to use.
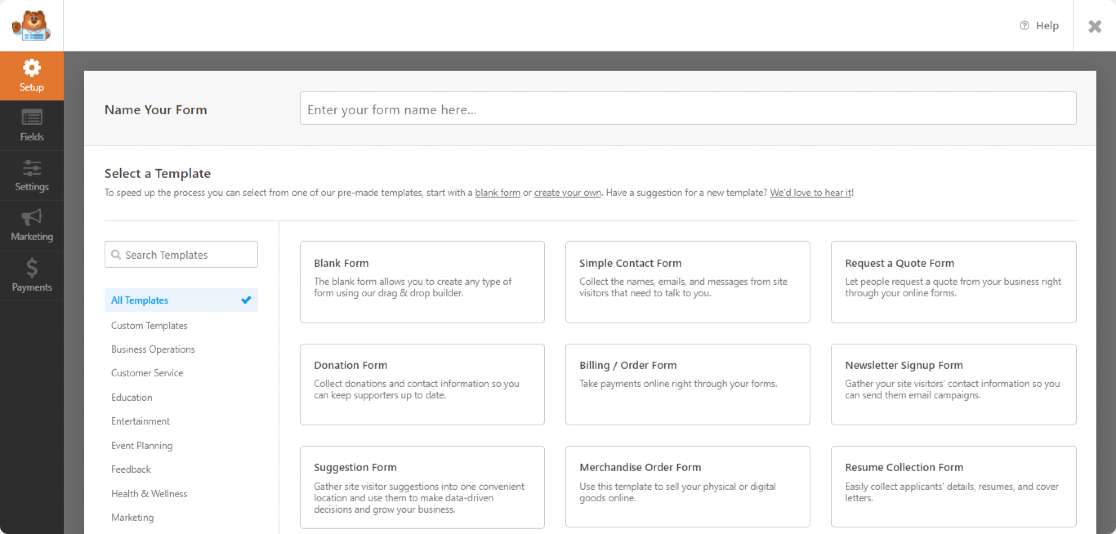
WPForms comes with a template library that offers 2,000+ WordPress form templates. You can choose any form template depending on your website’s requirements.
For this tutorial, I’ll use the Simple Contact Form template.
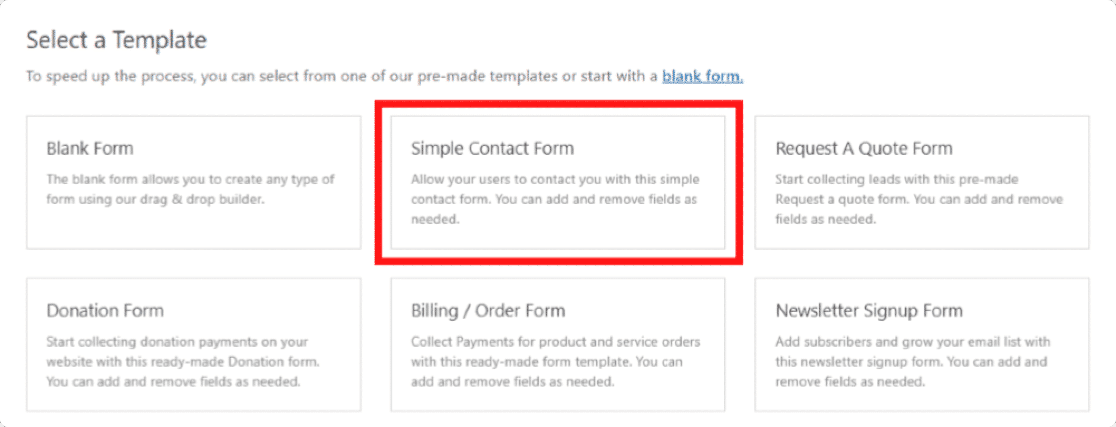
As soon as you click on the template, the form builder will open. You can see your form on the right and a drag and drop builder on the left.
You can add more fields by simply dragging and dropping fields from left to right.
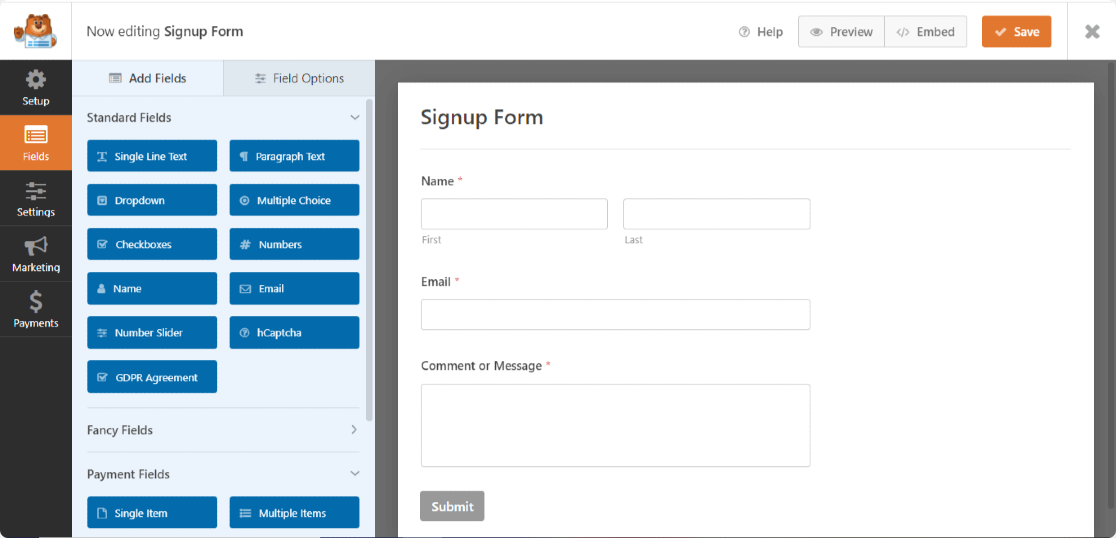
Step 4: Add a Checkbox Field
On the left, under the Standard Fields section and look for the Checkboxes field.
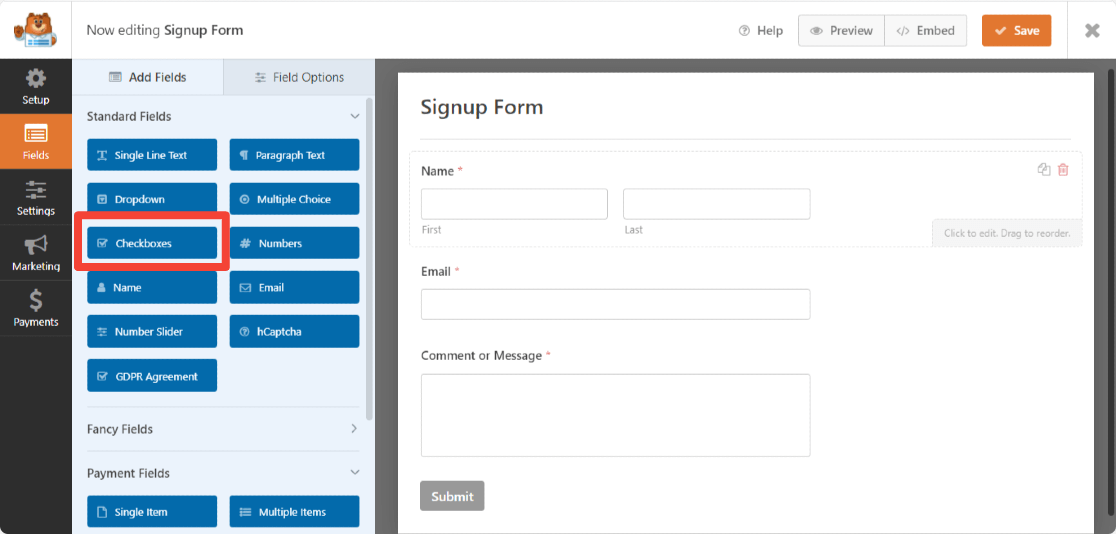
Drag the Checkboxes field onto your form above the submit button.
The Checkboxes field by default includes 3 choices. You can delete the 2nd and 3rd Choice by clicking on the red minus (-)icon. And then, add a custom label name and save it by clicking on the Save button.
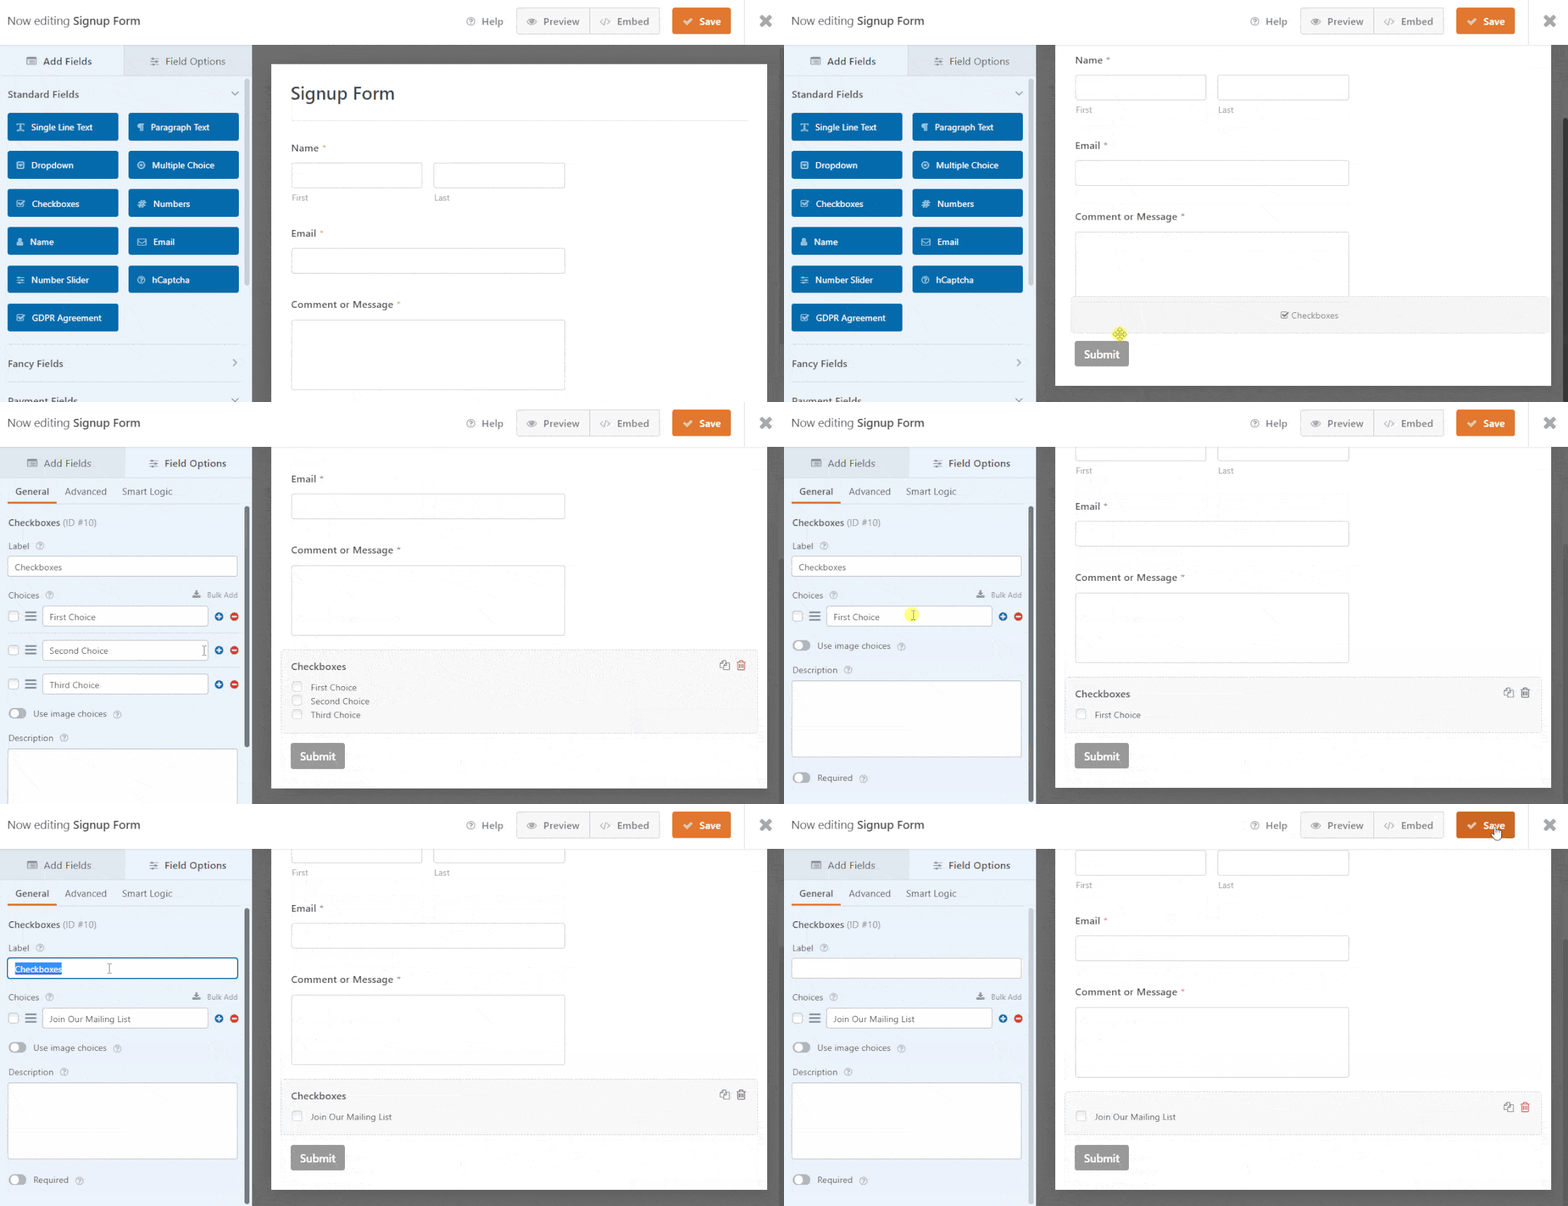
Great! Now that you’ve added the signup checkbox to your form, it’s time to connect your contact form to your Mailchimp email list.
Step 5: Connect Your Form to Mailchimp
WPForms lets you set up your Mailchimp integration right in the form builder.
To connect your form, in the form editor, go to Marketing » Mailchimp.
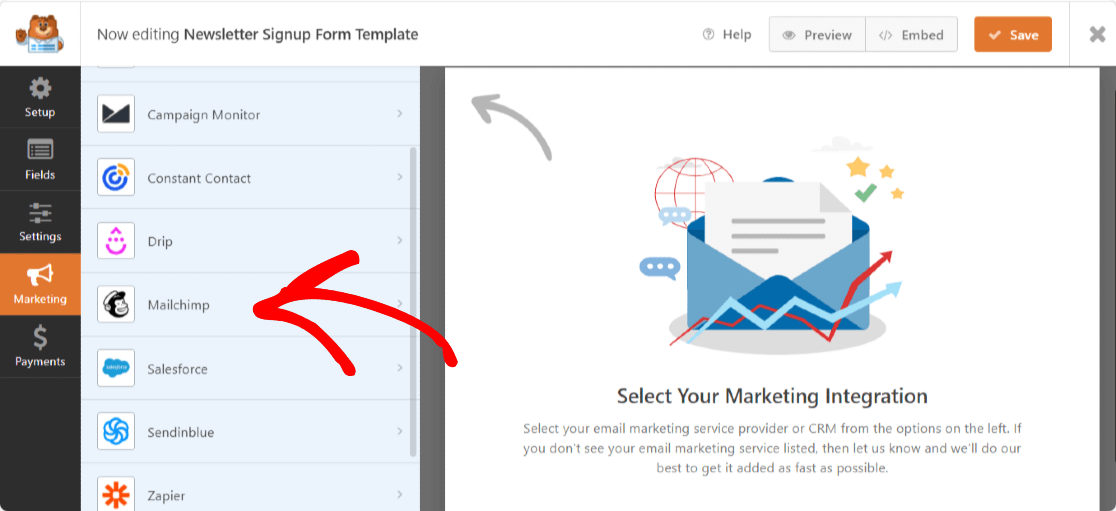
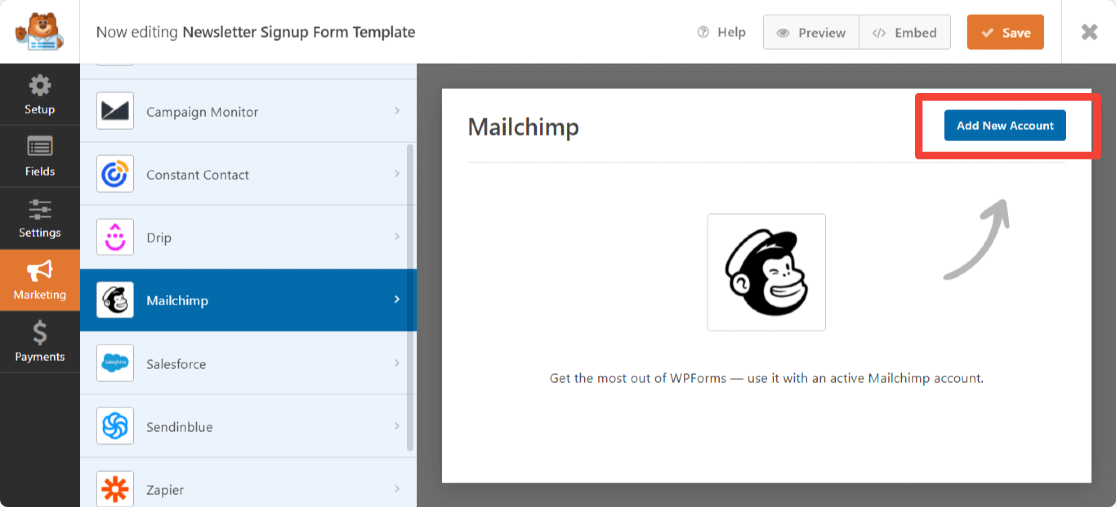
On the right-hand side, click on the Add New Connection button.
Now a popup will appear asking you to add the Mailchimp API key and Account Nickname.
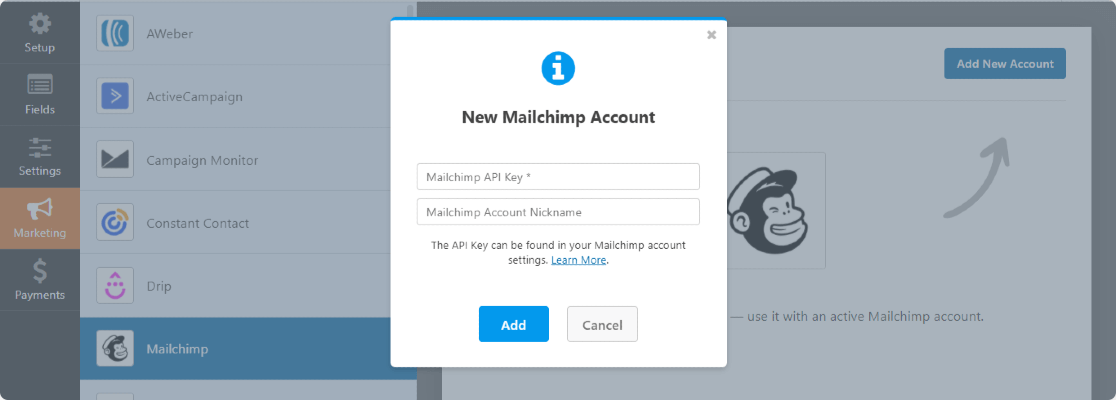
You can get your Mailchimp API key by signing in to your Mailchimp account.
Copy your Mailchimp API Key and paste it into the required field. Enter the account name and click on the Add button.
This will cause one more popup to appear asking to Enter a connection nickname. You can add any name since it’s for your reference only, and your users won’t see this name.
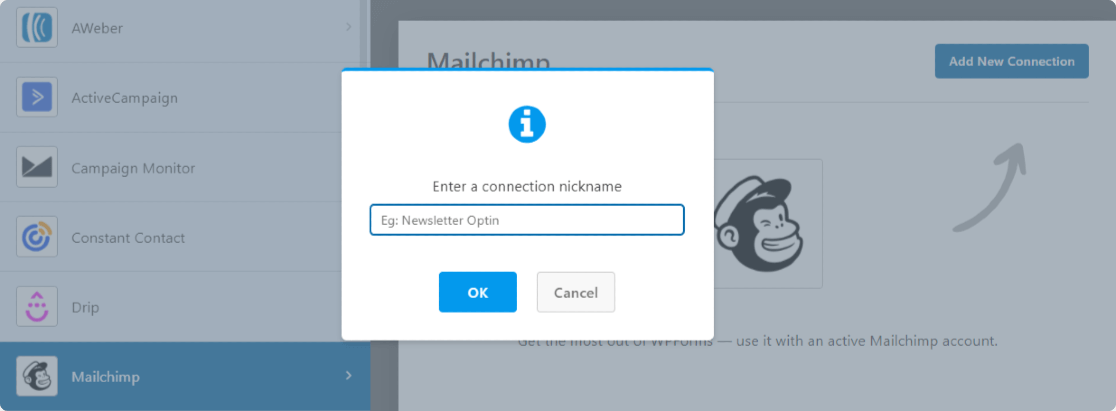
After completing the Mailchimp account settings, a new window will appear. Here you need to:
- Select your Mailchimp account.
- Select the email list you want to add new subscribers to.
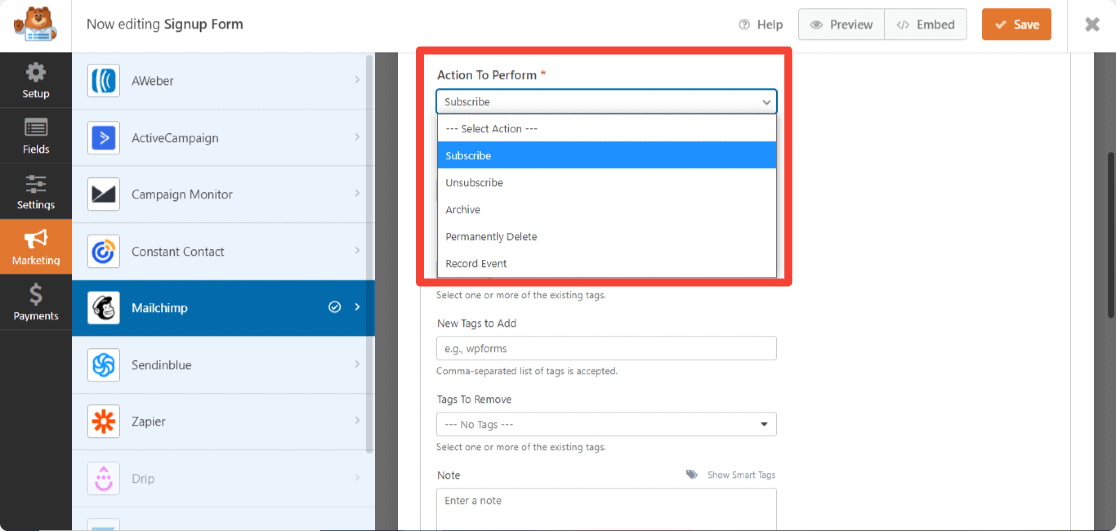
- Once you’ve selected your audience, you can choose what action to execute when the form is submitted. With the Mailchimp Addon, you can perform the following actions:
- Subscribe: Adds the user as a new subscriber to your Mailchimp audience
- Unsubscribe: Unsubscribes an existing contact from your Mailchimp audience
- Archive: Archives an existing contact
- Permanently Delete: Permanently deletes an existing contact
- Record Event: Lastly, you can also record an event for a specific contact after form submission.
Also, with the Mailchimp addon, you get the flexibility to:
- Enable double opt-in
- Mark subscriber as VIP
- Update the profile if this contact is already in an audience
- Notify users that they’re already subscribed
- Create Mailchimp custom fields
Step 6: Enable Conditional Logic
Next, we’ll need to ensure that only users who select the checkbox get added to your email list. You can do this by selecting enable conditional logic.
Scroll down the page until you see the Enable Conditional Logic box.
Now, after the “Process, this connection if Checkboxes is Join Our Mailing List.

And in the end, save all the changes you’ve made to your form.
Step 7: Add Your Mailchimp Form to Your Website
Now your form is ready to be published on your website.
Embedding contact forms on WordPress websites is exceptionally easy with the WPForms. You can display your contact form in several locations, including your blog posts, pages, and even as a sidebar widget.
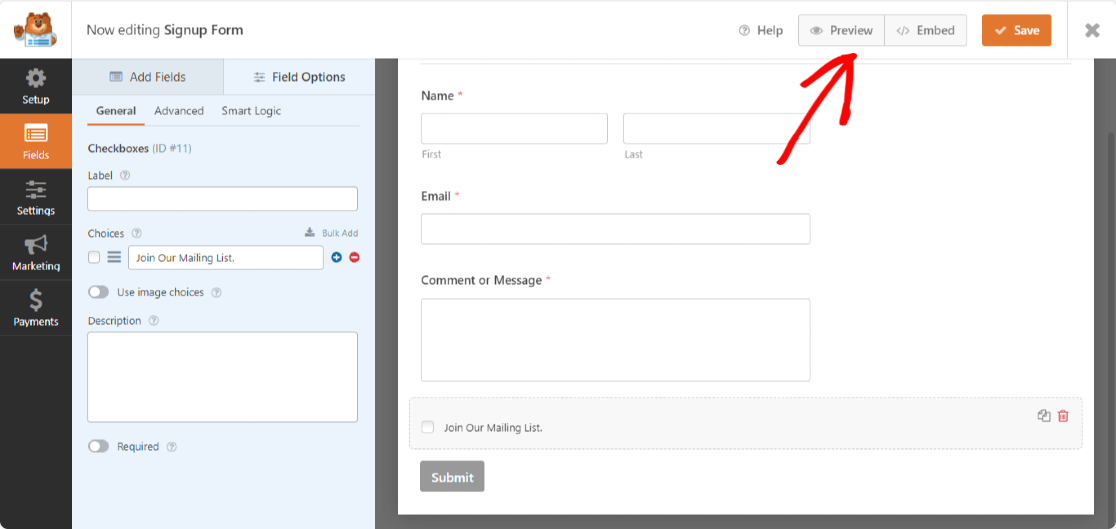
Before embedding, if you want, you can also preview your form to check how your form will look on your website page.
To preview your form, click on the Preview button at the top.
Now, let’s add your form to your website.
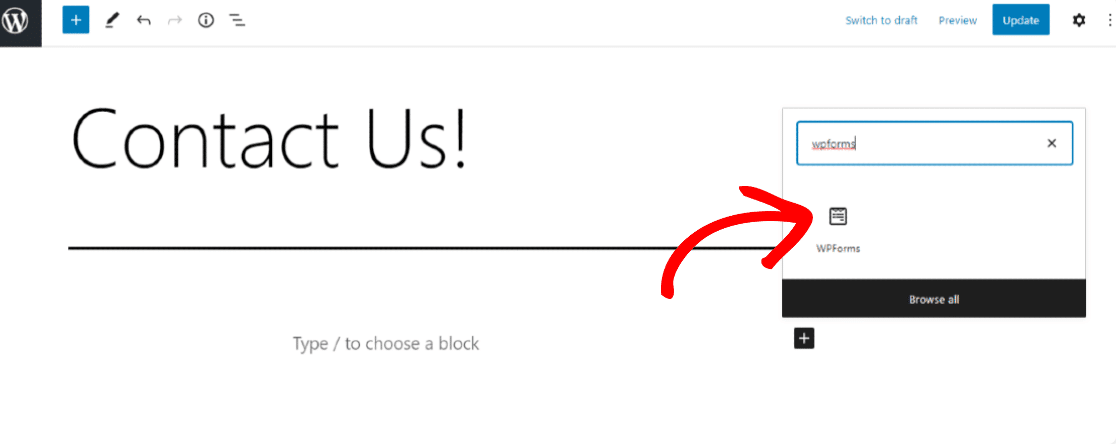
Open the page/post where you want to display your form. Click on the “+” icon and add the WPForms block from the block editor.
Now, select your form and publish the page.
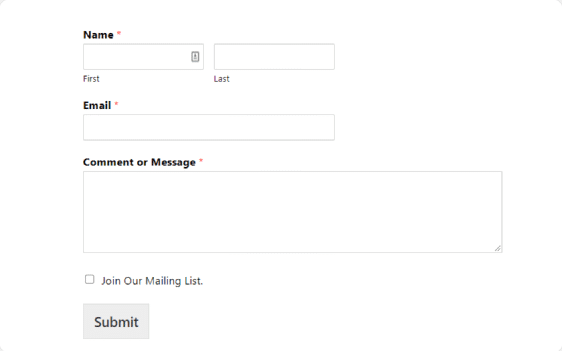
Awesome job on completing the Mailchimp signup checkbox tutorial! Before adding your form to a live site, make sure to run a test to check your newsletter sign-up checkbox works perfectly.
More Questions on Mailchimp Signup Checkbox
How do I ensure GDPR compliance with Mailchimp signup checkboxes?
You can use a consent checkbox in addition to the signup checkbox to make sure people are explicitly permitting you to use their email addresses for marketing purposes. WPForms also offers GDPR compliance features by disabling tracking cookies and other meta data related to the user. However, to ensure full legal compliance, I strongly recommend seeking professional legal counsel.
Can I customize the Mailchimp signup checkbox text?
Yes, you can customize the Mailchimp signup checkbox text directly inside the WPForms form builder. It’s a good idea to use descriptive and personalized text to engage your visitors.
What happens if a user is already subscribed to my Mailchimp list?
You can control what happens if a user is already subscribed to your Mailchimp list. If you use the “Update the profile if this contact is already in an audience“, then their profile will simply be updated with new information if they re-submit your form. If you use the “Notify user that they are already subscribed” option, then the form will simply display a validation message to let them know that they’re already subscribed.
Is it possible to add multiple checkboxes for different mailing lists?
Yes, you can segment your subscribers into different groups. For each group, you can use conditional logic in the Mailchimp connection settings inside your form builder to define which group a subscriber should be added to, depending on their selected checkboxes.
Next, Add hCaptcha to Your WordPress Forms
That’s it! You’ve just added a Mailchimp newsletter signup checkbox to your contact form. We hope that connecting your forms to your Mailchimp lists will help you grow your email list and stay organized in the process.
Next, you might want to add hCaptcha to your WordPress form to protect your site from hackers and spammers.
Want to get more people to fill out your contact form and subscribe to your newsletter? Check out these form conversion best practices to improve your contact form conversions.
Create Contact Form With Signup Checkbox Now
So what are you waiting for? Get started with the most powerful WordPress form builder plugin today and create awesome contact on your WordPress websites.
If you like this article, then please follow us on Facebook and Twitter for more free WordPress tutorials.

