



AI Summary
Want to create a student enrollment form in WordPress? Educational institutions burdened with the tasks of sorting through paperwork and performing manual processes might find it difficult to maintain records.
A student enrollment form is an online form that gathers everything a school needs to register a student, from the student’s name and contact details to their start date, documents, and any fees tied to admission.
So in this guide, I’ll show you how to build one in WordPress without touching a line of code. Give yourself about 20 minutes, and you’ll have a working form families can fill out from their phone.
Create Your Student Enrollment Form Now
Why Use an Online Registration Form for Student Enrollment?
Usually, student enrollment documents are filled out by parents using pen and paper. Then your school’s admissions staff must transfer all this data into the school’s database.
But, maintaining these mountains of files, documents, and folders takes time and becomes more difficult with each passing year.
Online student enrollment will make managing your school admissions much faster and easier. So why not try a student enrollment form on your WordPress website?
- More Accessible: Busy parents submit applications faster because they can complete the form on their desktop computer or mobile device.
- Faster Data Access: You can search and filter student information in seconds instead of digging through a filing cabinet..
- Error-Free Information: Just add required fields so that parents will submit complete, accurate, and legible information.
- Increased Budget Accuracy: Use data from your forms for budget planning, enrollment goals, and resource allocation.
- Better Use of Staff: Eliminate manual data entry so your staff can devote their time to helping students and families.
If admissions is only one of the jobs your site handles, it’s worth seeing the other ways schools use WPForms for events, feedback, and staff requests too.
How to Create a Student Enrollment Form in WordPress
The easiest way I’ve found to build one is with WPForms, and that’s the tool I’ll use for every step below. You’ll start from a ready-made Enrollment Form template, adjust the fields to match your school, and then publish the form on any page.
Step 1: Install the WPForms Pro Plugin
There’s no easier way to build a student enrollment form in WordPress than WPForms. It comes with a drag-and-drop builder and more than 2,100+ ready-made templates, including a full set of education form templates for schools, colleges, and training programs.
What I like most about WPForms for a job like this is that the enrollment template already has the right fields in place. You’re editing a form that’s 80 percent done rather than starting from a blank page, which is exactly what you want when enrollment season is already underway.
For this tutorial, you’ll want the WPForms Pro license, which unlocks the full template library, the file upload and advanced fields most enrollment forms need, and payment options if your school collects fees during admission.

To get started, buy the Pro license. Then, install WPForms on your website. If you need help, follow these instructions on how to add a plugin to WordPress.
Step 2: Create Your Student Enrollment Form
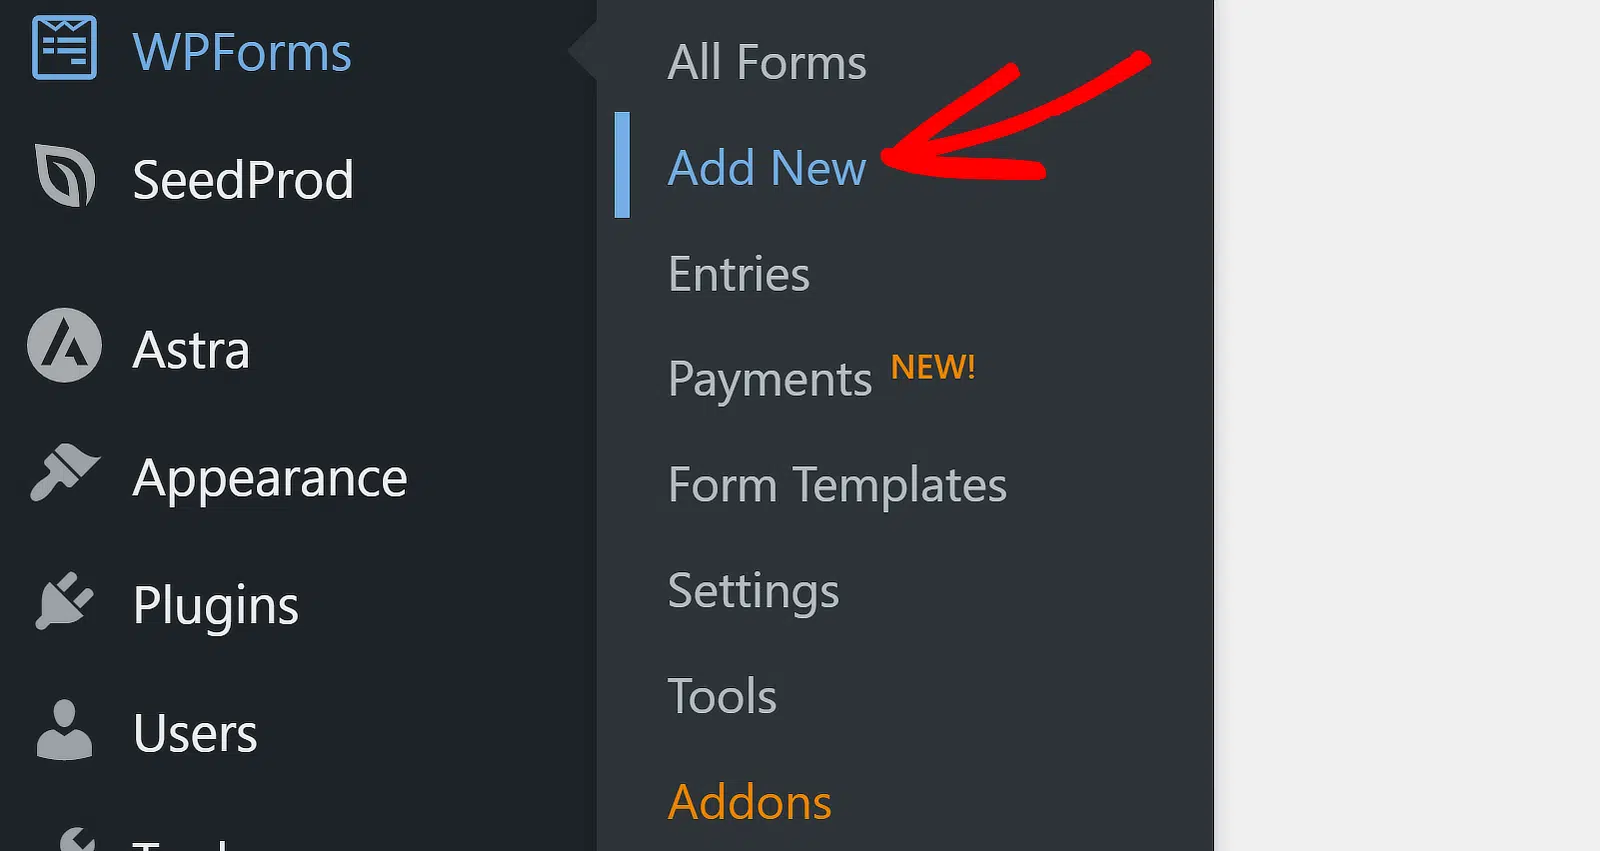
Once the plugin is active, go to WPForms » Add New and give your form a name. Pick something you’ll recognize later, like “New Student Enrollment,” and don’t worry too much about it, since you can rename the form anytime.
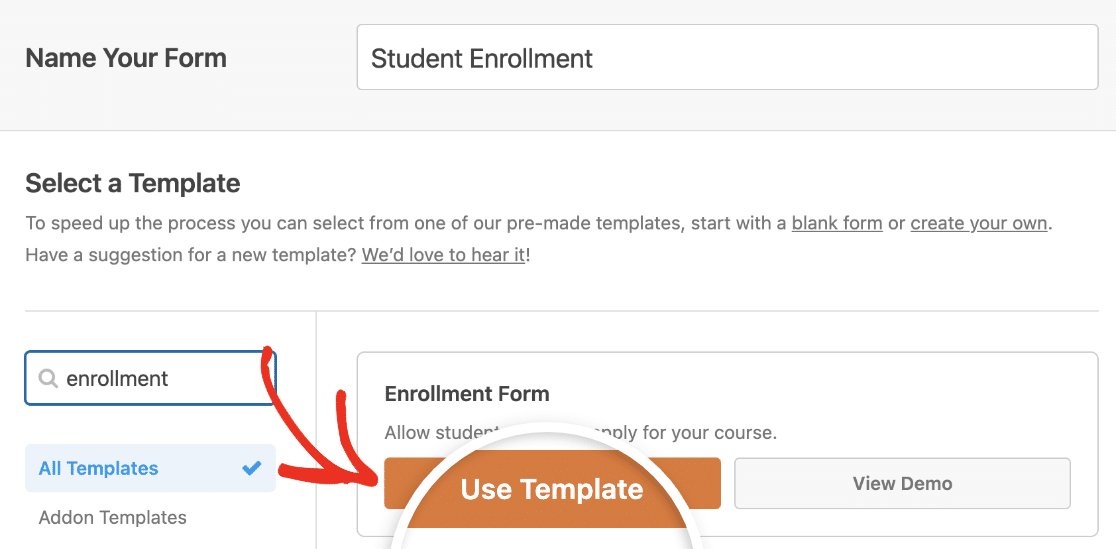
Now scroll down to the Select a Template section, type “Enrollment” into the search bar, and choose the Enrollment Form template.
When the template loads, WPForms drops in the fields most schools ask for right away. Out of the box, the enrollment form includes:
- Student Name
- Email Address
- Physical Address
- Anticipated Start Date
- Student Gender
- Date of Birth
- School Name
- School Address
- GPA
That’s a solid starting point, and the whole form is yours to change. To add a field, drag it from the panel on the left into the preview on the right.
To edit one, click it and change its label, options, or requirements. You can drag fields into a new order the same way.
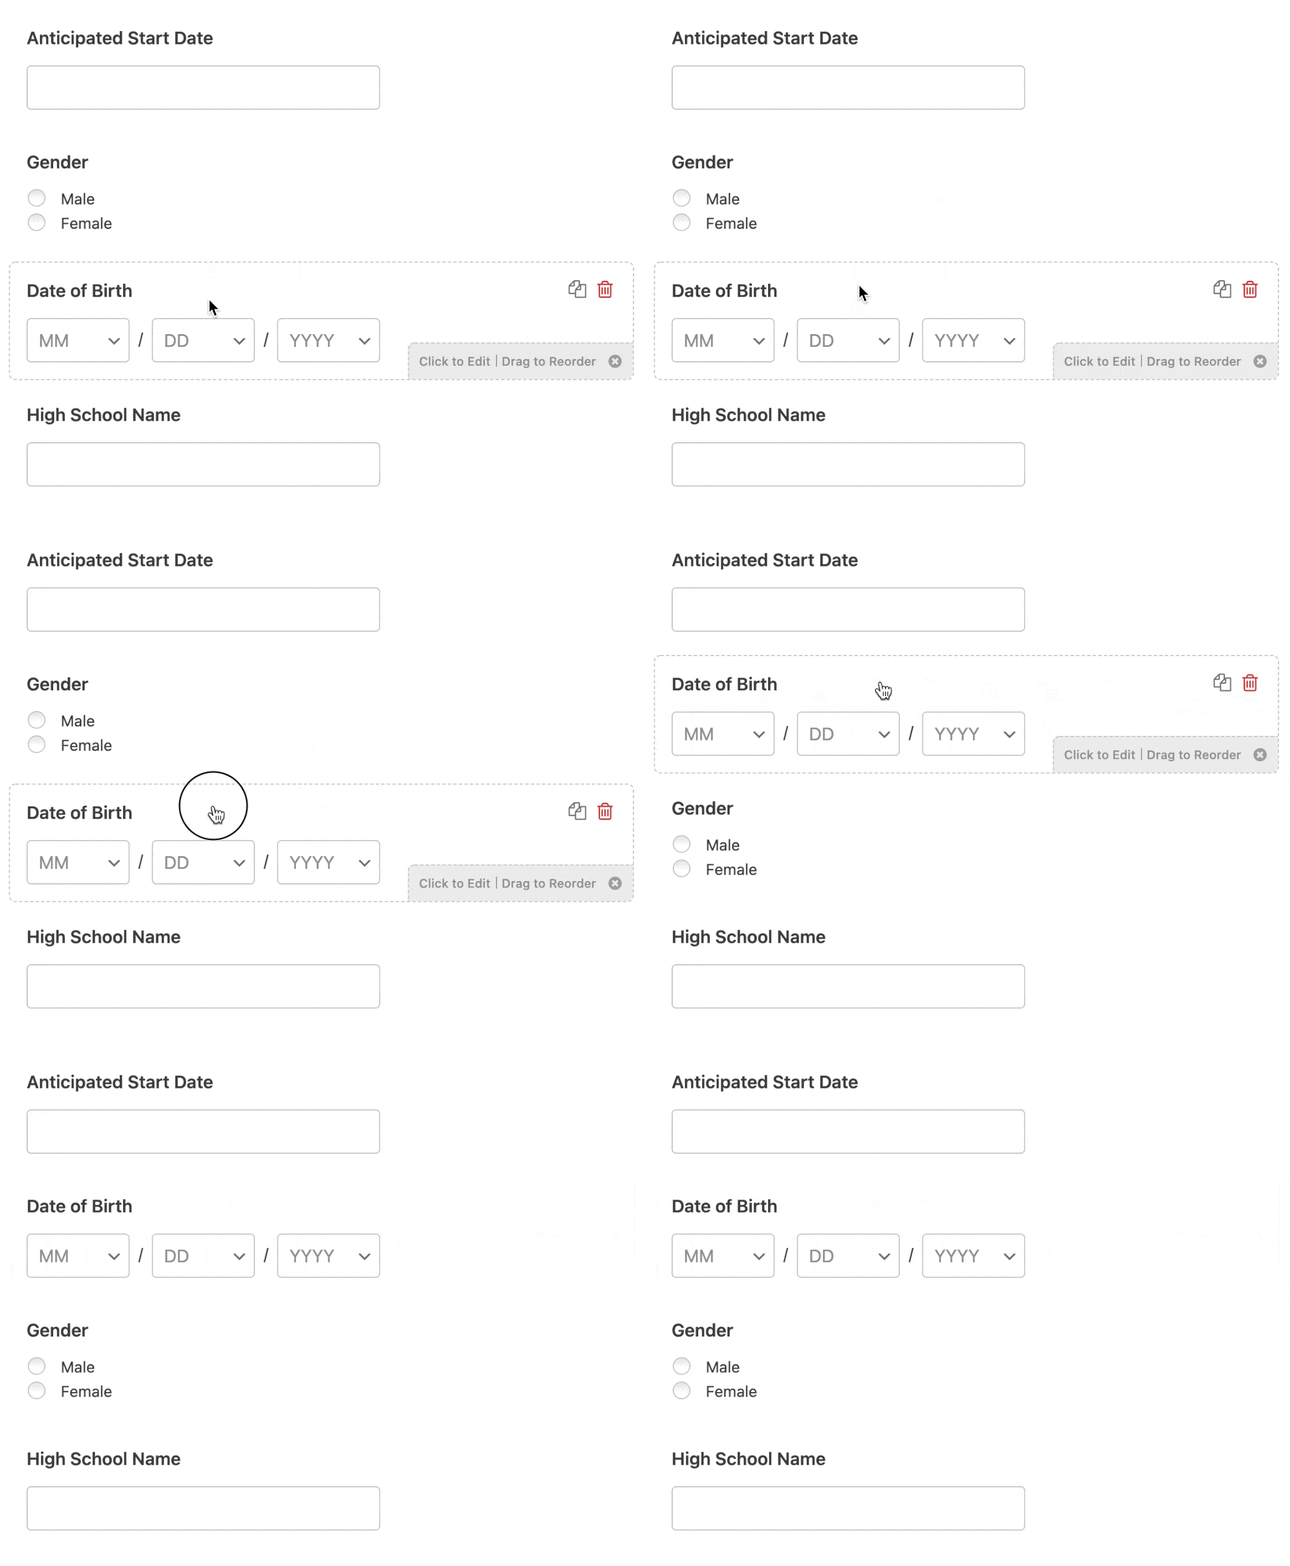
A few additions are worth thinking about for a school setting. When your form has the fields your school needs, click Save in the top-right corner.
Step 3: Collect Enrollment Fees (Optional)
Plenty of schools charge a registration or application fee, and some collect tuition deposits at enrollment. If that’s you, you can take the payment right on the form so families finish everything in one sitting.
WPForms Lite connects to Stripe and Square for card payments, and to PayPal Commerce if that’s what most people prefer. Higher plans add Authorize.Net as well.

Add a payment field, connect your processor, and the total updates automatically as families make their selections. The part parents appreciate is the automatic receipt.
Once a payment goes through, WPForms can email confirmation that the school received it. On Pro and Elite, you also pay no added WPForms transaction fees, so the only cut comes from your payment processor.
If you offer more than one way to pay, our guide on how to let parents pick a payment method walks through setting that up. You can learn more about the individual gateways on the Stripe and Square feature pages.
Step 4: Configure Your Form Settings
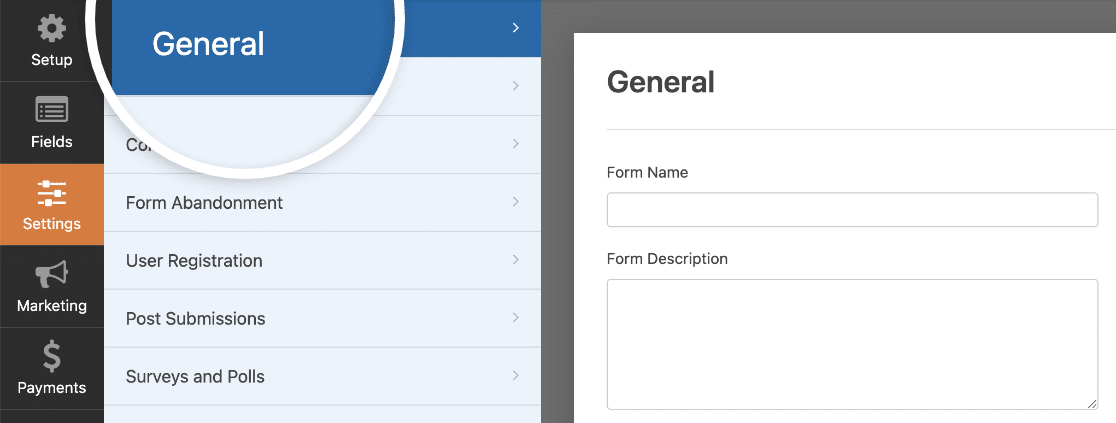
Next, open Settings » General in the form builder. This is where you control how the form behaves and presents itself. A few settings here are worth adjusting for an enrollment form:
- Form Name: Rename the form if you want it to read differently in your dashboard.
- Form Description: Add a short note about what the form is for.
- Submit Button Text: Change the button to something clearer for parents, like “Submit Application” or “Enroll Now.”
- Submit Button Processing Text: Set the message that shows while the form is submitting.
Scroll down and you’ll find the Spam Protection and Security settings. Modern anti-spam protection is on by default, and I’d leave it that way.
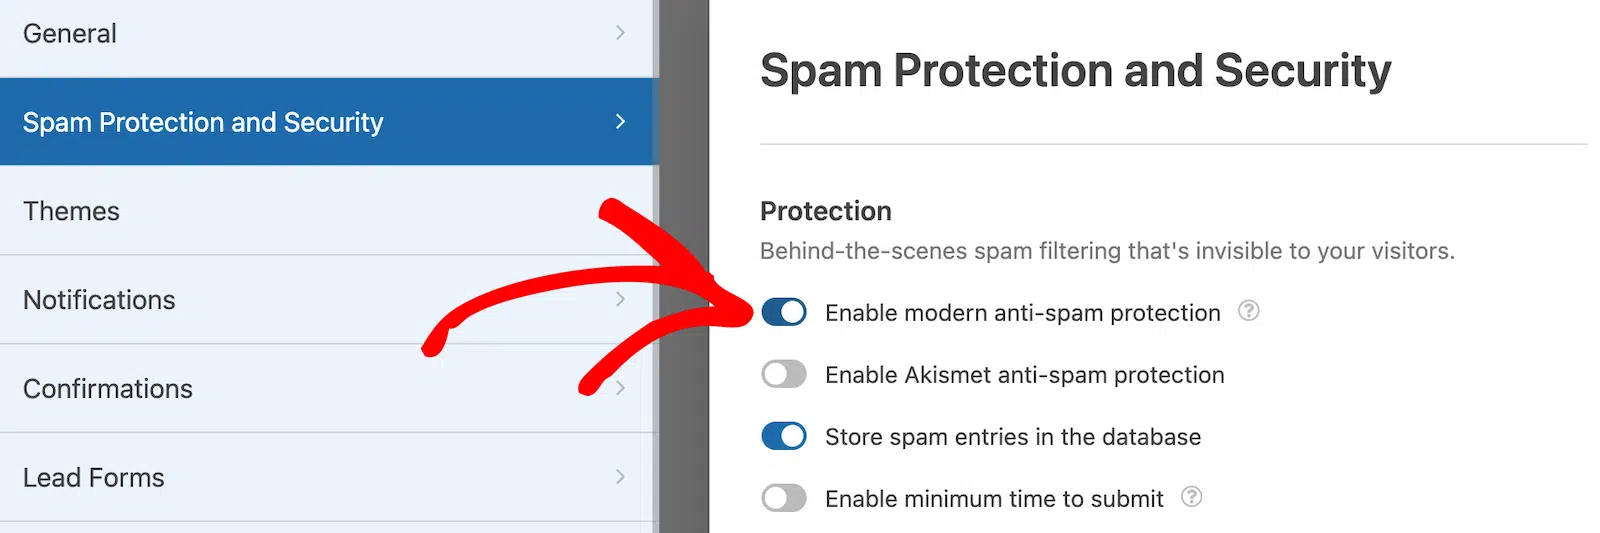
This built-in protection runs quietly in the background and blocks most junk submissions without asking parents to solve a puzzle.
You can also turn on Akismet, filter submissions by country, or block specific keywords if a particular kind of spam keeps slipping through, then click Save when you’re finished.
Step 5: Set Up Your Form Notifications
After a family submits the form, you’ll want an email letting you know. WPForms sends one to your admin address by default, so admissions hears about every new application the moment it lands.
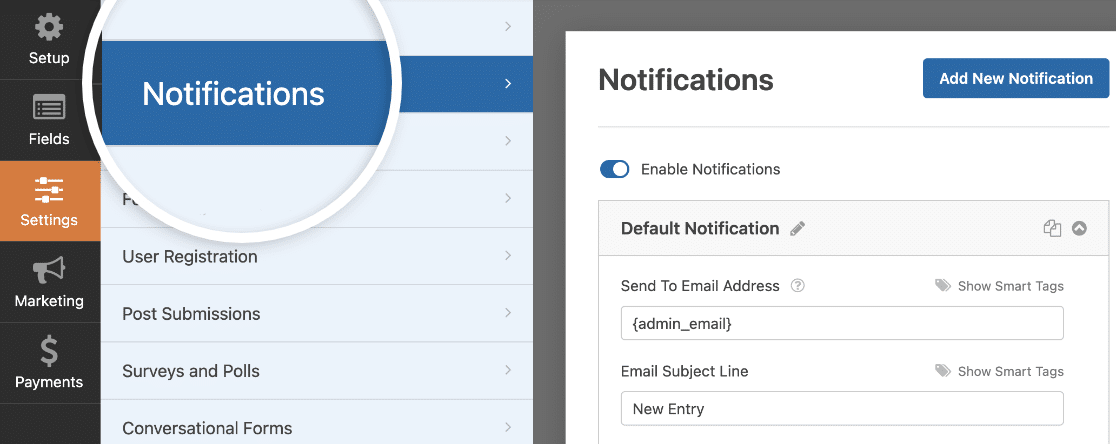
You’ll usually want to notify the parent too, so they know their child’s application went through. The trick is to send that confirmation to whatever email address they typed into the form, and you do that with Smart Tags.
A Smart Tag pulls the value from a field, so {field_id="email"} in the “Send To” box routes the message to each family automatically.
You can also send more than one notification at a time, so a single submission can alert the front office, the relevant teacher, and the registrar all at once, which saves a round of forwarding.
If you need a hand, here’s how to set up form notifications for different recipients. Finally, if your school cares about consistent branding, you can add a custom header image so every notification carries your logo.
Step 6: Customize Your Confirmation Message
The confirmation is what a parent sees the instant they hit submit. It’s your chance to reassure them the application arrived and tell them what happens next in the enrollment process. WPForms gives you three types of confirmation to choose from:
- Message: Show a custom thank-you message on the same page. This is the default, and it’s the quickest to set up.
- Show Page: Send families to a dedicated thank-you page on your site, which is handy if you want to share next steps or a welcome video.
- Go to URL (Redirect): Send them to any other web address, even one on a different site.
To edit it, open Settings » Confirmation in the form builder, type your message, and click Save.
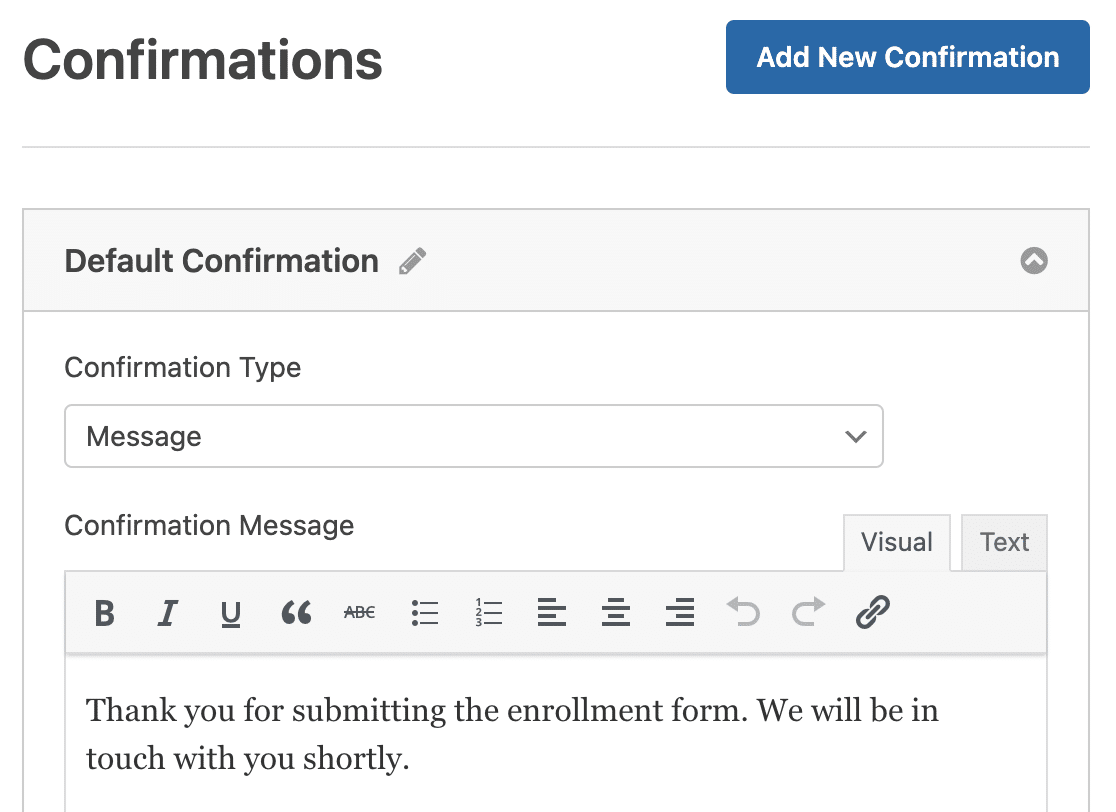
Tell parents when they’ll hear back, whether they need to send anything else, and who to contact with questions. If you’d rather send them somewhere specific, you can redirect them to a thank you page with all of that spelled out.
Step 7: Add Your Enrollment Form to WordPress
Your form is ready, so the last step is putting it where families can find it. WPForms lets you embed a form on any page, post, or widget area.
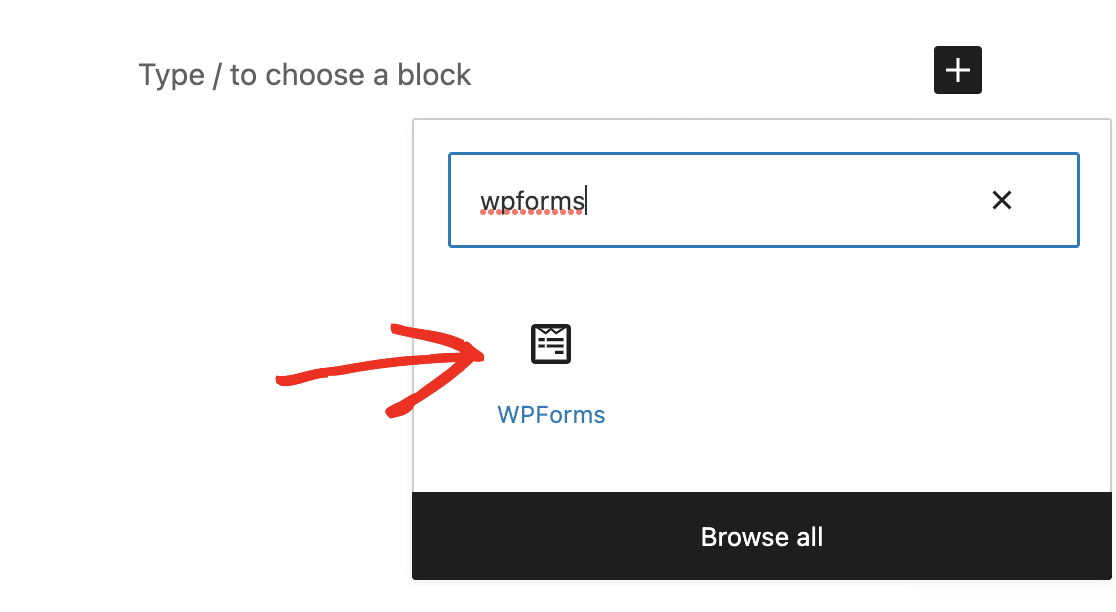
Create a new page (or edit an existing one), then click the plus (+) button to add a block and choose the WPForms block.
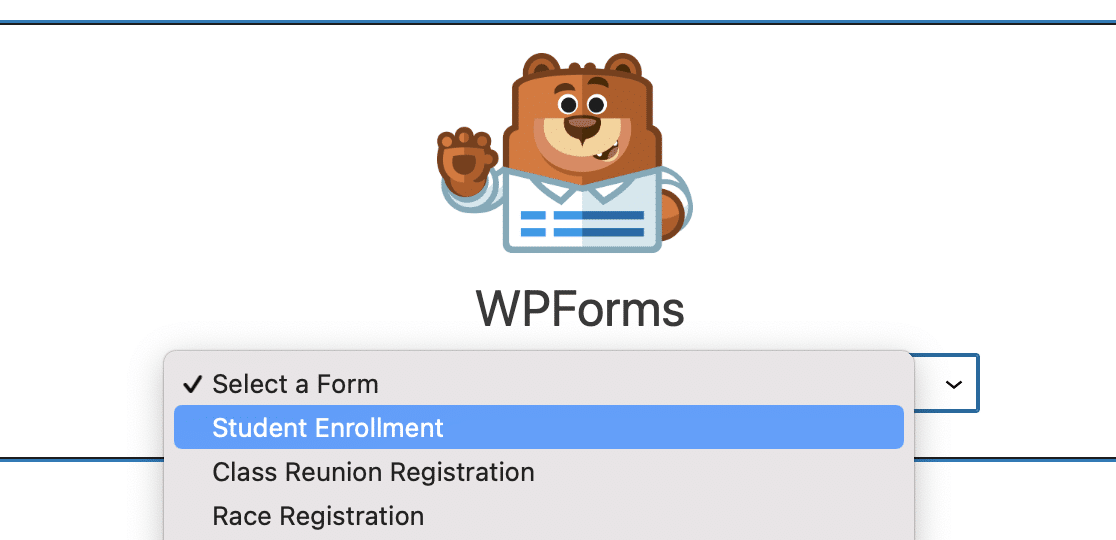
In the block’s dropdown menu, select your student enrollment form.
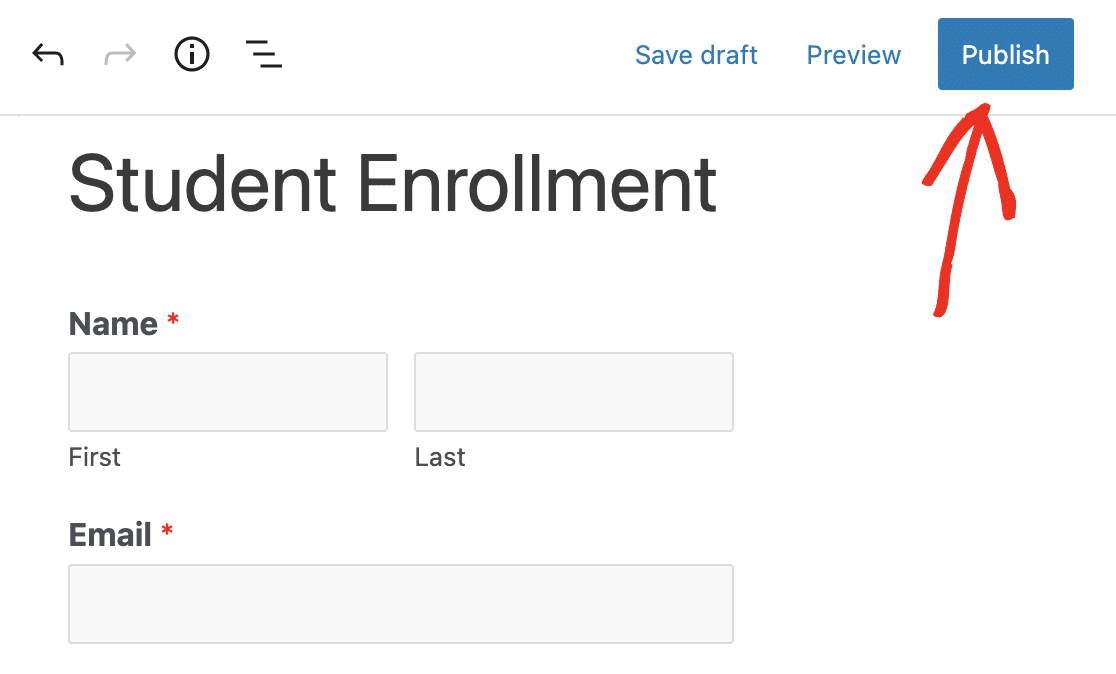
Now click Publish, and your form goes live for parents to fill out.
Every submission lands in your WordPress dashboard, where you can view, search, filter, print, and export it. If you’re new to that side of things, our complete guide to form entries covers it well, and it’s a page worth bookmarking.
One last tip for schools with a hard cutoff: you can set an enrollment deadline so the form closes itself on a specific date and stops accepting late applications automatically.
FAQs About Student Enrollment Forms
Student enrollment forms come up a lot for schools moving admissions online, so here are answers to the questions I hear most often.
What is a student enrollment form?
A student enrollment form is an online form schools use to register new students.
It collects the details admissions needs, such as the student’s name, contact information, start date, prior school, and any documents or fees that go with the application, and stores them in one place instead of on paper.
What should a student enrollment form include?
At a minimum, include the student’s name, date of birth, and contact details, plus a guardian’s name and phone number.
Most schools also add the anticipated start date, previous school, and a spot to upload documents like transcripts or immunization records. Add a payment field if you collect a registration fee.
Can I create a student enrollment form for free?
You can build a basic form with WPForms Lite for free, but a full enrollment form usually needs Pro.
The advanced fields, file uploads, and fee collection covered in this guide all live in the paid plans, so Pro is the sensible starting point for a school.
How do I collect enrollment fees online?
Add a payment field to your form and connect Stripe, Square, or PayPal Commerce.
Families pay when they submit their application, WPForms emails them a receipt, and on Pro you keep the full amount minus your processor’s own fee.
Next, Build a Custom College Application Form
That’s everything you need to get a student enrollment form live on your school’s website. If your admissions process goes a step further, you can also learn how to build a college application form from a template using the same builder.
And to get more families to actually notice and complete your form, take a look at our roundup of the best WordPress popup plugins for gentle, well-timed reminders.
Create Your Student Enrollment Form Now
Ready to build your form? Get started today with the easiest WordPress form builder plugin. WPForms Pro includes lots of free templates and offers a 14-day money-back guarantee.
If this article helped you out, please follow us on Facebook and X (Twitter) for more free WordPress tutorials and guides.





Am using WPForms for our school for student registration and enrollment. Many students
submit multiple forms because they either missed something or entered wrong information in the first, second and even up to 4 or 5 submissions. All because there is no form entry editing in wpforms. I hope this feature is made available soonest.
Hey Hory,
We don’t currently have a way for users to edit their entries on the front end through the submission of a form. I do agree it would be super helpful, though. I’ve made a note of the feature request and we’ll keep it on our radar as we plan out our roadmap for the future.
I hope this helps! If you have additional questions, please get in touch.
Have a good one 🙂
Hi
Haven’t had time to read through all the info.
But i wonder if it is possible to add a registration date that “school” can be based on as “registration queue” for new students
Hey Tommy – You can consider using the Hidden Field and use {entry_date format=”d/m/Y”} or {date format=”m/d/Y”} smart tags to pull the date which you can consider using as registration date.
Hi, I am trying to create a contact for for parents, I have fields for their name, email, and their student’s name and grade. I would like to have the parents list multiple students. How can I set up my form to allow multiple child records?
As in
Mary Smith
email@address com
and then fields to capture info for
Student 1
John Smith, Grade 9
Student 2
Sally Smith, Grade 10
I’m probably not using the correct terms to search the knowledge base. Thanks for any help.