AI Summary
Managing events can get complicated, especially when you need to gather and organize details for multiple participants.
WPForms offers a solution with its Repeater Field and Google Sheets integration, allowing you to collect dynamic, repetitive information and store all entries in one place.
In this guide, I’ll show you how to set up a form with the Repeater Field and connect it to Google Sheets to effortlessly manage your event details.
How to Manage Events with WPForms Repeater Field and Google Sheets
You can easily manage events using the WPForms Repeater Field and the Google Sheets addon. Follow the steps below to get started:
Step 1: Install and Activate the WPForms Plugin
To get started with using the WPForms Repeater Field and Google Sheets, the first step is to install and activate WPForms Pro on your WordPress site. The Pro version is necessary because it comes with the Google Sheets addon, which you need for this tutorial.
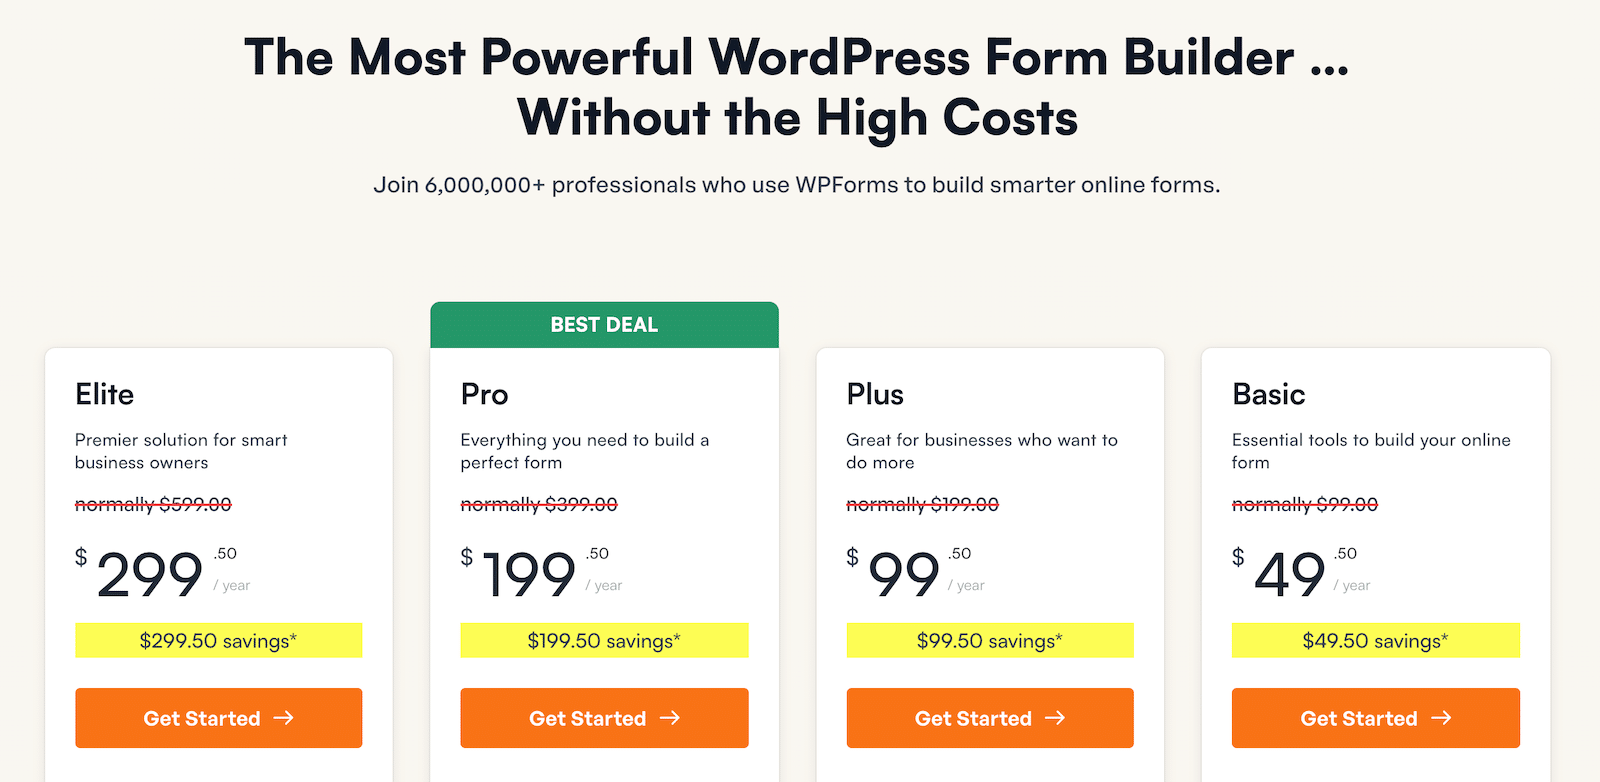
After securing the WPForms Pro License, you can proceed with adding the plugin to your WordPress site. If you’re new to this, don’t worry; check out this guide for step-by-step instructions on installing WPForms.
Step 2: Connect Your Google Account With WPForms
Once you’ve installed the WPForms plugin, you’re ready to connect it to your Google Sheets account. To do this, go to WPForms » Addons.
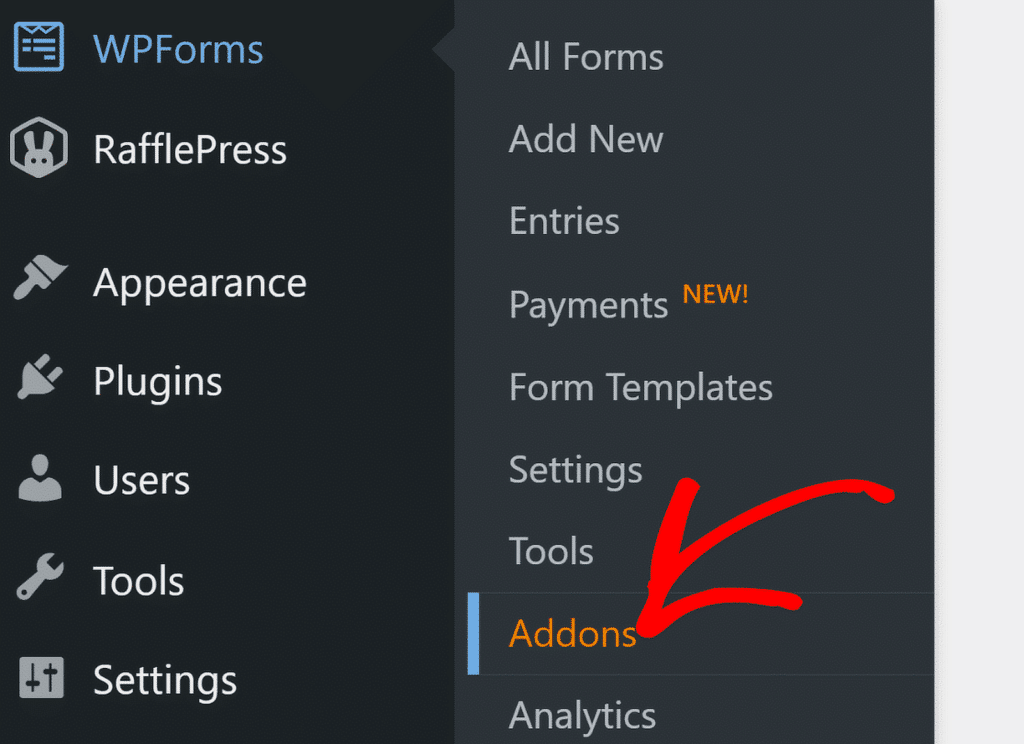
On the WPForms Addons page, find the Google Sheets Addon and click on Install Addon. Once it’s installed, click on the Settings option.
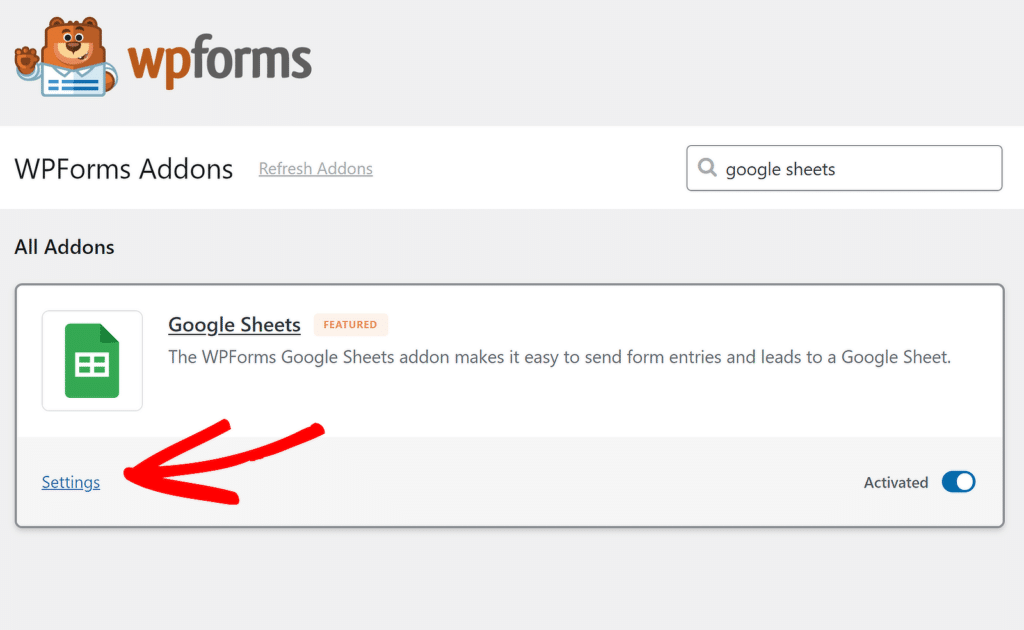
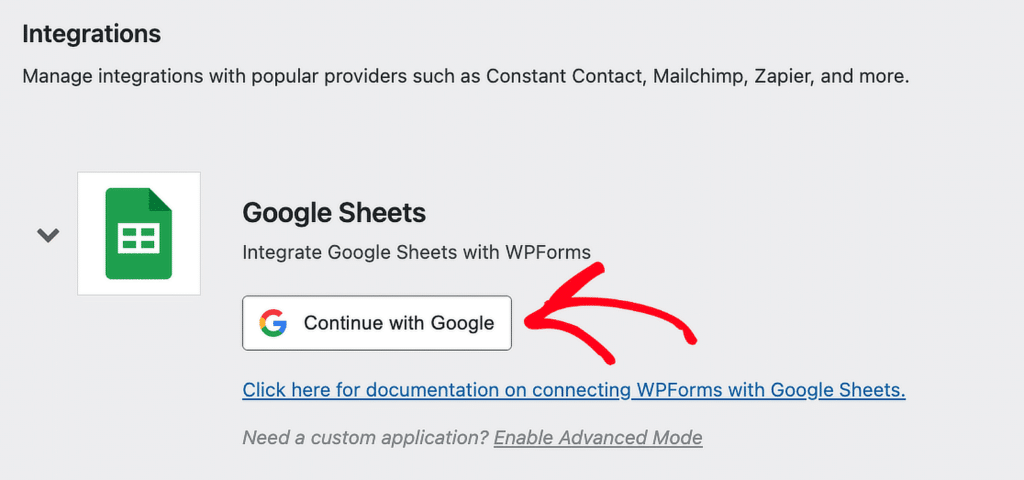
On the Settings page that opens, scroll down to find the Google Sheets addon, and then click on the Continue with Google button.
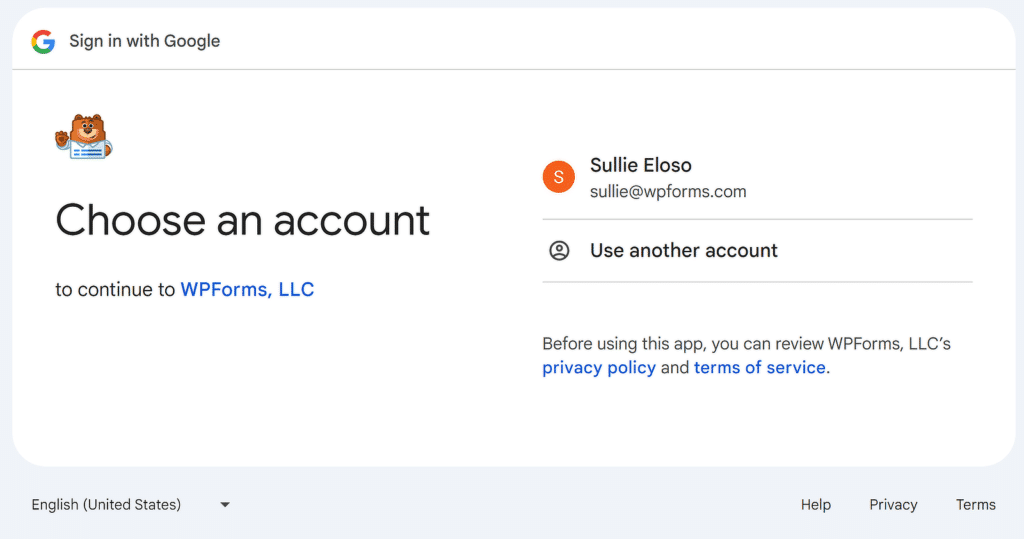
This will redirect you to a new page, where you will be required by Google to Choose an account to proceed with the setup process.
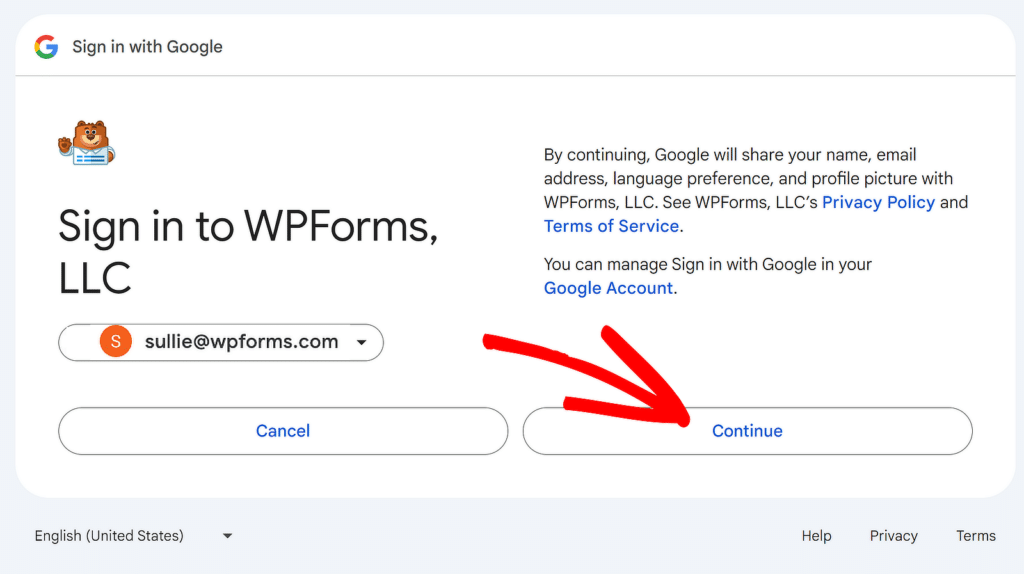
Next, click on the Continue button to allow WPForms to access your Google account and provide the necessary access rights.
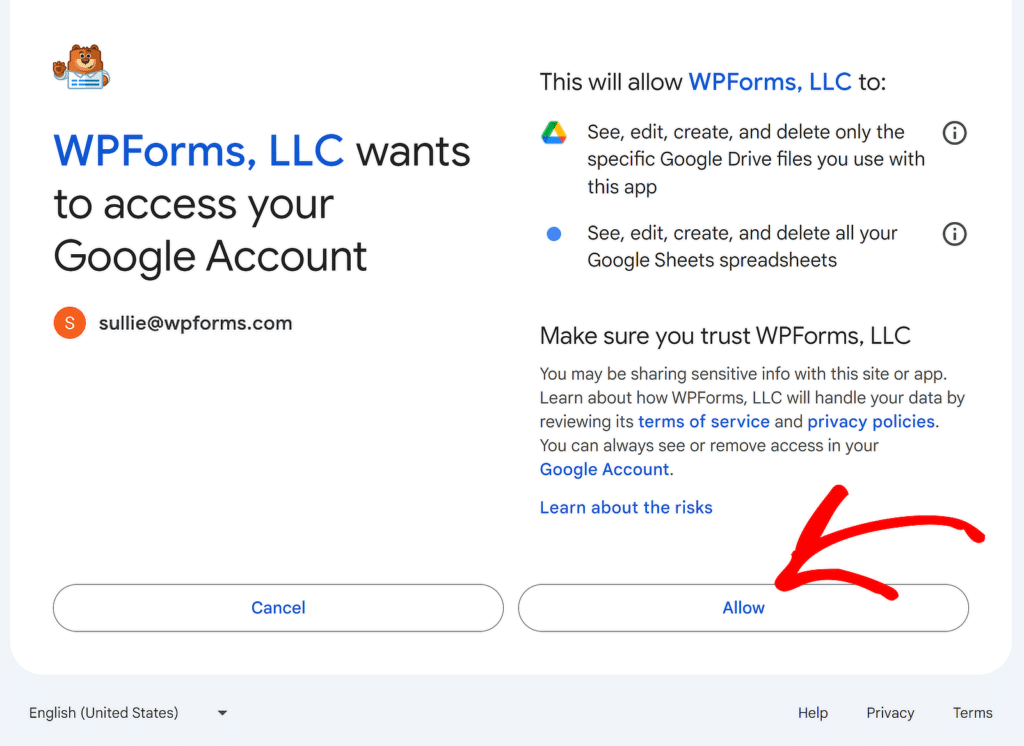
To complete the integration process, simply click on the Allow button. This will give WPForms the access see, edit, and create entries in your Google Sheets account.
Next, you’ll then be redirected to the Integrations page. Note that the Google Sheets integration will read Connected now.

Now that your account is integrated, you can connect any form you’ve created with Google Sheets to send form data automatically.
Step 3: Create Your Event Registration Form
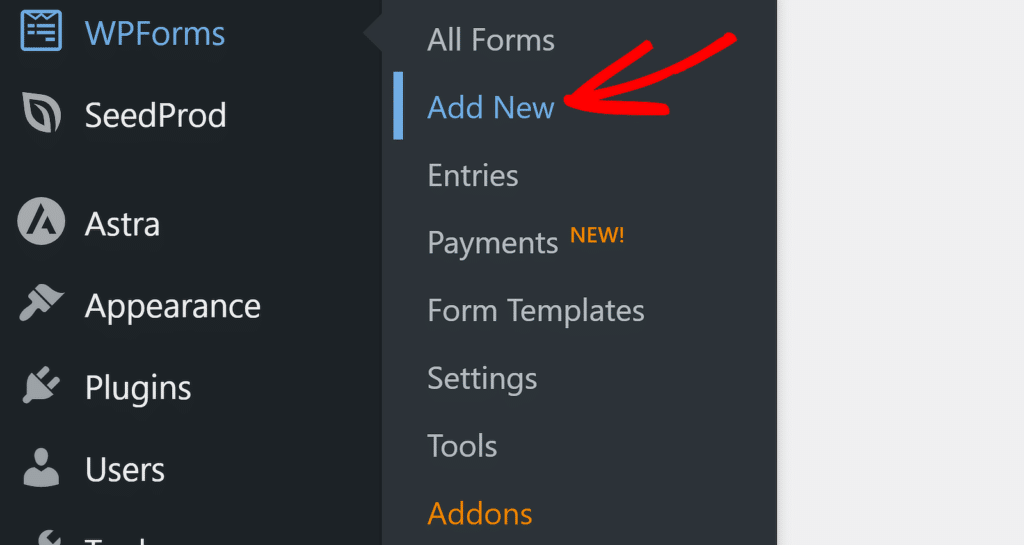
To create your event registration form with the Repeater Field, start by heading to WPForms in your dashboard and click on the Add New option.
Next, give your form a name and then choose to either create a new form from scratch with Repeater fields or save time by using a pre-built template. WPForms comes with 2,000+ WordPress form templates.
For instance, you can use the search bar to find the Event Attendees Registration Form template and click on the Use Template button to customize it based on your needs.
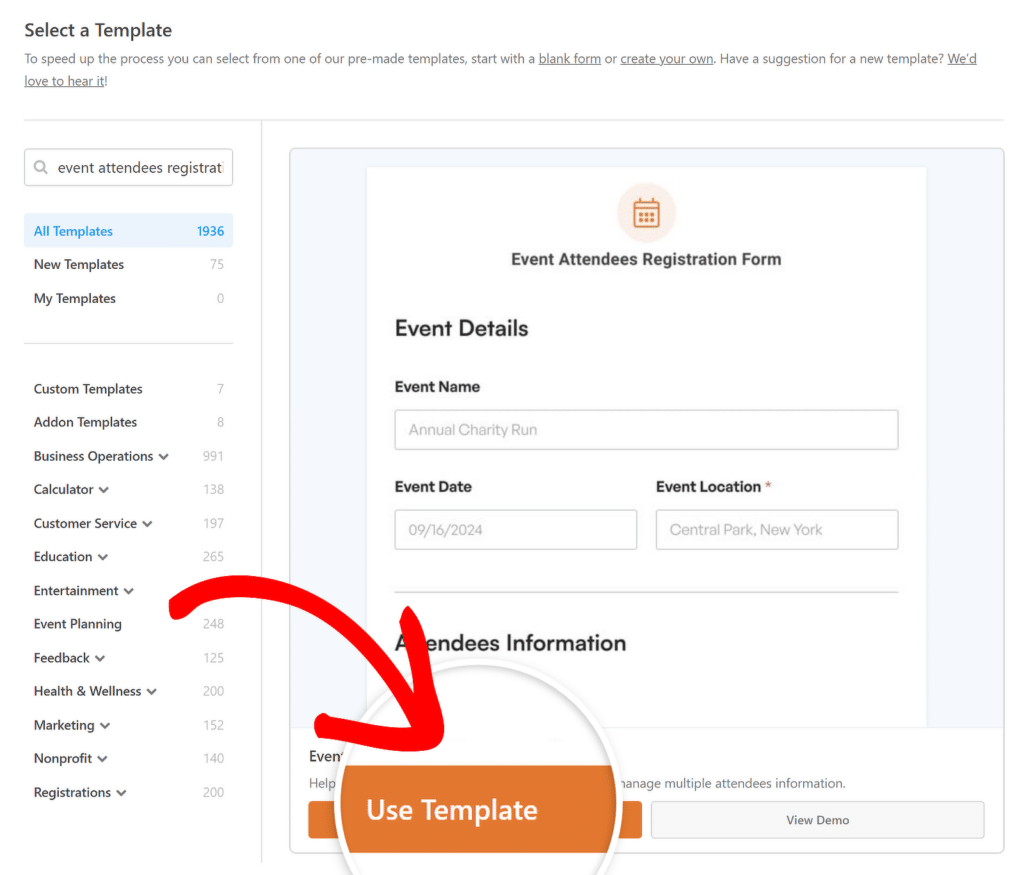
This template contains all of the fields required for collecting attendee information for your upcoming event, along with other details. These include:
- Event Information (Prefilled by Host/You):
- Event Name: Captures the official name of the event.
- Event Date: Logs the date on which the event will occur.
- Event Location: Specifies the venue where the event will take place.
- Attendee Details (Repeater Field):
- Attendee Name: Gathers the full name of each participant attending the event.
- Email Address: Collects email addresses to send updates or confirmations.
- Phone Number: Stores a phone number for contact or reminders.
- Additional Options:
- Comments: Provides space for attendees to add any special requests or information.
- Newsletter Signup: Allows attendees to opt-in to receive the organizer’s newsletter.
Step 4: Customize the Repeater Field for Data Collection
After you’ve selected the Event Attendees Registration Form, you can customize it to fit your event’s specific needs by adding, removing, or rearranging fields, ensuring you collect all the necessary details for your event.
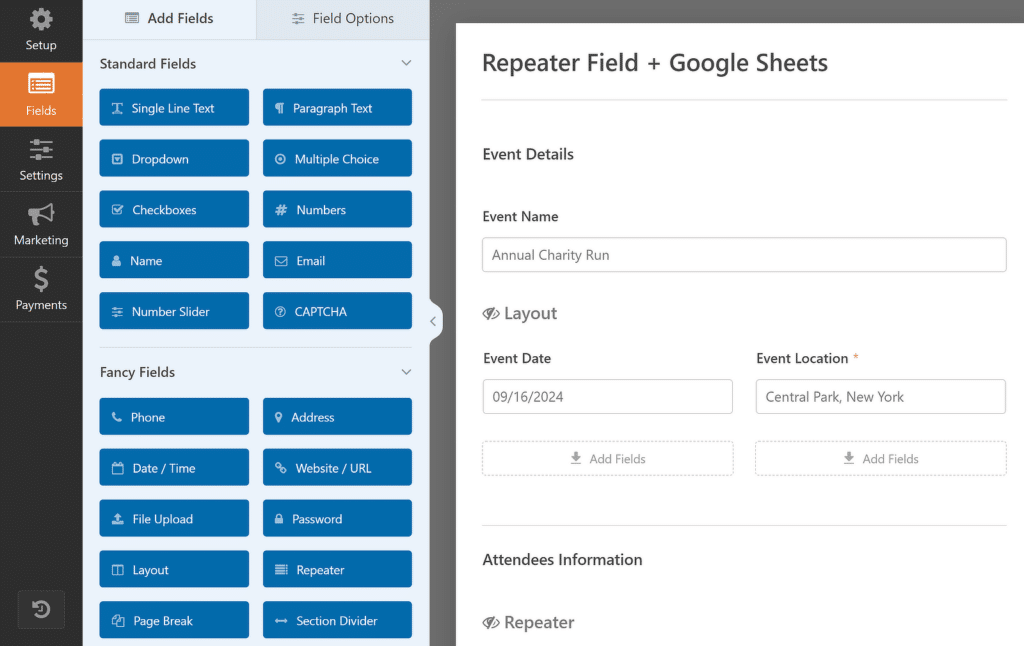
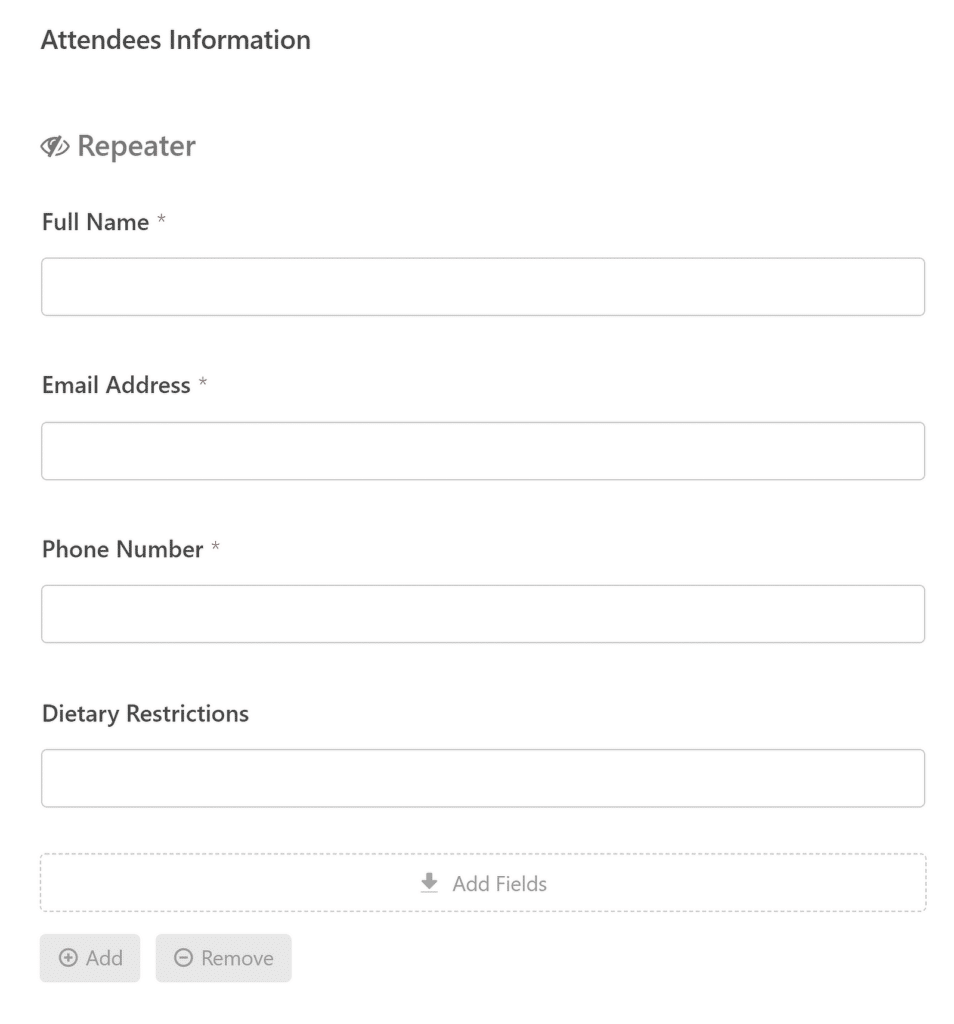
For instance, let’s suppose you want to add a field that’s repeatable. Simply drag and drop a relevant field from the left-hand side of the screen to the Add Fields option in the Repeater section on the right.
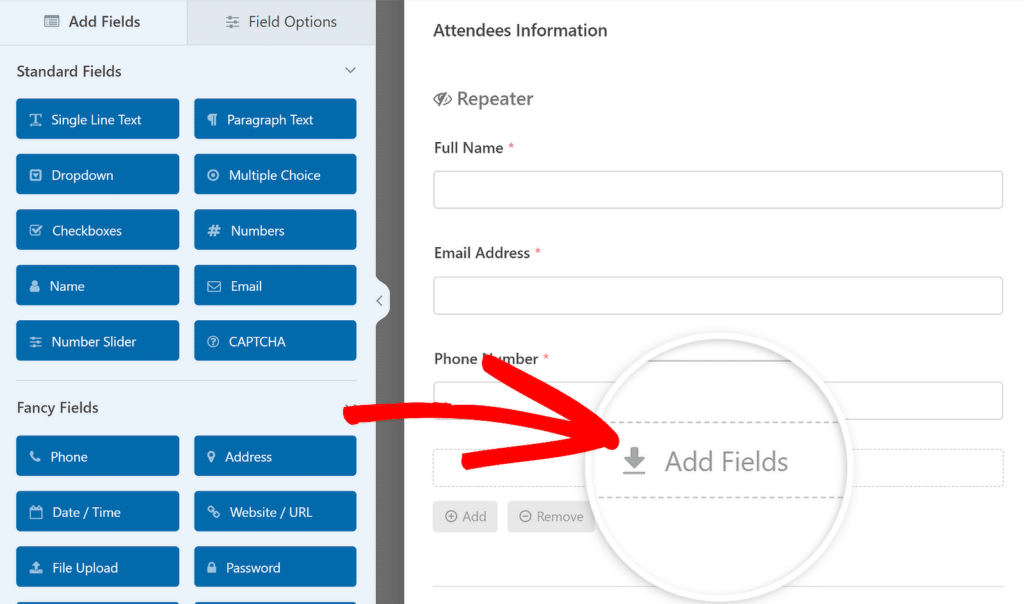
I wanted my form to include a space for attendees to provide information on any dietary restrictions, so I used the Single Line Text field and labeled it as “Dietary Restrictions.”
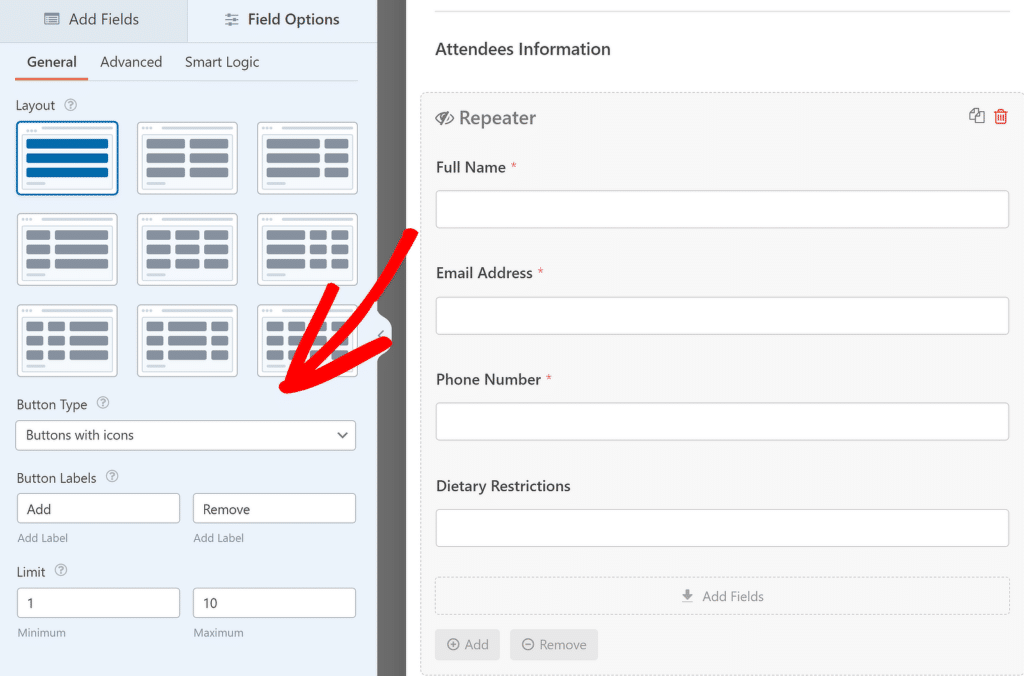
If required, you can even customize the Button Type of the Repeater field, change its Labels, or set a minimum and maximum limit for attendee registrants.
After making all the necessary changes to the form template, make sure to click on the Save button to ensure all your progress is updated.

Step 5: Configure Your Google Sheets Addon Settings
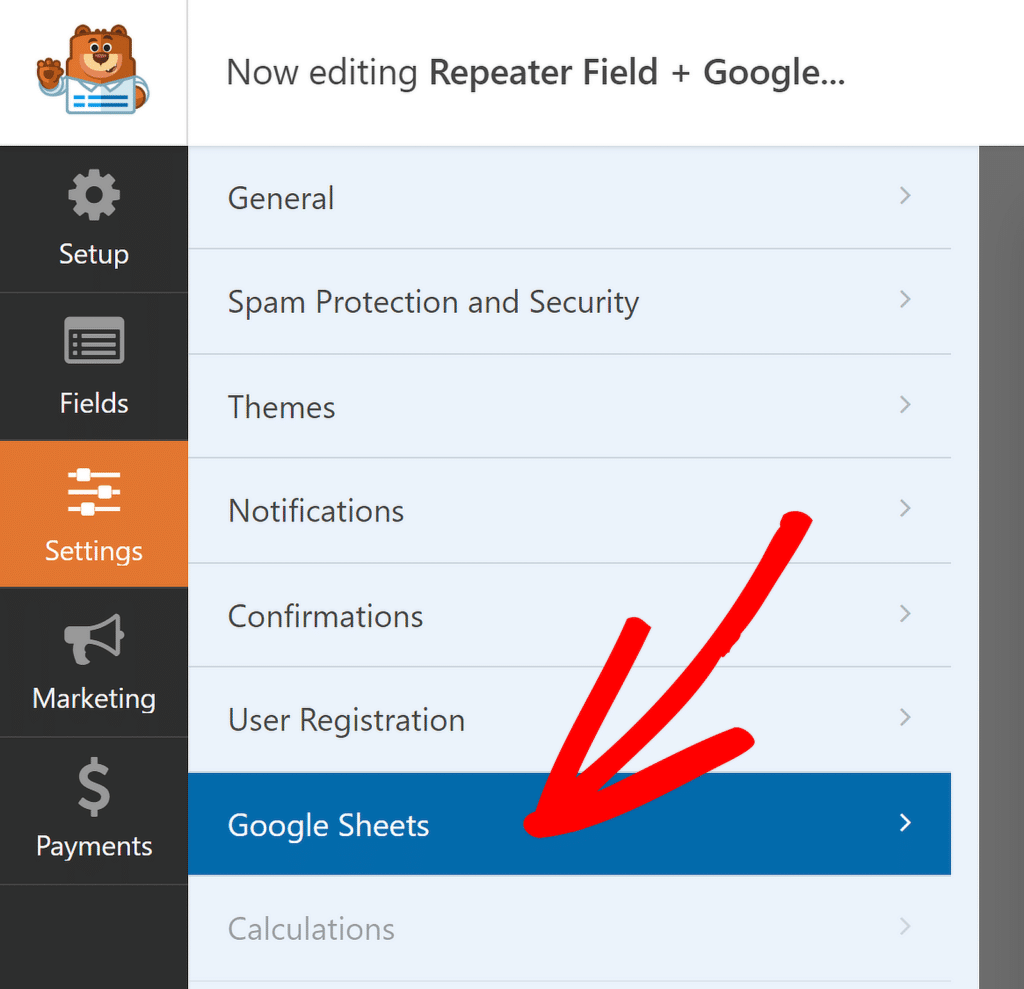
After customizing your form, go to the Settings tab in the form builder sidebar and choose Google Sheets from the available options.
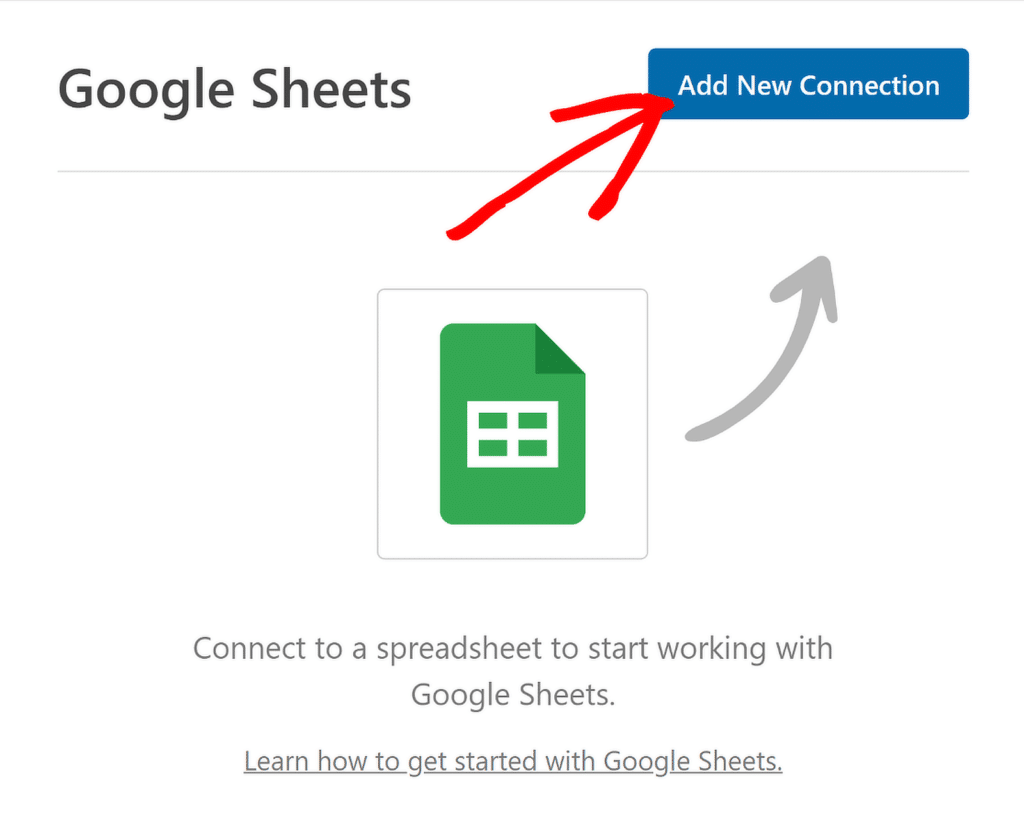
In the top-right corner, click on the blue Add New Connection button to link your Google account to the form from which you want to store entries.
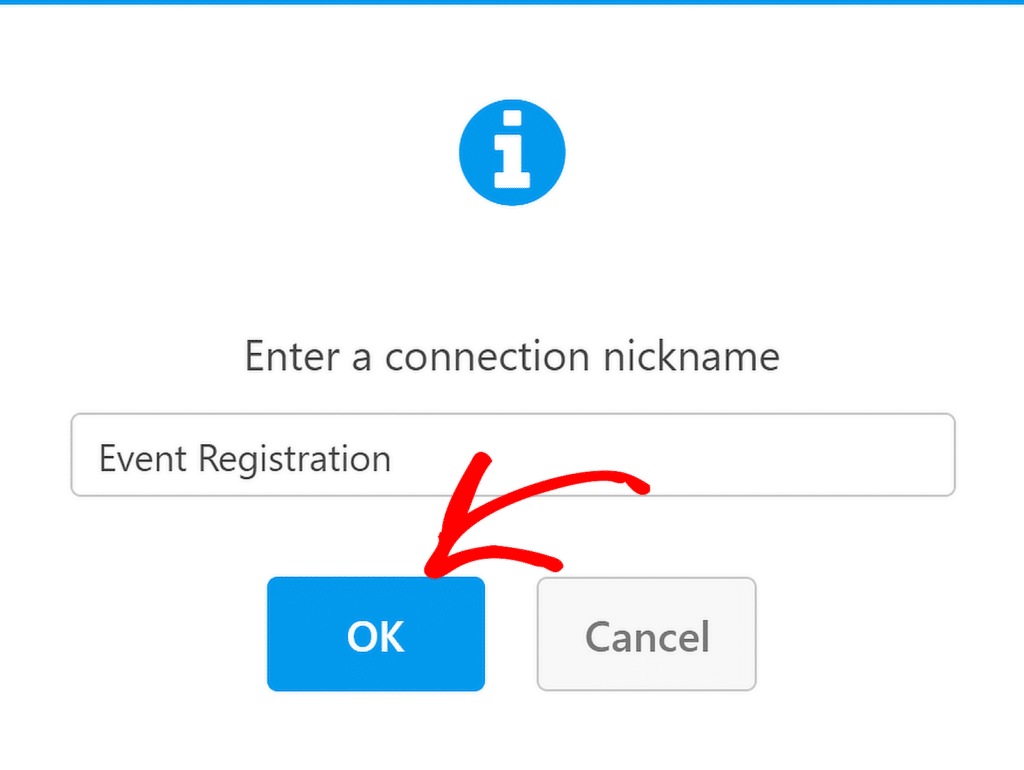
You’ll need to give this connection a name that’s easy to recognize. Once you’ve entered a nickname, press OK to confirm.
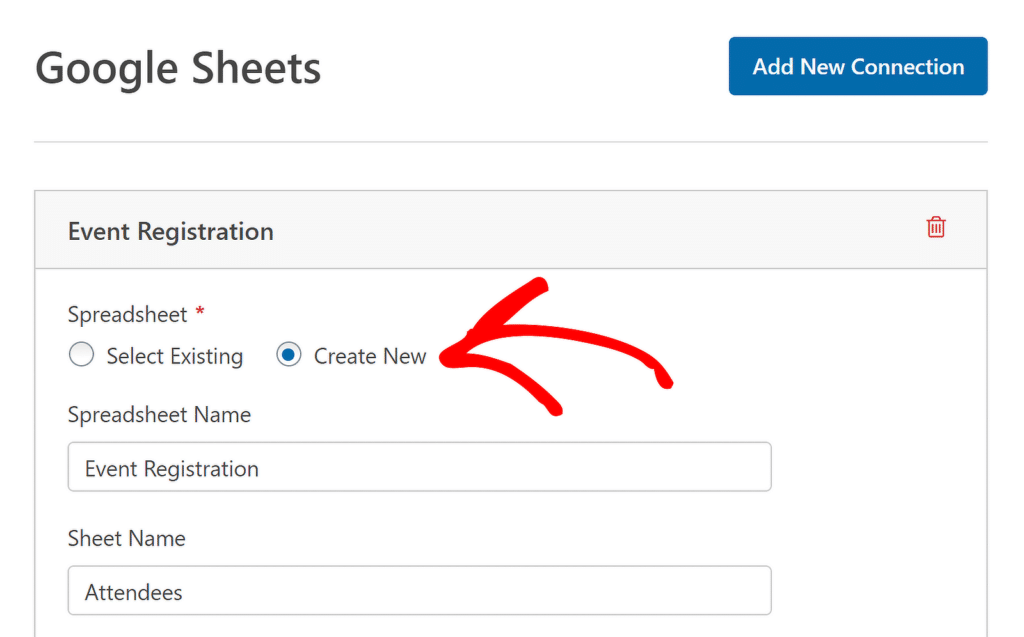
WPForms will now ask you to select whether you want to connect an existing spreadsheet or create a new one to send the form submissions.
For the purposes of this tutorial, I’m going to select the Create New option. Then, simply enter the Spreadsheet Name and Sheet Name to proceed.
After selecting or creating your sheet, scroll down further to see the Field Mapping settings. Use these settings to define which columns should correspond to which field values.
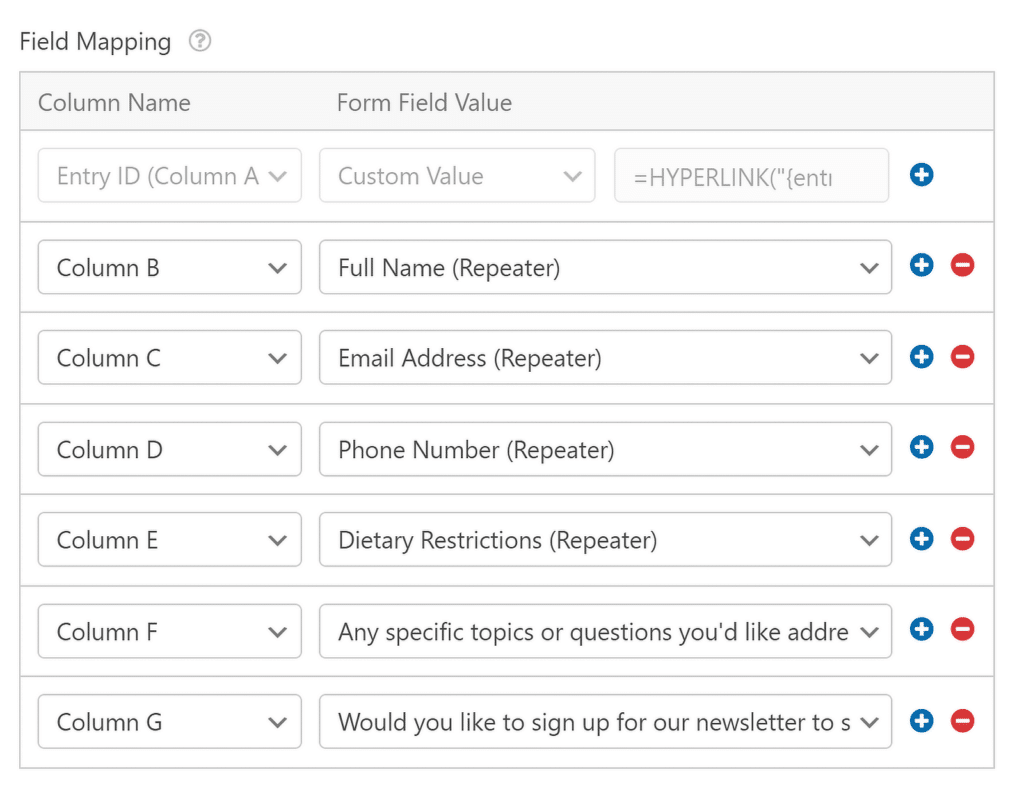
You can also map columns to custom values. This is useful if you want to extract additional hidden data or metadata from each entry, such as the date, IP address, and other information.
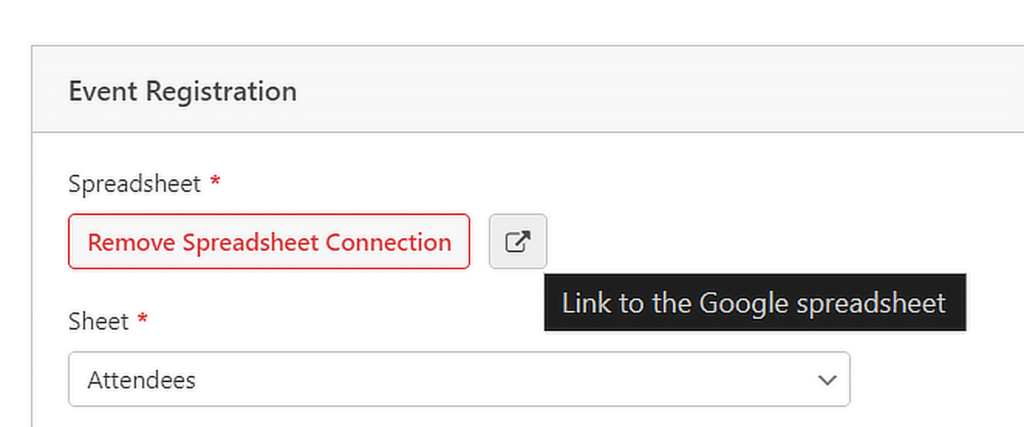
After you’ve mapped all the fields as required, you can easily access the new spreadsheet by clicking on the external link icon on top of the connection.
Step 6: Publish Your Event Registration Form
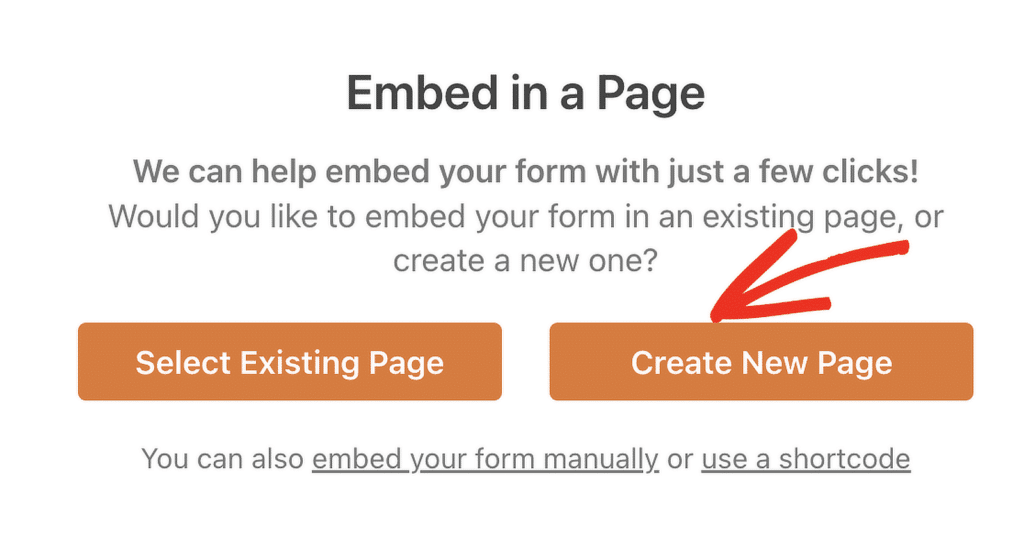
Your form is now almost ready to accept entries and automatically send them to your spreadsheet in real-time. To begin, click the Embed button at the top right corner of the form builder.

If you want to place the form on an existing page, simply choose the option to select an existing page from your site.
If you’d rather create a new page, click on the option to create a new one and give it a relevant name, like “Event Registration.”
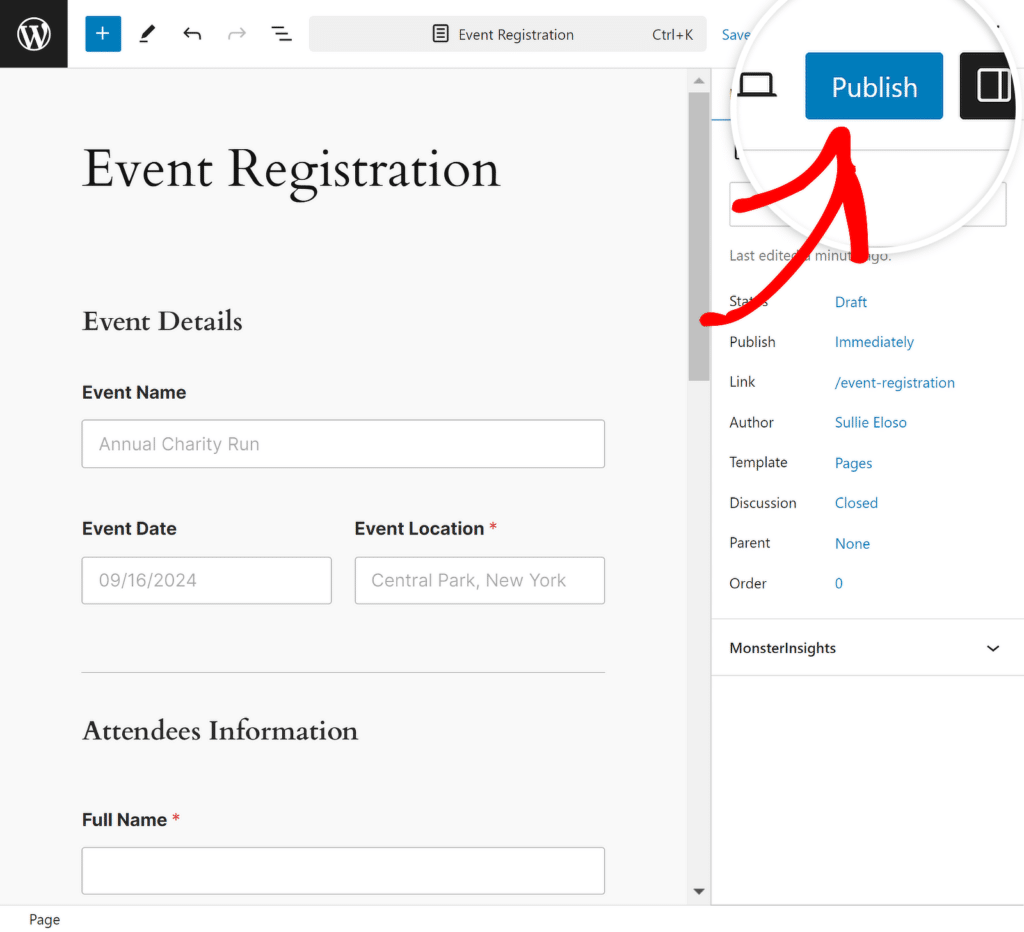
Once you’ve made your selection, the WordPress editor will open with the form already added. To make it live, just click the Publish button at the top.
To ensure that the data is being sent correctly, try submitting a test entry (which you can also do from the Preview before publishing your form).
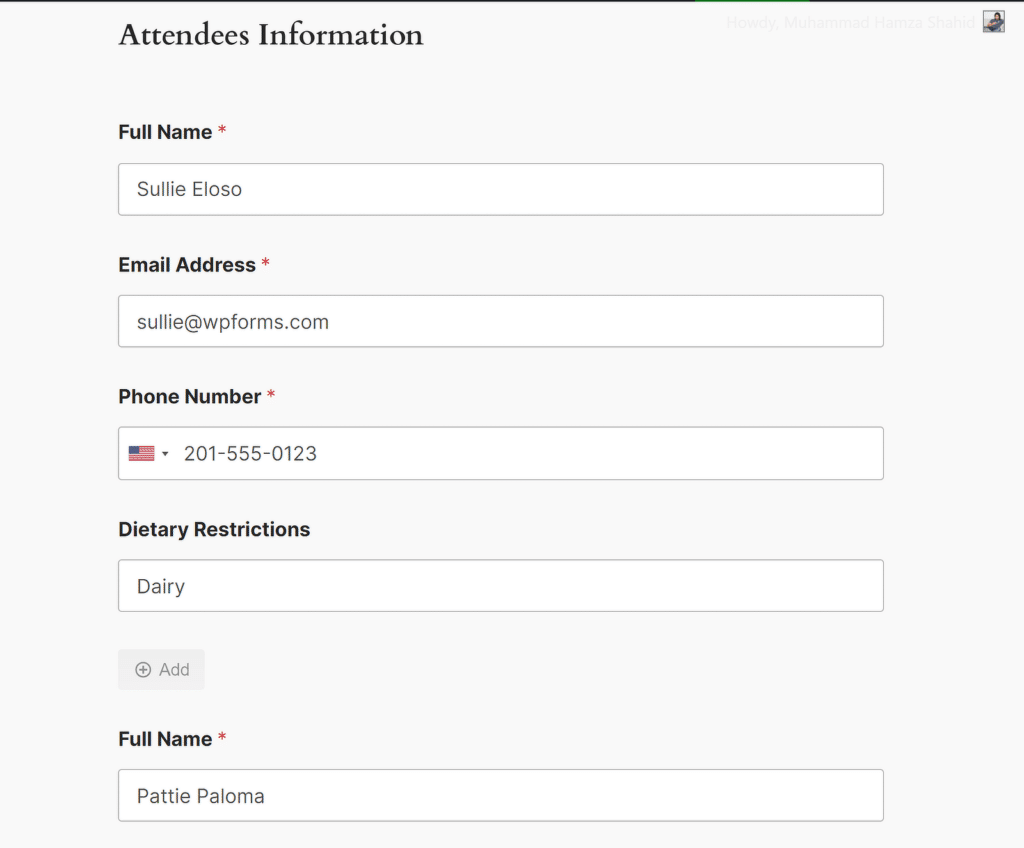
Wait a few seconds after pressing Submit before the entry appears in your spreadsheet, as shown below. And that’s it! All entries will be added to the specified spreadsheet in Google Sheets in real time!

Also check out this guide to learn whether or not you should use the WPForms Repeater field or Layout field with Conditional Logic to further optimize your form.
FAQs — How to Use WPForms Repeater Field + Google Sheets to Manage Events
How do I integrate Google Sheets with WPForms?
To integrate Google Sheets with WPForms, you’ll need the WPForms Pro version and the Google Sheets addon. After installing both, you can link your form to a Google Sheet by selecting the addon in the form’s settings and connecting your Google account.
How to add repeatable fields in WPForms?
With WPForms, you can easily create repeatable fields by dragging and dropping the Repeater field to the form preview and then inserting the relevant fields you want to make repeatable. Check out this guide on how to set up a form with repeater fields.
Can WPForms auto populate Google Sheets?
Yes, WPForms can automatically populate Google Sheets. By using the Google Sheets addon, any form submissions, including data from the Repeater Field, are instantly added to your chosen spreadsheet, keeping everything organized in real-time.
Next, Learn How to Connect Elementor Forms to Google Sheets
As a dedicated form builder plugin, WPForms Pro includes a native Google Sheets integration. This lets you connect any individual form to your spreadsheet without any code or the use of third-party apps. Check out this guide for steps on how to connect Elementor Forms to Google Sheets.
Create Your WordPress Form Now
Ready to build your form? Get started today with the easiest WordPress form builder plugin. WPForms Pro includes lots of free templates and offers a 14-day money-back guarantee.
If this article helped you out, please follow us on Facebook and Twitter for more free WordPress tutorials and guides.

