Are you looking for a simple and straightforward way to view the Stripe subscription status in WordPress?
You’ll be pleased to hear that the WPForms Stripe integration supports Stripe webhooks. That allows you to track all your financial activities directly from the WordPress dashboard – and it’s easy to set up.
View Stripe Subscription Status in WordPress
In this article, we’ll provide step-by-step instructions on integrating Stripe webhooks with WPForms to monitor your subscription statuses.
How to Track Stripe Subscription Status in WordPress
Step 1: Install the WPForms Plugin
As the best form builder, WPForms makes it super easy to create various forms on your WordPress site, such as contact forms, order forms, and more. It also integrates seamlessly with Stripe to handle all your payment needs.
Even if you opt for WPForms Lite, which is the free version of the plugin, you can easily connect your order forms with Stripe while paying a nominal fee of 3% per transaction, in addition to the standard Stripe fees.
Of course, if you want to avoid any of these charges, you can consider upgrading to WPForms Pro, which allows you to save money in the long run, while giving you access to other features like the Stripe Pro Addon that even supports recurring payments.
Regardless of the license, you can still use webhooks to establish a two-way connection with Stripe, which gives you a comprehensive overview of all your financial activities, including one-time payment details, subscription statuses, and refund data.
Once you’ve made the decision on which subscriptions suits your current needs and budget requirements, check out this guide to learn how to install a plugin in WordPress to get WPForms up and running.
Step 2: Connect Stripe to Your WordPress Website
Now it’s time to connect Stripe to WPForms. To do this, go to WPForms » Settings » Payments.
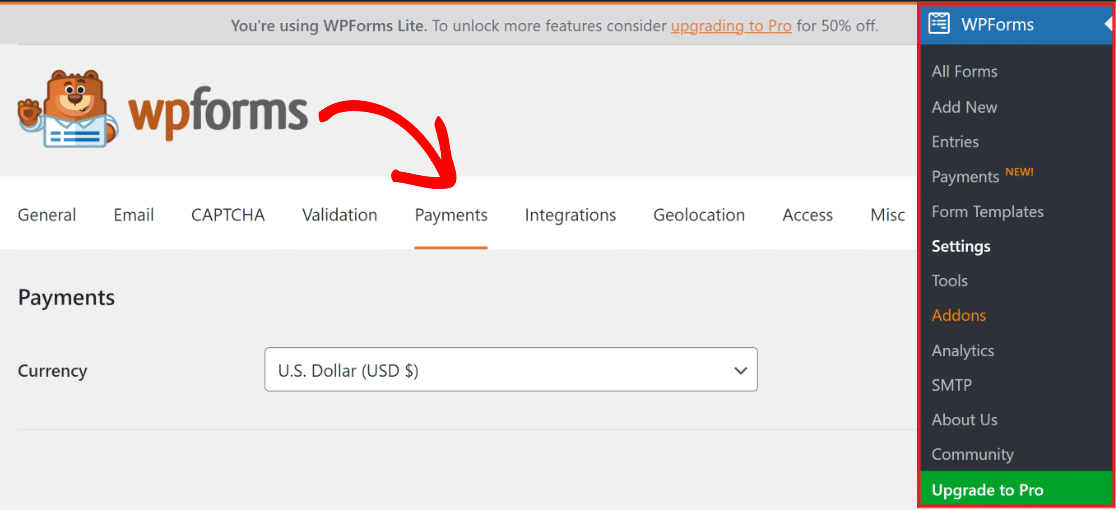
In this menu, you can change the Currency used on your site if required by selecting the preferred option in the dropdown menu.

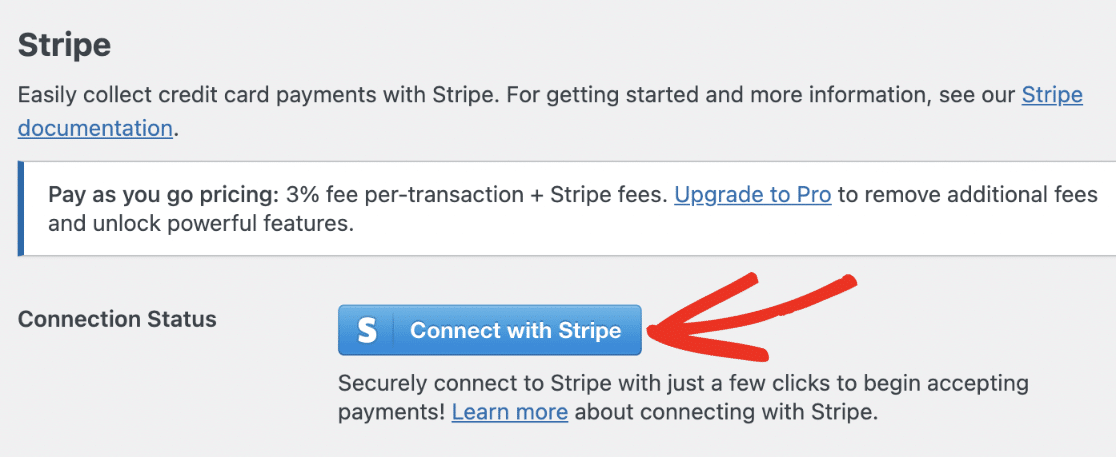
Once done, scroll down a bit and click on the blue Connect with Stripe button to integrate Stripe payments into your WordPress site.
You’ll now be required to enter your Stripe credentials. If you don’t already have an account, consider creating one now and follow the steps in the Stripe Connect Wizard.
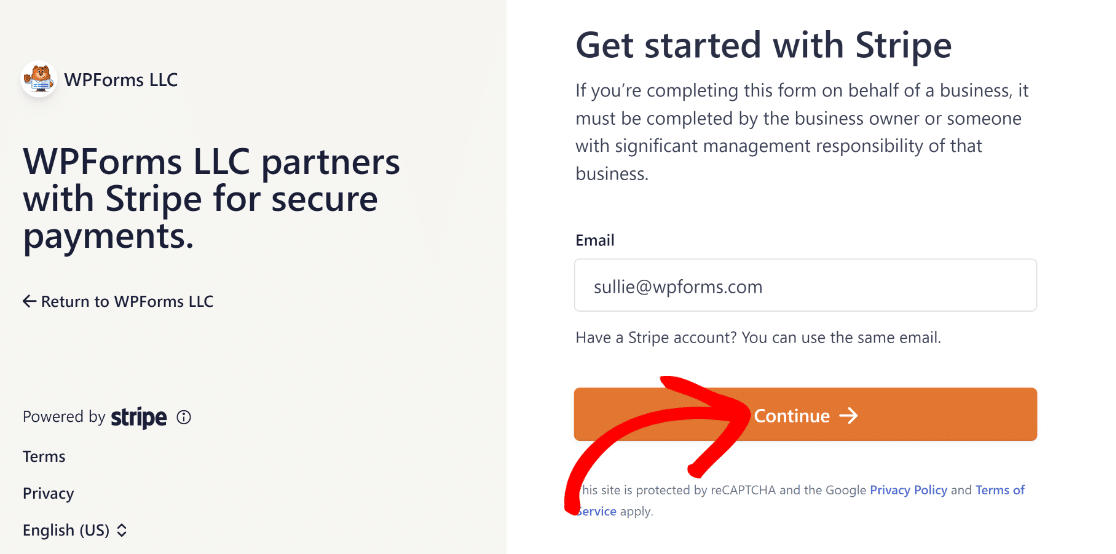
Once completed, return to WPForms » Settings » Payments, and you should see a green checkmark next to Connection Status.

Tip
The webhook events should automatically configure when connecting your site to use Stripe. It will try the autoconfiguration several times in the background.
However, in some rare cases, the autoconfiguration may not work for your account. So, WPForms will then display fields to set it up manually.
We’ll now guide you through the steps to set up the Stripe webhook manually to start viewing all Stripe payment activities directly within WordPress.
Step 3: Enable Stripe Webhooks in Payments
You’ll need to make an endpoint in the Stripe dashboard and copy the setup keys to WPForms to set up the Stripe webhook manually.
Start by going to WPForms » Settings » Payments and moving the toggle to the ON position for Enable Webhooks under the Stripe label.
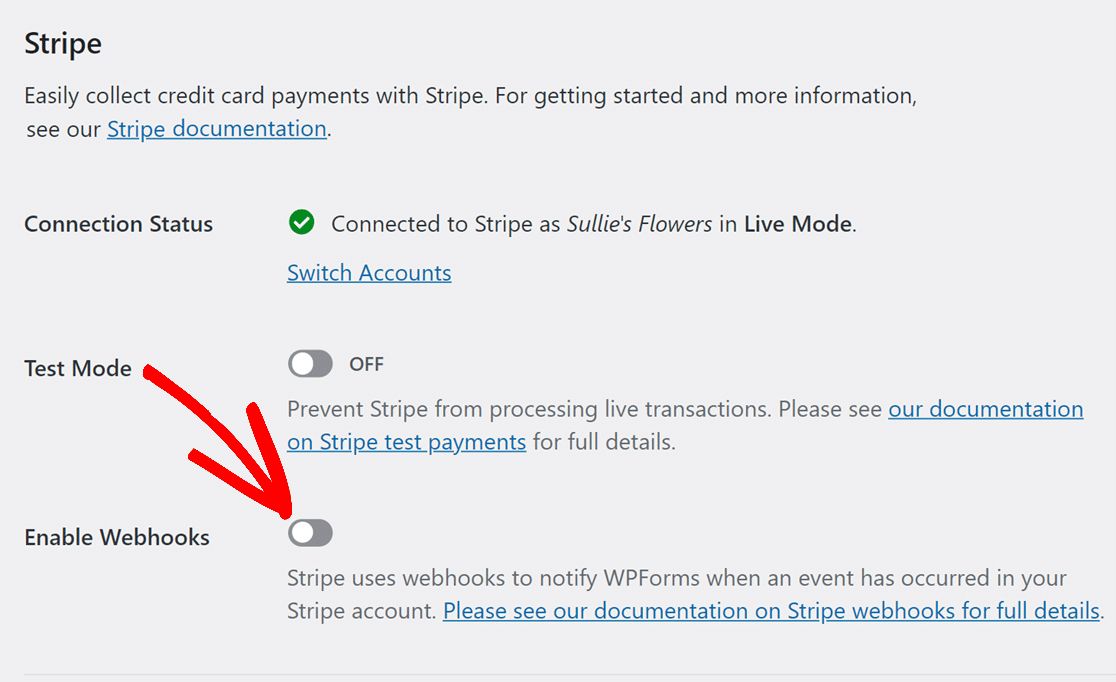
Next, click on Save Settings at the bottom of the page. Once the Payments screen reloads, you will see additional fields for the Stripe webhook configuration.
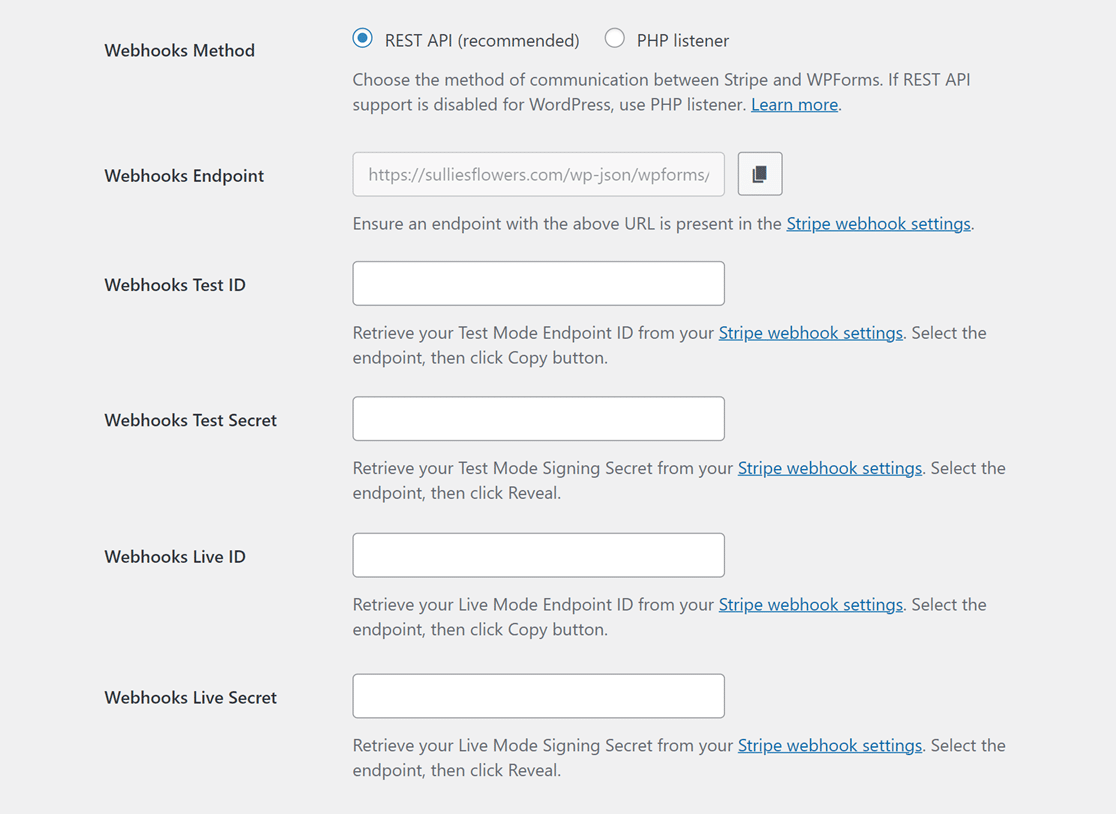
To manually set up the Stripe webhook, create an endpoint parameter in the Stripe account and transfer the configuration keys into WPForms.
Tip
Setting up the Live and Test modes require different configurations. For Test Mode, use the Webhooks Test ID and Webhooks Test Secret fields.
The Webhooks Live ID and Webhooks Live Secret fields, on the other hand, are for Live Mode. Ensure that your site’s mode fits how Stripe is set up.
You can then retry and switch between Live and Test synchronization modes by visiting*domain*/wp-admin/admin.php?page=wpforms-settings&view=payments&webhooks_settings.
Step 4: View Detailed Stripe Payment Information
Once the Stripe webhook has been configured and integrated with WPForms, you can view all your Stripe payments directly within the WordPress dashboard.
To do this, simply navigate to WPForms » Payments and click on the Overview tab. You’ll now be able to see the data you’re most interested in, such as:
- Total Payments
- Total Sales
- Total Refunded
- New Subscriptions
- Subscription Renewals
- Coupons Redeemed
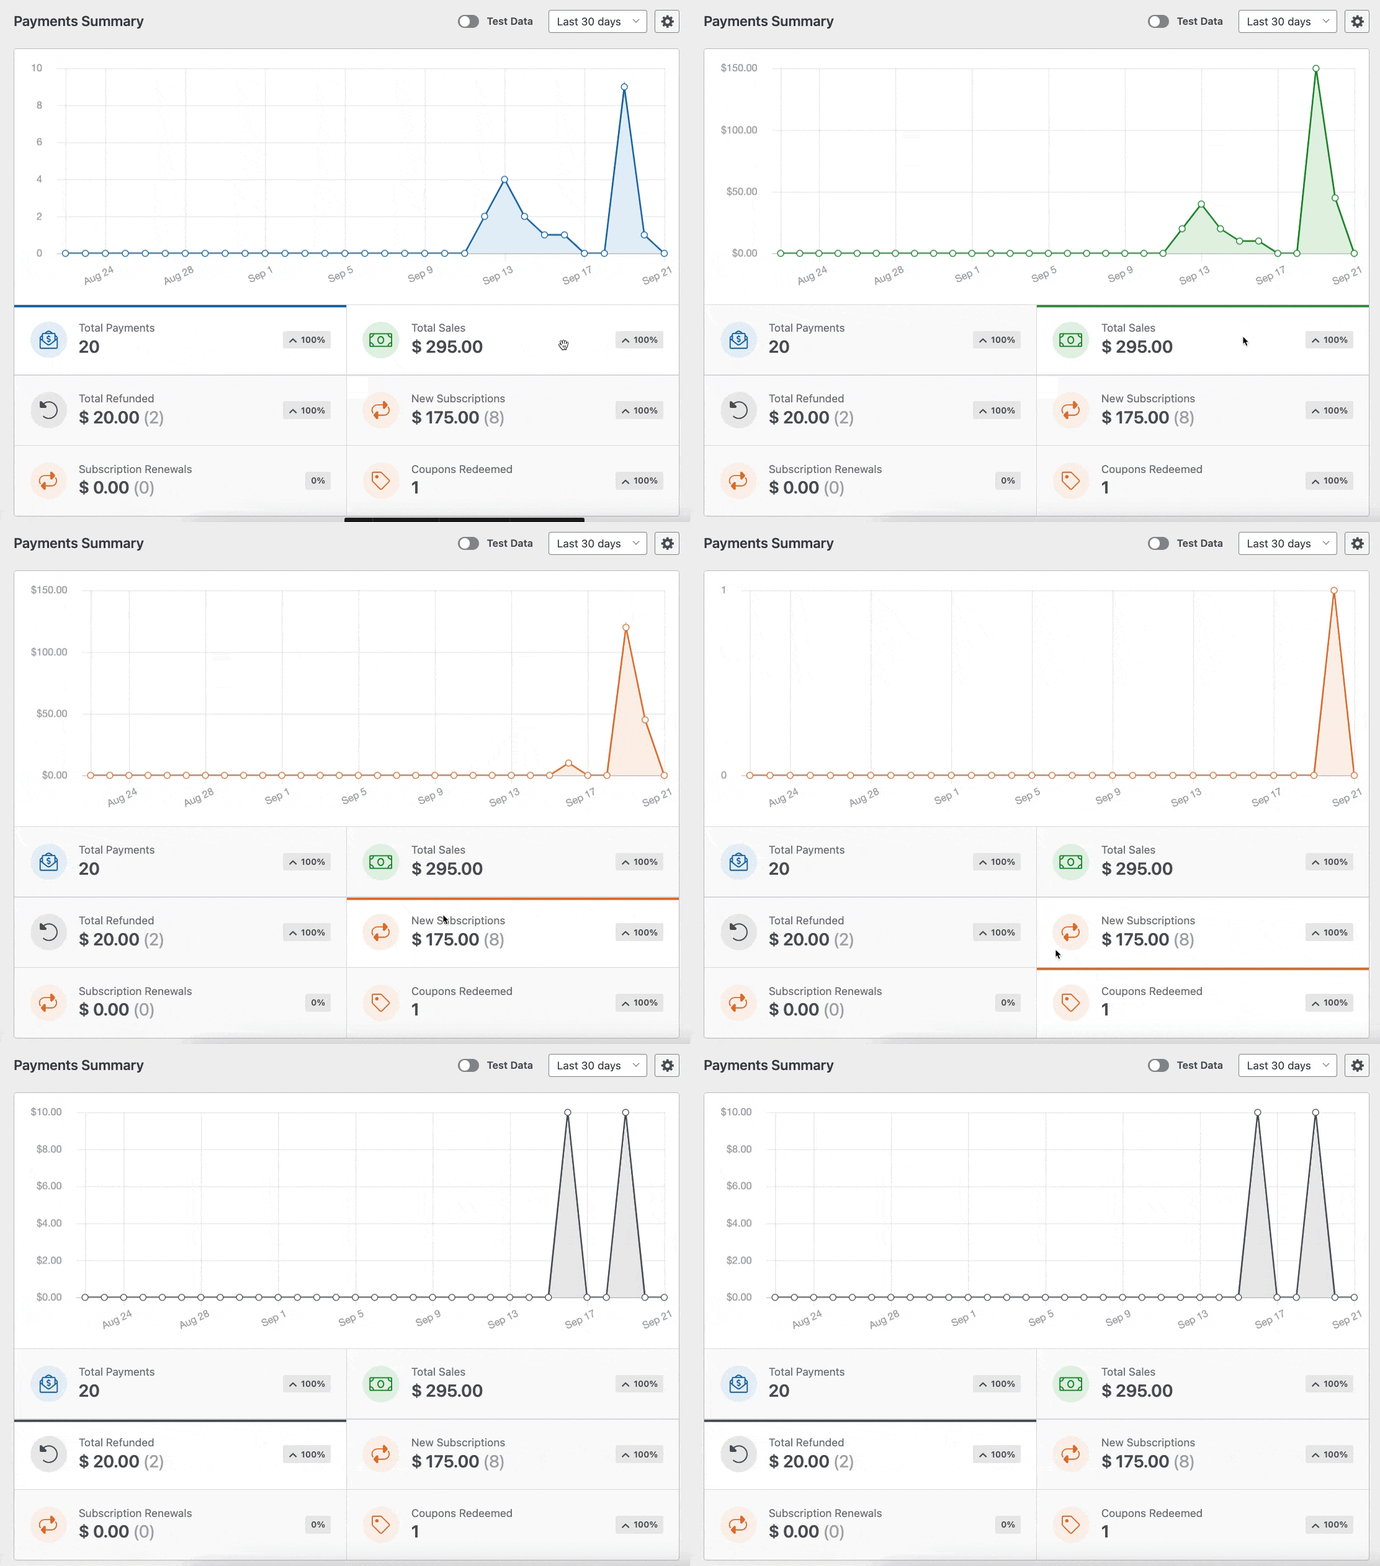
As shown above, if you want to view specific data related to your payments, just click on the available options below the graph.
You can also use the dropdowns at the top of the payments table to sort payments by different criteria. These filters include:
- All types: This covers both single-time and recurring payments (which are supported in WPForms Pro)
- All gateways: This refers to how the transaction was completed, with options being PayPal Standard, PayPal Commerce, Stripe, Square, or Authorize.net.
- All subscriptions: The current status of the payment, which may be one of the following: Active, Canceled, or Not Synced.

Tip
In WPForms, you can only use the All gateways filter if you have set up more than one payment method.
Step 5: Access Stripe Subscription Status Reports
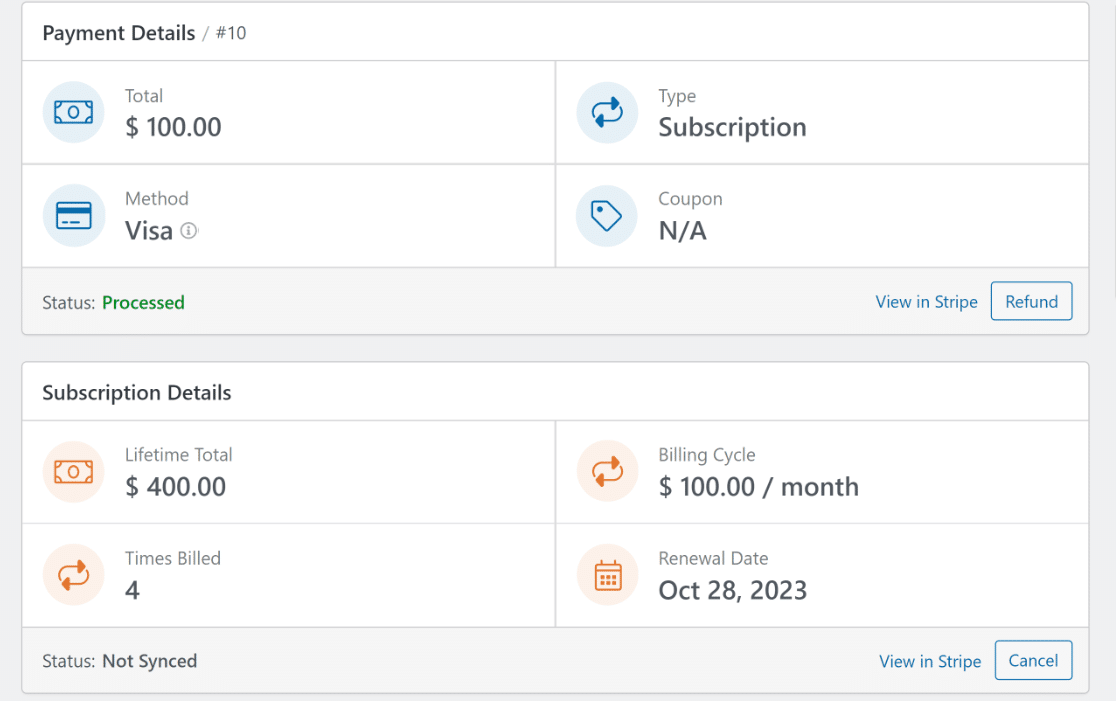
To view a subscription payment in greater detail, select the payer’s name or email address. This takes you to a detailed page of that specific subscription.

Now, it will be easy to take specific steps related to that subscription payment on its own page and access important information, including its:
- Lifetime Total
- Billing Cycle
- Times Billed
- Renewal Date
Scroll down to the Payment History area to see the exact dates and invoice items for a more in-depth look into the subscription lifecycle and price ID.

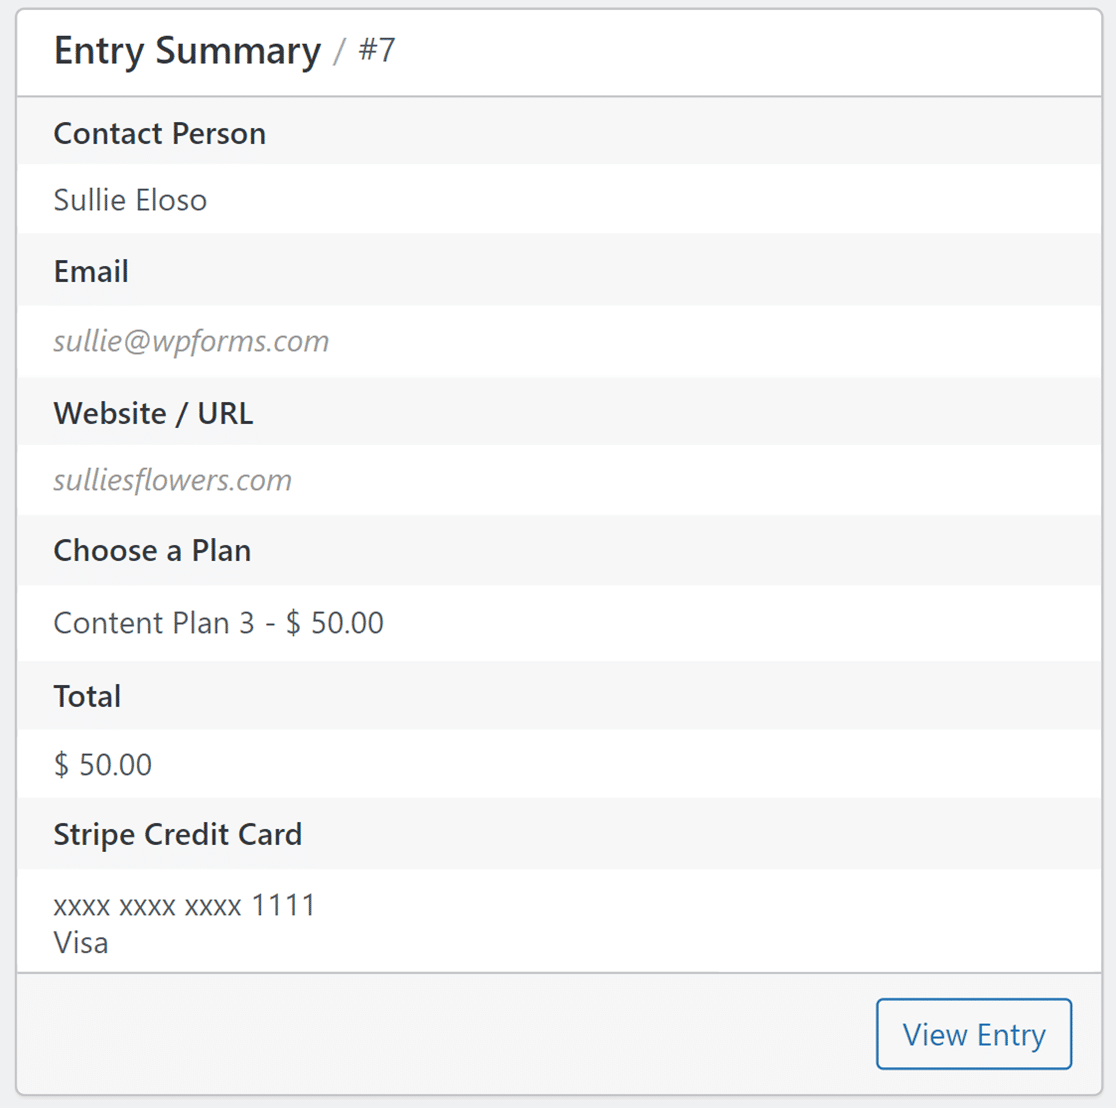
You’ll also find the Entry Summary section, which displays every field on the checkout page as well as the submission metadata associated with the credit card payment.
Click the View Entry icon in the lower-right corner to access the individual entry page for this particular form entry and obtain additional information.
Tip
The Entry Summary is accessible to all users. However, to fully examine the entry, the View Entry option is accessible only to users with a WPForms Basic license or higher.
Read our docs on Form Entries to learn more about using the individual entry page and seeing the details of each entry.
Refunds, Cancellations, and More
One of the best parts about the Stripe API integration and webhooks is that they allow you to perform different actions directly within the individual payment page.
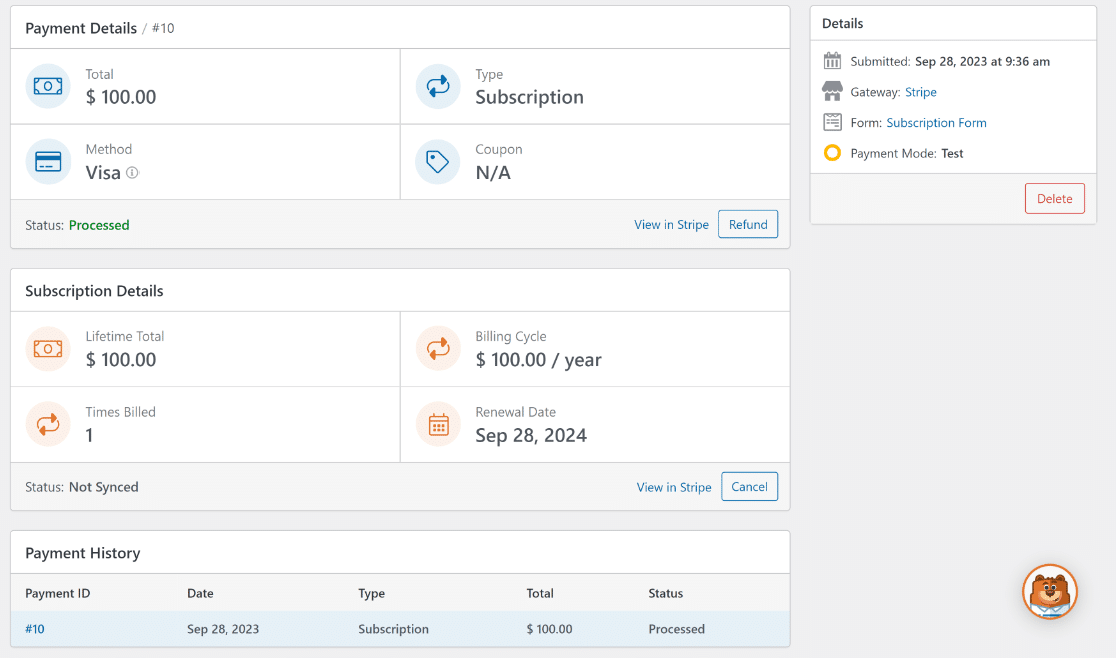
For instance, you can click on View in Stripe on the page for a certain payment if you want to see the payment information from the Stripe website.

Tip
If you’re using a different payment gateway, in the View in Stripe option, the text “Stripe” will change to the name of the payment gateway the user has made the payment from.
If you need to make a refund through Stripe, click the Refund button to begin the process right from within WordPress.

Likewise, if needed, you are provided with the option to permanently terminate a subscription. Just click on the Cancel button.

Once you click on the Refund or Cancel button, the payments table will be updated automatically to reflect the new entry and payment status.

And there you have it! Now, you’ll never have to leave your WordPress dashboard to manage upcoming invoices, subscriptions, cancellations, or refunds!
More Questions about Stripe Subscription Status
Viewing Stripe subscription invoice status in WordPress is a popular topic among our readers. Here are answers to some common queries.
How do I know if my Stripe subscription is active?
To check if a Stripe subscription is active, log into your Stripe dashboard and navigate to the ‘Subscriptions’ section. Active subscriptions are listed here.
Alternatively, you can access the subscription status reports directly from WordPress. Simply go to WPForms » Payments and click on the Overview tab.
From here, click on the New Subscriptions or Subscription Renewal options to view active subscriptions, or use a filter at the top of the payments table.
How do I see Cancelled subscriptions on Stripe?
Canceled subscriptions in Stripe can be viewed in the dashboard under Subscriptions, with a filter for Cancelled status.
WPForms’ Stripe integration can simplify this process if it’s your default payment method. Go to WPForms » Payments and click on the Overview tab.
Then, click on the All subscriptions dropdown filter and check the Cancelled box to view all Stripe subscriptions that have been canceled.
What does Stripe charge for subscriptions?
Stripe charges a 3% standard fee for subscription payments, typically a percentage of the transaction plus a fixed price. This can vary based on your country and specific Stripe plan or trial period.
If you are using an order form in WordPress created through WPForms to manage payments, you can avoid these extra charges by upgrading to a Pro License.
What is the difference between recurring payments and subscription payments?
Recurring payments refer to any repeated payment setup, while subscription payments are a type of recurring payment for ongoing permission and access to a product or service.
WPForms and its Stripe integration efficiently manages both, offering customization for various payment schedules and subscription changes.
However, in order to manage recurring payments and set up conditional logic, you’ll want to upgrade to WPForms Pro and use the Stripe Pro Addon.
How long does it take for Stripe payments to show up in my account?
Stripe payments typically appear in your account within a few days of the transaction, depending on your bank’s processing and finalization time, unless the payment fails, in which case, it will be labeled as “Cancelled.”
The WPForms Stripe integration offers real-time payment reports and notifications, helping you charge automatically and monitor transaction statuses instantly.
Next, Learn How to Make a Custom Online Calculator
Calculators prove to be an excellent way to generate additional leads for your business by capturing the email addresses of visitors. Check out our guide, where we’ll walk you through the steps of creating a custom calculator using WPForms!
View Stripe Subscription Status in WordPress
Ready to build your form? Get started today with the easiest WordPress form builder plugin. WPForms Pro includes lots of free templates and offers a 14-day money-back guarantee.
If this article helped you out, please follow us on Facebook and Twitter for more free WordPress tutorials and guides.

