


AI Summary
Are you exporting form entries manually? That gets old fast. Especially when you’re juggling orders, applications, or client inquiries every week.
With the WPForms Entry Automation addon, you can put your exports on autopilot. Whether you need to email reports, save backups to Google Drive, or delete old entries after processing them, this tool handles it all quietly in the background.
To automate your WPForms entry export, you’ll create an export task in the form builder under Settings » Entry Automation, pick a format and destination, and set a schedule. WPForms then runs the export for you automatically, daily, weekly, or monthly.
In this post, I’ll show you exactly how to set up automated exports step by step, including scheduled tasks and optional cleanup actions. Let’s go!
How to Automate Your WPForms Entry Export
Here’s everything we’ll cover. Feel free to jump straight to the step you need.
Step 1: Install the WPForms Elite Plugin
WPForms is the easiest way to build any kind of WordPress form and automate what happens after someone hits submit. You get 2,100+ form templates to start from, and the Entry Automation addon adds scheduled exports and cleanup tasks on top.
What I like most about WPForms here is that the automation lives right inside the form builder. You set up an export task once, and the report just shows up in your inbox (or your Dropbox) on schedule, without you touching the entries screen again.
You’ll need an Elite license to use the Entry Automation addon. It’s the top WPForms tier, and it also unlocks webhooks, premium CRM integrations like Salesforce and HubSpot, and multisite support.
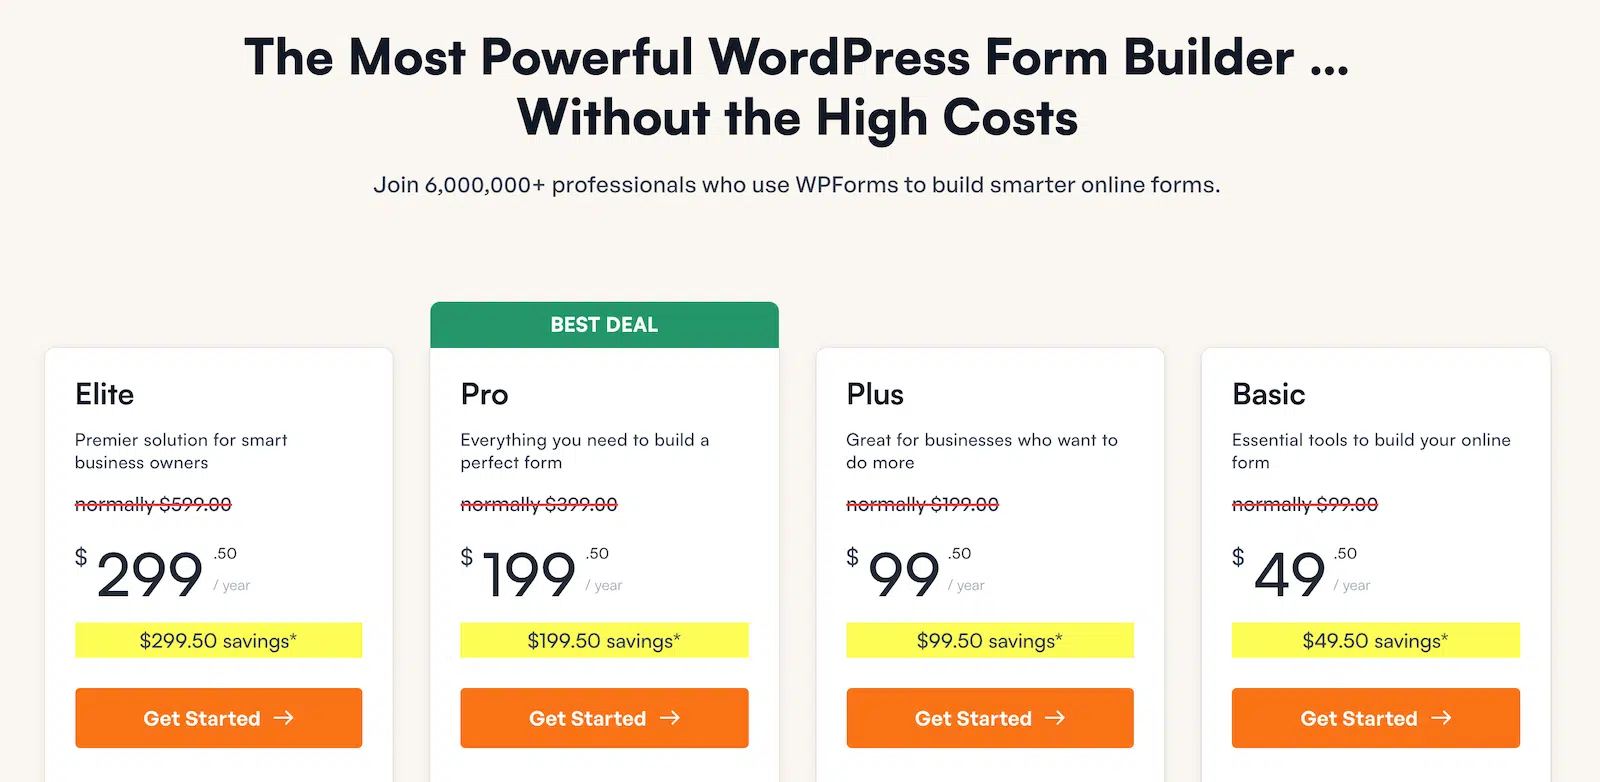
To get started, buy the Elite license. Then, install WPForms on your website. If you need help, follow these instructions on how to add a plugin to WordPress.
Step 2: Open the Form You Want to Automate
Start by opening the form you want to automate in the WPForms builder. If you haven’t installed the Entry Automation addon yet, activate it first under WPForms » Addons.
Now, within the form builder, go to the Settings tab and select Entry Automation. This is where you’ll manage all export and deletion tasks for this form.
Click Add New Task to get started.

💡 Just think of each task as a mini workflow. One form can have multiple tasks running on a schedule.
If you’re new to WPForms, here’s a quick guide on how to create your first form.
Step 3: Add Export to Email Task
After clicking Add New Task, you’ll be prompted to give your task a name, something like “Export Entries Email.”
Then click OK to move on.

You’ll then be presented with two task types to choose from:
- Export Entries
- Delete Entries
For now, choose Export Entries. (We’ll revisit these task options later.)

When you choose this task, additional settings appear where you can enter things like the form name, date, and more.
Here, you can either enter a name manually or use smart tags to generate the name field. Click on the Smart Tag icon to display a dropdown containing supported Tags you can use for the file name.

This helps keep your exports organized automatically, with no manual renaming needed.
Choose a Format and Destination
Now it’s time to decide what the exported file should look like and where it should go.
You can choose:
- Format: CSV (default), Excel, PDF, or JSON
- Destination: Email, Dropbox, Google Drive, or FTP
- Email field: Add one or more recipients (defaults to site admin)

The PDF option is a nice touch if you want WPForms to automatically export entries as polished reports. Think weekly lead summaries you can forward to a client without reformatting anything.
Keep in mind that you can add multiple email addresses, separated by commas. Smart Tags also work in the email field if you want to route reports to different people based on form context.
Step 4: Apply Filters (Optional)
You don’t have to export everything. WPForms lets you filter which entries are included, so you’re only pulling exactly what matters.
You can filter which entries get exported based on:
- Date range (e.g., past 7 days)
- Entry status (e.g., only completed)
- User agent (e.g., browser or device)
- New entries only (export only those submitted since the last run)

This is perfect for generating targeted exports like weekly sales reports or monthly newsletter signups. You can also limit form entries if you want to control how many submissions are accepted.
Step 5: Schedule the Export
Once your export is ready to go, you’ll need to tell WPForms when to run it.
So, choose:
- Frequency: Daily, Weekly, Monthly
- Specific days (e.g., every Monday)
- A start date, and optionally an end date
- The time of day the export should run

By default, tasks run at midnight, but feel free to adjust it to suit your workflow. That’s all it takes to put your entry export on a schedule it’ll follow without reminders.
Step 6: Add Redundancy with a Second Task
If your form entries are valuable (and let’s be real, of course they are), you’ll want to build in some backup.
So, you could create a second task to send the same export to a different location. For example:
- Task 1 → Email (CSV)
- Task 2 → Dropbox (PDF)
That way, if email fails or gets filtered, your data is still safe elsewhere. It’s a small step with a big safety net.

And when you add a second task, it’s automatically scheduled to run after the first. So there’s no need to guess or manually coordinate timing.
Step 7: (Optional) Add a Task to Delete Entries
Once your exports are safely delivered, you can set a final task to delete the entries from your WordPress site.
- Choose Delete Entries as the task type
- Set filters (if needed) and confirm the schedule

This helps keep your database clean and lightweight. It also means you’re not holding onto personal data longer than you need to, which your GDPR checklist will thank you for.
Step 8: Reorder Tasks with Drag Handles
Need to change the order later? No problem. Just drag and drop tasks to rearrange them.

This gives you more control over your automation logic without needing to rebuild anything.
Note: The first task (with the schedule) is locked in place to avoid accidental breakage. All following tasks can be reordered freely.
Step 9: Monitor Everything from the Automation Dashboard
So, which tasks are running where? WPForms includes a central automation dashboard that shows everything in one spot.
Just go to WPForms » Tools » Entry Automation to:
- See which forms have tasks running
- Review task types, schedules, and status
- Confirm if exports have run successfully

It’s the easiest way to keep your entry automation organized, especially if you’re using it across multiple forms. You can also view and manage form entries directly from your dashboard, and the full Entry Automation documentation covers every setting in detail.
And that’s it! Once your tasks are set, WPForms takes it from there. These automated exports help you stay on top of it all without the manual busywork.
From daily summaries to monthly cleanups, WPForms entry automation makes it easy to stay organized, accurate, and hands-off.
FAQ About Automatic Entry Export
Looking for something specific about automating your form entry exports? Take a peek at these frequently asked questions:
Can I export form entries to more than one place at once?
Yes. You can create multiple export tasks for the same form and send the data to different destinations, like email, Dropbox, and Google Drive, all at the same time or in sequence.
Will the exports include only new entries each time?
They can. Just select the “New Entries Since Last Export” option when setting up your task. This helps you avoid duplicates and only export what’s changed.
What happens if the export file already exists?
You can choose how WPForms handles that: overwrite the file, append new entries to it (for CSV and XLSX formats), or create a new file with an incremented name.
Can I test my connection before the automation runs?
Yes. For destinations like Dropbox, FTP, and Google Drive, WPForms includes a Test Connection button so you can make sure everything’s working before scheduling goes live.
What if I want to delete form entries after exporting them?
You can create a second task to automatically delete exported entries. Just choose “Delete Entries” as the task type and apply any filters or schedule settings you need.
What WPForms license do I need to automate entry exports?
You’ll need an Elite license, since the Entry Automation addon is exclusive to WPForms’ top tier. On other tiers, you can still export form entries manually as CSV or Excel files from the entries screen whenever you need them.
Can I automatically export WPForms entries as a PDF?
Yes. PDF is one of the four export formats, alongside CSV, Excel, and JSON. Choose PDF when you set up your export task, and WPForms will deliver a formatted PDF report to your chosen destination on schedule.
Next, Create a Google Drive Upload Form
Now that you know how to automate your form entries export, why not have the perfect form ready? Take a look at our tutorial on how to create Google Drive upload form to learn more.
And if this saved you some busywork, there are more ways WPForms can automate your business, from follow-up emails to lead routing.
Automate Your Entry Exports Now!
Ready to build your form? Get started today with the easiest WordPress form builder plugin. WPForms Pro includes lots of free templates and offers a 14-day money-back guarantee.
If this article helped you out, please follow us on Facebook and Twitter for more free WordPress tutorials and guides.





