AI Summary
Keywords and meta descriptions are key components of on-page search optimization.
Although Google and other search engines have evolved to become less dependent on keywords and meta descriptions when ranking content, they’re still important pieces of information.
With the correct usage of keywords and meta descriptions, search engines can better understand what your page is about improving the chances of ranking high for your targeted keywords.
However, adding meta descriptions and keywords in WordPress isn’t always straightforward without the right tools.
This guide will walk you through how to add keywords and meta descriptions in WordPress using the AIOSEO plugin.
How to Add Keywords and Meta Descriptions in WordPress
We will follow these steps to add keywords and meta descriptions in WordPress using the AIOSEO plugin.
Step 1: Install and Activate the All In One SEO Plugin
All In One SEO (AIOSEO) is a beginner-friendly plugin and recommends best practices to optimize your website content for search engines.
AIOSEO offers plenty of features that you need to optimize your WordPress site:
- SEO suggestion checklist gives you a list of actions to improve your SEO. You get suggestions on the title tag, meta description, canonical URL, and social media data.
- On-page analysis to help you optimize your content.
- The free version of AIOSEO includes essential features to help your website rank high on search engines.
- Powerful SEO health checker tool provides to-the-point on-page analysis.
- Dynamic tags for metadata. Simply use available tags to show the year, title separator, and website title.
- WooCommerce SEO tools help to create an optimized eCommerce site.
- .. and a lot more.
To know more about AIOSEO features, check out our full AIOSEO review.
In order to begin adding keywords and meta descriptions in WordPress, you’ll first need to install and activate the AIOSEO plugin.
If you want to learn how to install the AIOSEO plugin, check out this article on how to install a WordPress plugin.
Please note that we will use the premium version of the AIOSEO plugin as it offers more features. You can try out the free version too.
The free version allows you to add meta descriptions and a focus keyword but not additional keywords. To get suggestion for multiple relevant keywords, you’ll need to upgrade to AIOSEO Pro.
With the advanced features of AIOSEO Pro, it is easier to optimize posts and pages comprehensively.
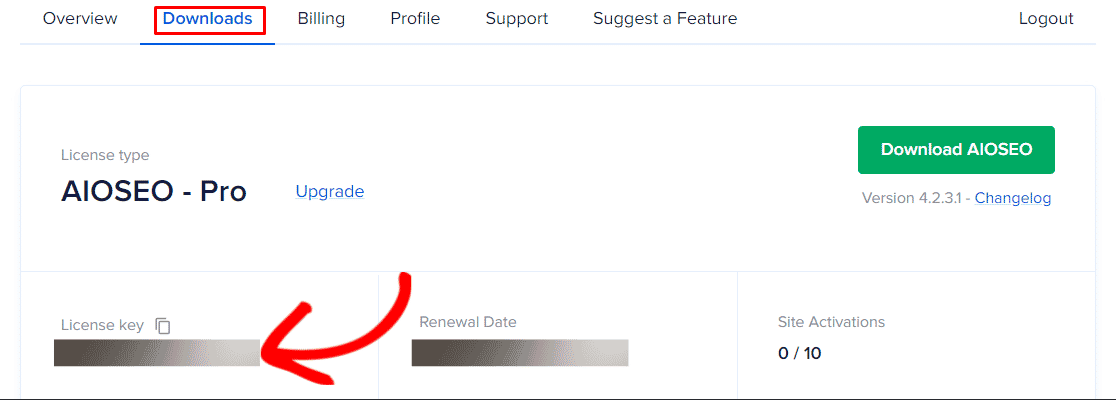
After purchasing an AIOSEO Pro license, you can download your copy of the AIOSEO plugin. To begin this process, go to the Downloads section of your AIOSEO account and click Download AIOSEO.
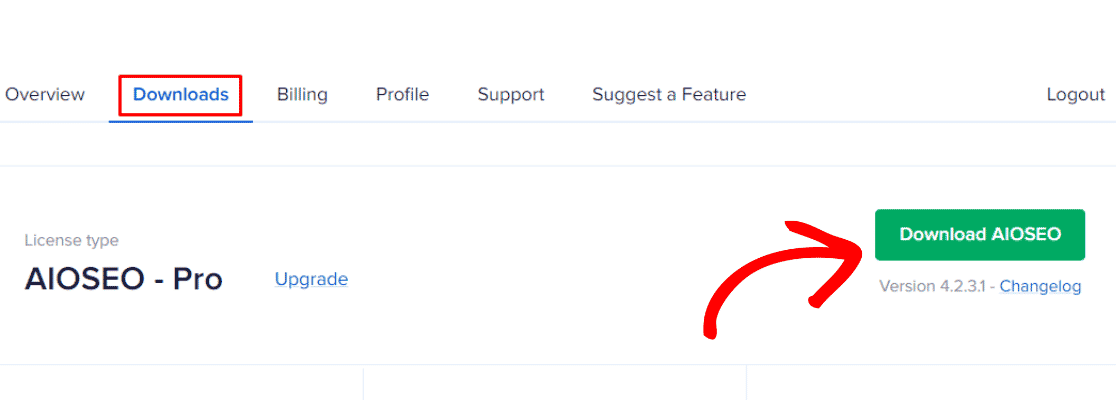
You’ll get a zip file of the plugin. Now, let’s head over to your WordPress dashboard.
After downloading the AIOSEO Pro plugin, you’ll need to install and activate it.
To install the plugin, go to Plugins » Add New in your WordPress dashboard and click on Upload Plugin.

Choose the zip file of the AIOSEO Pro plugin you downloaded from your AIOSEO account. Then, click on Install Now button to install the plugin on your site.
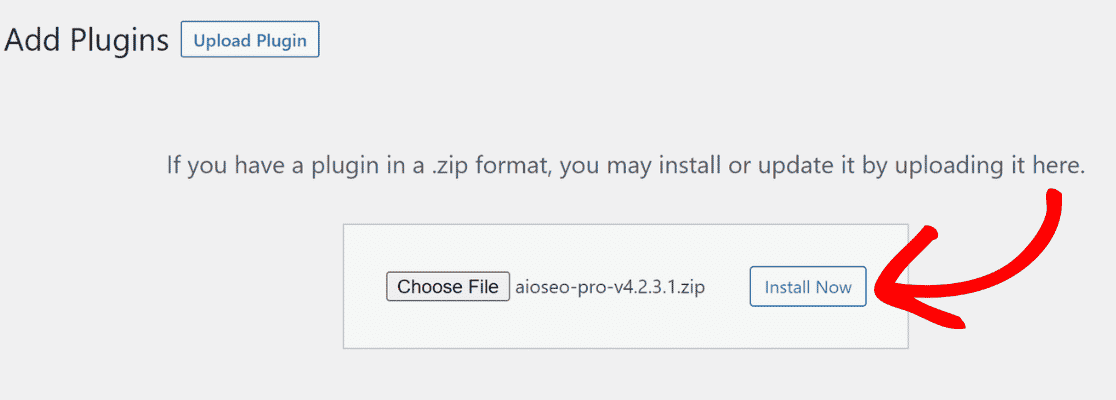
Once the file is uploaded, you need to activate the plugin.
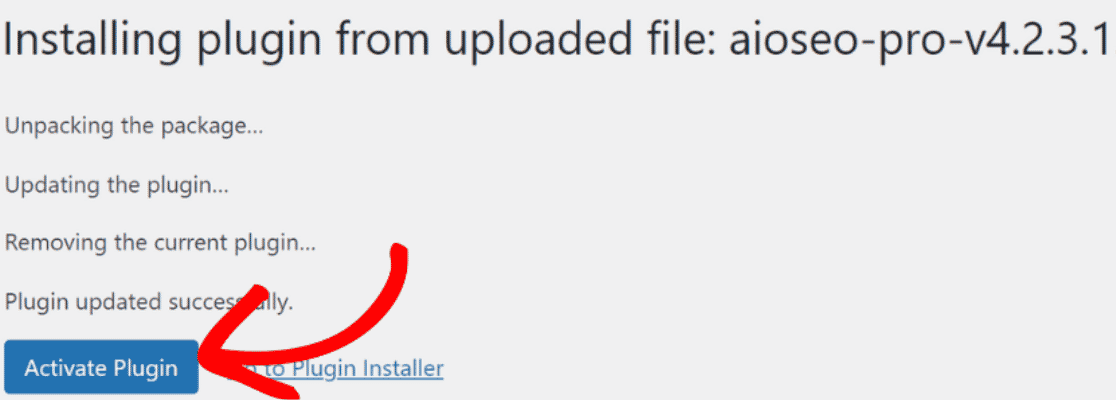
In the next step, activate the AIOSEO Pro account using your license key.
To get your license key, go to the downloads section of your AIOSEO account and copy the license key.
Go to All In One SEO» General Settings on your WordPress dashboard and paste the key in the License Key section.
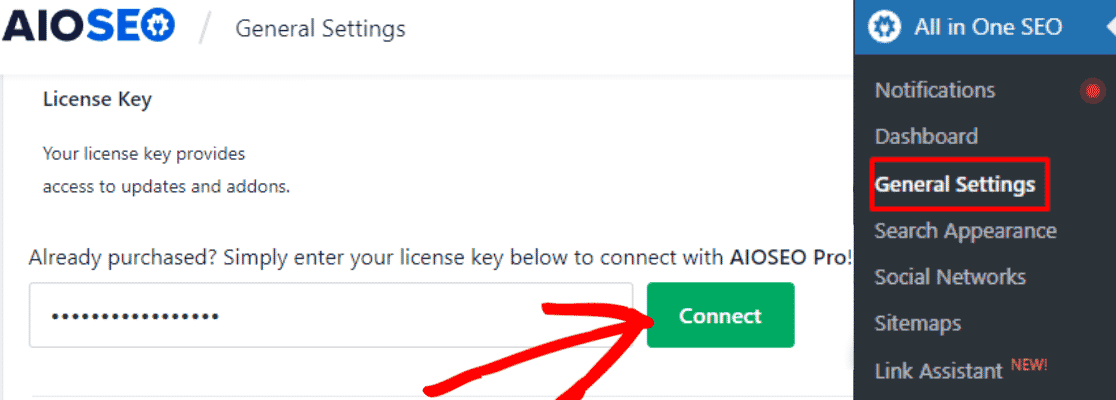
After you paste the license key, click on Connect to activate your AIOSEO Pro account.
Congrats! You have successfully installed and activated your AIOSEO Pro account.
Let’s move to the next step: adding meta descriptions and keywords to your WordPress posts and pages.
Step 2: Add Meta Description and Keywords to Your WordPress Posts and Pages
Start by going to the edit screen of your post or page, where you want to add keywords and meta descriptions.
Whether you use WordPress Block Editor or Classic Editor, AIOSEO works best for both.
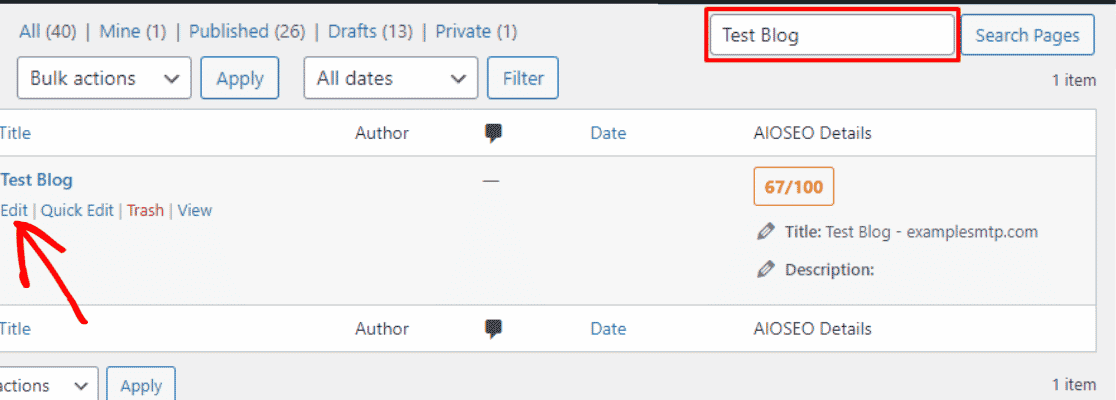
To go to the edit screen, look for Pages or Posts in your WordPress dashboard. Then, search for the post/page you want to edit and click on the edit option below the title of the post/page.
On your post/page edit screen, scroll down to the AIOSEO settings, where you will find SEO details of your page.
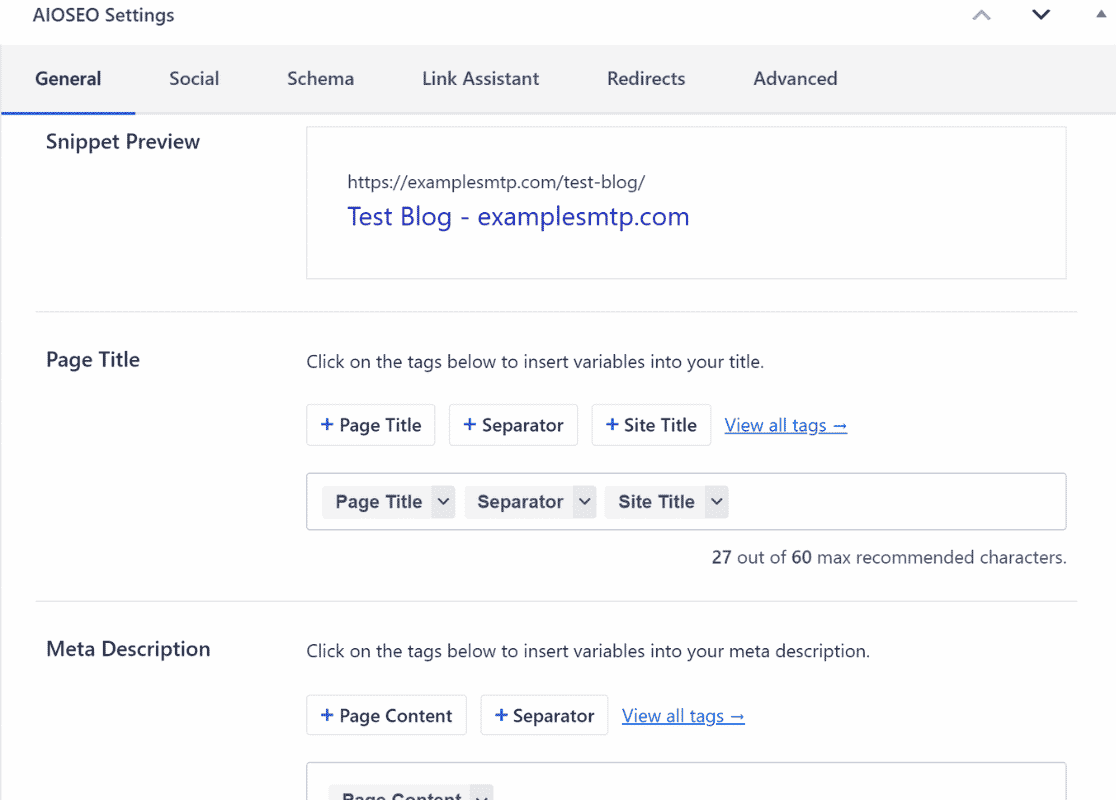
By default, AIOSEO adds your post content in the meta description. To manually add your meta description simply type into the text box.
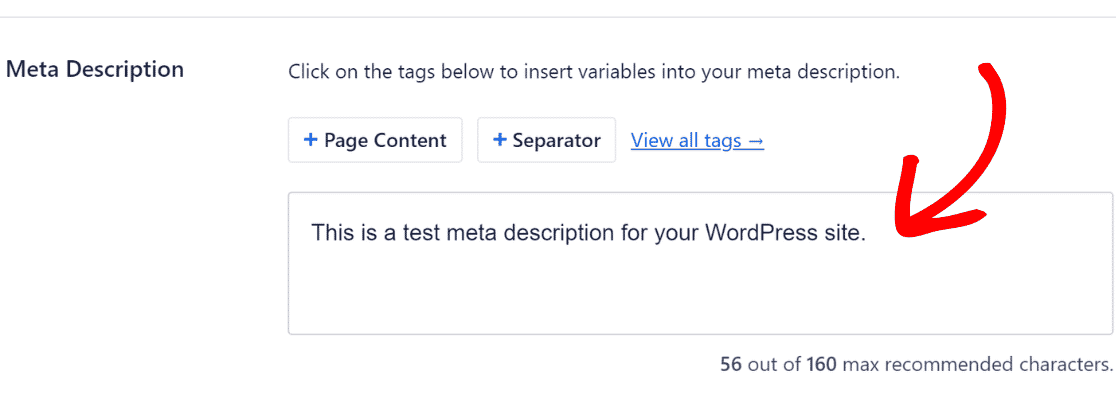
AIOSEO indicates the number of characters for your meta description along with the maximum recommended characters. This way, you can always write a perfectly optimized meta description that’s safely under the maximum limit.
If you want to make sure your meta description has the most impact, consider using a tool like SEOBoost’s content optimization feature. It provides AI-powered suggestions to help you make sure your keywords and meta descriptions are aligned to improve search engine visibility.
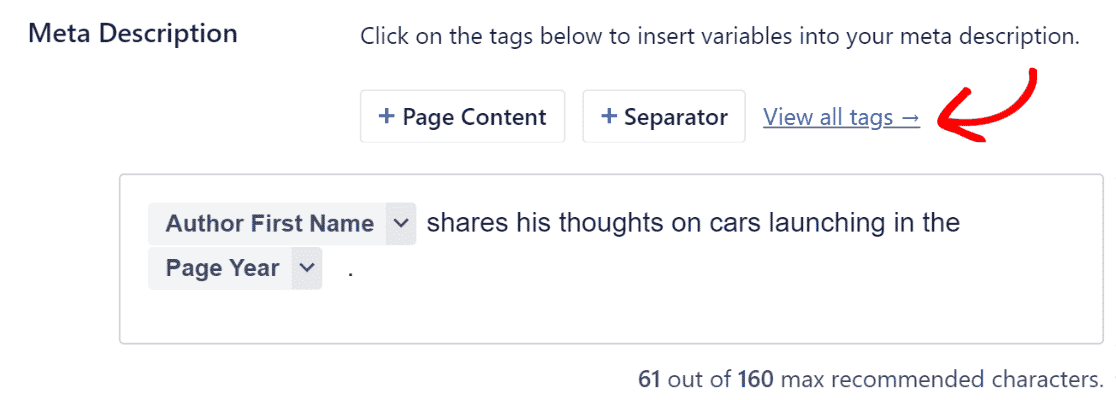
Another super awesome AIOSEO feature is that it lets you add dynamic tags to your titles and meta description. These tags can automatically plug in your Author Name, Current Date and Day, Page Title, and a lot more in your meta description without you having to manually enter these settings every time there’s a change.
To add dynamic tags to your meta description, click View All Tags and select the tag you want to add to your meta description.
Next, let’s add a focus keyphrase to your WordPress posts and pages.
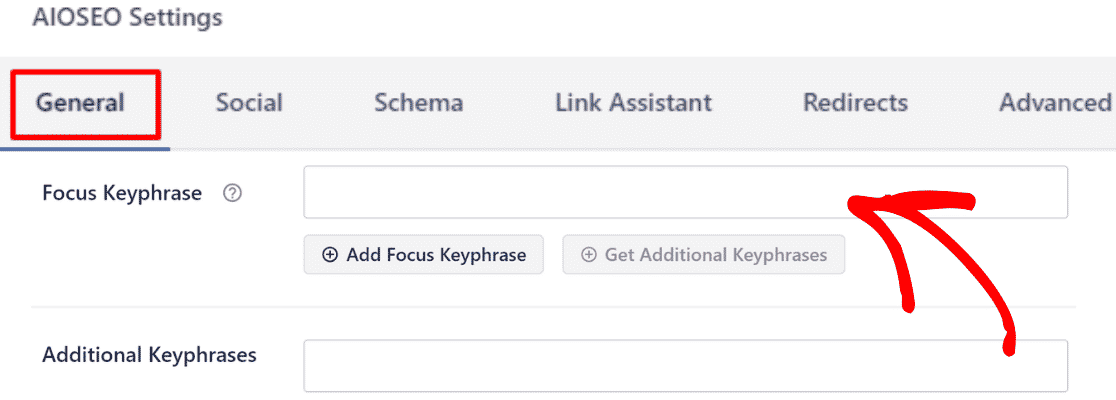
To optimize your content for a particular keyphrase, just scroll down to the bottom of your to find the General tab of AIOSEO Settings.
Enter your focus keyphrase in the text box and press the Add Focus Keyphrase button.
AIOSEO will now provide a list of suggestions for including your focus keyword in the most optimal way.
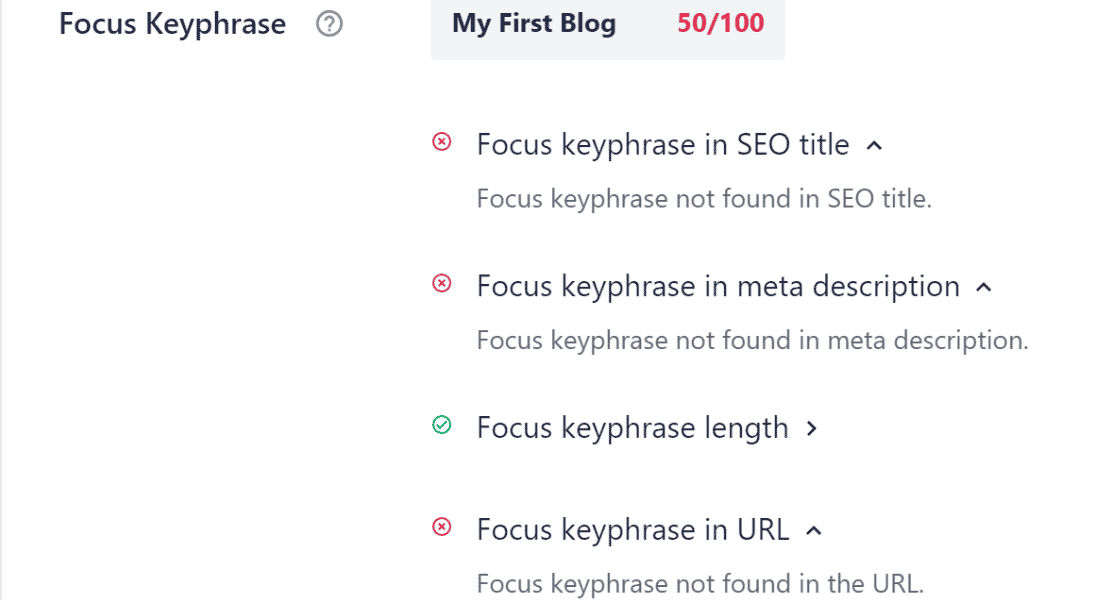
These suggestions are based on time-tested SEO best practices and play an important role in improving your keyword rankings. Whenever possible, you should aim to apply these suggestions (AIOSEO will mark suggestions with a green checkmark if you’ve already applied them).
Though your primary aim should be to produce helpful content for visitors, so it’s completely fine to avoid those suggestions which may not make the best sense in your scenario.
If you have AIOSEO Pro, you can even get additional keyword suggestions right within your WordPress dashboard by integrating your SEMRush account with AIOSEO.
Next, we’ll show you the steps for adding a meta description and keywords to your WordPress homepage with the All In One SEO plugin.
Step 3: Add Meta Description to Your WordPress Homepage
To add meta description and keyword to your homepage, go to All In One SEO » Search Appearance » Global Settings.
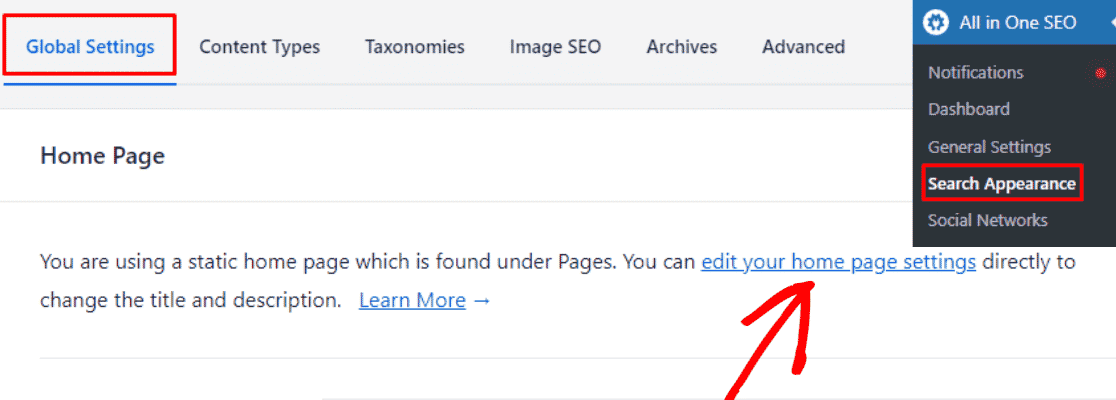
Scroll down to the Home Page section and click on edit your home page settings text highlighted on the screen.
Here, you can add your meta description in the General Settings menu.
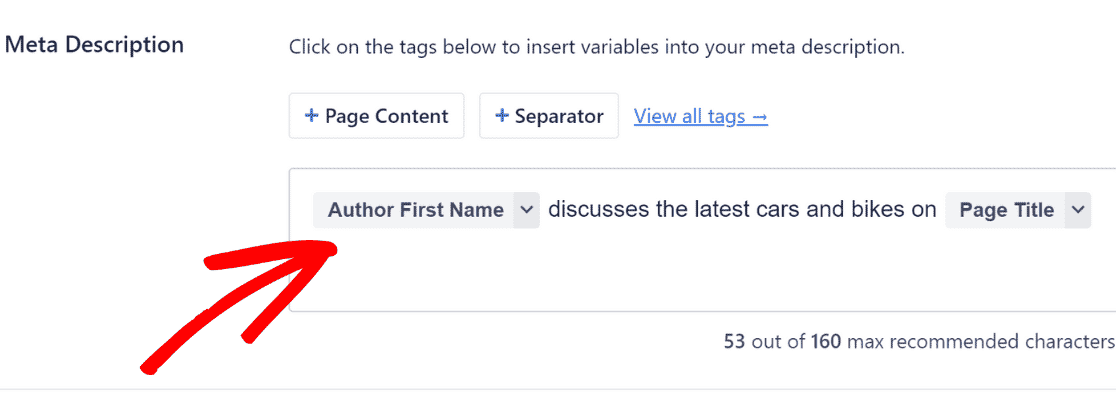
Again, similar to how you added meta description to a post/page, you can add dynamic tags in your meta description.
Congrats! You have successfully learned how to add keywords and descriptions in WordPress.
FAQs on Adding Keywords and Meta Descriptions in WordPress
Need to know more about using keywords and meta descriptions in WordPress? Take a look at some of the commonly asked questions below.
Are keywords important for SEO?
Yes, keywords are important for SEO. Good content and relevant keywords can help you organically grow your brand and reach a wider audience on Google and other search engines.
Smart keyword placement in your articles can play a big role in improving your rankings on SERPs. So it’s highly advisable to spend some time doing keyword research and incorporating relevant keywords wisely within your content.
What is the optimal length for a meta description in WordPress?
We recommend keeping your meta descriptions to around 120-150 characters. A description longer than 150 characters can get truncated depending on the user’s device, the total width of the characters in terms of pixels, and the nature of the search query. If you want to optimize for mobile, then you should aim for an even lower length (about 105 characters) at max.
Can I automate the process of adding meta descriptions in WordPress?
Yes, many WordPress plugins like AIOSEO allow you to use AI-generated meta descriptions for your posts. You just need to integrate AIOSEO with your ChatGPT account to access this feature. It’s a great way to speed up your meta description writing.
Can meta descriptions and keywords in WordPress improve my site’s click-through rate?
Absolutely. If the keywords you’re using in your post title and meta description accurately match the user intent, then people are much more likely to click through to your post. But make sure you’re writing user-first content, which means the keywords are there only to support your overall messaging rather than being stuffed aggressively throughout your meta description and content.
What are some common mistakes to avoid when adding keywords in WordPress?
Keyword stuffing is a common mistake that many sites make. The meta description is a small space and using too many keywords can make your text seem robotic and written for the search engines rather than addressing the user’s actual queries. This can really hurt your clickthrough rates. So always try to write helpful meta descriptions that accurately reflect the contents of your page.
Next, Improve Rankings With WordPress SEO
SEO requires a lot of guesswork and trial-and-error if you do it manually. The good thing is that there are some great SEO plugins for WordPress that can enhance your SEO game with minimal manual effort.
Ready to build your form? Get started today with the easiest WordPress form builder plugin. WPForms Pro includes lots of free templates and offers a 14-day money-back guarantee.
If this article helped you out, please follow us on Facebook and Twitter for more free WordPress tutorials and guides.

