Adding an Instagram feed to your WordPress site is a great way to showcase your latest posts, highlight customer experiences, or add some personality to your site.
It also presents an opportunity to attract more visitors and increase engagement on your WordPress site. Even better, it also helps you get more Instagram followers.
In this post, I’ll walk you through embedding an Instagram feed in WordPress, ensuring your feed looks great and functions perfectly on your website.
How to Embed an Instagram Feed on Your WordPress Site?
You can easily embed Instagram feeds on your website using the Instagram Feed Pro plugin from Smash Balloon. Follow the steps below to get started:
Step 1: Install and Activate the Instagram Feed Pro Plugin
Smash Balloon is the best social feeds plugin for WordPress. It comes with powerful plugin options that let you display:
- Custom Twitter Feed on your site
- YouTube channel on WordPress
- Customizable Facebook feeds on your website
- And Instagram feeds on WordPress
Talking about Instagram, Smash Balloon’s Instagram Feed plugin includes an extensive list of customization options that you can use to display completely customizable Instagram feeds on your website.
Most importantly, Instagram Feed Pro lets you embed an Instagram feed without registering as an app developer. This will save you a ton of time and hassle. Find out more in our full Smash Balloon review.
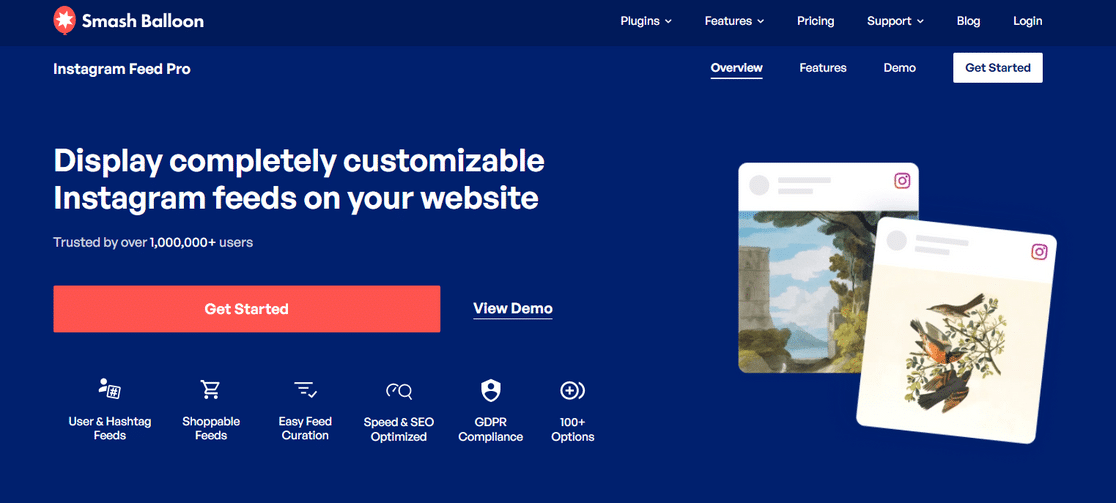
That said, we need to install and activate the Instagram Feed Pro plugin by Smash Balloon. You can get a copy of your plugin in the downloads section of your Smash Balloon account.
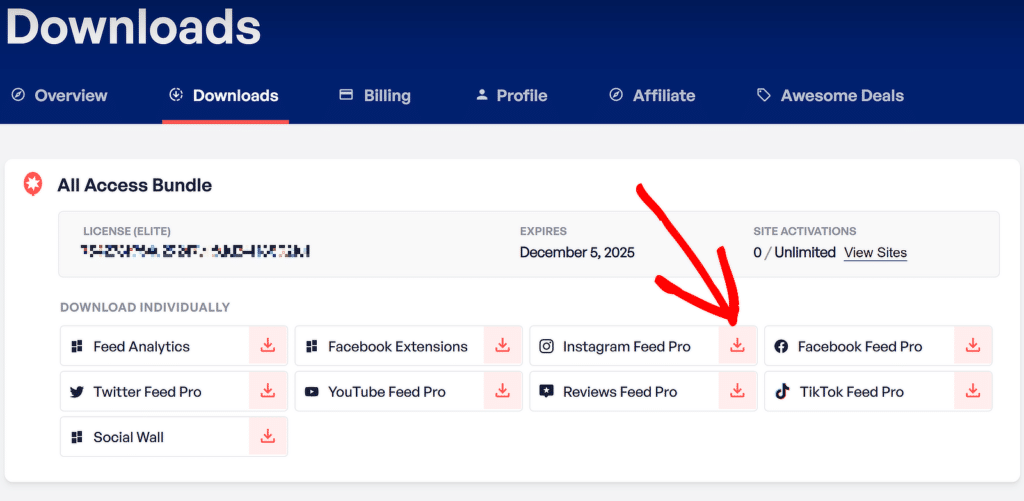
Once you download the zip file, it’s time to install the plugin. To do that, go to Plugins from your WordPress dashboard and then click on the Add New option.

On the next page, click on the Upload Plugin button and select the plugin’s zip file you downloaded earlier. After that, click Install Now to upload the file.

Once the installation is complete, don’t forget to click the Activate Plugin button to activate the Instagram Feed Pro Plugin on your WordPress site.
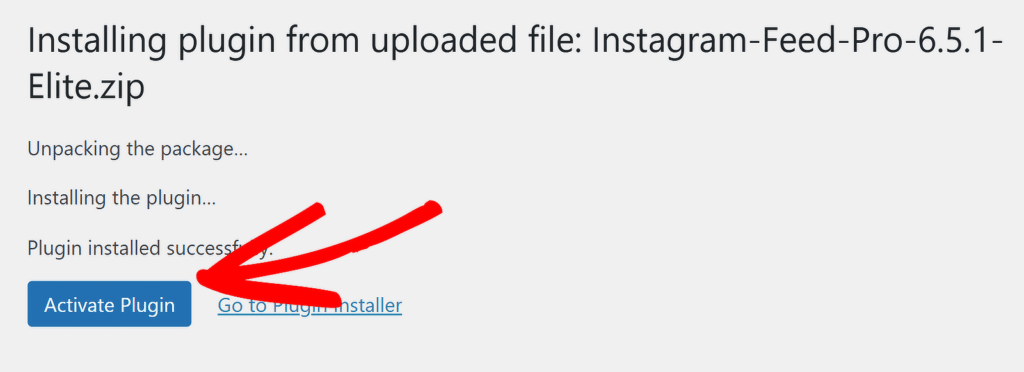
Fantastic! You’ve successfully installed and activated the Instagram Feed Pro plugin. It’s now time to connect your Instagram account to your WordPress website.
Step 2: Connect Your Instagram Account to WordPress
To connect your Instagram account to your site, navigate to Instagram Feed » Settings. Then, click on the + Add Source option under Manage Sources.
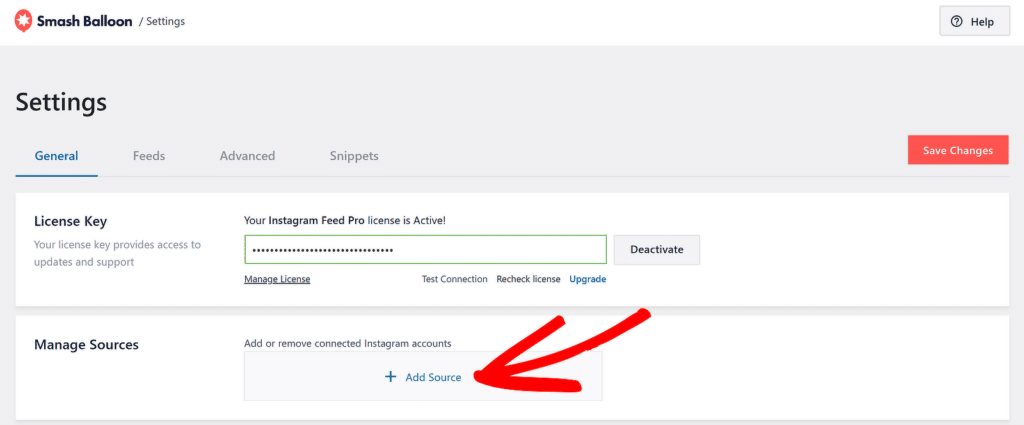
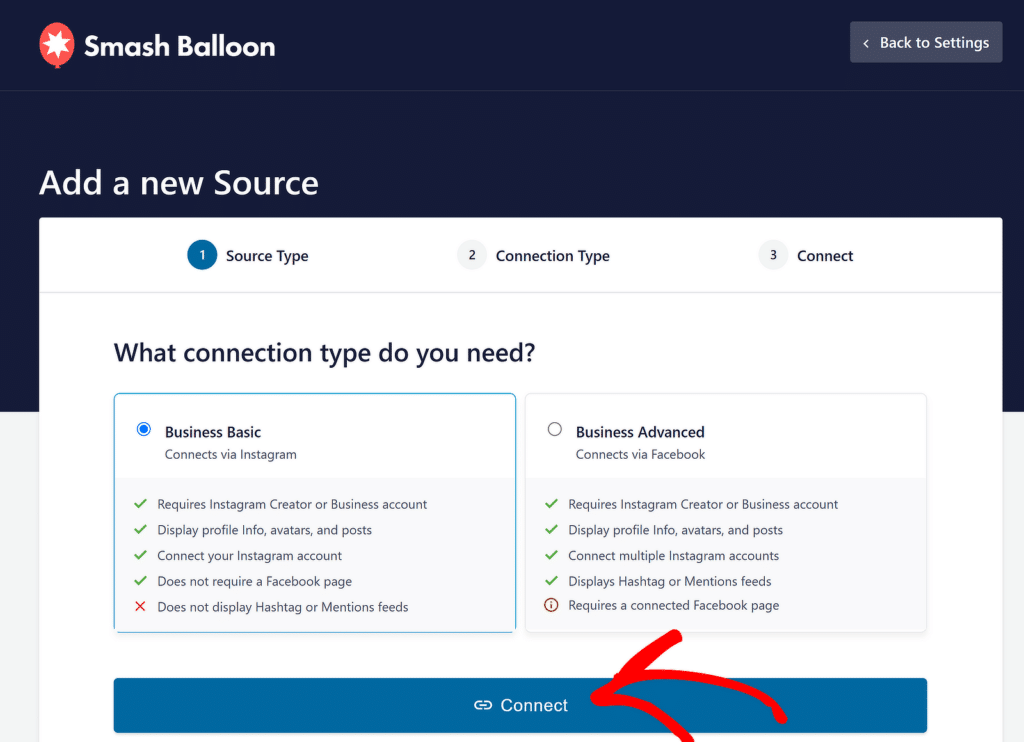
A pop-up box will appear, asking you to choose the type of connection you need. Basically, you will be presented with two options for connecting your account:
- Business Basic: With this option, you can showcase posts directly from your Instagram account only.
- Business Advanced: This option connects to your Instagram account via Facebook.
Once you choose your option, click on the Connect button.
This will redirect you to the next screen of the verification process. From here, confirm your account and click the Connect with Instagram button.
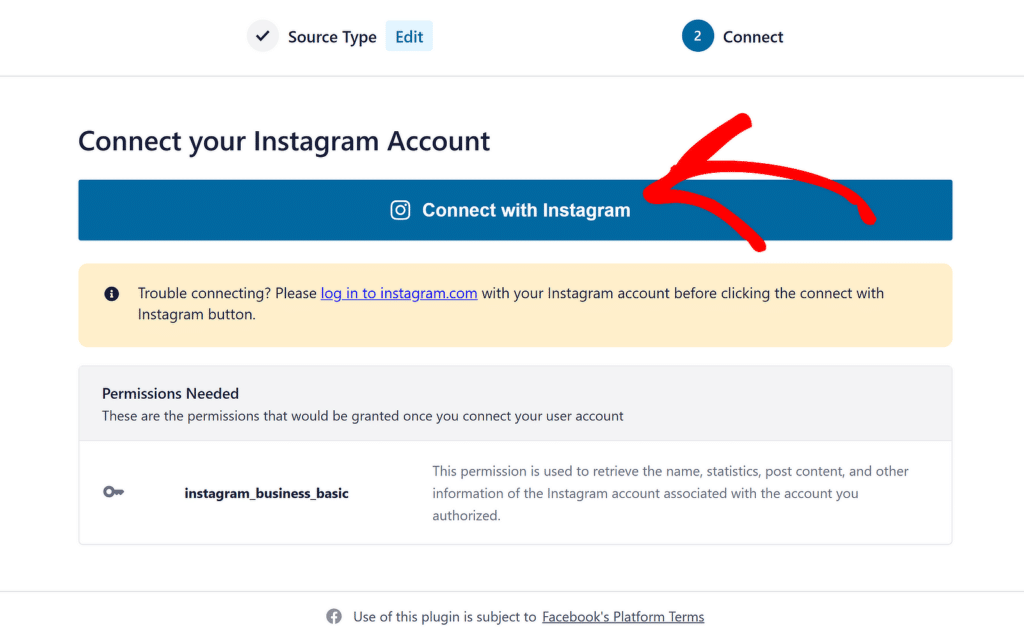
Enter your login credentials to connect Instagram to your WordPress website. Now let’s see the content display options you get with the Instagram Feed Pro plugin.
Step 3: Choose the Instagram Content to Display
The Instagram Feed Pro plugin gives you complete control over how Instagram content is displayed. Navigate to Instagram Feed » All Feeds and click on the Add New button.
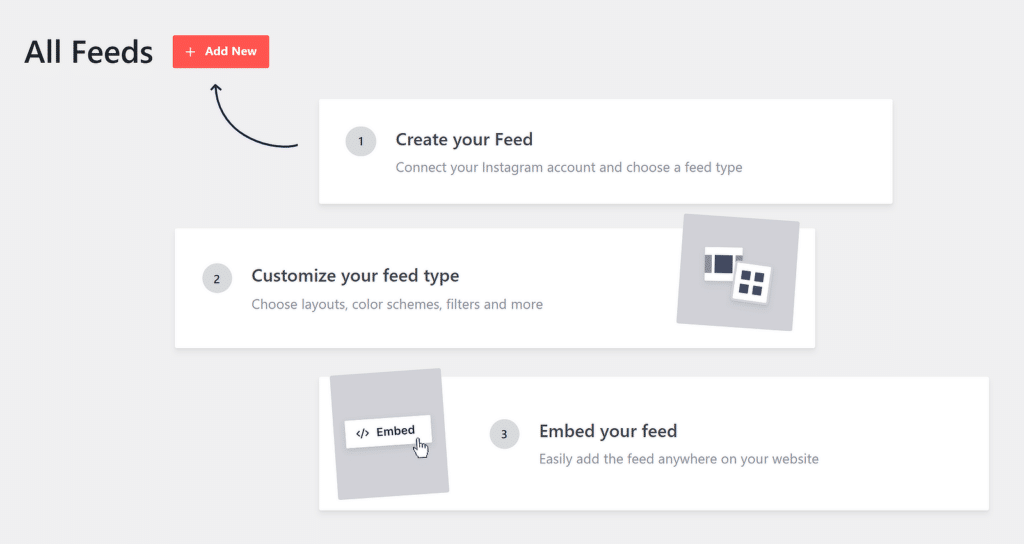
You can now choose what Instagram content you want to display. You’ll find the following options:
- User Account: display the latest photos from your Instagram user account.
- Hashtag: display your Instagram feed with custom hashtags.
- Tagged: display photos you’re tagged in by other users.
- Social wall: display a feed containing multiple feed types.
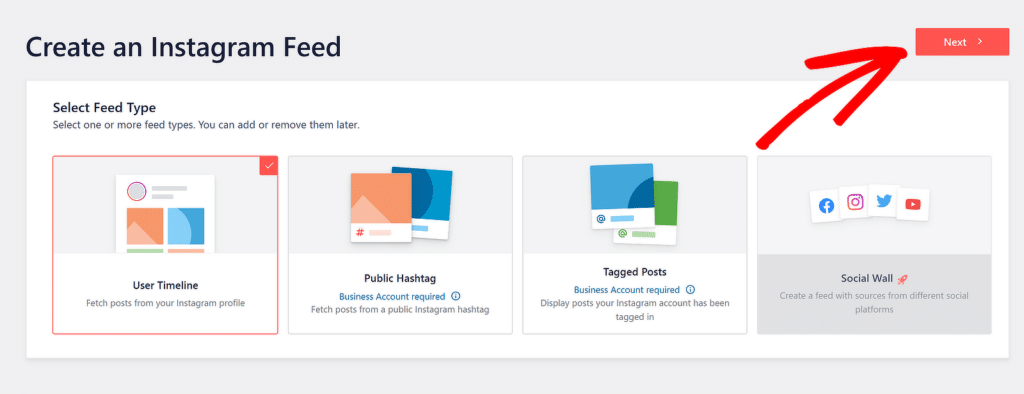
Once you select your display option, click on the Next button to proceed with customizing your feed type.
Step 4: Customize Your Instagram Feed
The first is the general customization settings; from here, you can change the background color, width, and height of your Instagram feed.
The Instagram Feed Pro plugin offers stylish layout options to display Instagram feeds on your website. You can choose from the Grid, Masonry, Carousel, and Highlight layouts.
Let’s see how each layout looks like:
1. Grid layout

2. Carousel layout

3. Masonry layout

4. Highlight layout

Including these, you also get additional options to:
- define the number of photos to show
- show/hide the header
- change header color and size
- show/hide the number of followers
- show/hide your Instagram bio
- customize the Load More and Follow button.
Once done with all the customizations, click on the Save button and proceed to the next step.
Step 5: Showcase Your Instagram Feed
Now let’s see how you can embed your Instagram feed on WordPress.
Smash Balloon works smoothly with the new WordPress block editor. You can add your Instagram feed in multiple locations, including blog posts, pages, and sidebar widget areas.
Let’s check out the post/page embed option. Open the page or post, click on the “+” icon and add the Instagram Feed block from the block editor.
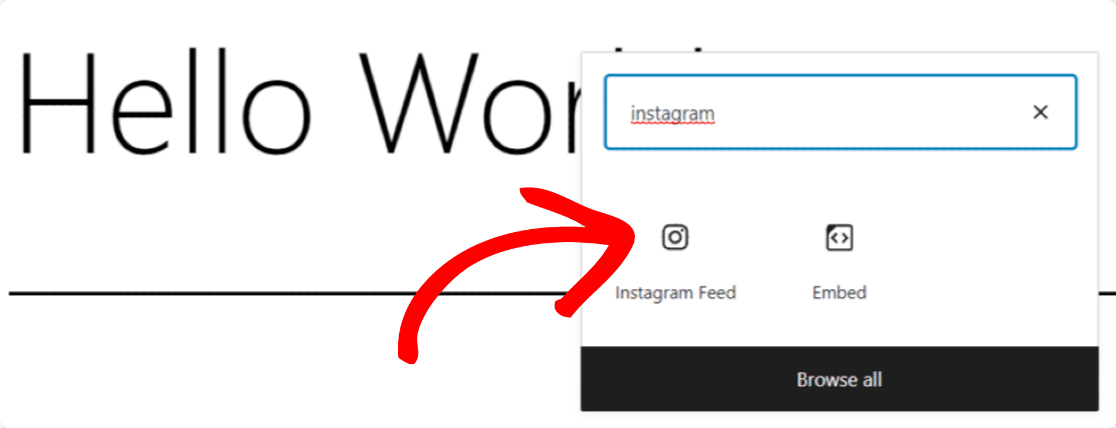
As soon as you add the block, your feed will appear on your page.

Publish the page and enjoy the Instagram live feed on your WordPress website And there you’ve it! This is how easy it is to embed an Instagram feed on your WordPress site in just 5 simple steps.
FAQs — How to Embed Instagram Feed in WordPress
Embedding an Instagram feed in WordPress is a popular topic of interest among our readers. Here are answers to some common queries about it:
How do I add Instagram feed to WordPress without login?
To add an Instagram feed to WordPress without logging in, you can use plugins like Smash Balloon.
These plugins allow you to display public Instagram posts without requiring your account credentials.
Simply install the plugin, configure the feed using public hashtags or user IDs, and embed it on your site.
How do I add an Instagram slider to WordPress?
You can add an Instagram slider to WordPress by using plugins like 10Web Social Photo Feed or Smash Balloon. These plugins let you create a customizable slider from your Instagram posts.
Once installed, set the display format to “slider,” adjust the settings, and use a shortcode to embed the slider on your page or widget.
How do I add an Instagram button to WordPress?
To add an Instagram button to WordPress, use a block editor or a widget. Insert a button block or widget, and link it to your Instagram profile.
You can also use social media plugins like Social Icons Widget for a professionally styled Instagram button that matches your site’s design.
Next, Check Impressive User-Generated Content Examples
After displaying the Instagram feed, next, you might be interested in checking the examples of user-generated content that you can display on your website to save time and grow your business.
Also, if you’ve added contact forms to your website, you must check out this post to stop contact form spam on WordPress.
Create Your Wordpress Form Now
Ready to build your form? Get started today with the easiest WordPress form builder plugin. WPForms Pro includes lots of free templates and offers a 14-day money-back guarantee.
If this article helped you out, please follow us on Facebook and Twitter for more free WordPress tutorials and guides.

