Many sites are guilty of treating their forms only as a data collection method.
Sure, that’s the practical purpose of a form, but your visitors see things differently. To them, your form is the first point of interaction and a means of communication between the visitor and you.
In other words, it’s your opportunity to engage the visitor by asking questions in your form in a layout that flows like a real conversation.
Conversational forms are designed to offer a personalized and engaging form-filling experience, mimicking an actual conversation that feels natural to the visitor.
In this post, I’ll walk you through the steps to create a conversational contact form in WordPress.
Create Your Conversational Contact Form Now
How to Create a Conversational Contact Form
In This Article
Step 1: Install WPForms
The easiest way to create a conversational contact form in WordPress is by using the WPForms plugin, which is the best Typeform alternative you can use for your site.
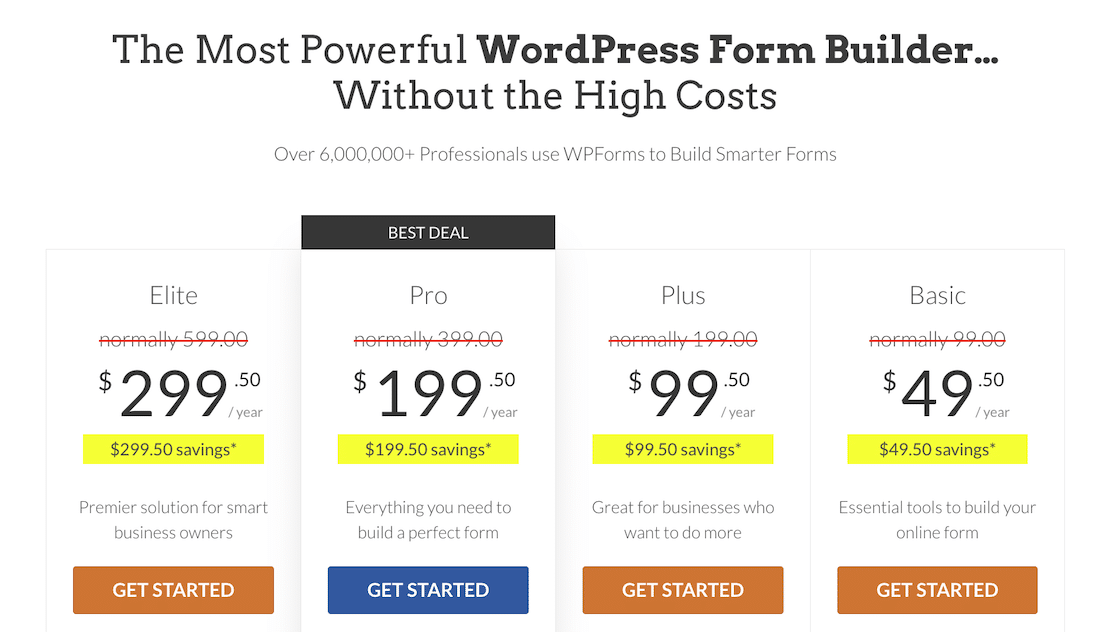
With a WPForms Pro license, you can access the Conversational Forms addon while also unlocking a bunch of conversion-boosting features like Lead Forms, Save and Resume, Form Abandonment (partial entry capture), and more.
If you haven’t installed a WordPress plugin before, don’t worry! This setup guide will help you install WPForms on your site without a sweat.
With the plugin now installed and ready to use, it’s time to create a custom contact form.
Step 2: Create a Contact Form
From your WordPress admin menu, go to WPForms » Add New.
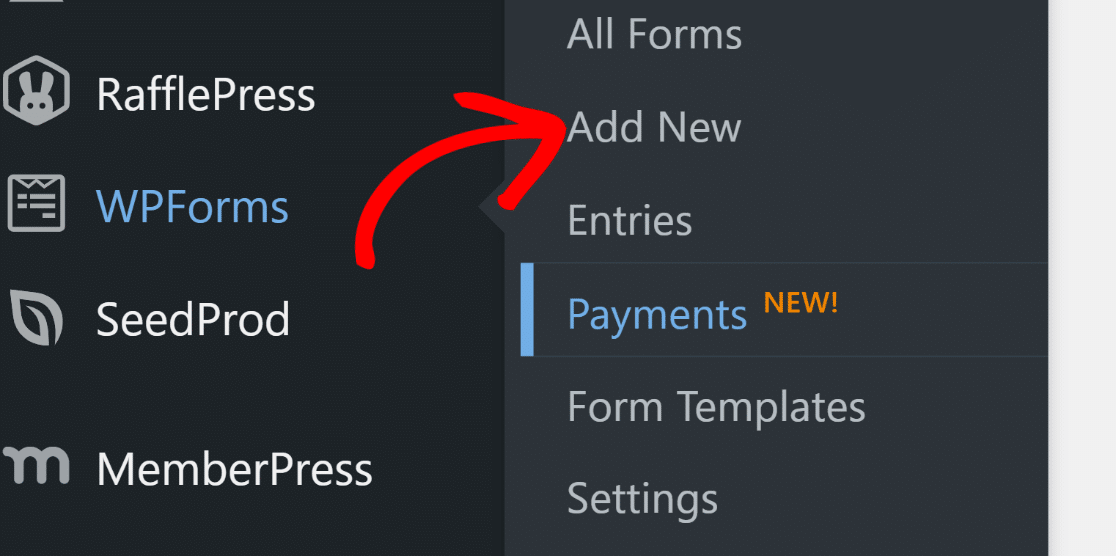
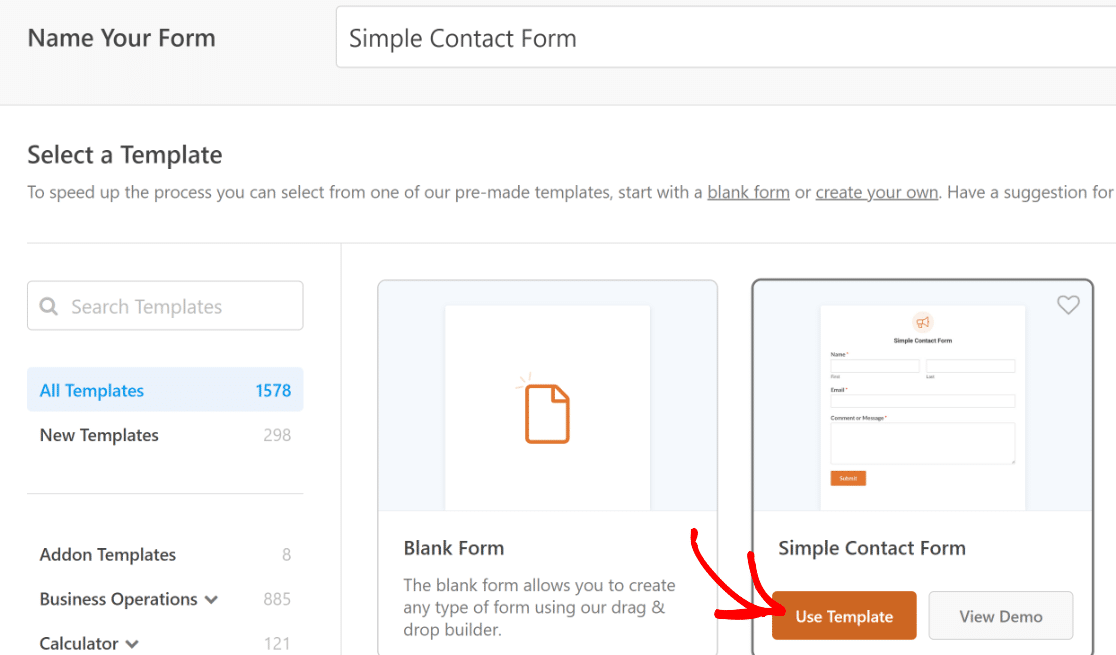
This will open the form setup screen, where you can name your form and select a template to get started instantly.
WPForms has 2,000+ form templates to choose from, but the simple contact form template would be ideal for our current scenario.
You can select a template by simply hovering your cursor over it and then clicking the Use Template button.
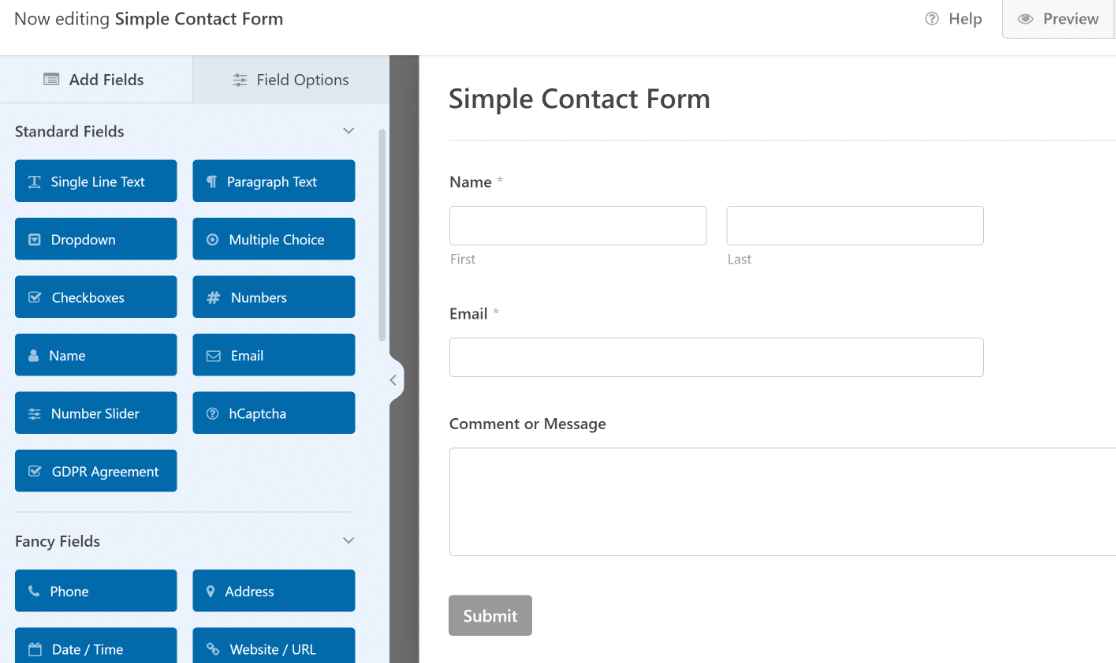
WPForms will now automatically generate a simple contact form for you. The form includes only three fields to keep it as simple as possible: Name, Email, and Comment or Message.
Pretty cool, right?
The template is fully customizable, so you can add new fields or change the labels or settings of existing ones using the easy drag-and-drop editor.
When you’ve finalized your form, proceed to the next step.
Step 3: Enable Conversational Forms Mode
In order to turn your form into a conversational form, you’ll first need the Conversational Forms addon.
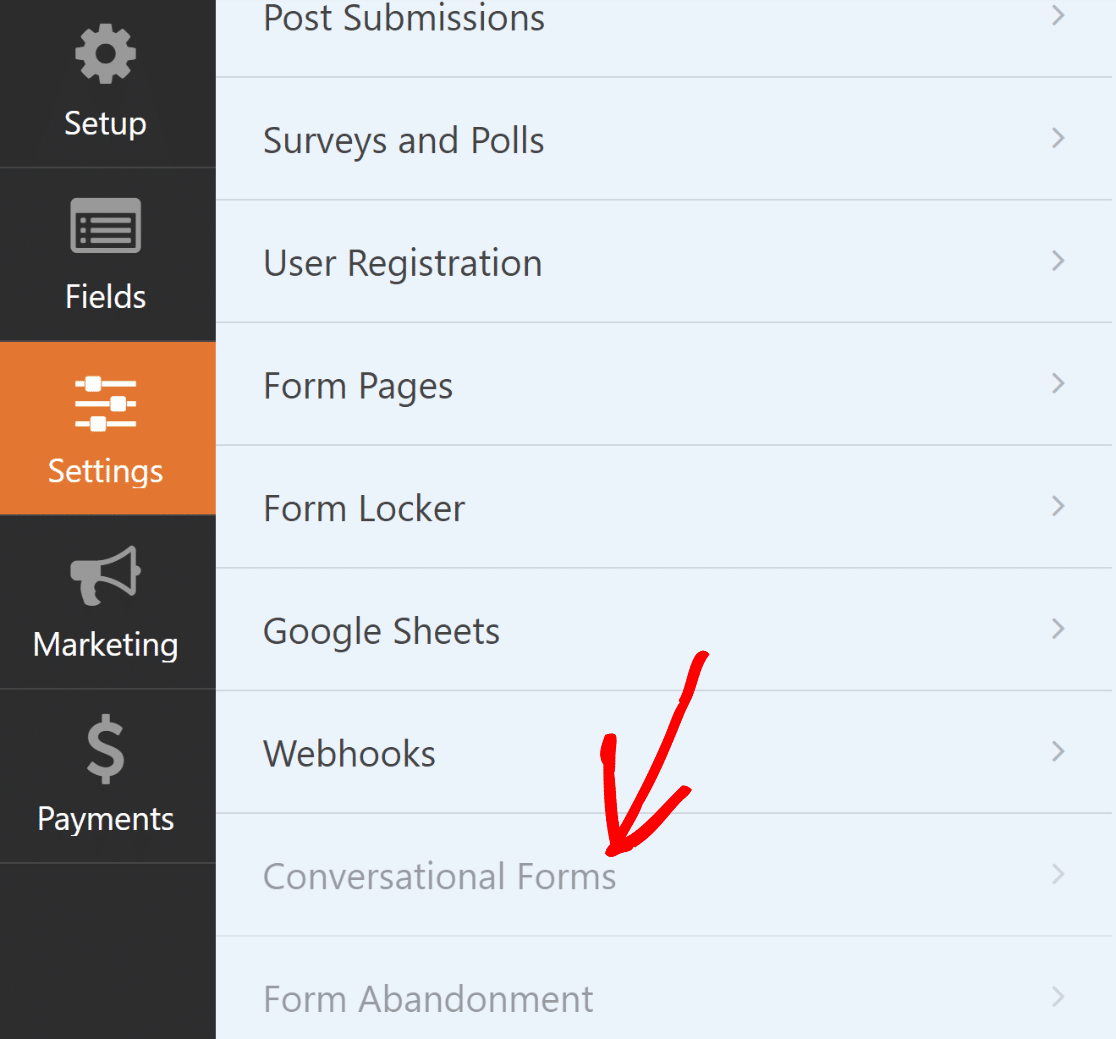
You can install the addon by going to the Settings tab in the form builder and then clicking on Conversational Forms from the list.
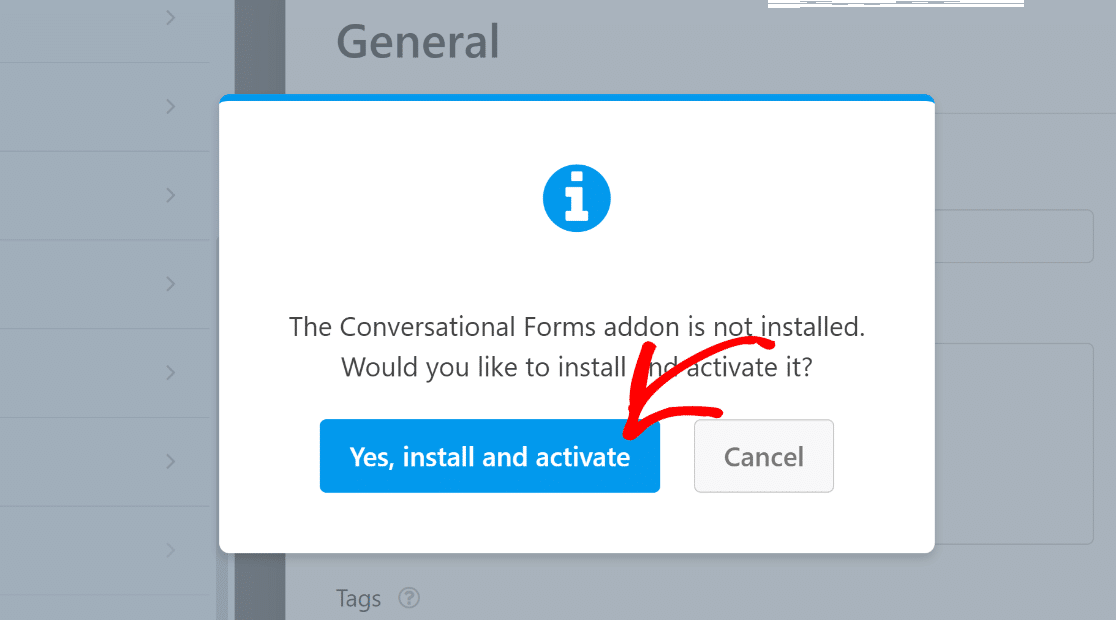
After that, a prompt will appear asking if you’d like to install the Conversational Forms addon. Press the Yes, Install and Activate button to proceed.
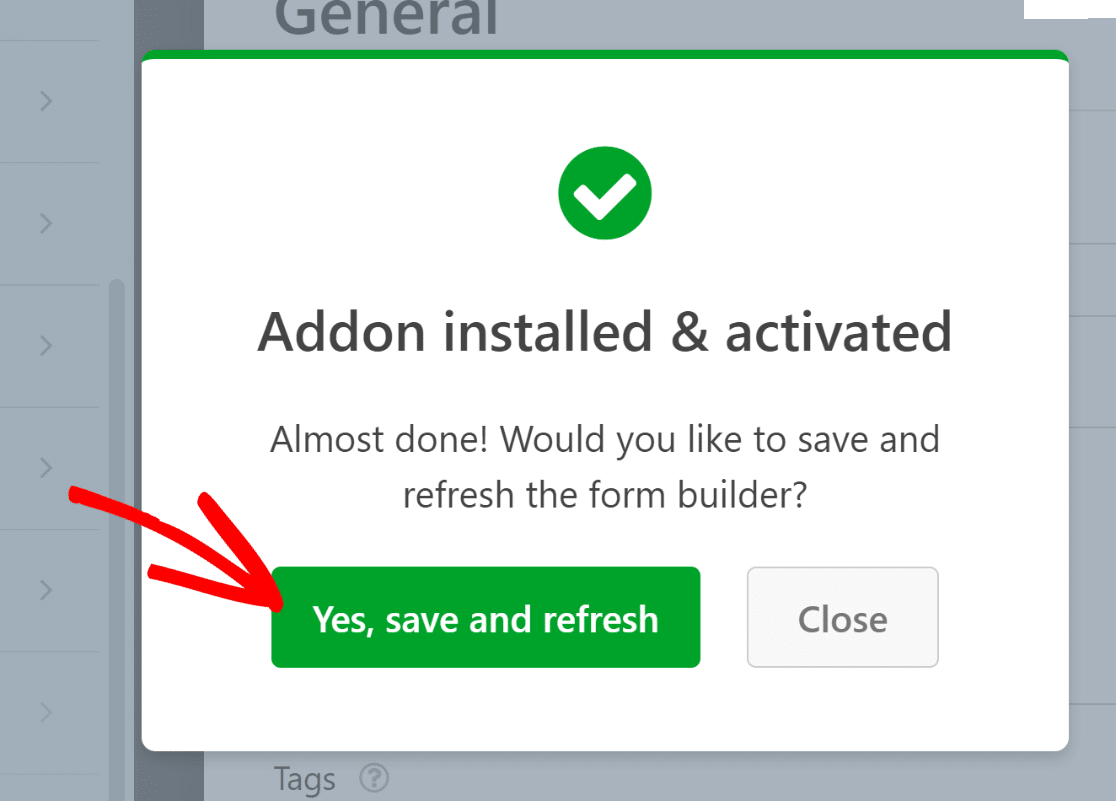
You should see another prompt for refreshing your form builder. This is needed so that you can now access the newly activated Conversational Forms addon. Click on the Yes, Save and Refresh button once again.
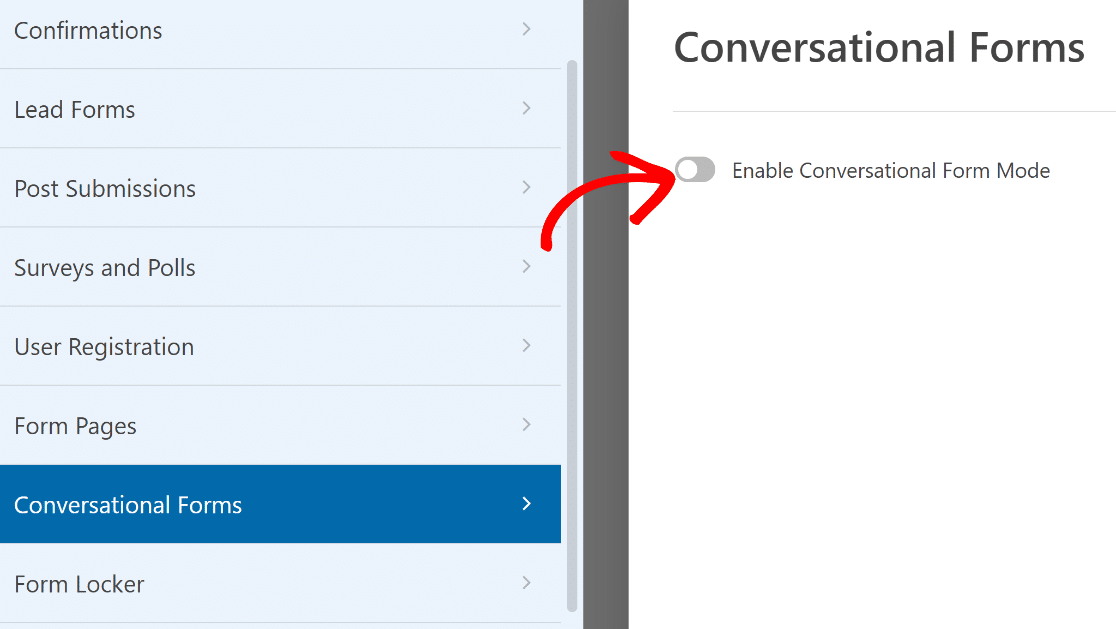
Perfect! The addon is now ready to use. You should immediately see a toggle button appear on the right-hand side of the form builder. Click the Enable Conversational Form Mode button.
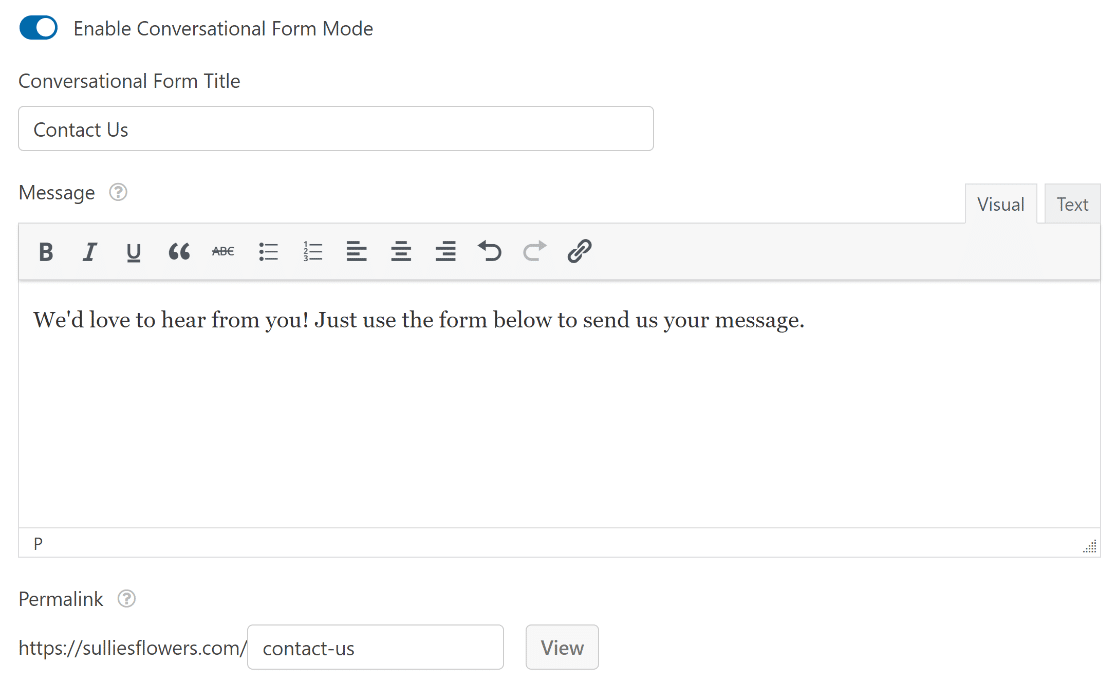
When you’ve done that, you’ll see settings related to Conversational Forms appear underneath.
Here you can give a title for your form and a message that will appear as a description at the top of your form in a full-screen conversational layout.
The most important setting here is the Permalink. This is the unique link that you can use to access your conversational form from the frontend.
You can use this permalink to share the form directly with your users and collect entries. So I recommend using a slug that’s short but descriptive.
Note: If you use a permalink that’s already taken by another page on your site, a number will automatically be added to the end of your given permalink to ensure that your form link is unique.
Unlike standard forms, Conversational Forms don’t need to be embedded. Instead, they appear in standalone pages accessible via the permalink.
If you scroll down further, you’ll find additional settings. For instance, you can upload a header image, which can really make your form stand out and is a great place to add your brand’s logo.
You can also choose a color scheme for the conversational form.
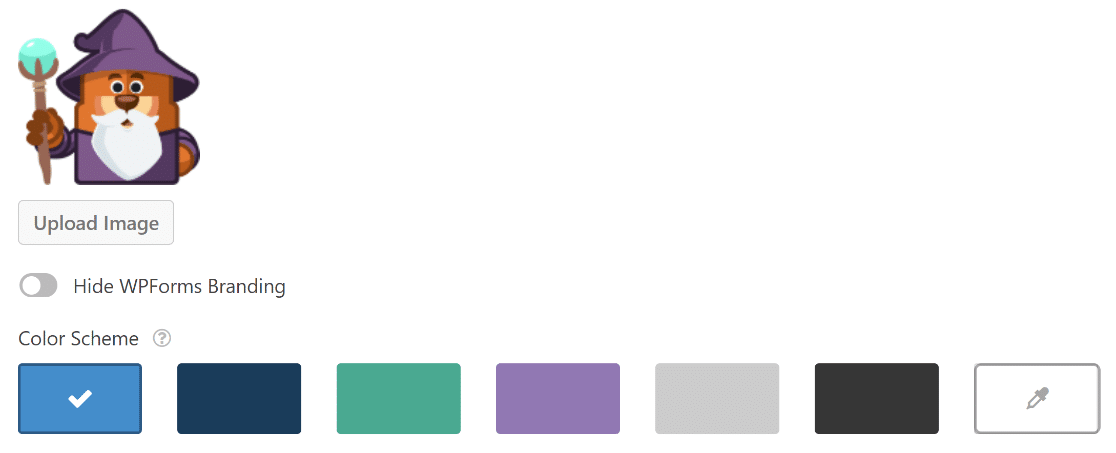
Once you’ve configured these settings, press the Save button at the top. You can press the View button next to the permalink field to visit your form.

At this point, your form is ready to start accepting submissions from visitors.
But before you move on, don’t forget to set check your form notifications.
Step 4: Configure Conversational Form Notifications & Confirmations
When you get an entry from your conversational contact form, you’ll probably want to know right away so you or your team can jump into action.
How can you do that? By setting up form notifications. They’re the perfect way to get an email whenever someone submits to your conversational contact form online.
To do this, click on Setting » Notifications. Here you can customize the email message, select a template for the email notification, and edit your sender details as well as the recipient email address.

You can also edit the confirmation message to be displayed after a user has submitted the form. Click on Confirmations (which is right under Notifications in the Settings tab), then simply type in your message.
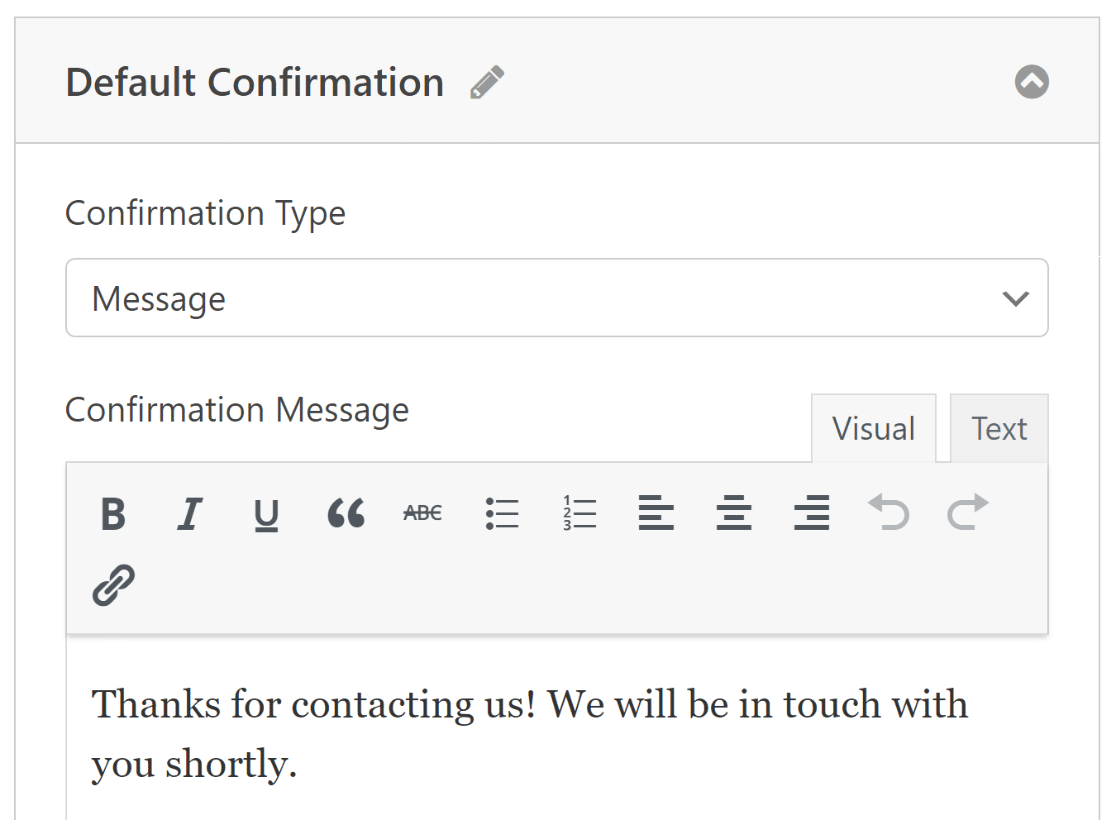
When you’re done making these changes, it’s a good idea to click the Save button at the top.
Now you have your conversational form set up, look at more ways to continue talking with your visitors to provide engaging conversational experiences. For example, you can check out our list of LiveChat solutions.
Conversational Contact Forms – FAQs
Here are a few common questions our visitors often ask us about using the conversational layout for WordPress contact forms.
Why should I use conversational forms on my WordPress site?
Conversational forms can significantly improve user engagement and conversion rates by guiding users through a more personalized interaction that feels natural. Because they break the form into smaller chunks, visitors are more likely to complete the conversational form, resulting in lower rates of abandonment.
Can I integrate conversational forms with other WordPress plugins or third-party services?
Yes, WPForms supports marketing integrations for all kinds of forms, including conversational forms. You can natively integrate popular email marketing services like Mailchimp, ConvertKit, HubSpot, Constant Contact, and more with WPForms. No code needed!
Are conversational forms mobile-friendly?
Yes, the conversational forms created with WPForms are designed to be responsive by default. These adapt perfectly to all devices from desktops to handhelds without requiring any manual adjustments on your end.
Do conversational forms support multi-page forms?
Conversational forms don’t typically support a multi-page format. That’s because the conversational layout is designed to be as streamlined as possible by guiding visitors from one question to the next step by step.
Supporting page breaks doesn’t offer any value in a layout that’s already broken down into multiple chunks for maximum user engagement.
Next, Compare Top Form Builders for WordPress
If you’ve already read our Ninja Forms vs WPForms review, you’ll know that Ninja Forms doesn’t support conversational forms at all. But with WPForms, you can turn any form into a beautiful conversational form in seconds.
Create Your WordPress Form Now
Did you enjoy this guide? You may also be interested in our post open source alternatives to reduce SaaS bills too.
So what are you waiting for? Get started with the most powerful WordPress forms plugin today. WPForms Pro includes unlimited free conversational contact forms and offers a 14-day money-back guarantee.
If you enjoyed this post, make sure to follow us on Facebook and Twitter for more free WordPress tutorials.



I need to create a form. Formidable Forms loose their functionality when the form is large and they don’t have bulk edits. Gravity forms does have bulk editing but their repeater fields is terrible. I’m looking for a builder for large forms that I can create repeaters and multi-edit.
Hi Joel- We don’t currently have the ability to allow front-end users to replicate fields or sets of fields, though this is on our feature request list to consider adding down the road.
For now, the best alternative solution is to use conditional logic to display the right number of fields (or sets of fields). If you’d like to give this a shot, here’s what you’d need to do (it’s actually pretty easy, but can be confusing when you’re just getting started):
1) Add a Dropdown field where each option is a number — include the full range of possible numbers of fields.
2) Add the field(s) you want. Then click on each to open its Field Options screen and click on Smart Logic. Enable this, then add logic to make this field appear for every number available in the dropdown.
Here’s a screenshot to demonstrate what the conditional logic would look like if your dropdown options are 1, 2, and 3: (screenshot) using the Single Line Text field as an example. The key is to make sure you use the Add new group button — which applies ‘OR’ logic.
Why you need OR logic can get confusing, but if you’re curious here are more details.
What you’ve just created is a field that will display with every single number that gets selected.
3) Now duplicate this field (with the double paper icon shown here). On this copied field, go into the Conditional Logic section and remove the ‘If Dropdown is 1’ logic, like in this screenshot.
This will mean that this field only appears if 2 or higher is selected from the dropdown.
4) Continue this process for every other possible number (duplicate previous field, then remove the lowest number’s conditional logic).
When you’re done, this will look super professional to the front-end user — it just takes a bit of doing for setup 🙂