Are you looking for a WordPress progress bar plugin?
Progress indicators, as they’re also known, will track and indicate the user’s overall progress as they fill out the form.
In this post, we’ll show you how to easily add a progress bar to your form using WPForms.
Create Your WordPress Form Now
How Do You Add a WordPress Progress Bar?
Progress bars are visual features that add functionality and improve user experience. They show users how many pages are in your form and which page they’re currently on.
You don’t need a WordPress progress bar plugin to add a progress bar to your form. Rather, you can use a form builder plugin like WPForms. Create a form, add page breaks, and voila! You’ll have a progress bar on your WordPress form.
Having a progress bar on your form helps reduce form abandonment by keeping your visitor informed on their progress.
The easiest way to add them to your forms is to use a plugin. The good news, especially for beginners, is that you don’t need a specific progress bar WordPress plugin. WPForms is super user-friendly and streamlines the process by making it a breeze to create multi-page forms with progress bars.
How to Make a WordPress Form With a Progress Bar
Here are the steps we’re going to take:
In This Article
Let’s start by installing WPForms as our form builder and progress bar plugin.
1. Install the WPForms Plugin
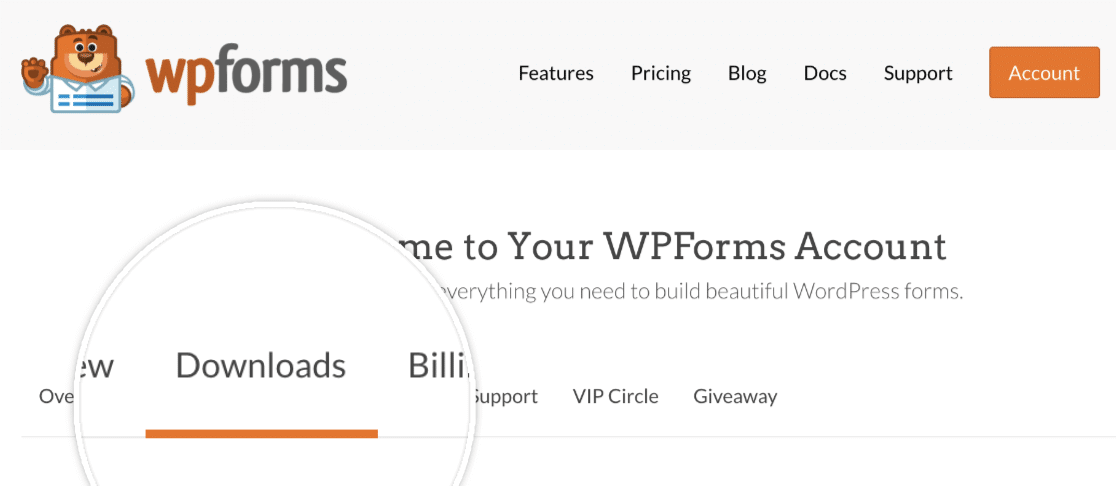
First, to have a progress bar on your form, you’ll need to purchase a WPForms Pro License and then log in to your WPForms account. Once you’ve logged in, click on the Downloads tab.
This will show you a page with all of your available licenses. To download the plugin, click on the Download WPForms button next to one of your licenses. This will save a zipped file of the WPForms plugin to your computer.
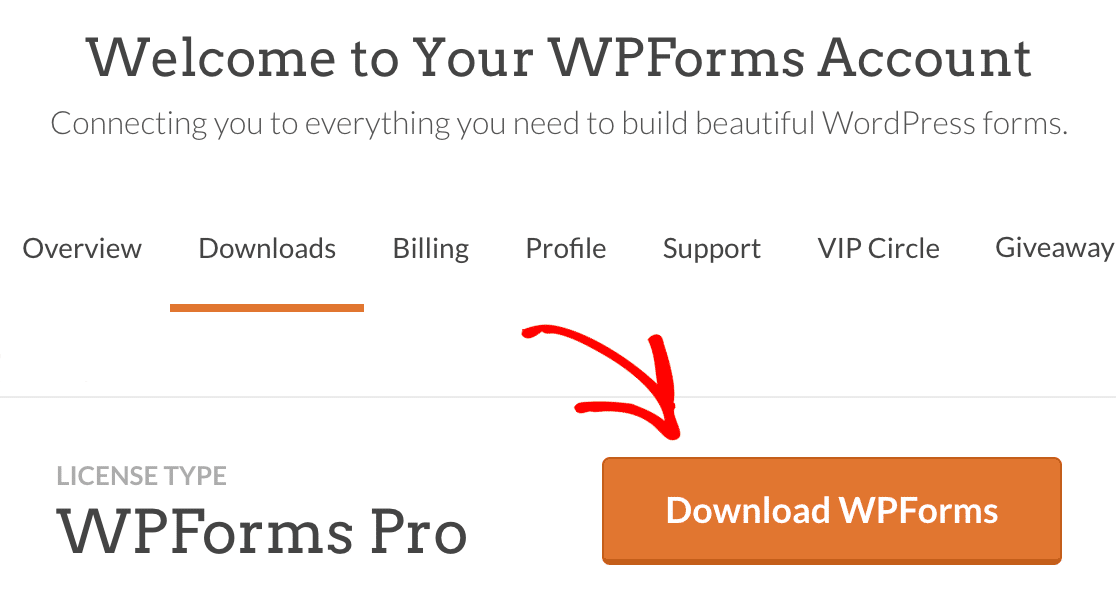
Important: You will need WPForms Pro as it includes the Page Break field. You need the Page Break field if you have various steps on your form and to show the progress bar.
Installing WPForms On Your WordPress Site
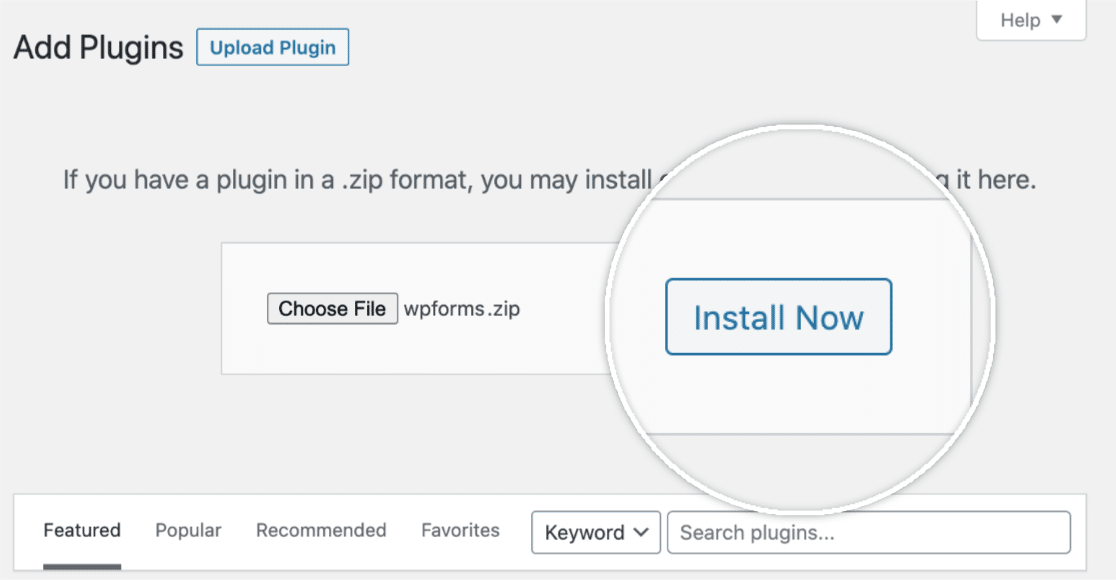
Once you’ve downloaded your zip file, head to your WordPress website where you’d like to install WPForms. Then, inside the admin dashboard, go to Plugins » Add New and click the Upload Plugin button.

From here, click on the Choose File button and select the WPForms zip file you just downloaded.

After your file is uploaded, click on the Install Now button.
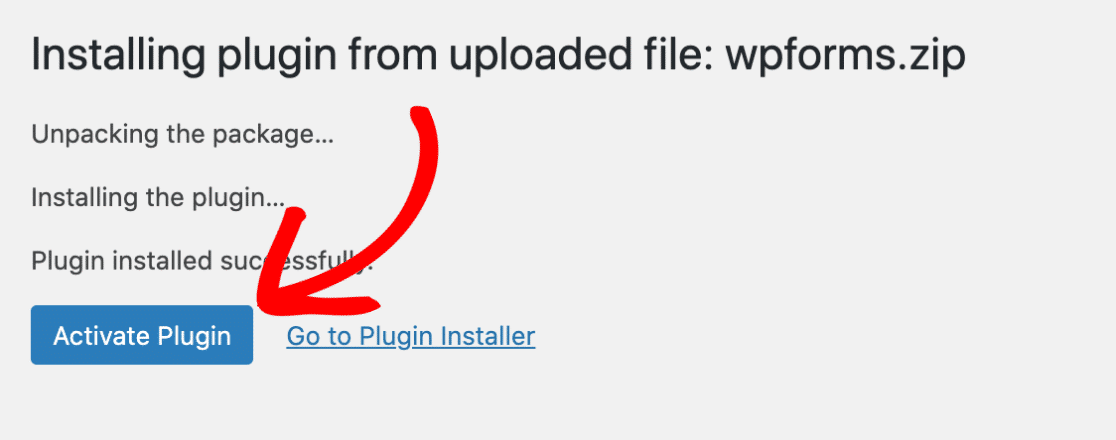
This will begin the installation process for you. Once the plugin is installed, click on the Activate Plugin button to activate WPForms on your site.
After activating the plugin, verify your WPForms license key to receive automatic updates and plugin support. Adding your license key will also allow you to easily install and activate WPForms addons from inside your WordPress dashboard.
That’s it! We can now go ahead a create a new form.
2. Create a New Form
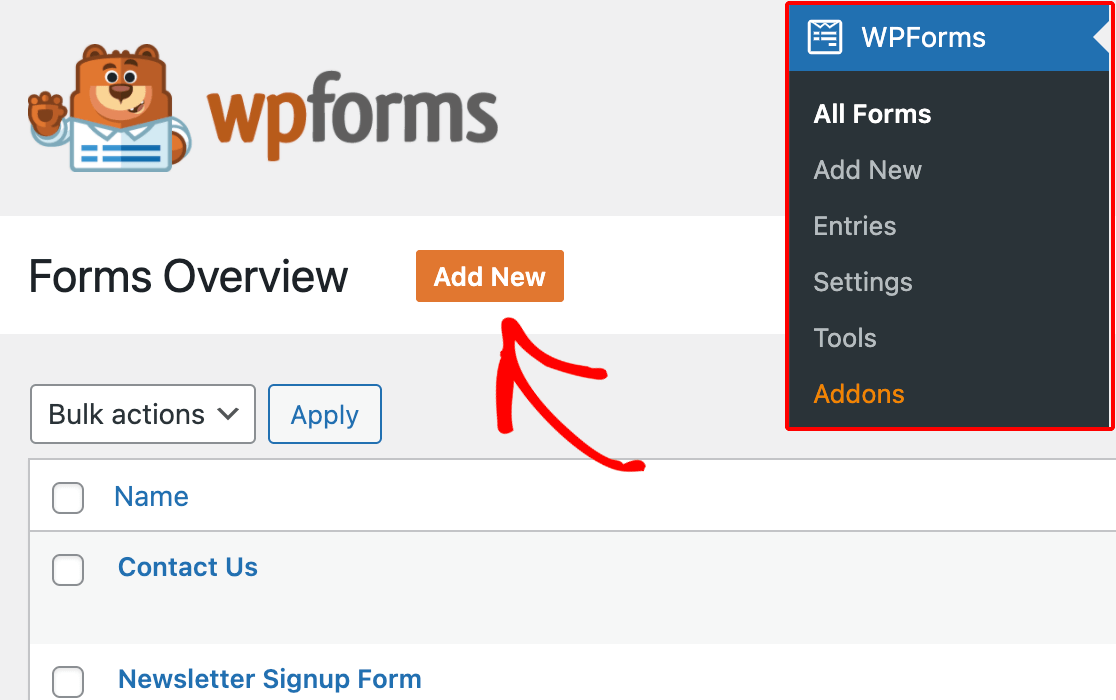
To begin, you must be logged into your WordPress admin area. Once there, click on WPForms in the admin sidebar to go to the Forms Overview page.
Then, to create a new form, click on the Add New button to launch the WPForms form builder.
On the Setup page of the form builder, you can name your form in the Form Name input field.
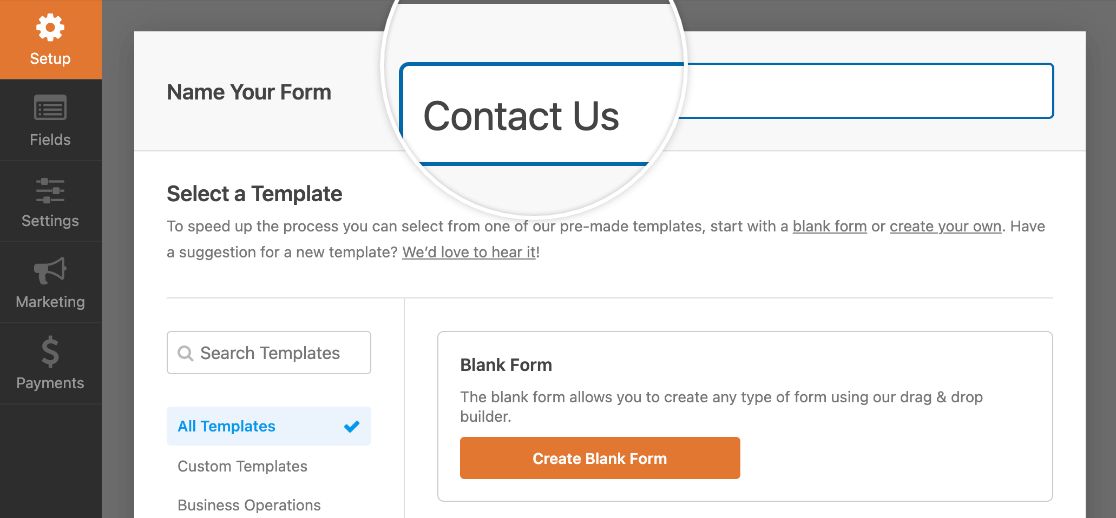
If no name is chosen, the form name will default to the name of your template.
Below the Form Name field, you’ll find hundreds of form templates in the Select a Template section. These are pre-built templates of commonly used forms such as contact forms, registration forms, and many more to help you start quickly.
Note: If you want to build your form from scratch, use the Blank Form template.
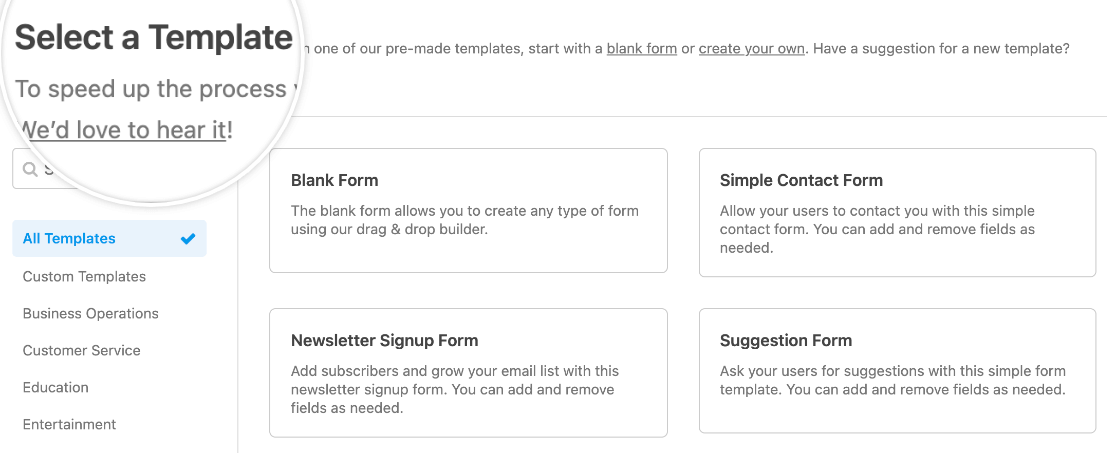
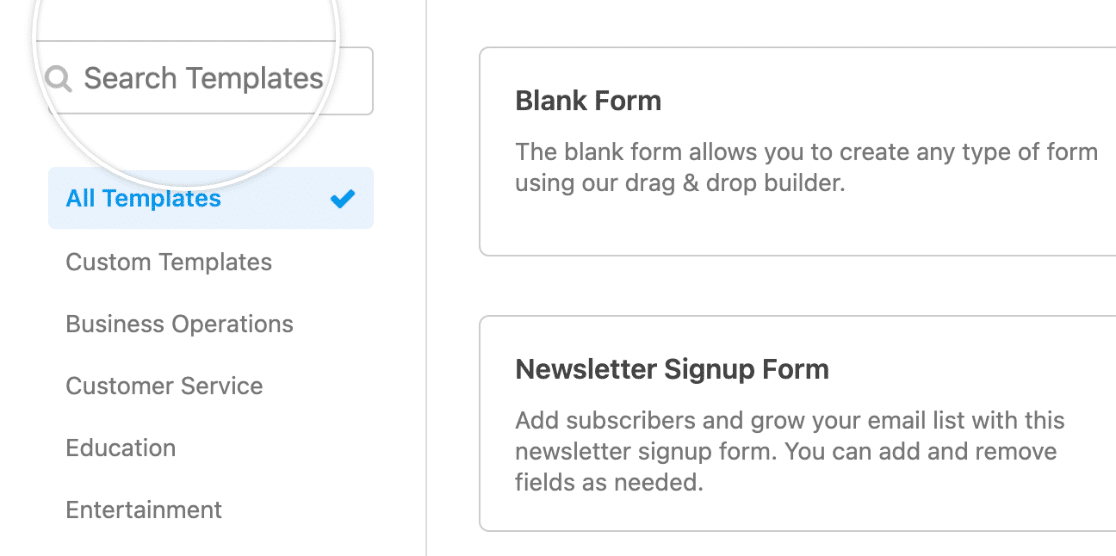
To select a template, you can use the categories in the menu on the left. You can also use the search bar in the top left corner of the template library to search through the available options.
Once you find your desired template, hover over it and click the Use Template button.

From there, you will enter the form builder, and you can drag and drop any additional elements if you’d like them. You can also change the form layout from inline fields to multi-columns.
If you’re having any difficulty creating your form, read our in-depth instructions on how to create and fully customize your form.
3. Add Page Breaks to Your Form
You’re now ready to add your page breaks and a progress bar. By adding a page break, the form will automatically include the progress bar.
Once you have the form builder open, add any fields you’d like to include in your form. Then drag a Page Break field into the preview area and drop it wherever you’d like to create a new form page.
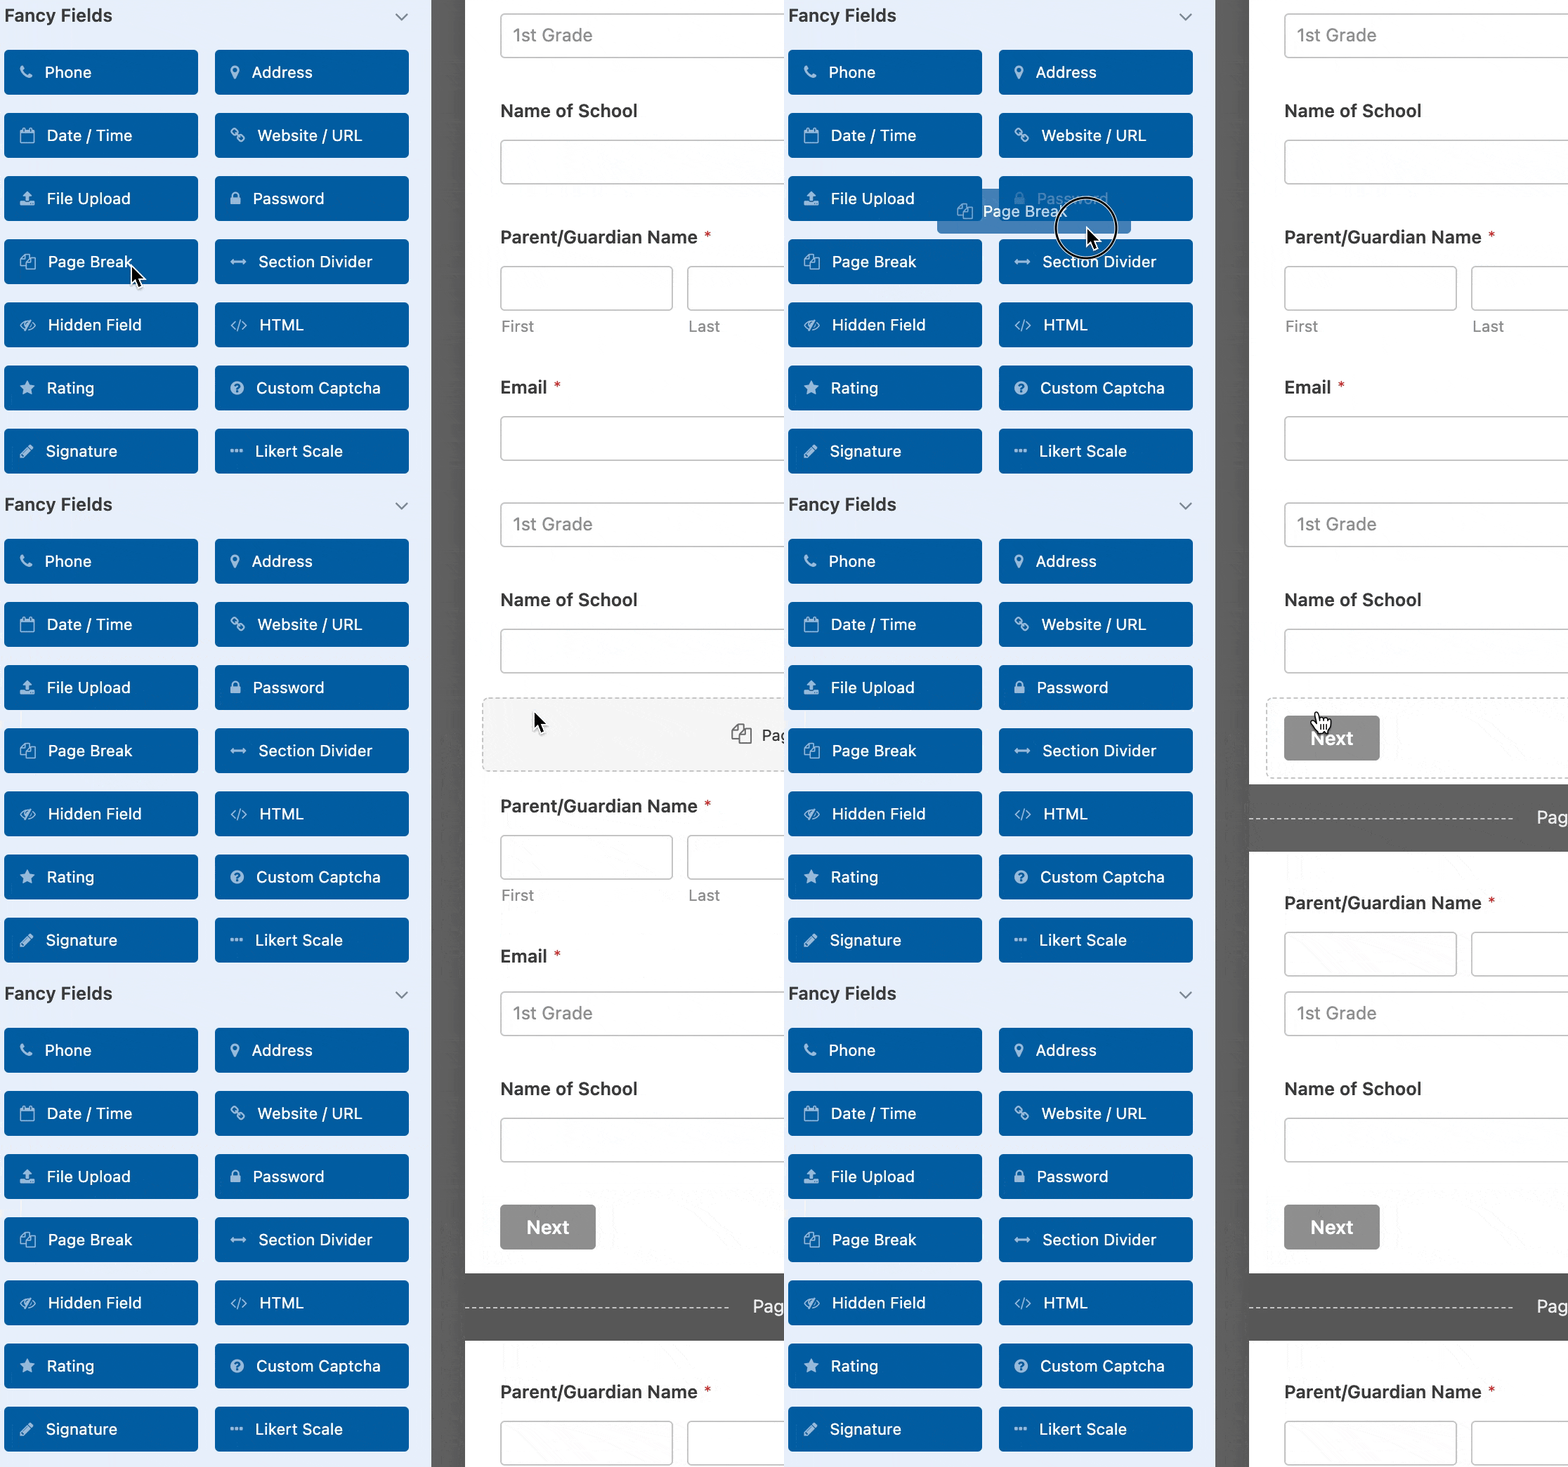
Each Page Break field you add will split the form into additional pages, and you can add as many pages as needed. To move the Page Break to a different section of your form, click on it in the preview area and drag it wherever you’d like.
Customizing Your Progress Bar
Once you’ve added a Page Break, you may notice that in the preview area, a First Page section has appeared at the top of your form. This is the placeholder for the horizontal progress bar. Click on First Page / Progress Indicator to access the options for your multi-page form.
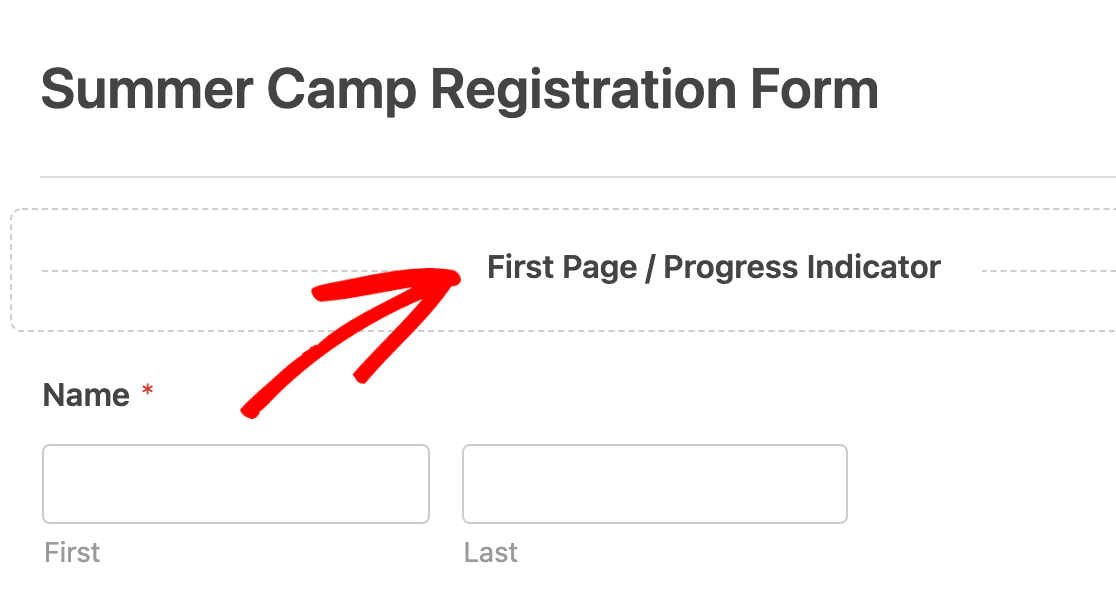
You can customize your progress bar in the Progress Indicator dropdown, and there are several customization options available to you.

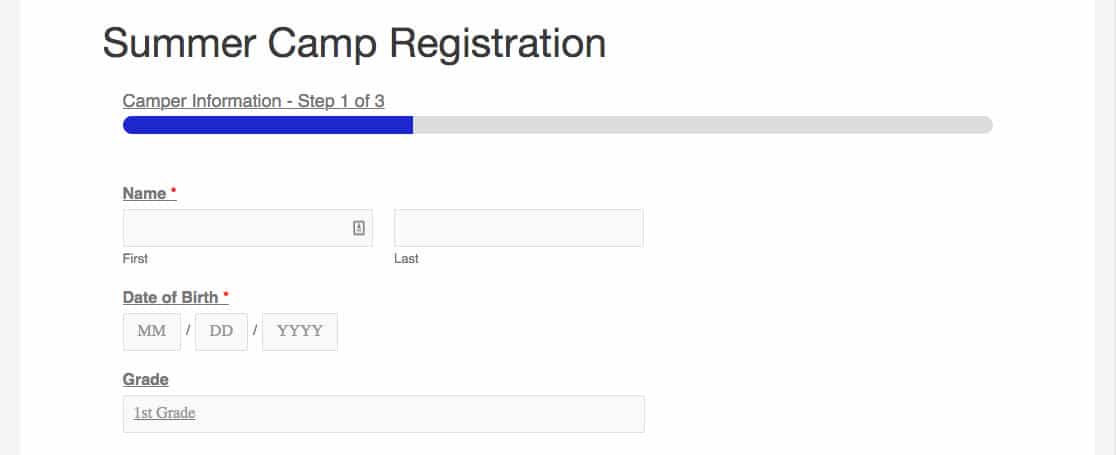
First up, choose your progress indicator styles. WPForms offers Progress Bars, Circular Progress Bars, and Connector Progress Bars.
Progress Bar:
Circles:
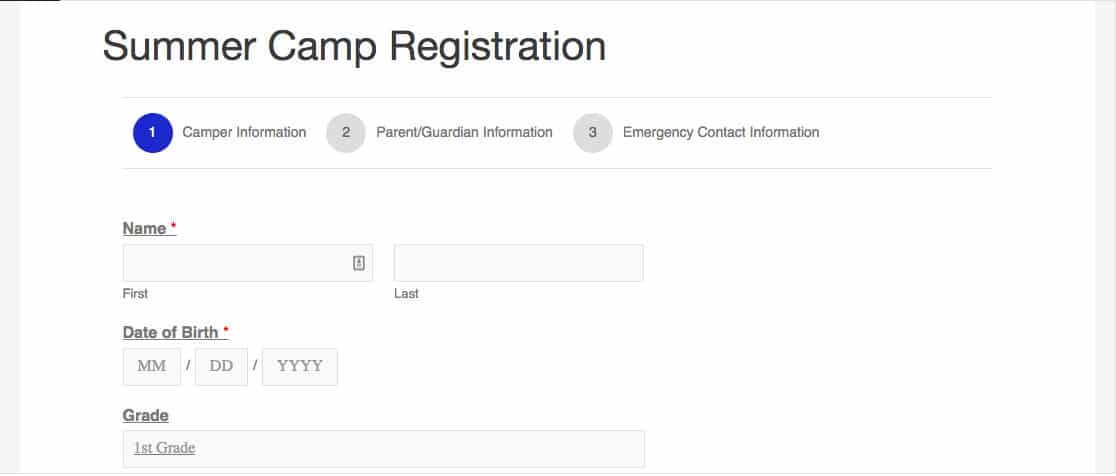
Connector:
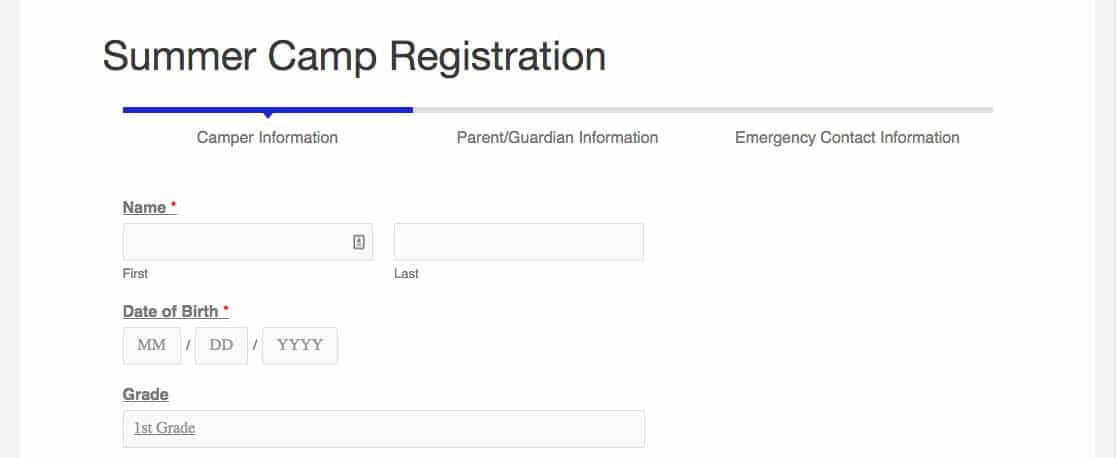
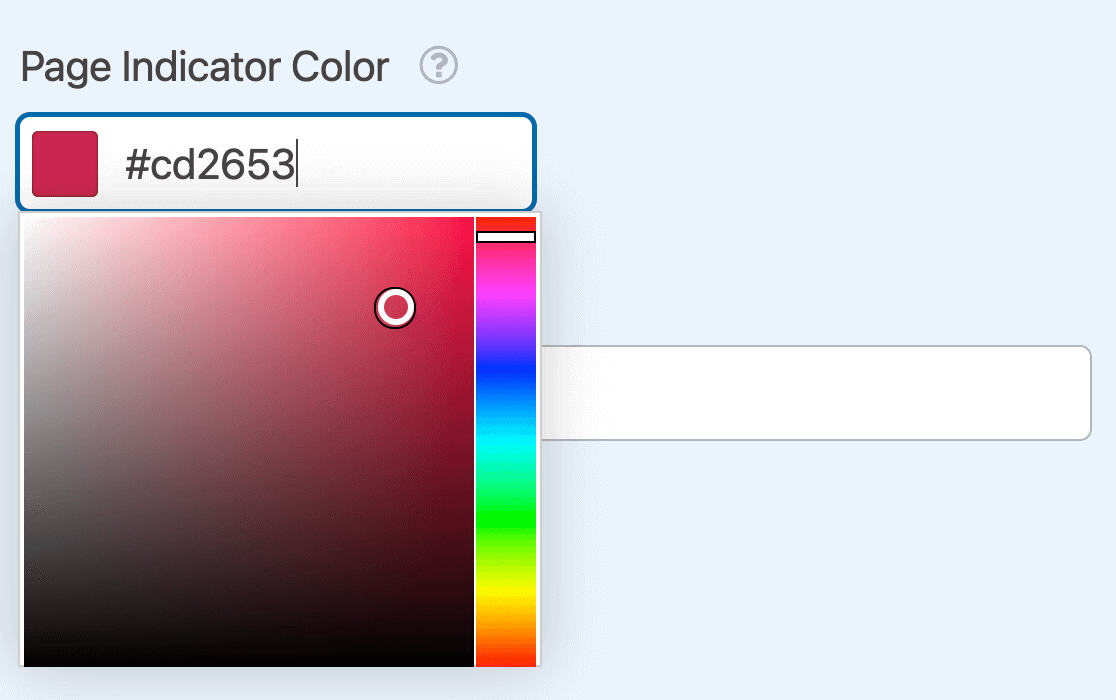
You have some styling options when it comes to these multi-page forms. To change the color of your Progress Indicator, use the color picker or enter the hex code.
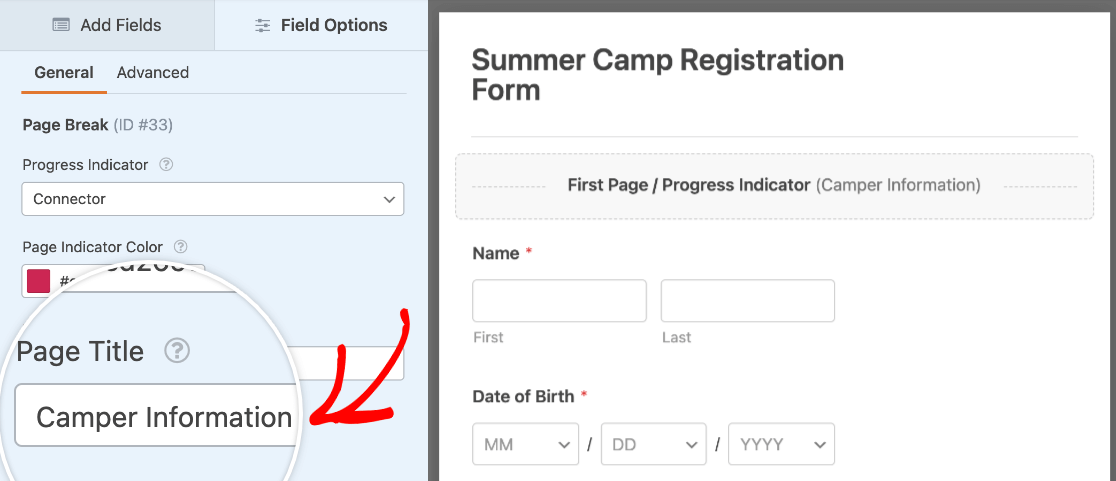
Finally, enter a name for your form in the Page Title field.
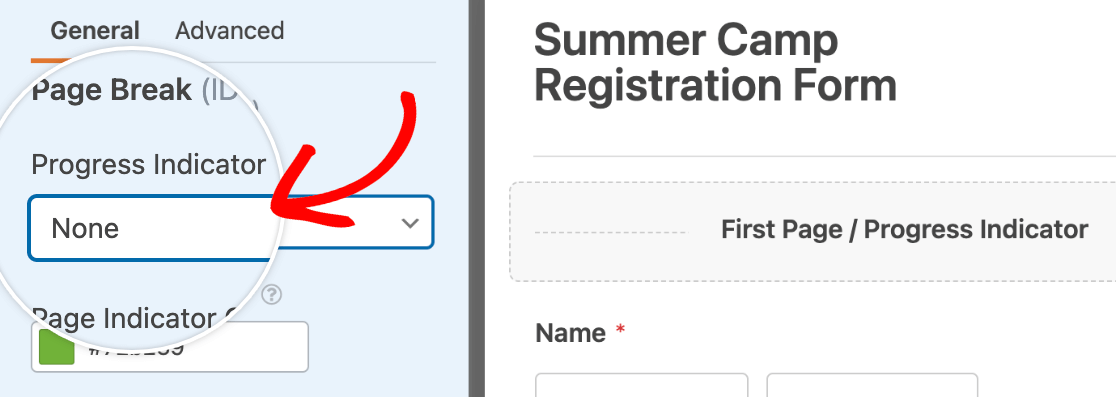
However, if you’re happy with how your form looks as it comes, you can hide the progress bar by selecting None.
Want to learn more? Read the full instructions for how to create multi-page forms to take full advantage of this form feature.
You might also want to allow your users to save their progress and fill out the remainder of your form at a later time. This is a great way of reducing form abandonment and increasing form completion rates.
4. Save and Publish Your Form
Once you’ve finished customizing your form, you can publish it. First, click the Save button at the top right corner of your form builder.

You can add your form to your website by clicking the Embed button.

From here, you’ll have the option to either create a new page or select an existing page to add your form.
Note that there’s a shortcode option, as well, if you’d like to embed the form directly on your page later. This is also useful if you plan to place forms in widgets instead.
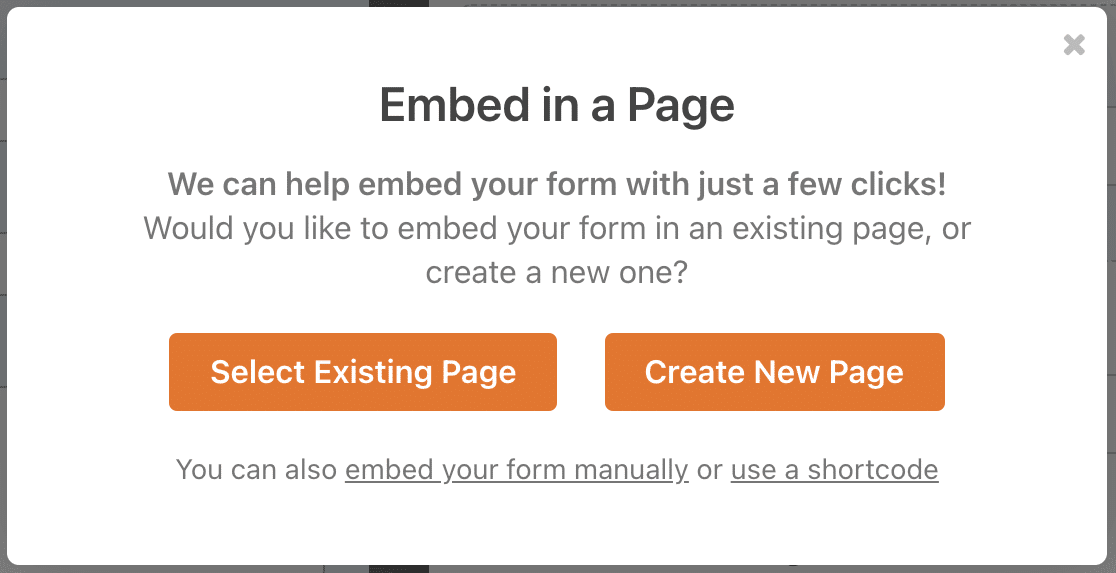
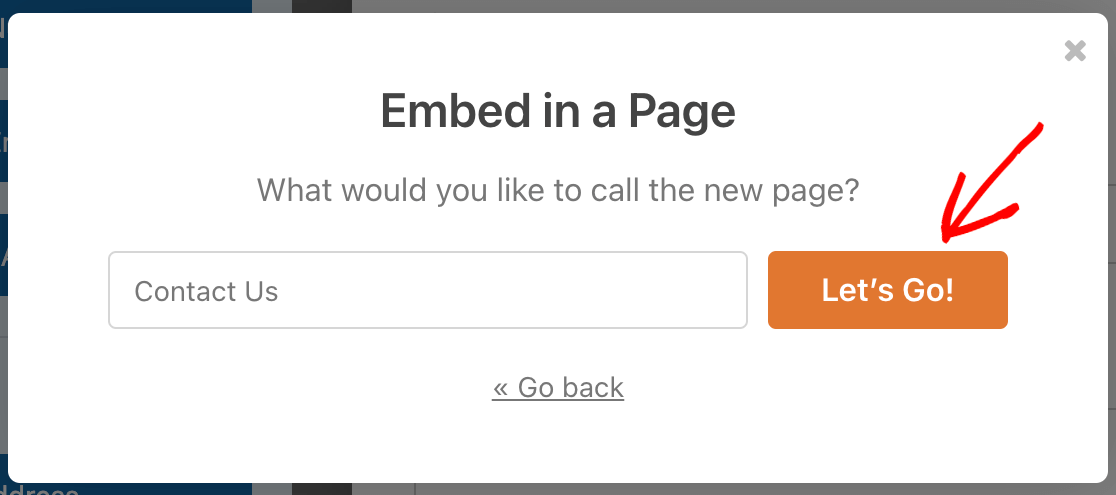
If you select the Create New Page option, you’ll be asked to enter a name for the page. Then click the Let’s Go button to embed your form and publish your page.
If you choose the Select Existing Page option, you’ll be asked to pick which page to embed your form on from the dropdown.
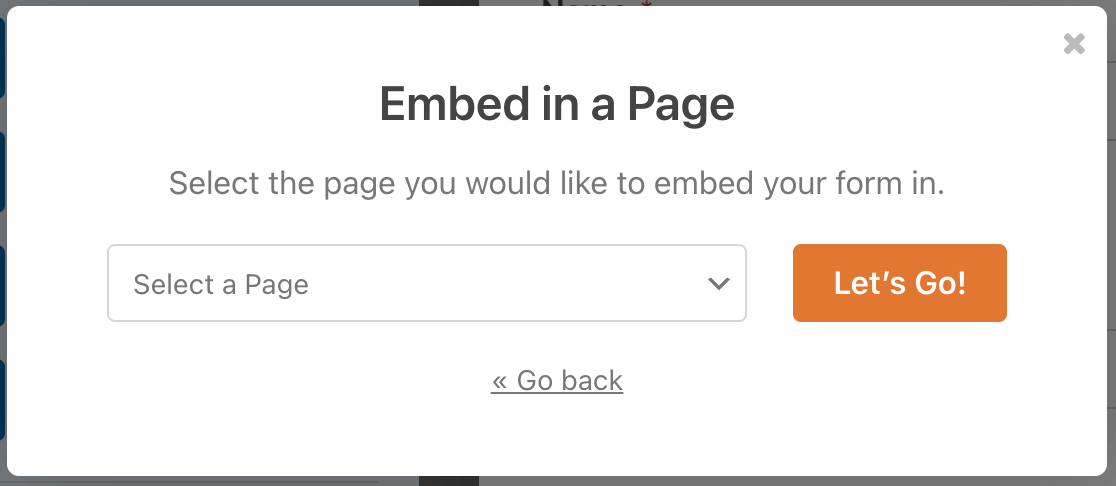
Then click the Let’s Go button to embed your form.
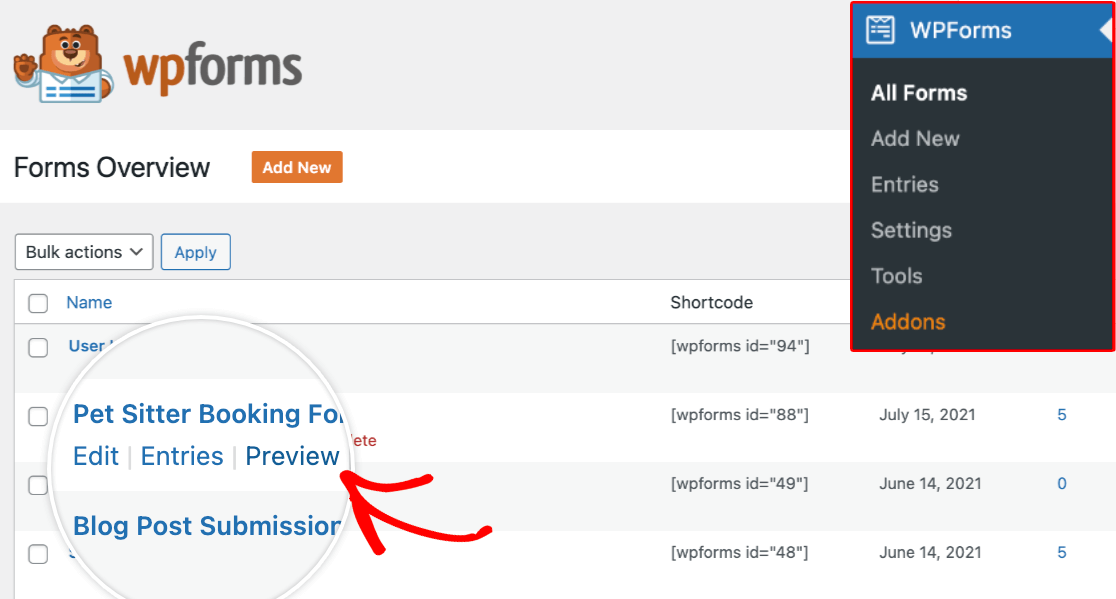
You can now view your form on the selected page. Either go to the page you’ve embedded it on or go to WPForms » All Forms. Hover over the form title to display an additional menu of options. Once the options appear, click Preview.
5. Check Your Form Progress Bar
You will now have a form that will have a progress indicator similar to this:

We recommend testing your form by filling out the fields and submitting it to ensure everything looks good and it works the way you want it to.
Note: The page break fields can be moved up or down on the form if you want to adjust the layout.
Next, Become a Form Building Expert
Would you like to increase your WPForms form-building knowledge? Be sure to check out our complete guide to form fields and how to customize the fields on your forms.
If you’re ready to take your forms to the next level, our article on customizing your forms to match your WordPress theme is worth the read. You’ll learn how to customize your form’s look, buttons, background color, and more, right from the WordPress block editor. The best part? If you don’t know CSS, it’s okay. You don’t need any custom CSS for these customizations!
Create Your WordPress Form Now
Ready to build your form? Get started today with the easiest WordPress form builder plugin. WPForms Pro includes lots of free templates and offers a 14-day money-back guarantee.
If this article helped you out, please follow us on Facebook and Twitter for more free WordPress tutorials and guides.



It would be great if the progress bar was clickable.
Hey Harun, I totally agree it would be super helpful to have this feature implemented though we don’t have an update on the same. I have gone ahead and added your vote to the feature request.
Thanks