Want to split your form into multiple pages? A multi-page form lets you break down lengthy forms into different sections, making them less overwhelming and improving user experience.
This tutorial will show you how to easily create multi-page forms with WPForms.
First, make sure WPForms is installed and activated on your site. Then, you’ll need to create a new form or edit an existing one.
Creating a Multi-Page Form
Once the form builder is open, go ahead and add any fields you’d like to include in your form. Then, drag a Page Break field into the preview area and drop it wherever you’d like to create a new form page.
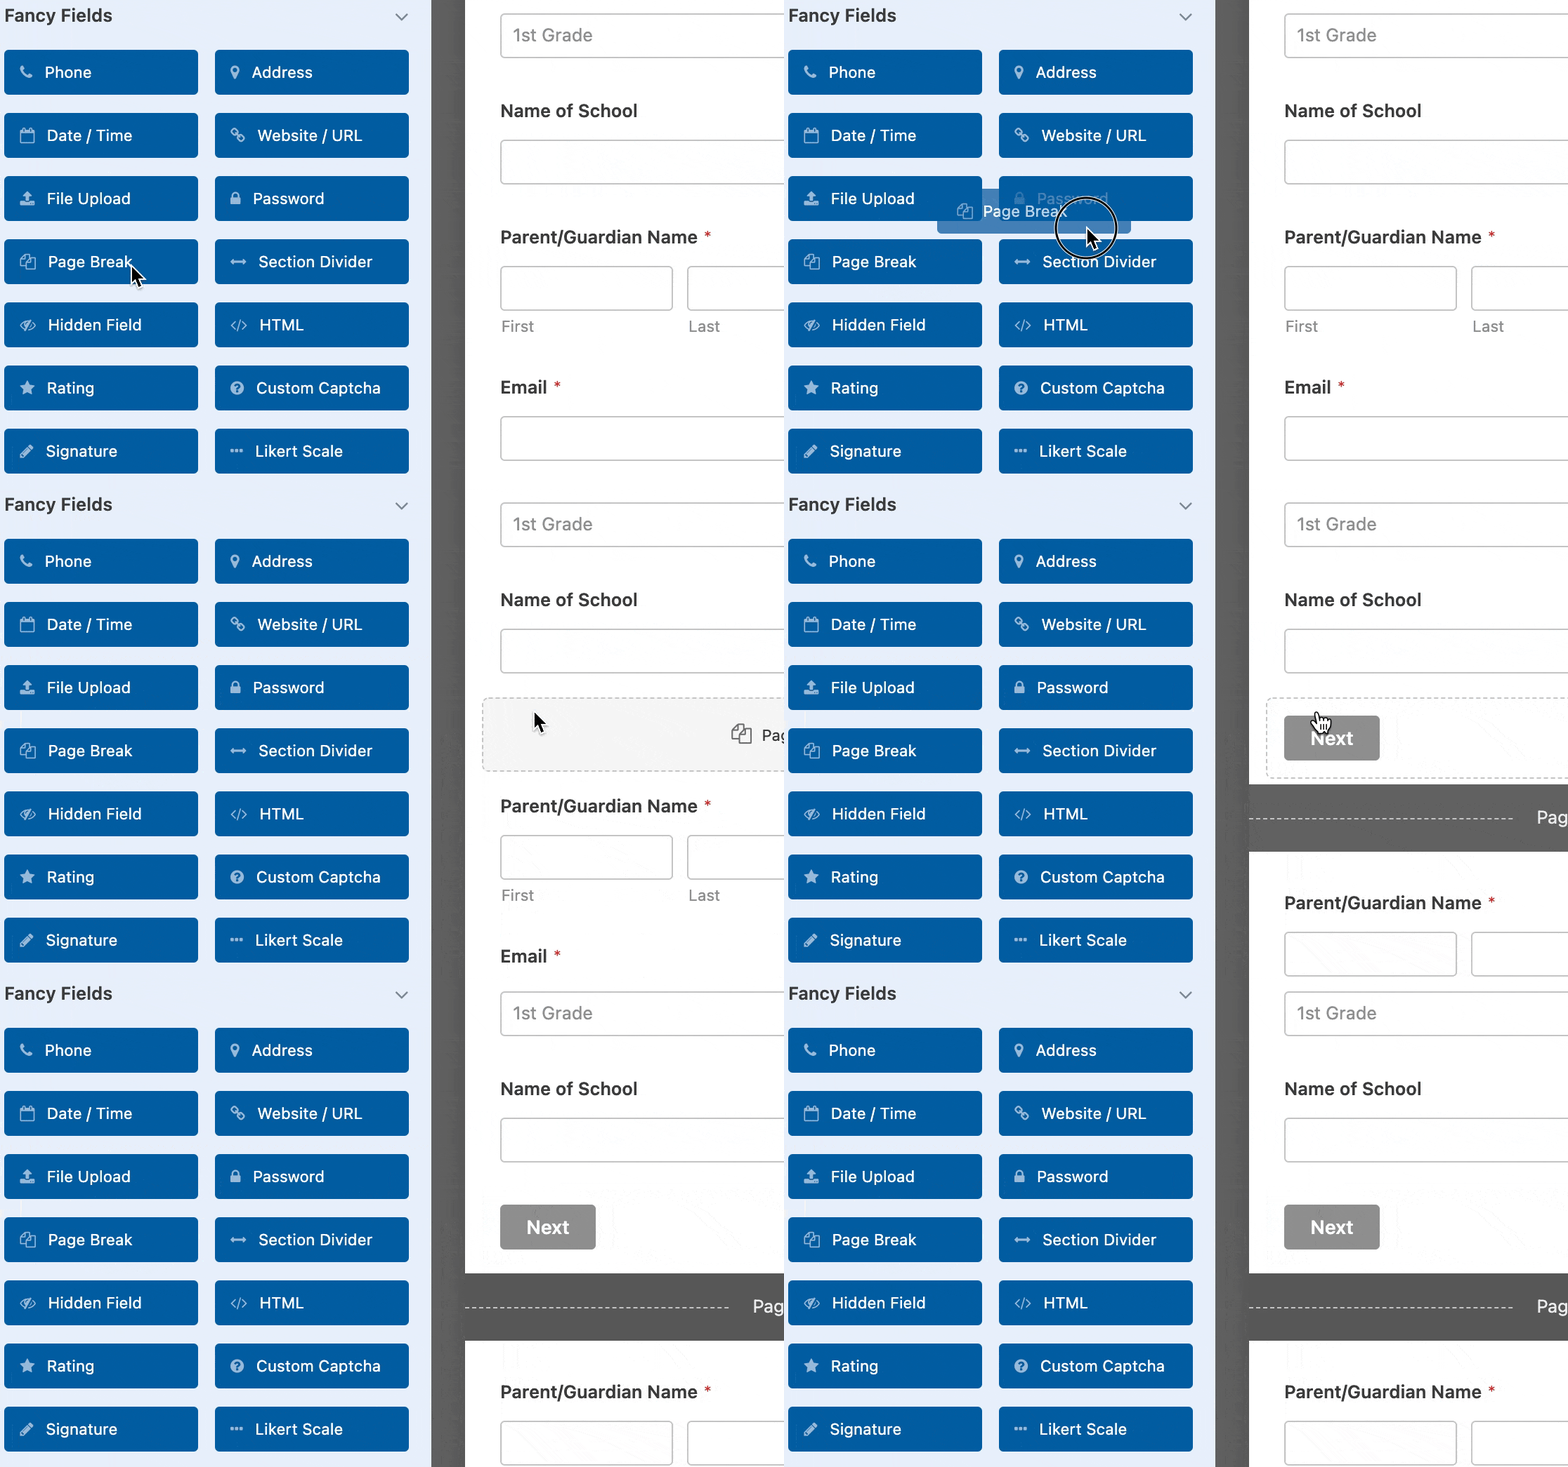
Each Page Break field that you add will split the form into additional pages, and you can add as many pages as needed. To move any Page Break to a different part of your form, simply click on it in the preview area and drag it wherever you’d like.
Customizing Form Page Settings
WPForms offers several ways to customize your multi-page forms, including adding page titles, choosing a progress bar style, and more.
Page Titles, Button Text, and Previous Buttons
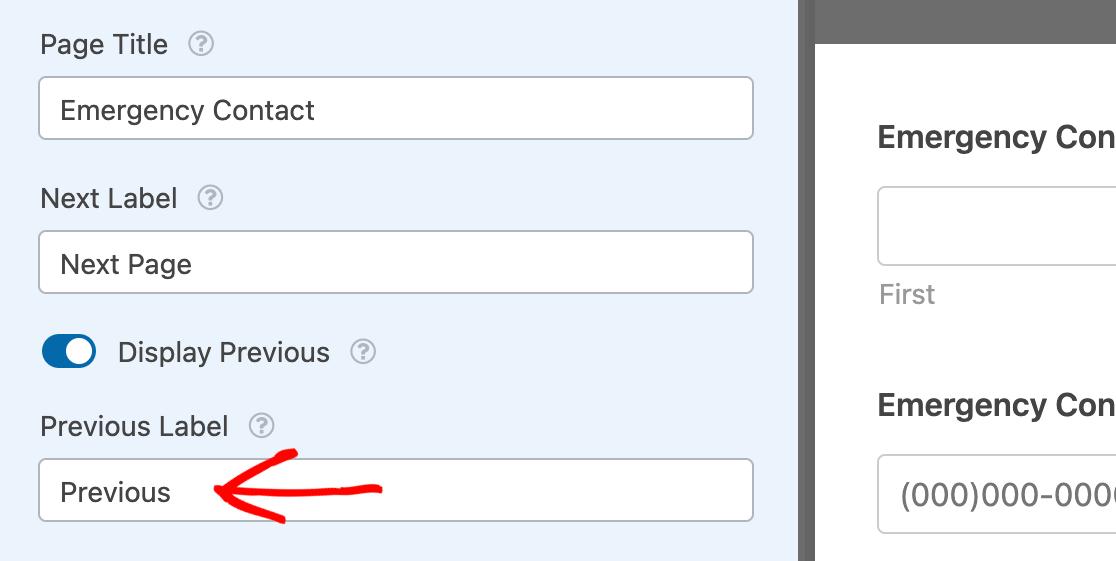
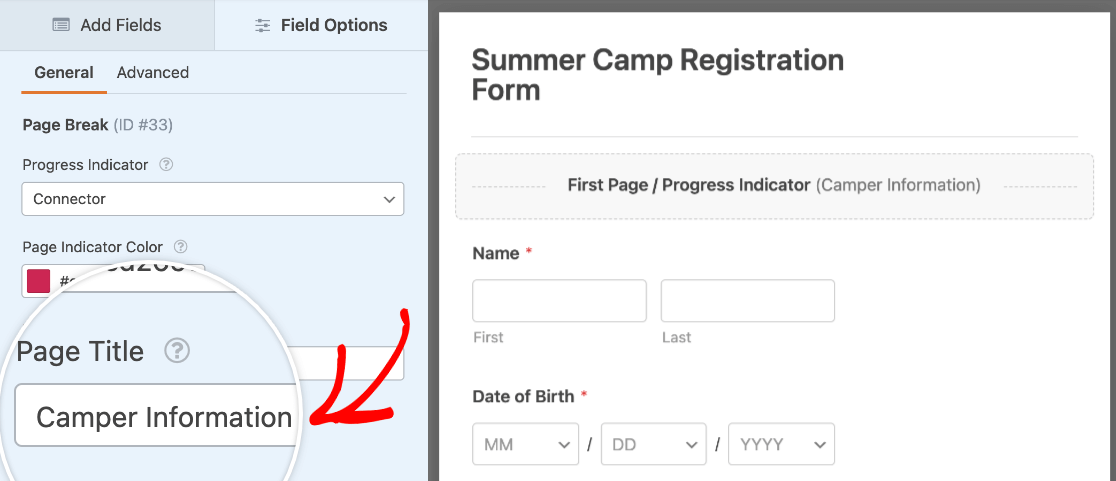
If you click on a Page Break field in the preview area of the form builder, its Field Options panel will open. From here, you can edit the Page Title.
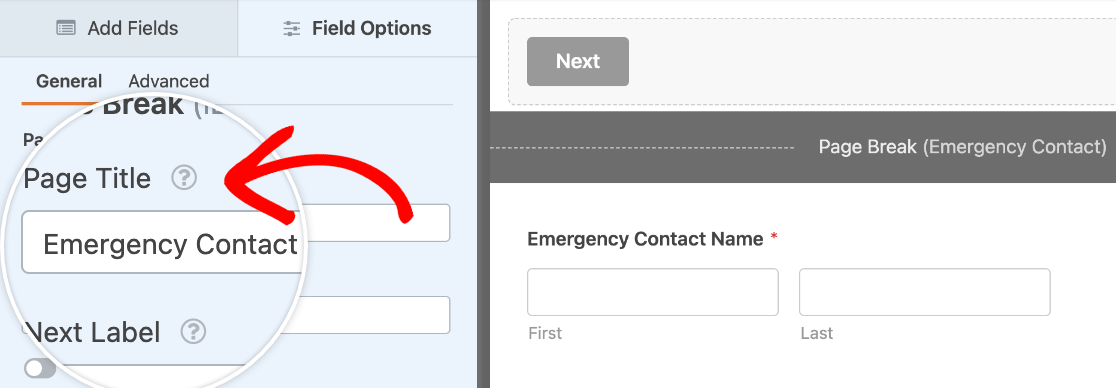
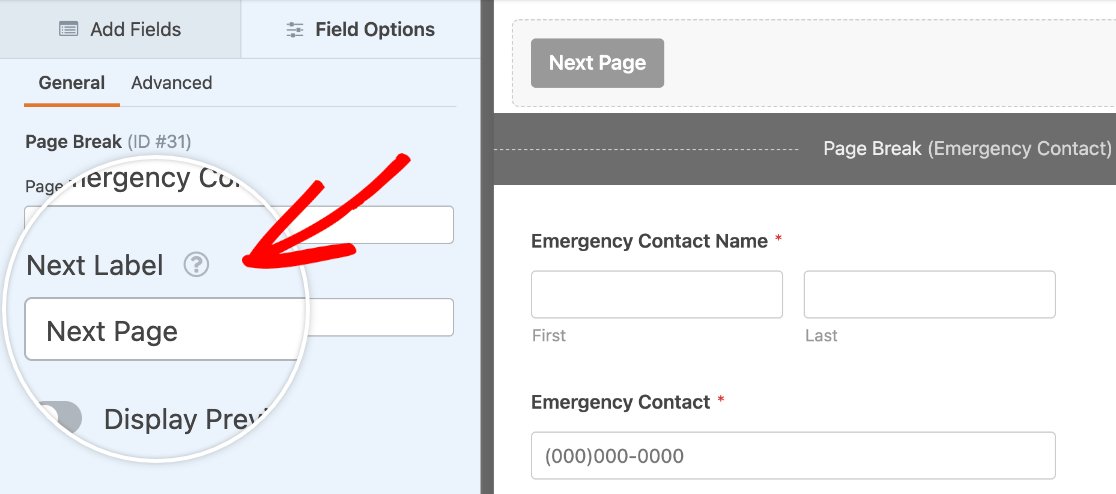
You can also customize the text for the button users will click to go to the next page in the Next Label field.
If you would like to enable the Previous button as well, toggle on the Display Previous option. This navigation button is hidden by default to help optimize conversions, but you can show it to users on a page-by-page basis.
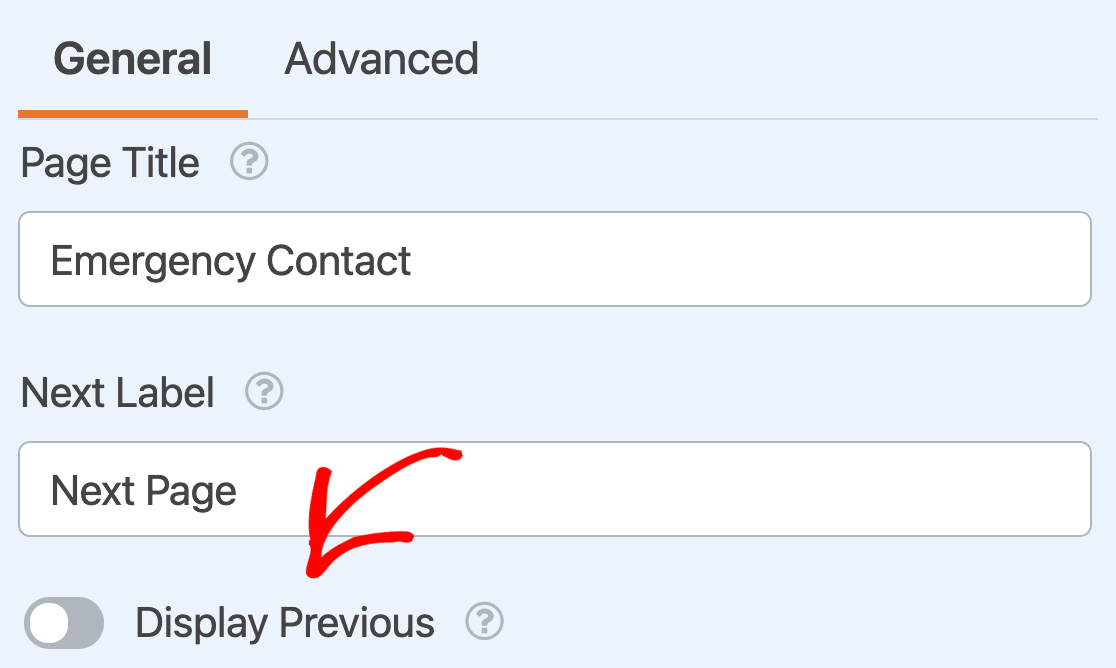
Note: The Display Previous toggle only appears if you have more than one Page Break field on your form. It won’t show on the first Page Break field on your form.
When the Previous button is enabled, the Previous Label option will appear so you can customize the button text.
Adding a Previous Button to the Last Page of Your Form
To display a Previous button on the last page of your form, click on the divider below the last field in the preview area of the form builder.
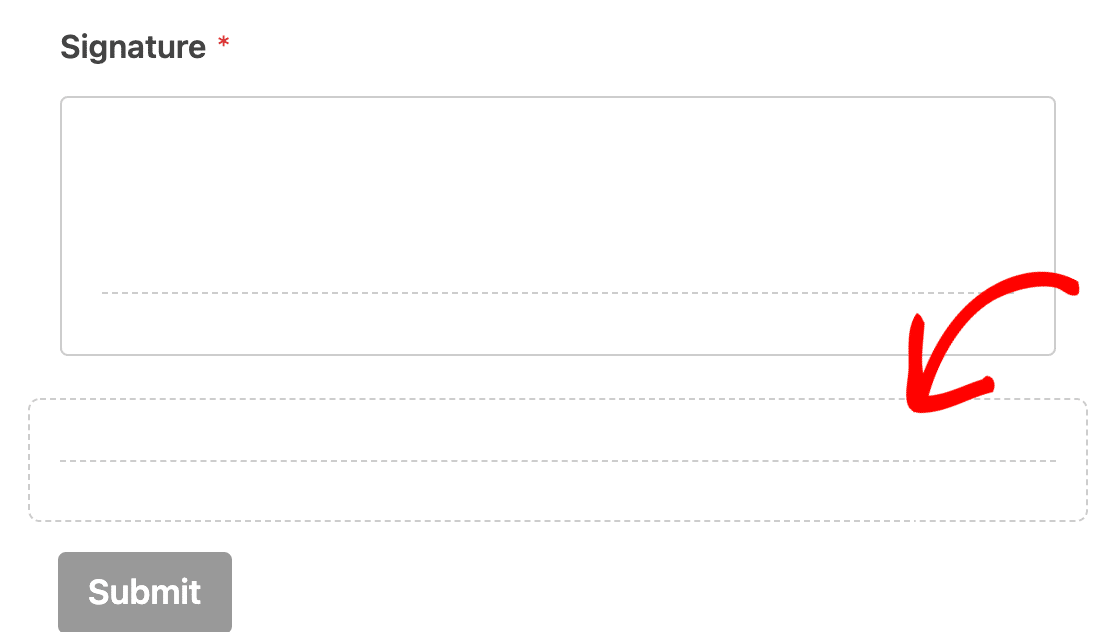
This will show the Display Previous toggle in the Field Options panel.

Turn it on to customize your button text as described above.
First Page Settings and Progress Bar Styles
Once you’ve added a Page Break, you may notice that a First Page area has appeared at the very top of your form in the preview area. Click on First Page / Progress Indicator to access more options for your multi-page form.
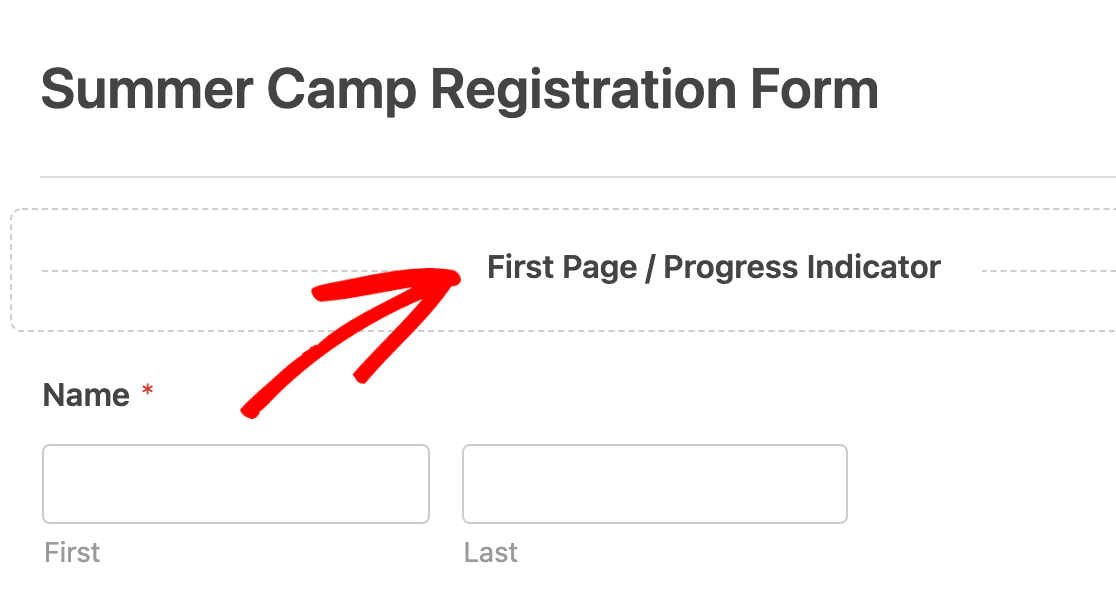
First, customize your Progress Indicator. This feature shows users how many pages are in your form and which page they are currently on. In the Progress Indicator dropdown, you can hide this feature by selecting None.
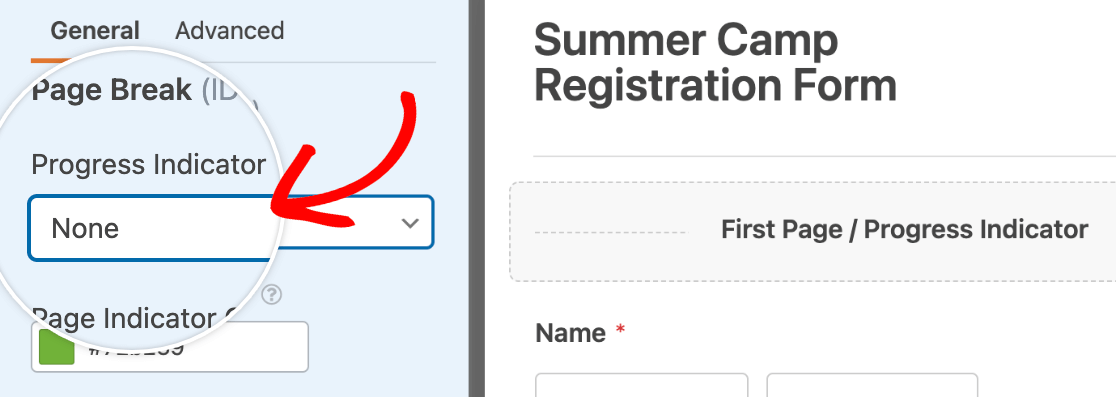
Or, you may choose from the three Progress Indicator styles: Progress Bar, Circles, or Connector.
Progress Bar:
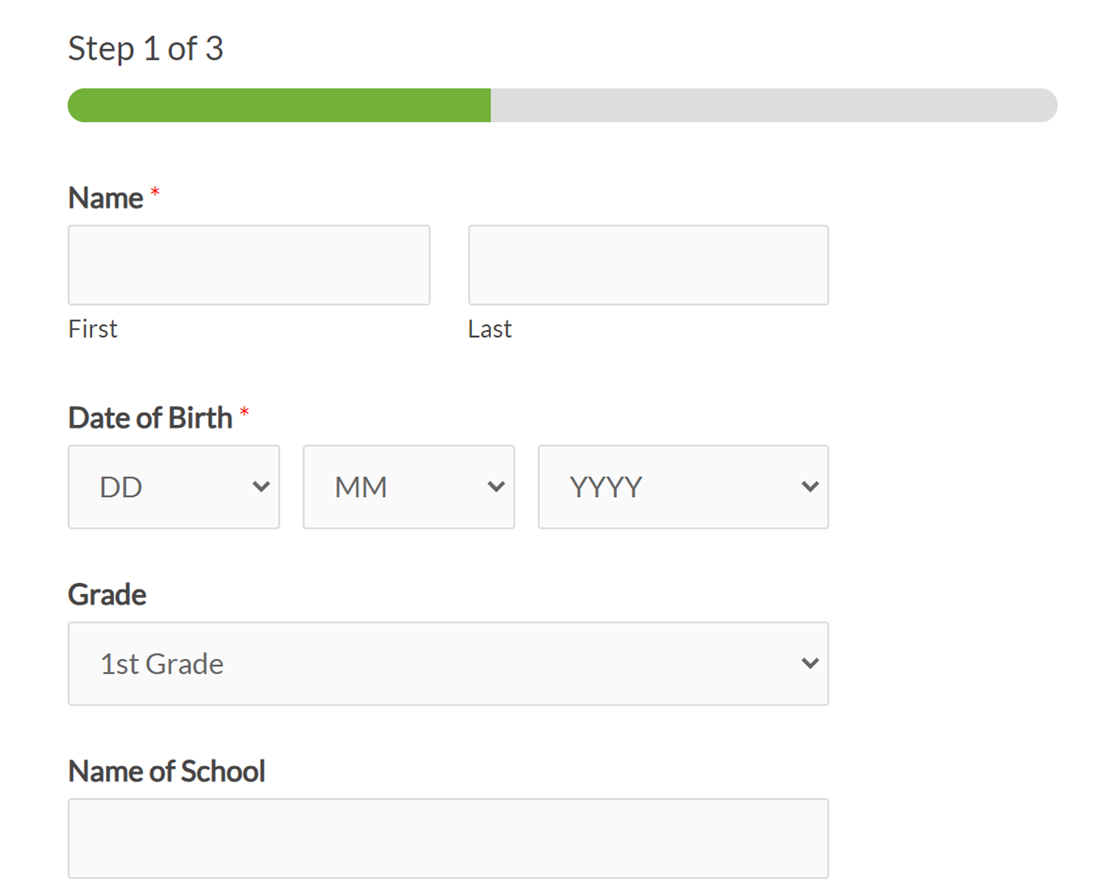
Here’s a live preview with the Progress Bar format.
Circles:

Connector:

Note: The Connector progress indicator may not display correctly on mobile devices. For better results across all devices, including mobile, we recommend using the Progress Bar or Circles options.
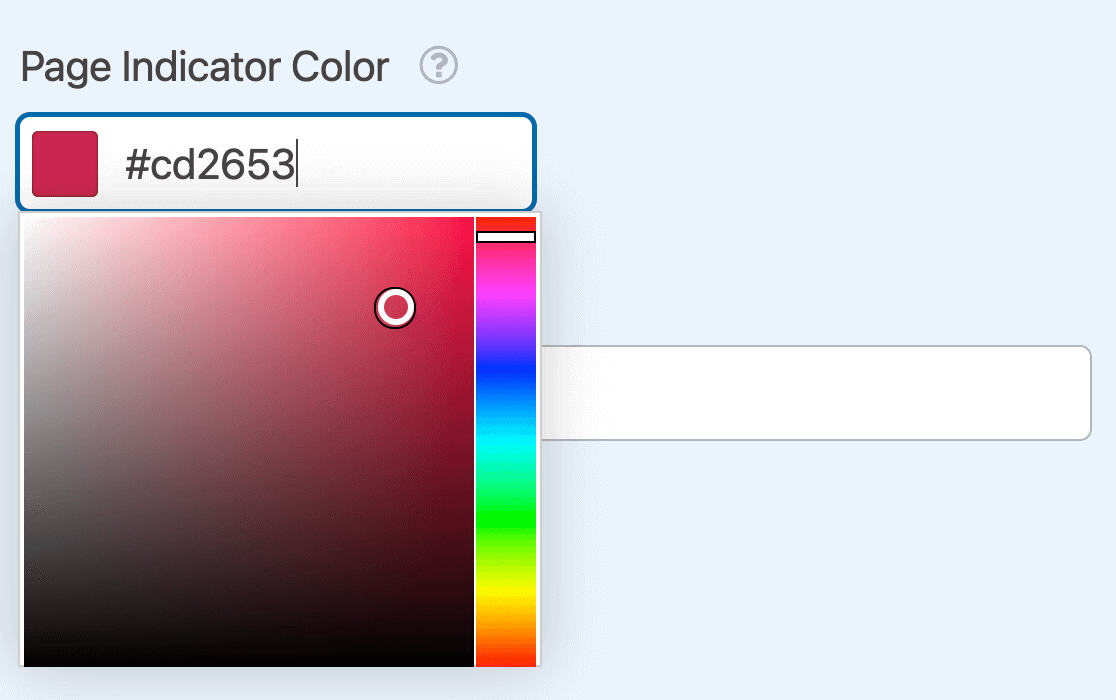
To select a color for your Progress Indicator, use the color picker or enter the HEX code for the color you want to use.
Finally, enter a name for your form’s first page in the Page Title field.
Page Break Advanced Options
In the First Page field options, you can customize even more Page Break settings by clicking on the Advanced tab.
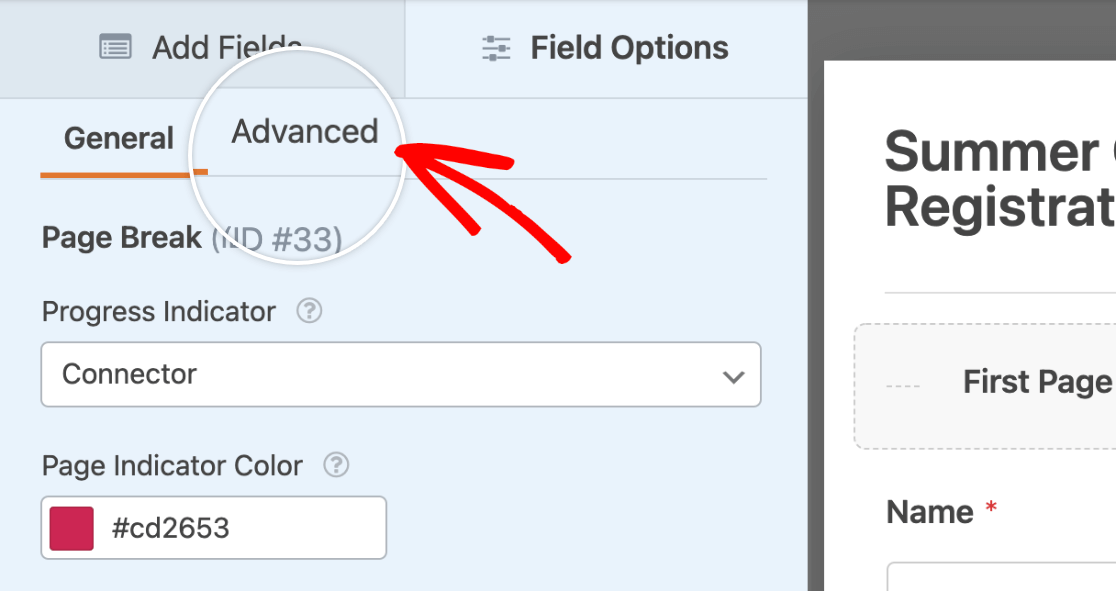
Here, you’ll find the following settings:
- Page Navigation Alignment: Choose where to place your form navigation buttons (Left, Right, Center, or Split).
- Disable Scroll Animation: Prevent automatic scrolling to the top of the page when users click the Next button.
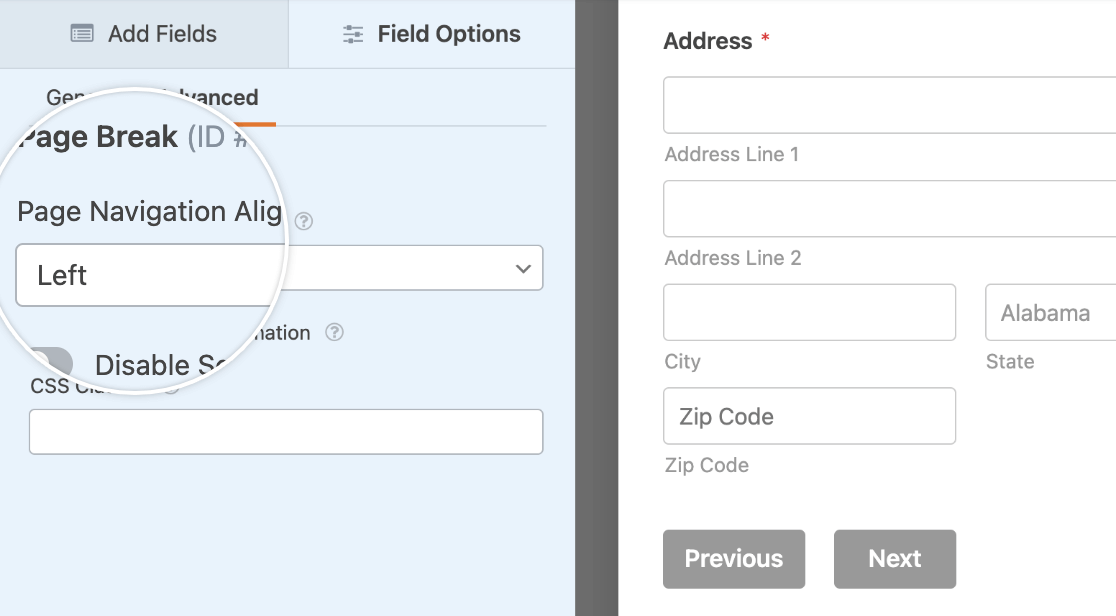
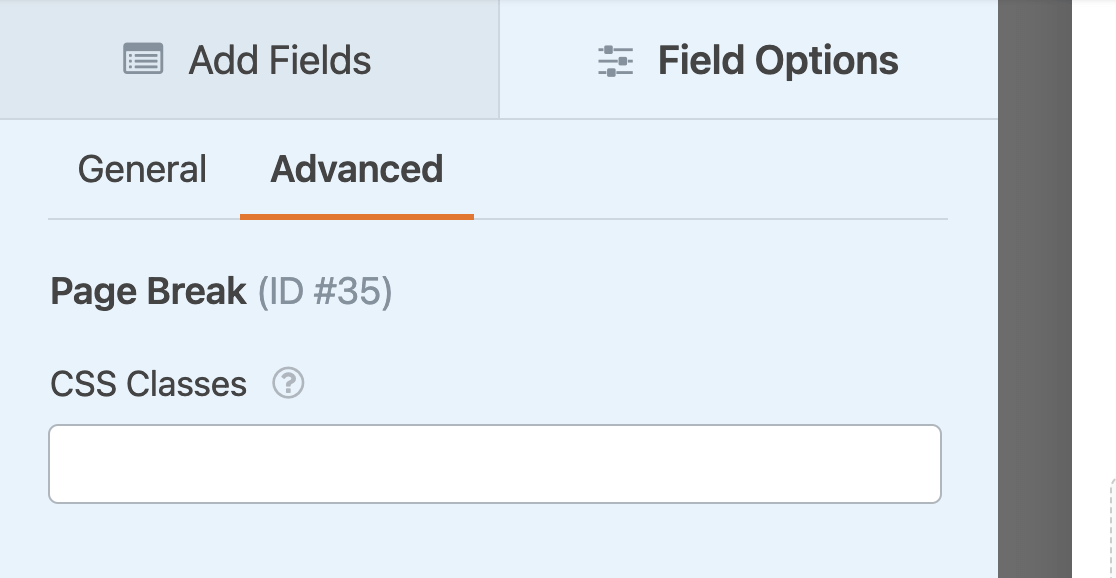
You can also add CSS classes here. This custom code will only apply to the first Page Break field in your form. To add CSS classes to other Page Break fields, click on the relevant field in the preview area and select the Advanced tab in the Field Options panel.
Frequently Asked Questions
Below, we’ve answered some of the most common questions we receive regarding multi-page forms.
Can I skip empty pages in my multi-page form?
Yes, you can skip empty pages in multi-page forms. To find out how, check out our guide on skipping page breaks when using conditional logic.
Can I set my multi-page form to advance to the next page automatically based on a selection?
Yes, you can configure your multi-page form to move to the next page automatically when a user makes a selection. For detailed instructions on setting this up, please refer to our developer documentation.
Can I delete a Page Break field after adding it to my form?
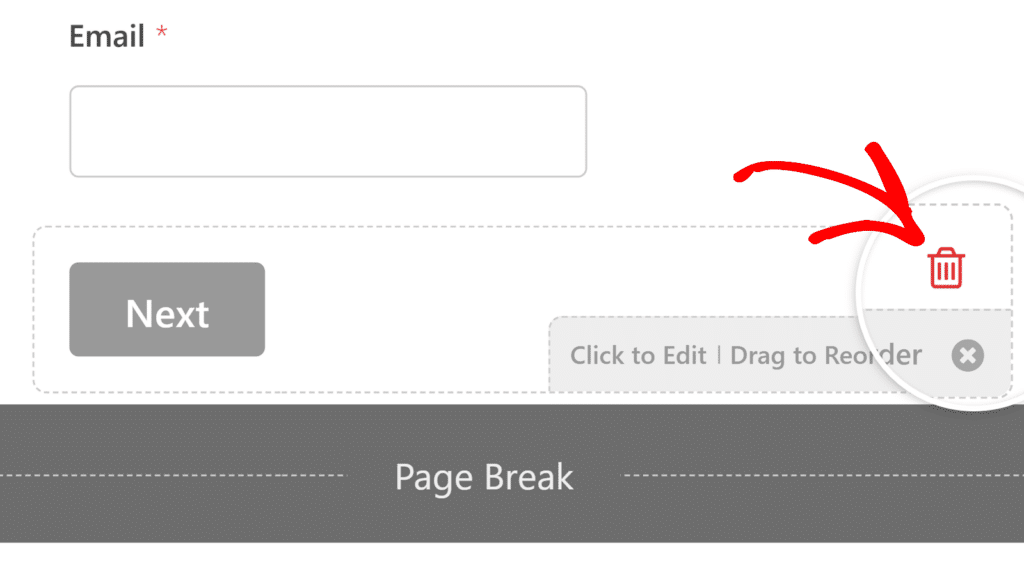
Yes, you can delete a Page Break field, though its delete icon appears in a different location than other fields. While most form fields show their trash can icon on the right edge when you hover over them, the Page Break field’s delete icon appears next to the Next button.
To remove a Page Break field, simply hover over it in the preview area and click the trash icon next to the Next button. This will delete the Page Break and merge the pages together.
That’s it! You can now create multi-page forms with WPForms.
Next, would you like to learn how to add extra text or instructions to your form? Be sure to check out our tutorial on adding non-input text for more details.

