
AI Summary
A new client just signed up through your form. What’s the next step? Manually creating a certificate, a contract, or their first PDF invoice?
That manual process is where costly mistakes happen. A typo in the contract, the wrong total on an invoice, or an outdated certificate all make you look unprofessional from the very start.
This is where the WPForms PDF Addon comes in. It instantly turns form submissions into polished, branded PDFs, so every document is professional, error-free, and delivered on time.
Generate Branded PDFs with WPForms! 🙂
How to Generate Branded PDFs with WPForms
Now, let’s get this set up on your site. Follow these instructions to automate your document workflow in just a few minutes.
Step 1: Install the WPForms Plugin
Most form plugins make you jump through hoops to create professional documents. WPForms takes a different approach by including PDF generation as a core feature.
With WPForms Pro, you get access to the PDF Addon, plus other powerful features like Stripe payments, conditional logic, and email marketing integrations.

If you haven’t installed WPForms yet, go ahead and do that first. It only takes a minute. And if you’re not sure how to install a plugin in WordPress, you can check out this step-by-step guide for help.
Once it’s installed and ready to go, you’ll have everything you need to start building a branded PDF with consistent styling and zero coding required.
Step 2: Activate the PDF Addon
After you’ve installed the WPForms plugin and activated it, head to your WordPress dashboard and go to WPForms » Addons.
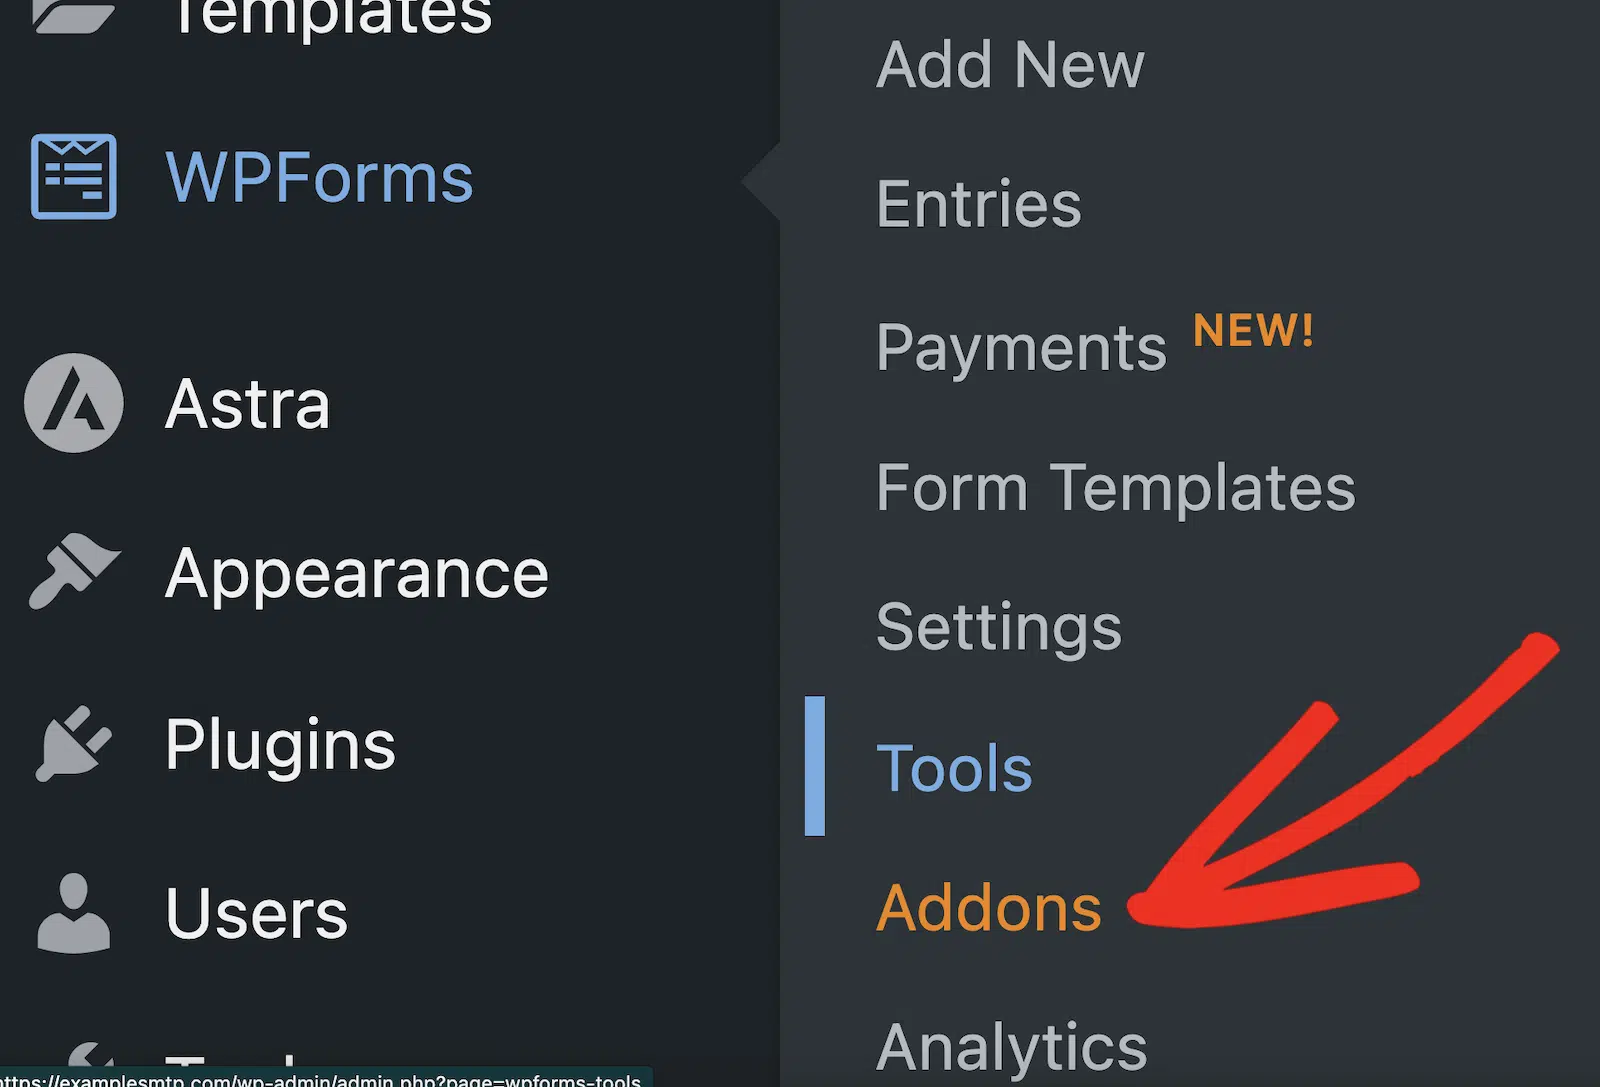
In the search bar, type “PDF”. Once the WPForms PDF Addon shows up, click on the Install Addon button and then after a few seconds Activate it.

Step 3: Create or Edit Your Form
Before diving into PDF settings, you need a form with the right fields for your document. Navigate to WPForms » Add New to create a new form.

Next, choose a template that matches your goal. For invoices, start with the Order Form template. For certificates, try the Event Registration form.

You can also use Generate With AI to quickly speed up the form creation process. Hovering over it displays the Generate Form button. You’ll need to click on this button to proceed.
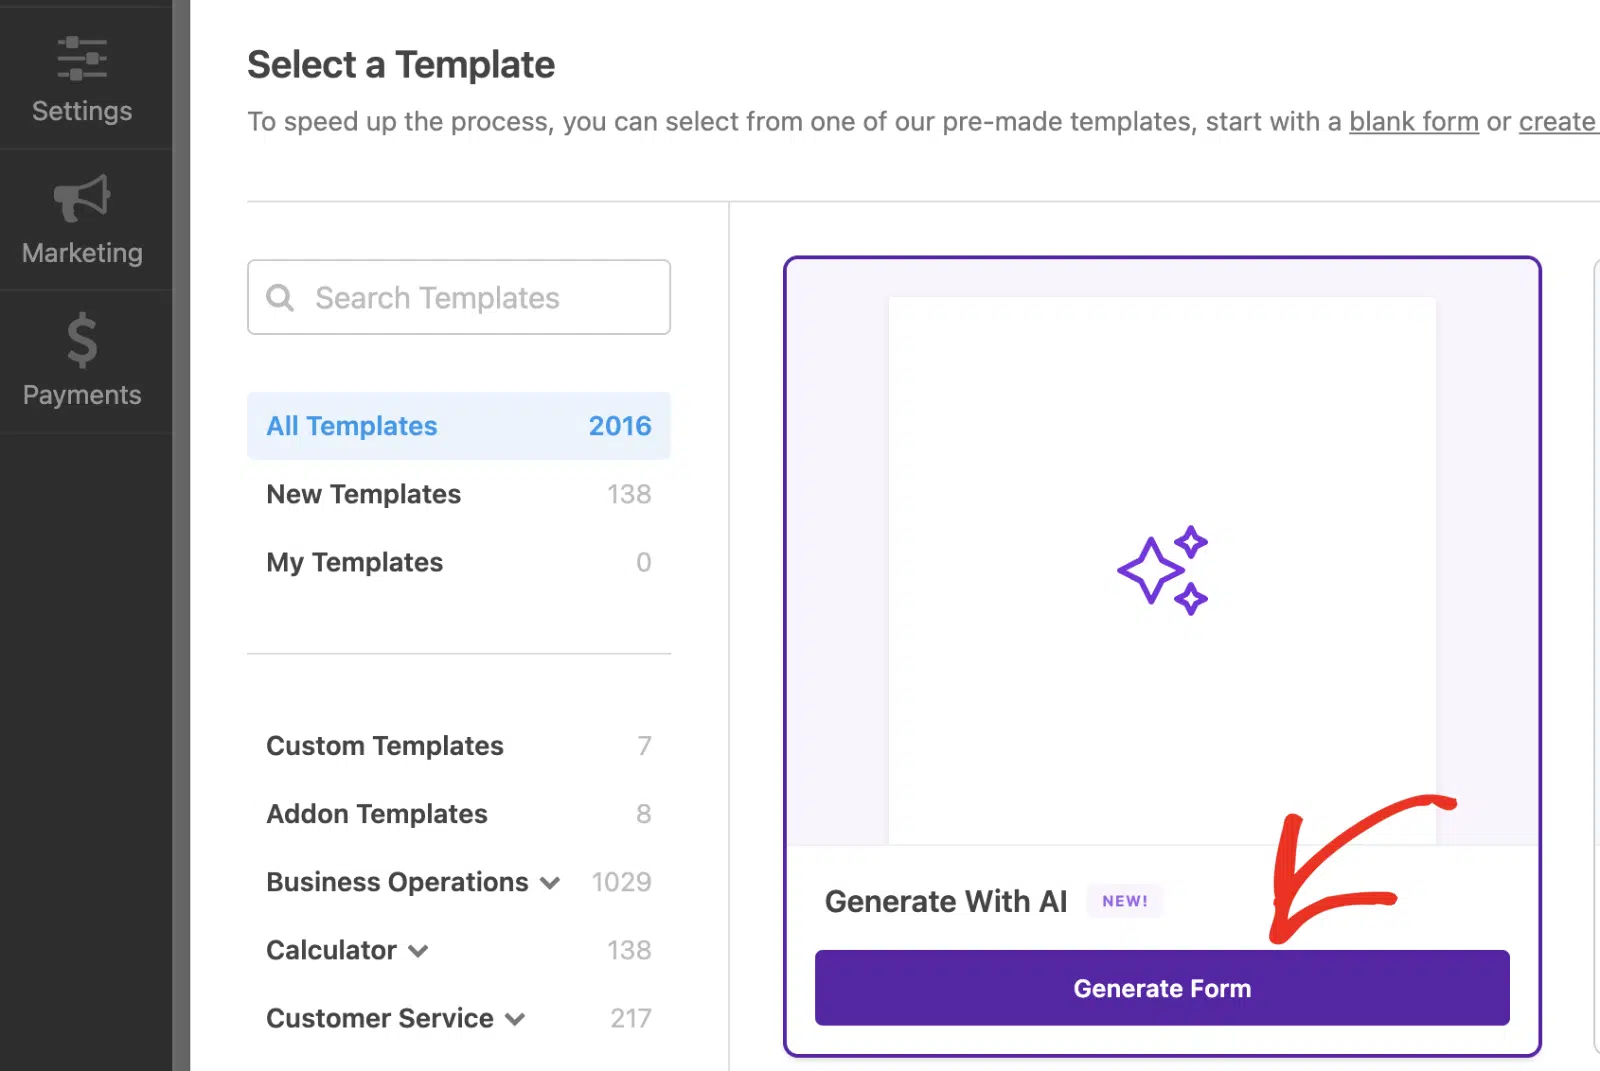
You can also use the Blank Form if you prefer starting from scratch. Include Name and Email fields for personalization, Dropdown or Checkbox fields for services or products, and Number fields for quantities or amounts.
It is best to think about the final document when adding fields. For instance, a course registration form might need Course Name, Start Date, and Instructor fields to generate proper certificates.
Step 4: Set Up Your PDF Configuration
With your form ready, navigate to Settings » PDF in the form builder. Click the Add New PDF button to create your first document.

Give your PDF a descriptive name in the popup window and click OK. You’ll see the PDF editor with a live preview on the left and all customization options on the right.

Start by configuring the basic settings. The File Name field defaults to your form name plus “.pdf”, but you can customize it or add smart tags for dynamic names like “Invoice-{entry_id}.pdf”.
Choose which email notifications should include this PDF as an attachment, and enable Conditional Logic if you only want PDFs generated under specific conditions.
Step 5: Choose Your Template and Style
The PDF addon includes four template categories, each designed for different business needs.
- Notifications match email styles for simple summaries.
- Documents offer flexible layouts for contracts and applications.
- Financial templates are built specifically for invoices and billing.
- Certificates provide award and completion layouts.
Select a Category from the dropdown, then pick a Style within that category.
For this tutorial, I’ll be using the Financial category and Modern style, since I want to create a PDF invoice.

If you’re unsure about which template and style to use, feel free to click the View All Templates button to browse every option with live previews.

Now comes the fun part of making the template yours. Click any field in the settings panel to see a red outline around it in the preview, so you know exactly what you’re editing.
Replace placeholder text with your own content. For larger content areas, use the built-in text editor to add headings, bold text, bullet points, and even HTML formatting.
The real power comes from smart tags. Click the Smart Tag icon next to any field and select from your form fields to pull in dynamic data, like using the Form ID as the Invoice Number.

You can also change text colors using the color picker next to each field, and toggle optional elements like badges or signature blocks on or off based on your needs.
Next, head to the Appearance section to make the PDF truly yours. Choose from over 40 pre-made themes in the Theme dropdown, each showing color previews to help you decide quickly.

Want to customize further? Click Edit Theme Colors to adjust the palette. WPForms automatically creates a copy of the theme instead of overwriting the original, so you can always revert back.

You can also upload your logo by clicking Upload Image (supports .png, .gif, .jpg, and .svg files). Set the logo Size to Small, Medium, Large, or Full, and choose its Position as Left, Center, or Right.
Step 6: Test and Launch Your PDF System
After creating your form and setting up your PDF, click Save to preserve your settings, then submit a test entry to see your PDF in action. Go to WPForms » Entries and click View on your test submission.

You’ll find a download link in the PDF section of the entry page. Open it to review the formatting, branding, and dynamic content population.

If everything looks good, publish your form and start collecting submissions. Each entry will automatically generate a branded PDF according to your specifications, saving you hours of manual document creation.
FAQs on How to Create Branded PDFs with WPForms
Learning how to create branded PDFs with WPForms is a popular topic of interest among our readers. Here are answers to some common queries about it:
What types of PDFs can I create with WPForms?
The PDF addon supports four main document types:
- simple notification summaries that match your email styles,
- flexible documents like contracts and applications,
- financial documents such as invoices and receipts,
- professional certificates for courses or awards.
Each category includes multiple design styles to match your branding needs.
Do I need coding skills to customize PDF templates?
Not at all. The PDF addon includes a visual editor with drag-and-drop customization.
You can edit text, change colors, upload logos, and insert dynamic content using smart tags, all through an intuitive interface with live preview.
Can I create multiple PDF types from the same form?
Yes, you can set up multiple PDFs for a single form. Use conditional logic to generate different documents based on user selections like sending invoices to paying customers and simple receipts to free downloads, all from the same registration form.
How secure are the generated PDFs?
WPForms includes access restrictions for PDFs. You can limit viewing to logged-in users, specific user roles, or protect documents with passwords.
This keeps sensitive information like invoices and contracts secure while still allowing easy distribution to authorized recipients.
Can I automatically email PDFs to form submitters?
Absolutely. In the PDF settings, choose which email notifications should include your PDF as an attachment. The document gets generated and sent automatically when someone submits your form.
What WPForms license do I need for the PDF addon?
The PDF addon requires a Pro license or higher. This also gives you access to conditional logic, payment processing, email marketing integrations, and 40+ other powerful addons to create complete business automation workflows.
Next, How to Add a Camera Field to Your WordPress Form
Have you ever tried to upload a photo to a form and found yourself scrolling through tons of screenshots, memes, and vacation pics just to find the right one?
That’s why the Camera field in WPForms feels like a small miracle. It lets people take a photo or video instantly, right from their device’s camera, without ever leaving the form.
Create Your WordPress Form Now! 🙂
Ready to build your form? Get started today with the easiest WordPress form builder plugin. WPForms Pro includes lots of free templates and offers a 14-day money-back guarantee.
If this article helped you out, please follow us on Facebook and Twitter for more free WordPress tutorials and guides.

