Do you want to create a WordPress sitemap?
Search engines use sitemaps to quickly index your site pages and understand the relationship between each page. As such, sitemaps have a lot of search engine optimization (SEO) value for your website.
In this article, we’ll explain the importance of sitemaps and show you how to create a sitemap in WordPress.
In This Article
What Is an XML Sitemap?
An Extensible Markup Language (XML) sitemap contains a list of all the URLs on your website in an XML file (a machine-readable format for search engines).
You can think of a sitemap as a blueprint for your site’s overall content structure. Without it, search engines can’t easily see how different pages of your site relate to one another.
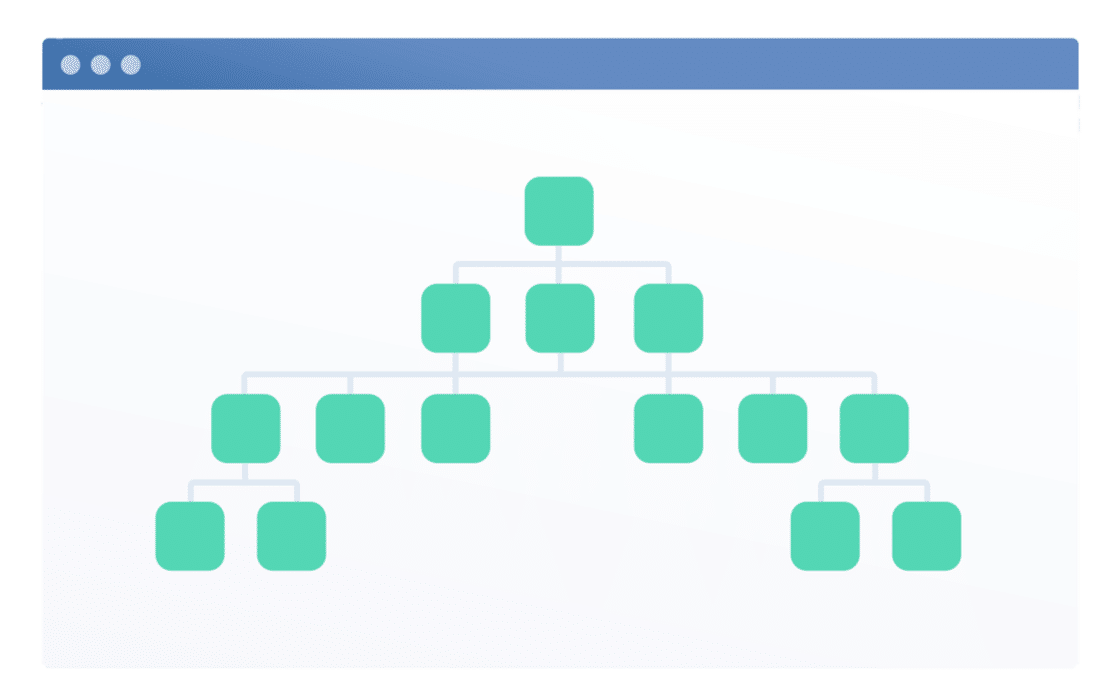
An XML sitemap allows you to:
- Give search engines like Google, Bing, and DuckDuckGo a quick way to discover the content on your site
- Help these search engines determine the relative importance of each page on your site
- Note the date each page was created or last updated, which can help with SEO
- Make sure all of your content is discoverable and can be indexed for inclusion on search engine result pages (SERPs).
Without a sitemap, you might struggle to rank for important keywords.
With that said, let’s now see how you can generate a sitemap for your WordPress site.
How to Make a Sitemap in WordPress
WordPress automatically creates a simple sitemap for your website. However, this sitemap includes every page on your site (even no-index pages) and there’s no way of customizing it without using code.
The easiest way to generate a customized sitemap is with AIOSEO, which is the best SEO plugin for WordPress.
Here are the steps we’re going to go through to set up the XML sitemap for your site:
Let’s dive in.
Step 1: Install All in One SEO
To start with, install the All in One SO plugin on your WordPress site like you would any other plugin.
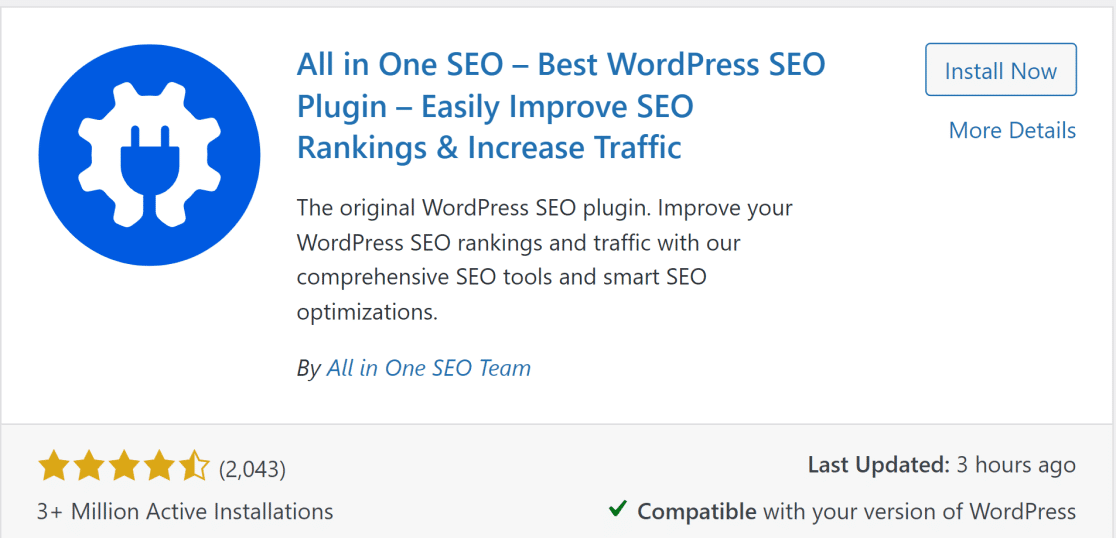
If you don’t know how, you can see this WP Beginner guide on how to install a WordPress plugin.
When the plugin is installed and activated on your site, move to the next step.
Step 2: Preview Your Sitemap
Sitemaps are enabled by default in AIOSEO, but it’s always a good idea to double-check and preview your sitemap.
To do this, click on All in One SEO » Sitemap from your WordPress dashboard menu. This will directly take you to the General Sitemap settings page.
You should have the Enable Sitemap button toggled on by default.
To preview your sitemap, simply click on Open Sitemap.

This will open your sitemap index page, which will look similar to this:
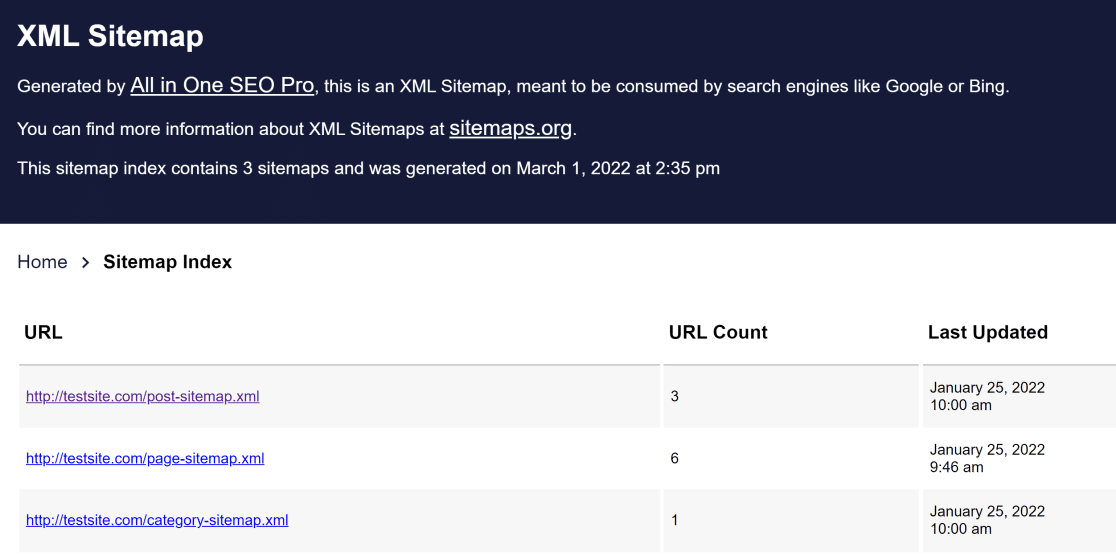
You can also view your sitemap in your browser. Simply add /sitemap.xml where your web URL ends to view your sitemap. For example, if your website is test.com then your WordPress sitemap URL will be: test.com/sitemap.xml
For basic websites, AIOSEO makes distinct sitemaps for your site’s posts, pages, and categories. However, if you’re an online store, your sitemap index will also include product pages.
In the next step, we’ll explore sitemap settings that allow you to customize as per your needs.
Step 3: Customize Sitemap Settings
When your scroll down to the Sitemap Settings section, the first thing you’ll see is the Enable Sitemap Indexes option, which is Enabled by default.
If you have a small website (with URLs in the hundreds, not thousands), you can disable sitemap indexes without any problems. However, we recommend enabling sitemap indexes if you have more than 1,000 URLs on your site.
To change the sitemap indexes settings on AIOSEO, you can simply use the toggle button to either Enable or Disable it.

If you’re unsure whether to enable sitemap indexes on your site, remember that it’s good practice to leave the sitemap indexes setting enabled so AIOSEO can organize your URLs into distinct, easily readable XML sitemaps files of a fixed number of URLs.
AIOSEO allows you to specify the maximum number of URLs to include per sitemap file. By default, the Links Per Sitemap field is set to 1,000 URLs, which is the ideal number. You should stick with this default setting since it works the best for most sites.

Scrolling down further, you should see settings for Post Types and Taxonomies. By default, AIOSEO makes a sitemap that includes all of your post types and taxonomies (as long as they’re not no-index).

We recommend leaving these settings checked.
However, if you’re experienced with SEO and have very particular requirements for your sitemap, then the good news is that AIOSEO lets you control which post types and taxonomies you’d like to include in your sitemap.
Excluding certain post types that provide no traffic value for your website can be useful, especially if you have a large website that is suffering from indexing issues.
If you want to select only particular post types, uncheck the boxes next to Post Types and Taxonomies to view options for all different types of posts on your site.
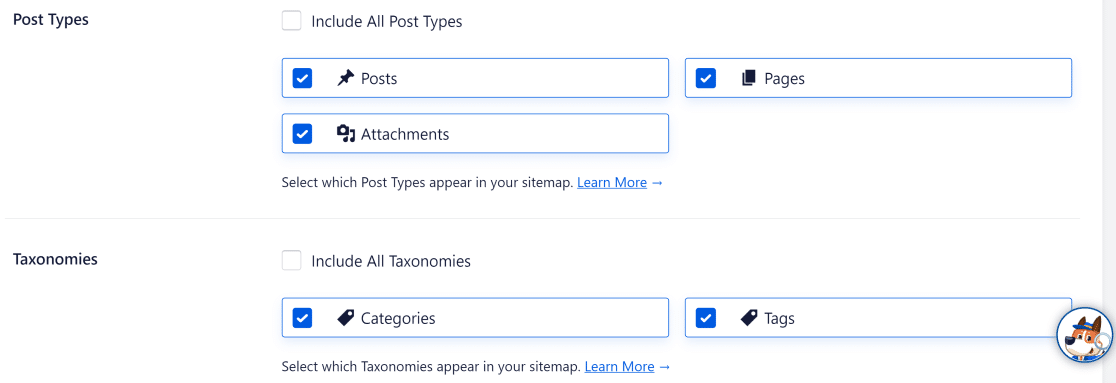
Now, simply deselect those post types that you want to exclude from your WordPress sitemap.
Step 4: Additional Sitemap Settings (Optional)
AIOSEO allows advanced users to go into finer details when it comes to WordPress sitemap customization.
For instance, it lets you control the Date Archive Sitemap and Author Sitemap settings. If you scroll down from where we left in the previous step, you should see these settings:
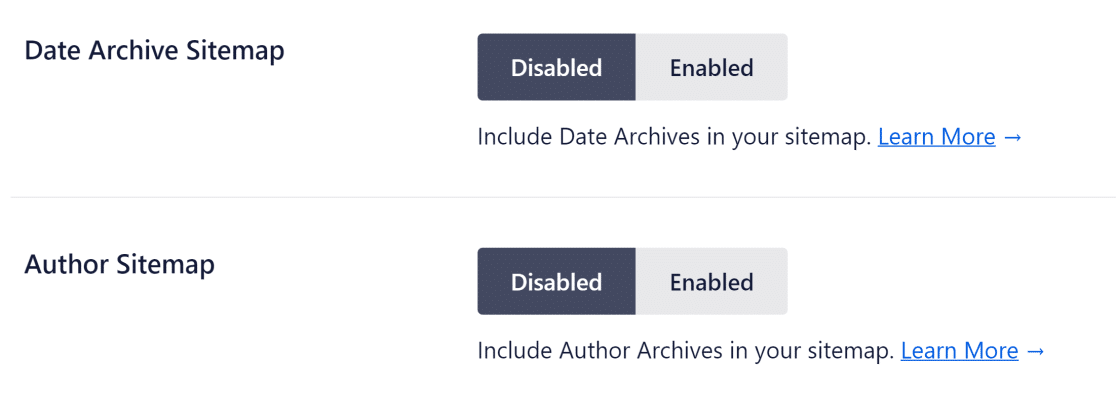
When WordPress creates your sitemap, it includes the date and author details in the sitemap as new posts are published.
AIOSEO’s default setting keeps date and author archives disabled because these do not provide any SEO value in many cases.
However, you might want to enable archives in special cases:
- News websites can benefit from a date archive because it can help your visitors find your posts by date.
- Blogs with multiple authors could benefit if each author has a following of their own. This will allow search engines to index your pages by authors and enable visitors to find posts by individual authors on your site.
Advanced Sitemap Settings
At the bottom of the General Sitemap page, you can toggle on the Advanced Settings option to get even more control over your sitemap.
Here, you’ll find options to exclude any particular posts on your WordPress site, set priority and frequency scores for all of your pages, and choose whether you want to exclude images from your sitemap.
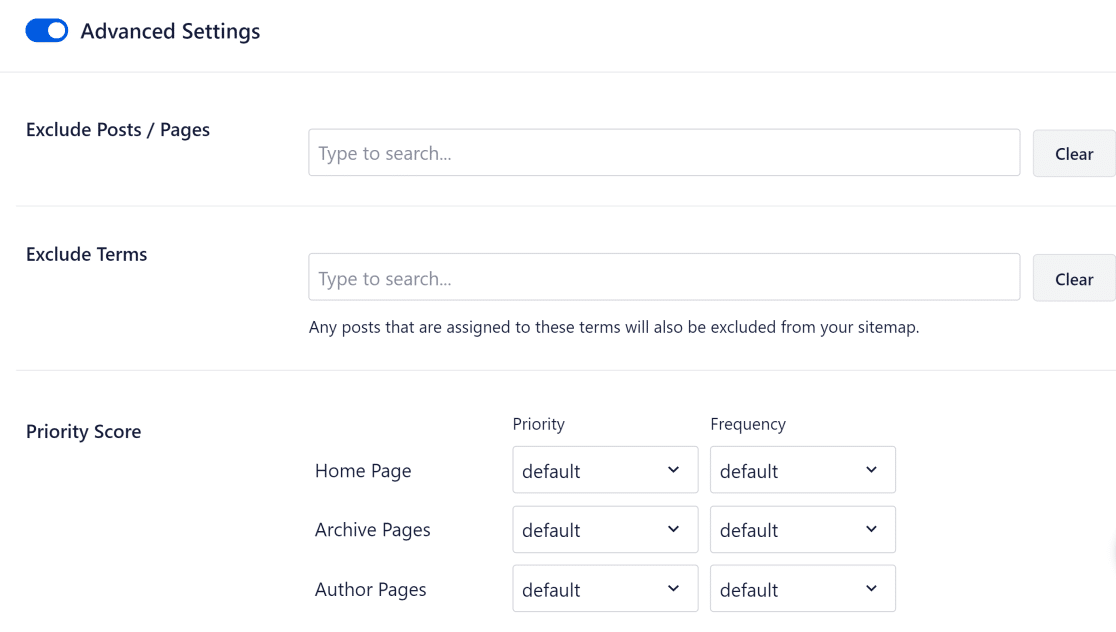
You can use the Priority Score to indicate how important a URL or post type is for your website relative to other pages. The priority score ranges from 0.0 (least important) to 1.0 (most important). The default priority score for all pages is 0.5.
The Frequency tells search engines how quickly a particular URL or post type is likely to change on a given page. For example, the homepage typically changes very rarely for most sites, but some blog posts might be frequently updated. You have various frequency options such as always, hourly, daily, weekly, and so on.
But remember, you don’t need to change any of these settings in the majority of cases. AIOSEO’s creates highly effective sitemaps that are perfectly capable of improving your site’s indexing rates even if you don’t change any of the default settings.
Step 5: Submit Sitemap to Search Engines
When you’re first starting your site and have generated a sitemap, it’s always a good idea to submit your sitemap to search engines to assist them in locating your sitemap faster.
Submitting Sitemap to Google
In order to submit your sitemap to Google, you must first have access to your Google Search Console property. If you don’t have it yet, don’t worry. It’s really easy to set it up as we’ll show you in the steps below.
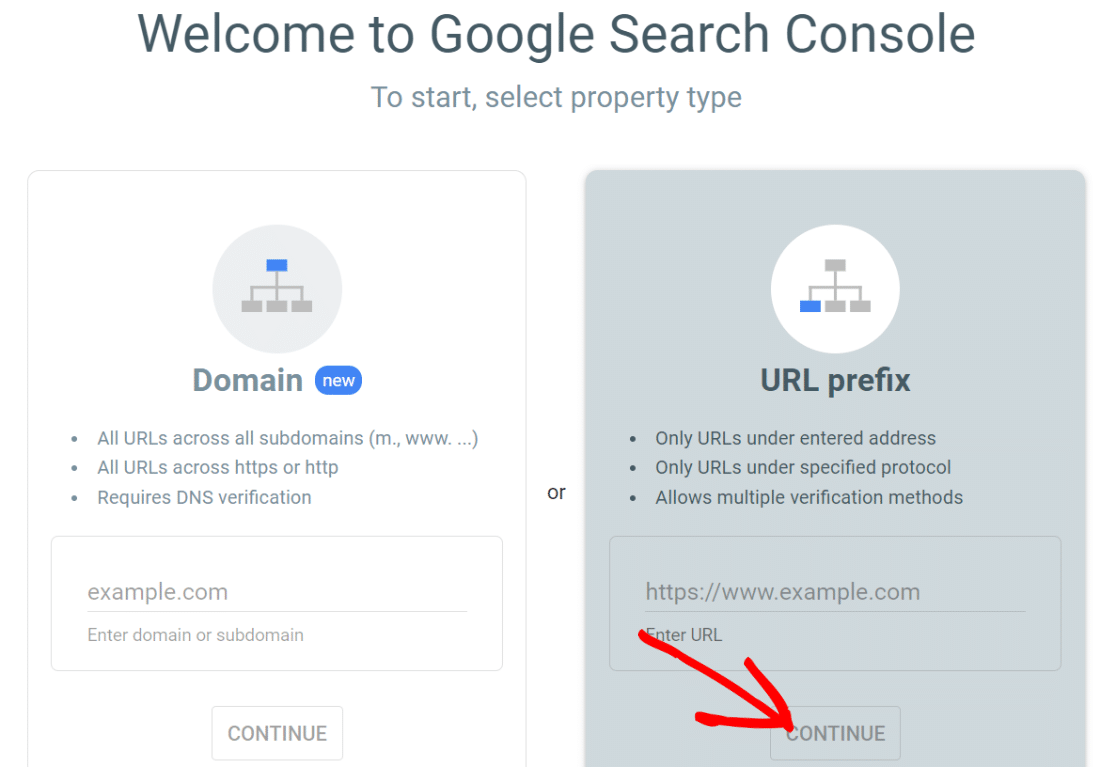
Start with visiting the Google Search Console welcome page after logging into your Google account. You’ll see two available methods for creating your Search Console property.
We recommend using the 2nd option i.e. URL prefix because it’s less complicated than the other method.
All you need is to enter the URL to your website’s frontpage such as https://example.com. This will allow Google Search Console to access your entire website, starting from the root directory and all its associated child directories starting from the main prefix.
After entering your root domain URL, press Continue.
At this point, Google will require you to verify your website ownership. It offers a few methods for accomplishing this, but the easiest way to do it in WordPress is an option other than the recommended one.
This is the HTML tag verification method. Click on the HTML tag menu to expand it. You’ll find a code here that you can copy.
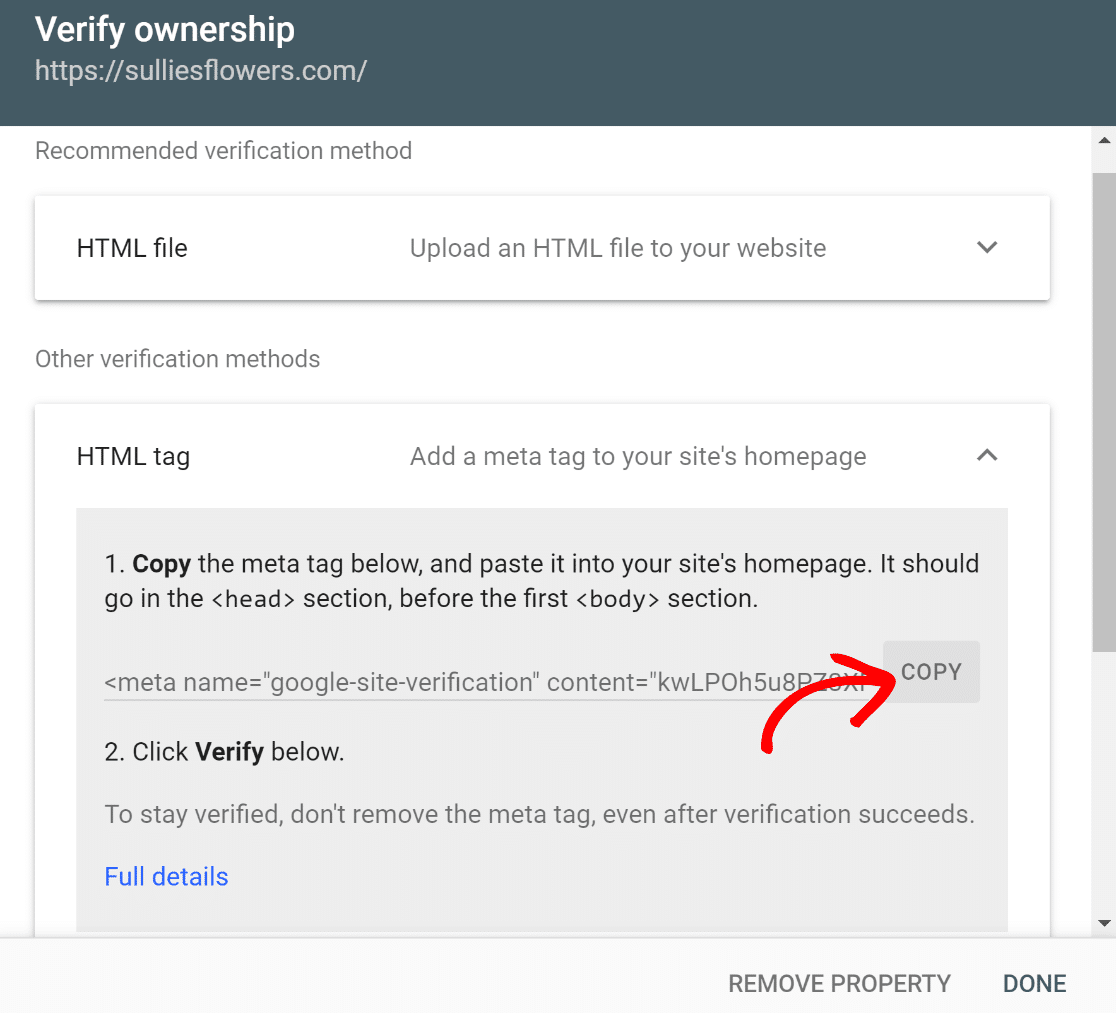
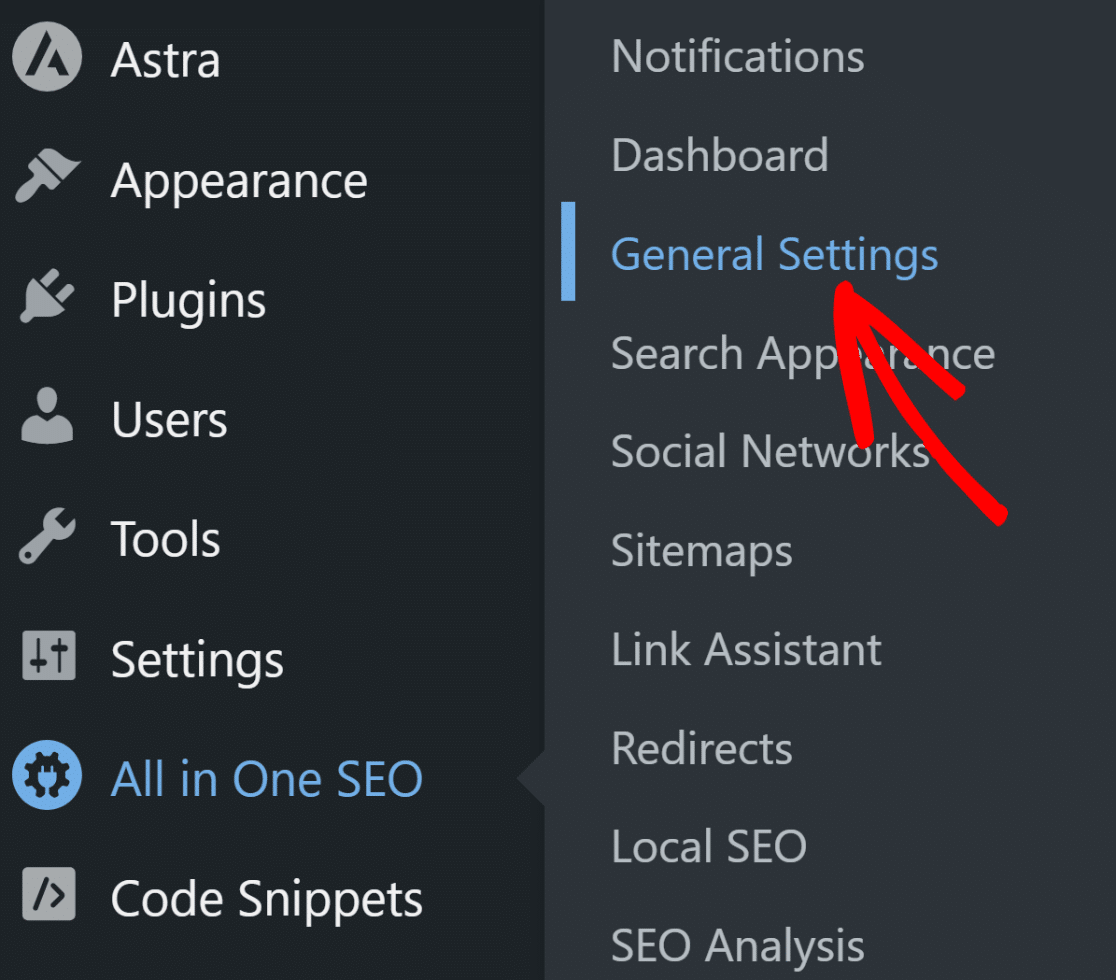
Once you’ve copied the code, switch tabs to your WordPress dashboard. Now, navigate to AIOSEO » General Settings.
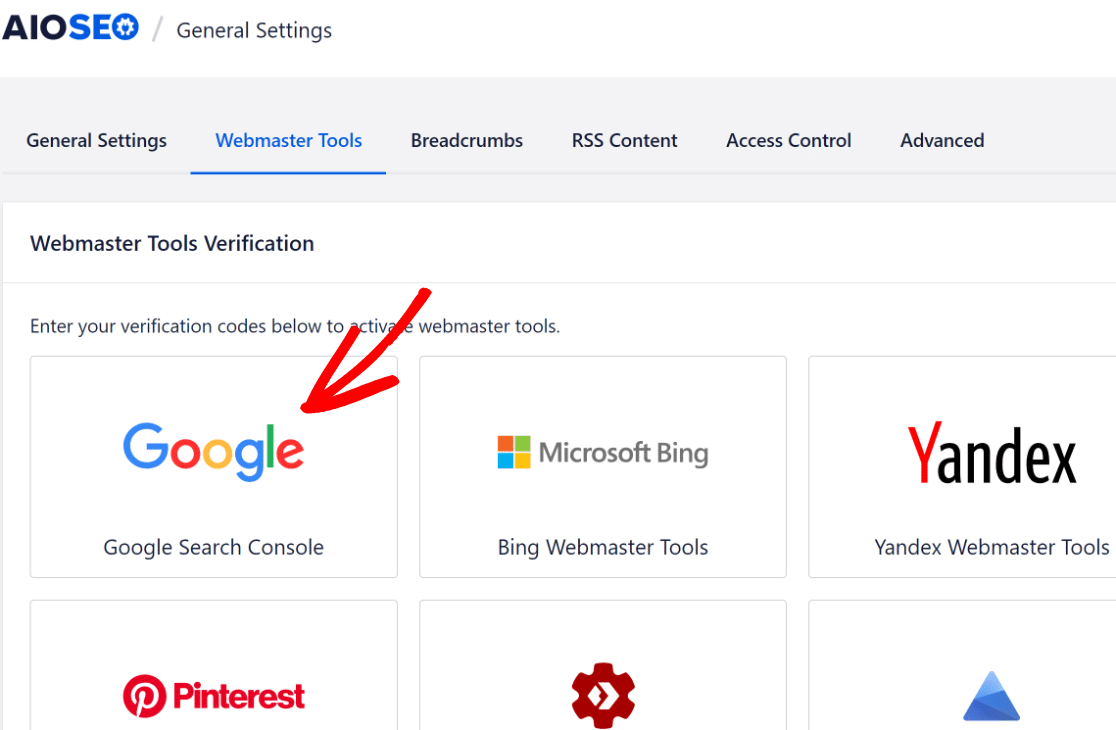
Once inside the settings area, go to the Webmaster Tools tab on the horizontal menu bar then select Google Search Console from the options in the grid.
Remember the HTML tag you copied earlier? Paste it in the Google verification code field.
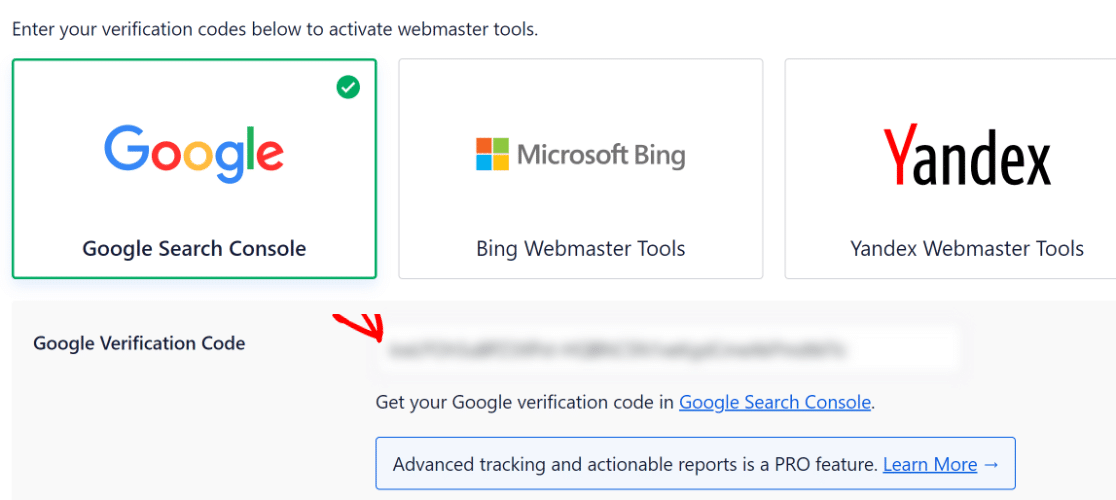
Next, scroll down to the bottom of this window and press Save Changes.

Switch back to the Google Search Console tab in your browser. It’s time to click on the Verify button under the HTML tag menu.
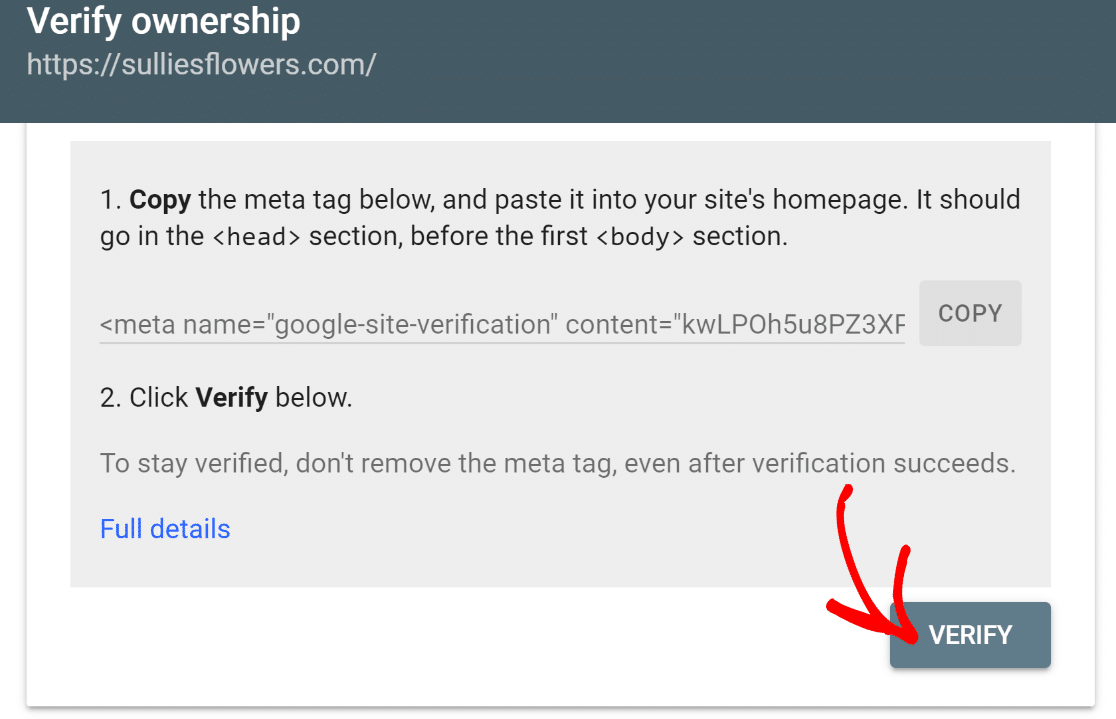
“🎩 Pro tip: Google may not verify your site right away after you add the HTML tag. If your verification attempt was unsuccessful, I suggest clearing your website cache and trying again. This is easily handled if you’re using a caching plugin like WP Rocket or W3 Total Cache.”
Once verification is successful, you’ll be able to access your Google Search Console dashboard. One of the many options available here is sitemap submission.
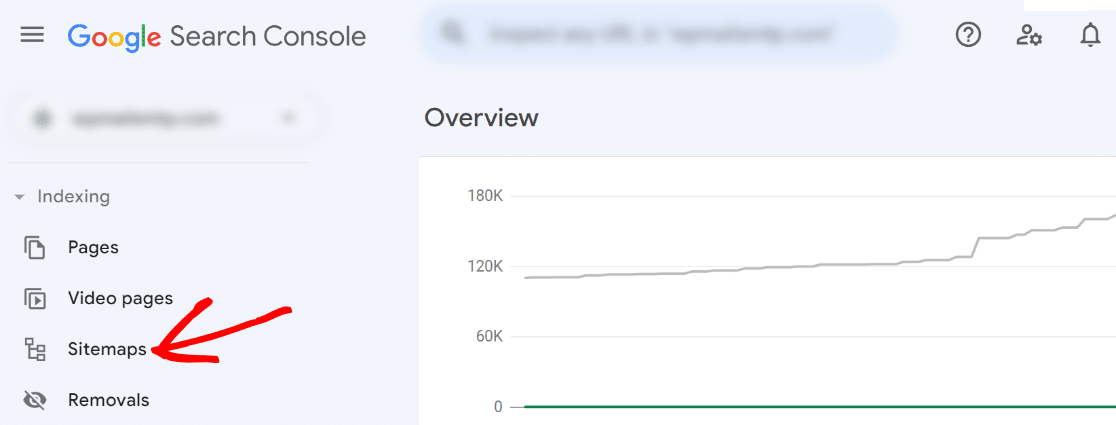
Scroll down on the menu options on the left and click on Sitemaps.
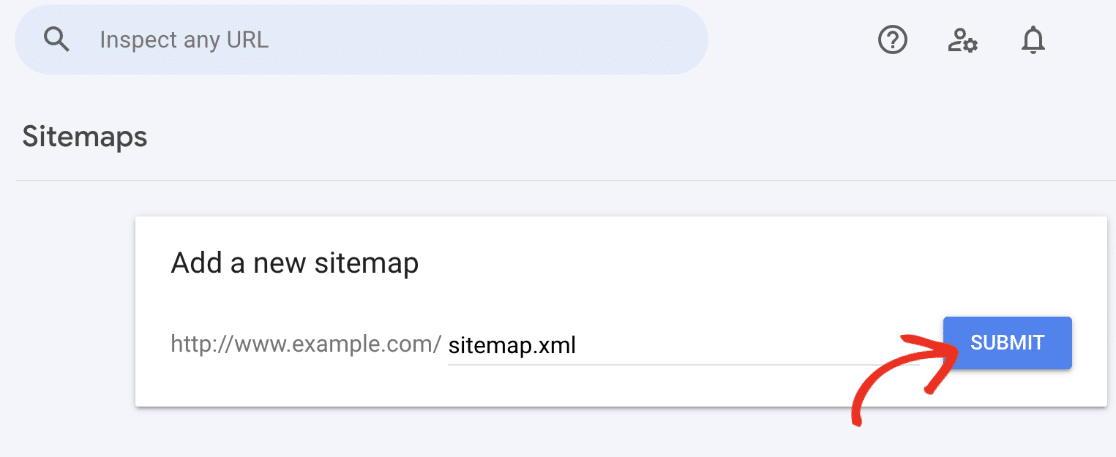
You should now see an option for adding a new sitemap to Google Search Console. You’ll only need to enter the part of your sitemap’s URL that appears after your root domain prefix.
Because the full URL of the sitemap is usually http://www.[your domain name].com/sitemap.xml, you can just enter “sitemap.xml” after the forward slash here and press submit.
When you’ve submitted it, you’ll see a success message after a short while telling you that your sitemap was successfully processed.
In a few moments, you’ll now be able to see some basic details about your sitemap which is further proof that Google has now successfully located and crawled through your sitemap.

Sweet! With Google out of the way, you can now think about other search engines that you want to be able to find your sitemap efficiently so they can also crawl your website.
While Google is the dominant search engine all over the world, it’s still a good idea to also submit your sitemap to alternate search engines like Bing.
Submitting Sitemap to Bing
Before starting this step, we strongly recommend you first submit your sitemap to Google Search Console.
This is because setting up Bing Webmaster Tools is completely automatic once you’ve already set up Google Search Console.
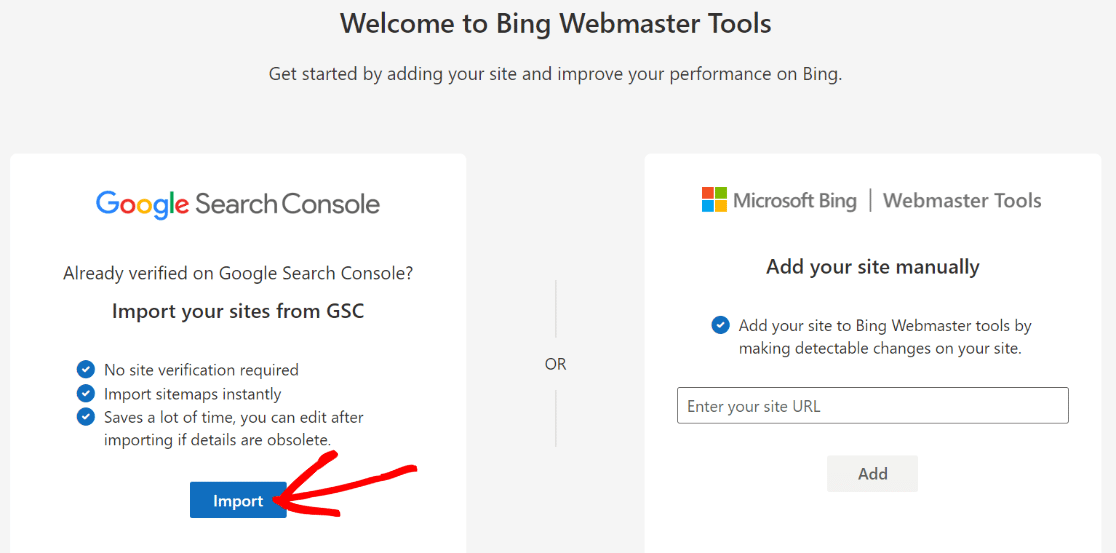
To start, visit Bing Webmaster Tools. You’ll see two options for adding your site. The easy way to do this is by importing your verification details from Google Search Console.
Click on the Import button on the left to begin this process.
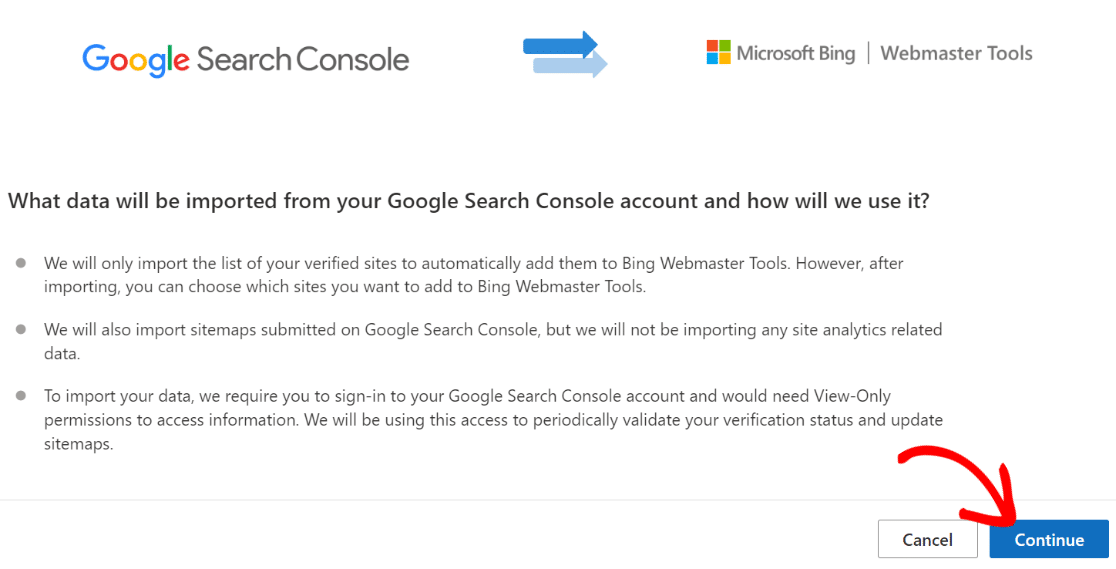
You’ll see a new window open where Bing will explain how your Google Search Console account will be used.
Essentially, Bing only requires view-only permissions to access your Google Search Console account periodically to check your verification status and update sitemaps.
When you’re ready to proceed, click on the Continue button.
After that, Bing will require you to sign into your Google account and request permission to access your Google Search Console account.
Once you’ve signed and allowed the requested permissions, your site will be added to Bing and your sitemap will be automatically submitted.
It’s that easy!
And there you have it! You now know how to create a sitemap in WordPress and make your website more easily discoverable by search engines.
Next, Design Effective Student Surveys
Are you running a class survey? Make sure to see these student survey question examples to design a survey that provides valuable feedback.
Also, don’t forget to check our tips for launching an Instagram giveaway.
Create Your WordPress Form Now
Ready to build your form? Get started today with the easiest WordPress form builder plugin. WPForms Pro includes lots of free templates and offers a 14-day money-back guarantee.
If this article helped you out, please follow us on Facebook and Twitter for more free WordPress tutorials and guides.

