AI Summary
Creating a responsive contact form with multiple columns sounds like it should be simple, but when you start working on it, things can get complicated fast.
You may wonder, “Can I really make this form look good on all devices without breaking the design?” This is a valid concern, especially if you’ve struggled with forms that don’t quite fit or feel clunky on mobile.
The good news is you can use WPForms to set up a responsive contact form with multiple columns. Follow the steps in this guide to get started!
Create Your Multi-Column Form Now! 🙂
How to Make a Multi-Column Form in WPForms
Making a muti-column form in WPForms is incredibly easy. Before starting, make sure you have a WPForms Pro license because you’ll get the Layout field along with tons of useful features with this plan.
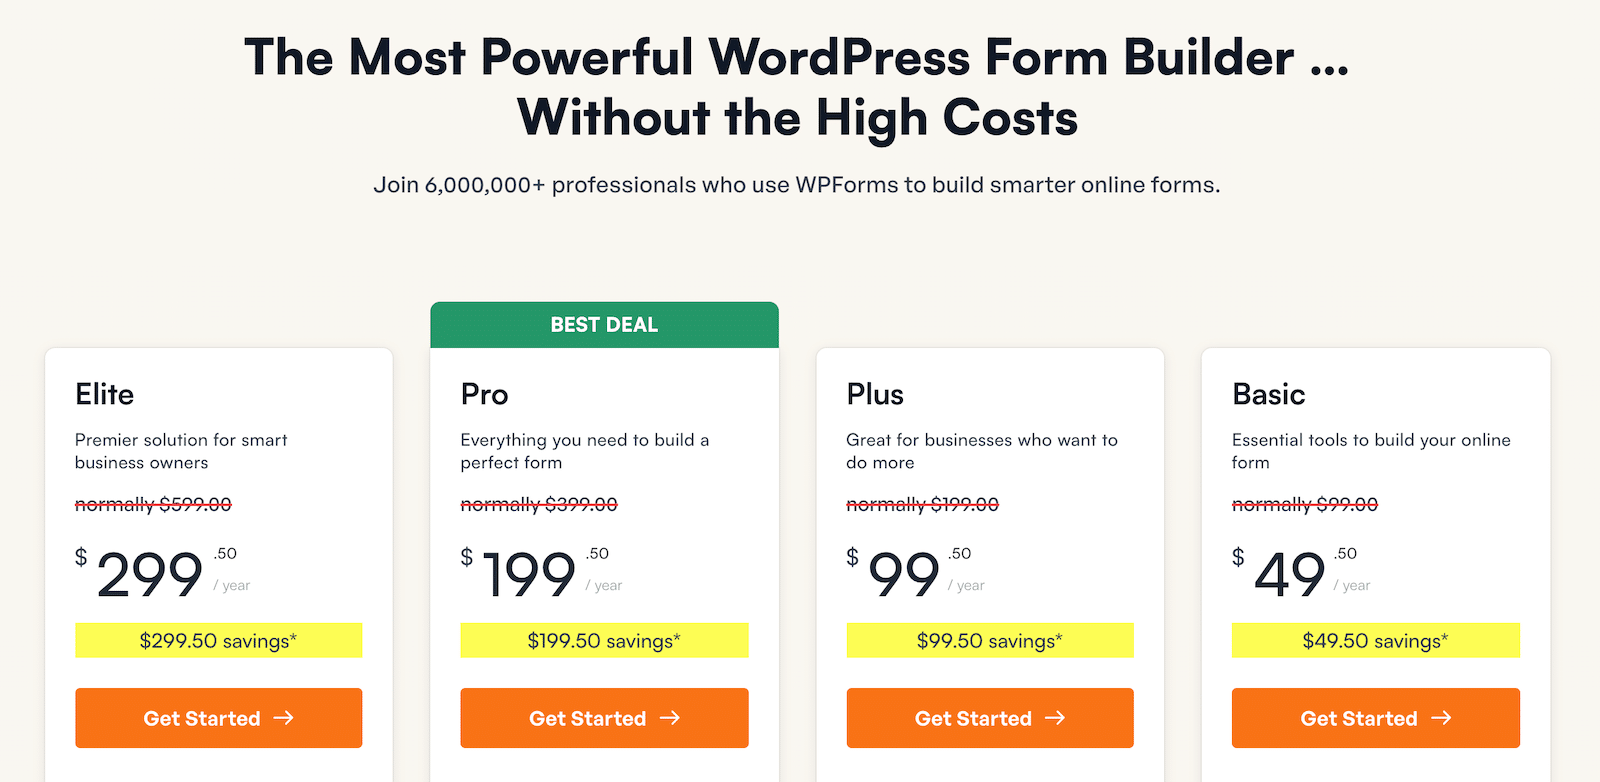
When you’ve purchased the license and installed WPForms on your site, just follow the steps below to create column layouts in your form.
Step 1. Create a New Form
Let’s start by creating a new form with a columns layout. To do that, open your WordPress dashboard and go to WPForms » Add New.

This will open the WPForms form builder interface. You can enter a name that you’d like to call your form and select a template.
For this example, let’s build a form from scratch. This will allow us to first choose a multi-column form layout and then assign different fields to each column as we see fit.
However, WPForms has several ready-made templates that use multiple columns, such as the multi-column contact form template.
To create a form from scratch, hover your cursor over Blank Form (this should be the first item in the template list) and press Create Blank Form.
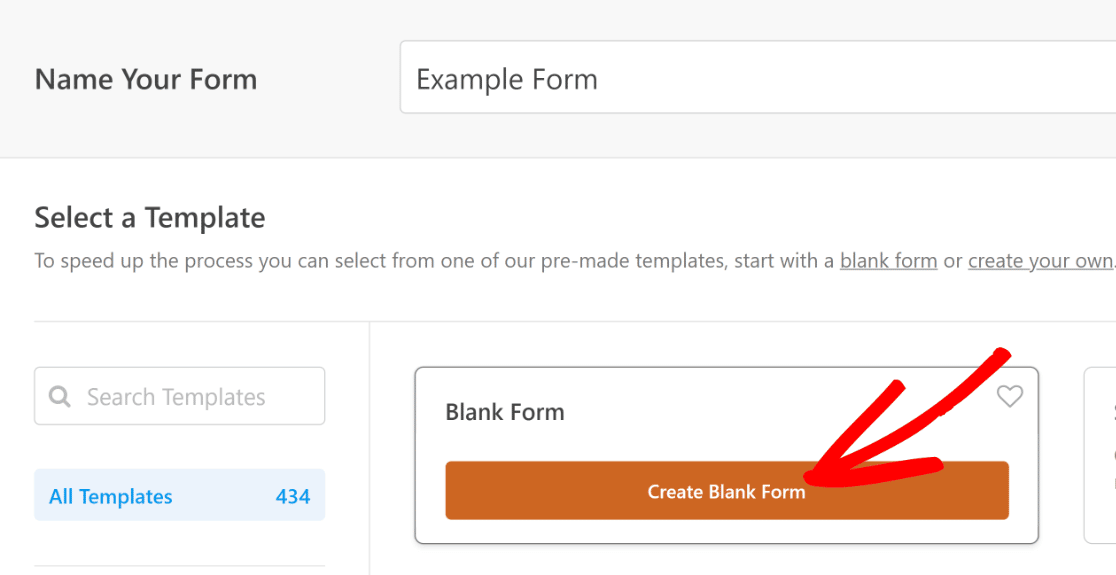
WPForms will now load a blank form that you can start building using simple drag and drop controls.
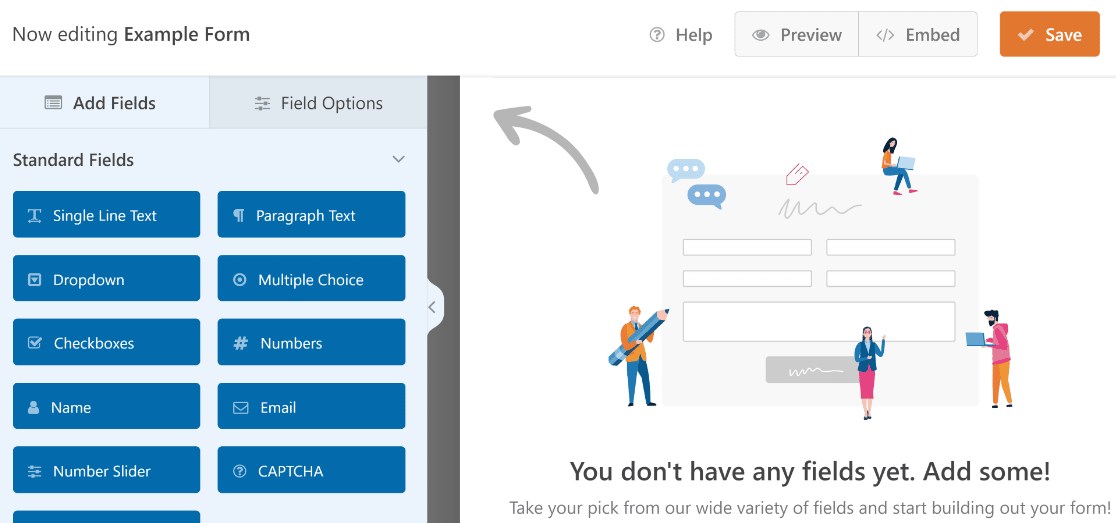
Now, let’s add some fields to this form and arrange them in a multi-column layout.
Step 2. Add Fields to Column Layout
In order to split an area of your form into multiple columns, you just need to add the Layout field.
Simply look under the Fancy Fields section on the left-hand pane, and drag and drop the Layout field onto the form on your right.
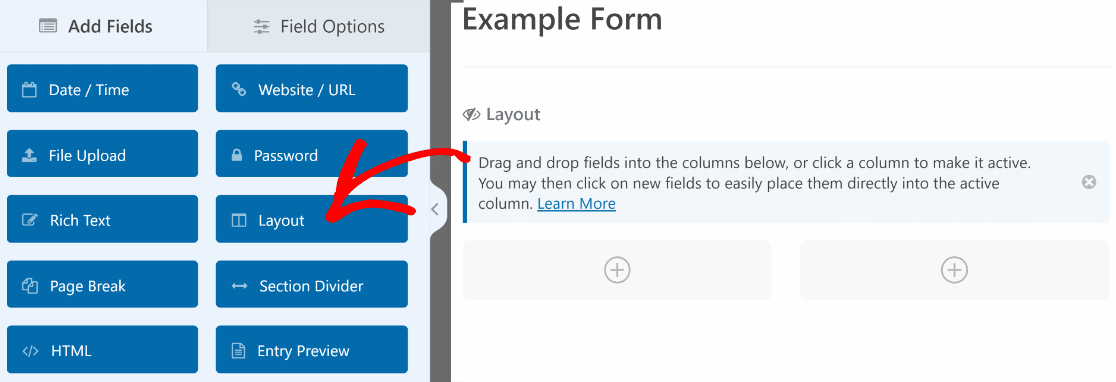
Now, we’re going to add the Name, Email, and Phone field on the left-hand column and an Address field to the right column.
The easiest way to do that is by clicking a column to make it active and then clicking the fields we want to add to that column.
Note: You can also drag and drop fields into the columns you want to assign them to.
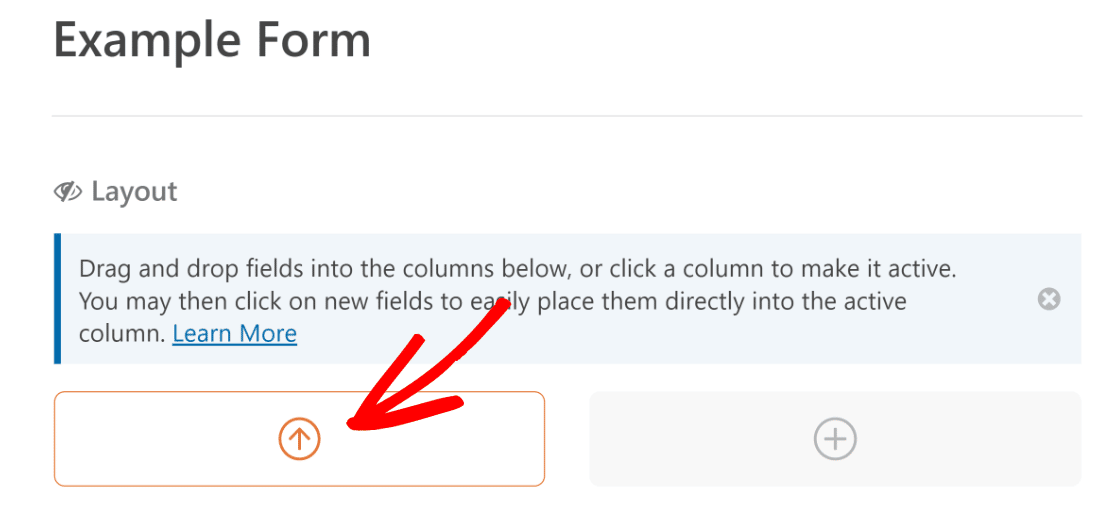
Let’s start by assigning fields to the left column first. We’ll click the left column to set it as active (as indicated by the upward arrow).
Now, we’ll click on the Name, Email, and Phone fields so that they get directly added to the active column one by one.
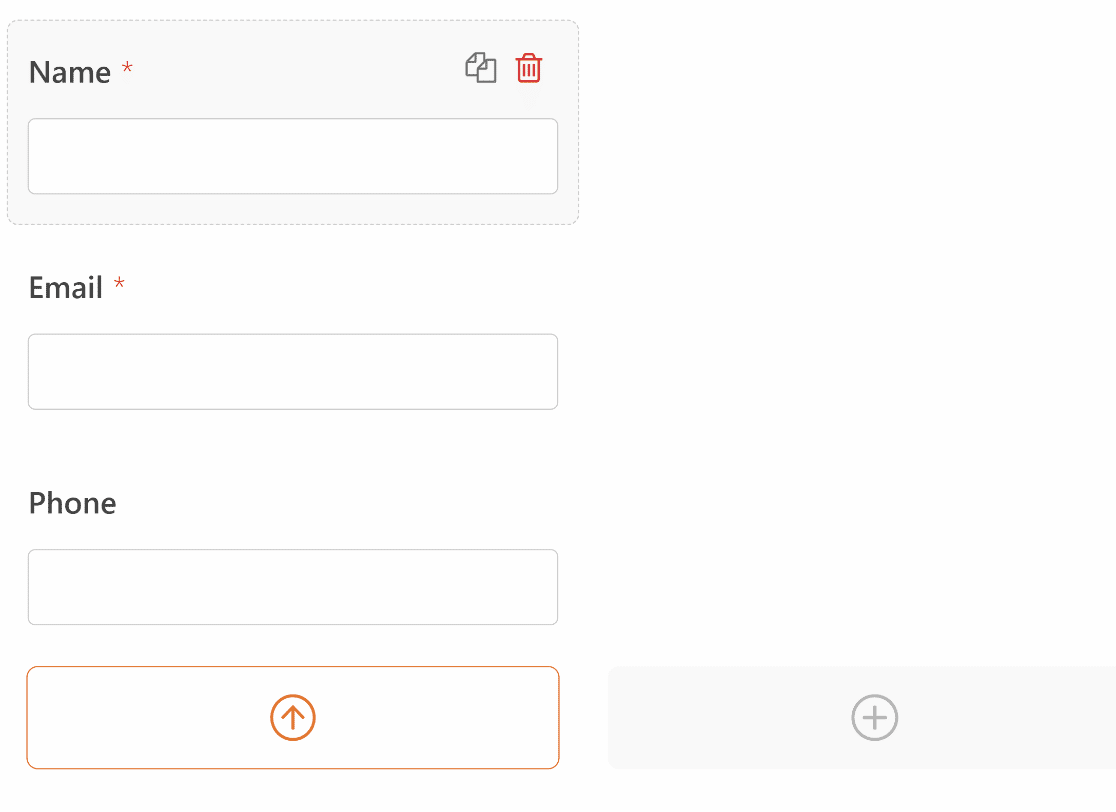
Next, we’ll repeat the same process for the column on the right and add the Address field to it.
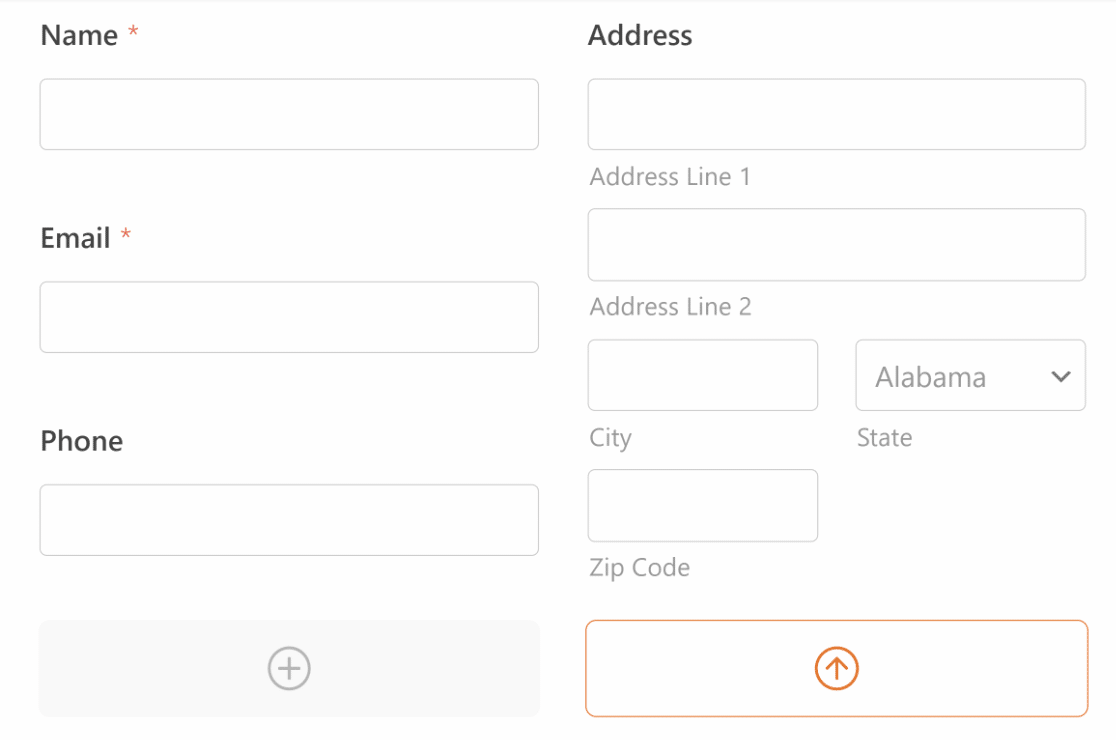
Great! This 2-column form is now looking in good shape.
But what if you wanted different widths for the two columns? Or maybe even more than 2 columns?
WPForms makes all of that possible as we show in the next step.
Also Read: Single Column Forms: Examples and Inspiration
Step 3. Customize the Form Layout
By default, the Layout field creates 2 equal-sized columns in your form. But you can choose from 8 different layouts and add up to 4 columns in a single form.
To select a layout preset, simply click on the Layout field after it’s added to your form.

After that, simply select a layout that works best for you. For instance, if you’d like a narrow column on the left but a wider one on the right, you can go with the 3rd layout option.
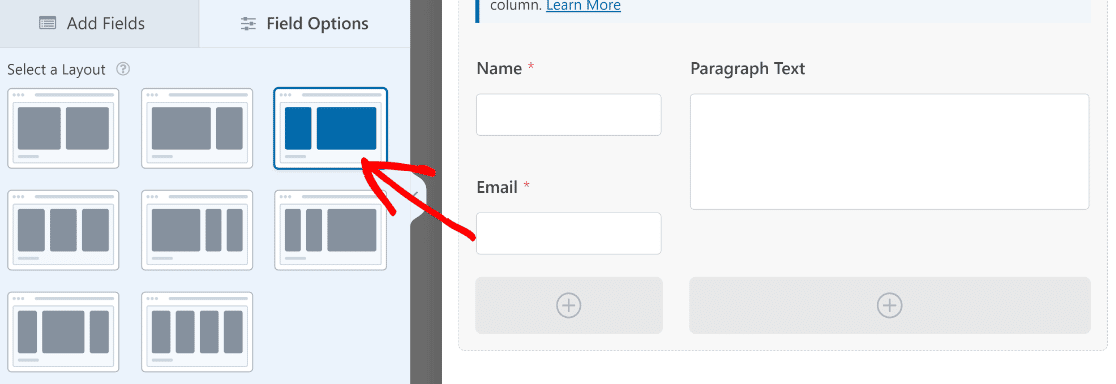
If you’d like to have 4 columns on your form, simply choose the matching layout option from the left-hand pane and drag and drop the fields to their respective columns.

We recommend experimenting with different layouts and previewing your form on the frontend to check that everything looks fine. Our guide to designing form layouts will give you a good start.
Sometimes, your chosen form layout may not go well with your page layout and lead to alignment issues. But if you do your form testing well and check everything before publishing, this shouldn’t be a problem.
WPForms automatically creates responsive multi-column forms. This means that the form will collapse into fewer columns to fit into the smaller screen when viewed from mobile devices.
Step 4. Configure Your Form Notification and Confirmation
Configuring notifications ensures you’re always updated regarding new form entries. Go to Settings and then Notifications in the form builder.
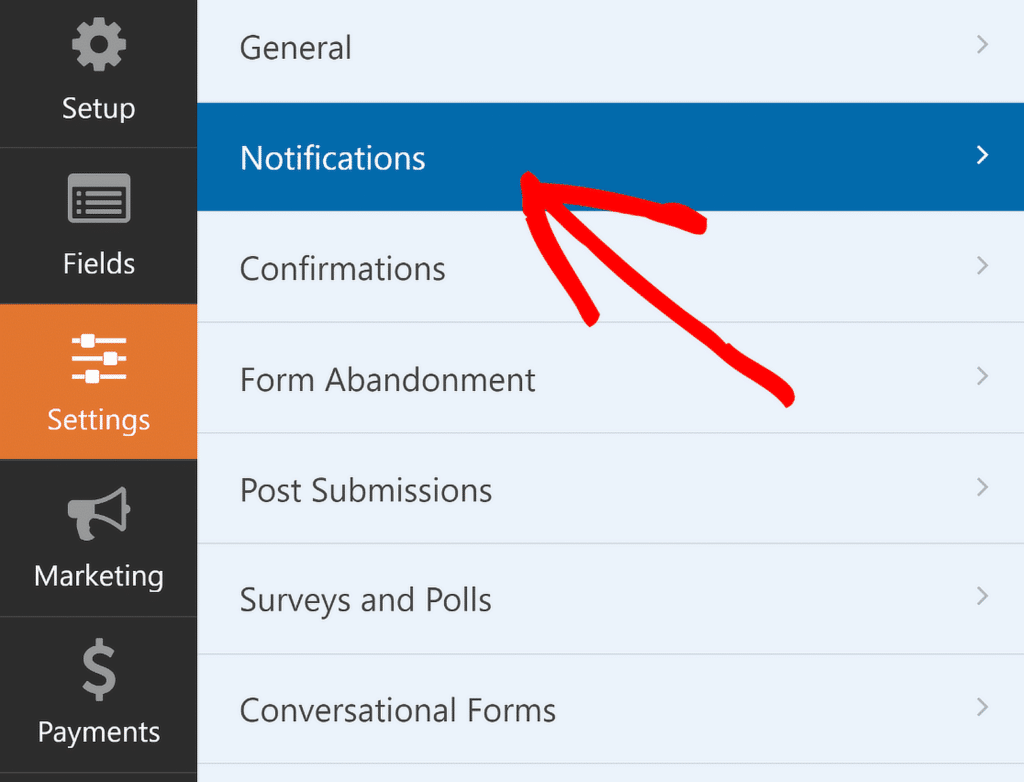
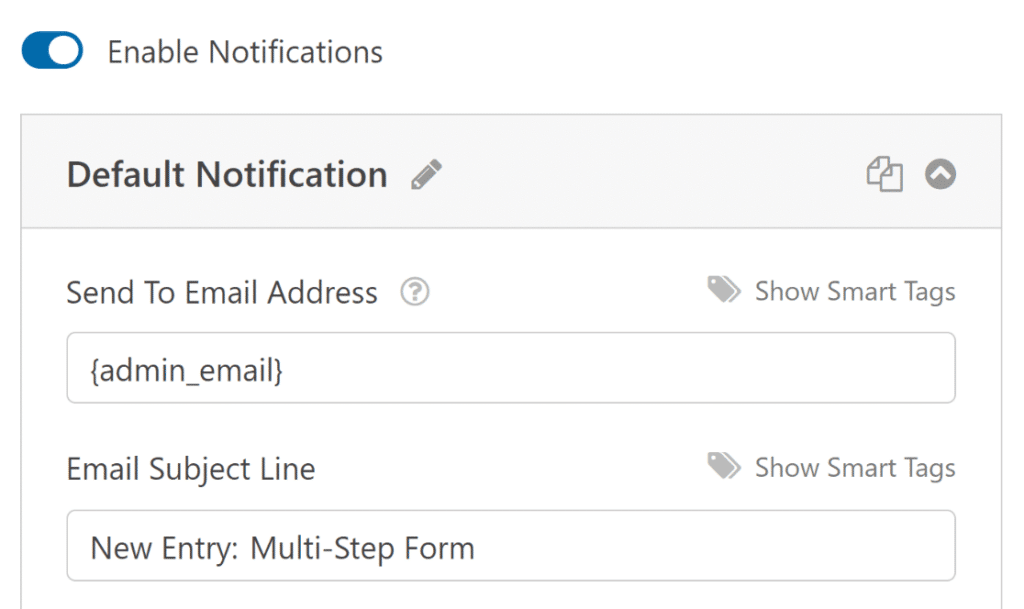
From here, edit the default notification settings, like the subject line, or change recipient emails as needed.
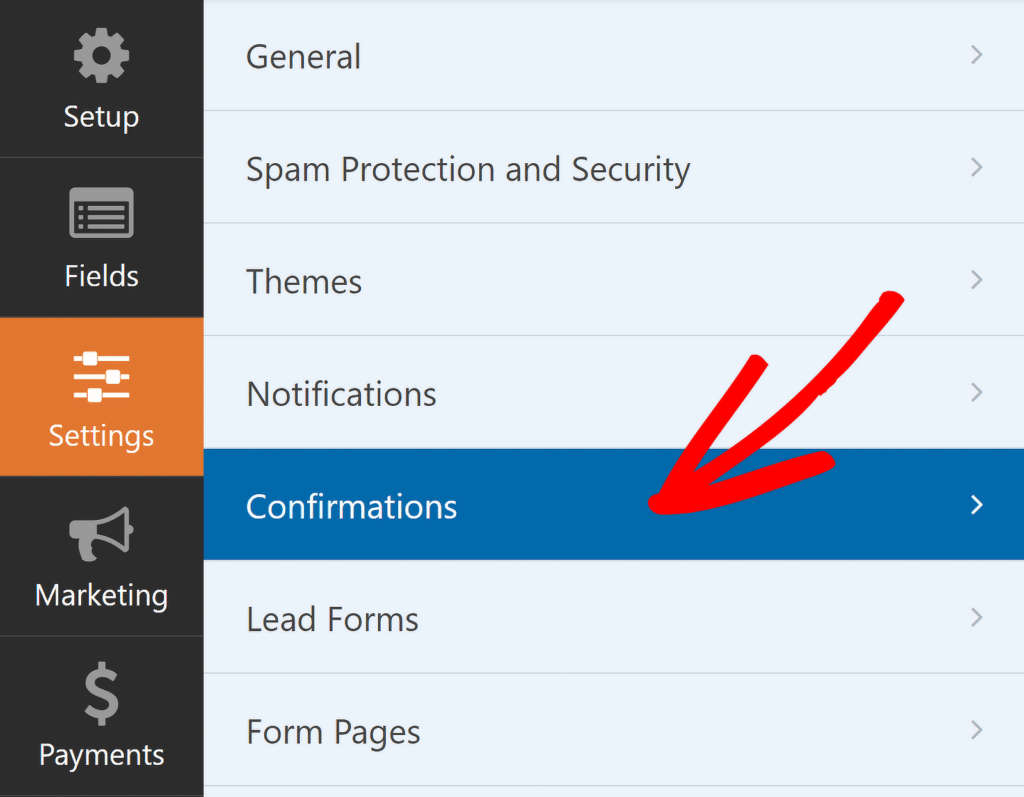
You can now select Confirmations in the Settings menu to set up responses for successful form submissions.
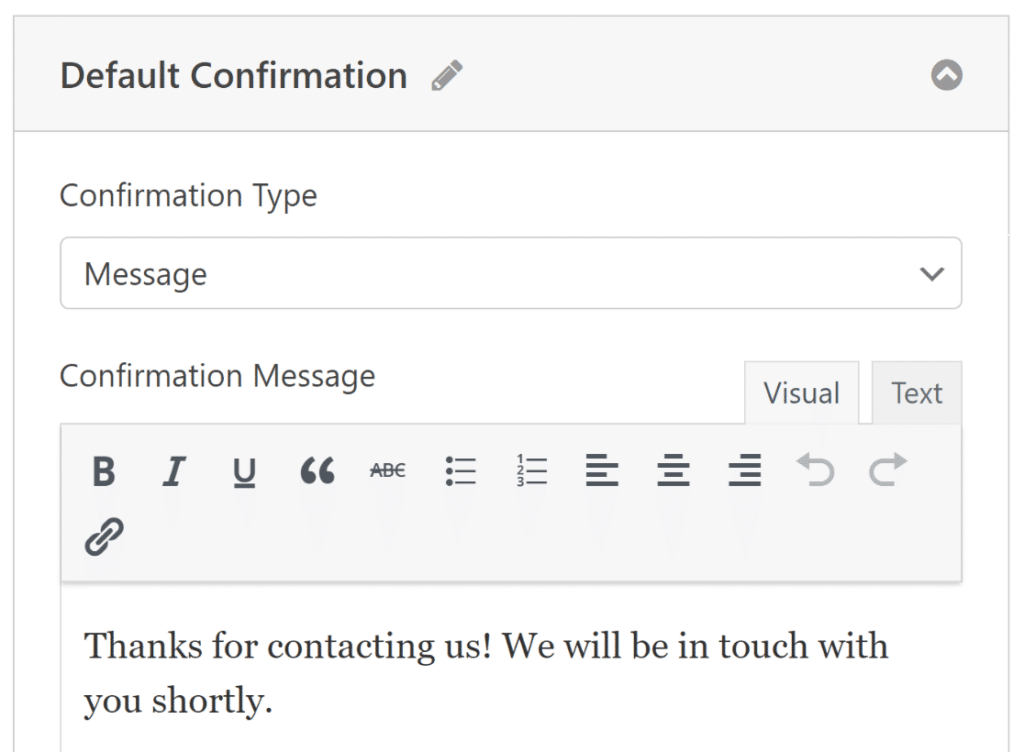
Choose the Confirmation Type that fits your site best – a message, page display, or a redirect.
Remember to save your changes to keep your form and its settings up-to-date. You’re now all set to publish the form on your WordPress site!
Step 5. Publish Your Multi-Column Form
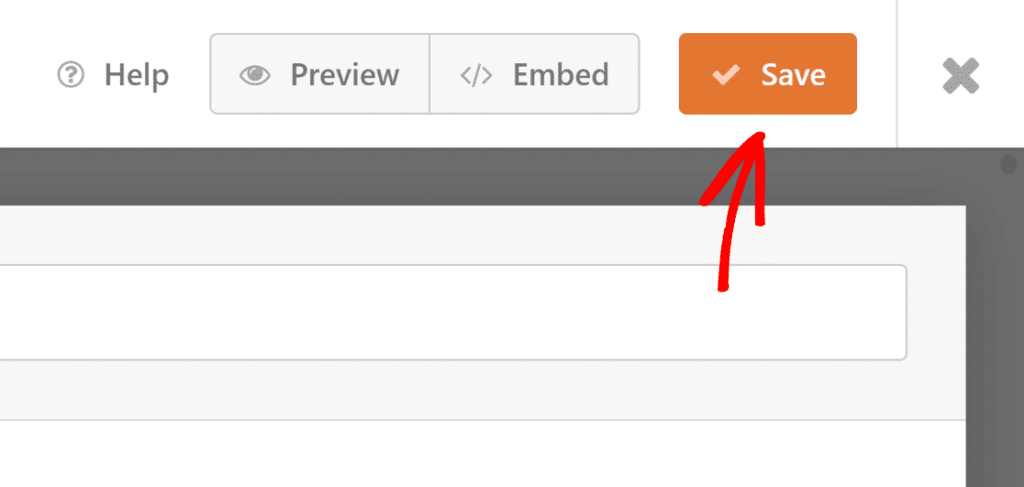
Now, it’s time to go to the final step of publishing it. To begin the embed process, click on the Embed button next to Save.

After pressing the Embed button, you’ll see a modal asking whether you’d like to embed your form in an existing page or create a new one. We’ll go with the Create New Page option, but the steps are very similar in either case.
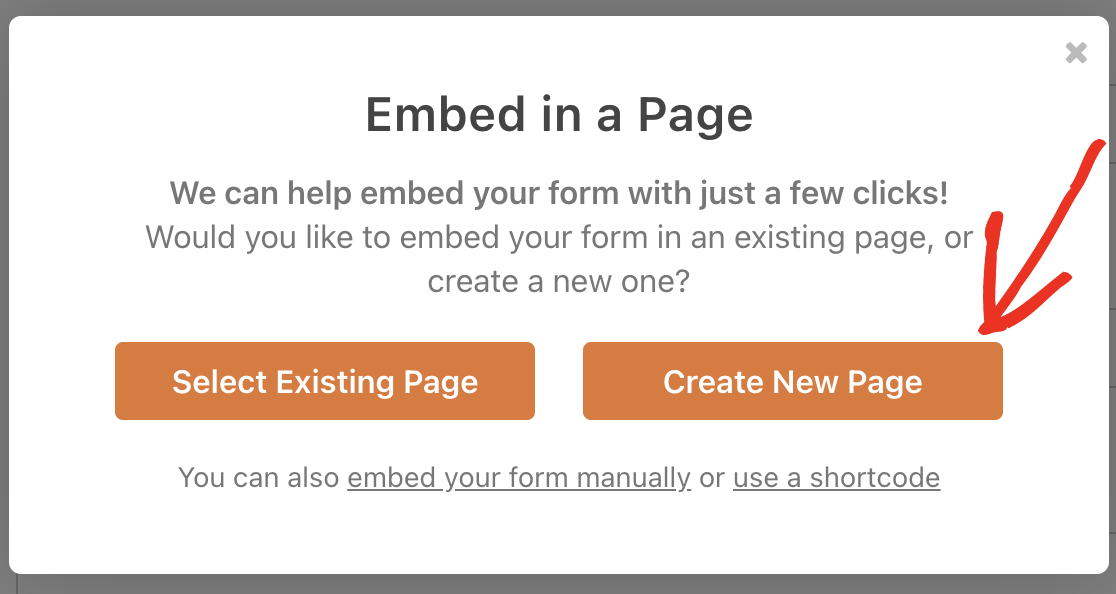
Give a name to your page and press Lets’ Go.

You’ll find the form embedded within this new page. Make any edits using the WordPress editor here, and when you’re satisfied, press Publish.
Here’s what a published multi-column will look like when viewed from the frontend:
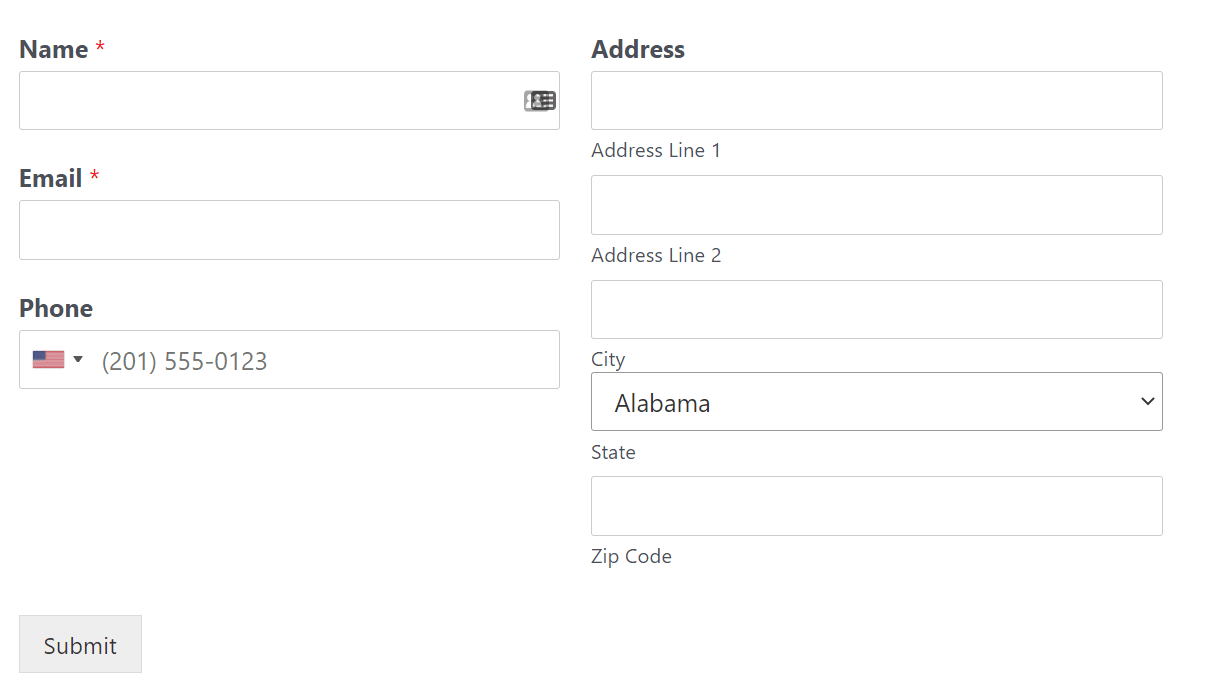
And that’s it! You can now easily create multi-column forms in WPForms without code. Don’t forget: you can also style your forms in the block editor with ease.
FAQs on How to Make a Multi-Column Form in WordPress
What’s the Benefit of a Multi-Column Form Layout?
Multi-column forms can be very beneficial from a user experience standpoint. One common scenario where multi-column forms come in handy is when you have a form long enough to have a vertical scroll.
In this scenario, you can reduce the length of the form and make it more compact by ordering your fields into two or more columns.
Similarly, when embedding a long form into a sidebar, it may fit better and reduce vertical scroll if you use a column layout.
There’s no one-size-fits-all approach to effective form design, which is why it’s so important to have different layout options available for different scenarios.
How do I create a multi-column form?
To create a multi-column form in WordPress, you can use WPForms and its drag-and-drop builder. Once your form is set up, you can easily split fields into multiple columns by using the Layout field.
WPForms automatically ensures the form is responsive, so it will adjust on smaller screens for a smooth user experience.
How do I split data into multiple columns?
With WPForms, splitting data into multiple columns is straightforward.
When building your form, simply select the form fields you want to display side-by-side and use the drag-and-drop functionality to add them to a Layout field.
WPForms will handle the rest, making sure your columns are displayed properly across all devices.
Next, Utilize Net Promoter Score for Surveys
If you’re trying to gauge customer satisfaction levels, the best survey instrument you can use for that is the Net Promoter Score (NPS).WPForms makes it really easy to create survey forms with the Net Promoter Scale as we explain in this guide.
If you’re having some challenges with users not entering their email addresses correctly, here’s how to add a confirm email address field to prevent this. Also, you might find our guide to the top ‘how did you hear about us’ survey questions interesting.
And, if you’re unsure about which spam prevention tool you should use on your forms, see our comparison on Akismet vs reCAPTCHA.
Create Your WordPress Form Now
Ready to build your form? Get started today with the easiest WordPress form builder plugin. WPForms Pro includes lots of free templates and offers a 14-day money-back guarantee.
If this article helped you out, please follow us on Facebook and Twitter for more free WordPress tutorials and guides.


How to make one column on mobile screen?
Hey Bilal, the Layout fields are mobile responsive and it will display the field as a single Column on Mobile. When you get some time, could you please check it out and let us know how it goes?
If you have a WPForms license, you have access to our email support, so please submit a support ticket. Otherwise, we provide limited complimentary support in the WPForms Lite WordPress.org support forum.
Thanks.
i always design forms for phone first but the automatique respensive mode still mess up the form in phone view how can i solve this probleme
Hey Sam – When you get a chance, please drop us a line with more details about the issue you are facing in support so we can assist further.
If you have a WPForms license, you have access to our email support, so please submit a support ticket.
Otherwise, we provide limited complimentary support in the WPForms Lite WordPress.org support forum.
Thanks 🙂
I need 10 columns
Hi Patrick!
I apologize, but creating 10 columns using the Layout field isn’t currently possible. However, you can achieve multi-column layouts using CSS classes – we actually have a detailed guide on creating multi-column form layouts that walks through all the options and CSS classes available.
For personalized advice on achieving your specific layout needs, I’d recommend getting in touch with our Trusted Advisors in the support team if you have a WPForms license. Please submit a support ticket and they will get back to you as soon as possible.