AI Summary
Do you want to engage leads and customers after they submit a form on your website? A follow-up email is an effective way to do it. Especially when that follow-up email includes a survey or some other feedback loop.
But can you automate this follow-up email process? Absolutely! And what about delaying these follow-up emails by a few days? That’s no problem either.
WPForms coupled with Uncanny Automator is your solution for automated email follow-up without writing a single line of code.
How to Automate Form Submission Follow-Up Emails
Step 1: Configure WPForms
If you’re reading this tutorial, you likely already have WPForms installed and activated. And if not, then what are you waiting for?
With the plugin fired up, select or create the forms that you want to use for this process. You’ll need 2 forms total — a form to kick off the automation process and a form to share with your leads in a follow-up email.
For example, you might create a survey form to email website users later, after they’ve submitted a contact form.
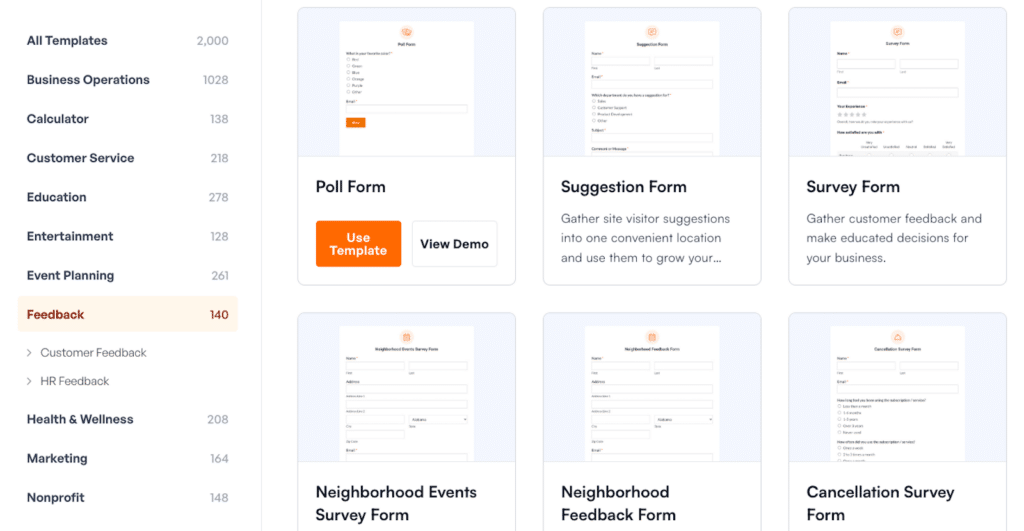
Add the essentials to your forms, like a Name field, Email field, and any other details specific to your needs and uses. With your forms created, you can test them to make sure they operate as desired.
When you’re happy with your WPForms configurations, you’re ready to move on to the Uncanny Automator steps.
Step 2: Install Uncanny Automator
With one-half of our toolkit prepared, it’s time now to install the Uncanny Automator plugin.
You can download the plugin from the website or find it directly in the WordPress repository.
Install and activate Uncanny Automator now, and keep in mind that you’ll need the Pro license to unlock the scheduling features.
Uncanny Automator utilizes a recipe-based system to create automation workflows, so it’s imperative to have access to all the “ingredients” 😉.
Looking for More? Check out our technical doc on Using Uncanny Automator with WPForms.
Step 3: Build a Recipe in Uncanny Automator
In Uncanny Automator, recipes are workflows consisting of triggers and actions. So, you need to create a new recipe to automate your follow-up emails.
Create a Recipe
Navigate to Automator » Add New Recipe.
Then, select Logged-in users if the email action involves registered users of your website, or choose Everyone for broader triggers.
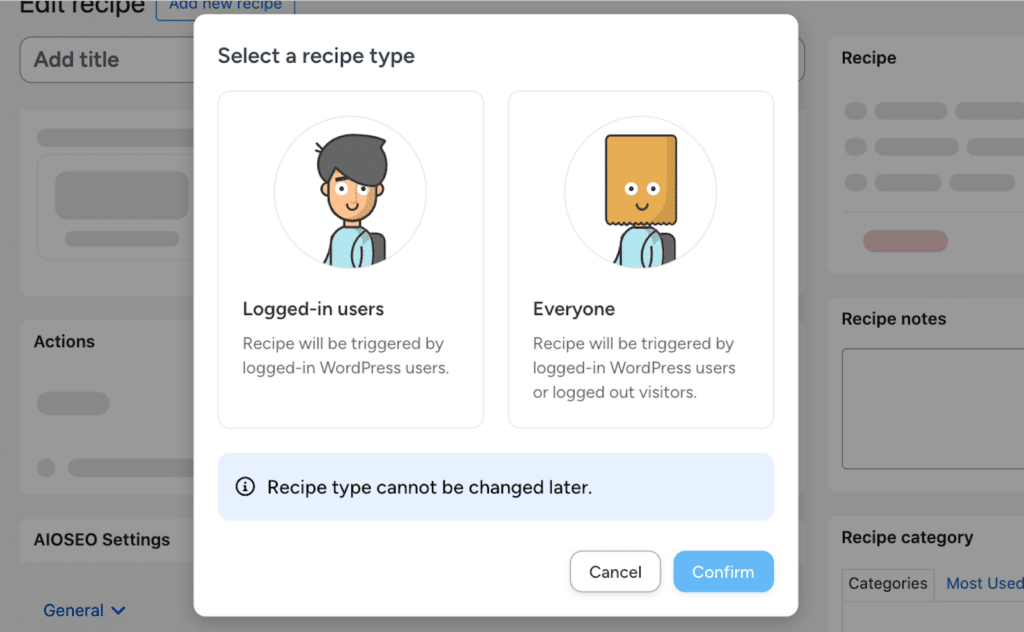
For my recipe type, I selected Logged-in users. This means my follow-up email will only be sent if the person filling out my form is logged in to my WordPress site.
Set the Trigger
Now you’ll choose a trigger for the automation process.
For this tutorial, we’re automating the follow-up emails from WPForms submissions, so select the WPForms integration.
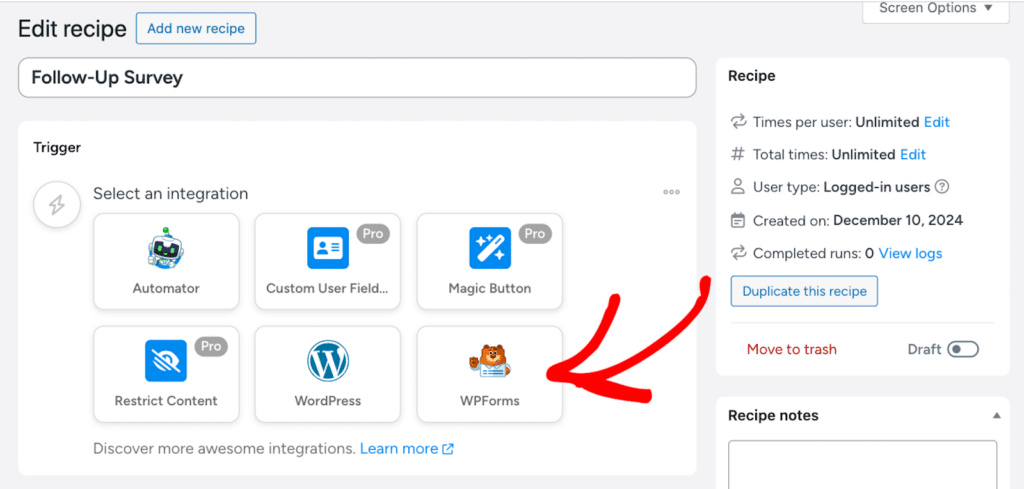
With it selected, you can set the trigger to occur when a form is submitted.
This means that when a user submits a form on your website, Uncanny Automator will trigger some action to automatically happen next.
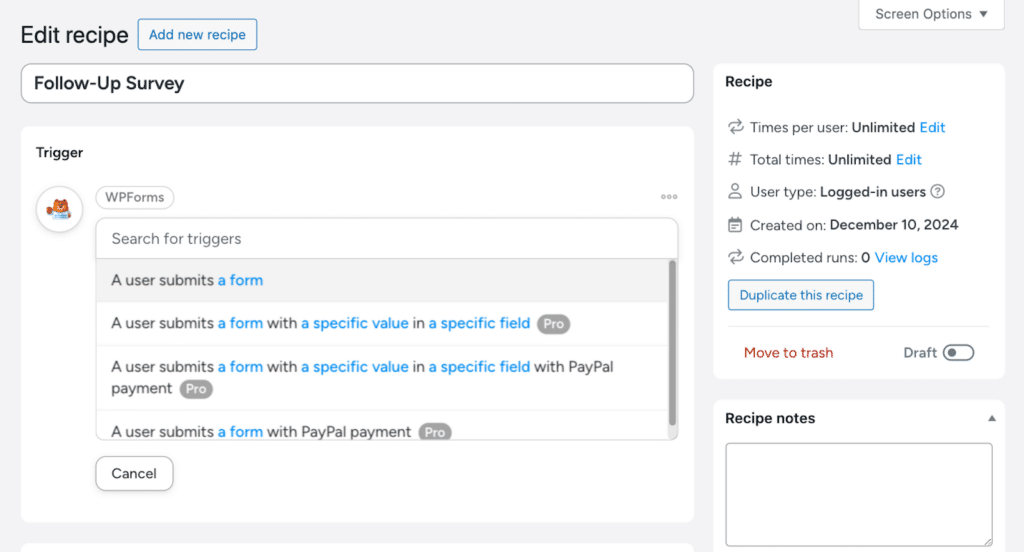
With this trigger, you’ll designate the type of form you want to trigger the action. As prompted, I selected the contact form that I already have created on WPForms.
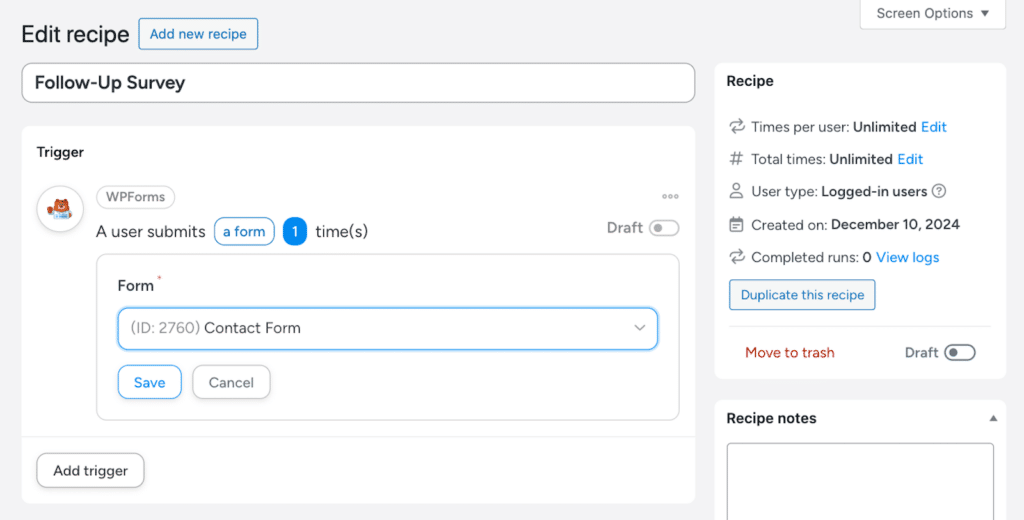
So, when a website visitor submits a contact form on my website, it will trigger the action of sending a follow-up email.
Be sure to Save the form you’ve selected for your trigger, too!
Define the Email Action
Next, you need to create the action that is triggered by your user submitting a form.
Click on the Add action button to do it.
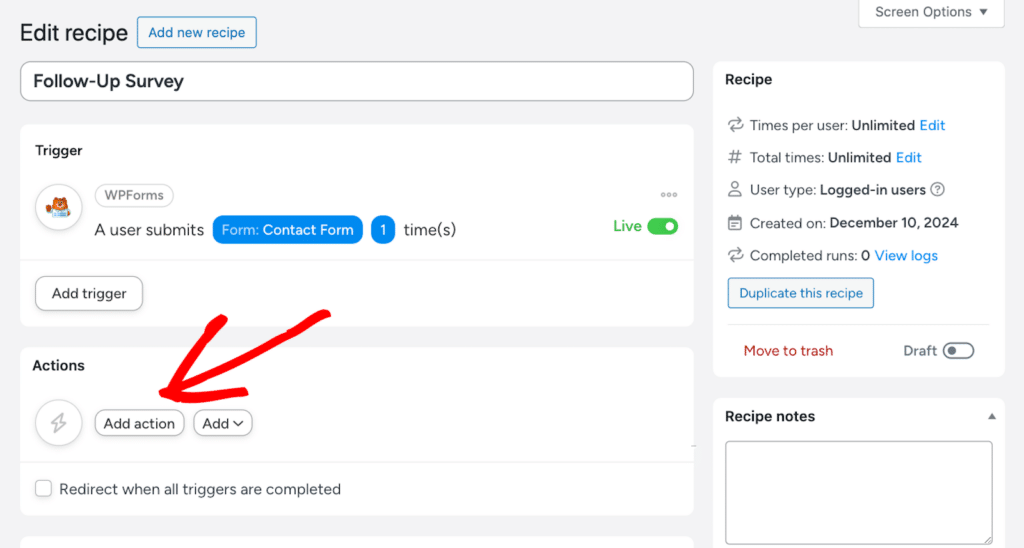
In this case, the action you want to trigger is the sending of a follow-up email survey.
So, go ahead and select the Emails integration.
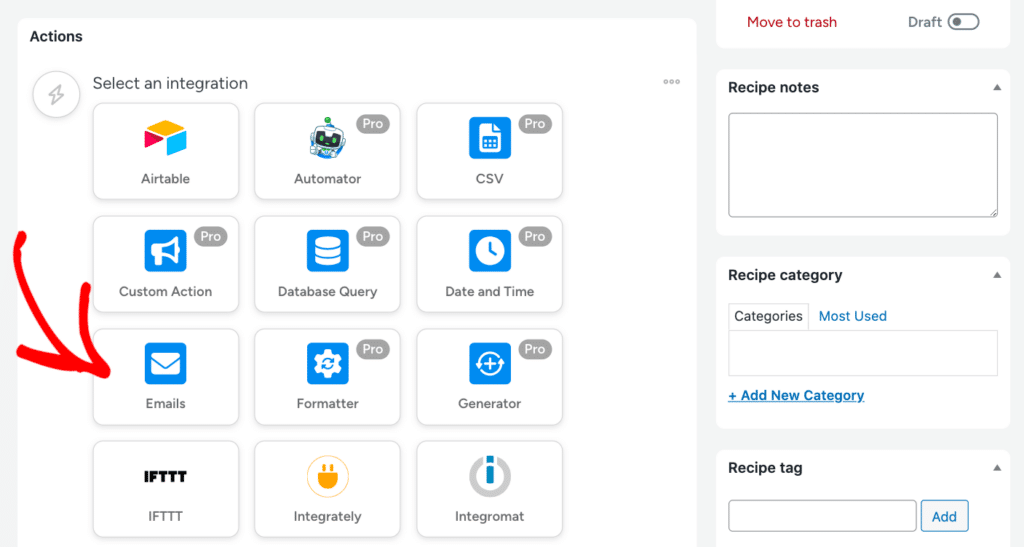
Now you’ll customize the subject, body, and recipient fields.
You can even use dynamic tokens to personalize the email, such as including the user’s name or specific responses.
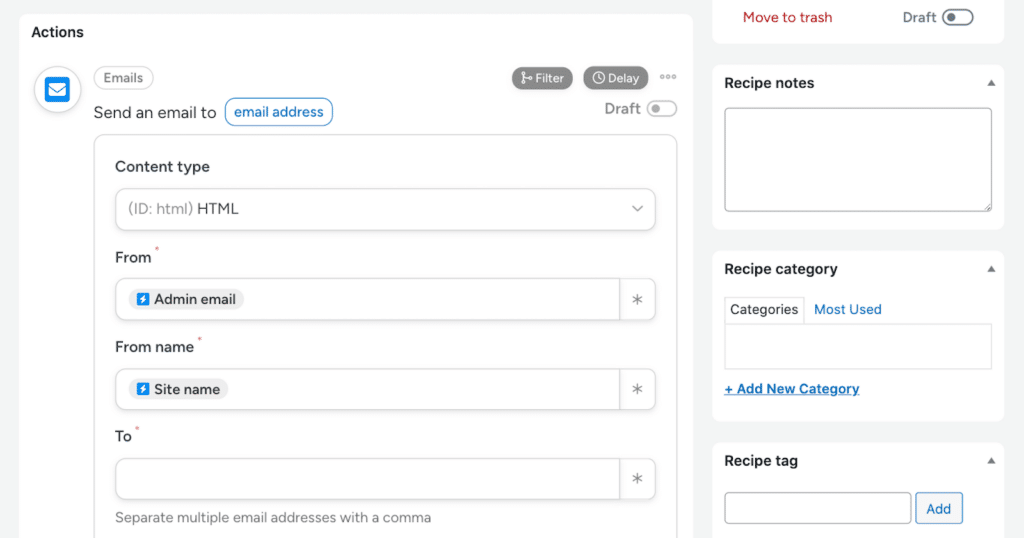
For example, your email could start with, “Hi {Name}, we’d love your feedback!”. Then just include a link to the feedback form or survey of your choice.
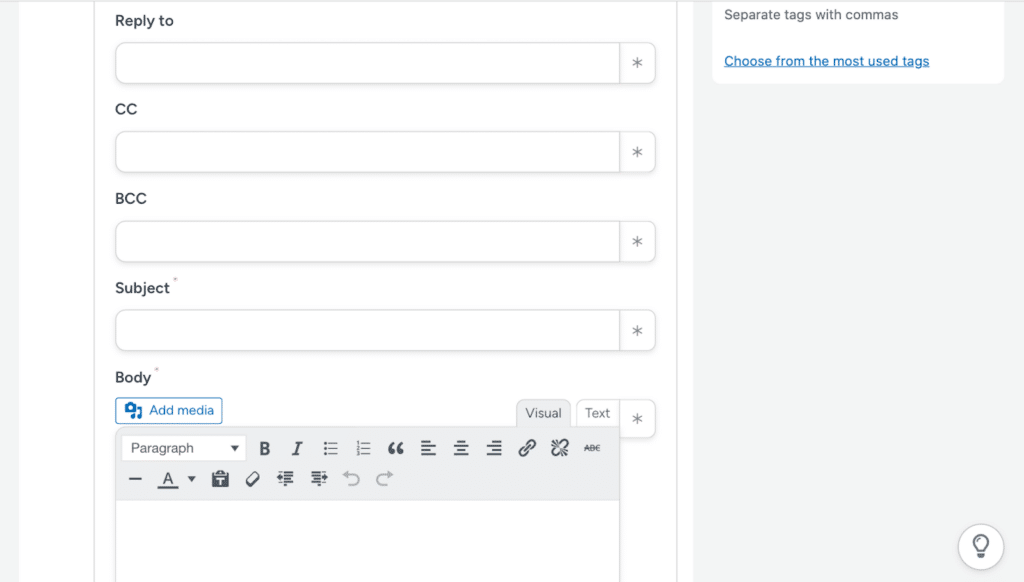
Don’t forget to Save your email contents, of course. Because the key step is next!
Add a Delay
Now, let’s suppose that you don’t want this follow-up email sent immediately after your website user submits a form.
With the Uncanny Automator Pro license, you can delay the action for minutes, days, months, or even years after the trigger.
Simply hover on the ellipses of your email action to see the Delay option.
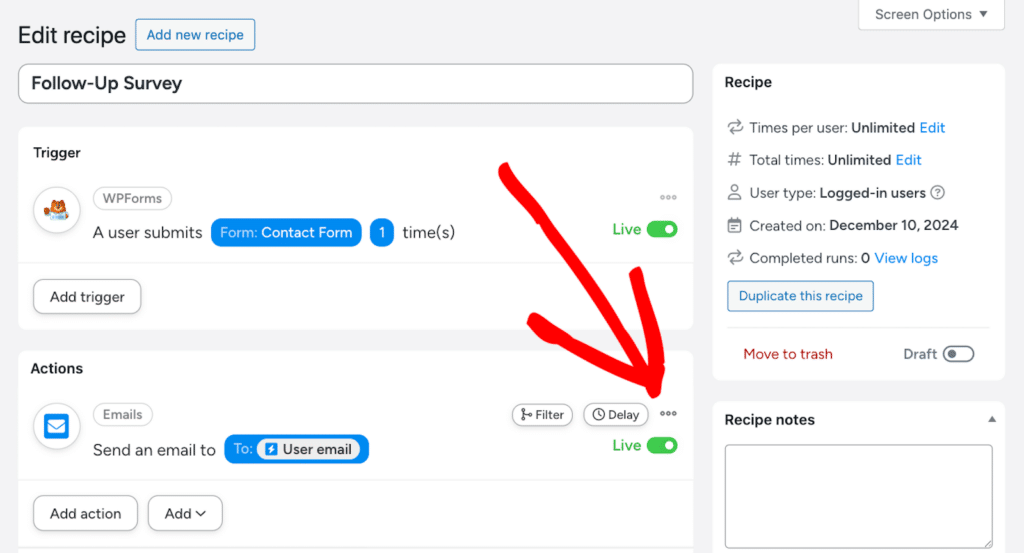
By clicking the Delay button, you’re given a full range of options to delay or schedule your action.
So, if you want your follow-up email to go out 3 or 4 days after a user submits a form, use the Delay option and then enter the amount of time for the delay using the fields provided.
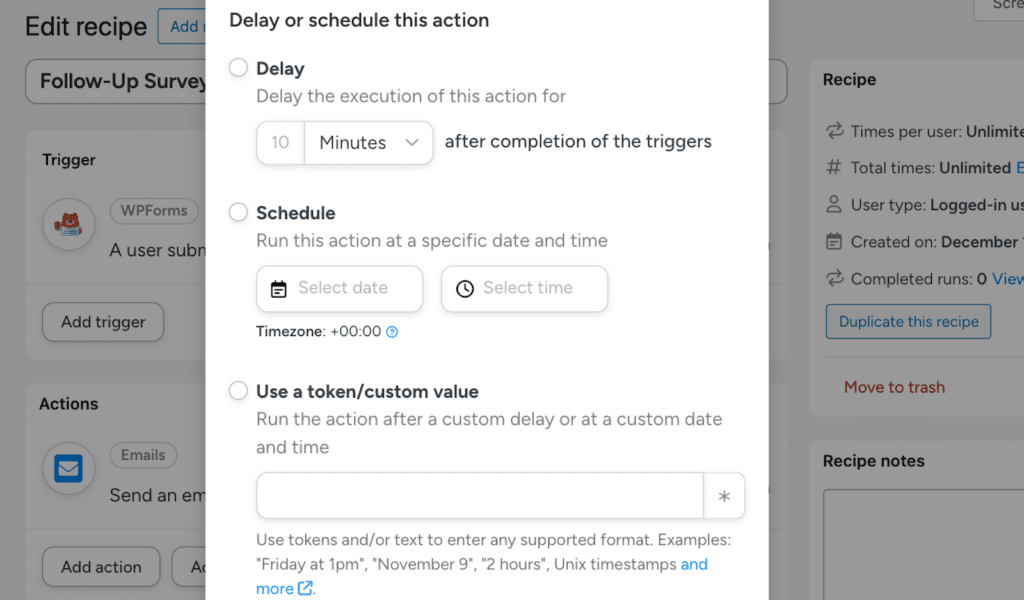
And, as you can see, you can always customize the delay as needed!
Step 4: Test the Workflow
With your lead form created in WPForms and your emails arranged with Uncanny Automator, you’re nearly ready to go. But to check your setup, submit a test form from your site to verify that the follow-up email arrives as scheduled.
Testing your workflows — especially the automated ones — is important for accuracy and timing.
And that’s all there is to it!
With WPForms and Uncanny Automator, you can easily save time, enhance engagement, and provide a seamless experience for your leads.
Also Read: How to Monitor and Analyze Spam on Your Online Forms
Pro Tips
As a bonus, here’s a summary of some tips for success with this tutorial:
Use Dynamic Tokens for Personalization
Uncanny Automator allows you to insert tokens to dynamically pull data from the form submission into your email. For example:
- {Name} for the user’s name.
- {Email} for the user’s email address.
Personalized emails are more engaging and likely to be opened.
Add Conditional Logic
For advanced use cases, use Uncanny Automator’s Pro features to add conditions. For instance:
- Send follow-ups only if a specific field, like a checkbox for agreeing to a survey, is checked.
- Trigger different follow-ups based on form responses.
Incorporate Surveys
As I suggested, you could link to a feedback survey you created with WPForms. Use a rating scale, open-text responses, or pre-defined options to make it user-friendly.
FAQ
Looking for something specific? Check out our most frequently asked questions below.
Can I Use the Free Version of Uncanny Automator?
Yes, but the free version has limited capabilities. For scheduling follow-up emails, the Pro version is necessary.
Does This Work with Other Email Plugins?
Yes, you can integrate Uncanny Automator with email marketing tools like Brevo or FluentCRM. However, this tutorial focuses on the built-in email feature.
What Happens if the User Submits Multiple Forms?
You can configure the recipe to handle duplicate submissions by adding conditions or logging actions.
Next, Style Your Email Notifications
In this post, we covered the steps for automating follow-up emails after a user submits a form on your site. These emails are a great way to engage with your audience.
But did you know that you can also enhance the email notifications sent directly from WPForms? You have the ability to style your email notifications directly in the dashboard, with no integrations needed. Explore our tips in the full tutorial to learn how!
Ready to build your form? Get started today with the easiest WordPress form builder plugin. WPForms Pro includes lots of free templates and offers a 14-day money-back guarantee.
If this article helped you out, please follow us on Facebook and Twitter for more free WordPress tutorials and guides.

