AI Summary
Your WordPress form is doing its job and collecting resumes, profile photos, signed contracts, ID scans, but they all land in the same crowded uploads folder with names like IMG_4821 and contract-final-v2.
So a month later, when you need one specific applicant’s resume, finding it means scrolling through hundreds of files with nothing to tell them apart.
Well, it doesn’t have to be that difficult because WPForms and the Google Drive addon can send every file your form receives into the right Google Drive folder the moment someone submits.
In this guide, I’ll show you how to set it up, from connecting your Google account to writing folder rules that keep everything organized long after launch.
How to Automatically Organize Form Uploads in Google Drive
The tool behind all of this is the Google Drive addon, which comes with WPForms Pro and higher. It links your forms to your Google account and handles uploads for you.
If you only need the basics of getting files into Drive, our walkthrough on how to create a basic Google Drive upload form covers that ground.
This tutorial focuses on the organizing part, the folder structures and rules that decide where each file ends up. I’ll walk you through every step so it’s easy to understand:
- Step 1: Install the WPForms Pro Plugin
- Step 2: Install and Activate the Google Drive Addon
- Step 3: Connect WPForms to Your Google Account
- Step 4: Add File Upload and Camera Fields to Your Form
- Step 5: Add a Google Drive Connection to Your Form
- Step 6: Auto-Organize Your Uploads Into Google Drive Folders
- Step 7: Save and Test Your Form Before Publishing
Step 1: Install the WPForms Pro Plugin
WPForms is the most beginner-friendly WordPress form builder. The drag-and-drop builder and library of 2,100+ templates mean you can put together a file upload form, a job application, or a photo submission form in minutes.
What keeps me reaching for WPForms on projects that involve a lot of file collection is that the uploads don’t have to sit on the server forever. And, the piece that does the organizing is the Google Drive addon, which requires a Pro license or higher.

So in order to get started, buy the Pro license. Then, install WPForms on your website. If you need help, follow these instructions on how to add a plugin to WordPress.
Step 2: Install and Activate the Google Drive Addon
With WPForms Pro active on your site, the Google Drive addon is a quick install away. Go to WPForms » Addons and type Google Drive into the search box at the top of the page.
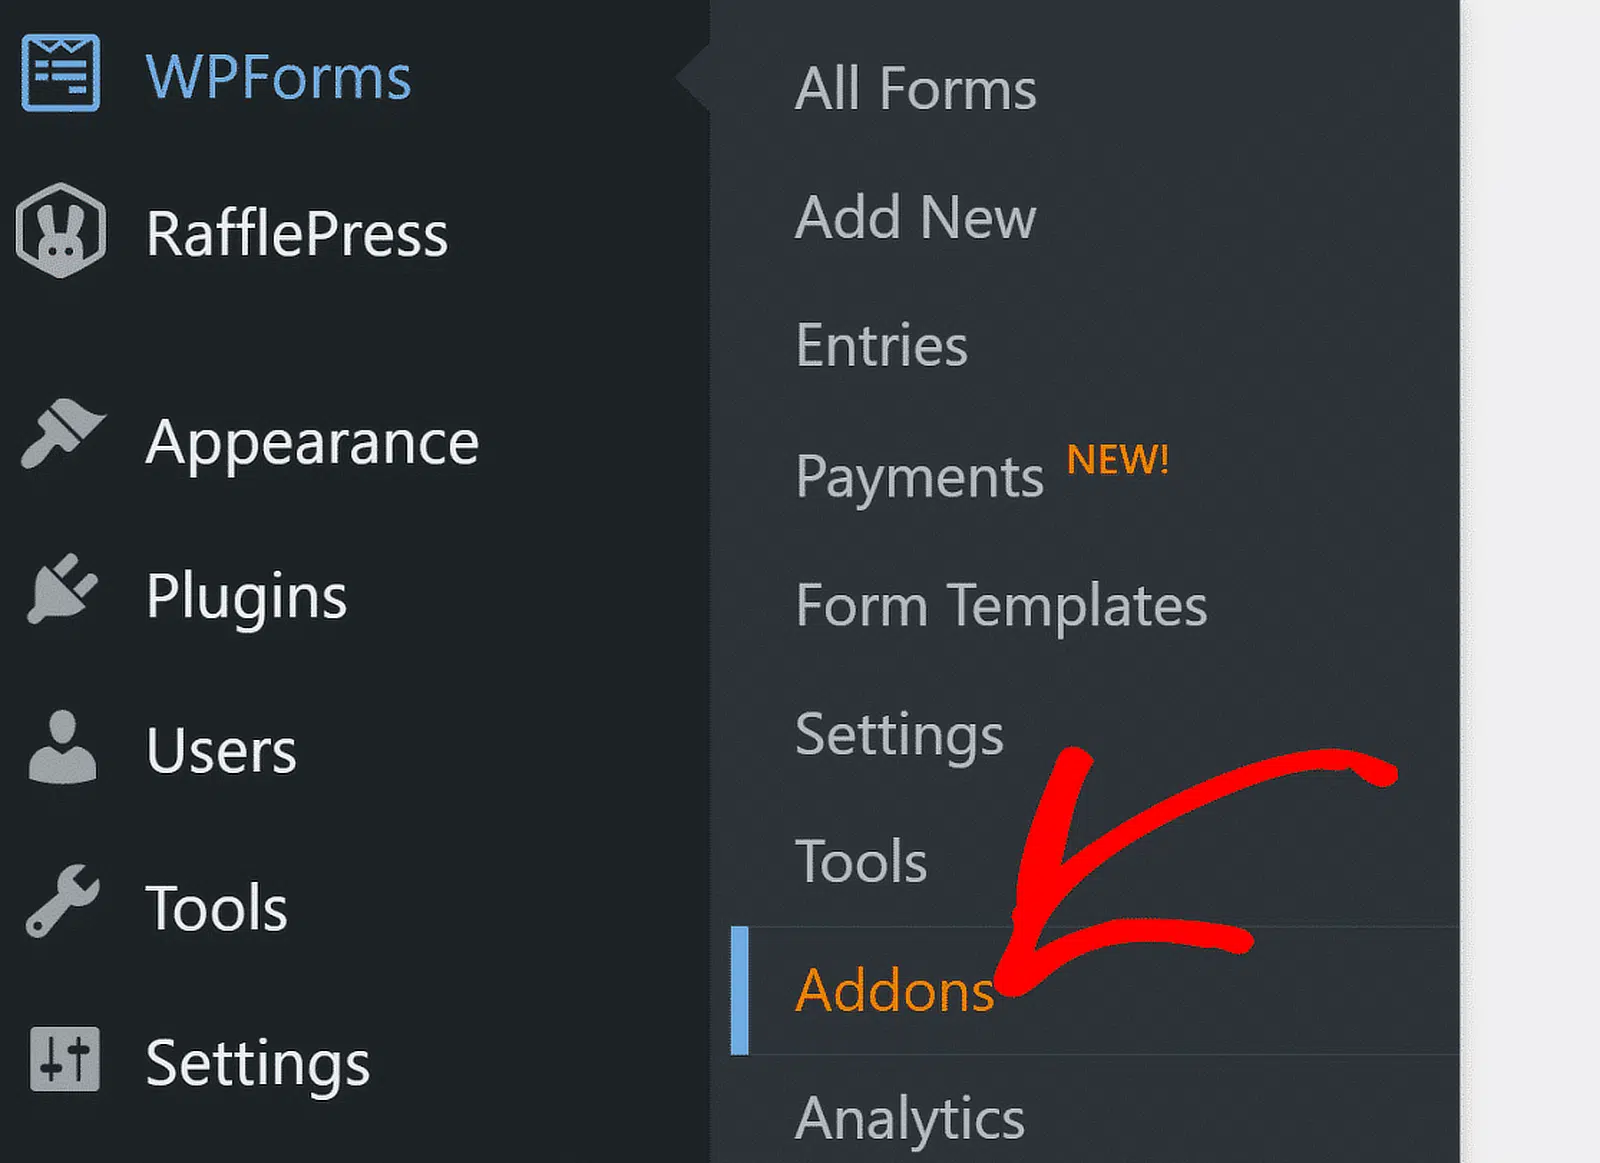
Search for the Google Drive Addon and then click on the Install Addon. WPForms downloads and turns it on for you. For a closer look at this process, our doc on how to install and activate the addon covers it in detail.

Step 3: Connect WPForms to Your Google Account
Before a form can send anything to Drive, WPForms needs permission to reach your Google account. You grant that once, and every form on your site can use the connection afterward.
Head to WPForms » Settings and open the Integrations tab. Click the Google Drive row to expand it, then click Continue with Google.

From here, Google takes over and asks you to choose the account where you want your form files stored. Select it, then click Continue to move ahead.

Next, Google shows you exactly what WPForms is asking for. Review it and click Allow access to confirm.
Google will now open your Drive and asks you to select a file, which is part of how it verifies the connection. Pick any file at all, then click Insert.

WPForms will now send you back to the Integrations screen, where a green Connected label next to your account confirms everything is linked.

Step 4: Add File Upload and Camera Fields to Your Form
Now for the part your visitors actually see, the fields they use to send you files. WPForms gives you two ways to collect them, and you can use either one or both on the same form.
The File Upload field handles documents and media people already have saved, while the Camera field lets them capture a photo or video on the spot.
Whichever you pick, the Google Drive addon organizes files from both. Open the form builder by creating a new form or editing one you already have. Then add whichever field fits what you’re collecting.

Our complete guide to the File Upload field walks through those settings, and you can see everything the File Upload field offers on its feature page.
For the full rundown of formats, file sizes, and button styles, see our guides on the Camera field and how to add a Camera field step by step.
Step 5: Add a Google Drive Connection to Your Form
The site-wide connection from Step 3 tells WPForms who you are with Google. This next part tells one specific form where to send its files.
You set it up inside that form’s builder, so different forms can route uploads to different places when you want them to. In the form builder, go to Settings » Google Drive and click Add New Connection.

WPForms asks you to name the connection. This nickname is only for you and your visitors never see it, so call it something you’ll recognize later like Resume Uploads or Client Photos. Type the name and click OK.

After that, an Account dropdown appears. Choose the Google account you connected earlier. If you’ve linked more than one Google account to WPForms, they all show up here, so pick whichever should receive this form’s files.

Step 6: Auto-Organize Your Uploads Into Google Drive Folders
This is where the organizing actually happens. After you choose an account, WPForms shows a Folder setting that controls where your files land in Drive.
To sort uploads as they arrive, you give WPForms a folder path with Smart Tags inside it, and it creates a fresh folder for each client, entry, or date automatically.
You can also send everything to a single folder you already use. Both options sit in the same setting, and they work a little differently.
Create New Folders Automatically
Choose Create New and WPForms pre-fills the Folder Name field with your form’s name. You can keep that name or type your own, and what you put here decides how every file gets sorted.

Type a plain name with no slashes, like Job Applications, and WPForms makes that one folder when you save the form, with every upload going into it. That’s the simplest setup, and it works well when you just want one tidy place for everything.
To build a folder structure, use a forward slash to separate the levels. A path like Applications/Resumes/2026 tells WPForms to nest those folders and drop files into the last one, and any folders that don’t exist yet get created on the first submission.
Not sure which number a field is? Every field in WPForms has an ID, which you can see by clicking the field in the builder and checking its options. Use that number in the Smart Tag so WPForms knows which answer to pull.
Save to an Existing Folder
Maybe you already keep a Drive folder set up the way you like. In that case, choose Select Existing instead. Click Select Folder, browse your Drive, and pick the destination.

Every upload from this form goes straight there, and no new folders get created. Don’t forget below the folder settings, a File Upload Fields dropdown lets you decide which fields feed Drive.
You can pick one specific field, or choose All File Upload Fields to send everything the form collects. That All option is the surest way to make sure nothing slips through.

Route Uploads With Conditional Logic (Optional)
By default, every file from your chosen fields goes to Drive, but sometimes you want more control than that. Conditional logic lets you decide whether someone’s files get sent at all, based on what they select on the form.
Say your form has a dropdown asking what kind of inquiry someone has. You might only want to archive uploads from job applicants and skip the ones from general questions.
Turn on Enable Conditional Logic, then build a rule that sends files to Drive only when Inquiry Type is Job Application. WPForms checks the rule on every submission and uploads only when it’s a match.

Step 7: Save and Test Your Form Before Publishing
Before you put the form in front of anyone, give it a real test. Save your changes in the builder, then go ahead and submit the form yourself with an actual file attached, plus a photo if you added the Camera field.
Now open your Google Drive and check the folder. Your test file should be sitting exactly where your folder rules said it would, and if you used Smart Tags, the right subfolders should have appeared on their own.
Seeing that first file land in the correct spot is how you know the whole thing is wired up properly. If an upload ever fails to reach Drive, you don’t have to recollect it.
Open the entry under WPForms » Entries, find the Actions panel, and click Reupload to Google Drive to run it again. And that’s it!

FAQs About Organizing WordPress Form Uploads in Google Drive
Sending WordPress form uploads to Google Drive raises a few common questions, especially around the Camera field, multiple accounts, and what happens to your files. Here are quick answers to the ones we hear most.
Can I send Camera field photos and videos to Google Drive?
Yes. Camera captures are stored the same way File Upload files are, so the Google Drive addon sends them to your chosen folder right alongside everything else. Selecting All File Upload Fields in your connection is the easiest way to include them.
Do I need Zapier to connect WPForms to Google Drive?
No. The Google Drive addon connects your forms to Drive directly, with no Zapier account or third-party connector in the middle. You authorize Google once and your forms can upload from then on.
Can I create a separate Google Drive folder for each submission?
Yes, and this is where Smart Tags earn their keep. A folder path like Clients/{field_id="3"}/Entry-{entry_id} builds a folder per client and a unique subfolder for every entry, so no two submissions share a folder unless you want them to.
Can I connect more than one Google account?
Yes. WPForms lets you link several Google accounts, and each form connection has an Account dropdown where you pick which one to use. That’s handy when you keep client work separate from your own files.
What happens to files on my WordPress site after they upload to Drive?
By default they stay in both places, your site and your Drive. If you turn on Delete Local Files After Upload, WPForms removes the local copy once the file reaches Drive and updates the entry links to point at the cloud version, so you keep full access.
Next, Secure the Files You Collect
Now that your uploads sort themselves into Drive, it’s worth thinking about who can open them.
WPForms lets you lock individual files behind user permissions or a password, which matters a lot for sensitive things like ID scans or contracts. Our guide on how to restrict access to uploaded files shows you how to set that up.
Get WPForms Pro and Organize Your Uploads 🙂
Ready to build your form? Get started today with the easiest WordPress form builder plugin. WPForms Pro includes lots of free templates and offers a 14-day money-back guarantee.
If this article helped you out, please follow us on Facebook and Twitter for more free WordPress tutorials and guides.

