AI Summary
Want to give people a discount right inside your form? With WPForms, you can add a coupon code field that automatically updates the total cost when someone enters a valid code.
It’s an easy way to reward customers, boost signups, or encourage sales without any extra tools. In this guide, I’ll show you exactly how to set it up and use it with your payment forms.
Create Your Coupon Code Form Now
How to Add a Coupon Code Field to Your Forms
If you want to add a one-time use promo code or Coupon field to your WordPress forms, simply follow these steps.
Step 1: Install the WPForms Plugin
Before doing anything else, you’ll need to install and activate the WPForms plugin. The plugin handles all the heavy lifting for creating professional forms with payment processing.
This plugin offers an easy-to-use, drag-and-drop form builder that is great for creating all kinds of forms, including eCommerce order forms with coupon fields.
And when you’re choosing a plan, be sure to grab the Pro license to access the fields and addons you’ll need to offer coupons on your forms.
The Pro version unlocks payment processing, advanced fields, and most importantly for our purposes, access to premium addons like the Coupons Addon.
For further instructions on this step, check out our step-by-step guide on how to install the WPForms plugin.
Step 2: Enable WPForms Coupons Addon
Now that WPForms Pro is running, it’s time to add the Coupons Addon that makes automated discount codes possible. This addon is what transforms your basic payment forms into smart sales tools.
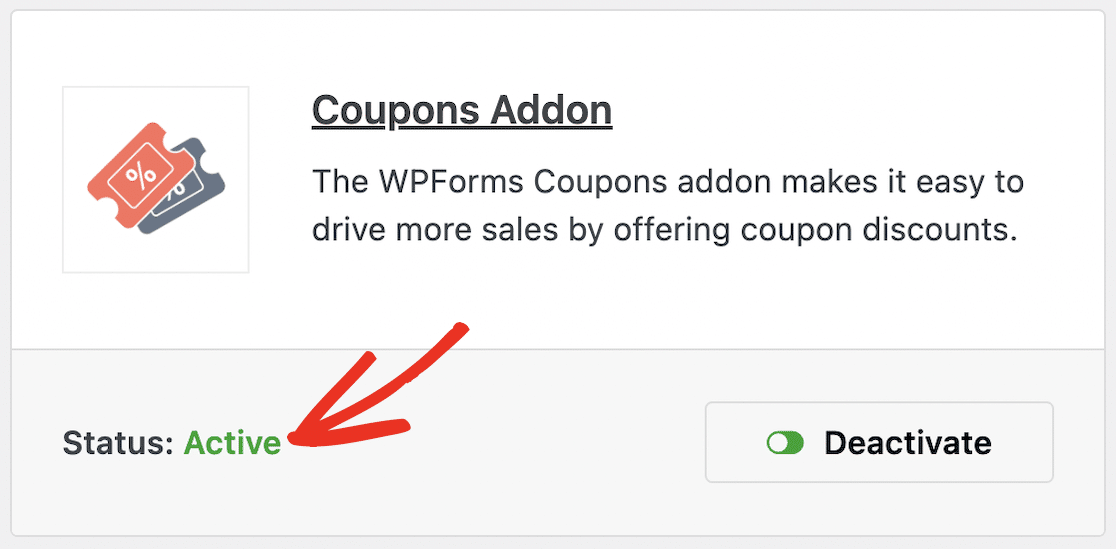
From your WordPress dashboard, navigate to WPForms » Addons and locate the Coupons addon. You’ll know it’s working when you see coupon management options appear in your WPForms menu.
This addon integrates seamlessly with your existing payment processors, whether you’re using Stripe payments or PayPal for your WordPress forms.
Now, with your WPForms license and the Coupons addon in tow, you’re ready to start creating coupons.
Step 3: Create Your New Coupon
There are a couple of ways to get to the coupon creation screen. You can get there from your WordPress dashboard or through the form builder. Let’s start with the dashboard.
To create a coupon from your WordPress dashboard, first navigate to WPForms in your sidebar, click on Payments, and then click the Coupons tab.
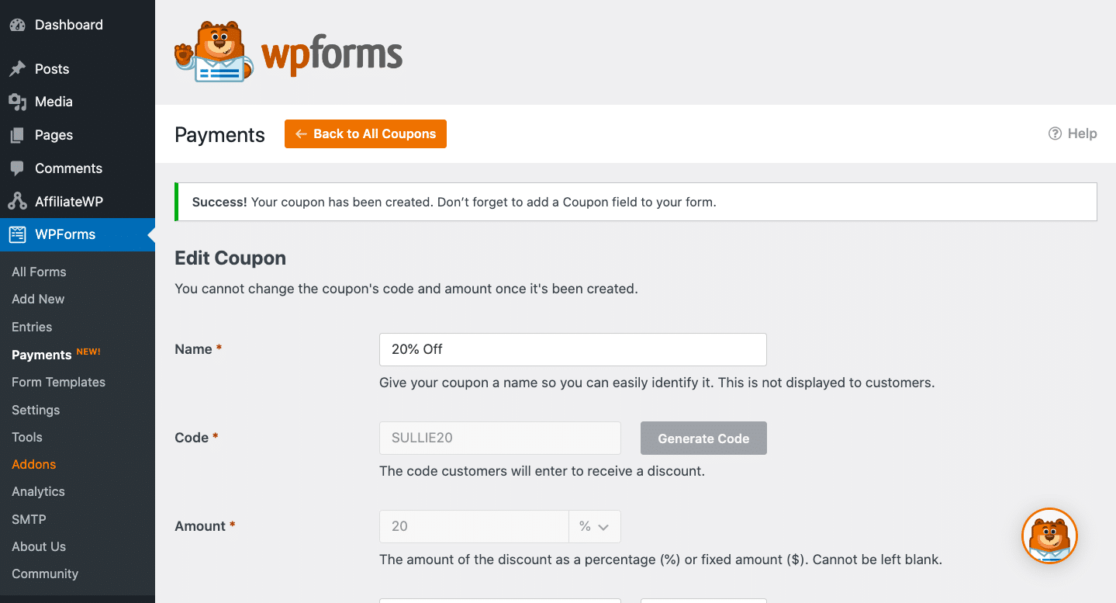
From here, you’ll see an orange Add Coupon button. Click here to create a new coupon. Then, enter the Name, Code, and Amount for your coupon on this screen.
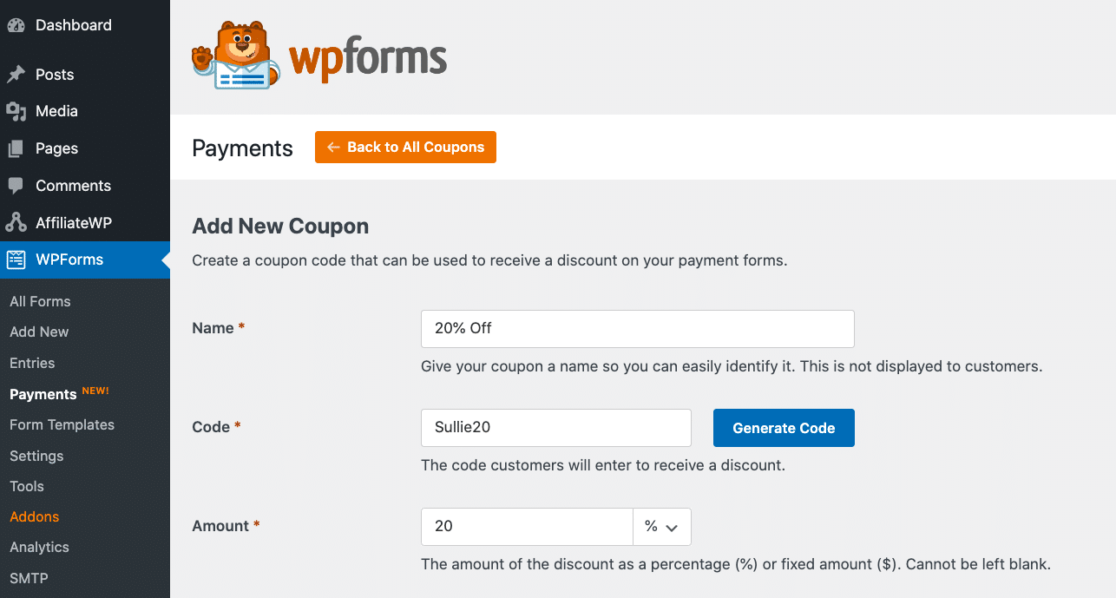
In the Name box, give your coupon a name or label for you to easily locate it later. Since we plan to make our coupon for 20% off a purchase, I’ll name my coupon “20% Off.”
Then, create or generate a code that your customers will enter on your form to use their coupon. I’ll once again use “20” in this code since that’s the percentage off we plan to give with this coupon. So, I’ll use “Sullie20” for my code.
For your coupon amount, you can apply an amount as a percentage or as a flat monetary amount. Keep in mind that the flat amount taken off the customer’s total is based on the currency you selected in your Payment Settings.
Next, you have the option to create a Start Date and Time and an End Date and Time for your coupon’s availability. This is a very useful option if you’re creating an exclusive coupon for an important date in your promotional calendar.
You can leave these boxes blank if you don’t want your coupon to have a time limit. You can also enter an amount for Max Uses here, or leave it blank.

Now, under Allowed Forms, you’ll need to enable your coupon on at least one form.
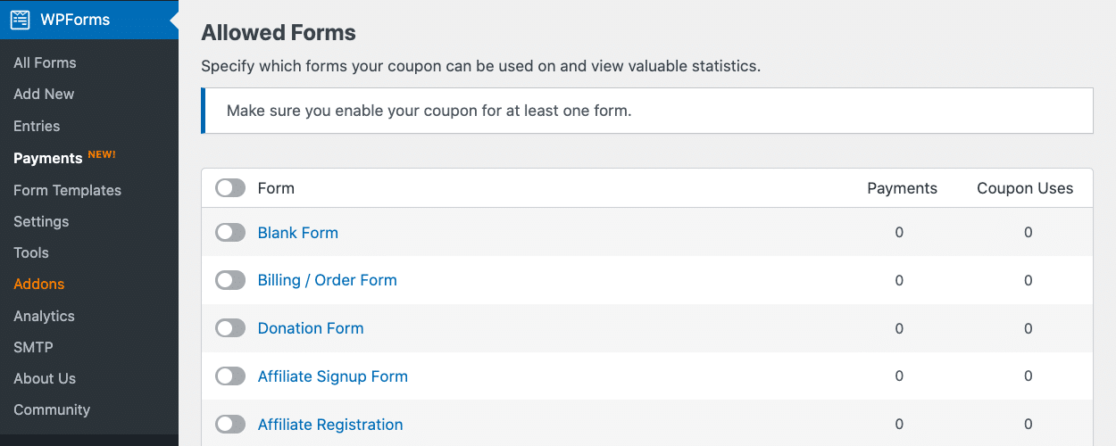
Once you start using a coupon on an allowed form, the stats will be displayed here. This screen will show you how much you’ve collected in payments for each form, and it will display the number of coupon uses on that form, too.
But, if you don’t have any forms created yet to toggle here, that’s ok. You can still add your coupon to a form later in the form builder. After you’ve specified your form and saved the coupon, you’ll see a success message on this page.
Now, back in the Coupons tab, you’ll see the coupon you just created along with its interactive details.
From here you can click on the coupon name to edit the coupon, or you can click on the form name to edit the form that the coupon is on.
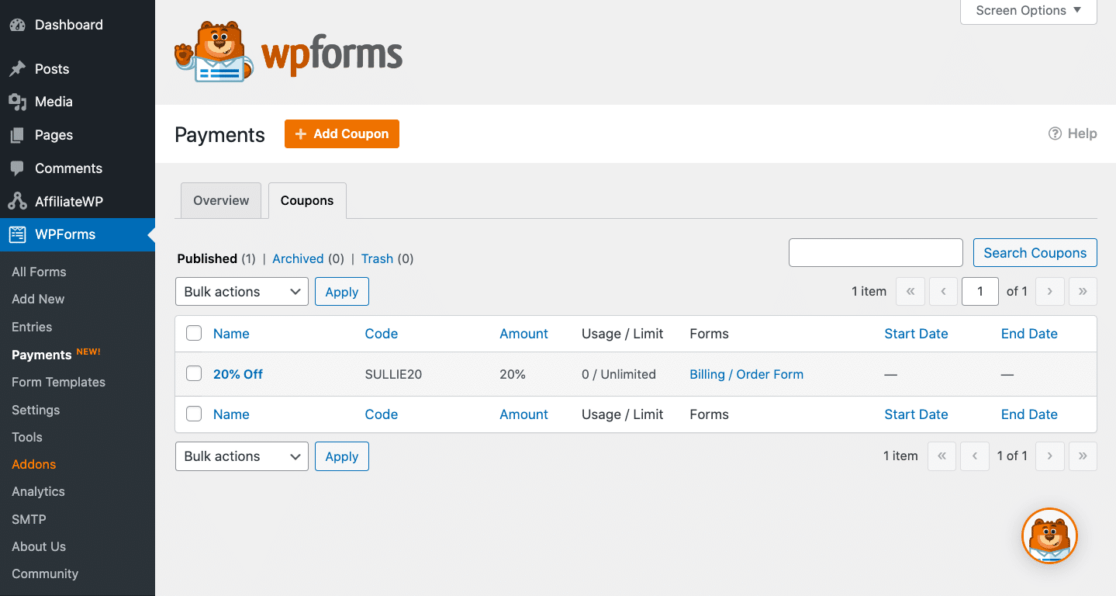
If you’ve limited the number of uses for this coupon or have set a start and end date, you’ll see that information here, too. Keep in mind that if the coupon has not been used yet, you can trash the coupon from this screen.
But if someone has already used that coupon and received a discount on their purchase, you can’t delete the coupon. In this case, you would just archive it.
Step 4: Write Coupon Error Message
Now, before you go on to editing the form or forms where you’ll add your Coupon field, go ahead and write the message that your form users will receive if they enter an incorrect coupon code.
Navigate to your WPForms Settings in your WordPress sidebar, and click on Validation.
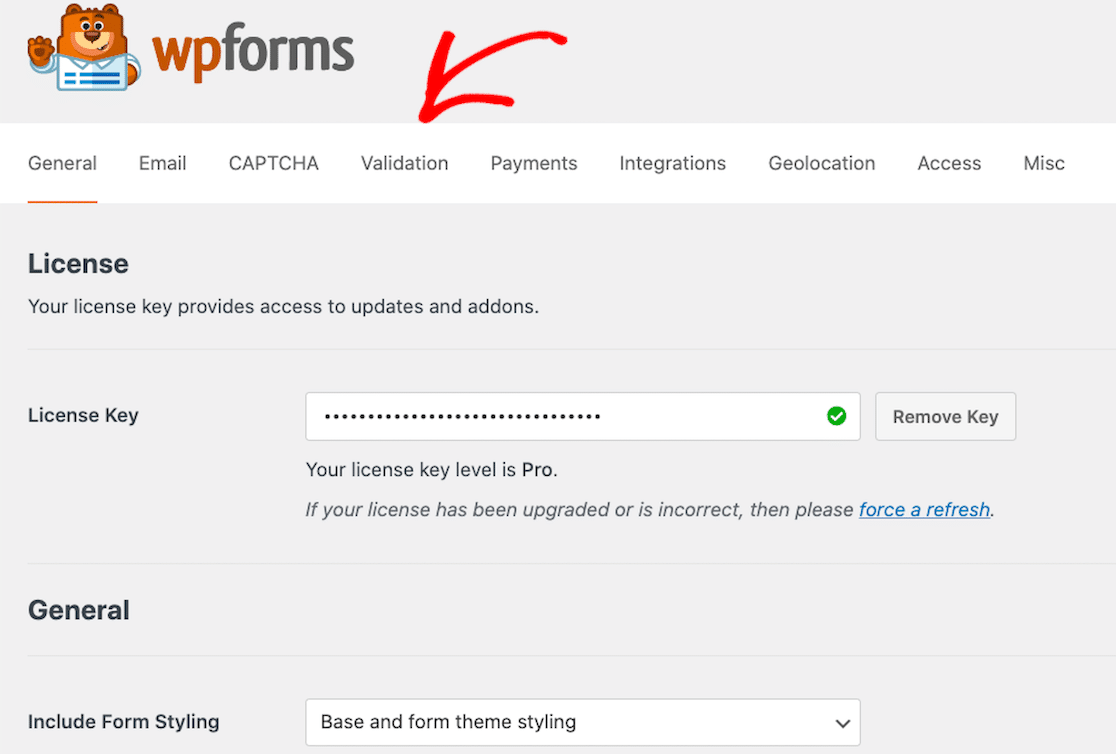
Then, scroll all the way down to the bottom of the screen. When you see the box labeled Coupon Error, type in the message you want to display to your users.
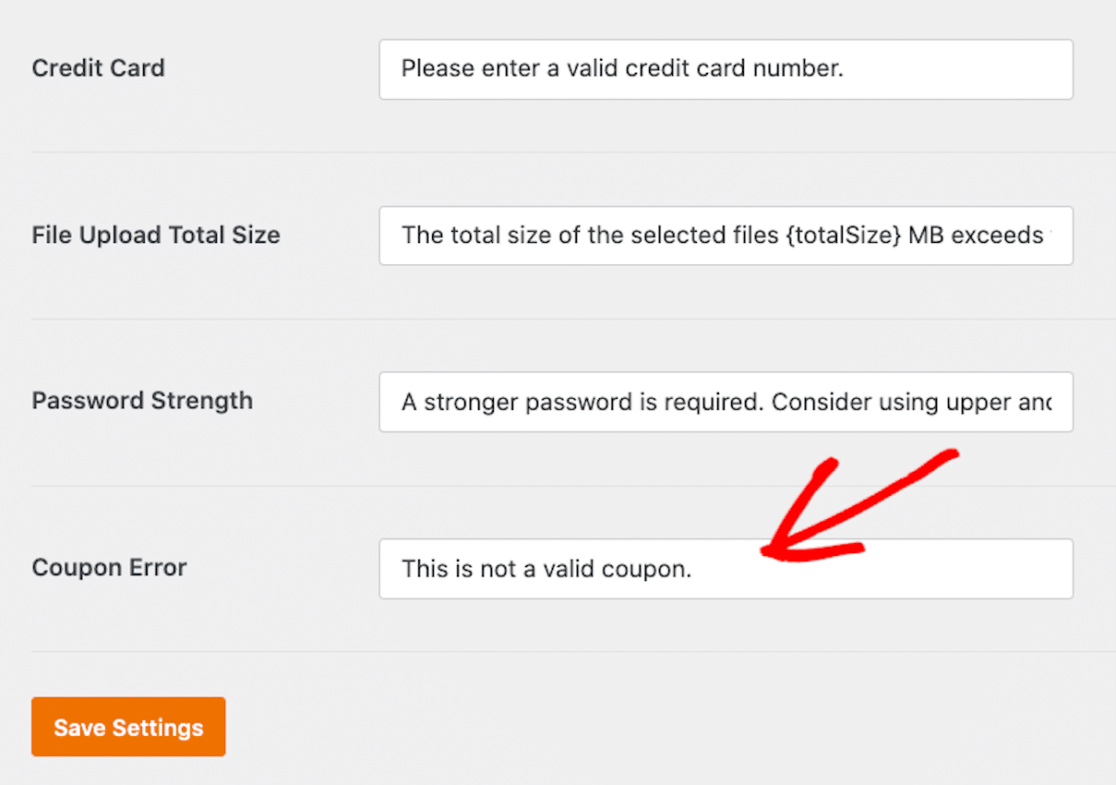
The default message reads, “This is not a valid coupon.” You may decide to give your users a direct prompt here, such as “Please enter a valid coupon.” Be sure to save your settings when you’re finished.
Step 5: Add Your Coupon to a Form
Now you’ll add the coupon you just made to a form. Head back over to the WPForms tab in your WordPress dashboard to locate your forms.
You can either create a brand new form and add a coupon field, or you can add a coupon field to a form you already have made.
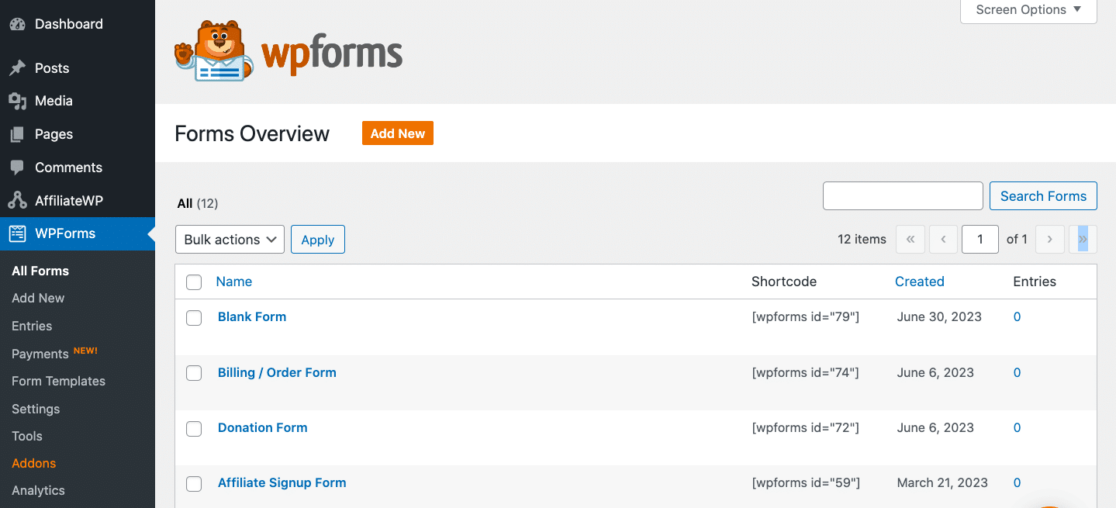
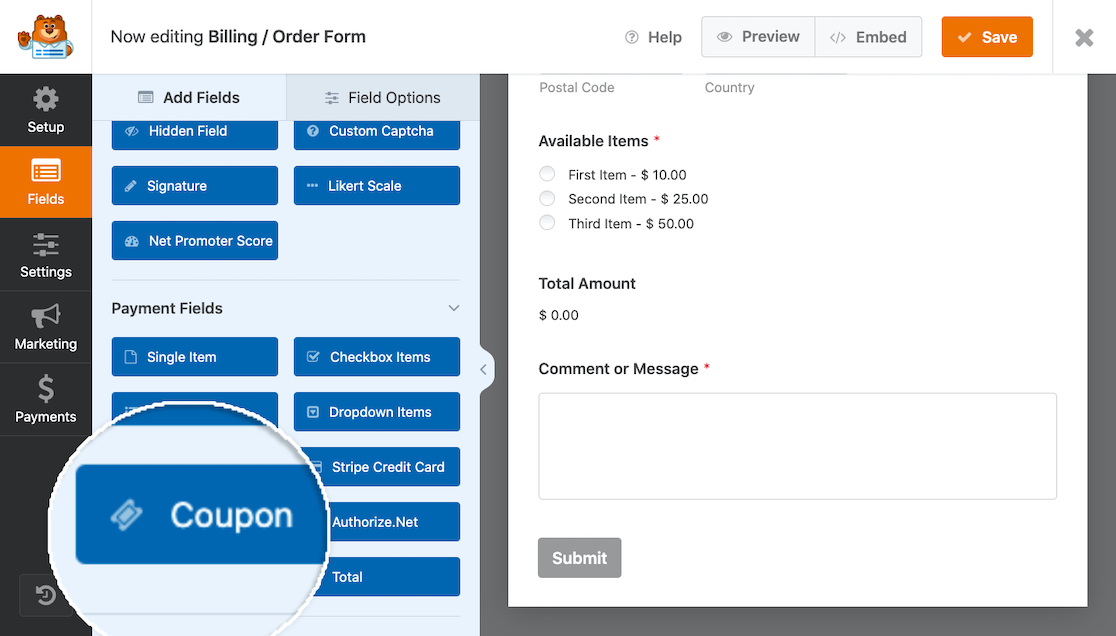
I’ll add the coupon we made to the Billing / Order form we already have saved in WPForms. Now, in the form builder, you’ll find a Coupon field under the form’s Payment Fields.
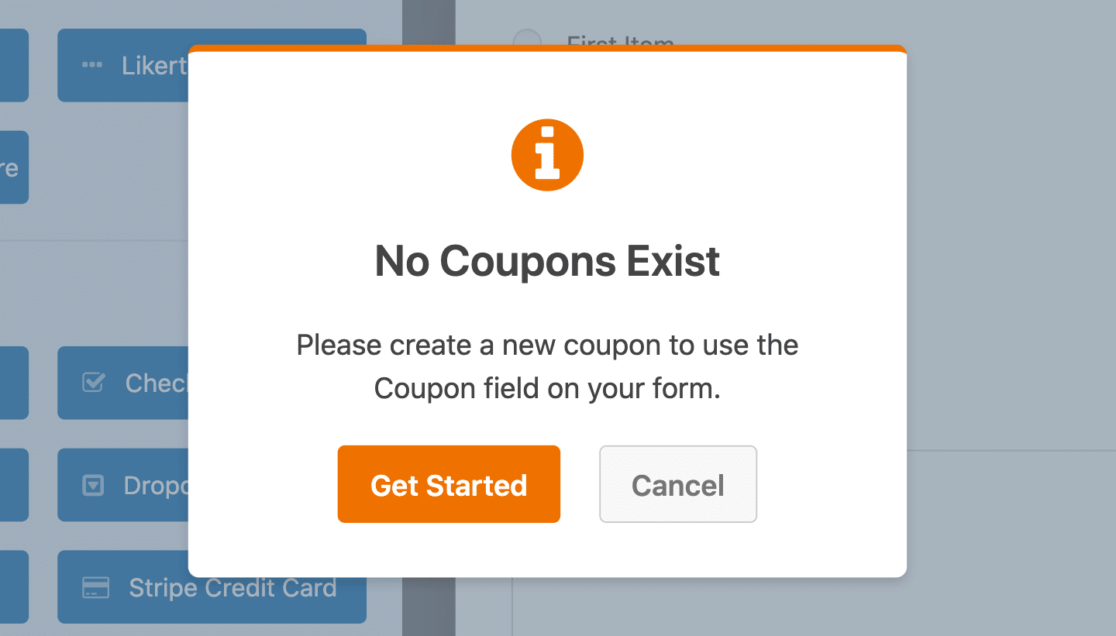
Keep in mind that if you try to add the Coupon field to a form before creating a coupon like we did in Step 3, you’ll receive an error message.
If you don’t already have a coupon made, you can click the Get Started button to create a coupon, or you can navigate to the Payments section from your WordPress dashboard.
So, just to recap before adding the Coupon field, there are a couple of ways to create a coupon. You can get to the coupon settings by going from the form to a coupon, or from the coupon to a form.
Since we already created the 20% Off coupon earlier in this tutorial, we can add the Coupon field to our form now. Go ahead and drag the Coupon field onto your form, and drop it near the bottom.
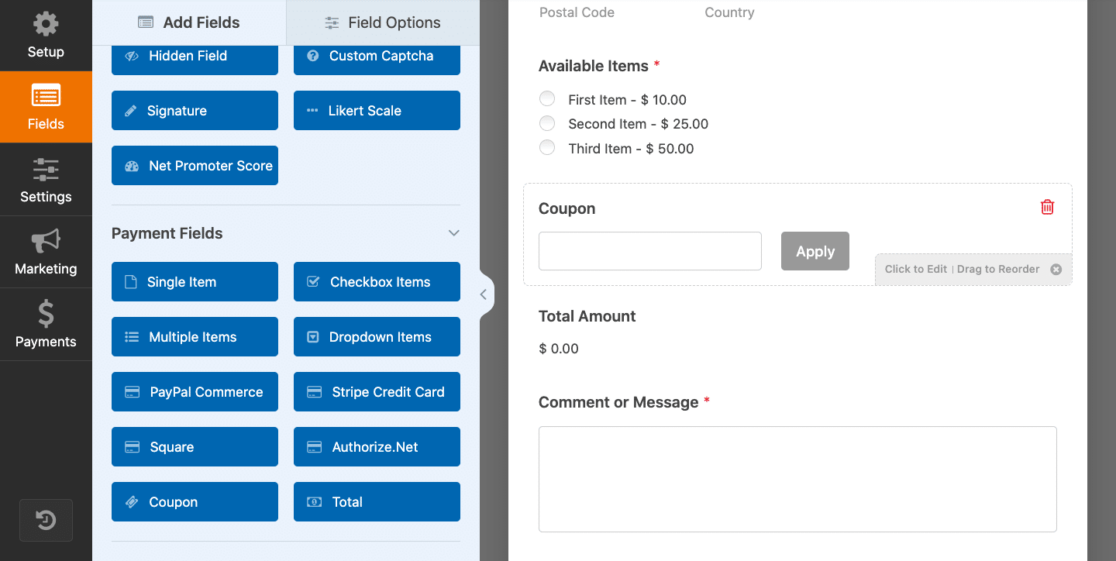
From here you can open the coupon settings by clicking on the field.
You might customize your form by changing the Label of the Coupon field, editing the text of the Apply button, or using conditional logic to hide the field or make others appear.
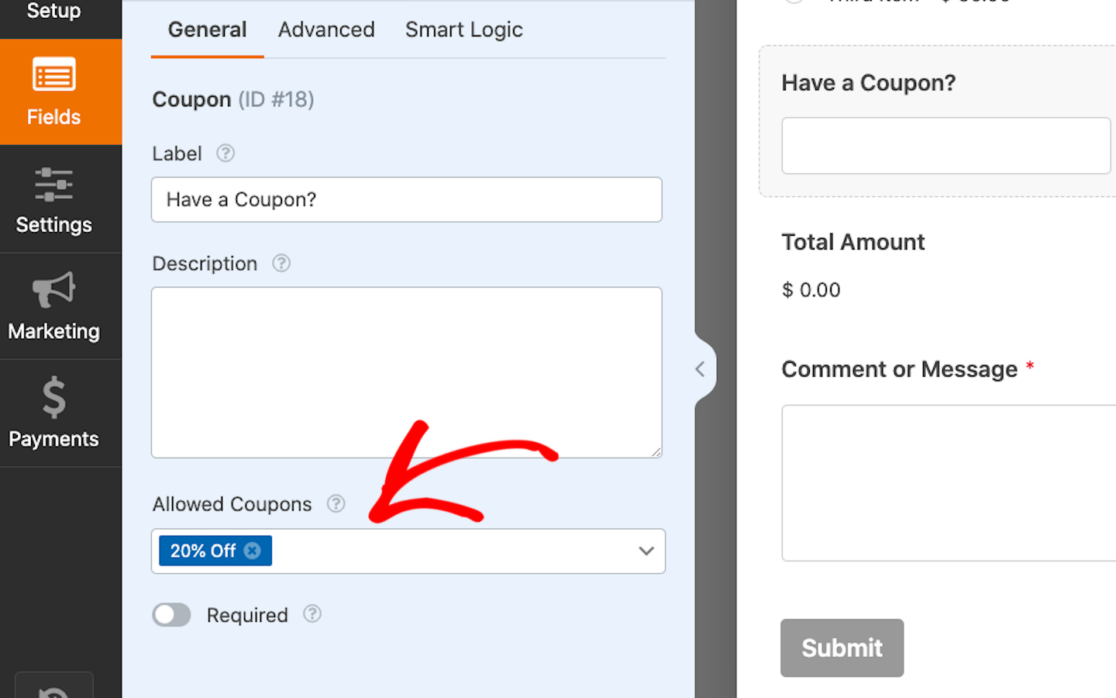
Notice that under Allowed Coupons, the 20% Off coupon is listed here since we selected this form to use the coupon on back in Step 3.
You aren’t limited to using just this coupon, though. Each of the coupons you create can be chosen from here.
That said, keep in mind that form users can only enter one coupon at a time. While you can have multiple coupons published with multiple discounts, only one can be applied on the front end.
In other words, many coupon codes can be accepted with a single Coupon field, but the form user can only enter one coupon code on the form.
Another thing to remember with using the Coupon field is that your form will also need a Total field and a Payment field.
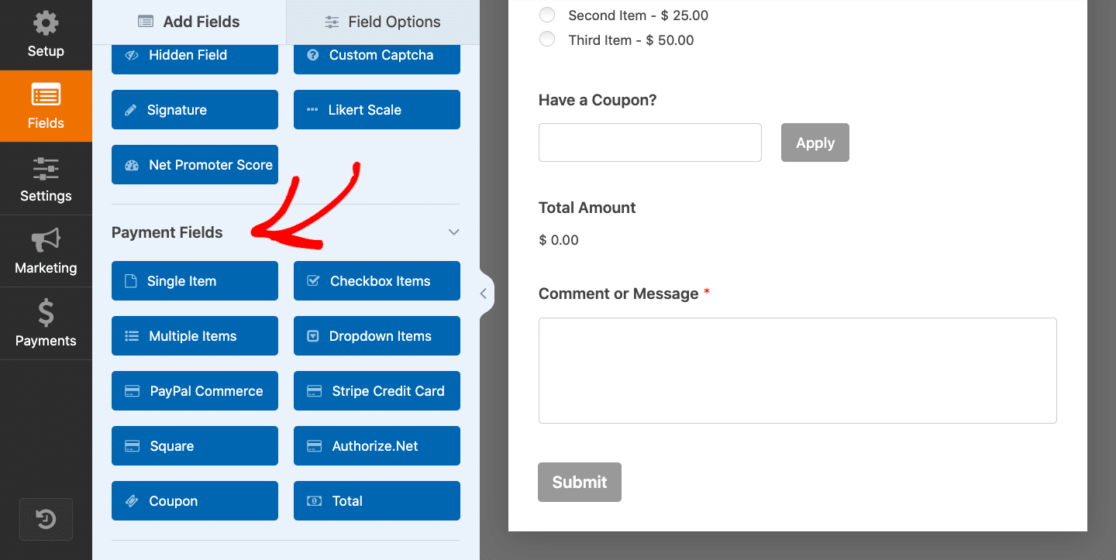
If you’re using a Billing / Order Form like we are, you might already have these fields on your form. But if you’re creating your form with a Coupon field from a blank form, then don’t forget to include the total and a payment option.
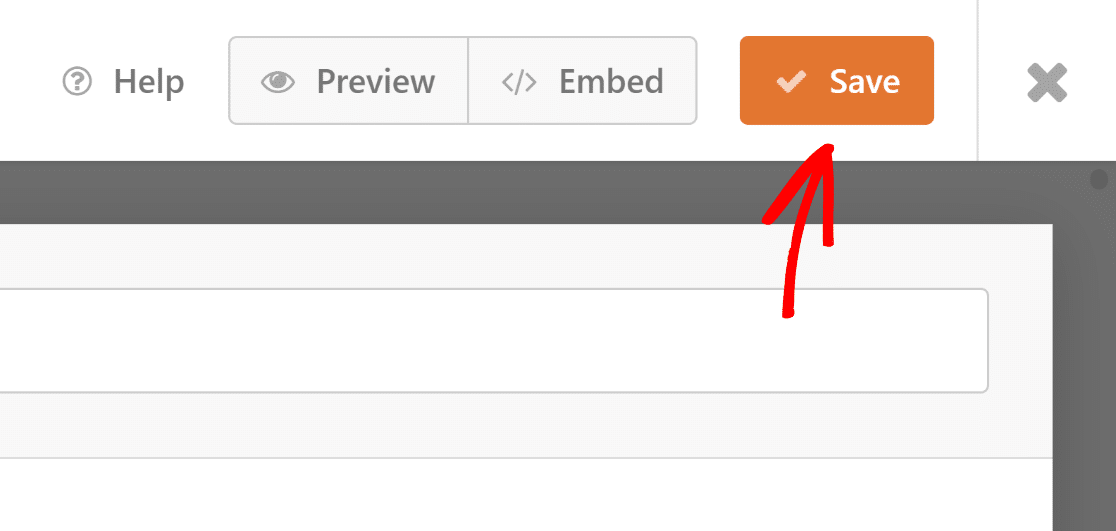
Not sure which payment option to offer your users? Check out our comparison of options and find out what we suggest. As always, you’ll need to click the Save button in the right-hand corner of your screen before you exit the form builder.
All that’s left to do now is add this form to a page on your website to start offering promotions and discounts to your customers and form users.
Step 6: Take Your Coupon Form Live
Now that you have an order form with a Coupon field on it, you need to embed it on a page displayed on your WordPress site.
And with WPForms, it’s incredibly easy to do. In fact, you can place your forms in multiple locations throughout your WordPress site, including your posts, pages, and even your sidebar widgets.
To embed your own form, create a new post or page in WordPress, or go to the update settings on an existing one. Then, click the black plus (+) button to add a new block. From the pop-up selections, choose WPForms.
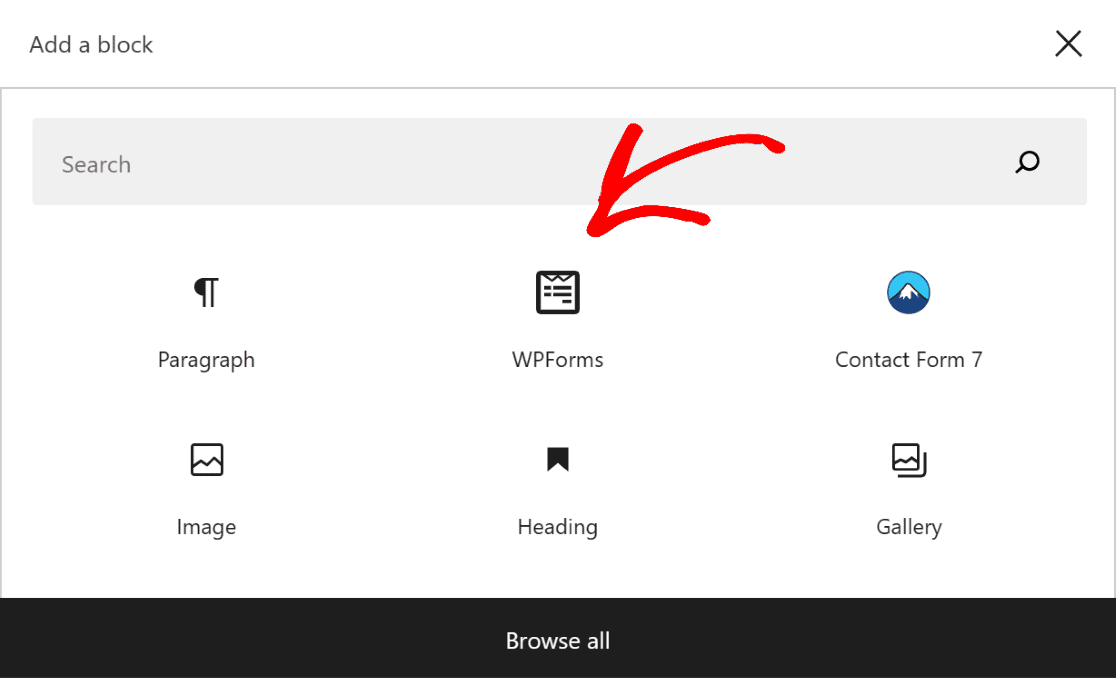
The WPForms widget will now appear inside this block. From here, click on the WPForms dropdown and pick which form that you want to display on your page.
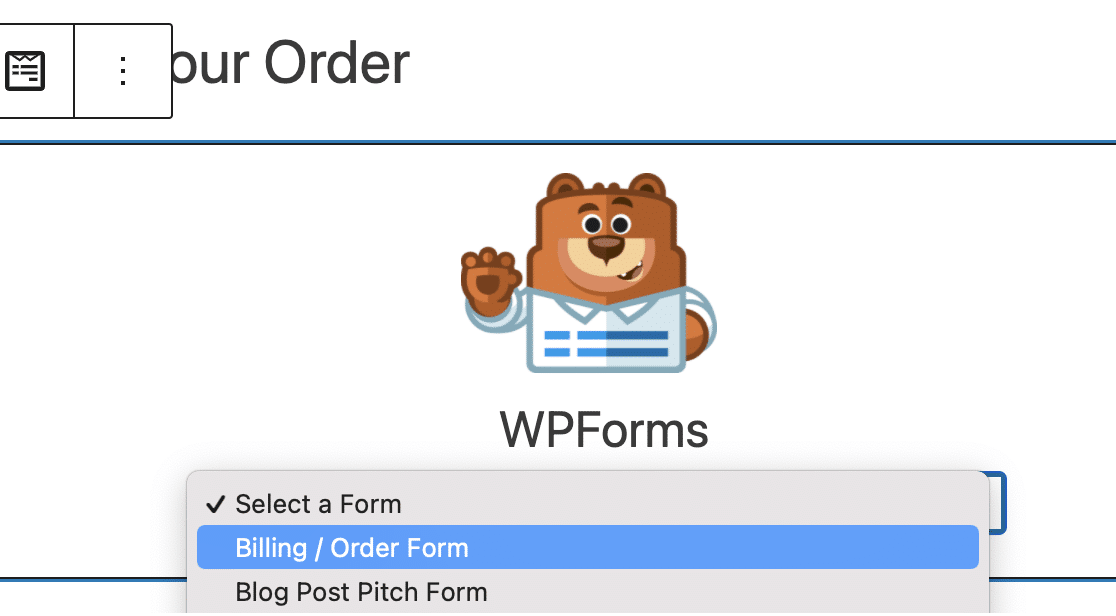
Now, just publish or update your page or post so your website users can apply your coupons to their orders.
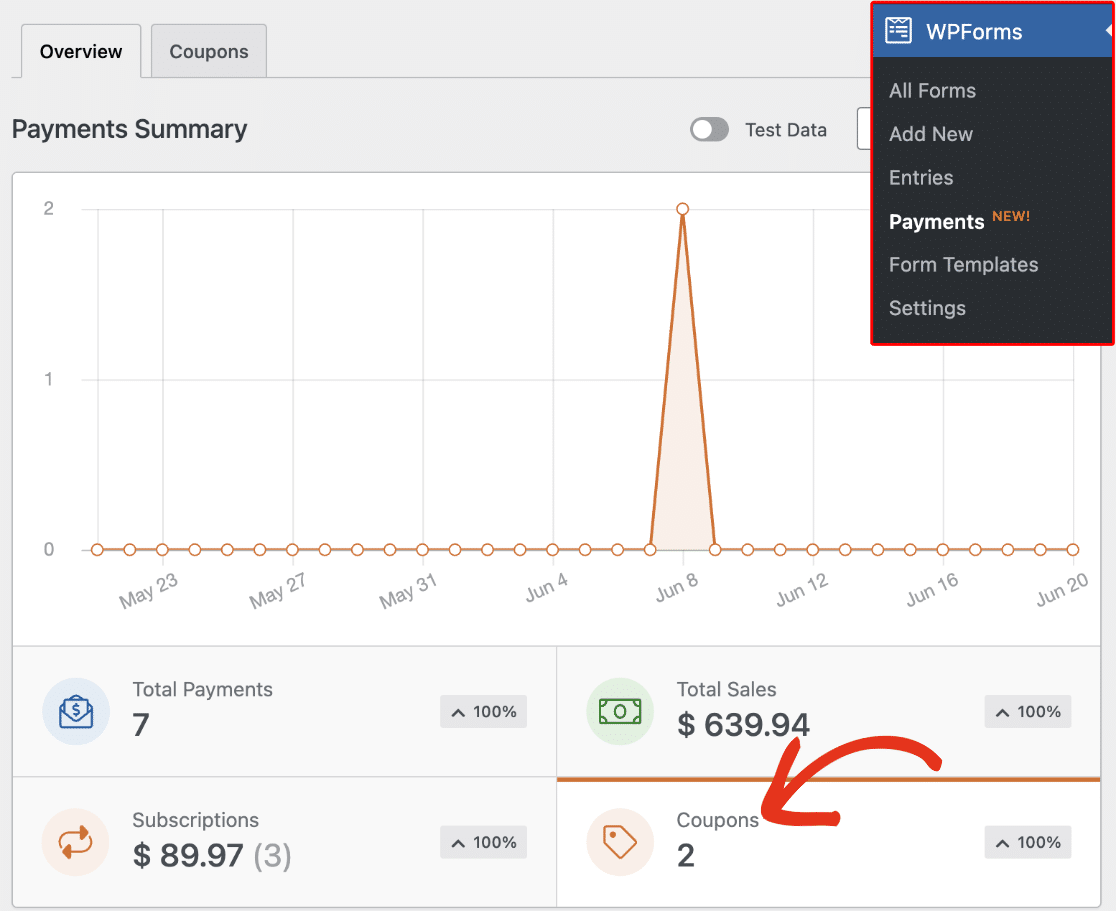
Then, once you’re receiving coupon codes on the forms you’ve added them to, you’ll be able to track your results in a couple of places.
Not only will the Entries tab of WPForms show you the coupon entries you’ve received on your forms, but the Payments Overview tab will show you specific coupon data. In the overview, you’re able to explore which coupons were applied to each payment.
Check out this complete guide to form entries to learn more about what you can discover through your entries.
Create Your Coupon Code Form Now
Adding Coupon Code Field to WordPress Forms – FAQs
Coupons is a hot topic with many of our customers so we receive lots of interesting questions about it. Here’s a selection of a few questions that might offer some additional context to you:
Why add a coupon code field to your forms?
Adding a coupon field to your order forms can help attract new customers and encourage repeat purchases by offering your visitors a perk to shop at your site. It creates a sense of exclusivity and urgency, which may also improve your conversion rates.
Plus, coupons provide opportunities for upselling and cross-selling related products or services. You may offer coupons to encourage the sale of specific clearance items or use them to reward loyal customers and celebrate birthdays and events.
In a nutshell, including a coupon field enhances customer satisfaction and fosters positive brand experiences.
What types of forms can I add coupon code fields to?
You can add coupon code fields to any form that accepts payments from your customers. In WPForms, you can even control precisely which coupons should work with which of your existing payment forms.
Do I need any coding knowledge to add a coupon code field?
No, you don’t need any coding knowledge to add a coupon code field in forms built using WPForms. This form plugin comes with easy and intuitive options, from the creation of your coupon code and setting its usage limits to adding a coupon field inside your form. None of this requires any code whatsoever.
How do I limit the number of times a coupon code can be used?
In WPForms, you can set the maximum uses of your coupon while you’re creating it. All it takes is for you to specify a number in the Max Uses box to limit the number of times your coupon can be used.

You can also edit this setting later for existing coupons from the same screen that you can access through WPForms » Payments and then going to the Coupons tab.
What happens if someone enters an invalid coupon code?
If a customer enters an invalid coupon code, the form won’t submit and an error message will pop up. The customer will then either have to enter a valid coupon code or leave the coupon code field blank to move on to making a payment via your form.
How does the coupon code affect my payment gateway integration?
Coupon codes aren’t dependent on payment gateway integration so they won’t affect your integration in any way. The normal processing fee that you’re usually charged will still apply as before, but the deductions will be based on the actual transaction after the discount rather than the full price of your product or service.
How do I track how many people are using my coupon codes?
You can track coupon usage on your forms using WPForms’ Payment Summary charts.

This screen tracks the number of times your coupons have been redeemed. If you just want to track the usage of a specific coupon only, you can also do that by going to the Coupons tab where all your saved coupons are listed. This table displays the usage statistics of each coupon individually.
Is it possible to create targeted coupon codes for specific users or groups?
You can use a combination of WPForms’ access restriction features with the Coupons addon if you want to allow a specific group of users to redeem a coupon. For instance, you can restrict your form to logged-in members of your site only and activate your special coupon code only on that particular form.
This way, only logged-in members will be able to access your form and the coupon will only be valid for that form (it won’t work in any other form).
Can I add an expiry date to a coupon code in WPForms?
Yes. When you create the code, set the Start and End dates in the coupon settings. After the last date passes, the code stops working on its own.
How can I track how many times a coupon code has been used?
Open the Payments tab in WPForms and look at the coupon column. It shows each use, so you can count them or export the list to a CSV file.
How do I show the new total right after the code is entered?
Add a Total field to the form and keep the “Show Summary” option on. When a visitor types a valid code, the form refreshes the price right away and displays an accurate summary of the total.
Is there a way to limit a coupon code to one use per buyer?
You can set usage limits for each coupon code to control how many times it can be redeemed.
Next, Create a Sales Page for Your Coupons
Now that you know how to easily add the Coupon fields to any form you’d like, it’s time to create a sales page that converts. Check out our full tutorial on creating sales pages in WordPress and start offering discounts now.
Also, did you know that you can auto-apply codes on payment forms using special links? You can also create a form with a repeater field if you want more registrations for an event or special occasion.
Ready to build your form? Get started today with the easiest WordPress form builder plugin. WPForms Pro includes lots of free templates and offers a 14-day money-back guarantee.
If this article helped you out, please follow us on Facebook and Twitter for more free WordPress tutorials and guides.



thanks a lot for this article but I need help, I’ve added a coupon of 100% but when I use that I obtain this:
This payment cannot be processed because the payment amount is not set or is set to an invalid amount.
Hey Riccardo – We’d be happy to help! When you get a chance, please drop us a line in support by creating a support ticket so we can assist.
Thanks 🙂