
AI Summary
Creating a personalized experience for your users can make all the difference when it comes to increasing engagement and boosting form completion rates.
If you’re managing a WordPress site, you might be wondering how you can tailor forms to make them more relevant to your visitors without adding complexity.
In this guide, I’ll walk you through some powerful WPForms features that make it easy to create personalized forms and explain how they can transform your form building and improve user satisfaction.
Personalize Your WordPress Form Now! 🙂
1. AI Choices to Transform Your Form Building
Even though creating forms is quick and simple with WPForms, filling in dropdown menus and multiple-choice questions still takes time. To make things easier, you can rely on the AI Choices feature.
All you need to do is click a button and describe what you need, and WPForms AI will fill in your checkboxes, dropdown lists, and multiple-choice options in seconds!
The best part of all is that AI Choices is available to everyone, regardless of whether you have a free or paid WPForms license. Here’s how you can use it:
How AI Choices Work in WPForms
Create any kind of form with Multiple Choice or Dropdown fields, or save time by using one of our premade form templates. WPForms offers a huge list of 2,100+ WordPress form templates.
Once you’re in the form builder, open the Field Options for the relevant Multiple Choice or Dropdown field. Then, click on the Generate Choices button to start adding a list of AI Choices!

A popup window will appear where you can now add details regarding the list you require in one or two sentences. Once done, hit the enter button.

The WPForms AI assistant will now generate a list of choices. You don’t need to copy and paste them—click on the Insert Choices button, and they will be automatically added to your form.

It takes seconds now to do what used to take hours. You can rearrange lists, take options out, or add more details. The possibilities are endless!
Not to mention, if you aren’t satisfied with the results generated, you can always ask WPForms AI to improve the response until you’re pleased.

Also Read: WPForms Best Practices: How to Make the Perfect Form for Your Site
2. Geolocation for Targeted Personalization
The WPForms Geolocation Addon is an incredibly useful tool for capturing and using a visitor’s location to personalize form fields.
By integrating with Google Maps, this feature can automatically detect the user’s city, state, and country, allowing you to customize the form experience based on their location.
For example, you can automatically set a default country or state in a dropdown, making it easier for users to fill out forms without manually selecting their location.
How Geolocation Works in WPForms
To set up geolocation in WPForms, you’ll need to install and configure the Geolocation Addon. Here’s a quick overview of the steps to get started:
First, make sure you have WPForms Pro, as the Geolocation Addon is only available in the Pro plan. Then, install and activate the Addon.

After you’ve activated the addon, you can configure its settings by going to WPForms » Settings and selecting the Geolocation tab. Then, follow the steps in this guide to connect your form with Google Places.

Address Autocomplete Personalization
Here’s an example of how your form might appear to users when the address and map autocomplete options are enabled to allow your users to submit your forms even faster!

Interactive Map Field
Beyond address autocomplete, the Geolocation Addon also includes a Map field that embeds an interactive map directly in your forms.
This is perfect for personalized experiences where you want visitors to:
- Select Their Preferred Location: Display multiple store locations, office branches, or service centers on a map with radio buttons for selection.
- Visualize Service Areas: Show coverage zones or delivery areas so visitors can see if they’re within your service region before submitting.
- Choose Event Venues: For event registration forms, let attendees see all venue locations and pick the one closest to them.
- Customize Markers: Use custom icons and colors to match your brand or differentiate between location types (stores vs. warehouses, for example).
The Map field supports both Google Maps and Mapbox integration, and you can enable features like “Find Nearby Location” to use the visitor’s browser geolocation to help them identify the closest option.
This level of location-based personalization makes forms more intuitive and helps ensure that submissions are routed to the right team or location from the start.
3. Prefill Form Fields Using URL Parameters or Query Strings
Prefilling form fields with WPForms using URL parameters or query strings is a great way to improve user experience, especially for returning visitors. It allows you to pass data directly into your forms, saving users time from re-entering information.
Using Query Strings to Auto-Fill a Text Field
Query strings are small pieces of information added to a URL, often after a question mark (?). They’re used to pass data from one page to another.
In WPForms, query strings can automatically fill out form fields when a user visits a page with that specific URL.
This is a great way to personalize forms for users who are returning to your site or have clicked on a special link from an email or ad.
For example, if you want the field for a user’s name to be prefilled, you could create a URL that looks like this:
https://yourwebsite.com/form-page/?name=John
In this case, “name” is the form field, and “John” is the value that appears automatically in that field when the user visits the page.

Check out this guide to learn how to use query strings to auto-fill a text field.
Setting Up Prefilled Forms in WPForms
Another way to set up prefilled form fields is to have your visitor fill out a basic form first, then pass that information to a second form when they click the Submit button.
To do this, you’ll need to set the Confirmation Type to Go to URL (Redirect) and configure the fields to populate using a query string.
For example, you would add a URL like this to the Redirect URL to enable dynamic field population:
- ?wpf: This marks the start of the query string for WPForms’ prefill function.
- Form ID: It indicates which form the data will go to (in this case, the Form ID would be 20).
- Field ID: This identifies which field in the form you’re targeting (here, the Field ID is 1).
- Subfield Identifier (Optional): This is used if you’re targeting a specific part of a multi-part field, like the city in an Address field (for example, labeled as “subfield”).
- =: The equal sign tells the system where the field’s value begins.
- Value: This is the data you want to auto-fill in the field. Any spaces in the value need to be replaced with %20 to function properly in the URL.

Also Read: Creative WPForms Ideas to Grow Your Business
4. Using Conditional Logic for Dynamic Forms
Conditional logic in WPForms is a powerful feature that allows you to control which fields your users see based on their previous inputs.
For instance, if you’re collecting feedback, you can ask more detailed follow-up questions if the user indicates dissatisfaction.
Another example is tailoring forms for different customer types—if a user selects “Business” instead of “Individual,” you can dynamically adjust the form to show fields relevant to business-related inquiries.
Setting Up Conditional Logic
One of the most practical ways to use conditional logic in WPForms is to make fields appear or disappear based on what users select.
To do this, first open the form builder and click on the field you’d like to control. This will bring up the Field Options panel, where you’ll find the Smart Logic tab.
By clicking on this tab, you can enable conditional logic for that field. You can apply conditional logic to entire sections of your form, not just individual fields.

Once activated, conditional logic allows you to show or hide fields depending on how users interact with your form. You can even set up advanced rules to automate actions based on their input.
For instance, you can let users choose their preferred payment method, customize notifications, or route leads automatically based on responses.
5. Multi-Step Forms for a Unique User Experience
By breaking a form into multiple steps, you create a more user-friendly experience, allowing people to focus on one section at a time.
This is especially helpful for forms that require detailed information or have a variety of questions. Users feel less overwhelmed when presented with smaller, manageable parts.
Setting Up Multi-Step Forms in WPForms
To create a multi-step form in WPForms, you’ll start by building your form as usual within the form builder. Instead of overwhelming users with too many fields at once, you can break the form into sections or “steps.”
This is done using the Page Break field. Simply drag and drop the field where you want to divide your form into different parts.

Once the Page Break is added, you can customize each step with a unique heading or description, helping users understand where they are in the process.
You can also configure the progress bar, which guides users through each section of the form, making the experience smoother and less daunting.

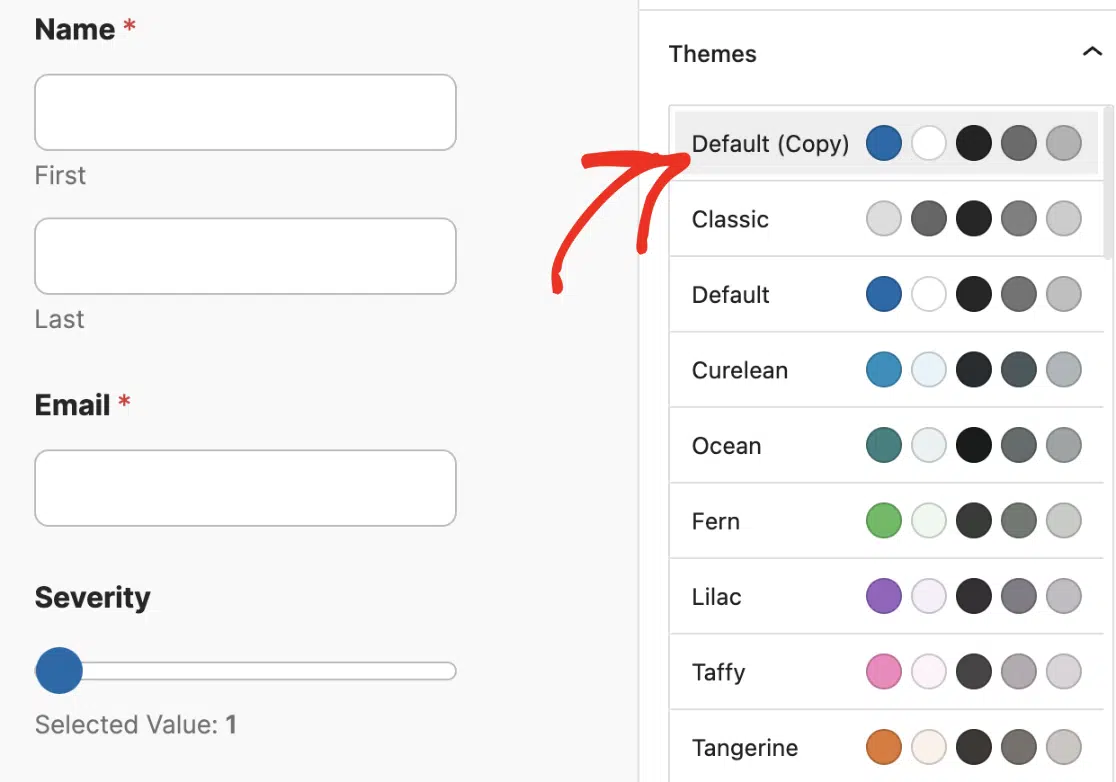
6. Style Your Form with the Block Editor
If you want to give your forms a personalized look and feel, WPForms integrates seamlessly with the WordPress block editor. This allows you to style your forms without writing any custom code.
By breaking up sections with clear headings, adjusting spacing, and adding custom fonts or buttons, you make the form more intuitive and enjoyable to complete.
Customizing Forms Using the Block Editor
Start by embedding your form directly into the block editor, where you can easily preview and edit the layout. By using the WPForms block within the editor, you’ll have full control over how your form is displayed on the page.
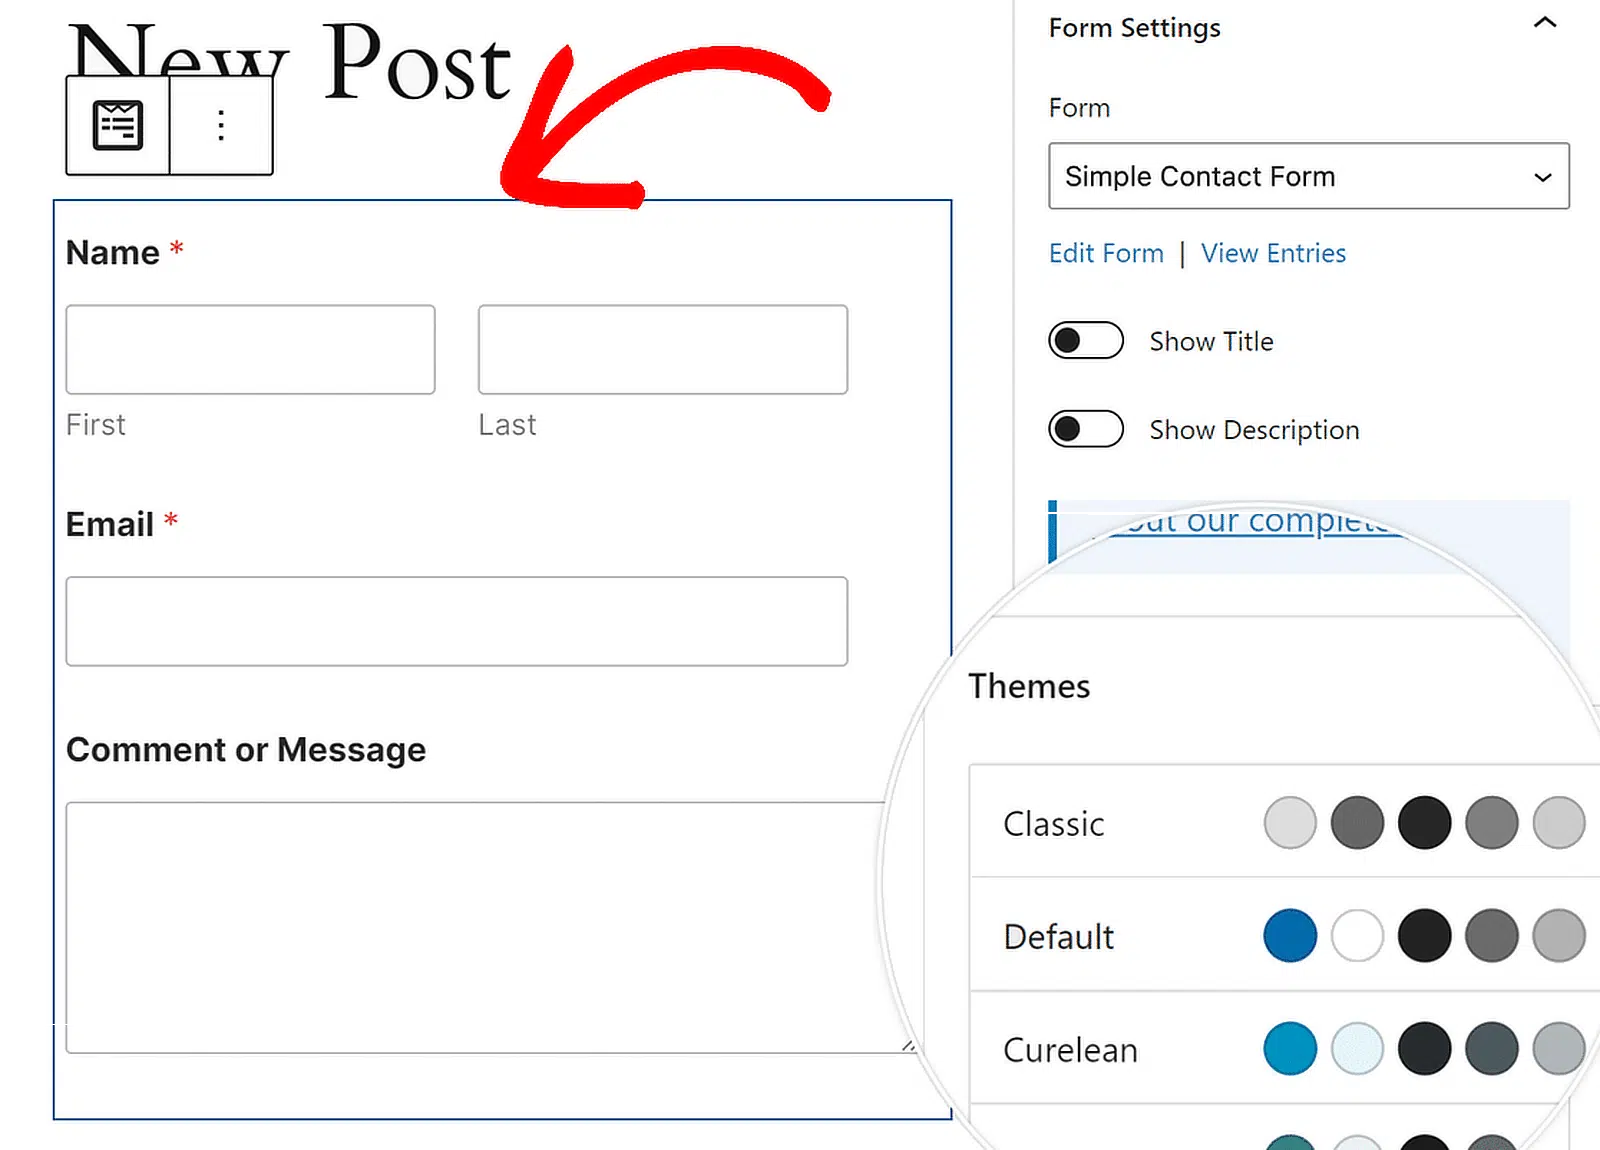
The WPForms block settings allow you to alter the color theme, form fields, labels, buttons, as well as the container and background styles.

You’ll particularly appreciate the pre-built Form Themes that allow you to apply consistent styling across your forms with just a few clicks.
These themes are especially useful if you’re looking to maintain a cohesive look without spending too much time manually styling each element.
FAQs — How to Personalize WordPress Forms With WPForms
Personalizing WordPress forms is a popular topic of interest among our readers. Here are answers to some common questions about it:
How to create custom forms in WordPress?
To create a custom form in WordPress, you can use the WPForms plugin. After installing the plugin, go to WPForms » Add New. From there, either choose a template or start from scratch.
Customize your form by dragging and dropping fields into place, then configure the settings. Finally, embed the form on any page using the shortcode or block editor.
How do I change the design of a form in WordPress?
You can easily change the design of your forms built with WPForms by using Form Themes. Navigate to the block editor after embedding your form and select a theme that matches your website’s style. You can also use the WPForms block to adjust colors, fonts, and layouts.
How do I create a custom Smart Tag in WPForms?
Creating a custom Smart Tag in WPForms requires a bit of code. You’ll need to hook into WPForms using wpforms_smart_tag_process and write a function that defines the tag’s behavior.
Once set, you can use the custom Smart Tag in your form fields or notifications to dynamically insert user information. Check out this guide for more information on creating custom Smart Tags.
Can you customize WPForms?
Yes, WPForms is highly customizable. You can use Conditional Logic to personalize the user experience, Form Themes to adjust the design, and various addons to customize the form experience.
WPForms also offers advanced features like pre-filled forms, geolocation, and Smart Tags for further customization.
Next, Explore These Hidden WPForms Features
WPForms is packed with tools and options that aren’t immediately obvious but can significantly improve your workflow and the forms you create. Check out this guide to learn about features that might have slipped under your radar or this guide for some more WordPress tips.
Create Your WordPress Form Now
Ready to build your form? Get started today with the easiest WordPress form builder plugin. WPForms Pro includes lots of free templates and offers a 14-day money-back guarantee.
If this article helped you out, please follow us on Facebook and Twitter for more free WordPress tutorials and guides.

