AI Summary
Would you like to learn more about the locations of the users who fill out your forms? With the WPForms Geolocation addon, you can easily collect geographical data for each of your leads.
This tutorial will show you how to install and use the Geolocation addon for WPForms.
Requirements:
- You will need a Pro license level or higher to access the Geolocation addon
- Ensure that you’ve installed the latest version of WPForms to meet the minimum required version for the Geolocation addon
Setting Up the Geolocation Addon
Before getting started, you’ll first need to make sure that WPForms is installed and activated on your WordPress site.
Once you’ve installed WPForms and your license is verified, you’ll be able to quickly install and activate the Geolocation addon.
After you’ve activated the addon, you can configure its settings by going to WPForms » Settings and selecting the Geolocation tab.
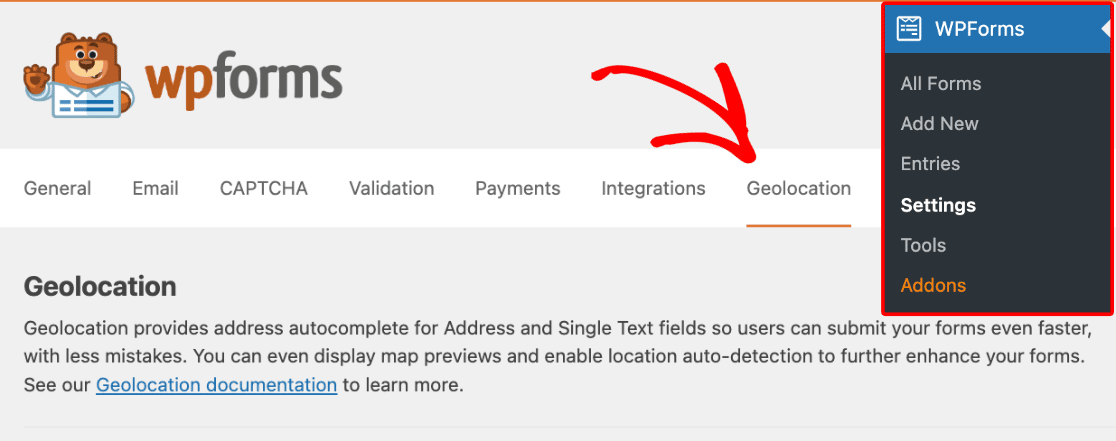
From here, you’ll have the option to choose which provider you’d like to receive your geolocation information.

Note: Selecting None from the Places Provider options will prevent your forms from saving location data.
In the following sections, we’ll cover how to set up the Google Places and Mapbox Search APIs.
Google Places API
Note: Google Places requires your site to have an SSL certificate (i.e., to load over HTTPS). If you’d like more information on how to get an SSL certificate for your site, be sure to check out WPBeginner’s guide on how to get a free SSL certificate.
First, select Google Places from the list of options in the Geolocation section.

Once you select the Google Places option, additional settings will appear. You’ll need to retrieve your Google Places API key so you can enter it in the field provided. To do so, open the Google Cloud Console in a new browser tab or window.
Generating Your Google Places API Key
At the top of your Google Cloud dashboard, select the project you’d like to enable this API key for from the Select a project menu.
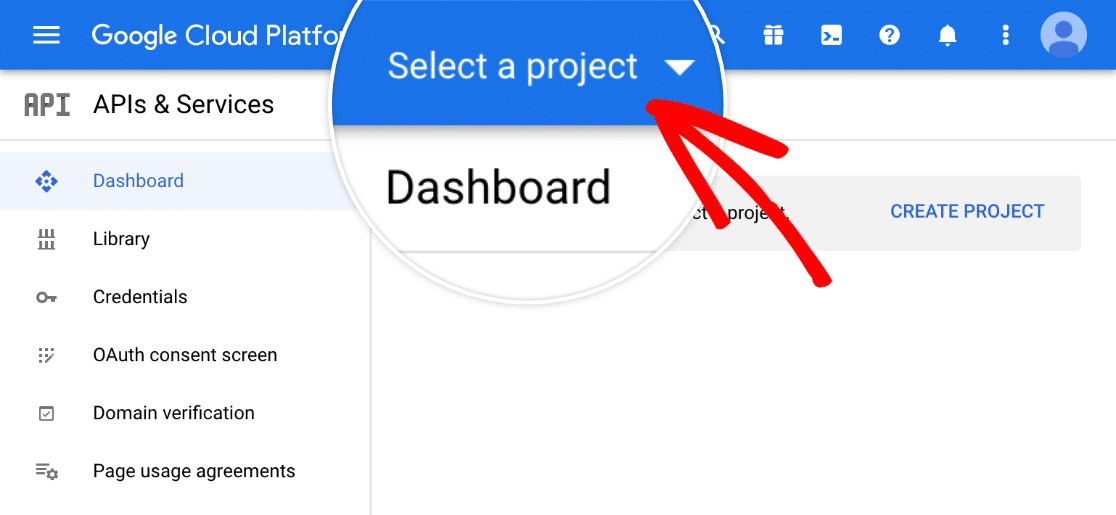
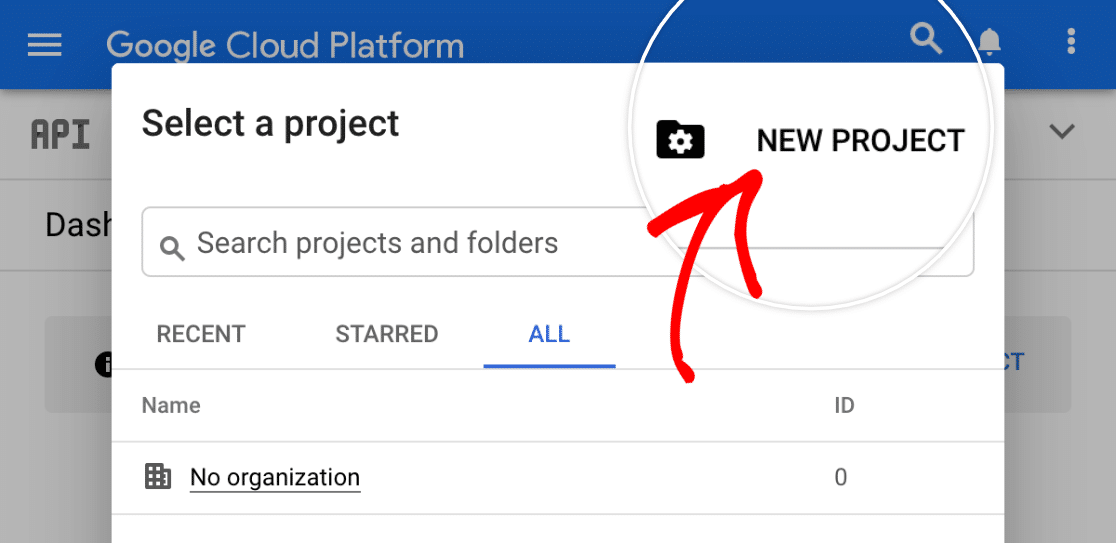
If you haven’t previously created a project, click NEW PROJECT to set one up.
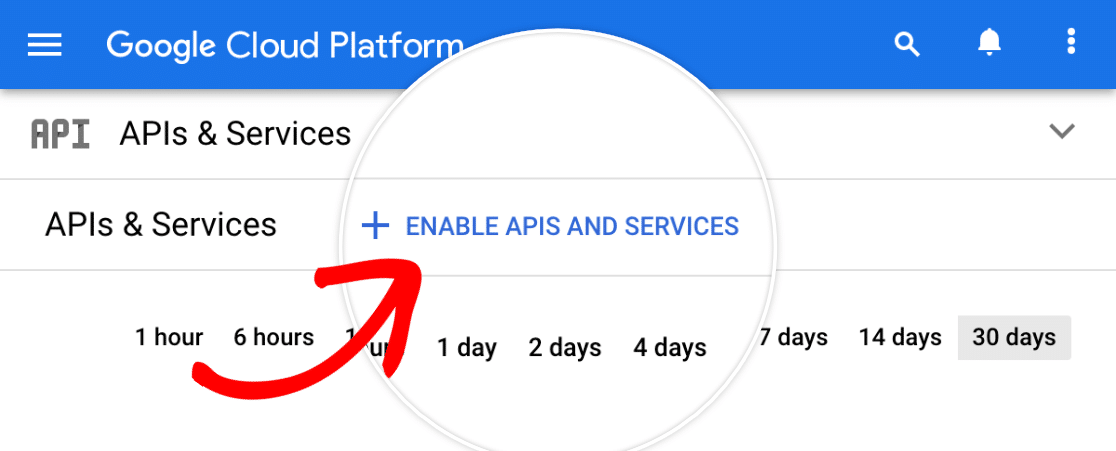
Once you’ve opened up your project, you should be redirected to its APIs & Services dashboard. If not, open the hamburger menu in the top left corner of the screen and go to APIs & Services » Enabled APIs & services.
Then click + ENABLE APIS AND SERVICES.
This will open the API Library. Search for and enable the following APIs:
- Places API
- Maps JavaScript API
- Geocoding API
To enable an API for your project, you only need to click on the blue ENABLE button below its name.

After enabling all three APIs, navigate to the Credentials settings by going to APIs & Services » Credentials from the menu on the left. From here, click + CREATE CREDENTIALS and select the API key option to generate an API key.

In the popup window with your new API key, click on Edit API key.

On the next screen, you’ll need to configure the following options:
Set an Application Restriction
To allow your API key to be used with WPForms, you’ll need to select the Websites option.

Website Restrictions
Once you’ve allowed your key to be used on websites, it’s recommended that you restrict which domains are able to use it for security purposes. To do so, click on + ADD in the Website restrictions section.

Then enter your website’s domain in the field provided. If you’d like to allow your key to be used across an entire domain, enter it with a forward slash (/) followed by an asterisk (*) at the end.

You can add as many items as you need to enable your key for your entire site or multiple sites.
Note: If your site uses subdomains, add .example.com/ as an item in your website restrictions to enable your key to be used on all of your subdomains.
API Restrictions
Once you’ve restricted your key by Application and Website, you’ll need to restrict your key by API. To do this, select the Restrict key option.
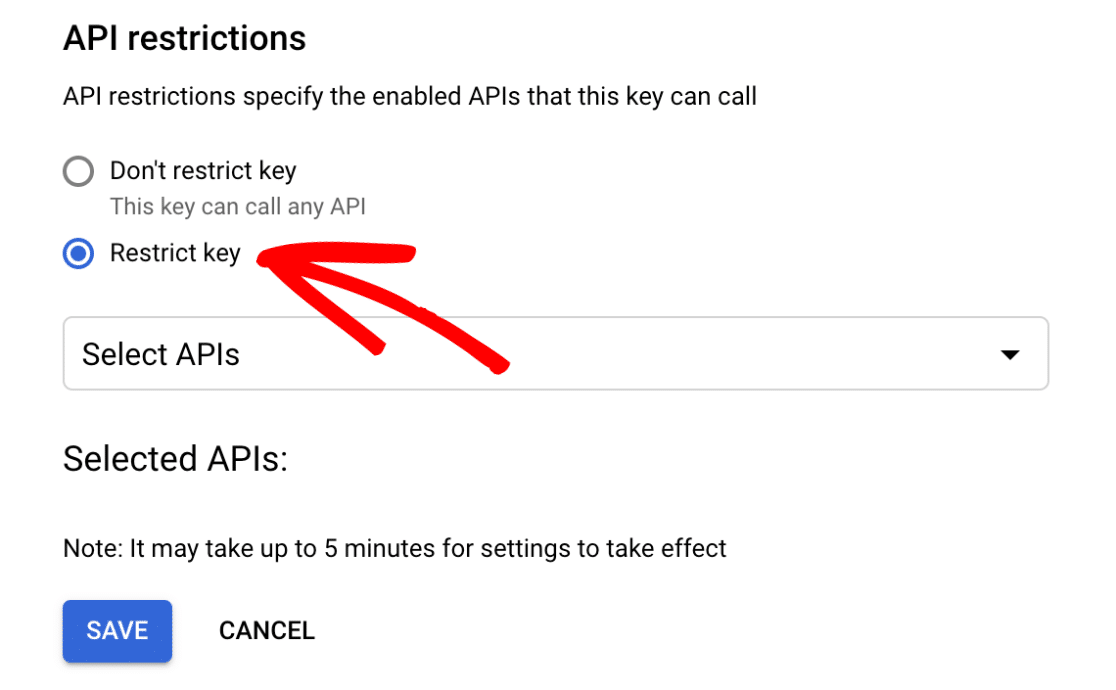
This will reveal a dropdown, from which you’ll need to select the specific APIs you’d like to restrict your key to.
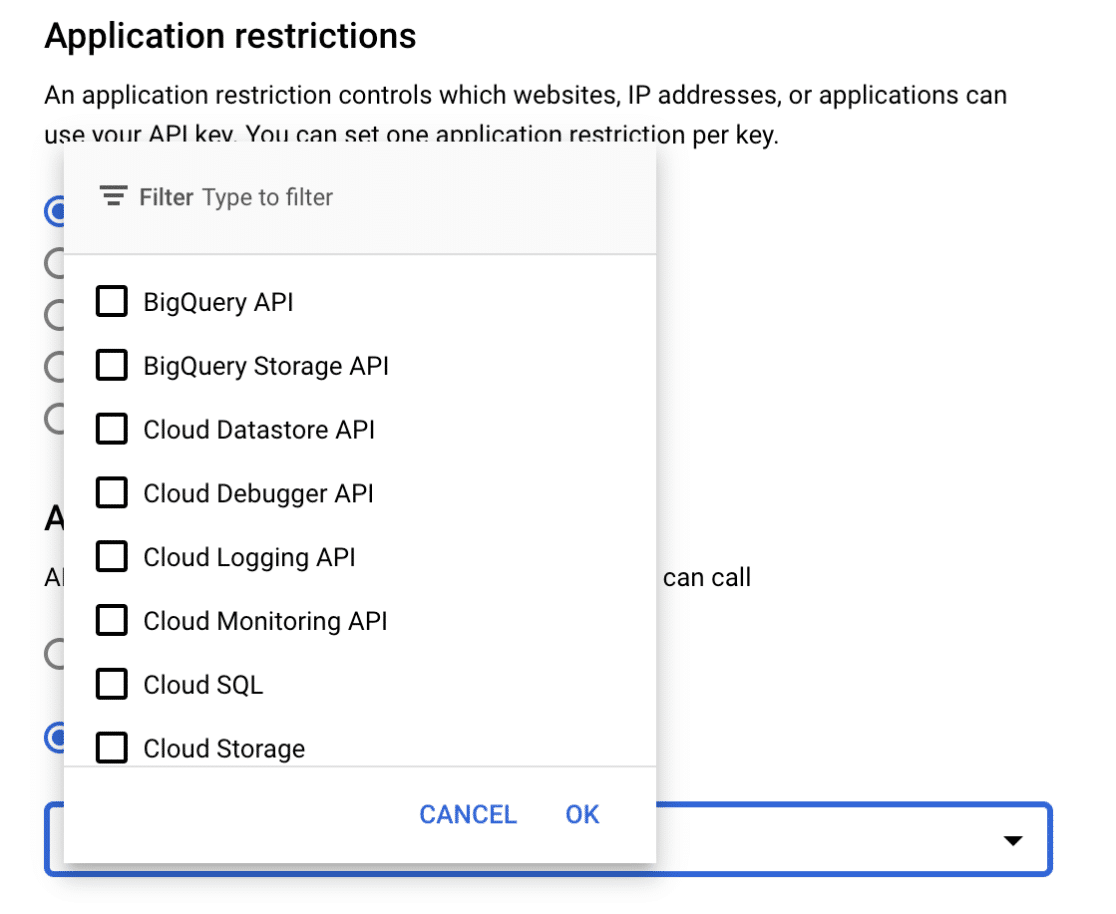
From this dropdown, select the following APIs:
- Places API
- Maps JavaScript API
- Geocoding API
Once you’ve selected these APIs, go ahead and click the Save button to save your settings.

Copying Your Google Places API Key
After saving your settings, you’ll be redirected to an overview of all your available API keys. To view your key, click the SHOW KEY option under the Actions heading.

A popup window will appear displaying the API key. From here, copy the key by clicking the copy icon and return to your WPForms settings.

Back in your WPForms settings, paste the API Key you just copied into the API Key field and save your settings.

If you would like to pre-fill your forms with users’ locations, toggle the Current Location option to the ON position.

That’s all you need to know to set up the Google Places API. In the next section, we’ll cover how to use the Mapbox provider, which is another great option for providing geolocation data.
Mapbox Search API
To begin setting up the Mapbox Search API, select Mapbox Search from the list of options under the Geolocation section.

Note: Mapbox Search JS, the set of JavaScript frameworks that enables users to interact with Mapbox maps, is currently in a public beta phase. During the beta phase, the Mapbox address autofill and search features may be subject to potential changes.
Once you select the Mapbox Search API option, additional settings will appear. You’ll need to create a Mapbox Search access token. To do this, you’ll first need to log in to your Mapbox account dashboard.
Once you’ve accessed your account dashboard, locate the navigation bar and click Tokens.
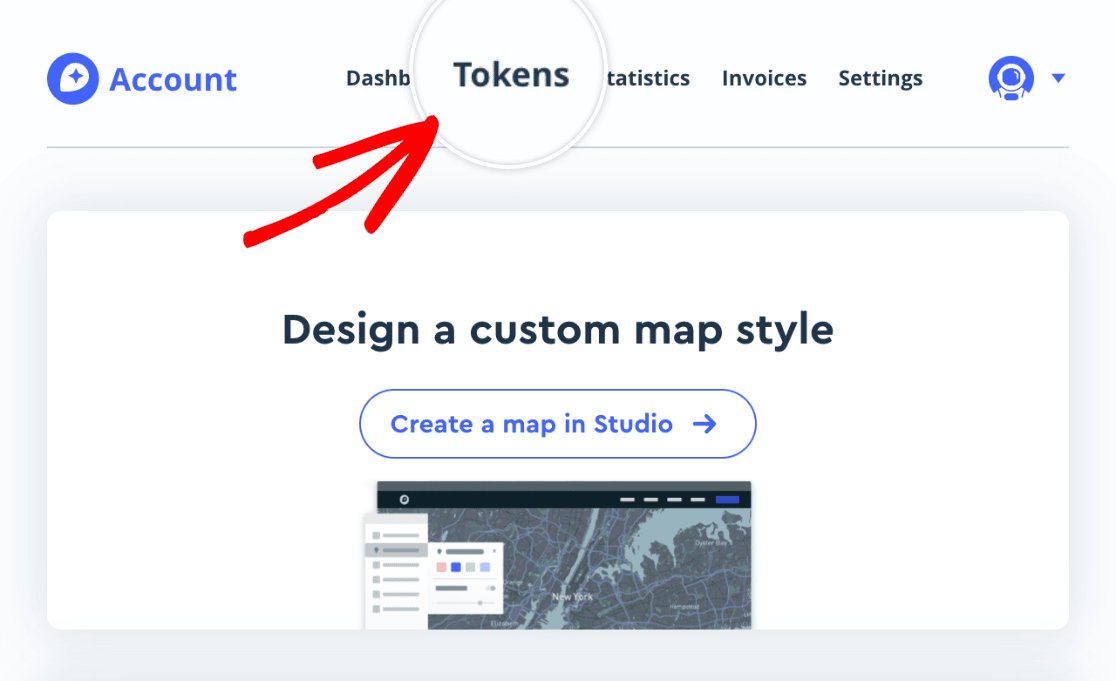
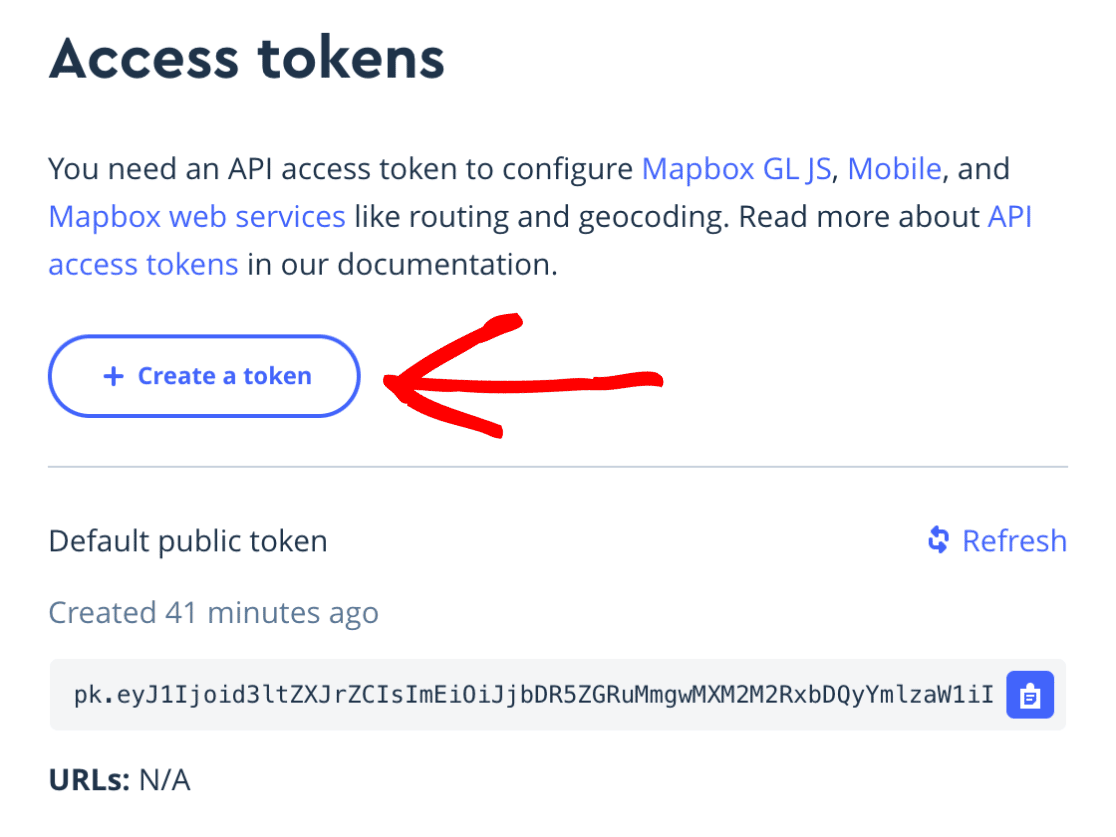
This will take you to the Access tokens page where you can add and manage your tokens.
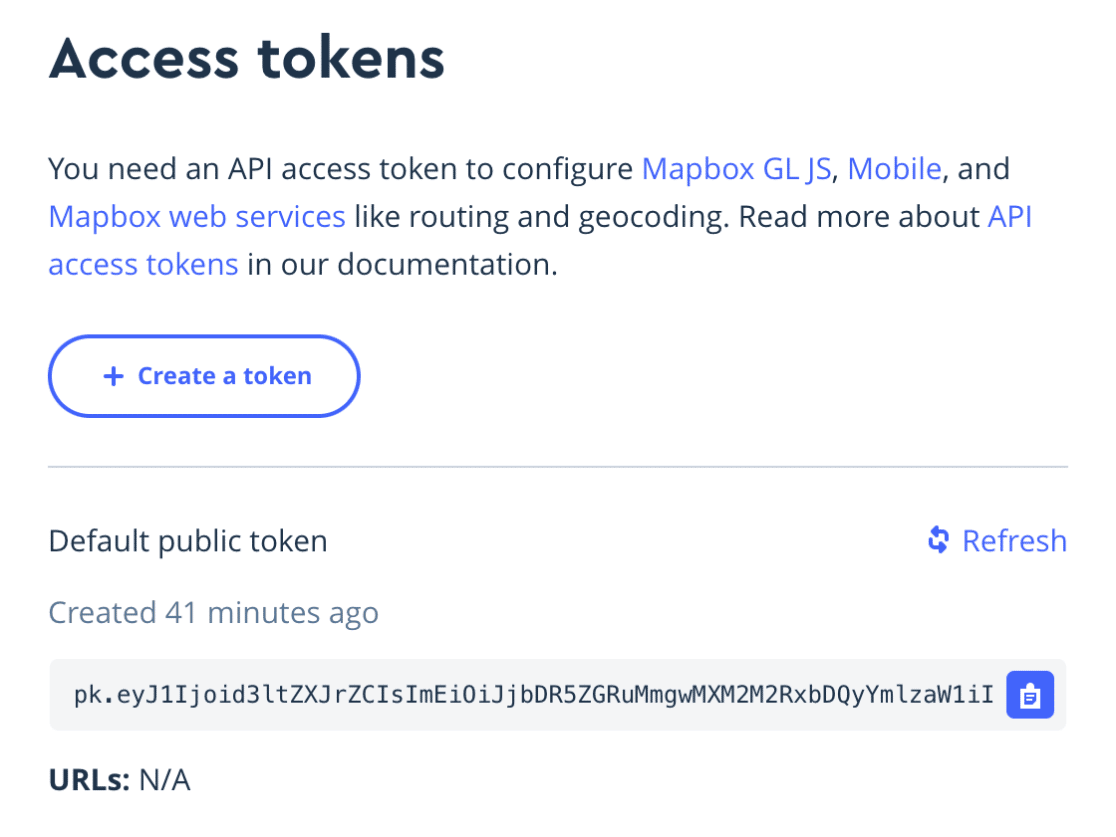
Mapbox provides a default access token for you, however, we recommend creating a new token you can use specifically for WPForms. To do this, click the Create a token button.
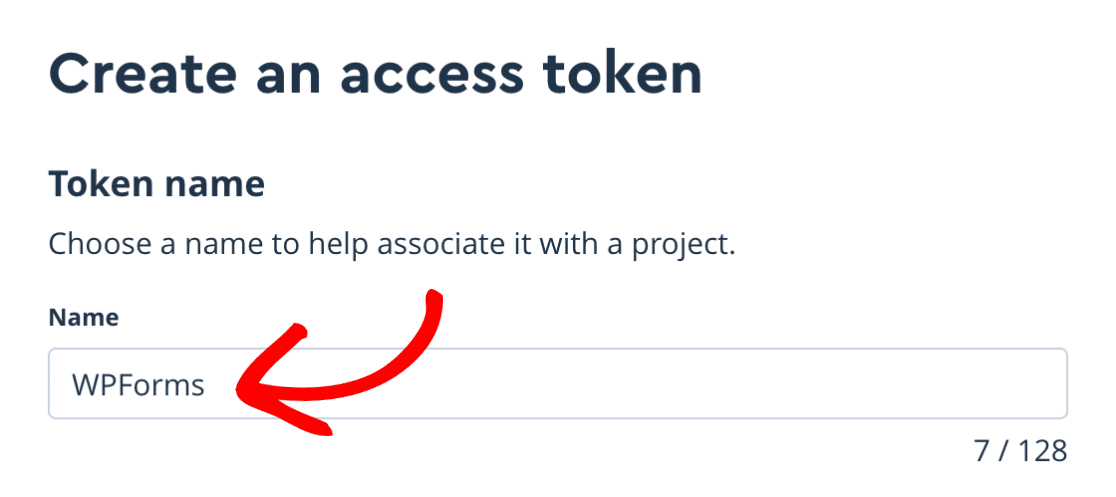
Clicking this button will take you to a new page where you can create a new access token. Under the Token name section, locate the Name field and type in a label to help associate it with a project.
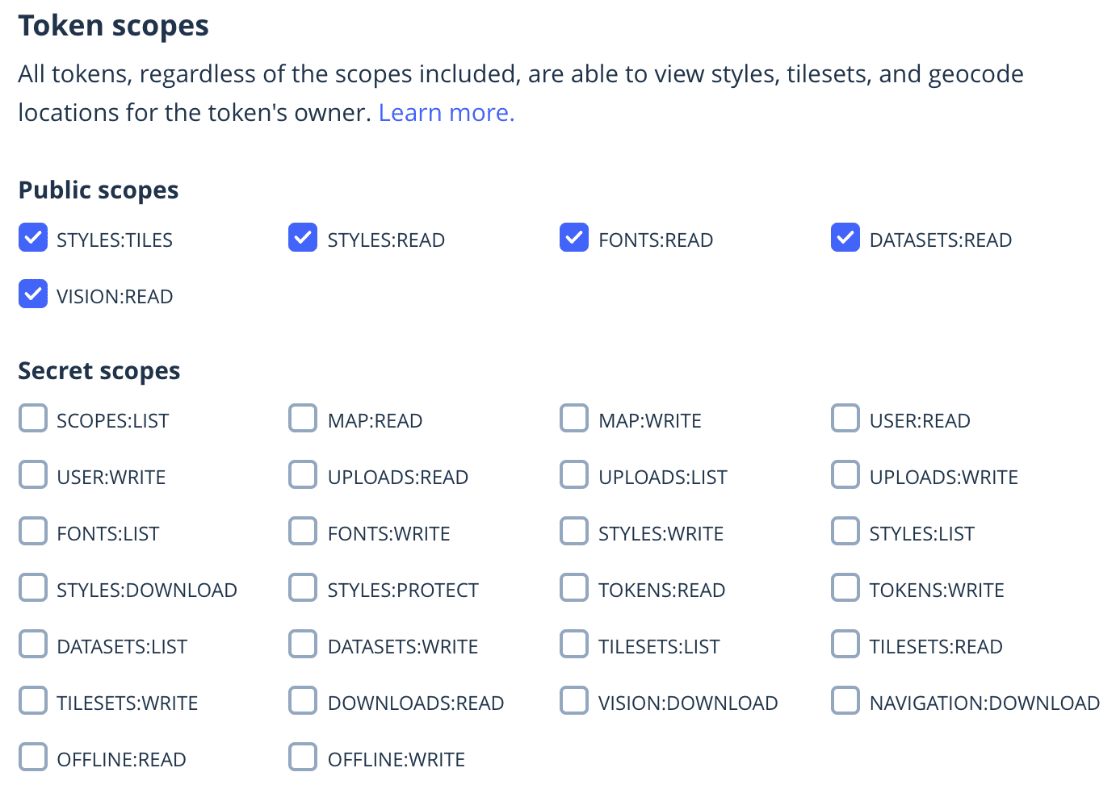
Then, scroll down to the Token scopes section. Here you’ll see various public scopes selected by default. Go ahead and leave this section as is.
Next, scroll down to the Token restrictions section and enter your site’s URL in the URL field.
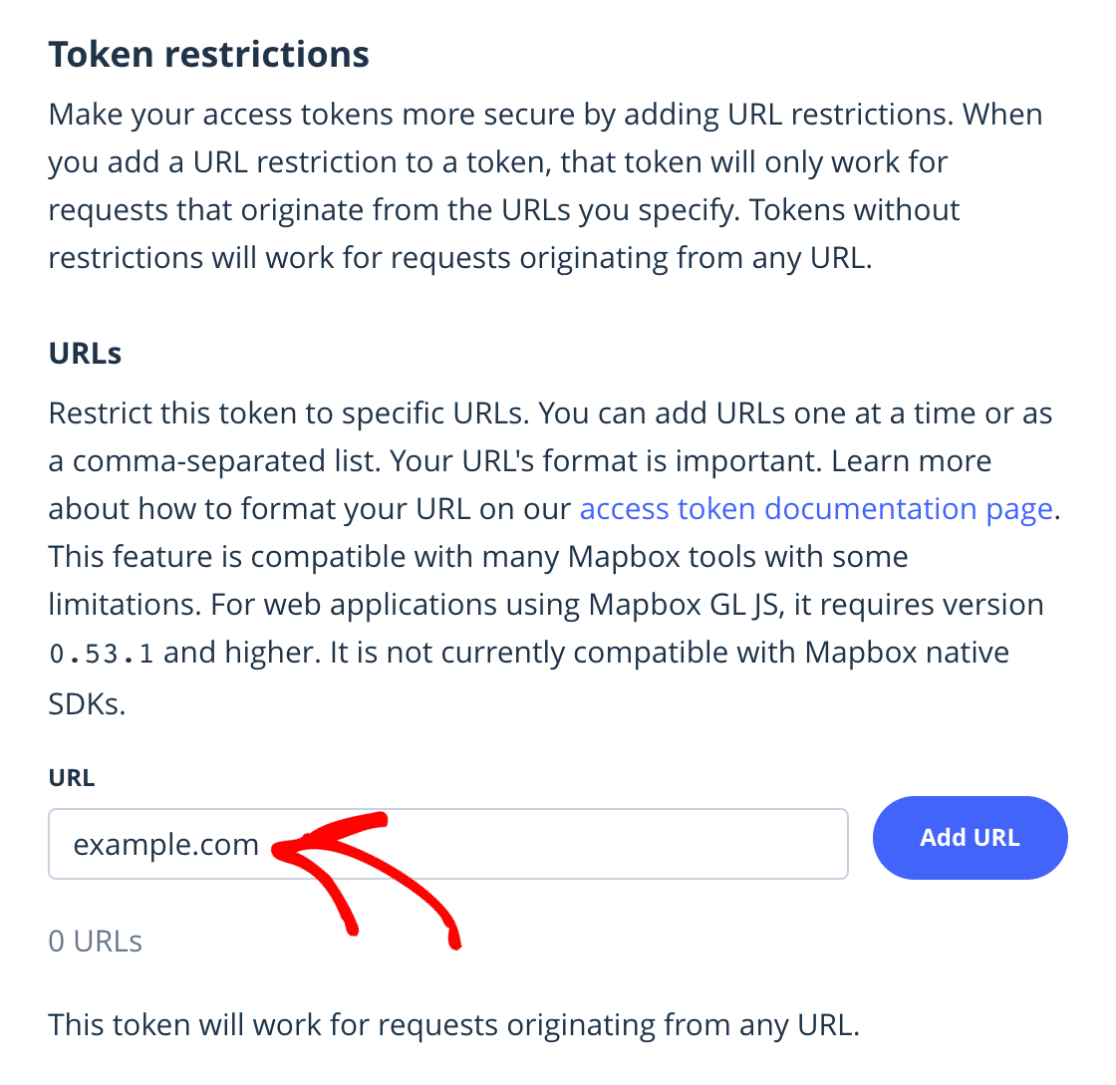
After you’ve typed in your URL, click the Add URL button to add the URL.

Once you’ve filled out the necessary fields, click the Create token button.
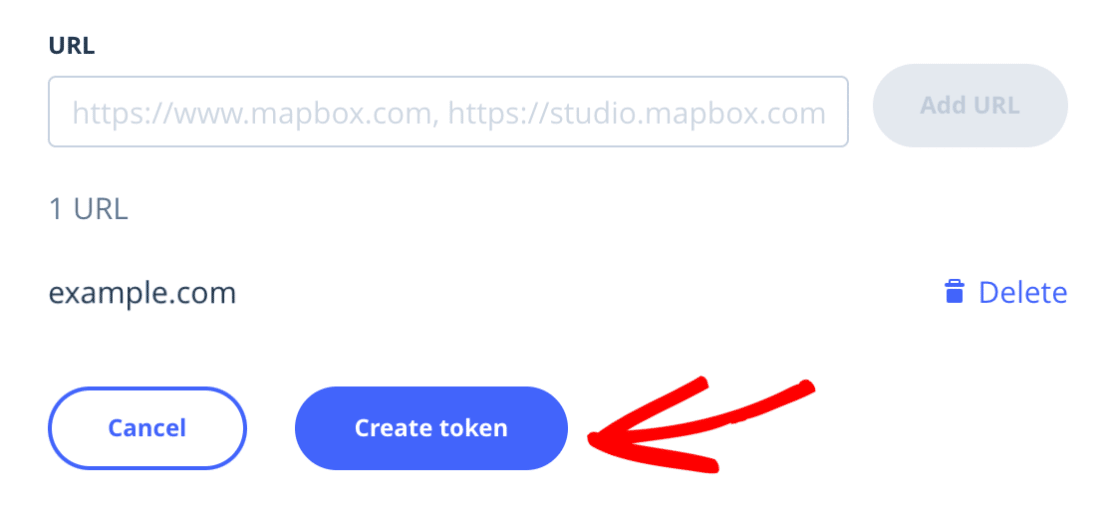
You’ll then see a modal window appear asking you to confirm your account password. Go ahead and enter your password and click Submit.

Now you’ll be redirected back to the Access tokens page where you’ll see the new token you just created. Go ahead and click the copy icon to copy the token.
Once you’ve copied your access token, head back to your WPForms settings and paste the token into the Access Token field.

If you’d like to pre-fill your forms with users’ locations, toggle on the Current Location option.
When you’re finished, be sure to save your settings.
Note: When you save your settings, you’ll likely see a prompt in your browser asking you to share your location. If you’d like Mapbox to detect your current location, you’ll need to agree to share your location.
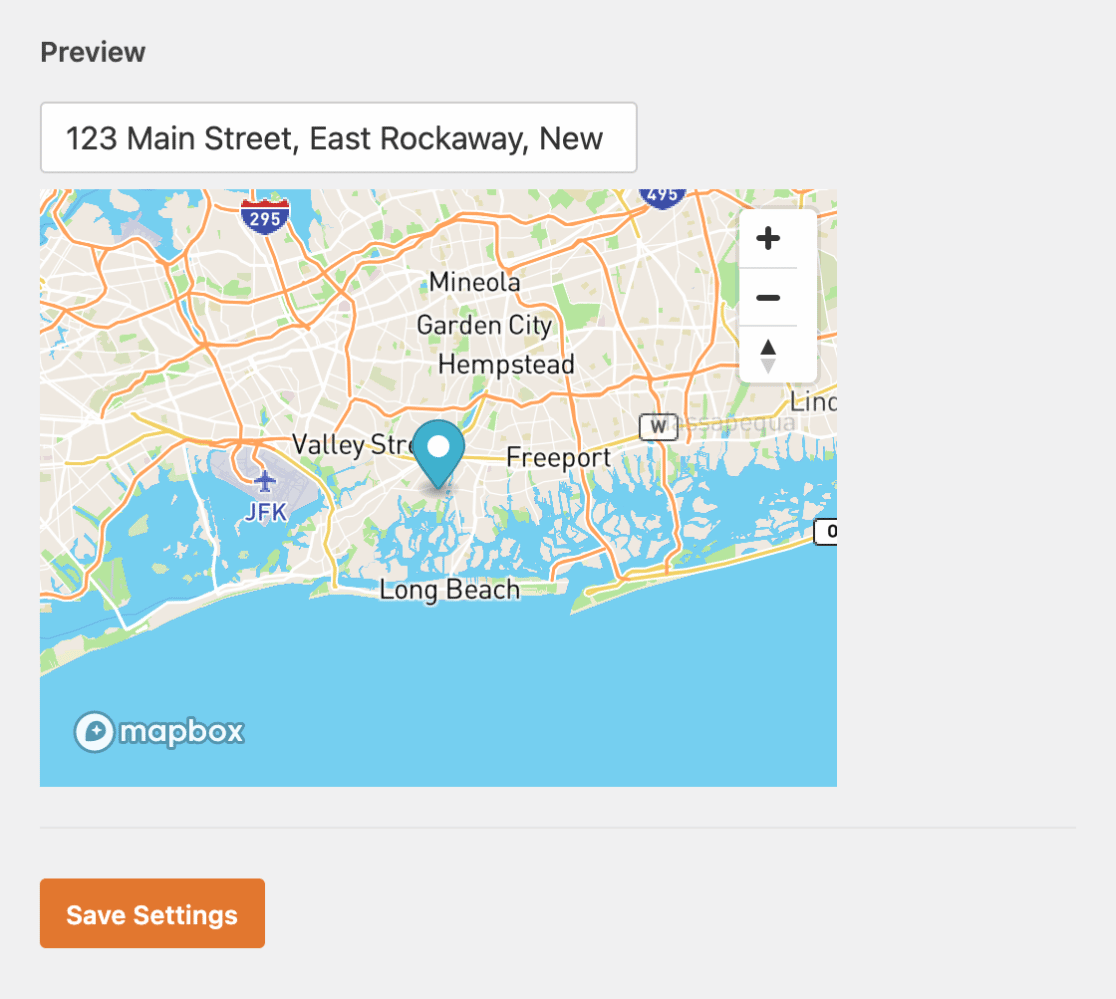
Next, you’ll see a map preview. If you’ve decided to share your location, you’ll see your current location represented on the map.
In the next section, we’ll cover how to add address autocomplete to your forms.
Adding Address Autocomplete to Your Forms
Once you’ve configured your Geolocation settings, you can enable the Geolocation addon’s autocomplete feature in your forms.
To do so, you’ll first need to create a new form or edit an existing one. Then, in the form builder, add either an Address field or a Single Line Text field.
If you’d like to display the address on multiple lines, select the Address field.

If you’d prefer to display the address on a single line, choose the Single Line Text field.

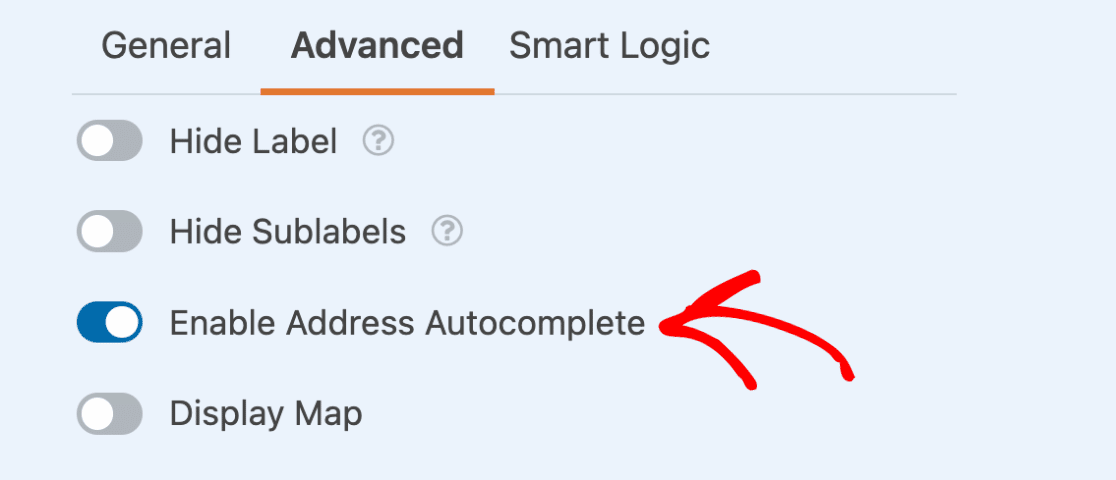
Then open the Field Options panel for your Address or Single Line Text field and click on the Advanced tab to open up additional settings. From here, you can turn on the address autocomplete feature by selecting the Enable Address Autocomplete option.
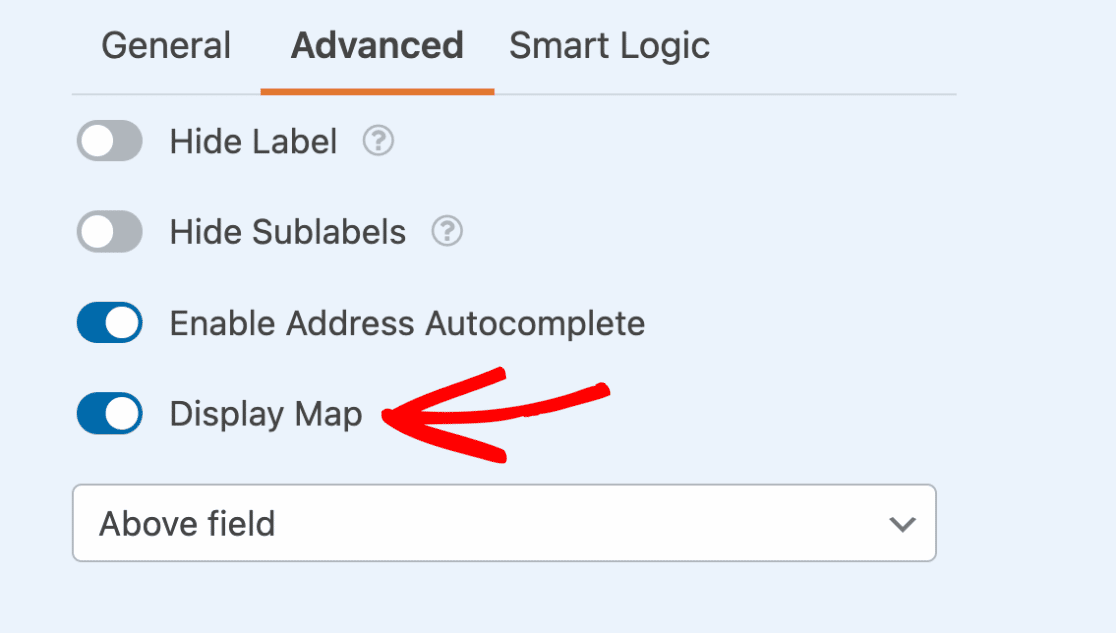
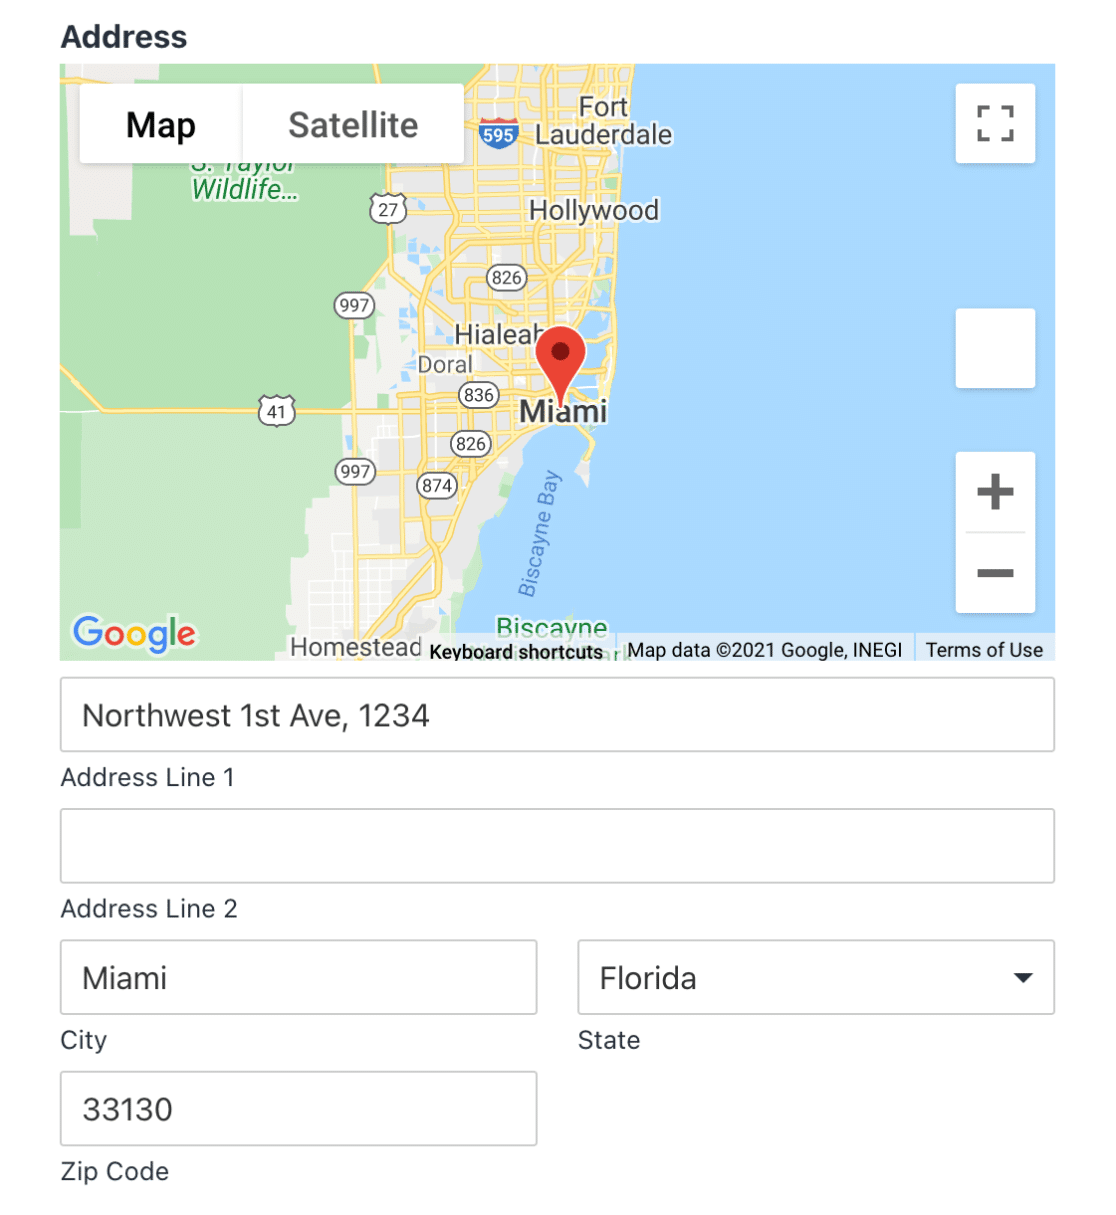
If you’d like, you can also display an interactive map on the frontend of your site by selecting the Display Map option. This will reveal a dropdown where you can choose whether to show the map above or below your form’s field.
Once you’ve got everything set up, be sure to save your form.
Here’s an example of how your form might look on the frontend with the map and address autocomplete options enabled:
Using the Map Field
The Map Field in WPForms allows you to display specific locations on an interactive map within your forms. Unlike the Address field, which collects the location of users submitting your form, the Map Field displays locations that you configure, such as office addresses, store locations, or pickup points. This feature is ideal for showcasing multiple business locations or helping users identify specific service areas.

For detailed step-by-step instructions on adding locations, customizing markers, configuring advanced settings, and handling multiple locations, see our comprehensive guide on Using the Map Field in WPForms.
Viewing Entry Location Data
To view an entry’s geolocation data, go to WPForms » Entries and choose the form you’d like to see geolocation details for. Then click View to open an individual entry’s page.

In addition to an interactive map, you’ll see details such as the user’s city, state, country, and zip code, as well as approximate latitude and longitude coordinates for the user’s town.

Including Geolocation Data in Form Notification Emails
If you’d like, you can also include geolocation data in automatic notification emails for your forms.
Note: For extremely large websites or those with a large volume of form submissions, it’s not recommended to include geolocation data in notification emails as it could impact server speed.
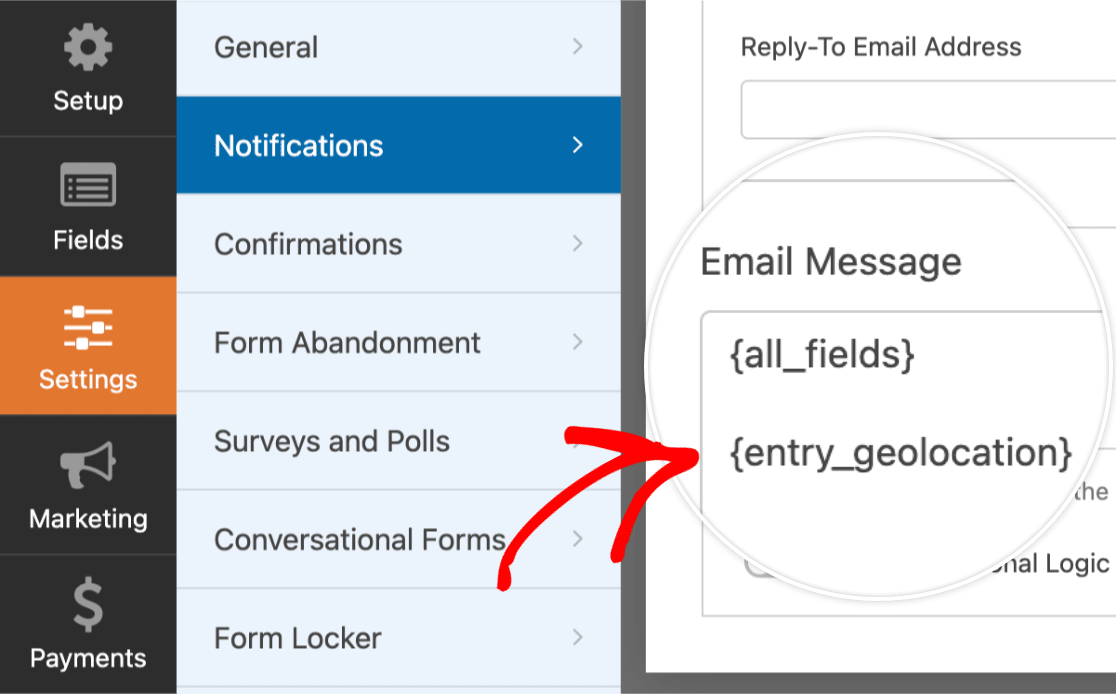
To set this up, open the form builder and go to Settings » Notifications. Then scroll to the Email Message section and add the {entry_geolocation} Smart Tag.
When the notification email is sent, it will include location data for the user.

That’s it! You now know how to collect geolocation data to learn more about your users.
Next, would you also like to send out different notification emails depending on users’ form selections? To learn how, be sure to check out our tutorial on conditional form notifications.