Would you like to change the default location that loads on the map when using the Geolocation addon? Or maybe you’d like to change the zoom? With a custom PHP snippet, you can customize the Geolocation addon display on your forms.
In this tutorial, we’ll walk you through how to set the default location of the map when the form loads and the zoom level.
Creating the Form
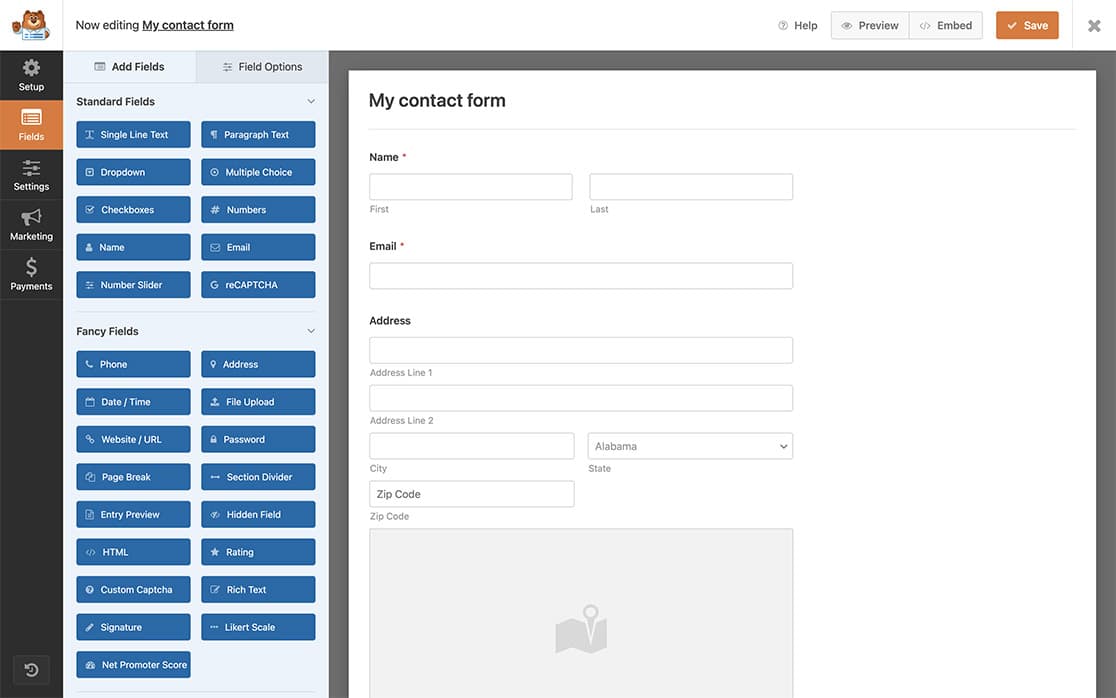
To begin, create a new form or edit an existing one to access the form builder. In the form builder, go ahead and add your fields. Make sure to include at least one Address form field.

If you need any help in creating your form, please see this documentation.
Enabling the Map
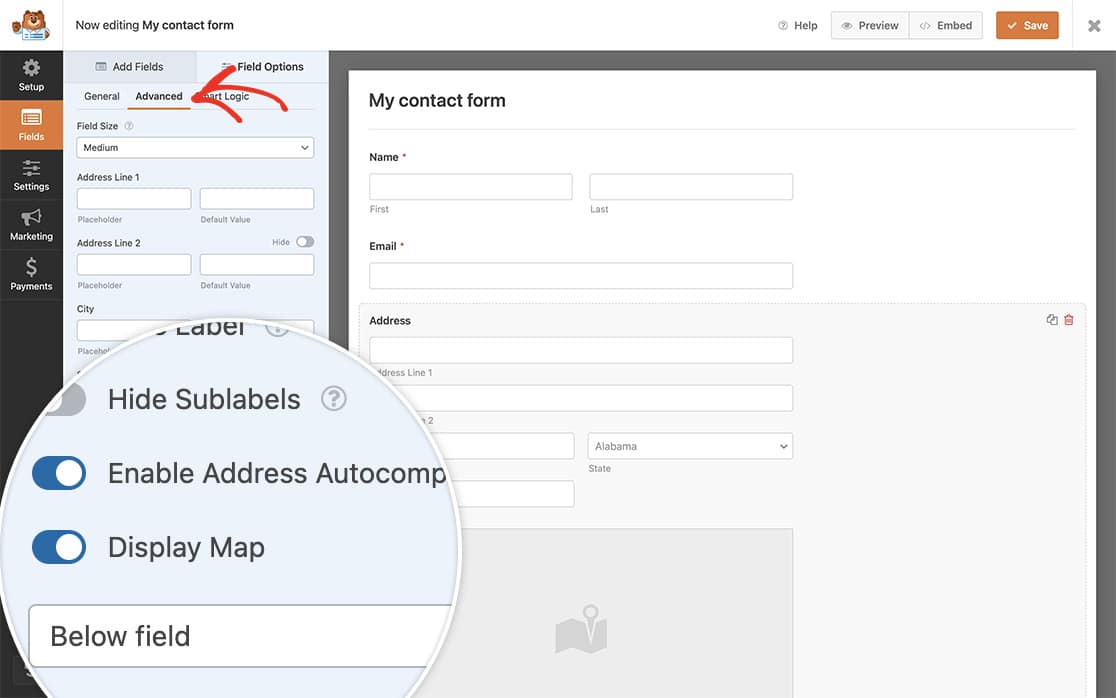
After adding the Address field, click on it to open the Field Options panel and then select the Advanced tab.
Scroll down to the options and click to enable the Enable Address Autocomplete setting which will then allow you to also click to enable the Display Map setting. Next, we’ll select the show the map Below field option.

If you need any help setting up your Geolocation addon settings or adding the map to your form, please review this documentation.
Changing the Default Location
To change the default location, you’ll need to add this code snippet to your site. If you need help adding snippets to your site, please review this tutorial.
/**
 * Change default location on Geolocation addon.
 *
 * @link    https://wpforms.com/developers/how-to-change-default-location-for-geolocation-addon/
 */

function wpf_wpforms_geolocation_map_default_location() {

    return [
            'lat' => 51.5207,
            'lng' => -0.1550,
        ];
}
add_filter( 'wpforms_geolocation_map_default_location', 'wpf_wpforms_geolocation_map_default_location', 10 );
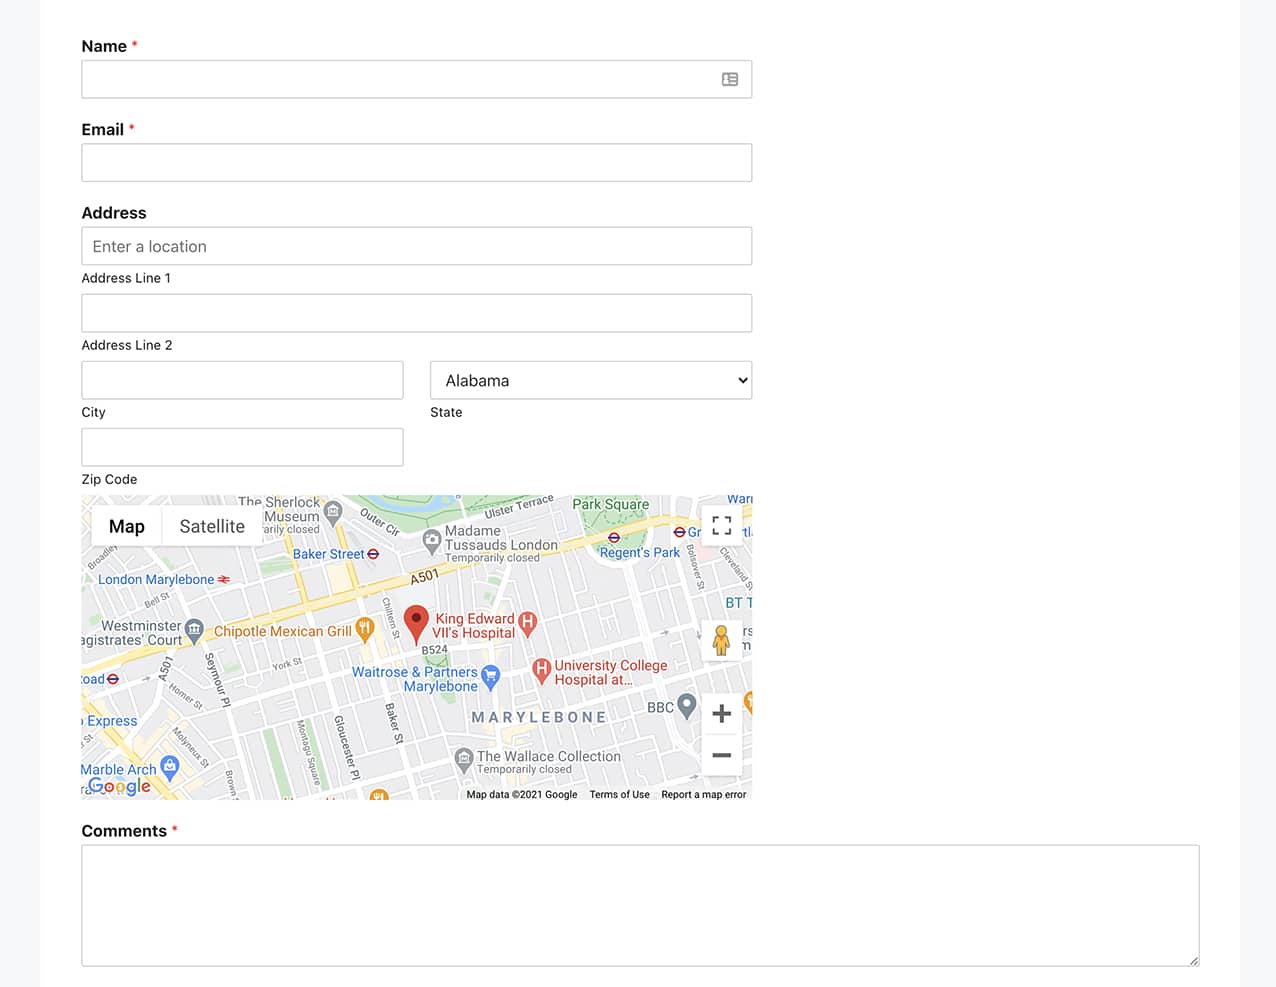
In our snippet, we’re setting the latitude and longitude of where the pin on the map will display when the page loads. If you’re not sure what these numbers should be, you can visit Google’s page to find these coordinates.
Changing the Zoom Level on Your Map
To change the zoom level, simply add the snippet below in the same way you added the previous one. You can use both snippets to change the default location and the zoom level together.
/**
 * Change zoom level for the Geolocation addon map.
 *
 * @link    https://wpforms.com/developers/how-to-change-default-location-for-geolocation-addon/
 */

function wpf_wpforms_geolocation_map_zoom( $zoom, $context ) {

       // This will change the zoom level while viewing the entry.
       if ( 'entry' === $context ) {
           return 10;
       }

       // This will change the zoom level on the map that displays on the form above/under the Address field.
       if ( 'field' === $context ) {
           return 15;
       }

       return $zoom;
}
add_filter( 'wpforms_geolocation_map_zoom', 'wpf_wpforms_geolocation_map_zoom', 10, 2 );
In this snippet, you can see two different zoom levels in the comments. One is for the entries page and the other is for the map on your form. You can either comment out the lines you don’t want or need or just remove them completely.

That’s it! You now know how to change the default location in the map displayed when using the Geolocation addon.
Next, would you like to also know how to create your address scheme for your forms? Take a look at our tutorial on creating additional schemes for the Address field.
Related
Filter References:
