AI Summary
Creating forms on a WordPress site is easy with WPForms, but what if your audience speaks multiple languages? That’s where AI-powered translation steps in!
By combining WPForms with AI translation, you can translate your forms quickly and reach a global audience, without needing a full team of translators.
In this guide, I’ll walk you through the basics of setting up an AI-translated form in WordPress with WPForms via 2 different methods.
Use AI Translation with WPForms! 🙂
How to Translate Your WordPress Forms with AI
If you simply want to translate your form within the form builder, you can rely on the functionality available with the WPForms AI chatbot.
On the other hand, if you want to create a multilingual site with multiple form translations, it may be better suited for you to use the WPML plugin.
WPML is a plugin designed for translating WordPress content, and it works perfectly with WPForms. Let’s dive into the steps for both methods:
Method #1: Use WPForms AI to Translate Your Forms
WPForms is the best form builder plugin for WordPress and comes with a ton of features, addons, and integrations to make your form building incredibly easy.
Step 1: Upgrade to a Paid WPForms Plan
Among the numerous features available is the WPForms AI assistant, which is available to all paid customers – Basic, Plus, Pro, and Elite.
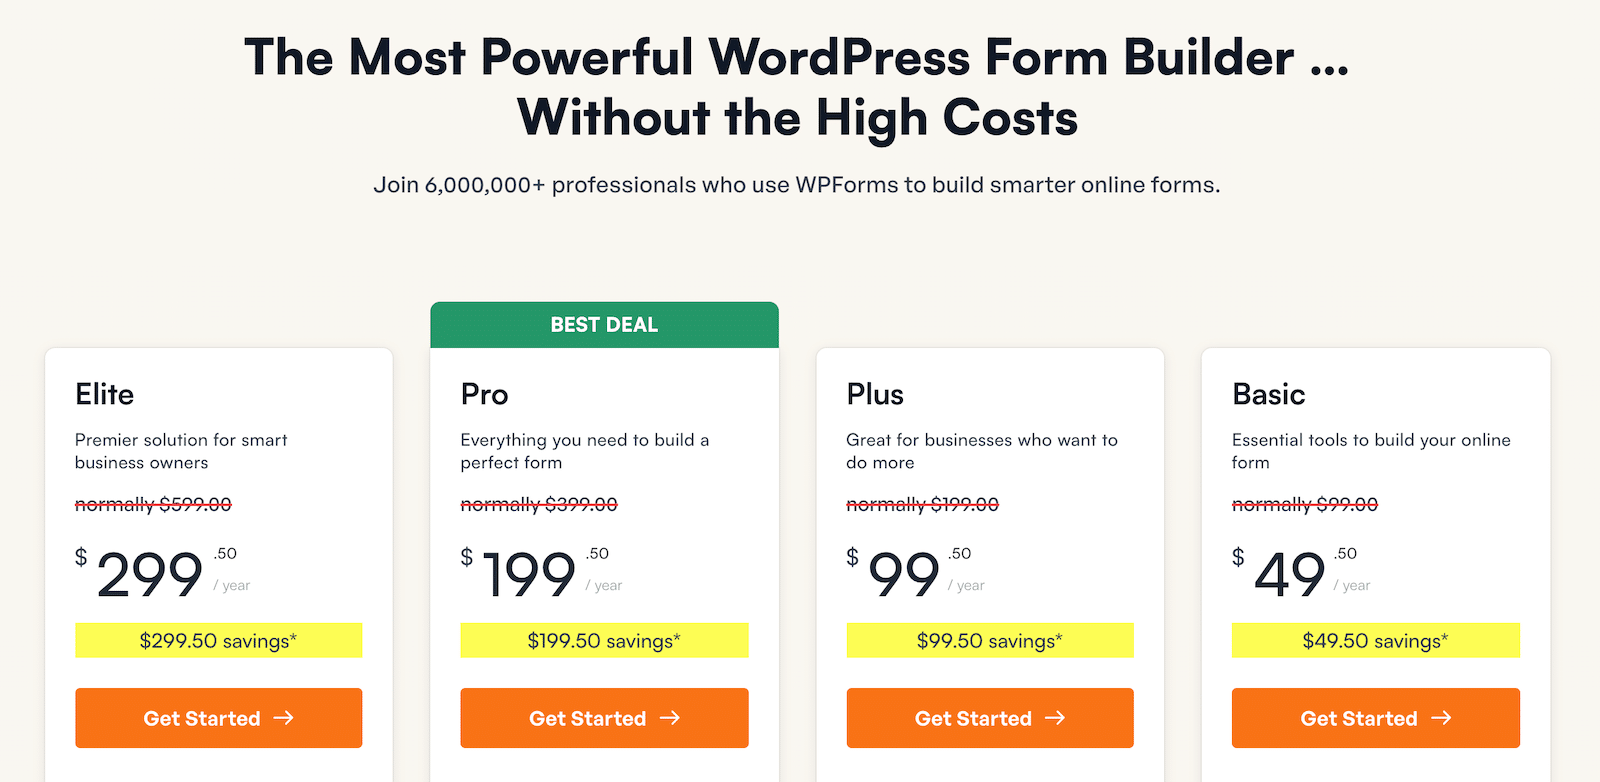
So, if you are using the WPForms Lite version, the first step you need to take is upgrade to a paid plan in order to access our AI chatbot.
Step 2: Create Your WordPress Form with AI
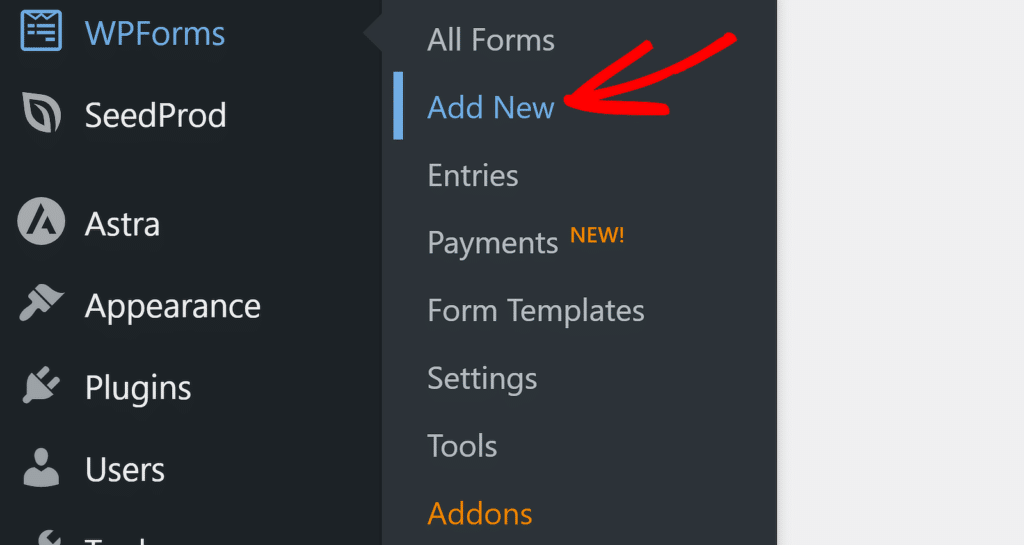
Once you upgrade to a paid plan, simply head to the form builder screen. From your WordPress dashboard, click on WPForms, and then the Add New button.
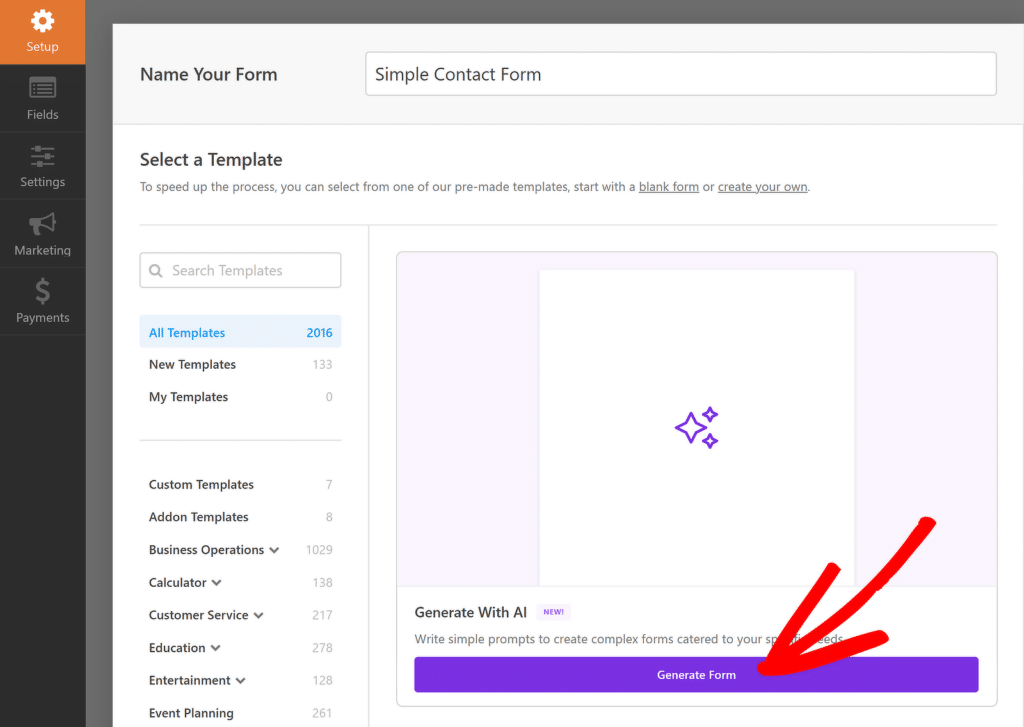
On the next screen, enter your form name, hover your mouse over the Generate with AI option, and then click the Generate Form button.
This will redirect you to the AI form builder screen. Describe the form you would like to create or use one of the example prompts below to get started.
For the purposes of this tutorial, I’m just going to ask the AI chatbot to create a simple contact form for me by describing the form and the fields I’ll require.
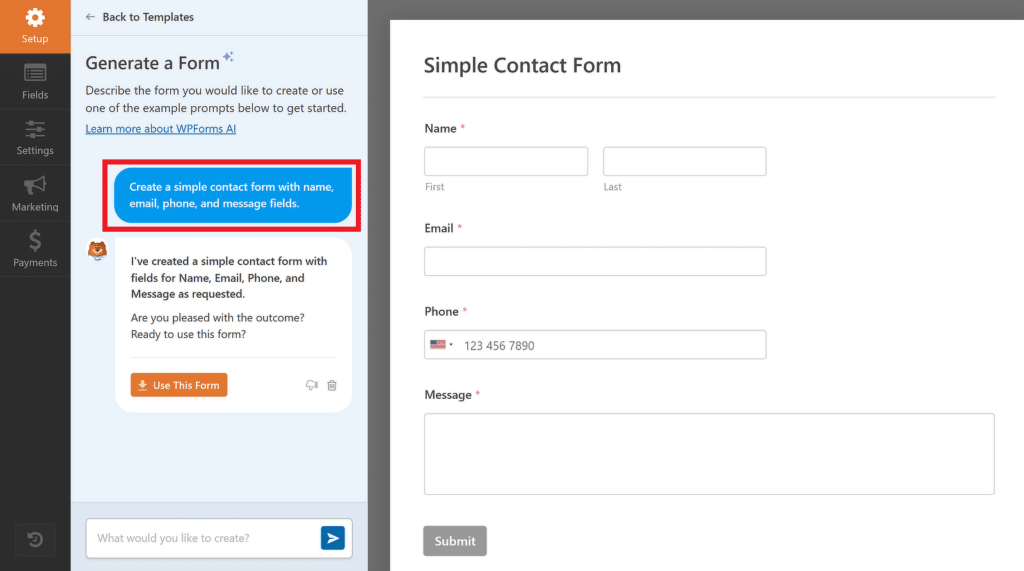
WPForms AI will create the form as requested. At this point, feel free to engage with the chatbot to modify the form or proceed with the next step to translate it.
Step 3: Translate Your WordPress Form with AI
Once you feel satisfied with the form created by WPForms AI, you can enter a prompt to translate the entire form into any language of your preference.
For instance, if I want to translate the contact form in my example to Spanish, I’ll enter a straightforward prompt like “Please translate this form into Spanish.”
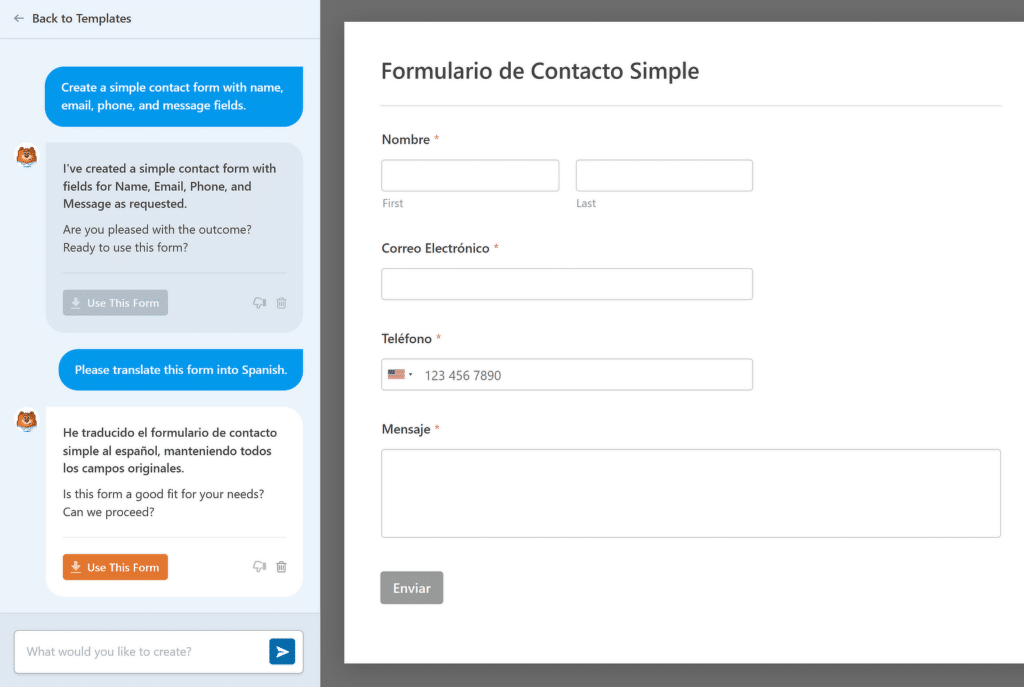
As you can see in the image above, the form has successfully been translated into Spanish. If you’re satisfied with the result, simply click on the Use this form button.
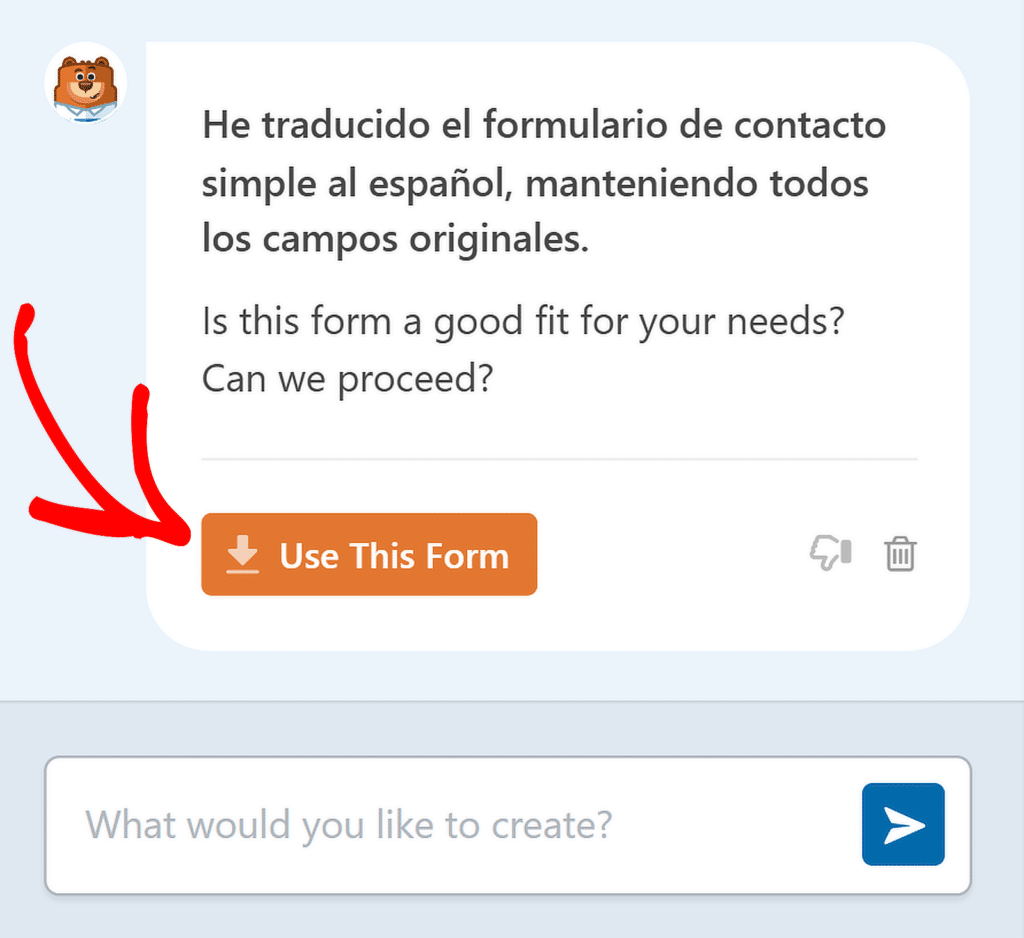
You will now be redirected to the form builder screen, where you can add, remove, or change the order of the fields and make any other customizations to your form.
Bear in mind that when you translate a form with the WPForms AI chatbot, your notifications and confirmation messages will also be translated.
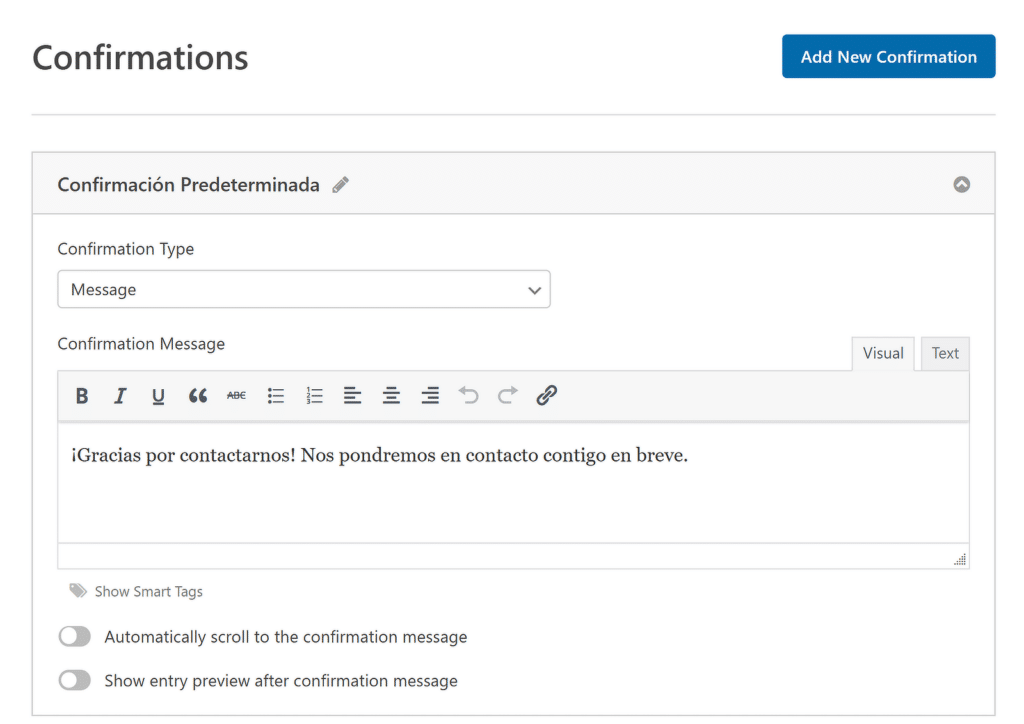
Now, all you have to do to start accepting entries to your translated form is test it to see if everything works perfectly and then publish it.
Method #2: Use the WPML Plugin to Translate Your Forms
The above method is the fastest way to translate your forms. But if you need to translate your entire website, you’ll need a dedicated translation and languages plugin like WPML.
With WPML, you can translate:
- Forms
- Pages
- Posts
- Menus
- Theme Text
- And More…
However, translating individual forms this way is not as intuitive as using WPForms AI. That said, it’s still helpful for large multi-language websites that want to translate every type of content they have.
Step 1: Set Up the Following Plugins
To translate WPForms with WPML, install and activate the following plugins:
Once you’ve installed the above plugins, make sure you have a form created on your WordPress website. WPForms offers a huge list of 2,000+ WordPress form templates to kick off the form creation process.
Step 2: Configure WPML on Your WordPress Site
After WPML is activated, you’ll be guided through a simple setup wizard. Start by choosing the languages you want to support. Don’t worry, you can always add more later.
During the setup, WPML will automatically suggest which features to activate based on your current plugins. Make sure you check the box next to WPForms Multilingual.
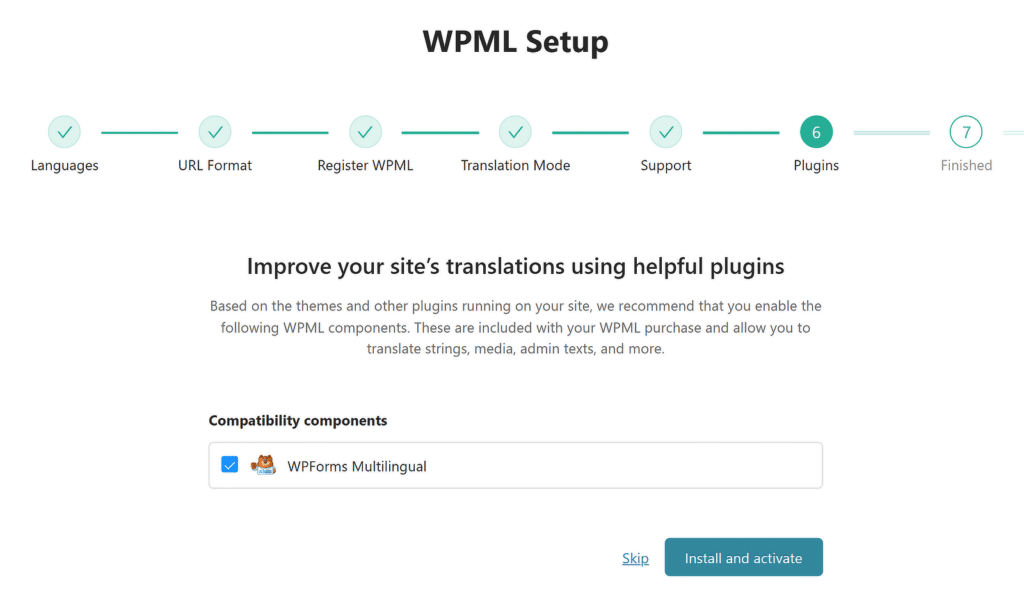
This addon is essential for translating any content within your forms, so it’s a step you don’t want to miss.
Step 3: Translate WPForms with WPML
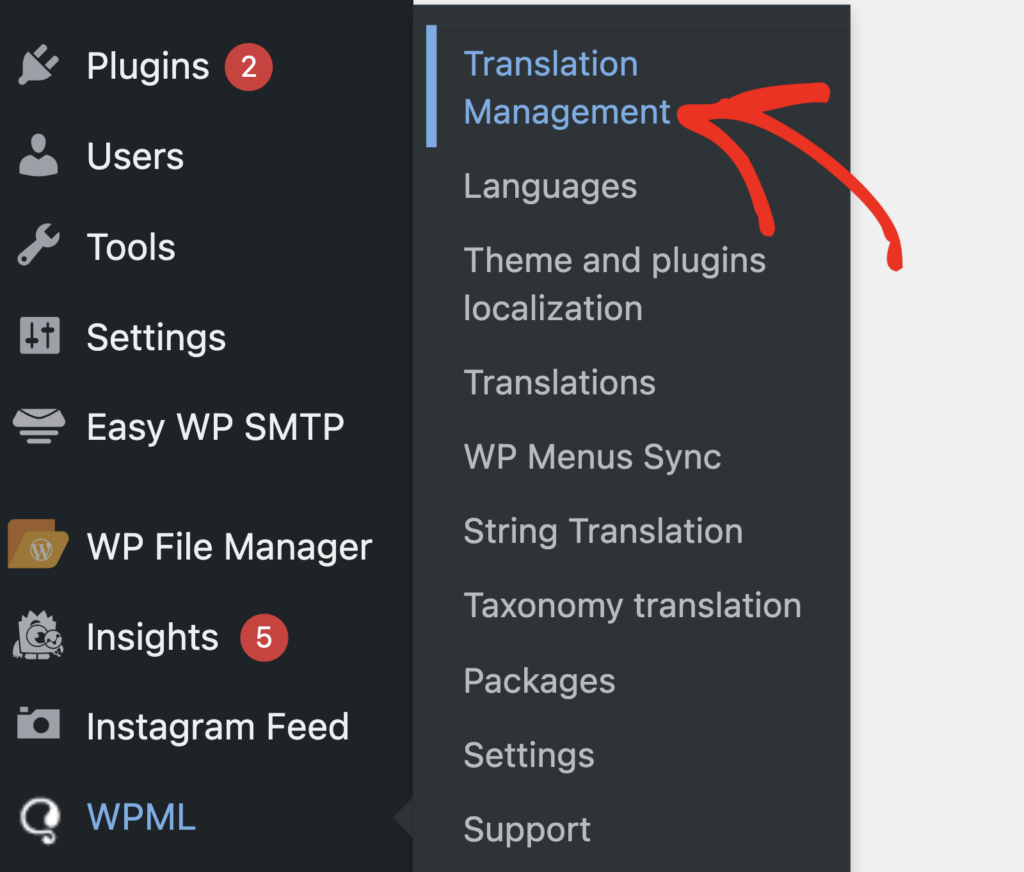
To translate WPForms using WPML, start by going to WPML » Translation Management in your WordPress dashboard.
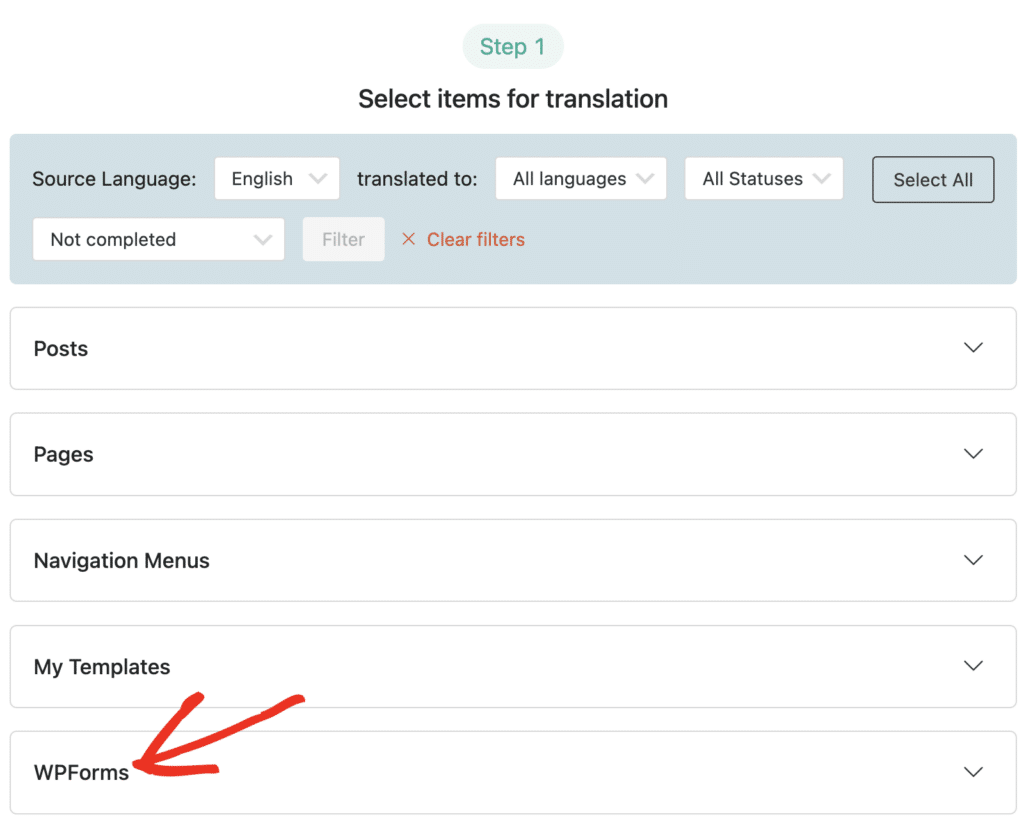
Here, you’ll find different content types like your posts, pages, forms, navigation menus, and more neatly organized into sections. Click the dropdown labeled WPForms to reveal your existing forms that are available for translation.
After that, select the specific forms you’d like to translate. For example, I’ll pick the Summer Camp Satisfaction Survey.
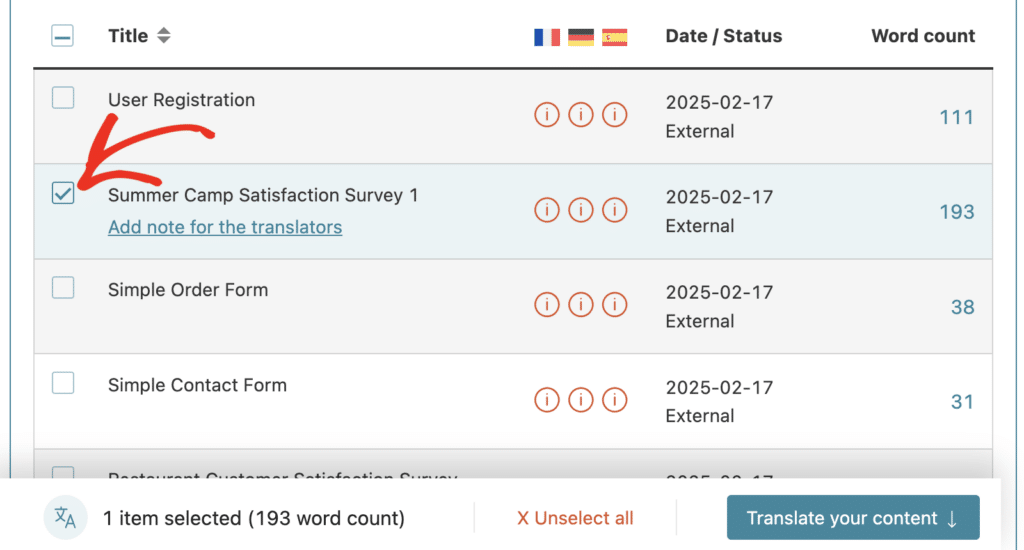
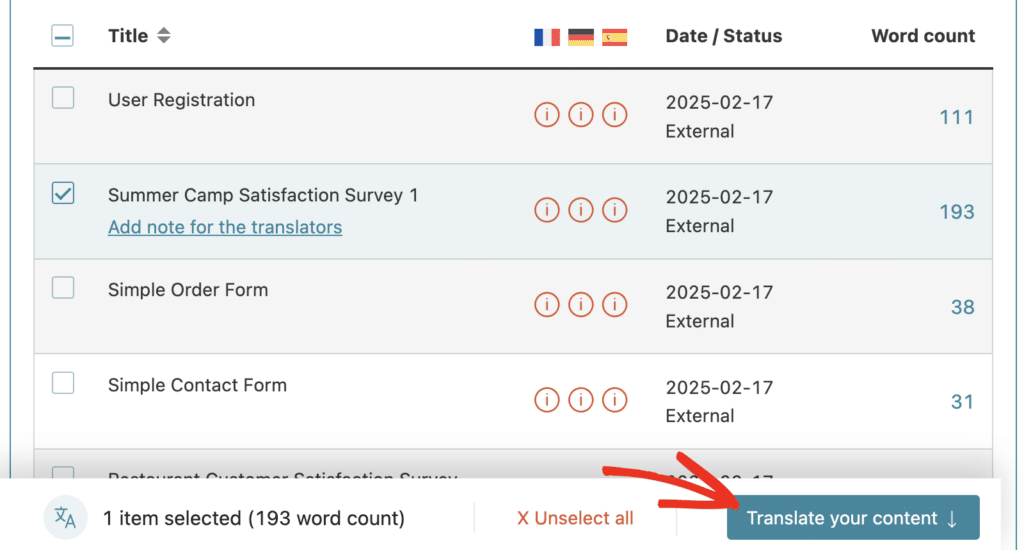
You can also select multiple forms that you need translated at the same time. With that, you’ll see an option to translate your selected forms at the bottom of the screen. Click Translate Your Content to proceed.
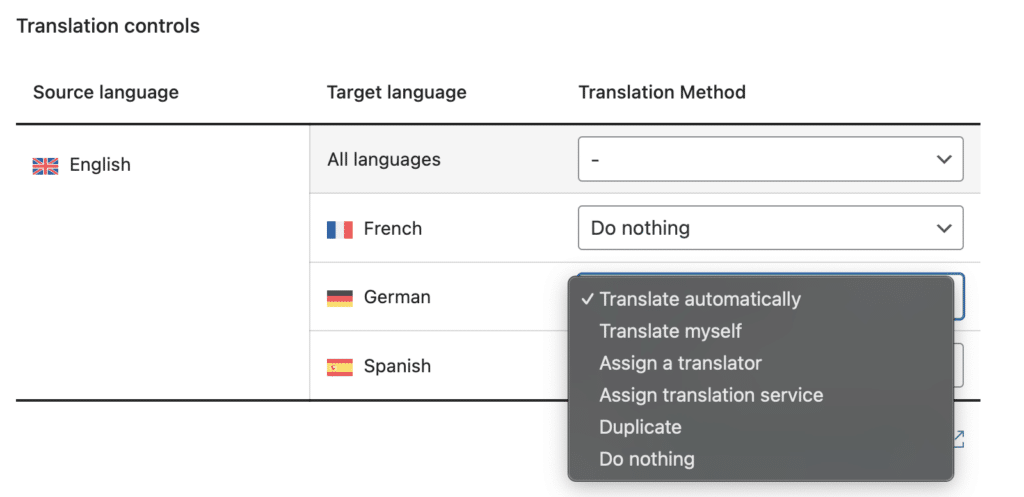
Immediately after that, you’ll be taken to the translation controls where you can select the translation method for each language you need your form translated into.
WPML gives you several translation options for each language. For instance, you can assign a translation task to human translators on your site, perform the translation manually yourself, or translate automatically using AI.
In this example, I’ll use the translate automatically method from the dropdown menu next to German. I only want to translate into German, so I’ve selected Do nothing for other languages (French and Spanish) in this particular case.
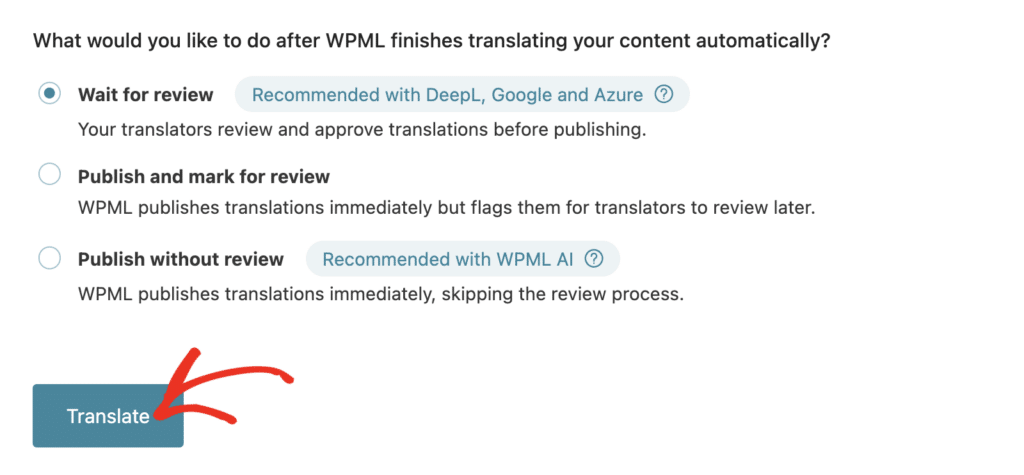
Next, you can choose your translation review preferences. If you’d like to review each translation before publishing, you can use the Wait for review option. Then, press the Translate button to start the automatic translation.
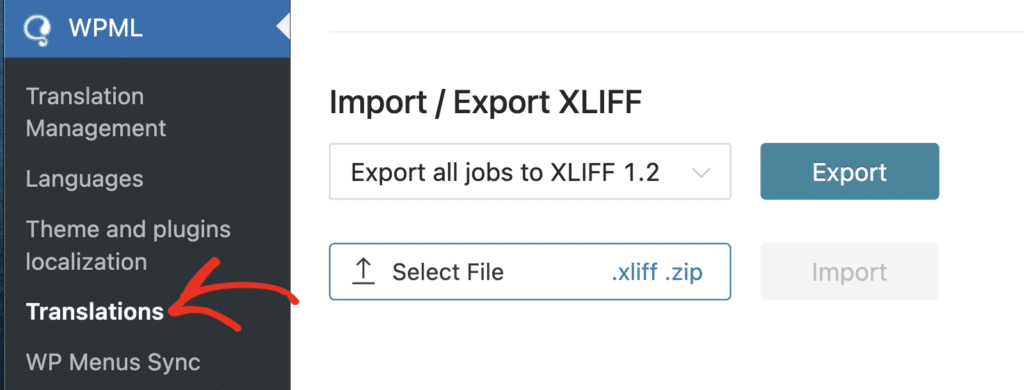
WPML will translate your form almost instantly. To review the translation, head over to WPML » Translations.
On the next screen, you’ll find the translated form available for review. Click on the Review button to view the translated version of the form.

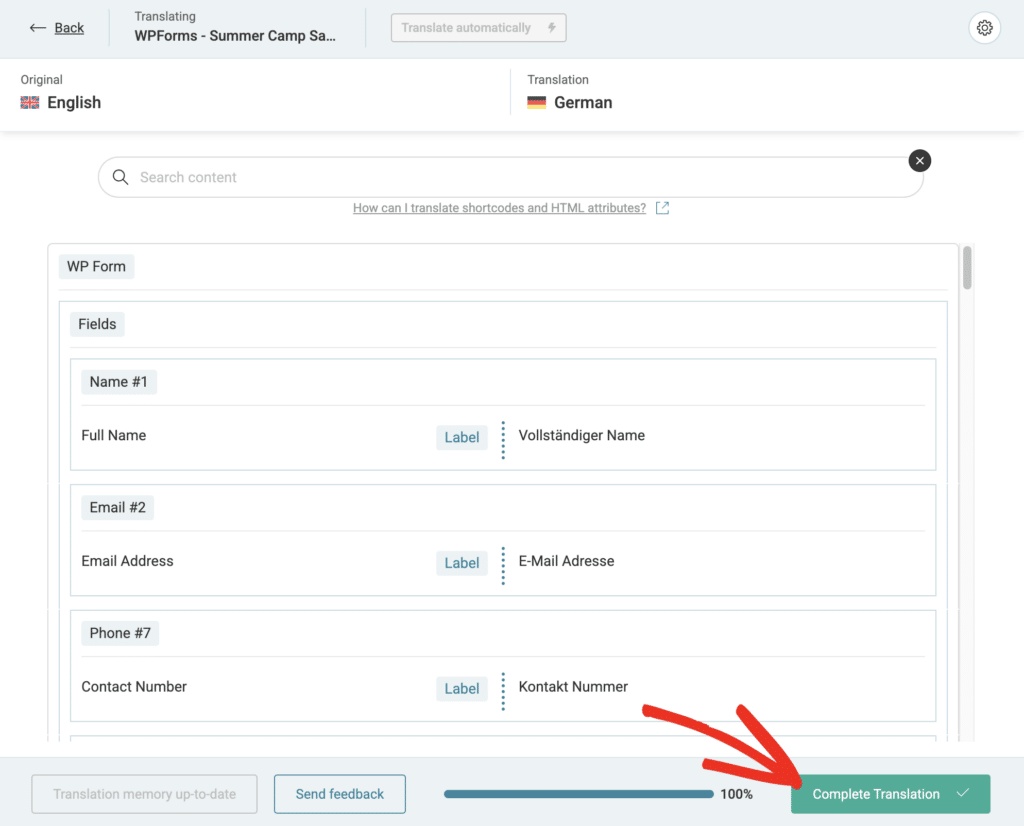
Here, you can review all the translated fields and content of your form. If something looks wrong, you can just click on that piece of text to edit it. When you’re happy with the translation, go ahead and click Complete Translation.
Remember, your form translations will appear whenever you switch languages on your site. And you can only switch languages on pages that you’ve already translated.
So in order to view the translated version of your form on the frontend, make sure to translate the page containing your form as well. The steps for translating a page are almost identical to the steps I’ve listed here for form translations.
The only difference is that you’ll need to select the page from the Pages dropdown in Translation Management screen, instead of the form like I did earlier in this tutorial.
FAQs – How to Use AI Translation With WPForms
Translating forms with AI is a popular topic of interest among our readers. Here are answers to some common questions about it:
How to translate WPForms with WPML?
To translate WPForms with WPML, go to WPML » Translation Management in your WordPress dashboard.
Filter by WPForms, choose the form you want to translate, select your target languages, and complete the translation using WPML’s options.
Can you use AI to translate?
Yes, AI can be used for translation. Tools like WPForms come equipped with Generative AI technology to translate entire forms into different languages easily.
How to translate a form in WordPress?
To translate a form in WordPress, use a multilingual plugin like WPML.
After installing it, navigate to the translation settings, select the form you want to translate, and choose the target language.
You can then translate the form fields and messages either manually or using automatic translation.
How do I use WPML Automatic Translation?
To use WPML’s automatic translation, go to WPML » Settings in your WordPress dashboard. Enable the automatic translation option and select your preferred translation engine.
Then, in Translation Management, choose the content you want to translate automatically. WPML will translate the selected content into the languages you’ve chosen.
Next, Explore These Related Articles on AI
That’s it! We hope this list helped you understand how to use AI Translation with WPForms. Read more about how to use AI and related WordPress plugins for different tasks here:
- How to Leverage AI in Email Marketing
- Best ChatGPT Plugins for WordPress
- How to Add AI to Your Website
- Best AI SEO Tools for WordPress
- The Best AI Plugins for WordPress
Ready to build your form? Get started today with the easiest WordPress form builder plugin. WPForms Pro includes lots of free templates and offers a 14-day money-back guarantee.
If this article helped you out, please follow us on Facebook and Twitter for more free WordPress tutorials and guides.

